flat tire BMW Z3 2002 User Guide
[x] Cancel search | Manufacturer: BMW, Model Year: 2002, Model line: Z3, Model: BMW Z3 2002Pages: 187, PDF Size: 2.73 MB
Page 115 of 187

115n
IndexDataTechnologyRepairsMaintenanceControlsOverview
Special features of winter tires Snow chains
*
Choosing the right tireBMW recommends winter tires (M+S
radial tires) for operation under
inclement winter driving conditions.
While so-called all season tires (M+S
designation) provide better winter trac-
tion than summer tires with the load
ratings H, V, W, Y and ZR, they gener-
ally do not achieve the performance of
winter tires.
In the interests of sure tracking and safe
steering response, mount winter tires
which are made by the same manufac-
turer and which have the same tread
configuration at all four wheels.Comply with recommended speed
Never exceed the maximum
speed for which the winter tires
are rated.
Unprofessional attempts by laymen to
service tires can lead to damage and
accidents.
Have this work performed by skilled
professionals only. Any BMW center
has the required technical knowledge
and the proper equipment and will be
happy to assist you.<
Tire condition, tire pressureOnce the tire wears to below 0.16 in
(4 mm), winter tires display a percep-
tible decrease in their ability to cope
with winter driving conditions, and
should be replaced in the interest of
safety.
Comply with the specified tire inflation
pressures Ð and be sure to have the
wheel and tire assemblies balanced
every time you change the tires.BMW narrow-link snow chains are
intended for mounting in pairs at the
rear wheels only. Comply with all manu-
facturer's safety precautions when
mounting the chains. Do not exceed a
speed of 30 mph (50 km/h) while
driving with mounted snow chains.
Page 116 of 187

116n
Approved wheel and tire specificationsBMW tests certain tire brands for each tire size, classifies them as road-safe and
approves them. Consult your BMW center for more information.
Observe any regulations applicable in the country of use, e.g. requiring entry in
the vehicle documents.
Tire specifications Suitable for
snow chainsSteel wheel
(rim)Light-alloy
wheel
Z3 roadster 2.5i
Summer
225/50 R 16 92 V
225/50 ZR 16[Ð 7Jx16
Front: 225/45 ZR 17
Rear: 245/40 ZR 17Ð
ÐÐ
Ð7.5Jx17
8.5Jx17
Winter (M+S)
205/60 R 15 91 Q/T/H[ 6.5Jx15 7Jx15
205/55 R 16 91 Q/T/H
225/50 R 16 92 Q/T/H[7Jx16 7Jx16
225/45 R 17 91 Q/T/H[Ð
Ð7.5Jx17
8Jx17
Spare tire
T 115/90 R 16 92 M Ð 3.00Bx16 Ð
Use the spare wheel only for short
distances (to reach the nearest BMW
center, for instance). Due to the altered
handling characteristics, do not exceed
a maximum speed of 50 mph (80 km/h).
Mounting snow chains on the spare tire
is not possible. Be sure that all tires are
properly inflated, refer to page 27.
The use of rims and lug bolts that
do not meet the specifications of
the original factory-installed equipment
will affect the safe operation of your
vehicle and may cause an accident and
personal injury.
Never mix tires of different design, such
as steel-belted radials with bias-belted
or bias-ply tires etc. Mixing tire types
will adversely affect road-holding and
can lead to loss of vehicle control.<
Page 117 of 187

117n
IndexDataTechnologyRepairsMaintenanceControlsOverview
Approved wheel and tire specificationsBMW tests certain tire brands for each tire size, classifies them as road-safe and
approves them. Consult your BMW center for more information.
Observe any regulations applicable in the country of use, e.g. requiring entry in
the vehicle documents.
Z3 roadster 3.0i, Z3 coupe 3.0i
Summer
225/50 R 16 92 V
225/50 ZR 16[Ð 7Jx16
Front: 225/45 ZR 17 Ð Ð 7.5Jx17
Rear: 245/40 ZR 17 Ð Ð 8.5Jx17
Winter (M+S)
205/55 R 16 91 Q/T/H
225/50 R 16 92 Q/T/H[7Jx16 7Jx16
225/45 R 17 91 Q[Ð
Ð7.5Jx17
8Jx17
Spare tire
T 115/90 R 16 92 M Ð 3.00Bx16 Ð
Use the spare tire only for short
distances (to reach the nearest BMW
center, for instance). Due to the altered
handling characteristics, do not exceed
a maximum speed of 50 mph (80 km/h).
Mounting snow chains on the spare tire
is not possible. Be sure that all tires are
properly inflated, refer to page 27.
The use of rims and lug bolts that
do not meet the specifications of
the original factory-installed equipment
will affect the safe operation of your
vehicle and may cause an accident and
personal injury.
Never mix tires of different design, such
as steel-belted radials with bias-belted
or bias-ply tires etc. Mixing tire types
will adversely affect road-holding and
can lead to loss of vehicle control.<
Page 131 of 187

131n
IndexDataTechnologyRepairsMaintenanceControlsOverview
Storing your vehicle5. Fill the fuel tank completely to
prevent the formation of condensa-
tion
6. Increase the tire inflation pressure to
51 psi (350 kPa).Before parking the vehicle for
storage1. Dry the parking brake and footbrake
by brake applications to prevent the
brake rotors and drums from
corroding
2. Park the vehicle in a covered, dry,
and well-ventilated room. Place the
transmission in 1st gear or set the
selector lever to the "P" position.
Chock the wheels to prevent the
vehicle from rolling if necessary. Do
not set the parking brake
3. Remove the battery, charge it
completely and store it in a cool (but
frost-free) room
Z3 roadster:
4. Remove the hardtop
* and store it
separately, refer to page 109
5. Close the convertible top.
During storageRecharge the battery every six months.
If it is not recharged, it will not be
serviceable. Every time the battery is
discharged, especially over extended
periods, its service life is reduced.
Removing the vehicle from
storageRecharge the battery if the "Magic Eye"
turns black, refer to page 154.
Then have Inspection I performed by
your BMW center, including a brake
fluid replacement if necessary, refer to
the Service Manual.
Page 146 of 187

146n
Wheel change
Safety measures in the event of a
flat tire or a wheel change:
Stop the vehicle on a firm, level surface
as far as possible from the flow of
traffic. Turn on the hazard warning
flashers.
Turn the steering wheel to the straight-
ahead position and engage the steering
lock, engage the parking brake and
shift into 1st or reverse gear (selector
lever in "Park" with automatic transmis-
sion).
All passengers should be outside the
vehicle and well away from your imme-
diate working area (for instance, behind
the guardrail).
If a warning triangle or portable hazard
warning lamp is available, set it up on
the roadside at an appropriate distance
from the rear of the vehicle. Comply
with all safety guidelines and regula-
tions.
Change the wheel only on a level, firm
surface which is not slippery. Avoid
jacking the vehicle on a soft or slippery
support surface (snow, ice, tiles, loose
gravel, etc.), since it could slide side-
ways.
Place the jack on a firm support
surface.
Do not place wooden blocks or similar
objects under the jack. If this is done,
the jack might not be able to reach its
full support capacity because of the
limited height.
Do not lie under the vehicle or start the
engine when the vehicle is supported
by the jack. This creates the risk of fatal
injury.<
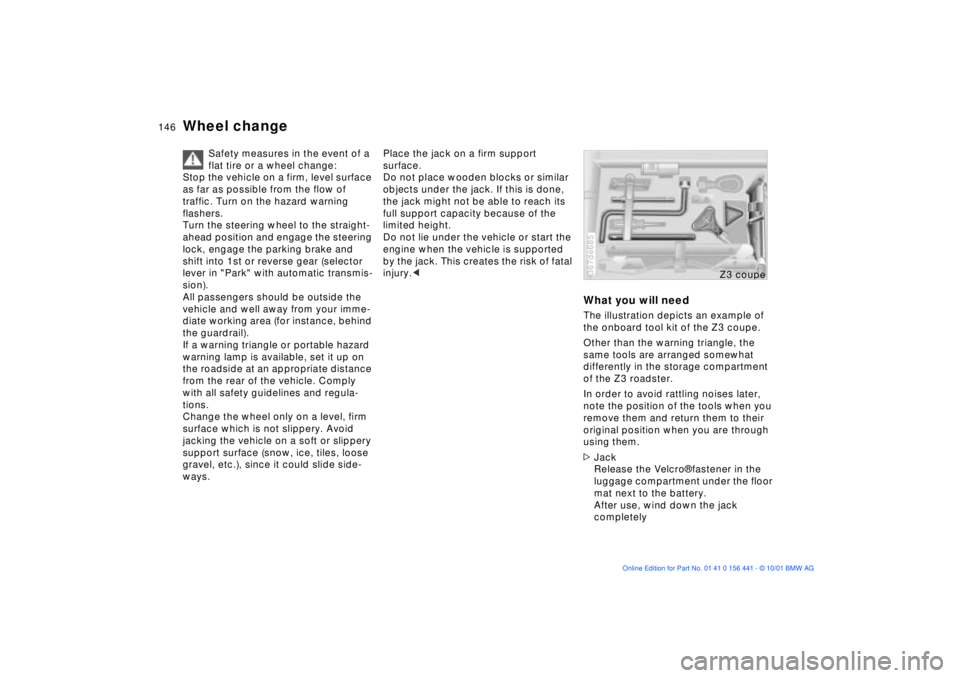
What you will needThe illustration depicts an example of
the onboard tool kit of the Z3 coupe.
Other than the warning triangle, the
same tools are arranged somewhat
differently in the storage compartment
of the Z3 roadster.
In order to avoid rattling noises later,
note the position of the tools when you
remove them and return them to their
original position when you are through
using them.
>Jack
Release the Velcro¨ fastener in the
luggage compartment under the floor
mat next to the battery.
After use, wind down the jack
completely367de685
Z3 coupe
Page 150 of 187

150n
Wheel change
The wheel with the flat tire cannot
be placed in the spare wheel
bracket in the place of the spare
wheel.<
There is a plastic bag in the onboard
tool kit. Put the flat tire and the storage
tray into this bag.
Do not reposition the storage tray
in the spare wheel bracket without
the spare wheel.<
Using the lifting handle, pull the spare
wheel bracket upward until the spring
retainer catches. Secure the bracket
with the hexagon nut Ð ensure that it is
tightened down correctly.
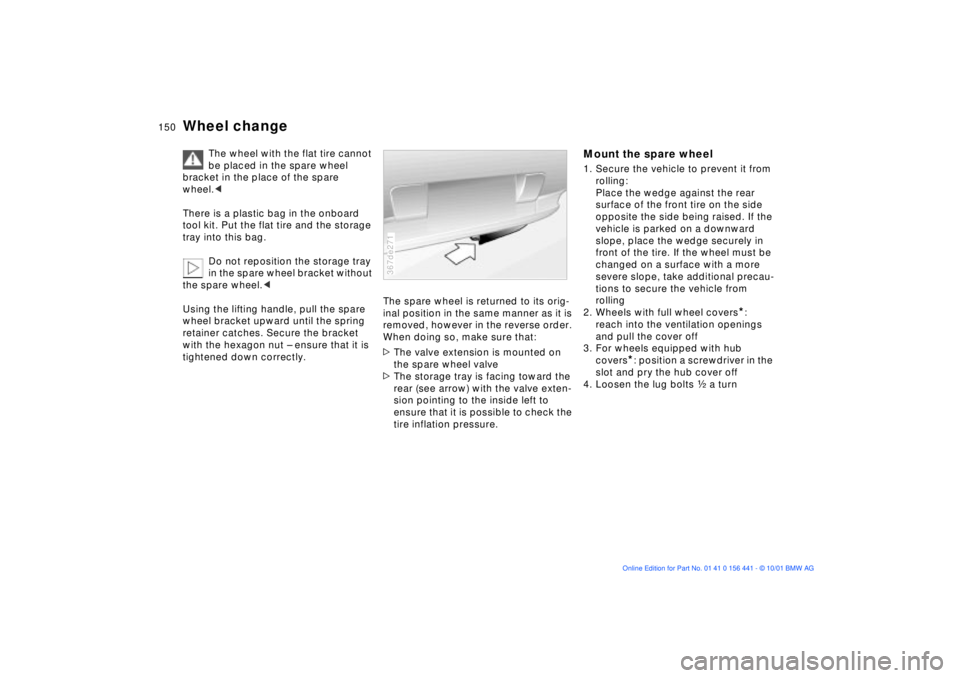
The spare wheel is returned to its orig-
inal position in the same manner as it is
removed, however in the reverse order.
When doing so, make sure that:
>The valve extension is mounted on
the spare wheel valve
>The storage tray is facing toward the
rear (see arrow) with the valve exten-
sion pointing to the inside left to
ensure that it is possible to check the
tire inflation pressure.367de271
Mount the spare wheel1. Secure the vehicle to prevent it from
rolling:
Place the wedge against the rear
surface of the front tire on the side
opposite the side being raised. If the
vehicle is parked on a downward
slope, place the wedge securely in
front of the tire. If the wheel must be
changed on a surface with a more
severe slope, take additional precau-
tions to secure the vehicle from
rolling
2. Wheels with full wheel covers
*:
reach into the ventilation openings
and pull the cover off
3. For wheels equipped with hub
covers
*: position a screwdriver in the
slot and pry the hub cover off
4. Loosen the lug bolts g a turn
Page 151 of 187

151n
IndexDataTechnologyRepairsMaintenanceControlsOverview
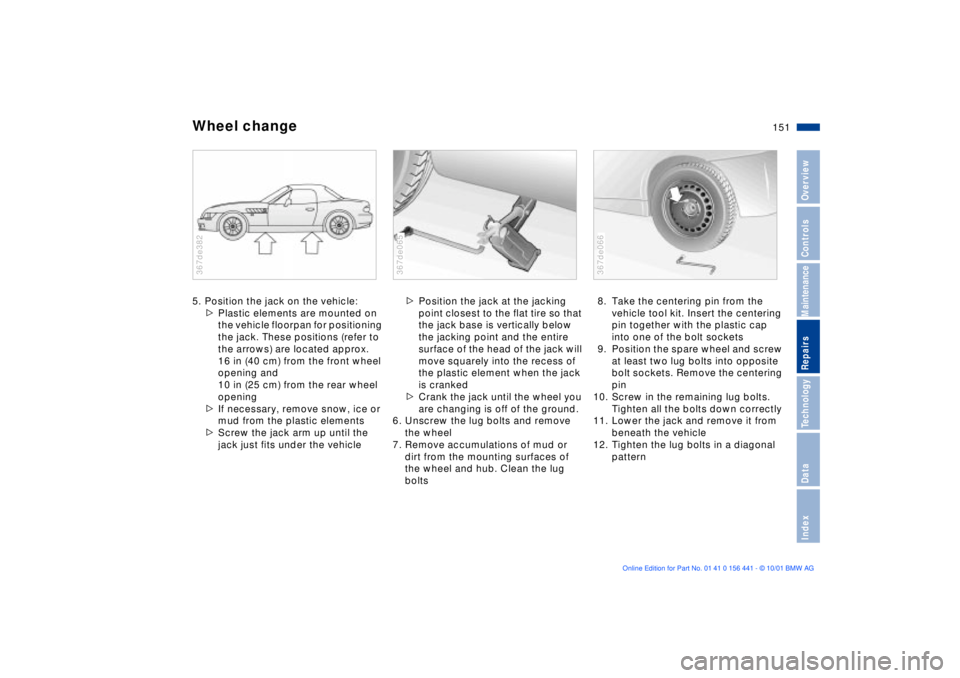
Wheel change5. Position the jack on the vehicle:
>Plastic elements are mounted on
the vehicle floorpan for positioning
the jack. These positions (refer to
the arrows) are located approx.
16 in (40 cm) from the front wheel
opening and
10 in (25 cm) from the rear wheel
opening
>If necessary, remove snow, ice or
mud from the plastic elements
>Screw the jack arm up until the
jack just fits under the vehicle367de382
>Position the jack at the jacking
point closest to the flat tire so that
the jack base is vertically below
the jacking point and the entire
surface of the head of the jack will
move squarely into the recess of
the plastic element when the jack
is cranked
>Crank the jack until the wheel you
are changing is off of the ground.
6. Unscrew the lug bolts and remove
the wheel
7. Remove accumulations of mud or
dirt from the mounting surfaces of
the wheel and hub. Clean the lug
bolts367de065
8. Take the centering pin from the
vehicle tool kit. Insert the centering
pin together with the plastic cap
into one of the bolt sockets
9. Position the spare wheel and screw
at least two lug bolts into opposite
bolt sockets. Remove the centering
pin
10. Screw in the remaining lug bolts.
Tighten all the bolts down correctly
11. Lower the jack and remove it from
beneath the vehicle
12. Tighten the lug bolts in a diagonal
pattern367de066
Page 152 of 187

152n
Wheel change13. Wheels with full wheel covers:
Place the wheel cover with the
valve opening over the valve. Use
both hands to press the cover
securely onto the rim
14. Check and correct the inflation
pressure at the earliest opportunity.
Use only the full wheel cover
installed by the factory. Other
wheel covers may not fit securely. The
full wheel cover may not be installed on
the spare wheel because the cover
could be damaged.<
The jack is designed for changing
wheels only. Do not attempt to lift
a different vehicle model or any other
type of load with the jack. To do so
could lead to property damage or
personal injury.
To ensure continued safety, check the
tightness of the lug bolts at the earliest
opportunity (torque specification:
72 lbs ft [100 Nm]).<
If light-alloy wheels other than Original
BMW light-alloy wheels have been
mounted, it may be necessary to use
different lug bolts for those wheels.
Replace the defective tire as soon as
possible and have the new wheel/tire
balanced.
Driving with the spare wheelDrive cautiously and do not exceed a
speed of 50 mph (80 km/h).
Be aware that vehicle handling will be
altered. Slower brake response time,
longer braking distances and changed
steering characteristics may be antici-
pated when approaching limit condi-
tions.
Only one spare wheel may be
mounted at any time. Mount a
wheel and tire with the same size and
specifications as the others at the
earliest possible opportunity. Maintain
the specified tire inflation pressures,
refer to the table on page 27.<
Page 165 of 187

165n
IndexDataTechnologyRepairsMaintenanceControlsOverview
The airbags located under the marked
covers inflate and unfold in a matter of
a few milliseconds. In this process they
tear through the designed breaking
points of the upholstered covers or
press them out.
Because the inflation process must be
virtually instantaneous, it is necessarily
accompanied by a certain amount of
ignition and inflation noise. The gas
required to inflate the airbags is not
dangerous, and it dissipates together
with the associated smoke.
The entire process is completed within
fractions of a second.Precision sensors monitor the number of
revolutions of the wheels. When
equipped with DSC, they also monitor
steering angle, lateral acceleration,
brake pressure and the movement of the
vehicle around its vertical axis.
If differences in the wheel speeds occur,
ASC+T recognizes the danger of wheel-
spin and reduces the drive torque. If
necessary, the system also responds
with additional applications of the brakes
at the rear wheels.
In addition, DSC permanently monitors
the vehicle's current operating condition
and compares it with an ideal condition
that is calculated from the sensor's
signals. If deviations from this occur
(understeering or oversteering, for
instance), DSC can stabilize the vehicle
in fractions of a second by adjusting
engine output and with the assistance of
braking intervention at individual wheels.
Within physically possible limits
dangerous skids can be prevented even
as they are just beginning.You may need some time to become
accustomed to this system's interven-
tion. However, it provides optimum
propulsive force and driving stability.
The braking intervention may be accom-
panied by a certain degree of noise.Airbags ASC+T/DSC
*
Page 180 of 187

Everything from A to ZDSC (Dynamic Stability
Control)74, 165
Dynamic Brake Control
(DBC)103
Dynamic Stability Control
(DSC)74, 165EElectric convertible top
operation44
Electric power windows38
Electrical malfunction
convertible top157t
doors32t
fuel filler door157t
luggage compartment
lid37t
power convertible
top157t
Electrical system174
Electronic immobilizer31
Emergency release of
luggage compartment lid
from luggage
compartment's interior38
Engine
compartment120, 121Engine coolant126
adding126t
Engine oil123
adding123t
dipstick123
disposal125t
grades124
level21, 123t
pressure20
viscosity124
Engine output170
Engine specifications170
Exterior mirrors50
FFailure of an electrical
accessory156t
Fan82, 86
Filler cap cover25
Filling the washer
reservoir122t
First-aid kit24
Fittings, tow-starting and
towing159t
Flasher, headlamp64Flat tire111
Z3 roadster,
Z3 coupe146t
Folding top40
Footbrake103
Front airbags54, 130
Front fog lamps76
bulb replacement139t
Frost protection,
radiator105
Fuel26
Fuel consumption,
average72
Fuel filler door
electrical
malfunction157t
manual operation157t
Fuel gauge68
Fuel specifications26
Fuel tank capacity173
Fuses156
GGasoline26
Gear indicator68
Glass sunroof39
Glove compartment90
Grilles80, 84
Gross vehicle weight172HHardtop108
Hazard warning
flashers24t
Hazard warning system24
Hazard warning
triangle24t
Head restraints50
Headlamp cleaning
system122
Headlamp cover,
care137t
Headlamp flasher64
Headlamp washers66
Headlamps, high
beam23, 64
bulb replacement137t
Headlamps, low beam76
bulb replacement137t