key BMW Z3 2002 User Guide
[x] Cancel search | Manufacturer: BMW, Model Year: 2002, Model line: Z3, Model: BMW Z3 2002Pages: 187, PDF Size: 2.73 MB
Page 37 of 187
37n
IndexDataTechnologyRepairsMaintenanceControlsOverview
Luggage compartment lidTo lock separatelyTurn the master key to the right past the
pressure point and then pull it out in the
horizontal position
This locks the luggage compartment
and disengages it from the central
locking system. If you then surrender
only the door and ignition key (refer to
page 30), access to the vehicle through
the luggage compartment is not
possible. This is recommended for valet
parking, for instance.Manual operation(in the event of electrical malfunction)
Turn the master key in the lock of the
luggage compartment lid to the left to
the stop Ð the luggage compartment lid
opens slightly.
The luggage compartment is locked
again as soon as it is closed.
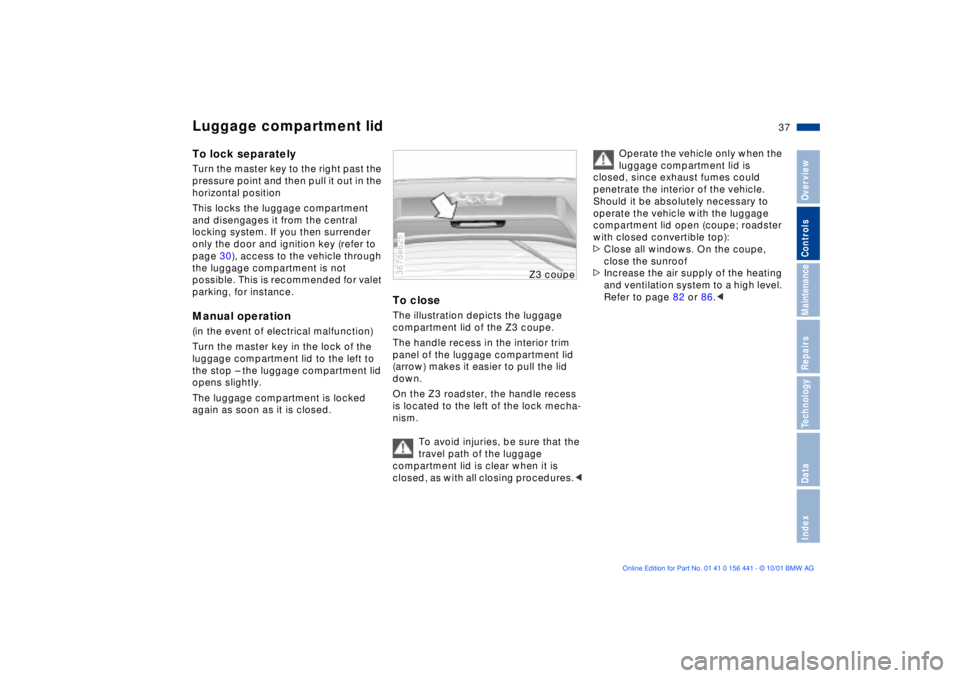
To closeThe illustration depicts the luggage
compartment lid of the Z3 coupe.
The handle recess in the interior trim
panel of the luggage compartment lid
(arrow) makes it easier to pull the lid
down.
On the Z3 roadster, the handle recess
is located to the left of the lock mecha-
nism.
To avoid injuries, be sure that the
travel path of the luggage
compartment lid is clear when it is
closed, as with all closing procedures.< 367de625
Z3 cou
pe
Operate the vehicle only when the
luggage compartment lid is
closed, since exhaust fumes could
penetrate the interior of the vehicle.
Should it be absolutely necessary to
operate the vehicle with the luggage
compartment lid open (coupe; roadster
with closed convertible top):
>Close all windows. On the coupe,
close the sunroof
>Increase the air supply of the heating
and ventilation system to a high level.
Refer to page 82 or 86.<
Page 38 of 187
38n
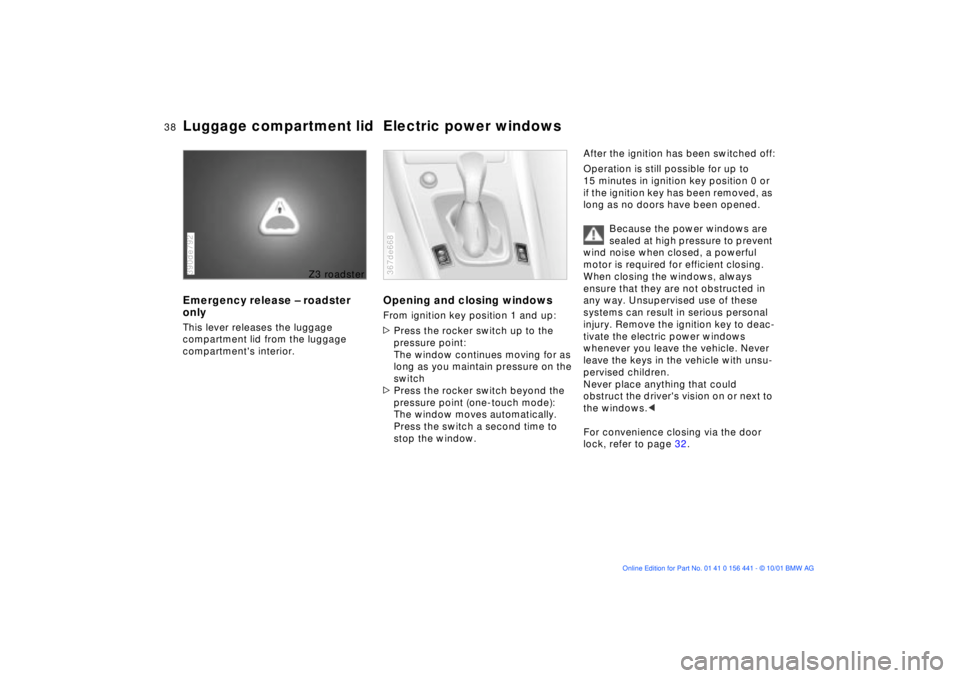
Luggage compartment lid Electric power windowsEmergency release Ð roadster
onlyThis lever releases the luggage
compartment lid from the luggage
compartment's interior.390de792
Z3 roadster
Opening and closing windowsFrom ignition key position 1 and up:
>Press the rocker switch up to the
pressure point:
The window continues moving for as
long as you maintain pressure on the
switch
>Press the rocker switch beyond the
pressure point (one-touch mode):
The window moves automatically.
Press the switch a second time to
stop the window.367de668
After the ignition has been switched off:
Operation is still possible for up to
15 minutes in ignition key position 0 or
if the ignition key has been removed, as
long as no doors have been opened.
Because the power windows are
sealed at high pressure to prevent
wind noise when closed, a powerful
motor is required for efficient closing.
When closing the windows, always
ensure that they are not obstructed in
any way. Unsupervised use of these
systems can result in serious personal
injury. Remove the ignition key to deac-
tivate the electric power windows
whenever you leave the vehicle. Never
leave the keys in the vehicle with unsu-
pervised children.
Never place anything that could
obstruct the driver's vision on or next to
the windows.<
For convenience closing via the door
lock, refer to page 32.
Page 39 of 187
39n
IndexDataTechnologyRepairsMaintenanceControlsOverview
Electric power windows Sunroof
*, coupe
Jam protectionIf one of the windows comes into
contact with an object between the
window and roof frame when it is
closing, the closing cycle is interrupted
immediately and the window will open
again slightly.
You can override this jam protec-
tion function (if there is an
attempted unauthorized entrance from
the outside, for instance) by pressing
the switch beyond the resistance point
and holding it.<
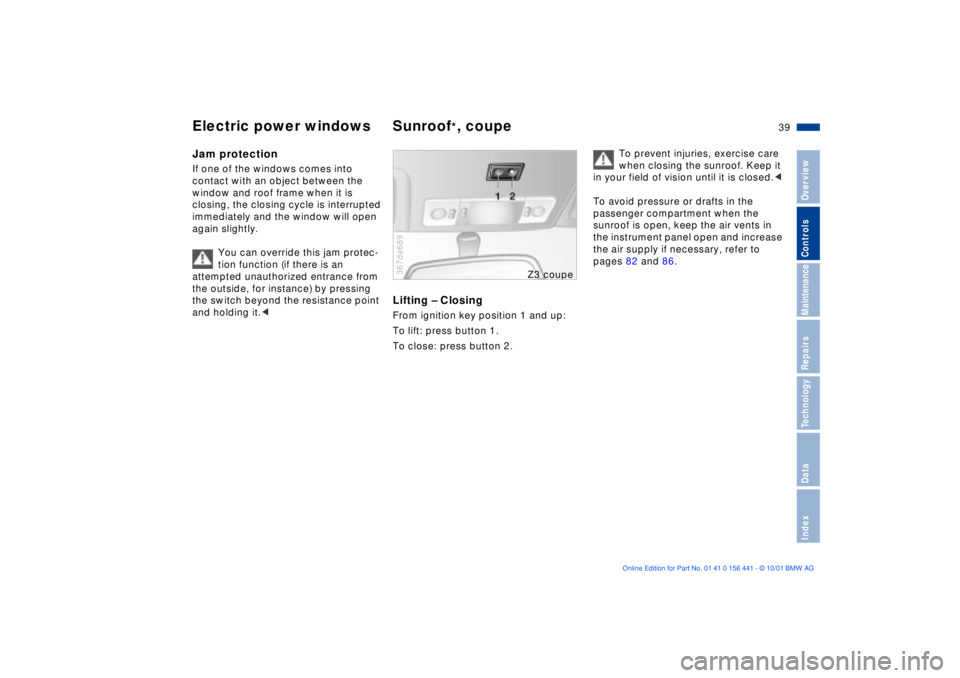
Lifting Ð ClosingFrom ignition key position 1 and up:
To lift: press button 1.
To close: press button 2.367de689
Z3 cou
pe
To prevent injuries, exercise care
when closing the sunroof. Keep it
in your field of vision until it is closed.<
To avoid pressure or drafts in the
passenger compartment when the
sunroof is open, keep the air vents in
the instrument panel open and increase
the air supply if necessary, refer to
pages 82 and 86.
Page 51 of 187
51n
IndexDataTechnologyRepiarsMaintenanceControlsOverview
Mirrors
The mirror on the passenger's
side features a lens with a convex
surface. When estimating the distance
between yourself and other traffic, bear
in mind that the objects reflected in the
mirror are closer than they appear. This
means that estimates of the distance to
following traffic should not be regarded
as precise.<
Electric defrosting
*
Both mirrors are defrosted automa-
tically when the ignition key is in
position 2.
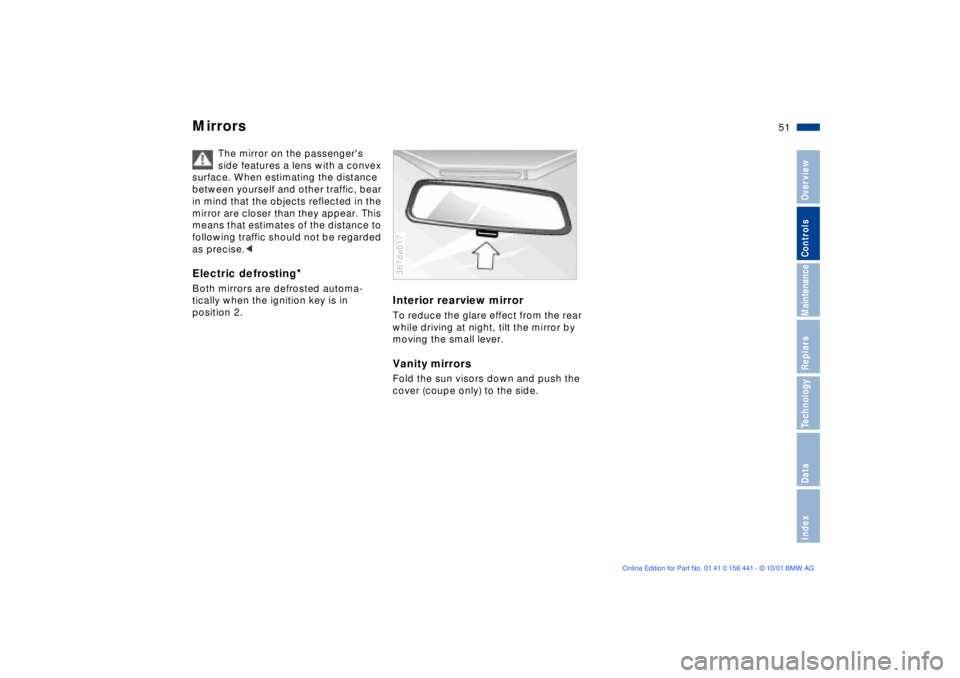
Interior rearview mirrorTo reduce the glare effect from the rear
while driving at night, tilt the mirror by
moving the small lever.Vanity mirrorsFold the sun visors down and push the
cover (coupe only) to the side.367de017
Page 54 of 187
54n
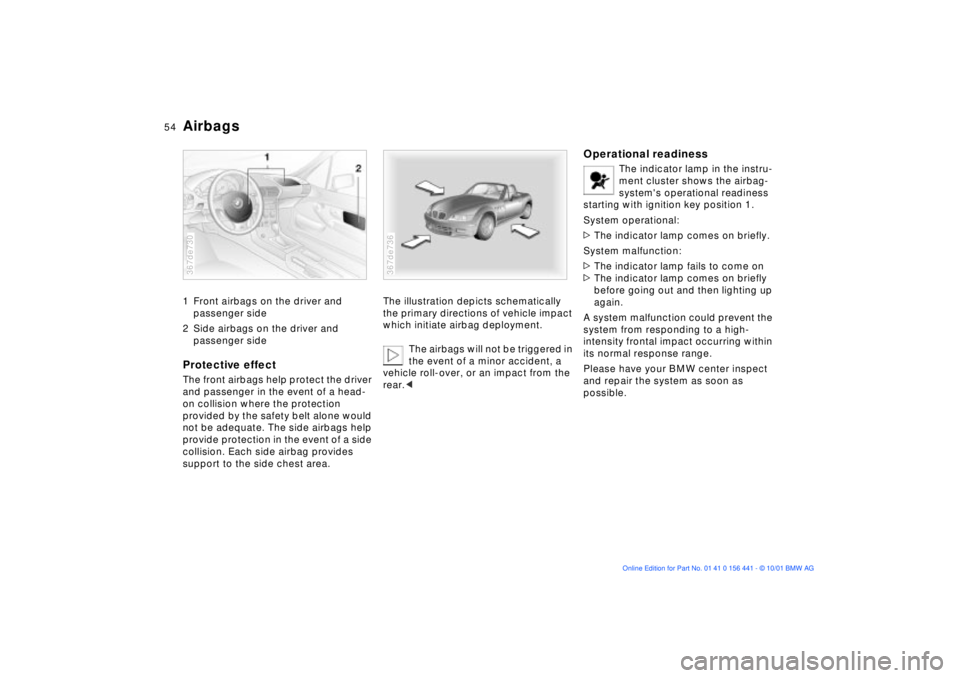
Airbags1 Front airbags on the driver and
passenger side
2 Side airbags on the driver and
passenger sideProtective effectThe front airbags help protect the driver
and passenger in the event of a head-
on collision where the protection
provided by the safety belt alone would
not be adequate. The side airbags help
provide protection in the event of a side
collision. Each side airbag provides
support to the side chest area.367de730
The illustration depicts schematically
the primary directions of vehicle impact
which initiate airbag deployment.
The airbags will not be triggered in
the event of a minor accident, a
vehicle roll-over, or an impact from the
rear.< 367de736
Operational readiness
The indicator lamp in the instru-
ment cluster shows the airbag-
system's operational readiness
starting with ignition key position 1.
System operational:
>The indicator lamp comes on briefly.
System malfunction:
>The indicator lamp fails to come on
>The indicator lamp comes on briefly
before going out and then lighting up
again.
A system malfunction could prevent the
system from responding to a high-
intensity frontal impact occurring within
its normal response range.
Please have your BMW center inspect
and repair the system as soon as
possible.
Page 58 of 187
58n
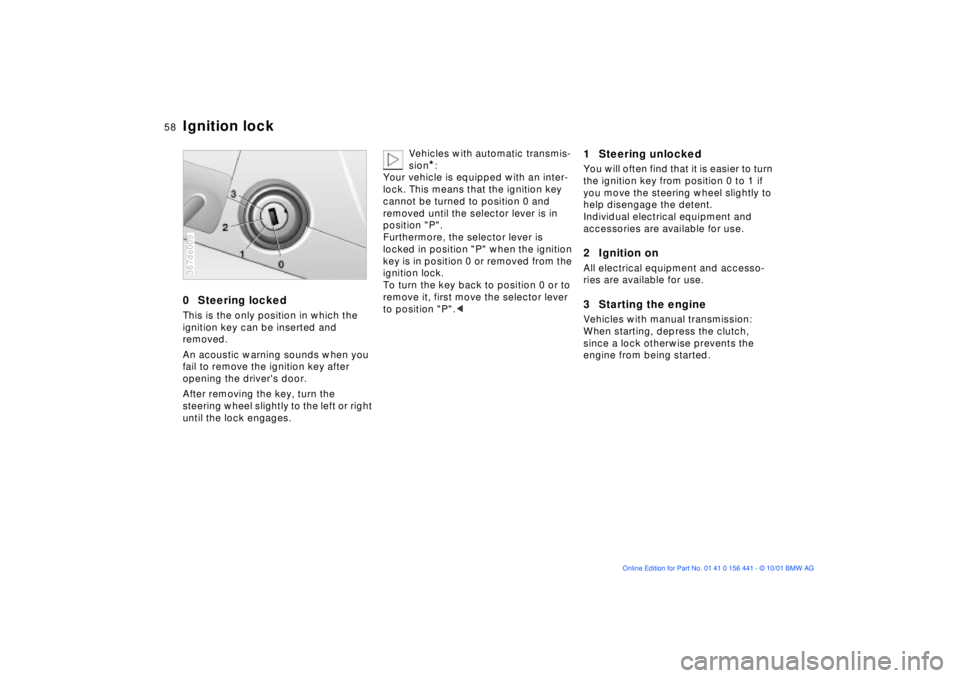
0 Steering lockedThis is the only position in which the
ignition key can be inserted and
removed.
An acoustic warning sounds when you
fail to remove the ignition key after
opening the driver's door.
After removing the key, turn the
steering wheel slightly to the left or right
until the lock engages.367de009
Vehicles with automatic transmis-
sion
*:
Your vehicle is equipped with an inter-
lock. This means that the ignition key
cannot be turned to position 0 and
removed until the selector lever is in
position "P".
Furthermore, the selector lever is
locked in position "P" when the ignition
key is in position 0 or removed from the
ignition lock.
To turn the key back to position 0 or to
remove it, first move the selector lever
to position "P".<
1 Steering unlockedYou will often find that it is easier to turn
the ignition key from position 0 to 1 if
you move the steering wheel slightly to
help disengage the detent.
Individual electrical equipment and
accessories are available for use.2 Ignition onAll electrical equipment and accesso-
ries are available for use.3 Starting the engineVehicles with manual transmission:
When starting, depress the clutch,
since a lock otherwise prevents the
engine from being started.
Ignition lock
Page 59 of 187

59n
IndexDataTechnologyRepairsMaintenanceControlsOverview
Starting the engineBefore starting>Engage the parking brake
>Be sure that the gearshift lever is in
"Neutral" (or the selector lever in "P"
if the vehicle is equipped with auto-
matic transmission)
>Depress the clutch pedal.
Do not run the engine in enclosed
spaces. The exhaust gases
contain carbon monoxide, an odorless
and colorless, but highly toxic gas.
Breathing the exhaust gases poses an
extreme health risk, and can lead to
unconsciousness and death.
Do not leave the vehicle unattended
with the engine running. An unattended
vehicle with a running engine repre-
sents a potential safety hazard.<
Starting the engine>Do not press the accelerator pedal
while starting the engine.
Do not actuate the starter for too
short a time. Do not turn it for
more than approx. 20 seconds. Release
the ignition key immediately after the
engine starts.
Do not allow the engine to warm up
by leaving it running while the vehicle
remains stationary. Instead, begin to
drive immediately at a moderate engine
speed.<
Should the engine fail to start on the
first attempt (if it is very hot or cold, for
instance):
>Press the accelerator pedal halfway
down while engaging the starter.
Cold starts at very low temperatures,
from approx. +5 7 (Ð15 6) and at
altitudes above approx. 3,300 ft
(1,000 m):
>On the first start attempt, engage the
starter for a longer period (approx.
10 seconds).
If these temperature conditions are
anticipated for a longer period, have the
engine oil changed to a special oil, refer
to page 124. Please contact your BMW
center for additional information.
Usually, it is not necessary to depress
the accelerator pedal. However, at high
altitudes or in very hot or very cold
weather, depress the pedal halfway
down when starting the engine.
Engine idle speed is controlled by the
engine computer system. Increased
speeds at start-up are normal and
should decrease as the engine warms
up. If engine speed does not decrease,
service is required.
To prevent the battery from
discharging, always switch off any
accessories which are not required.
Switch off the ignition when the vehicle
is not being driven.
Page 60 of 187
60n
Switching off the engine Parking brakeTurn the ignition key to position 1 or 0.
Do not remove the ignition key
while the vehicle is rolling. The
steering locks and it is impossible to
steer the vehicle.
Always remove the ignition key and
engage the steering lock before leaving
the vehicle.
Vehicles with manual transmission:
Always engage the parking brake when
parking on slopes and inclined
surfaces, since even placing the gear-
shift lever in 1st gear or reverse may not
provide adequate resistance to rolling.
Vehicles with automatic transmission:
Place the selector lever in "P".<
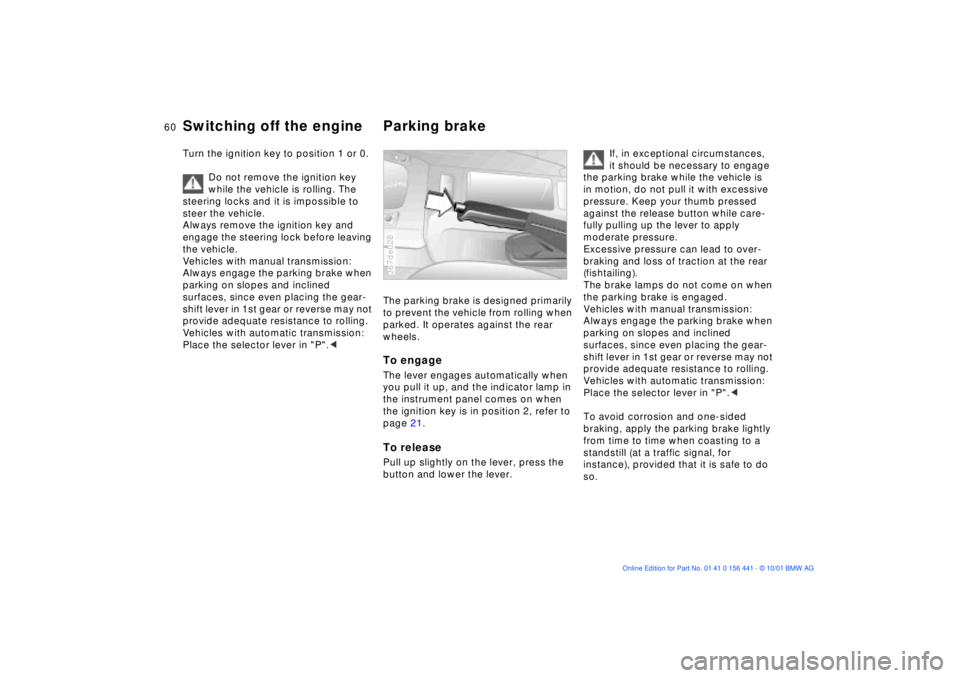
The parking brake is designed primarily
to prevent the vehicle from rolling when
parked. It operates against the rear
wheels.To engageThe lever engages automatically when
you pull it up, and the indicator lamp in
the instrument panel comes on when
the ignition key is in position 2, refer to
page 21.To releasePull up slightly on the lever, press the
button and lower the lever.367de028
If, in exceptional circumstances,
it should be necessary to engage
the parking brake while the vehicle is
in motion, do not pull it with excessive
pressure. Keep your thumb pressed
against the release button while care-
fully pulling up the lever to apply
moderate pressure.
Excessive pressure can lead to over-
braking and loss of traction at the rear
(fishtailing).
The brake lamps do not come on when
the parking brake is engaged.
Vehicles with manual transmission:
Always engage the parking brake when
parking on slopes and inclined
surfaces, since even placing the gear-
shift lever in 1st gear or reverse may not
provide adequate resistance to rolling.
Vehicles with automatic transmission:
Place the selector lever in "P".<
To avoid corrosion and one-sided
braking, apply the parking brake lightly
from time to time when coasting to a
standstill (at a traffic signal, for
instance), provided that it is safe to do
so.
Page 61 of 187
61n
IndexDataTechnologyRepairsMaintenanceControlsOverview
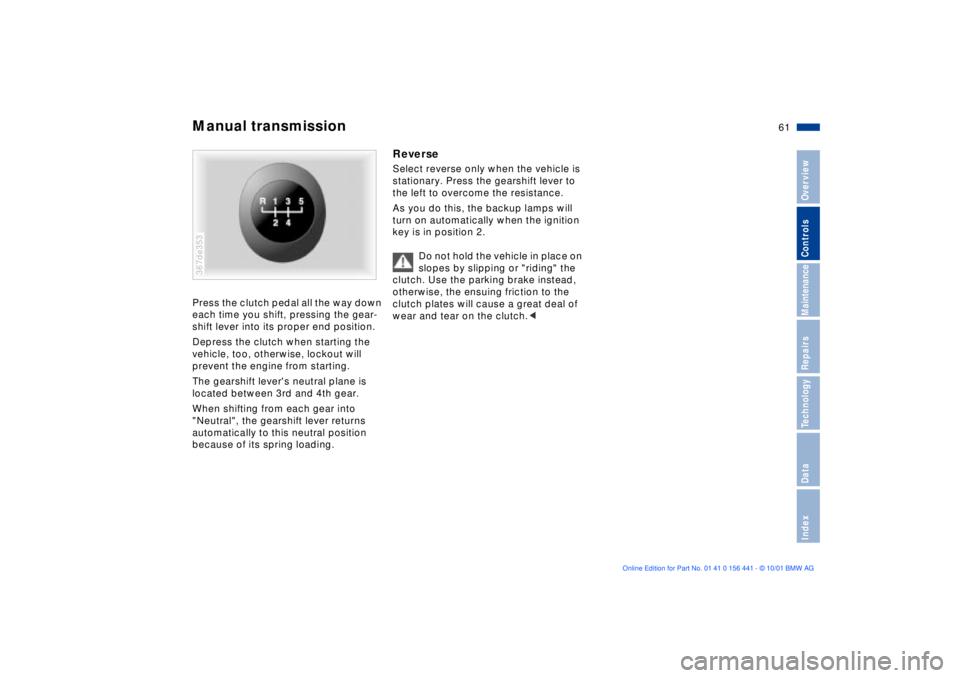
Manual transmissionPress the clutch pedal all the way down
each time you shift, pressing the gear-
shift lever into its proper end position.
Depress the clutch when starting the
vehicle, too, otherwise, lockout will
prevent the engine from starting.
The gearshift lever's neutral plane is
located between 3rd and 4th gear.
When shifting from each gear into
"Neutral", the gearshift lever returns
automatically to this neutral position
because of its spring loading.367de353
ReverseSelect reverse only when the vehicle is
stationary. Press the gearshift lever to
the left to overcome the resistance.
As you do this, the backup lamps will
turn on automatically when the ignition
key is in position 2.
Do not hold the vehicle in place on
slopes by slipping or "riding" the
clutch. Use the parking brake instead,
otherwise, the ensuing friction to the
clutch plates will cause a great deal of
wear and tear on the clutch.<
Page 65 of 187
65n
IndexDataTechnologyRepairsMaintenanceControlsOverview
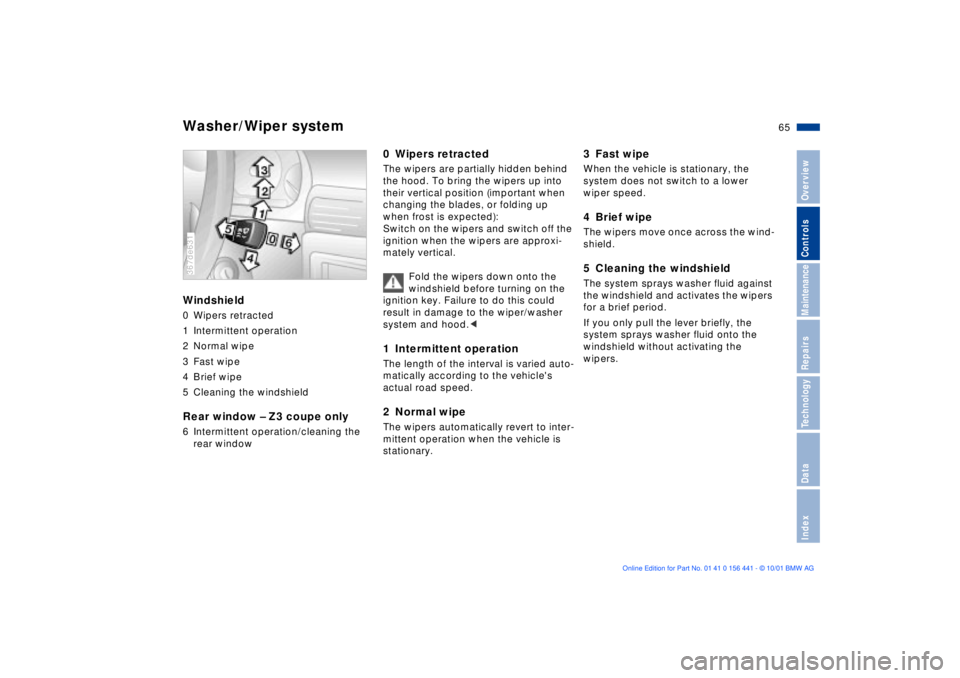
Washer/Wiper systemWindshield0 Wipers retracted
1 Intermittent operation
2 Normal wipe
3 Fast wipe
4 Brief wipe
5 Cleaning the windshieldRear window Ð Z3 coupe only6 Intermittent operation/cleaning the
rear window367de631
0 Wipers retractedThe wipers are partially hidden behind
the hood. To bring the wipers up into
their vertical position (important when
changing the blades, or folding up
when frost is expected):
Switch on the wipers and switch off the
ignition when the wipers are approxi-
mately vertical.
Fold the wipers down onto the
windshield before turning on the
ignition key. Failure to do this could
result in damage to the wiper/washer
system and hood.< 1 Intermittent operationThe length of the interval is varied auto-
matically according to the vehicle's
actual road speed.2 Normal wipeThe wipers automatically revert to inter-
mittent operation when the vehicle is
stationary.
3 Fast wipeWhen the vehicle is stationary, the
system does not switch to a lower
wiper speed.4 Brief wipeThe wipers move once across the wind-
shield.5 Cleaning the windshieldThe system sprays washer fluid against
the windshield and activates the wipers
for a brief period.
If you only pull the lever briefly, the
system sprays washer fluid onto the
windshield without activating the
wipers.