wheel BMW Z3 2002 Owners Manual
[x] Cancel search | Manufacturer: BMW, Model Year: 2002, Model line: Z3, Model: BMW Z3 2002Pages: 187, PDF Size: 2.73 MB
Page 6 of 187

6n
For your own safety
Use unleaded gasoline only. Fuels
containing up to and including
10% ethanol or other oxygenates with
up to 2.8% oxygen by weight (i.e.
15% MTBE or 3% methanol plus an
equivalent amount of co-solvent) will
not void the applicable warranties
respecting defects in materials or work-
manship. Field experience has indi-
cated significant differences in fuel
quality (i.e. volatility, composition or
additives, etc.) among gasolines offered
for sale in the United States and
Canada. The use of poor-quality fuels
may result in driveability, starting and
stalling problems especially under
certain environmental conditions such
as high ambient temperature and high
altitude.
Should you encounter driveability prob-
lems that you suspect could be related
to the fuel you are using, we recom-
mend that you respond by switching
to a recognized high-quality brand.
Failure to comply with these recom-
mendations may result in unscheduled
maintenance.
Follow the relevant safety rules when
you are handling gasoline.
<
Important safety information!
For your own safety, use genuine parts
and accessories approved by BMW.
When you purchase accessories tested
and approved by BMW and Original
BMW Parts, you simultaneously acquire
the assurance that they have been thor-
oughly tested by BMW to ensure
optimum performance when installed
on your vehicle.
BMW warrants these parts to be free
from defects in material and workman-
ship.
BMW will not accept any liability for
damage resulting from installation of
parts and accessories not approved
by BMW.
BMW cannot test every product made
by other manufacturers to verify if it can
be used on a BMW safely and without
risk to either the vehicle, its operation,
or its occupants.
Original BMW Parts, BMW Accessories
and other products approved by BMW,
together with professional advice on
using these items, are available from
all BMW centers.
Installation and operation of non-BMW
approved accessories such as alarms,
radios, amplifiers, radar detectors,
wheels, suspension components, brake
dust shields, telephones (including
operation of any portable cellular phone
from within the vehicle without using an
externally mounted antenna) or trans-
ceiver equipment (such as CB, walkie-
talkie, ham radio or similar) may cause
extensive damage to the vehicle,
compromise its safety, interfere with
the vehicle's electrical system or affect
the validity of the BMW Limited
Warranty. Consult your BMW center for
additional information.
<
Maintenance, replacement, or
repair of the emission control
devices and systems may be performed
by any automotive repair establishment
or individual using any certified auto-
motive part.
<
Symbol on vehicle parts
Indicates that you should consult
the relevant section of this Owner's
Manual for information on a particular
part or assembly.
For your own safety
Page 11 of 187
11n
Controls and features
Operation, maintenance
Cabin convenience:
Glove compartment90
Storage compartments90
Storage boxes90
Beverage holder91
Ashtray91
Cigarette lighter92
Loading and transporting:
coupe:
Roll-up cover93
Partition net93
Cargo loading94
Roof-mounted luggage
rack95
Special operating instructions:
Break-in procedure98
Driving notes99
Catalytic converter100
Antilock Brake System
(ABS)101
Disc brakes103
Brake system104
Winter operation105
Power steering106
Cellular phone107
Car radio reception107
Hardtop Ð roadster108
Wheels and tires:
Notes on inflation pressures110
Tire condition110
Tire replacement111
Tire rotation113
Wheel and tire
combinations114
Special features of winter
tires115
Snow chains115
Approved wheel and tire
specifications116
In the engine compartment:
Hood118
Engine compartment120
Fluids for the washer
systems122
Washer nozzles122
Engine oil123
Coolant125
Brake fluid126
Vehicle Identification127
Care and maintenance:
The BMW Maintenance
System128
Airbags130
Storing your vehicle130
Laws and regulations:
Technical modifications132
California Proposition
65 Warning132
OBD interface socket133
Page 12 of 187

Contents
Owner service procedures
Advanced technology
Technical data
Replacement procedures:
Onboard tool kit136
Windshield wiper blades136
Lamps and bulbs137
Master key with battery
lamp143
Remote control144
Wheel change146
Battery153
Fuses156
In case of electrical
malfunction:
Power convertible top157
Fuel filler door157
Assistance, giving and
receiving:
Jump-starting158
Towing the vehicle159Adaptive Transmission Control
(ATC)164
Airbags164
Automatic Stability Control plus
Traction (ASC+T)/Dynamic
Stability Control (DSC)165
Car radio reception166
Safety belt tensioner166Engine specifications170
Dimensions171
Weights172
Capacities173
Electrical system174
Drive belts174
Page 49 of 187
49n
IndexDataTechnologyRepiarsMaintenanceControlsOverview
For maximum safety, please comply
with the following:
Never try to adjust your seat while
operating the vehicle. The seat
could respond with an unexpected
movement, and the ensuing loss of
vehicle control could result in an acci-
dent.
Be sure that the safety belt is fastened
firmly against your body at all times. In
the event of a frontal impact, a loose lap
belt could slide over your hips, leading
to abdominal injury. In addition, the
safety belt's restraint effectiveness is
reduced if the belt is worn loosely.
When adjusting your seat, select a
position that provides the maximum
distance between you and the steering
wheel, instrument panel and door while
still allowing comfortable and safe
access to all vehicle controls.<
Correct sitting postureTo reduce strain on your spinal column,
sit all the way back in the seat and rest
your back fully against the backrest.
In the ideal sitting posture, your head
extends along a straight line from your
spine.
For long-distance driving, you may wish
to increase the backrest tilt angle
slightly to reduce muscular tension.
You should also be able to grasp the
highest point of the steering wheel with
your arms slightly bent.
After a seat adjustment in the coupe,
adjust the height of the safety belt also,
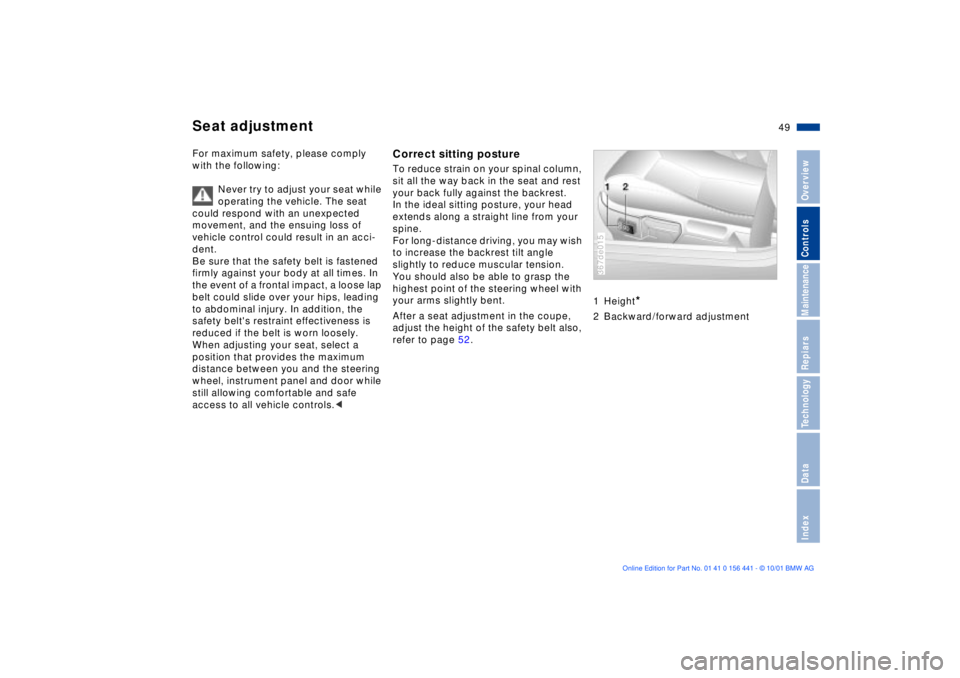
refer to page 52.1 Height
*
2 Backward/forward adjustment367de015
Seat adjustment
Page 55 of 187
55n
IndexDataTechnologyRepairsMaintenanceControlsOverview
AirbagsSitting correctly with airbags
For your safety, comply with the
following instructions for the
airbags. If you do not, the airbags may
not be able to provide their maximum
protection. All passengers in the vehicle
should be aware of and comply with this
information:
The airbags are supplemental restraint
devices designed to provide extra
protection; they are not a substitute for
safety belts. Wear your safety belt at
all times.
Adjust your seat to a position that is
comfortable for you, allowing unre-
stricted vehicle operation, and is not
closer to the steering wheel than neces-
sary.
Always grasp the steering wheel by the
steering wheel rim, keeping your hands
at the "9-o'clock" and "3-o'clock" posi-
tions in order to minimize any risk of
injury to hands or arms if the airbag does
deploy.
There should not be any other persons,
animals or objects between the airbag
and the passenger in that seat.
Do not use the cover panel for the front
airbag on the passenger side as a
storage area.
Do not apply adhesive materials to the
cover panels of the airbags, cover them
or modify them in any other way.
If you use a child-restraint system, read
carefully and comply with the instruc-
tions on page 56.
Be sure that child-restraint systems are
installed correctly and with the greatest
possible distance from the airbag in the
side trim panel. Do not allow children to
lean out of the child-restraint system in
the direction of the side trim panel.
Otherwise, serious injuries could occur
if the airbag is triggered.<
Even when you have complied with all
of these guidelines, there is still a small
residual risk of minor facial, hand and
arm injuries from airbag deployment
occurring in isolated instances.
The ignition and inflation noise may
cause a mild temporary hearing loss in
extremely sensitive individuals.
Corresponding airbag safety precau-
tions are provided on both sun visors
and the instrument panel (US models).
For additional information concerning
the airbag system, refer to pages 130
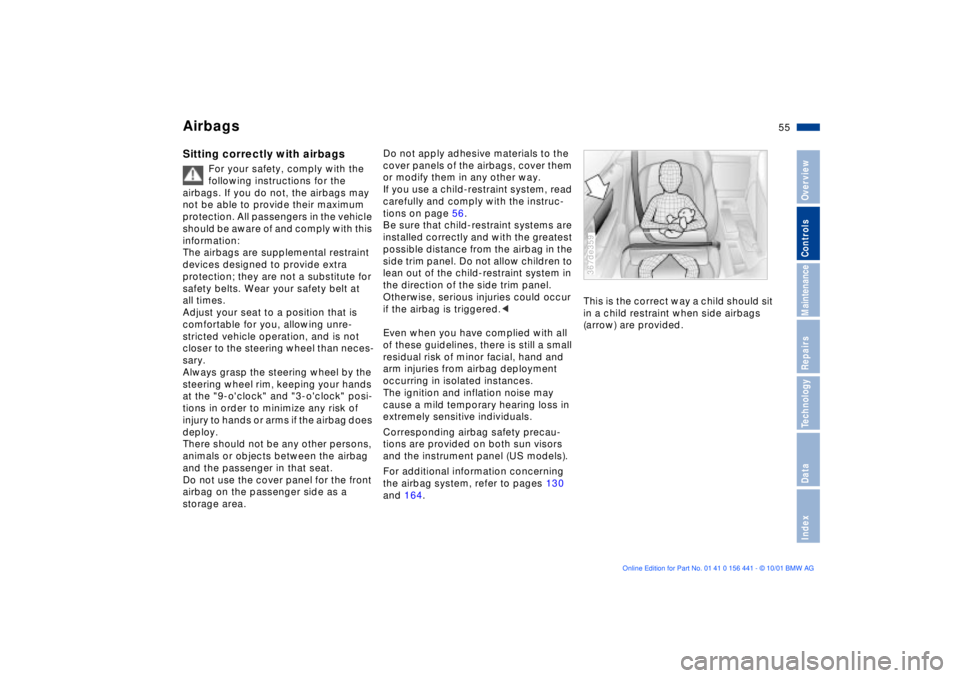
and 164.This is the correct way a child should sit
in a child restraint when side airbags
(arrow) are provided.
367de359
Page 58 of 187
58n
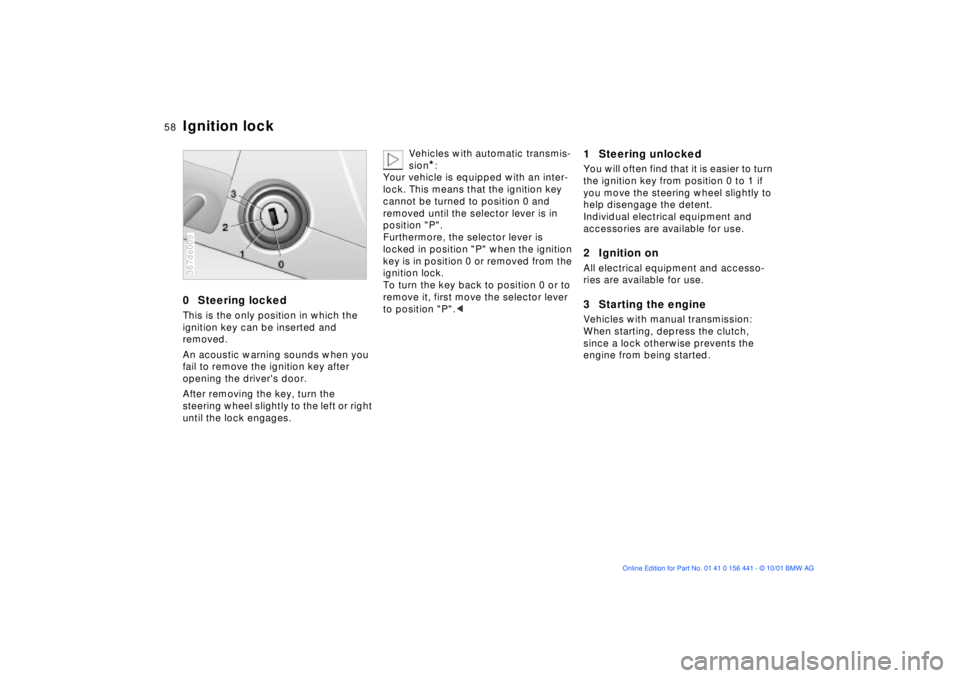
0 Steering lockedThis is the only position in which the
ignition key can be inserted and
removed.
An acoustic warning sounds when you
fail to remove the ignition key after
opening the driver's door.
After removing the key, turn the
steering wheel slightly to the left or right
until the lock engages.367de009
Vehicles with automatic transmis-
sion
*:
Your vehicle is equipped with an inter-
lock. This means that the ignition key
cannot be turned to position 0 and
removed until the selector lever is in
position "P".
Furthermore, the selector lever is
locked in position "P" when the ignition
key is in position 0 or removed from the
ignition lock.
To turn the key back to position 0 or to
remove it, first move the selector lever
to position "P".<
1 Steering unlockedYou will often find that it is easier to turn
the ignition key from position 0 to 1 if
you move the steering wheel slightly to
help disengage the detent.
Individual electrical equipment and
accessories are available for use.2 Ignition onAll electrical equipment and accesso-
ries are available for use.3 Starting the engineVehicles with manual transmission:
When starting, depress the clutch,
since a lock otherwise prevents the
engine from being started.
Ignition lock
Page 60 of 187
60n
Switching off the engine Parking brakeTurn the ignition key to position 1 or 0.
Do not remove the ignition key
while the vehicle is rolling. The
steering locks and it is impossible to
steer the vehicle.
Always remove the ignition key and
engage the steering lock before leaving
the vehicle.
Vehicles with manual transmission:
Always engage the parking brake when
parking on slopes and inclined
surfaces, since even placing the gear-
shift lever in 1st gear or reverse may not
provide adequate resistance to rolling.
Vehicles with automatic transmission:
Place the selector lever in "P".<
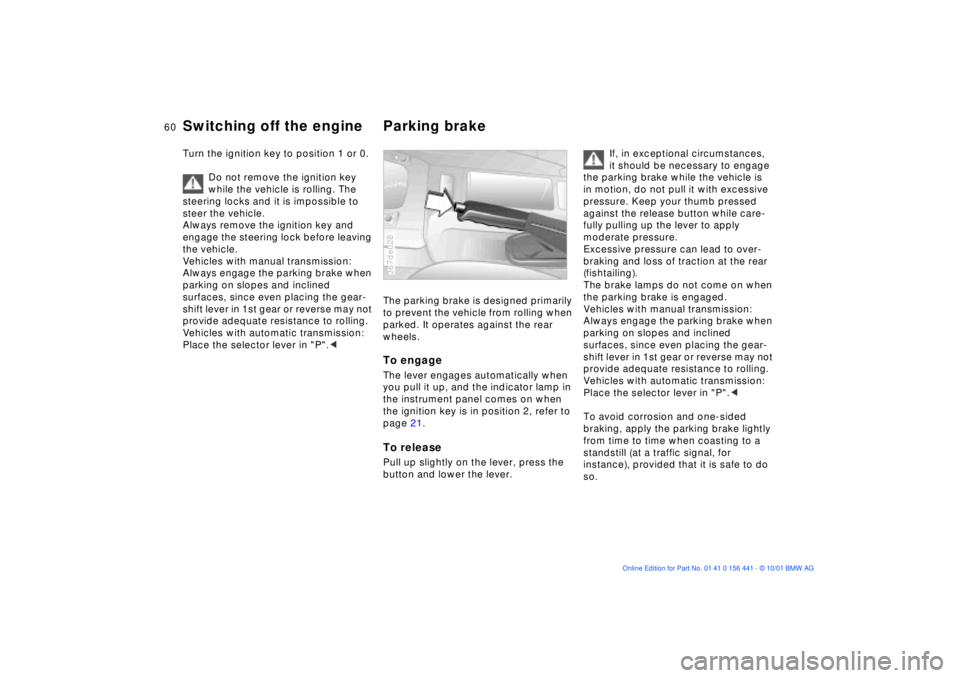
The parking brake is designed primarily
to prevent the vehicle from rolling when
parked. It operates against the rear
wheels.To engageThe lever engages automatically when
you pull it up, and the indicator lamp in
the instrument panel comes on when
the ignition key is in position 2, refer to
page 21.To releasePull up slightly on the lever, press the
button and lower the lever.367de028
If, in exceptional circumstances,
it should be necessary to engage
the parking brake while the vehicle is
in motion, do not pull it with excessive
pressure. Keep your thumb pressed
against the release button while care-
fully pulling up the lever to apply
moderate pressure.
Excessive pressure can lead to over-
braking and loss of traction at the rear
(fishtailing).
The brake lamps do not come on when
the parking brake is engaged.
Vehicles with manual transmission:
Always engage the parking brake when
parking on slopes and inclined
surfaces, since even placing the gear-
shift lever in 1st gear or reverse may not
provide adequate resistance to rolling.
Vehicles with automatic transmission:
Place the selector lever in "P".<
To avoid corrosion and one-sided
braking, apply the parking brake lightly
from time to time when coasting to a
standstill (at a traffic signal, for
instance), provided that it is safe to do
so.
Page 63 of 187
63n
IndexDataTechnologyRepairsMaintenanceControlsOverview
Automatic transmission with Steptronic
*
P Ñ Park Select only when the vehicle is
stationary. The transmission locks to
prevent the rear wheels from turning.R Ñ Reverse Select only when the vehicle is
stationary. N Ñ Neutral Select only if your journey is interrupted
for a longer period. D Ñ Drive
(automatic shift program) This position is designed for driving
under all normal operating conditions.
All forward gears are available. Kickdown In the kickdown mode, you achieve
maximum performance and in
position D, you reach maximum speed.
Depress the accelerator pedal past the
increased resistance point at the full-
throttle position.
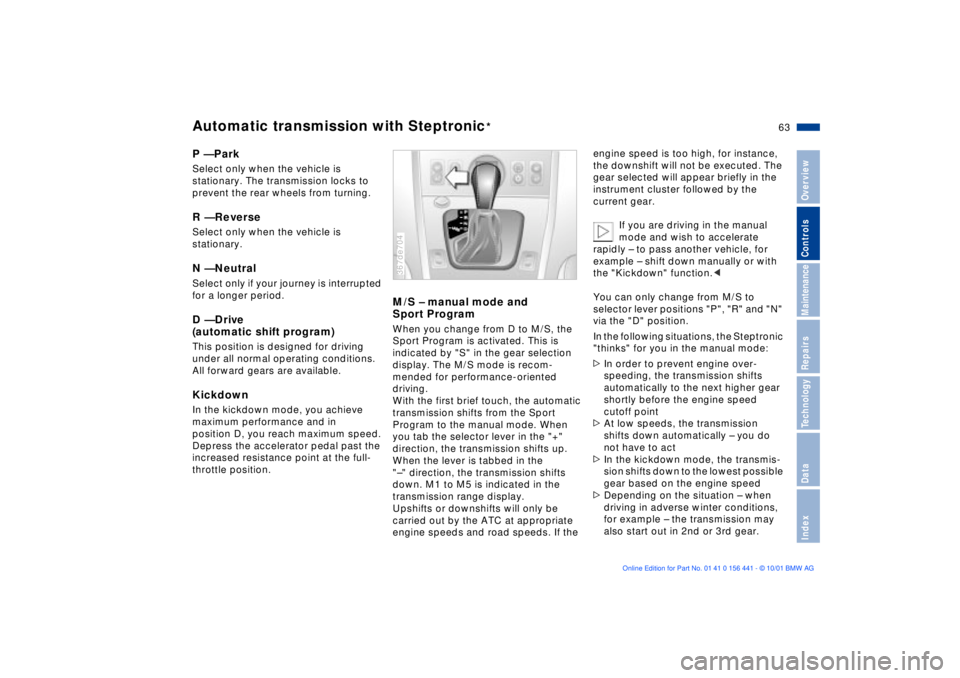
M/S Ð manual mode and
Sport Program When you change from D to M/S, the
Sport Program is activated. This is
indicated by "S" in the gear selection
display. The M/S mode is recom-
mended for performance-oriented
driving.
With the first brief touch, the automatic
transmission shifts from the Sport
Program to the manual mode. When
you tab the selector lever in the "+"
direction, the transmission shifts up.
When the lever is tabbed in the
"Ð" direction, the transmission shifts
down. M1 to M5 is indicated in the
transmission range display.
Upshifts or downshifts will only be
carried out by the ATC at appropriate
engine speeds and road speeds. If the 367de704
engine speed is too high, for instance,
the downshift will not be executed. The
gear selected will appear briefly in the
instrument cluster followed by the
current gear.
If you are driving in the manual
mode and wish to accelerate
rapidly Ð to pass another vehicle, for
example Ð shift down manually or with
the "Kickdown" function.<
You can only change from M/S to
selector lever positions "P", "R" and "N"
via the "D" position.
In the following situations, the Steptronic
"thinks" for you in the manual mode:
>In order to prevent engine over-
speeding, the transmission shifts
automatically to the next higher gear
shortly before the engine speed
cutoff point
>At low speeds, the transmission
shifts down automatically Ð you do
not have to act
>In the kickdown mode, the transmis-
sion shifts down to the lowest possible
gear based on the engine speed
>Depending on the situation Ð when
driving in adverse winter conditions,
for example Ð the transmission may
also start out in 2nd or 3rd gear.
Page 73 of 187
73n
IndexDataTechnologyRepairsMaintenanceControlsOverview
The conceptThis system helps provide additional
dynamic stability, particularly when
starting off, accelerating and cornering.
ASC+T recognizes the danger present
in traction loss and will increase driving
stability and traction by reducing the
engine's output, and if necessary, by
applying the brakes individually to the
rear wheels.
ASC+T is available as soon as the
engine starts up.
Indicator lamp
The indicator lamp in the instru-
ment cluster goes out shortly
after you switch on the ignition,
refer to page 22.
The indicator lamp flashes:
ASC+T controls the drive and braking
forces.
If the indicator lamp fails to go out after
the engine is started, or if it comes on
during normal driving and stays on:
There is a system malfunction or the
system was switched off with the
button. Consequently, interventions to
increase driving stability (as described
in the preceding column) are not avail-
able. You can still drive the vehicle
normally without ASC+T.
In the event of a malfunction, please
consult your BMW center.
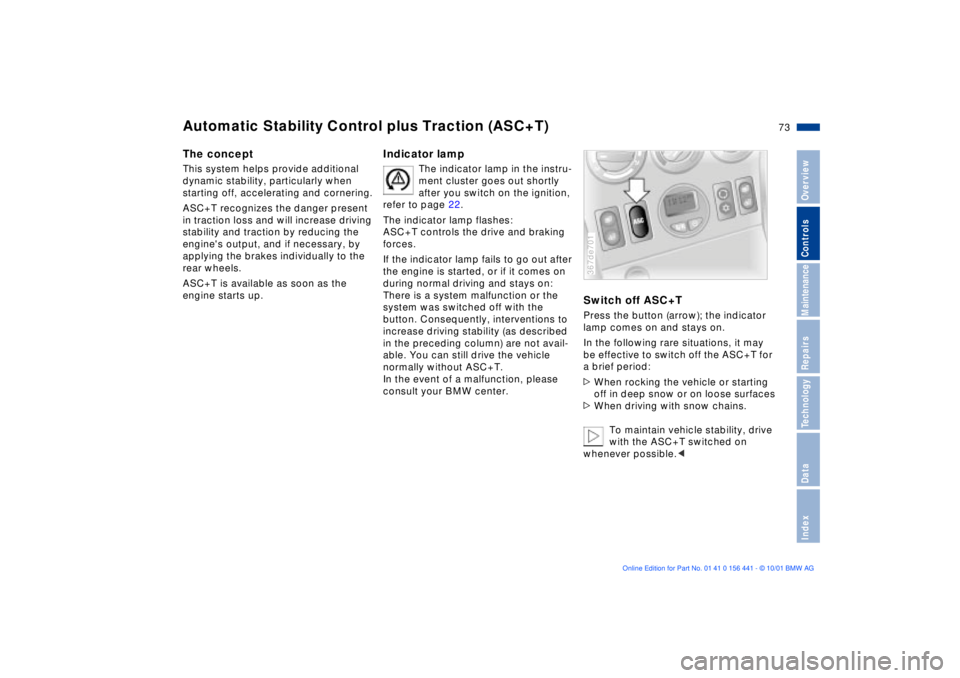
Switch off ASC+TPress the button (arrow); the indicator
lamp comes on and stays on.
In the following rare situations, it may
be effective to switch off the ASC+T for
a brief period:
>When rocking the vehicle or starting
off in deep snow or on loose surfaces
>When driving with snow chains.
To maintain vehicle stability, drive
with the ASC+T switched on
whenever possible.<367de701
Automatic Stability Control plus Traction (ASC+T)
Page 74 of 187
74n
ASC+T Dynamic Stability Control (DSC)*Reactivate the ASC+TPress the button again; the indicator
lamp goes out.
The laws of physics cannot be
repealed, even with ASC+T. It will
always be the driver's responsibility to
drive in a manner that matches road
conditions. We therefore urge you to
avoid using the additional safety margin
of the system as an excuse for taking
risks.<
For additional details concerning
ASC+T, please refer to the chapter,
"Advanced technology," page 165.
The conceptDSC maintains vehicle stability, even in
critical driving situations.
The system optimizes vehicle stability
during acceleration and when starting
from a full stop, as well as optimizing
traction. In addition, it recognizes
unstable vehicle conditions, such as
understeering or oversteering, and, as
far as is possible within the laws of
physics, helps keep the vehicle on a
steady course by reducing the engine
speed and brake applications to the
individual wheels.
The DSC is operational every time you
start the engine. DSC includes the
functions of ADB and CBC, refer to
page 102.
The ADB (Automatic Differential
Braking) copies the function of conven-
tional differential and transverse locks
through brake intervention, and
increases traction whenever conditions
merit, e. g. when driving on snow-
covered roads.
If the DSC is deactivated the ADB is in
ready mode.
Indicator lamp
The indicator lamp in the instru-
ment cluster goes out shortly
after you switch on the ignition,
refer to page 22.
The indicator lamp flashes:
DSC controls the drive and braking
forces.
The indicator lamp stays lit:
DSC has been switched off via the
button; ADB is in ready mode.
ADB control intervention is not indi-
cated.
The indicator lamp and the
brake warning lamp remain on:
The DSC, ADB and DBC have
been switched off via the button
or are defective.
The vehicle will remain completely
operational, however without DSC. In
the event of a fault, please see your
BMW center.
Indicator and warning lamps for
Canadian models.