reset BMW Z4 2014 E89 Owner's Manual
[x] Cancel search | Manufacturer: BMW, Model Year: 2014, Model line: Z4, Model: BMW Z4 2014 E89Pages: 289, PDF Size: 7.13 MB
Page 18 of 289
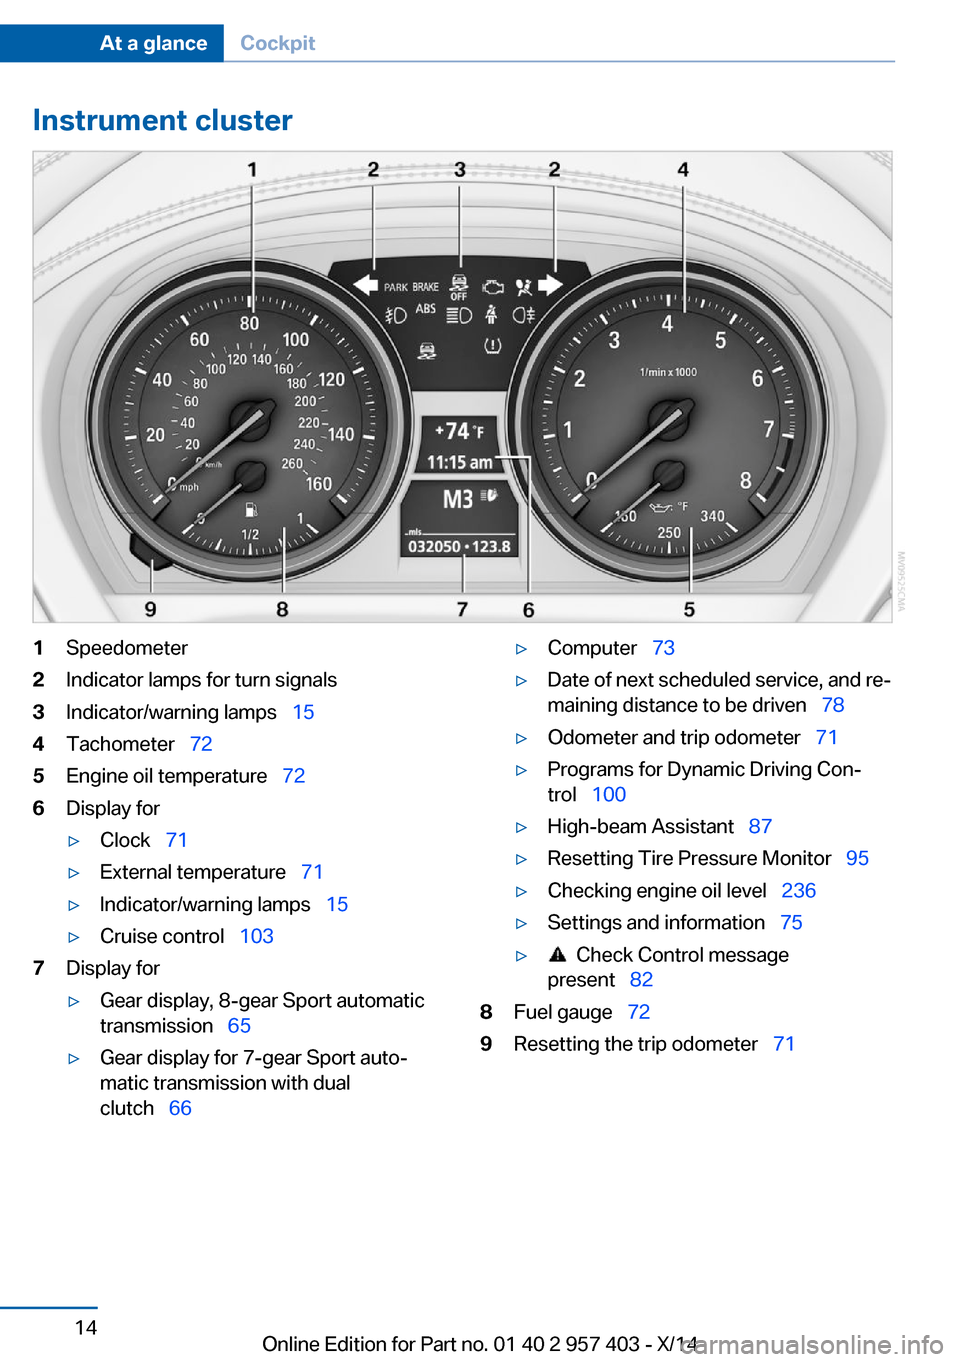
Instrument cluster1Speedometer2Indicator lamps for turn signals3Indicator/warning lamps‚ÄÇ‚ÄÖ154Tachometer‚ÄÇ‚ÄÖ725Engine oil temperature‚ÄÇ‚ÄÖ 726Display for‚ñ∑Clock‚ÄÇ‚ÄÖ71‚ñ∑External temperature‚ÄÇ‚ÄÖ 71‚ñ∑Indicator/warning lamps‚ÄÇ‚ÄÖ 15‚ñ∑Cruise control‚ÄÇ‚ÄÖ1037Display for‚ñ∑Gear display, 8-gear Sport automatic
transmission‚ÄÇ‚ÄÖ 65‚ñ∑Gear display for 7-gear Sport auto‚Äê
matic transmission with dual
clutch‚ÄÇ‚ÄÖ 66‚ñ∑Computer‚ÄÇ‚ÄÖ 73‚ñ∑Date of next scheduled service, and re‚Äê
maining distance to be driven‚ÄÇ‚ÄÖ 78‚ñ∑Odometer and trip odometer‚ÄÇ‚ÄÖ71‚ñ∑Programs for Dynamic Driving Con‚Äê
trol‚ÄÇ‚ÄÖ 100‚ñ∑High-beam Assistant‚ÄÇ‚ÄÖ 87‚ñ∑Resetting Tire Pressure Monitor‚ÄÇ‚ÄÖ 95‚ñ∑Checking engine oil level‚ÄÇ‚ÄÖ236‚ñ∑Settings and information‚ÄÇ‚ÄÖ75‚ñ∑ Check Control message
present‚ÄÇ‚ÄÖ 828Fuel gauge‚ÄÇ‚ÄÖ 729Resetting the trip odometer‚ÄÇ‚ÄÖ 71Seite 14At a glanceCockpit14
Online Edition for Part no. 01 40 2 957 403 - X/14
Page 65 of 289
3."Lighting"4."Triple turn signal"
The setting is stored for the remote control
currently in use.
Washer/wiper system Notes Do not switch on the wipers if frozen
Do not switch on the wipers if they are
frozen onto the windshield; otherwise, the wiper blades and the windshield wiper motor
may be damaged.‚óÄ
Do not use the wipers on a dry wind‚Äê
shield
Do not use the wipers on a dry windshield; oth‚Äê
erwise, the wiper blades may wear more rap‚Äê
idly or become damaged.‚óÄ
At a glance
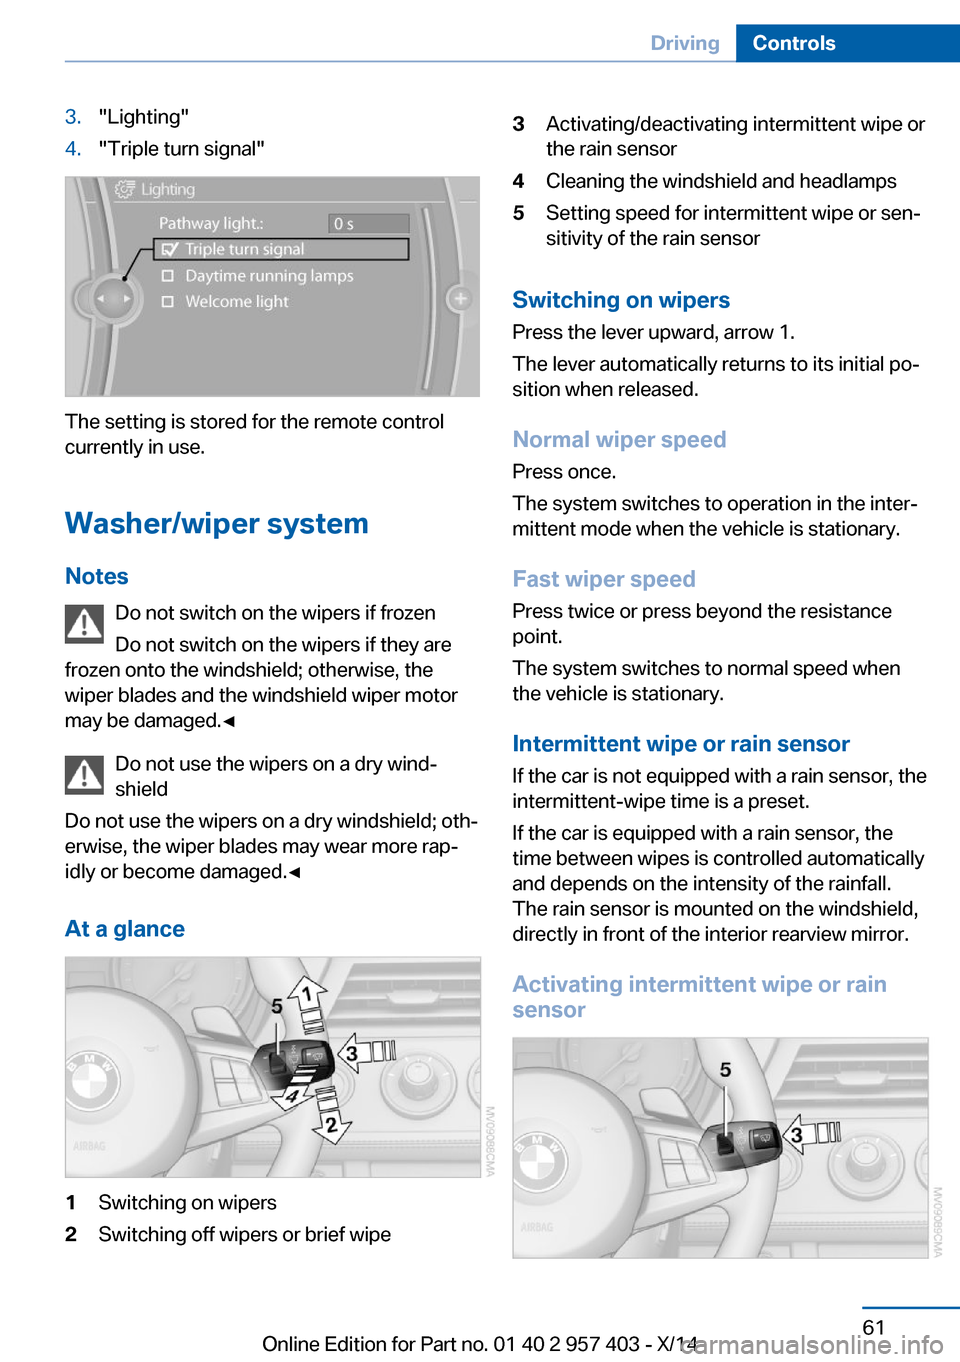
1Switching on wipers2Switching off wipers or brief wipe3Activating/deactivating intermittent wipe or
the rain sensor4Cleaning the windshield and headlamps5Setting speed for intermittent wipe or sen‚Äê
sitivity of the rain sensor
Switching on wipers
Press the lever upward, arrow 1.
The lever automatically returns to its initial po‚Äê
sition when released.
Normal wiper speed
Press once.
The system switches to operation in the inter‚Äê
mittent mode when the vehicle is stationary.
Fast wiper speed
Press twice or press beyond the resistance
point.
The system switches to normal speed when
the vehicle is stationary.
Intermittent wipe or rain sensor
If the car is not equipped with a rain sensor, the
intermittent-wipe time is a preset.
If the car is equipped with a rain sensor, the
time between wipes is controlled automatically
and depends on the intensity of the rainfall.
The rain sensor is mounted on the windshield,
directly in front of the interior rearview mirror.
Activating intermittent wipe or rain sensor
Seite 61DrivingControls61
Online Edition for Part no. 01 40 2 957 403 - X/14
Page 75 of 289
DisplaysVehicle equipmentThis chapter describes all series equipment as
well as country-specific and special equipment
offered for this model series. Therefore, it also
describes equipment that may not be found in
your vehicle, for instance due to the selected
special equipment or the country version. This
also applies to safety-related functions and
systems.
When using the features and systems descri‚Äê
bed here, adhere to local regulations.
Odometer, external
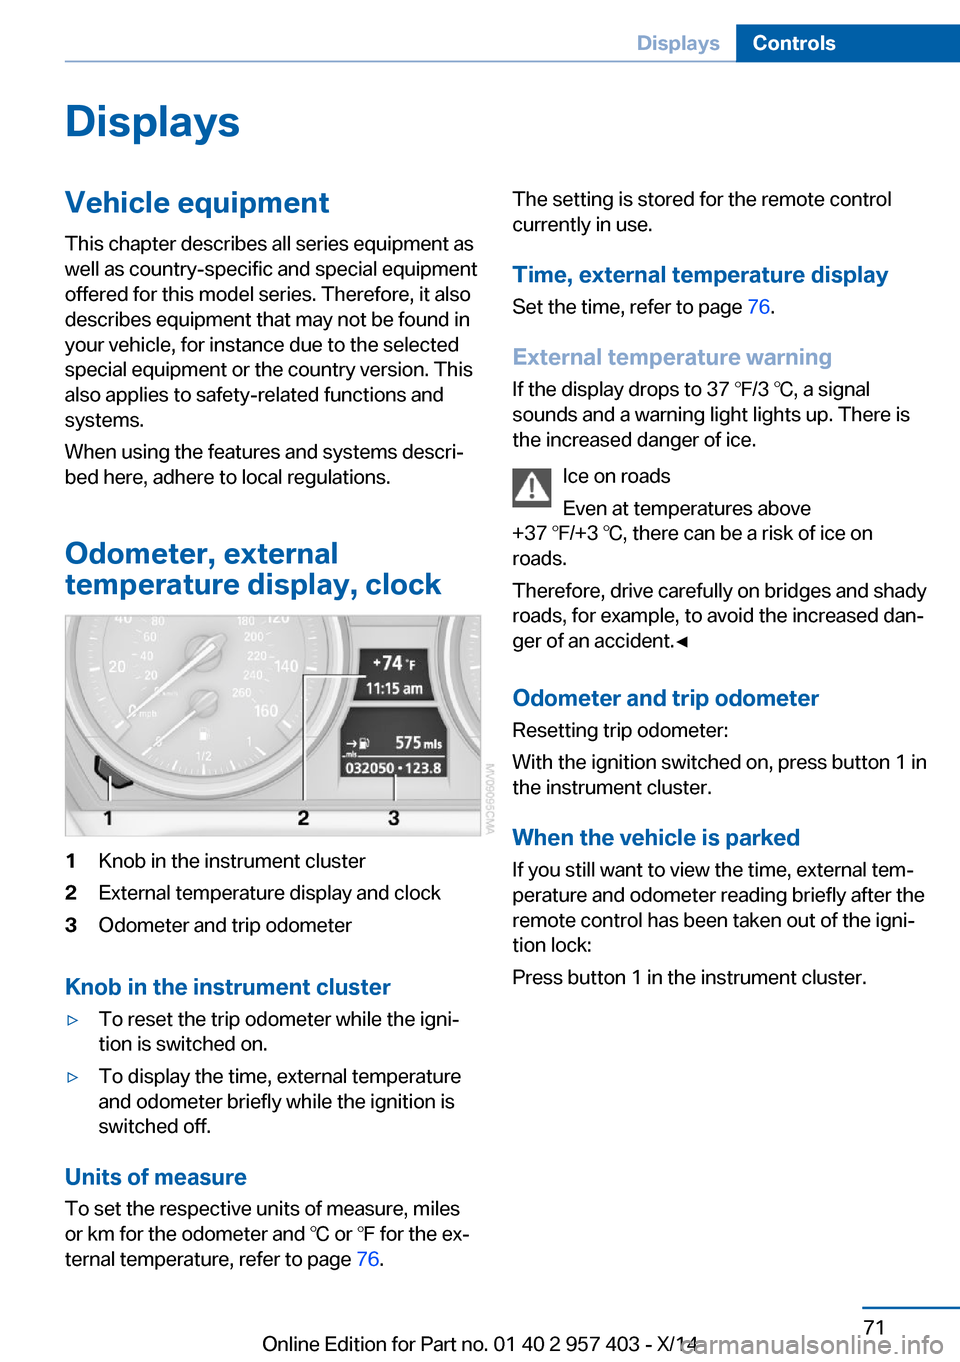
temperature display, clock1Knob in the instrument cluster2External temperature display and clock3Odometer and trip odometer
Knob in the instrument cluster
‚ñ∑To reset the trip odometer while the igni‚Äê
tion is switched on.‚ñ∑To display the time, external temperature
and odometer briefly while the ignition is
switched off.
Units of measure
To set the respective units of measure, miles
or km for the odometer and ‚ÑÉ or ‚Ñâ for the ex‚Äê
ternal temperature, refer to page 76.
The setting is stored for the remote control
currently in use.
Time, external temperature display Set the time, refer to page 76.
External temperature warning
If the display drops to 37 ‚Ñâ/3 ‚ÑÉ, a signal
sounds and a warning light lights up. There is
the increased danger of ice.
Ice on roads
Even at temperatures above
+37 ‚Ñâ/+3 ‚ÑÉ, there can be a risk of ice on
roads.
Therefore, drive carefully on bridges and shady
roads, for example, to avoid the increased dan‚Äê
ger of an accident.‚óÄ
Odometer and trip odometer
Resetting trip odometer:
With the ignition switched on, press button 1 in
the instrument cluster.
When the vehicle is parked
If you still want to view the time, external tem‚Äê
perature and odometer reading briefly after the
remote control has been taken out of the igni‚Äê
tion lock:
Press button 1 in the instrument cluster.Seite 71DisplaysControls71
Online Edition for Part no. 01 40 2 957 403 - X/14
Page 77 of 289
‚ñ∑The remaining range is shown on the com‚Äê
puter.‚ñ∑When a dynamic driving style is used, such
as when corners are taken rapidly, engine
functions are not ensured.
Below a range of approx. 30 miles/50 km, the
message is displayed continuously.
Refuel promptly
At the latest, refuel at a range of
30 miles/50 km; otherwise, the engine function
is not ensured and damage may occur.‚óÄ
Computer Displays in the instrument cluster
Calling up information
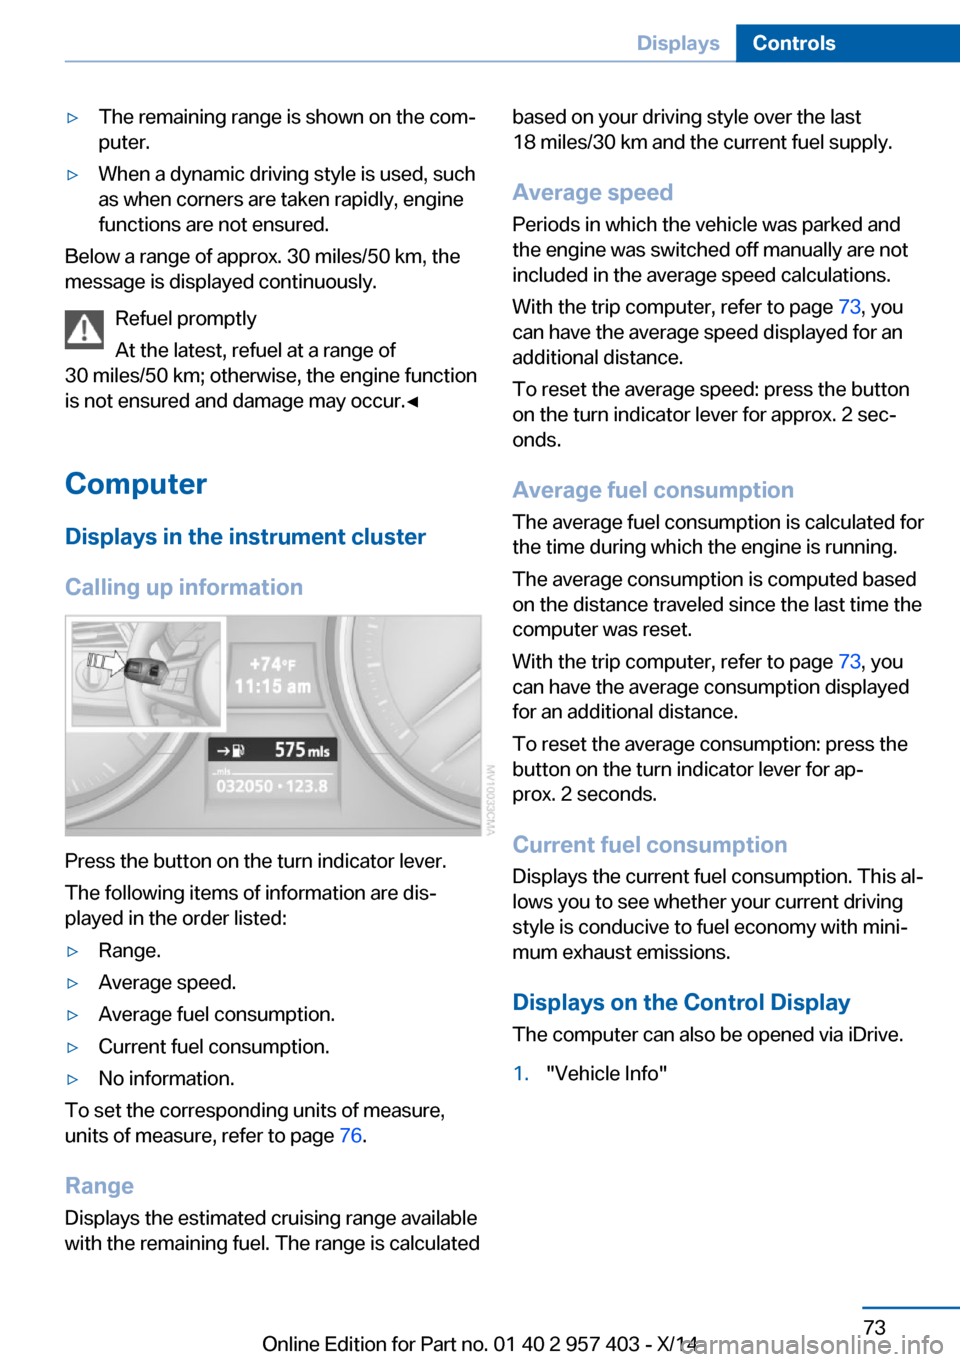
Press the button on the turn indicator lever.
The following items of information are dis‚Äê
played in the order listed:
‚ñ∑Range.‚ñ∑Average speed.‚ñ∑Average fuel consumption.‚ñ∑Current fuel consumption.‚ñ∑No information.
To set the corresponding units of measure,
units of measure, refer to page 76.
Range
Displays the estimated cruising range available
with the remaining fuel. The range is calculated
based on your driving style over the last
18 miles/30 km and the current fuel supply.
Average speed
Periods in which the vehicle was parked and
the engine was switched off manually are not
included in the average speed calculations.
With the trip computer, refer to page 73, you
can have the average speed displayed for an
additional distance.
To reset the average speed: press the button
on the turn indicator lever for approx. 2 sec‚Äê
onds.
Average fuel consumption
The average fuel consumption is calculated for
the time during which the engine is running.
The average consumption is computed based
on the distance traveled since the last time the
computer was reset.
With the trip computer, refer to page 73, you
can have the average consumption displayed
for an additional distance.
To reset the average consumption: press the
button on the turn indicator lever for ap‚Äê
prox. 2 seconds.
Current fuel consumption Displays the current fuel consumption. This al‚Äê
lows you to see whether your current driving
style is conducive to fuel economy with mini‚Äê
mum exhaust emissions.
Displays on the Control Display
The computer can also be opened via iDrive.1."Vehicle Info"Seite 73DisplaysControls73
Online Edition for Part no. 01 40 2 957 403 - X/14
Page 78 of 289
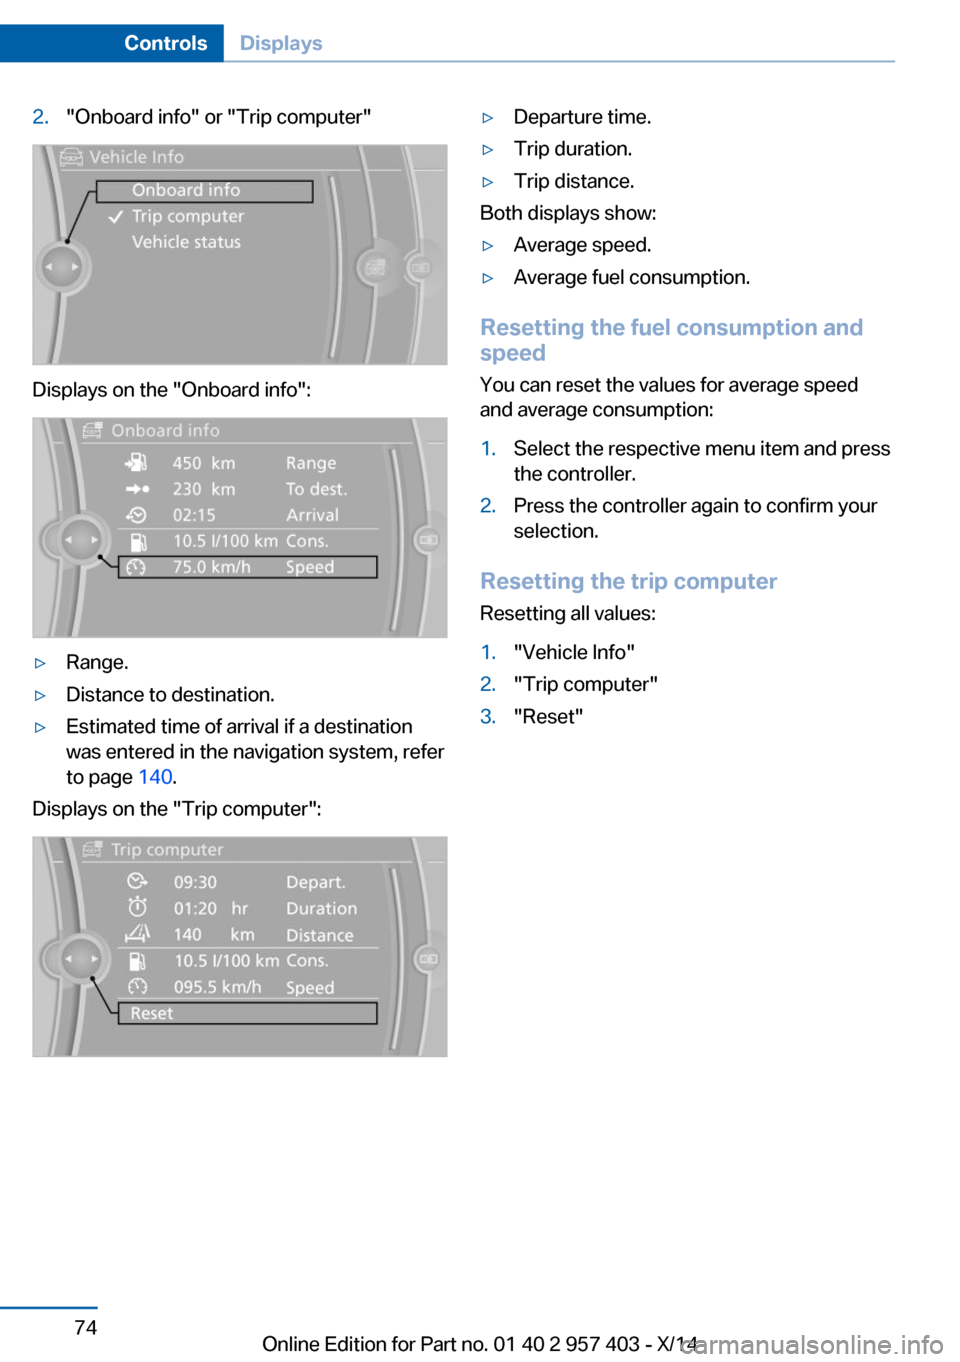
2."Onboard info" or "Trip computer"
Displays on the "Onboard info":
‚ñ∑Range.‚ñ∑Distance to destination.‚ñ∑Estimated time of arrival if a destination
was entered in the navigation system, refer
to page 140.
Displays on the "Trip computer":
‚ñ∑Departure time.‚ñ∑Trip duration.‚ñ∑Trip distance.
Both displays show:
‚ñ∑Average speed.‚ñ∑Average fuel consumption.
Resetting the fuel consumption and
speed
You can reset the values for average speed
and average consumption:
1.Select the respective menu item and press
the controller.2.Press the controller again to confirm your
selection.
Resetting the trip computer
Resetting all values:
1."Vehicle Info"2."Trip computer"3."Reset"Seite 74ControlsDisplays74
Online Edition for Part no. 01 40 2 957 403 - X/14
Page 97 of 289
wise, reliable signaling of a flat tire is not en‚Äê
sured. Initialize the system after each correc‚Äê
tion of the tire inflation pressure and after
every tire or wheel change.
System limits Sudden tire damage
Sudden serious tire damage caused by
external influences cannot be indicated in ad‚Äê
vance.‚óÄ
A natural, even pressure loss in all four tires
cannot be detected.
The system could be delayed or malfunction in
the following situations:‚ñ∑When the system has not been initialized.‚ñ∑When driving on a snowy or slippery road
surface.‚ñ∑Sporty driving style: slip in the drive
wheels, high lateral acceleration.‚ñ∑When driving with snow chains.
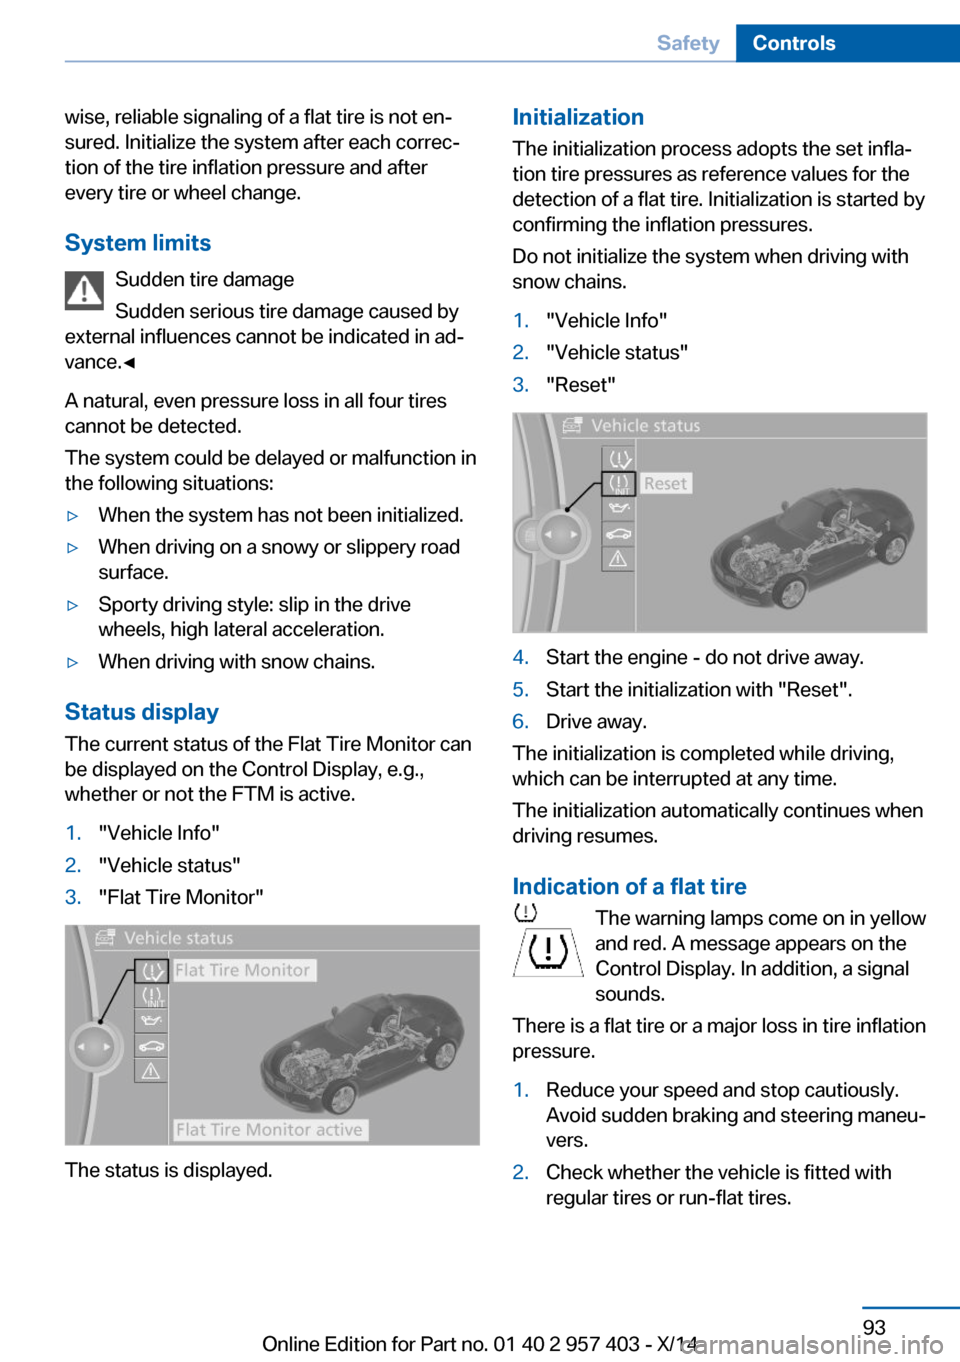
Status display
The current status of the Flat Tire Monitor can
be displayed on the Control Display, e.g.,
whether or not the FTM is active.
1."Vehicle Info"2."Vehicle status"3."Flat Tire Monitor"
The status is displayed.
Initialization
The initialization process adopts the set infla‚Äê
tion tire pressures as reference values for the
detection of a flat tire. Initialization is started by
confirming the inflation pressures.
Do not initialize the system when driving with
snow chains.1."Vehicle Info"2."Vehicle status"3."Reset"4.Start the engine - do not drive away.5.Start the initialization with "Reset".6.Drive away.
The initialization is completed while driving,
which can be interrupted at any time.
The initialization automatically continues when
driving resumes.
Indication of a flat tire The warning lamps come on in yellow
and red. A message appears on the
Control Display. In addition, a signal
sounds.
There is a flat tire or a major loss in tire inflation
pressure.
1.Reduce your speed and stop cautiously.
Avoid sudden braking and steering maneu‚Äê
vers.2.Check whether the vehicle is fitted with
regular tires or run-flat tires.Seite 93SafetyControls93
Online Edition for Part no. 01 40 2 957 403 - X/14
Page 99 of 289
one or more tires. Sensors in the tire valves
measure the tire pressure.
Notes Tire damage caused by external influen‚Äê
ces
Sudden tire damage caused by external influ‚Äê
ences cannot be indicated in advance.‚óÄ
To operate the system, also note the additional
information and instructions contained under
Tire inflation pressure, refer to page 226.
Functional requirement The system must have been reset while the in‚Äê
flation pressure was correct; otherwise, reliable
signaling of pressure loss is not ensured.
Reset the system after adjusting the tire infla‚Äê
tion pressure and after changing a tire or
wheel.
Always use wheels with TPM electronics to
ensure that the system will operate properly.
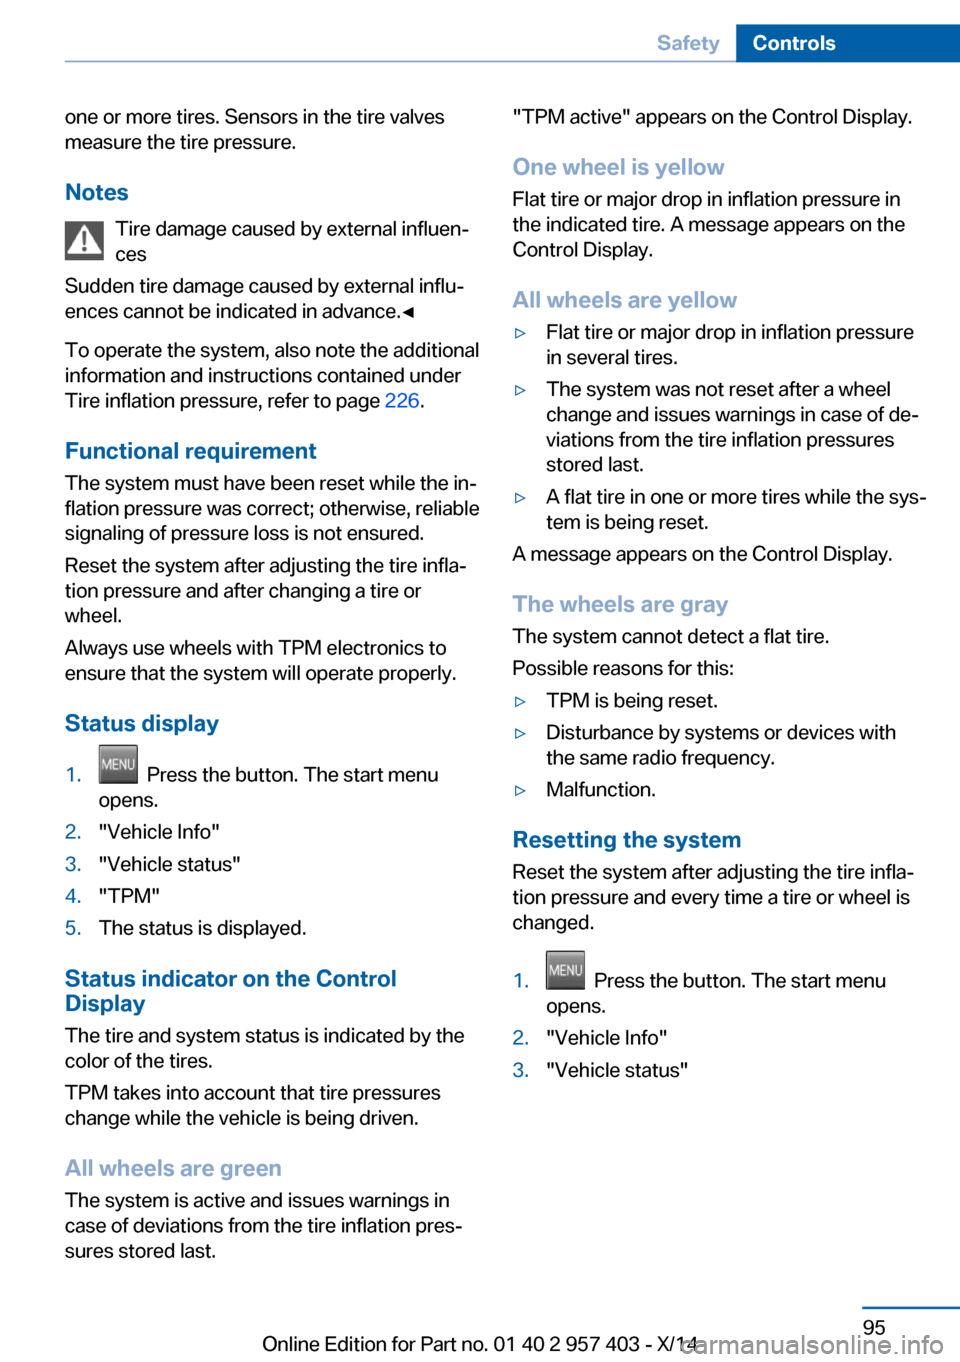
Status display1. Press the button. The start menu
opens.2."Vehicle Info"3."Vehicle status"4."TPM"5.The status is displayed.
Status indicator on the Control
Display
The tire and system status is indicated by the
color of the tires.
TPM takes into account that tire pressures
change while the vehicle is being driven.
All wheels are green
The system is active and issues warnings in
case of deviations from the tire inflation pres‚Äê
sures stored last.
"TPM active" appears on the Control Display.
One wheel is yellow
Flat tire or major drop in inflation pressure in
the indicated tire. A message appears on the
Control Display.
All wheels are yellow‚ñ∑Flat tire or major drop in inflation pressure
in several tires.‚ñ∑The system was not reset after a wheel
change and issues warnings in case of de‚Äê
viations from the tire inflation pressures
stored last.‚ñ∑A flat tire in one or more tires while the sys‚Äê
tem is being reset.
A message appears on the Control Display.
The wheels are gray The system cannot detect a flat tire.
Possible reasons for this:
‚ñ∑TPM is being reset.‚ñ∑Disturbance by systems or devices with
the same radio frequency.‚ñ∑Malfunction.
Resetting the system
Reset the system after adjusting the tire infla‚Äê
tion pressure and every time a tire or wheel is
changed.
1. Press the button. The start menu
opens.2."Vehicle Info"3."Vehicle status"Seite 95SafetyControls95
Online Edition for Part no. 01 40 2 957 403 - X/14
Page 100 of 289
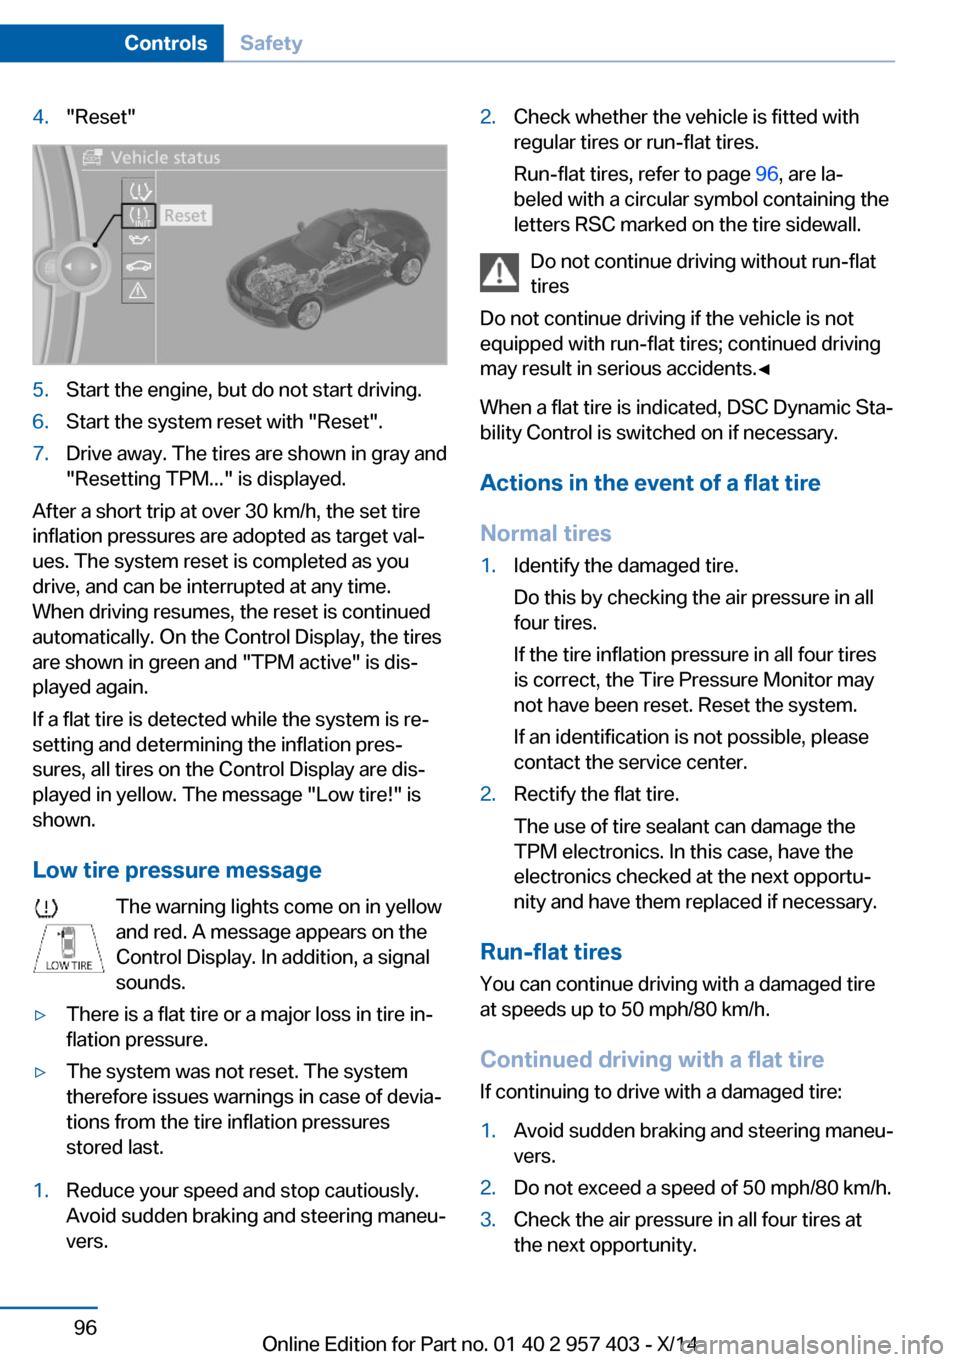
4."Reset"5.Start the engine, but do not start driving.6.Start the system reset with "Reset".7.Drive away. The tires are shown in gray and
"Resetting TPM..." is displayed.
After a short trip at over 30 km/h, the set tire
inflation pressures are adopted as target val‚Äê
ues. The system reset is completed as you
drive, and can be interrupted at any time.
When driving resumes, the reset is continued
automatically. On the Control Display, the tires
are shown in green and "TPM active" is dis‚Äê
played again.
If a flat tire is detected while the system is re‚Äê
setting and determining the inflation pres‚Äê
sures, all tires on the Control Display are dis‚Äê
played in yellow. The message "Low tire!" is
shown.
Low tire pressure message The warning lights come on in yellow
and red. A message appears on the
Control Display. In addition, a signal
sounds.
‚ñ∑There is a flat tire or a major loss in tire in‚Äê
flation pressure.‚ñ∑The system was not reset. The system
therefore issues warnings in case of devia‚Äê
tions from the tire inflation pressures
stored last.1.Reduce your speed and stop cautiously.
Avoid sudden braking and steering maneu‚Äê
vers.2.Check whether the vehicle is fitted with
regular tires or run-flat tires.
Run-flat tires, refer to page 96, are la‚Äê
beled with a circular symbol containing the
letters RSC marked on the tire sidewall.
Do not continue driving without run-flat
tires
Do not continue driving if the vehicle is not
equipped with run-flat tires; continued driving
may result in serious accidents.‚óÄ
When a flat tire is indicated, DSC Dynamic Sta‚Äê
bility Control is switched on if necessary.
Actions in the event of a flat tire Normal tires
1.Identify the damaged tire.
Do this by checking the air pressure in all
four tires.
If the tire inflation pressure in all four tires
is correct, the Tire Pressure Monitor may
not have been reset. Reset the system.
If an identification is not possible, please
contact the service center.2.Rectify the flat tire.
The use of tire sealant can damage the
TPM electronics. In this case, have the
electronics checked at the next opportu‚Äê
nity and have them replaced if necessary.
Run-flat tires
You can continue driving with a damaged tire
at speeds up to 50 mph/80 km/h.
Continued driving with a flat tire If continuing to drive with a damaged tire:
1.Avoid sudden braking and steering maneu‚Äê
vers.2.Do not exceed a speed of 50 mph/80 km/h.3.Check the air pressure in all four tires at
the next opportunity.Seite 96ControlsSafety96
Online Edition for Part no. 01 40 2 957 403 - X/14
Page 101 of 289
If the tire inflation pressure in all four tires
is correct, the Tire Pressure Monitor may
not have been reset. Reset the system.
Possible driving distance with complete loss of
tire inflation pressure:
The possible driving distance after a loss of tire
inflation pressure depends on the cargo load
and the driving style and conditions.
For a vehicle containing an average load, the
possible driving distance is approx.
50 miles/80 km.
When the vehicle is driven with a damaged tire,
its handling characteristics change, e.g., re‚Äê
duced lane stability during braking, a longer
braking distance, and altered self-steering
properties. Adjust your driving style accord‚Äê
ingly. Avoid abrupt steering maneuvers or driv‚Äê
ing over obstacles, e. g., curbs, potholes, etc.
Because the possible driving distance de‚Äê
pends on how the vehicle is used during the
trip, the actual distance may be smaller or
greater depending on the driving speed, road
conditions, external temperature, cargo load,
etc.
Continued driving with a flat tire
Drive moderately and do not exceed a
speed of 50 mph/80 km/h.
A loss of tire inflation pressure results in a
change in the handling characteristics, e.g., re‚Äê
duced lane stability during braking, a longer
braking distance and altered self-steering
properties.‚óÄ
Final tire failure
Vibrations or loud noises while driving
can indicate the final failure of the tire. Reduce
speed and stop; otherwise, pieces of the tire
could come loose and cause an accident. Do
not continue driving, and contact your service
center.‚óÄ
Message when not reset
The warning light lights up yellow. A
Check Control message is displayed.
The system may not have been reset
although a wheel was changed.
Check the tire inflation pressure and reset the
system, refer to page 95.
System limits
The system does not function properly if it has
not been reset, e.g., it may identify a tire as flat
in spite of the fact that the tire is filled to the
correct inflation pressure.
The tire pressure depends on the temperature
of the tire. An increase in the tire temperature,
e.g., while driving or due to sunlight, increases
the tire inflation pressure. The tire pressure
decreases when the tire temperature drops. In
case of severe temperature drops, this behav‚Äê ior may lead to a warning on account of the de‚Äê
fined warning limits.
Malfunction The small warning light flashes in yel‚Äê
low and then lights up continuously;
the larger warning light comes on in
yellow. On the Control Display, the
tires are shown in gray and a message ap‚Äê
pears. No flat tire can be detected.
Display in the following situations:‚ñ∑A wheel without TPM electronics is fitted:
have the service center check it if neces‚Äê
sary.‚ñ∑Malfunction: have the system checked by
your service center.‚ñ∑TPM could not be fully reset. Reset the
system again.
The small warning light flashes in yel‚Äê
low and then lights up continuously;
the larger warning light comes on in
yellow. The tires are displayed in gray
Seite 97SafetyControls97
Online Edition for Part no. 01 40 2 957 403 - X/14
Page 165 of 289
Multi-channel playback,
surround
Choose between stereo and multi-channel
playback, surround.
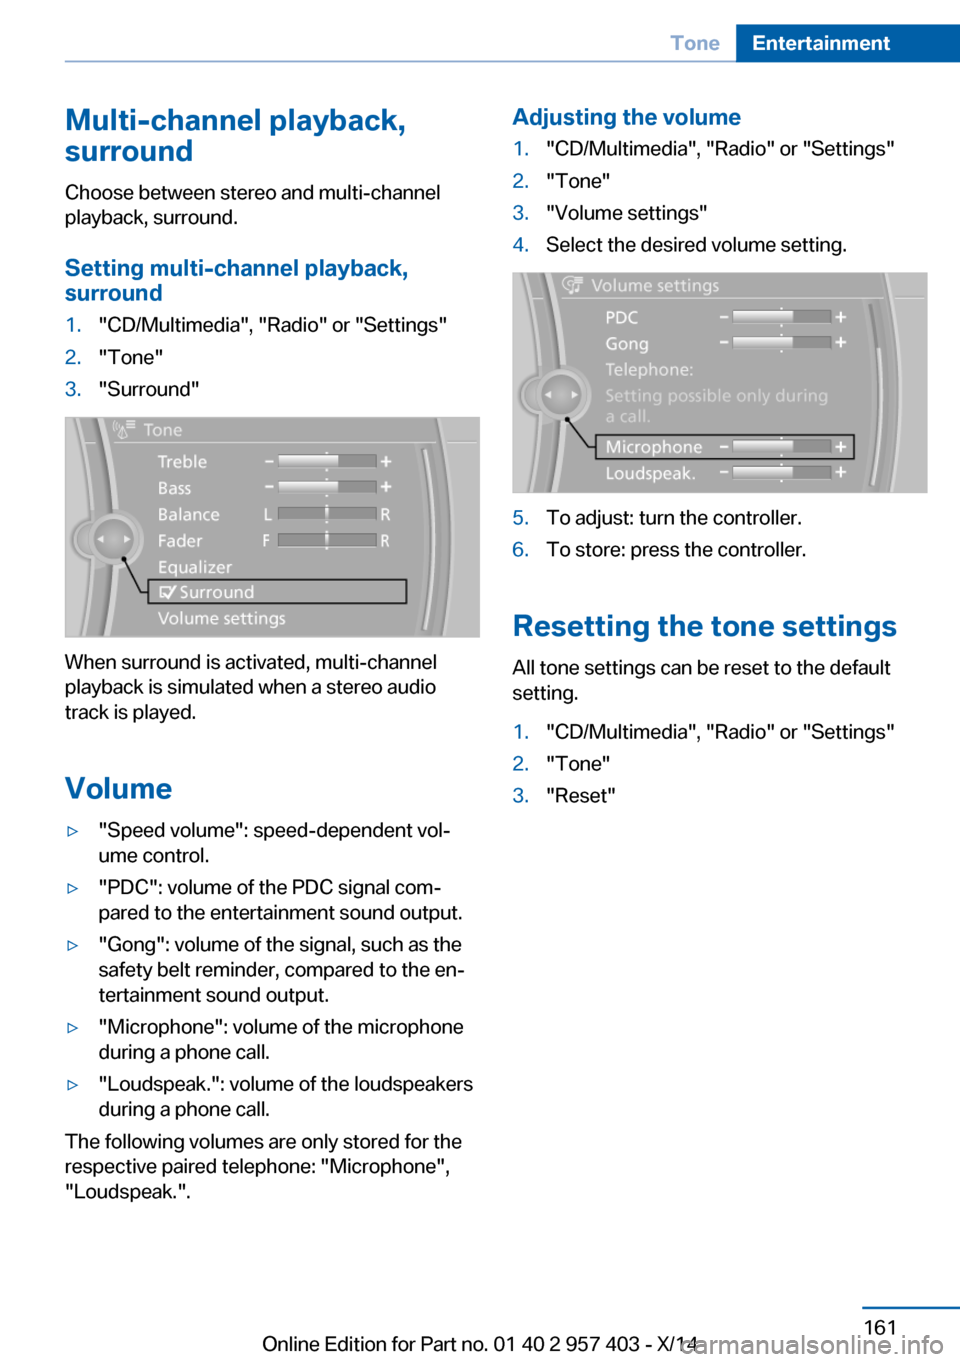
Setting multi-channel playback,
surround1."CD/Multimedia", "Radio" or "Settings"2."Tone"3."Surround"
When surround is activated, multi-channel
playback is simulated when a stereo audio
track is played.
Volume
‚ñ∑"Speed volume": speed-dependent vol‚Äê
ume control.‚ñ∑"PDC": volume of the PDC signal com‚Äê
pared to the entertainment sound output.‚ñ∑"Gong": volume of the signal, such as the
safety belt reminder, compared to the en‚Äê
tertainment sound output.‚ñ∑"Microphone": volume of the microphone
during a phone call.‚ñ∑"Loudspeak.": volume of the loudspeakers
during a phone call.
The following volumes are only stored for the
respective paired telephone: "Microphone",
"Loudspeak.".
Adjusting the volume1."CD/Multimedia", "Radio" or "Settings"2."Tone"3."Volume settings"4.Select the desired volume setting.5.To adjust: turn the controller.6.To store: press the controller.
Resetting the tone settings
All tone settings can be reset to the default
setting.
1."CD/Multimedia", "Radio" or "Settings"2."Tone"3."Reset"Seite 161ToneEntertainment161
Online Edition for Part no. 01 40 2 957 403 - X/14