hardtop BMW Z4 2016 E89 Owner's Manual
[x] Cancel search | Manufacturer: BMW, Model Year: 2016, Model line: Z4, Model: BMW Z4 2016 E89Pages: 289, PDF Size: 7.13 MB
Page 31 of 289
▷The volume remains constant even if the
volume of other audio sources is changed.▷The volume is stored for the remote con‐
trol currently in use.
Notes on Emergency
Requests
Do not use the voice activation system to ini‐
tiate an Emergency Request. In stressful situa‐
tions, the voice and vocal pitch can change.
This can unnecessarily delay the establish‐
ment of a telephone connection.
Instead, use the SOS button, refer to
page 249, in the vicinity of the interior mirror.
Environmental conditions
▷Say the commands, numbers, and letters
smoothly and with normal volume, empha‐
sis, and speed.▷Always say commands in the language of
the voice activation system.▷Keep the doors, windows, and retractable
hardtop closed to prevent noise interfer‐
ence.▷Avoid making other noise in the vehicle
while speaking.Seite 27Voice activation systemAt a glance27
Online Edition for Part no. 01 40 2 957 403 - X/14
Page 37 of 289
Only the driver's door and the fuel
filler flap are unlocked. Pressing again
unlocks the entire vehicle.5.Press the controller.
Convenient opening: window and hardtop
When you are close to the vehicle, the remote
control for Comfort Access can be used to
open the retractable hardtop.
Press and hold the button on the remote
control.
The windows and the retractable hardtop are
opened if the doors are closed.
Hold the button down. When you are close
to the vehicle, the windows move up after the
hardtop is opened.
Monitor the opening process
Monitor the opening process to ensure
that no one becomes trapped; otherwise, inju‐
ries may result. Releasing the button interrupts
the opening process.◀
Locking
Press the button on the remote con‐
trol.
Locking from the outside
Do not lock the vehicle from the outside
if there are people in it, as the vehicle cannot
be unlocked from inside without special knowl‐
edge.◀
Convenient closing
When you are close to the vehicle, the remote
control for Comfort Access can be used to
close the retractable hardtop and the windows.
Press and hold the button on the re‐
mote control.
The retractable hardtop and the windows are
closed.
Monitor the closing process
Monitor the closing process to ensure
that no one becomes trapped.
Releasing the button stops the motion.◀
Switching on the interior lamps and courtesy lamps
Press the button on the remote con‐
trol with the vehicle locked.
Unlocking the trunk lid
Press the button on the remote control for
approx. one second.
Note the opening height of the trunk lid
During opening, the trunk lid pivots back
and up. Ensure that there is sufficient clear‐
ance when the trunk lid opens; otherwise,
damage may result.◀
To avoid locking yourself out of the vehicle, do
not place the remote control into the cargo
area. A previously locked trunk lid is locked
again after closing.
Before and after each trip, check that the trunk
lid has not been inadvertently unlocked.
Convenient loading
When you are close to the vehicle, the remote
control for Comfort Access can be used to par‐
tially tilt the open hardtop for more convenient
loading of the trunk.
1. Briefly press the button on the remote
control.
Press again within one second and hold
until the retractable hardtop stops in an in‐
termediate position. The trunk lid opens
slightly.2.Open the trunk lid, press the cargo area
partition upward and stow the cargo in the
cargo area.Seite 33Opening and closingControls33
Online Edition for Part no. 01 40 2 957 403 - X/14
Page 38 of 289
3.Press down the cargo area partition until it
engages on both sides and close the trunk
lid.4. Press the button on the remote control
for an extended period to fold the retracta‐
ble hardtop back in.
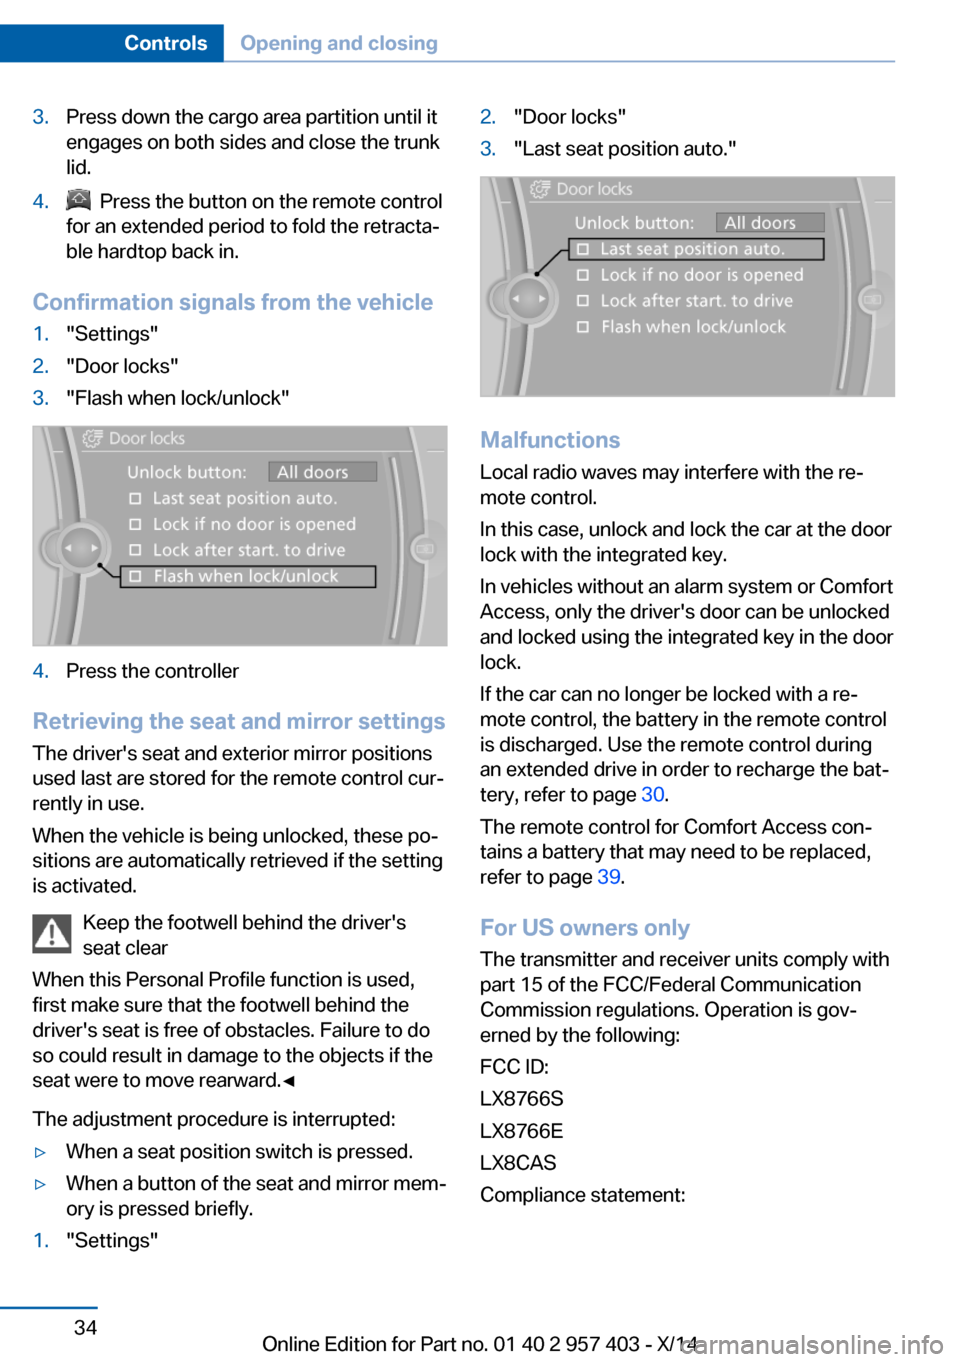
Confirmation signals from the vehicle
1."Settings"2."Door locks"3."Flash when lock/unlock"4.Press the controller
Retrieving the seat and mirror settings
The driver's seat and exterior mirror positions
used last are stored for the remote control cur‐
rently in use.
When the vehicle is being unlocked, these po‐
sitions are automatically retrieved if the setting
is activated.
Keep the footwell behind the driver's
seat clear
When this Personal Profile function is used,
first make sure that the footwell behind the
driver's seat is free of obstacles. Failure to do
so could result in damage to the objects if the
seat were to move rearward.◀
The adjustment procedure is interrupted:
▷When a seat position switch is pressed.▷When a button of the seat and mirror mem‐
ory is pressed briefly.1."Settings"2."Door locks"3."Last seat position auto."
Malfunctions
Local radio waves may interfere with the re‐
mote control.
In this case, unlock and lock the car at the door
lock with the integrated key.
In vehicles without an alarm system or Comfort
Access, only the driver's door can be unlocked
and locked using the integrated key in the door
lock.
If the car can no longer be locked with a re‐
mote control, the battery in the remote control
is discharged. Use the remote control during
an extended drive in order to recharge the bat‐
tery, refer to page 30.
The remote control for Comfort Access con‐
tains a battery that may need to be replaced,
refer to page 39.
For US owners only
The transmitter and receiver units comply with
part 15 of the FCC/Federal Communication
Commission regulations. Operation is gov‐
erned by the following:
FCC ID:
LX8766S
LX8766E
LX8CAS
Compliance statement:
Seite 34ControlsOpening and closing34
Online Edition for Part no. 01 40 2 957 403 - X/14
Page 41 of 289
Emergency unlocking
Pull the lever in the cargo area.
The trunk lid unlocks.
Comfort Access
The concept The vehicle can be accessed without activat‐
ing the remote control.
All you need to do is to have the remote con‐ trol with you, e.g., in your jacket pocket.
The vehicle automatically detects the remote
control when it is nearby or in the passenger
compartment.
Comfort Access supports the following func‐
tions:
▷Unlocking/locking of the vehicle.▷Convenient closing.▷Convenient opening▷Unlocking of the trunk lid separately.▷Starting the engine.
Functional requirement
▷To lock the vehicle, the remote control
must be located outside of the vehicle.▷The vehicle cannot be unlocked or locked
again for approx. the next two seconds.▷The engine can only be started if the re‐
mote control is inside the vehicle.Comparison to the standard remote
control
The specified functions can be controlled by
pressing the button or via Comfort Access.
If you notice a brief delay while opening or
closing the windows or retractable hardtop, the
system is checking whether a remote control is
inside the vehicle. Repeat the opening or clos‐
ing procedure, if necessary.
Unlocking
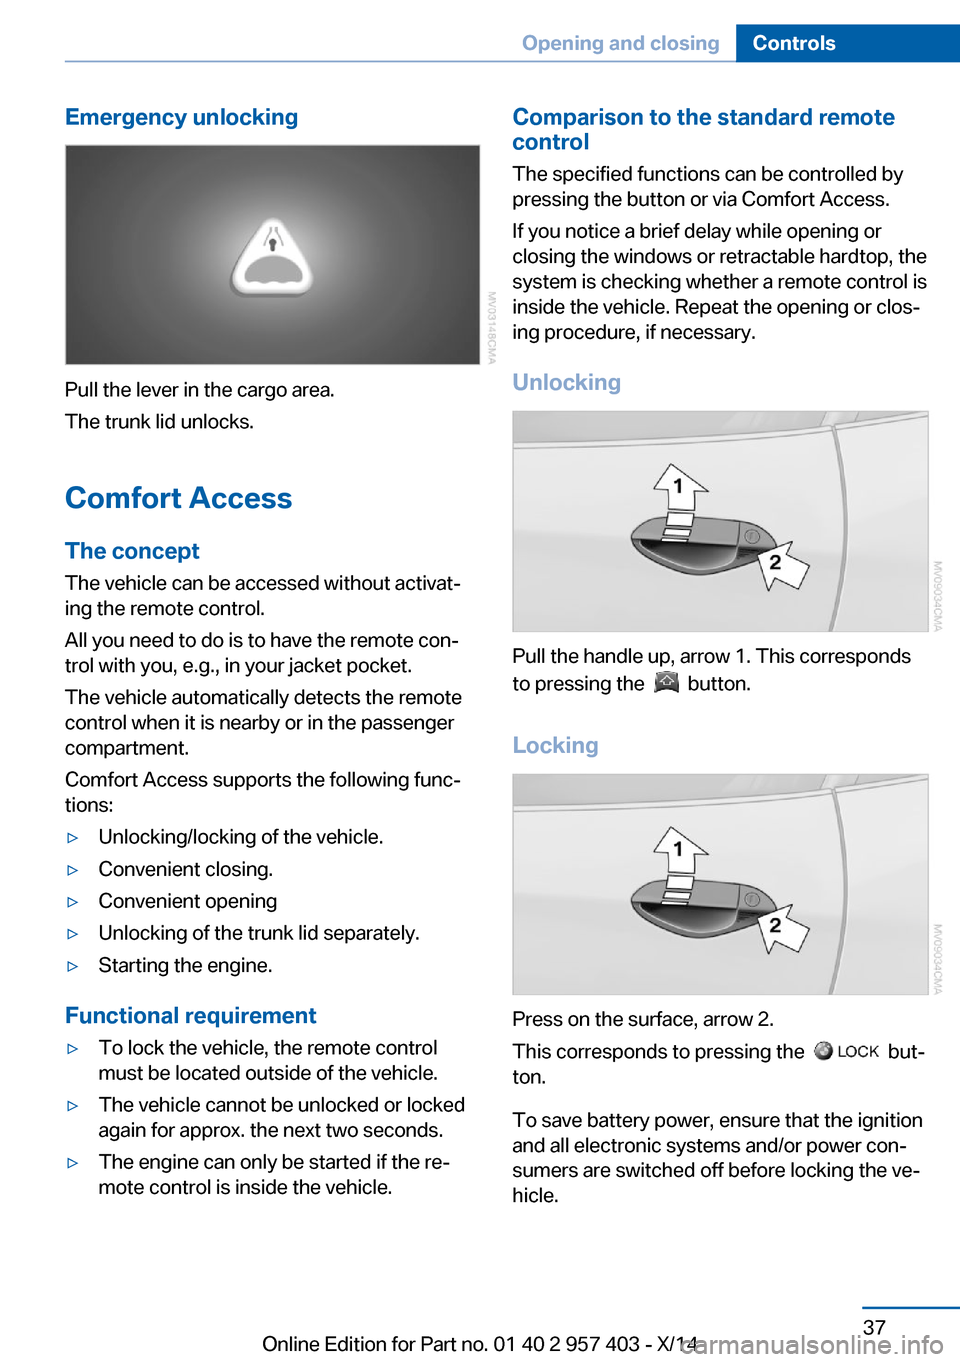
Pull the handle up, arrow 1. This corresponds
to pressing the
button.
Locking
Press on the surface, arrow 2.
This corresponds to pressing the
but‐
ton.
To save battery power, ensure that the ignition
and all electronic systems and/or power con‐
sumers are switched off before locking the ve‐
hicle.
Seite 37Opening and closingControls37
Online Edition for Part no. 01 40 2 957 403 - X/14
Page 44 of 289
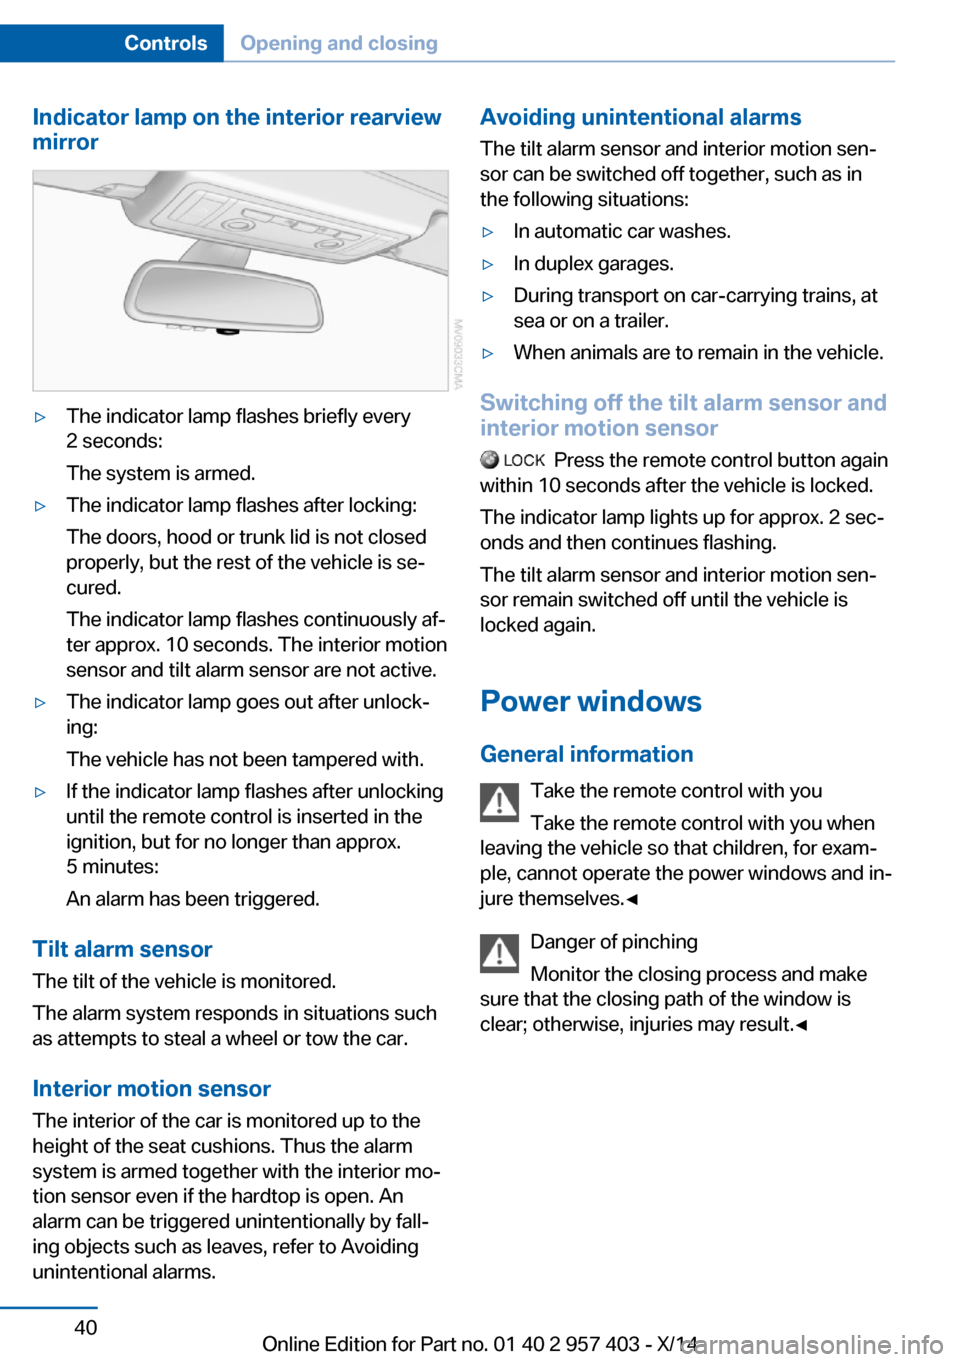
Indicator lamp on the interior rearview
mirror▷The indicator lamp flashes briefly every
2 seconds:
The system is armed.▷The indicator lamp flashes after locking:
The doors, hood or trunk lid is not closed
properly, but the rest of the vehicle is se‐
cured.
The indicator lamp flashes continuously af‐
ter approx. 10 seconds. The interior motion
sensor and tilt alarm sensor are not active.▷The indicator lamp goes out after unlock‐
ing:
The vehicle has not been tampered with.▷If the indicator lamp flashes after unlocking
until the remote control is inserted in the
ignition, but for no longer than approx.
5 minutes:
An alarm has been triggered.
Tilt alarm sensor The tilt of the vehicle is monitored.
The alarm system responds in situations such
as attempts to steal a wheel or tow the car.
Interior motion sensor The interior of the car is monitored up to the
height of the seat cushions. Thus the alarm
system is armed together with the interior mo‐
tion sensor even if the hardtop is open. An
alarm can be triggered unintentionally by fall‐
ing objects such as leaves, refer to Avoiding
unintentional alarms.
Avoiding unintentional alarms
The tilt alarm sensor and interior motion sen‐
sor can be switched off together, such as in
the following situations:▷In automatic car washes.▷In duplex garages.▷During transport on car-carrying trains, at
sea or on a trailer.▷When animals are to remain in the vehicle.
Switching off the tilt alarm sensor and
interior motion sensor
Press the remote control button again
within 10 seconds after the vehicle is locked.
The indicator lamp lights up for approx. 2 sec‐
onds and then continues flashing.
The tilt alarm sensor and interior motion sen‐
sor remain switched off until the vehicle is
locked again.
Power windows General information Take the remote control with youTake the remote control with you when
leaving the vehicle so that children, for exam‐
ple, cannot operate the power windows and in‐
jure themselves.◀
Danger of pinching
Monitor the closing process and make
sure that the closing path of the window is
clear; otherwise, injuries may result.◀
Seite 40ControlsOpening and closing40
Online Edition for Part no. 01 40 2 957 403 - X/14
Page 46 of 289
Retractable hardtopGeneral information
Adhere to the following instructions:▷It is advisable that you close the retractable
hardtop when you park the vehicle. Not
only does the closed hardtop protect the
vehicle interior against unanticipated
weather damage, it also offers theft protec‐
tion. However, even when the hardtop is
closed, valuables should only be stored in
the locked cargo area.▷Do not attach roof rack systems to the re‐
tractable hardtop, and in particular do not
attach magnetic racks.▷Do not attach rack systems to the trunk lid,
and in particular do not attach magnetic
racks.▷When the retractable hardtop is operated,
the trunk lid swings back and up.
Before operating the retractable hardtop,
ensure that there is enough clearance, e.g.,
in tight parking spaces.▷If you open the hardtop while it is wet, e.g.,
after driving in the rain, water may drip into
the cargo area.
If necessary, remove items from the cargo
area beforehand to avoid water stains or
soiling.▷Opening and closing while the vehicle is
moving can cause air turbulence in the
cargo area.
Properly stow away objects in the cargo
area.▷At temperatures below 14 ℉/-10 ℃, the
retractable hardtop cannot be moved.
A message appears on the Control Display.
Do not touch the mechanism and keep
the opening path clear.
During opening and closing, do not reach into
the mechanism and keep children away from
the opening path of the retractable hardtop;
otherwise, there is the risk of injury.◀
Do not place objects on the retractable
hardtop.
Do not place any objects on the retractable
hardtop or on the trunk lid; otherwise, they
could fall during movements of the retractable
hardtop and cause damage or injury.◀
Before opening and closing Always open or close the hardtop fully.
Do not let the hardtop stop in an inter‐
mediate position when opening or closing.
Otherwise, there is the danger of personal in‐
jury since the hardtop will be lowered automat‐
ically after a few minutes.◀▷Observe the safety precautions above.▷Ensure that the trunk lid is closed.▷The vehicle should be parked on fairly level
ground. Excessive angle is indicated by a
light.▷Fold down the cargo area partition and
make sure it engages, refer to the instruc‐
tions below.▷Do not place any objects next to or on the
cargo area partition and close the storage
compartment on the left side of the cargo
area.▷Do not exceed the maximum loading
height under the cargo area partition; refer
to the label in the cargo area showing a line
indicating the maximum height.Seite 42ControlsOpening and closing42
Online Edition for Part no. 01 40 2 957 403 - X/14
Page 47 of 289
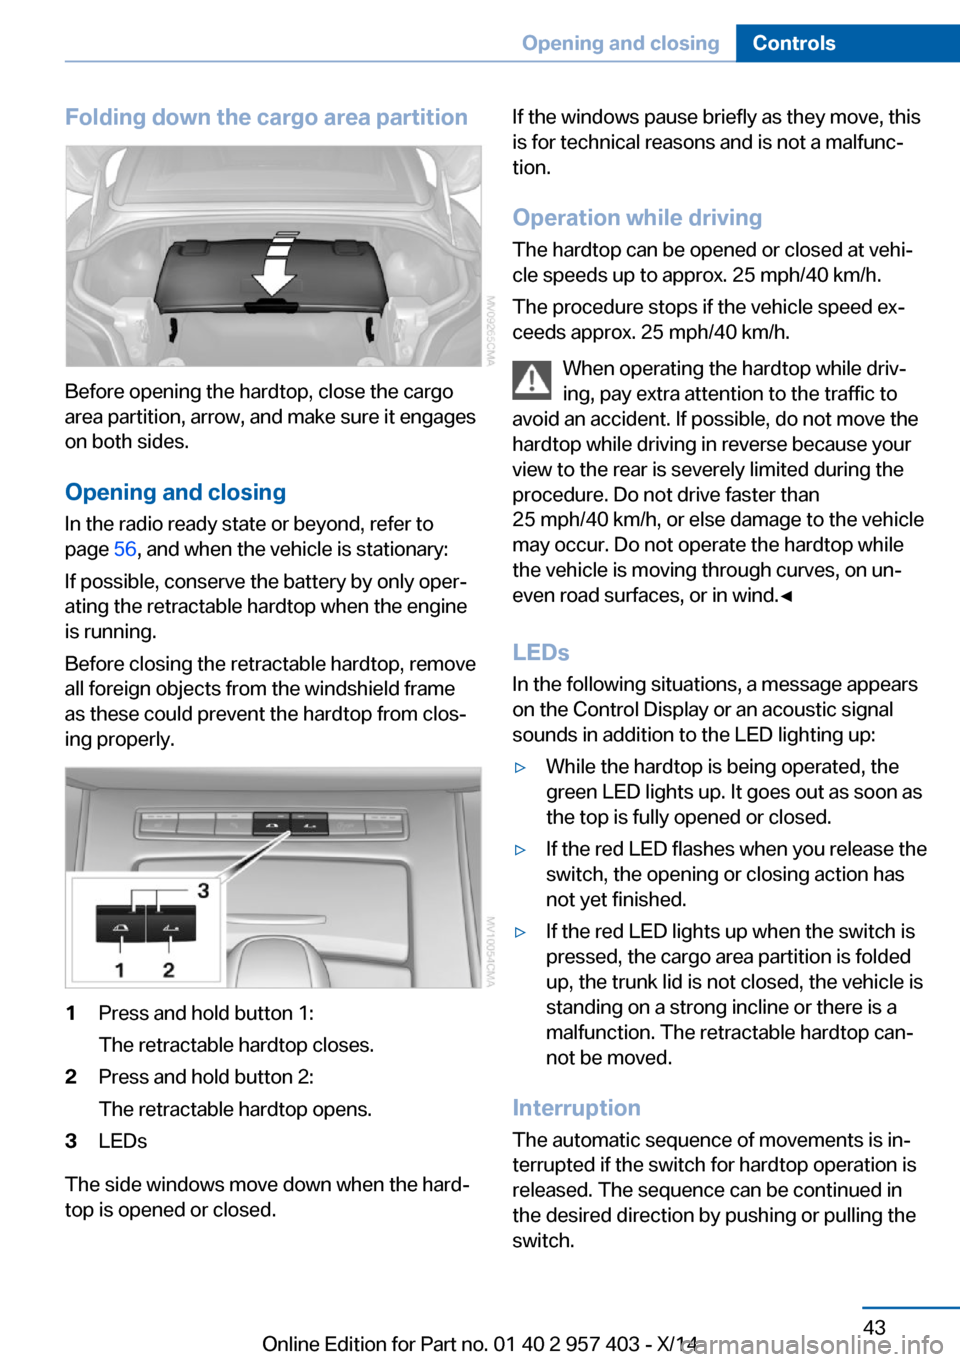
Folding down the cargo area partition
Before opening the hardtop, close the cargo
area partition, arrow, and make sure it engages
on both sides.
Opening and closing In the radio ready state or beyond, refer to
page 56, and when the vehicle is stationary:
If possible, conserve the battery by only oper‐
ating the retractable hardtop when the engine
is running.
Before closing the retractable hardtop, remove
all foreign objects from the windshield frame
as these could prevent the hardtop from clos‐
ing properly.
1Press and hold button 1:
The retractable hardtop closes.2Press and hold button 2:
The retractable hardtop opens.3LEDs
The side windows move down when the hard‐
top is opened or closed.
If the windows pause briefly as they move, this
is for technical reasons and is not a malfunc‐
tion.
Operation while driving
The hardtop can be opened or closed at vehi‐
cle speeds up to approx. 25 mph/40 km/h.
The procedure stops if the vehicle speed ex‐
ceeds approx. 25 mph/40 km/h.
When operating the hardtop while driv‐
ing, pay extra attention to the traffic to
avoid an accident. If possible, do not move the hardtop while driving in reverse because your
view to the rear is severely limited during the
procedure. Do not drive faster than
25 mph/40 km/h, or else damage to the vehicle
may occur. Do not operate the hardtop while
the vehicle is moving through curves, on un‐
even road surfaces, or in wind.◀
LEDs
In the following situations, a message appears
on the Control Display or an acoustic signal
sounds in addition to the LED lighting up:▷While the hardtop is being operated, the
green LED lights up. It goes out as soon as
the top is fully opened or closed.▷If the red LED flashes when you release the
switch, the opening or closing action has
not yet finished.▷If the red LED lights up when the switch is
pressed, the cargo area partition is folded
up, the trunk lid is not closed, the vehicle is
standing on a strong incline or there is a
malfunction. The retractable hardtop can‐
not be moved.
Interruption
The automatic sequence of movements is in‐
terrupted if the switch for hardtop operation is
released. The sequence can be continued in
the desired direction by pushing or pulling the
switch.
Seite 43Opening and closingControls43
Online Edition for Part no. 01 40 2 957 403 - X/14
Page 48 of 289
Always open or close the hardtop fully.
Open or close the hardtop fully; other‐
wise, there is a risk of injury or damage when
driving. Do not interrupt and resume the clos‐
ing procedure several times in close succes‐
sion as this could damage the mechanism.◀
If the hardtop is not fully opened or closed, the
trunk lid cannot be opened and the windows
cannot be moved.
Convenient operation via the remote
control
Information on convenient operation, refer to
page 33.
Wind deflector
The wind deflector keeps air movements in the
passenger compartment to a minimum when
the hardtop is open and provides an even more
comfortable ride, particularly at high speeds.
Installation1.Insert the wind deflector 1 into the holders
2 on the rollover bars; the arrow should
point in the direction of travel.2.Push the wind deflector down, arrow 1, and
then push down and forward simultane‐
ously, arrow 2, until it engages.
Attach the wind deflector securely
The wind deflector must engage firmly;
otherwise, it could become detached at higher
vehicle speeds.◀
Removing
1.Push the wind deflector down and back si‐
multaneously, arrow 1, to disengage it from
the catch mechanism.2.Pull the wind deflector upward out of the
holders, arrow 2.
Clothes hooks
Seite 44ControlsOpening and closing44
Online Edition for Part no. 01 40 2 957 403 - X/14
Page 113 of 289
blower and air conditioner are completely
switched off and the air supply is cut off.
To switch on the air conditioner, set the de‐
sired air flow rate.
Switching cooling function on/off The cooling function cools and
dehumidifies the incoming air be‐
fore reheating it as required, according to the
temperature setting. This function is only avail‐
able while the engine is running.
The cooling function helps to prevent conden‐
sation on the windows or to remove it quickly.
Depending on the weather, the windshield may
fog over briefly when the engine is started.
Rear window defroster The defroster switches off auto‐
matically after a certain time or
when the hardtop is opened.
Temperature To increase the temperature, turn
the rotary switch clockwise to‐
wards red. For a lower tempera‐
ture, turn the rotary switch coun‐
terclockwise towards blue.
Defrosting windows and removing
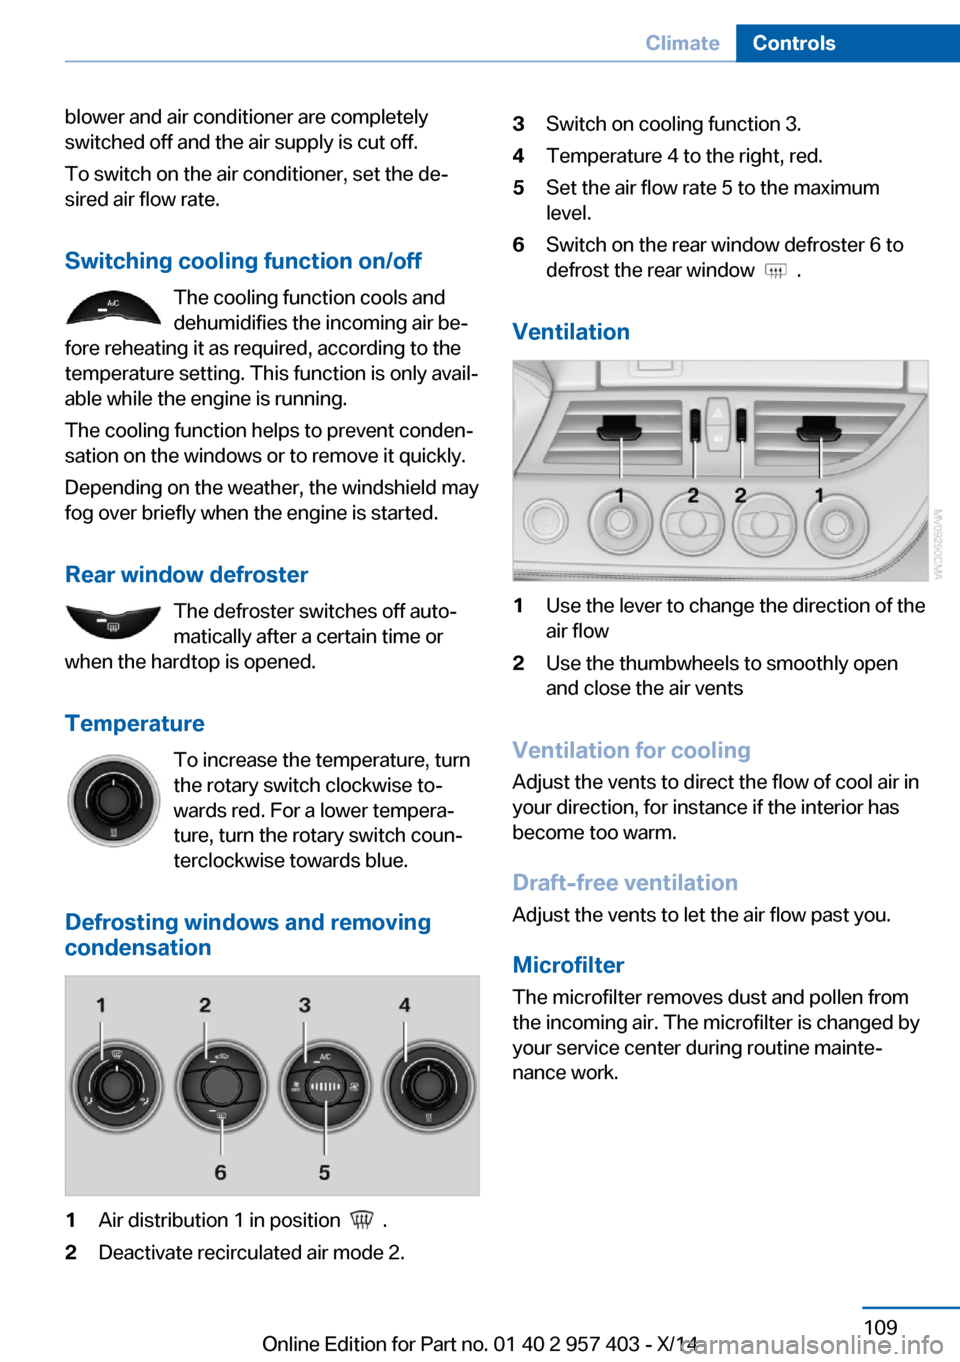
condensation1Air distribution 1 in position .2Deactivate recirculated air mode 2.3Switch on cooling function 3.4Temperature 4 to the right, red.5Set the air flow rate 5 to the maximum
level.6Switch on the rear window defroster 6 to
defrost the rear window
.
Ventilation
1Use the lever to change the direction of the
air flow2Use the thumbwheels to smoothly open
and close the air vents
Ventilation for cooling
Adjust the vents to direct the flow of cool air in
your direction, for instance if the interior has
become too warm.
Draft-free ventilation
Adjust the vents to let the air flow past you.
Microfilter
The microfilter removes dust and pollen from
the incoming air. The microfilter is changed by
your service center during routine mainte‐
nance work.
Seite 109ClimateControls109
Online Edition for Part no. 01 40 2 957 403 - X/14
Page 115 of 289
To give the automatic climate control enough
time to achieve the set temperature, do not
switch between different temperature settings
in quick succession.
Maximum heating power can be obtained with
the highest setting, regardless of the external
temperature.
The lowest setting effects continuous cooling.
Switching the cooling function on and
off
The cooling function cools and
dehumidifies the incoming air be‐
fore reheating it as required, ac‐ cording to the temperature set‐
ting. This function is only available
while the engine is running.
The cooling function helps to prevent conden‐
sation on the windows or to remove it quickly.
Depending on the weather, the windshield may
fog over briefly when the engine is started.
The cooling function is switched on automati‐
cally with the AUTO program.
Maximum cooling The air is cooled as quickly as
possible with the engine running.
The automatic climate control goes into recir‐
culated air mode at the lowest temperature. Air
flows at maximum rate from the vents for the
upper body area. You should therefore open
the vents for maximum cooling.
AUTO program
The AUTO program automatically adjusts the
air distribution to the windshield and side win‐
dows, toward the upper body area, and into the
footwell and knee area.
The air flow rate and air distribution, in addition
to your temperature specifications, will be
adapted to outside influences as a result ofseasonal changes, e.g., sunlight or window
condensation.
The cooling function is switched on automati‐
cally with the AUTO program.
Switching on/off Press the button.
Manual air distribution and air flow
rate are activated when the AUTO program is
deactivated.
AUTO program climate level
The climate levels can be used to vary the in‐
tensity when the AUTO program is switched
on. For example, air flow is adjusted automati‐
cally to optimize climate control.
When the AUTO program is
switched on, the climate level of
the AUTO program can be se‐
lected using the buttons for controlling the
manual air flow rate.
The selected climate level is displayed by an
LED.
Convertible programWhen the hardtop is open, the convertible pro‐
gram is activated as well. In the convertible
program, the automatic climate control is opti‐
mized for driving with the hardtop open. In ad‐
dition, the air flow rate is increased as vehicle
speed increases.
The effectiveness of the convertible program
can be enhanced considerably by installing the
wind deflector.
Adjusting air flow rate manually Press the left side of the button to
reduce air flow. Press the right
side of the button to increase it.
The air volume may be reduced automatically
to save battery power. The display remains the
same.Seite 111ClimateControls111
Online Edition for Part no. 01 40 2 957 403 - X/14