radio BMW Z4 3.0SI COUPE 2008 E86 Owner's Manual
[x] Cancel search | Manufacturer: BMW, Model Year: 2008, Model line: Z4 3.0SI COUPE, Model: BMW Z4 3.0SI COUPE 2008 E86Pages: 132, PDF Size: 3.23 MB
Page 8 of 132
Notes
6
Parts and accessories
For your own safety, use genuine parts
and accessories approved by BMW.
When you purchase accessories tested and
approved by BMW and Original BMW Parts, you
simultaneously acquire the assurance that they
have been thoroughly tested by BMW to ensure
optimum performance when installed on your
vehicle.
BMW warrants these parts to be free from
defects in material and workmanship.
BMW will not accept any liability for damage
resulting from installation of parts and accesso-
ries not approved by BMW.
BMW cannot test every product made by other
manufacturers to verify if it can be used on a
BMW safely and without risk to either the vehi-
cle, its operation, or its occupants.
Original BMW Parts, BMW Accessories and
other products approved by BMW, together
with professional advice on using these items,
are available from all BMW centers.
Installation and operation of non-BMW
approved accessories such as alarms, radios,
amplifiers, radar detectors, wheels, suspension
components, brake dust shields, telephones,
including operation of any mobile phone from
within the vehicle without using an externally
mounted antenna, or transceiver equipment, for
instance, CBs, walkie-talkie, ham radio or simi-
lar accessories, may cause extensive damage
to the vehicle, compromise its safety, interfere
with the vehicle's electrical system or affect the
validity of the BMW Limited Warranty. See your
BMW center for additional information.<
Maintenance, replacement or repair of
the emission control devices and sys-
tems may be performed by any automotive
repair establishment or individual using any cer-
tified automotive part.<
Service and warranty
We recommend that you read this publication
thoroughly.
Your BMW is covered by the following warran-
ties:
>New Vehicle Limited Warranty
>Rust Perforation Limited Warranty
>Federal Emissions System Defect Warranty
>Federal Emissions Performance Warranty
>California Emission Control System Limited
Warranty
Detailed information about these warranties is
listed in the Service and Warranty Information
Booklet for US models or in the Warranty and
Service Guide Booklet for Canadian models.
Page 13 of 132
At a glance
Controls
Driving tips
Mobility Reference
11
8Instrument cluster12
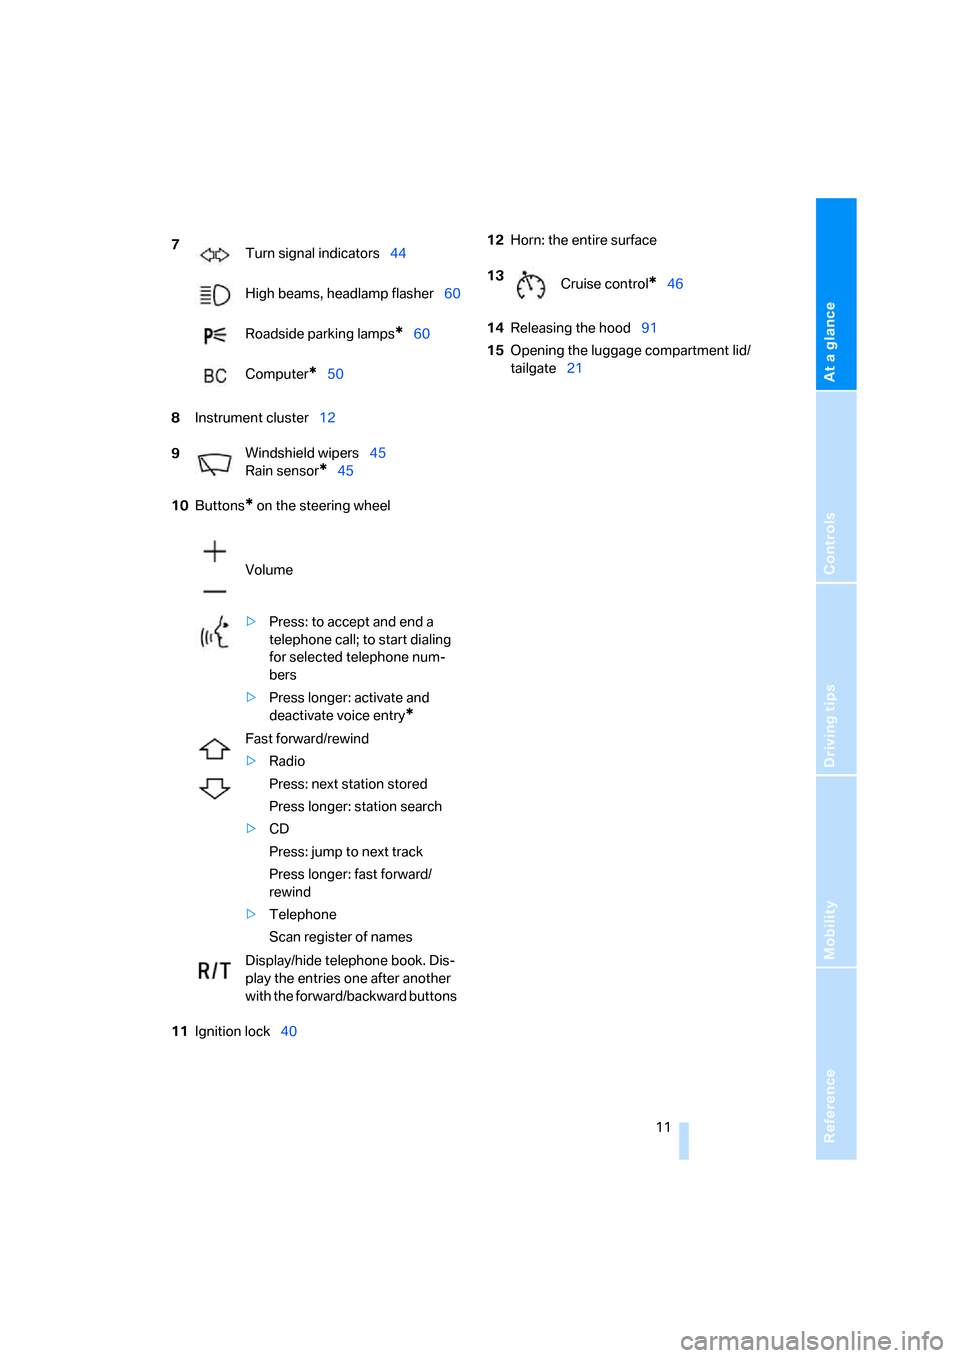
10Buttons
* on the steering wheel
11Ignition lock4012Horn: the entire surface
14Releasing the hood91
15Opening the luggage compartment lid/
tailgate21 7
Turn signal indicators44
High beams, headlamp flasher60
Roadside parking lamps
*60
Computer
*50
9Windshield wipers45
Rain sensor
*45
Volume
>Press: to accept and end a
telephone call; to start dialing
for selected telephone num-
bers
>Press longer: activate and
deactivate voice entry
*
Fast forward/rewind
>Radio
Press: next station stored
Press longer: station search
>CD
Press: jump to next track
Press longer: fast forward/
rewind
>Telephone
Scan register of names
Display/hide telephone book. Dis-
play the entries one after another
with the forward/backward buttons
13
Cruise control*46
Page 22 of 132
Opening and closing
20
Unlocking the luggage compartment
lid/tailgate
Press the button for approx. 1 second.
The luggage compartment lid/tailgate opens a
short distance, regardless of whether it was
locked or unlocked.
A previously locked luggage compart-
ment lid/tailgate is locked again after
closing.
Before and after each trip, check that the lug-
gage compartment lid/tailgate has not been
inadvertently unlocked.<
Panic mode*
You can also trigger the alarm system* if you
find yourself in a dangerous situation:
Press the button for at least 3 seconds.
To switch off the alarm: press any button.
Malfunctions
The remote control may malfunction due to
local radio waves. If this occurs, unlock and lock
the car at the door lock or luggage compart-
ment lid/tailgate lock with the key.
If the car can no longer be locked with a remote
control, the battery in the remote control is dis-
charged. Use this remote control key while driv-
ing for an extended period in order to recharge
the battery, refer to page18.
For US owners only
The transmitter and receiver units comply with
part 15 of the FCC/Federal Communications
Commission regulations. Operation is gov-
erned by the following:
FCC ID:
LX8EWS
LX8FZVS
LX8FZVE
Compliance statement:
This device complies with part 15 of the FCC
Rules. Operation is subject to the following two
conditions:
>This device may not cause harmful interfer-
ence, and>this device must accept any interference
received, including interference that may
cause undesired operation.
Any unauthorized modifications or
changes to these devices could void the
user's authority to operate this equipment.<
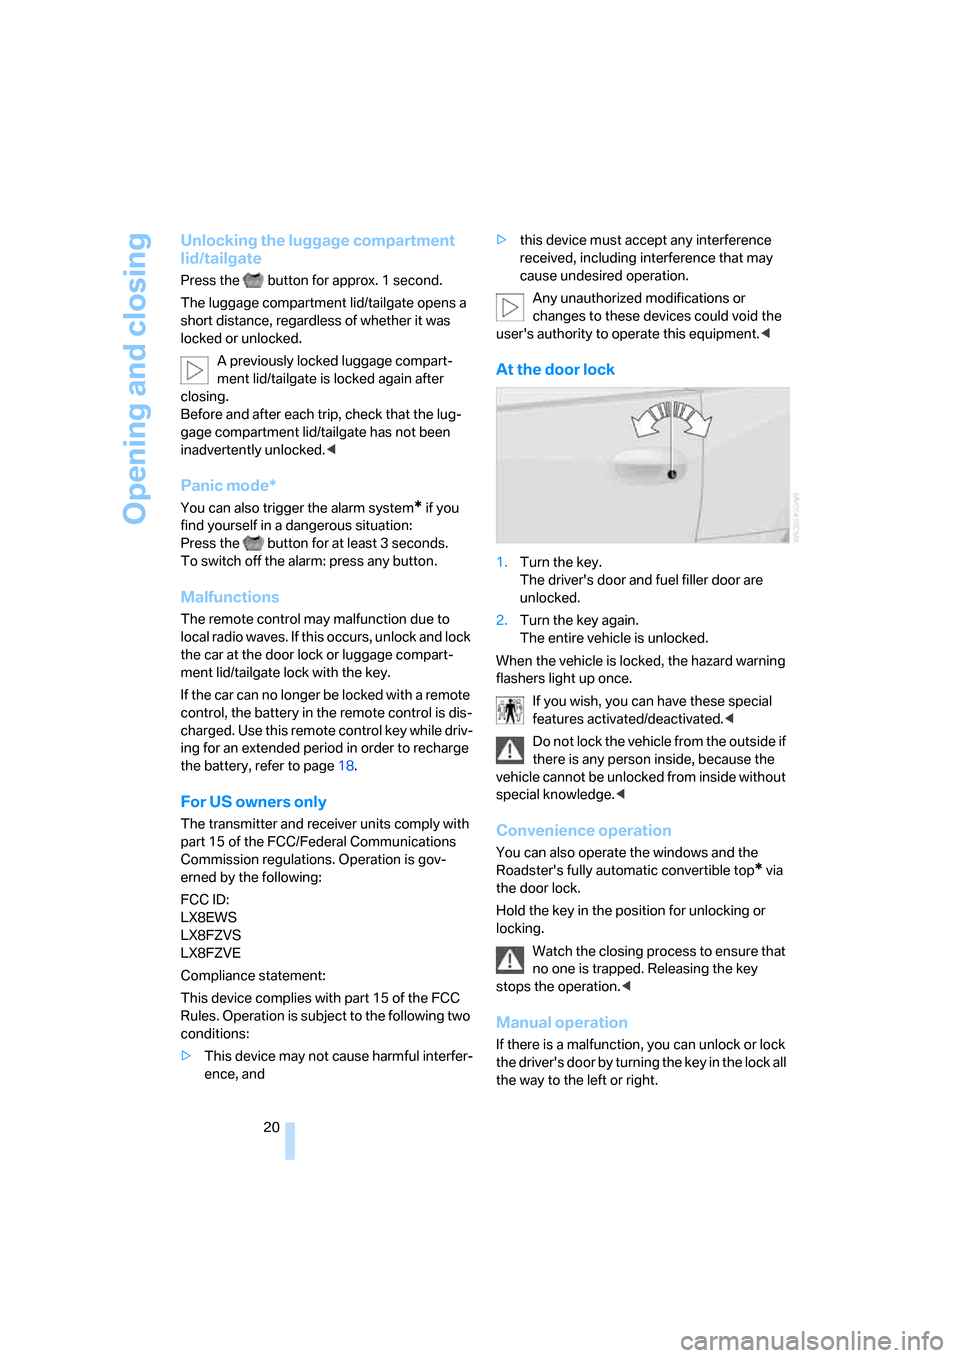
At the door lock
1.Turn the key.
The driver's door and fuel filler door are
unlocked.
2.Turn the key again.
The entire vehicle is unlocked.
When the vehicle is locked, the hazard warning
flashers light up once.
If you wish, you can have these special
features activated/deactivated.<
Do not lock the vehicle from the outside if
there is any person inside, because the
vehicle cannot be unlocked from inside without
special knowledge.<
Convenience operation
You can also operate the windows and the
Roadster's fully automatic convertible top
* via
the door lock.
Hold the key in the position for unlocking or
locking.
Watch the closing process to ensure that
no one is trapped. Releasing the key
stops the operation.<
Manual operation
If there is a malfunction, you can unlock or lock
the driver's door by turning the key in the lock all
the way to the left or right.
Page 51 of 132
Reference
At a glance
Controls
Driving tips
Mobility
49
Reserve
Once the fuel level has fallen to the reserve
zone of approx. 2.1 US gallons/8 liters, indicator
lamp 1 lights up continuously.
Do not drive until the fuel tank is empty
and refill it well in advance. Otherwise the
engine may not operate properly and damage
could result.<
When you switch on the ignition, the indicator
lamp comes on briefly to indicate an operational
check.
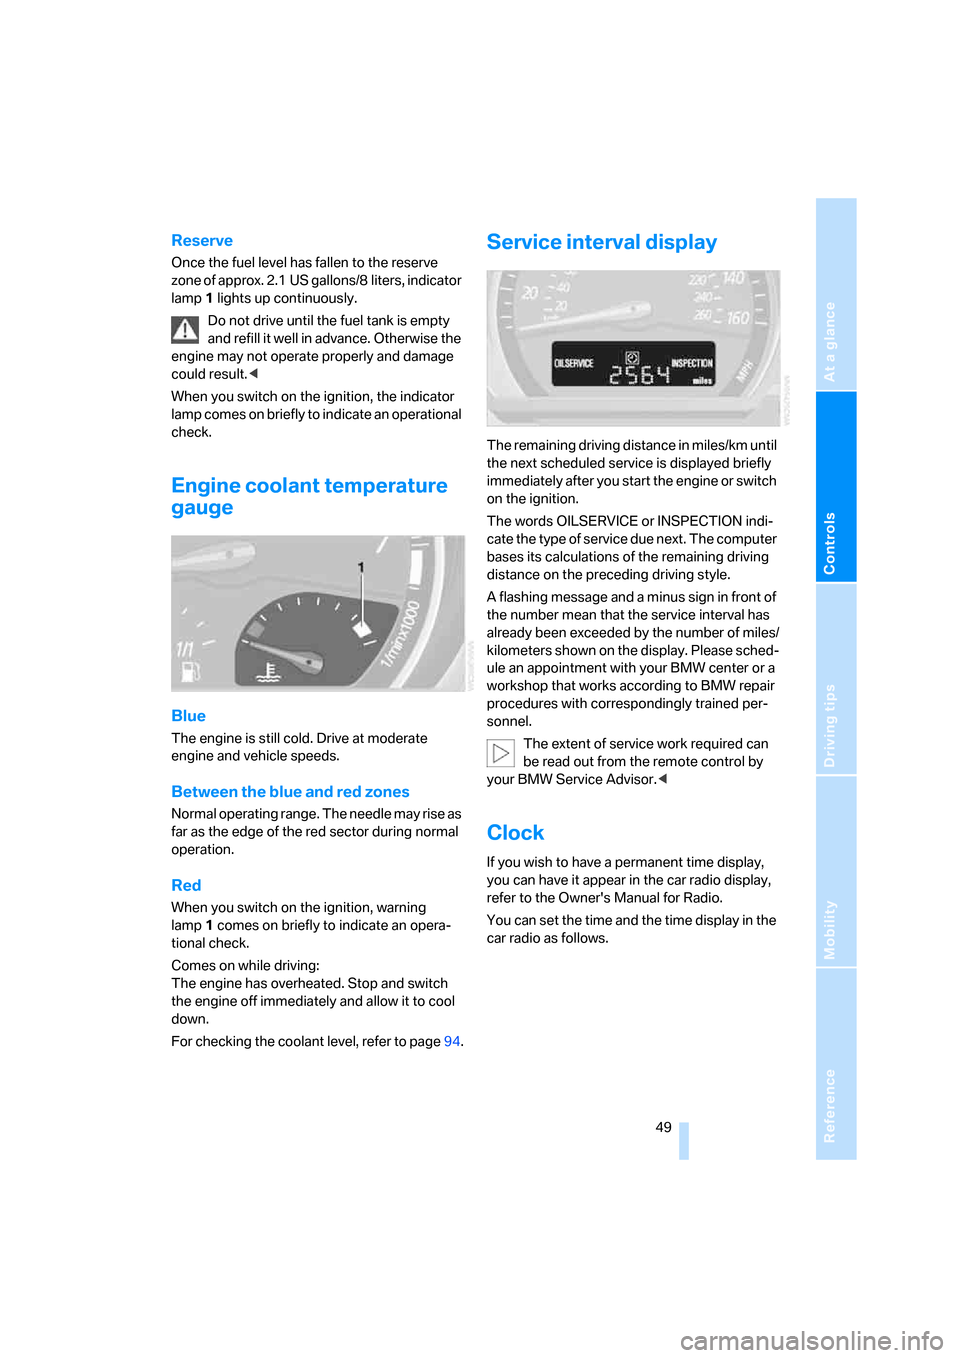
Engine coolant temperature
gauge
Blue
The engine is still cold. Drive at moderate
engine and vehicle speeds.
Between the blue and red zones
Normal operating range. The needle may rise as
far as the edge of the red sector during normal
operation.
Red
When you switch on the ignition, warning
lamp1 comes on briefly to indicate an opera-
tional check.
Comes on while driving:
The engine has overheated. Stop and switch
the engine off immediately and allow it to cool
down.
For checking the coolant level, refer to page94.
Service interval display
The remaining driving distance in miles/km until
the next scheduled service is displayed briefly
immediately after you start the engine or switch
on the ignition.
The words OILSERVICE or INSPECTION indi-
cate the type of service due next. The computer
bases its calculations of the remaining driving
distance on the preceding driving style.
A flashing message and a minus sign in front of
the number mean that the service interval has
already been exceeded by the number of miles/
kilometers shown on the display. Please sched-
ule an appointment with your BMW center or a
workshop that works according to BMW repair
procedures with correspondingly trained per-
sonnel.
The extent of service work required can
be read out from the remote control by
your BMW Service Advisor.<
Clock
If you wish to have a permanent time display,
you can have it appear in the car radio display,
refer to the Owner's Manual for Radio.
You can set the time and the time display in the
car radio as follows.
Page 52 of 132
Everything under control
50
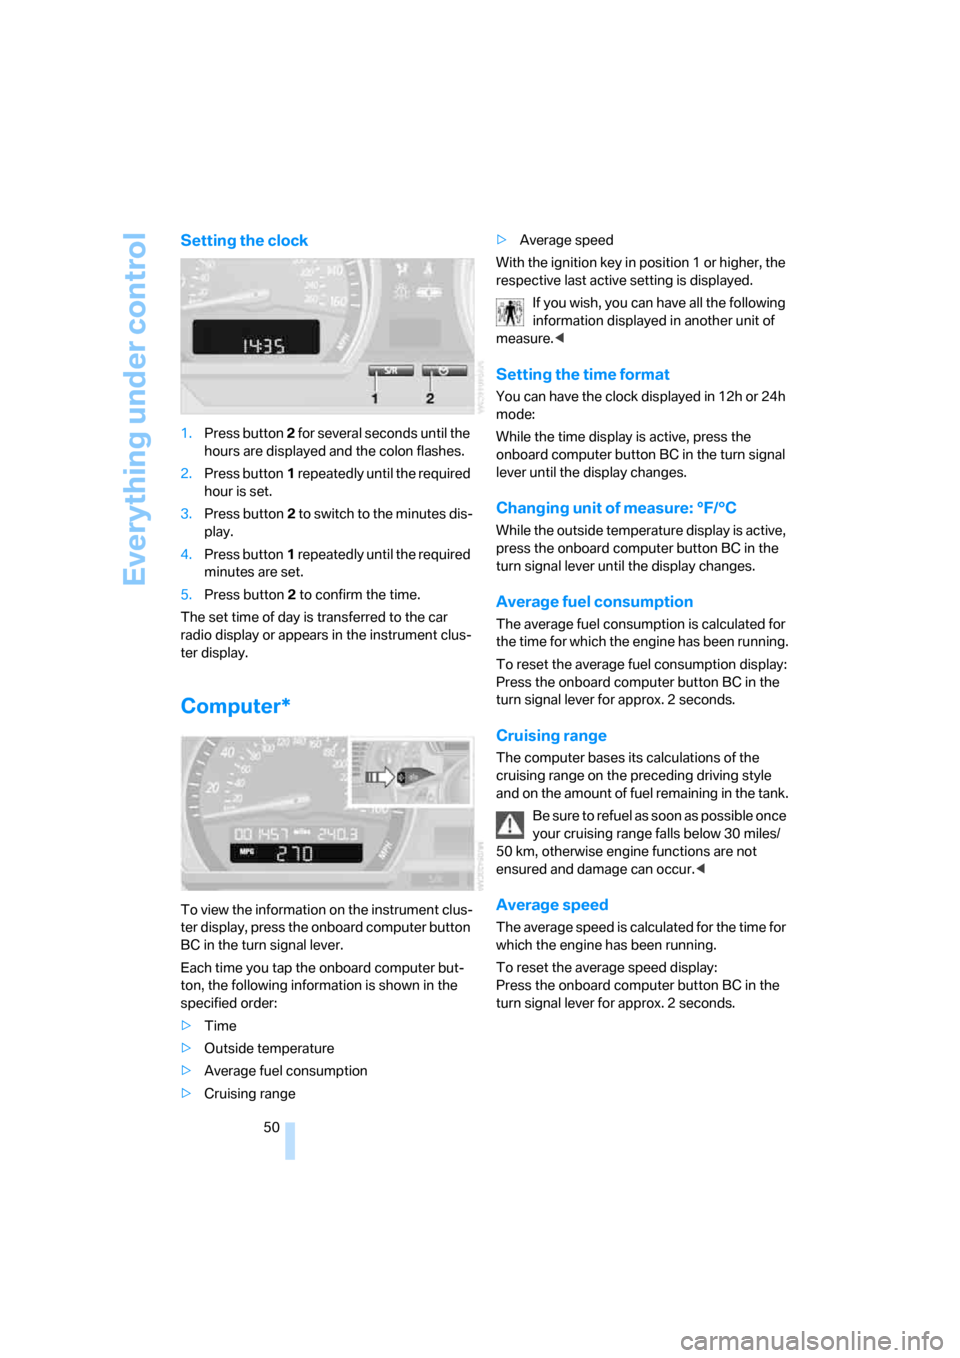
Setting the clock
1.Press button 2 for several seconds until the
hours are displayed and the colon flashes.
2.Press button1 repeatedly until the required
hour is set.
3.Press button2 to switch to the minutes dis-
play.
4.Press button1 repeatedly until the required
minutes are set.
5.Press button2 to confirm the time.
The set time of day is transferred to the car
radio display or appears in the instrument clus-
ter display.
Computer*
To view the information on the instrument clus-
ter display, press the onboard computer button
BC in the turn signal lever.
Each time you tap the onboard computer but-
ton, the following information is shown in the
specified order:
>Time
>Outside temperature
>Average fuel consumption
>Cruising range>Average speed
With the ignition key in position 1 or higher, the
respective last active setting is displayed.
If you wish, you can have all the following
information displayed in another unit of
measure.<
Setting the time format
You can have the clock displayed in 12h or 24h
mode:
While the time display is active, press the
onboard computer button BC in the turn signal
lever until the display changes.
Changing unit of measure: °F/°C
While the outside temperature display is active,
press the onboard computer button BC in the
turn signal lever until the display changes.
Average fuel consumption
The average fuel consumption is calculated for
the time for which the engine has been running.
To reset the average fuel consumption display:
Press the onboard computer button BC in the
turn signal lever for approx. 2 seconds.
Cruising range
The computer bases its calculations of the
cruising range on the preceding driving style
and on the amount of fuel remaining in the tank.
B e s u r e t o r e f u e l a s s o o n a s p o s s i b l e o n c e
your cruising range falls below 30 miles/
50 km, otherwise engine functions are not
ensured and damage can occur.<
Average speed
The average speed is calculated for the time for
which the engine has been running.
To reset the average speed display:
Press the onboard computer button BC in the
turn signal lever for approx. 2 seconds.
Page 56 of 132
Technology for driving comfort and safety
54 3.In the event of complete tire pressure loss,
0 psi/0 kilopascal, you can estimate the
possible distance for continued driving on
the basis of the following guidelines:
>With a light load:
1 person without luggage:
approx. 155 miles/250 km
>With a medium load:
1 person, cargo bay full,
or
2 persons without luggage:
approx. 90 miles/150 km
>With a full load:
2 persons, cargo bay full:
approx. 30 miles/50 km
Drive cautiously. Do not exceed a speed
of 50 mph/80 km/h. Driving characteris-
tics change if there is a loss of tire pressure.
This includes reduced tracking stability in brak-
ing, extended braking distance and altered nat-
ural steering characteristics.
If unusual vibration or loud noises occur during
the journey, this may be an indication that the
damaged tire has finally failed. Reduce your
speed and pull over to the side of the road at the
earliest opportunity. Otherwise, parts of the tire
could come loose and cause an accident. Do
not continue driving. Contact a BMW center.<
Tire Pressure Monitor TPM*
The concept
TPM monitors the tire inflation pressure in all
four mounted tires. The system reports if infla-
tion pressure has dropped significantly in one
or more of the tires.
System requirements
To ensure a reliable flat tire warning, the system
must have been reset while tire inflation pres-
sures were correct.
Always use tires with TPM electronics to
ensure that the system operates properly.The system must be reset each time a tire
inflation pressure has been corrected or a
wheel or tire has been changed.<
System limitations
TPM cannot report sudden serious tire
damage due to external causes.<
The system will not operate correctly if it was
not reset, e.g. it may report a flat tire even if the
tire inflation pressures are correct.
The system is inactive and cannot indicate a flat
tire if a wheel without TPM electronics is
mounted or if other systems or devices that use
the same radio frequency temporarily interfere
with the TPM system.
Resetting the system
The system must be reset each time a tire
inflation pressure has been corrected or a
wheel or tire has been changed.<
1.Start the engine but do not drive off yet.
2.Press the button until the yellow warning
lamp in the instrument cluster lights up for a
few seconds.
3.Drive off.
After several minutes of driving, the current
inflation pressures in the tires are adopted
as the target values to be monitored. The
resetting procedure is completed automat-
ically without further notice during the trip,
which can be interrupted at any time.
Resetting is continued automatically when
you continue driving.
Page 57 of 132
Reference
At a glance
Controls
Driving tips
Mobility
55
Warning of low tire inflation pressure
The warning lamp lights up in yellow. A
signal also sounds. There is a flat tire or
a significant loss of tire pressure in one
or more tires.
1.Cautiously reduce speed to 50 mph/
80 km/h or lower. Avoid strong braking and
steering maneuvers. Do not exceed a maxi-
mum speed of 50 mph/80 km/h.
If the car is not equipped with Run-
Flat Tires, which is the standard
equipment by design, refer to page88, then
do not continue driving. Doing so after a tire
puncture may result in a severe accident.<
2.In the event of complete tire pressure loss,
0 psi/0 kilopascal, you can estimate how far
you can continue driving on the basis of the
following guidelines:
>With a light load:
1 person without luggage:
approx. 155 miles/250 km
>With a medium load:
1 person, cargo bay full,
or
2 persons without luggage:
approx. 90 miles/150 km
>With a full load:
2 persons, cargo bay full:
approx. 30 miles/50 km
Drive cautiously. Do not exceed a speed
of 50 mph/80 km/h. Driving characteris-
tics change if there is a loss of tire pressure.
This includes reduced tracking stability in brak-
ing, extended braking distance and altered nat-
ural steering characteristics.
If unusual vibration or loud noises occur during
the journey, this may be an indication that the
damaged tire has finally failed. Reduce your
speed and pull over to the side of the road at a
suitable location at the earliest opportunity.
Otherwise, parts of the tire could come loose
and cause an accident. Do not continue driving.
Contact a BMW center.<
Malfunction
The yellow warning lamp flashes and
then lights up continuously. A flat tire
cannot be detected.
This warning is displayed under the following
circumstances:
>If there is a malfunction;
have the system checked.
>If a wheel without TPM electronics is
mounted.
>If other systems or devices that use the
same radio frequency temporarily interfere
with the TPM.
Declaration according to NHTSA/
FMVSS 138 Tire Pressure Monitoring
System
Each tire should be checked monthly when cold
and inflated to the inflation pressure recom-
mended by the vehicle manufacturer on the
vehicle placard or tire inflation pressure label. If
your vehicle has tires of a different size than the
size indicated on the vehicle placard or tire infla-
tion pressure label, you should determine the
proper tire inflation pressure for those tires. As
an added safety feature, your vehicle has been
equipped with a tire pressure monitoring sys-
tem, TPMS, that illuminates a low tire pressure
telltale when one or more of your tires are signif-
icantly under-inflated. Accordingly, when the
low tire pressure telltale illuminates, you should
stop and check your tires as soon as possible,
and inflate them to the proper pressure. Driving
on a significantly underinflated tire causes the
tire to overheat and can lead to tire failure.
Under-inflation also reduces fuel efficiency and
tire tread life, and may affect the vehicle's han-
dling and stopping ability. Please note that the
TPMS is not a substitute for proper tire mainte-
nance, and it is the driver's responsibility to
maintain correct tire pressure, even if under-
inflation has not reached the level to trigger illu-
mination of the TPMS low tire pressure telltale.
The TPMS malfunction indicator is combined
with the low tire pressure telltale. When the sys-
tem detects a malfunction, the telltale will flash
for approximately one minute and then remain
Page 70 of 132
Practical interior accessories
68
Practical interior accessories
Glove compartment
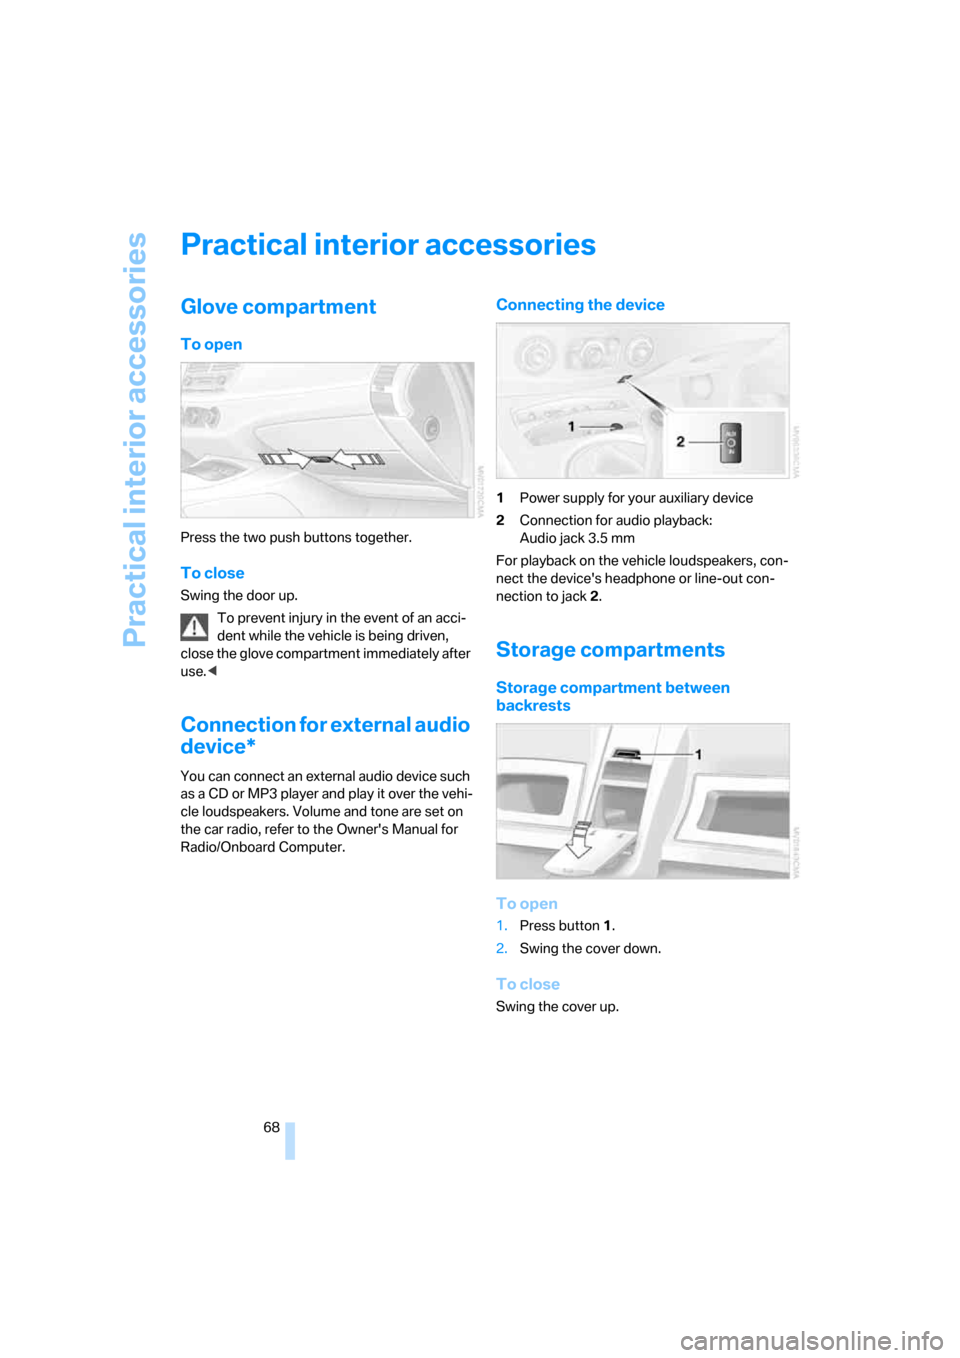
To open
Press the two push buttons together.
To close
Swing the door up.
To prevent injury in the event of an acci-
dent while the vehicle is being driven,
close the glove compartment immediately after
use.<
Connection for external audio
device*
You can connect an external audio device such
as a CD or MP3 player and play it over the vehi-
cle loudspeakers. Volume and tone are set on
the car radio, refer to the Owner's Manual for
Radio/Onboard Computer.
Connecting the device
1Power supply for your auxiliary device
2Connection for audio playback:
Audio jack 3.5 mm
For playback on the vehicle loudspeakers, con-
nect the device's headphone or line-out con-
nection to jack 2.
Storage compartments
Storage compartment between
backrests
To open
1.Press button1.
2.Swing the cover down.
To close
Swing the cover up.
Page 119 of 132
Reference
At a glance
Controls
Driving tips
Mobility
117
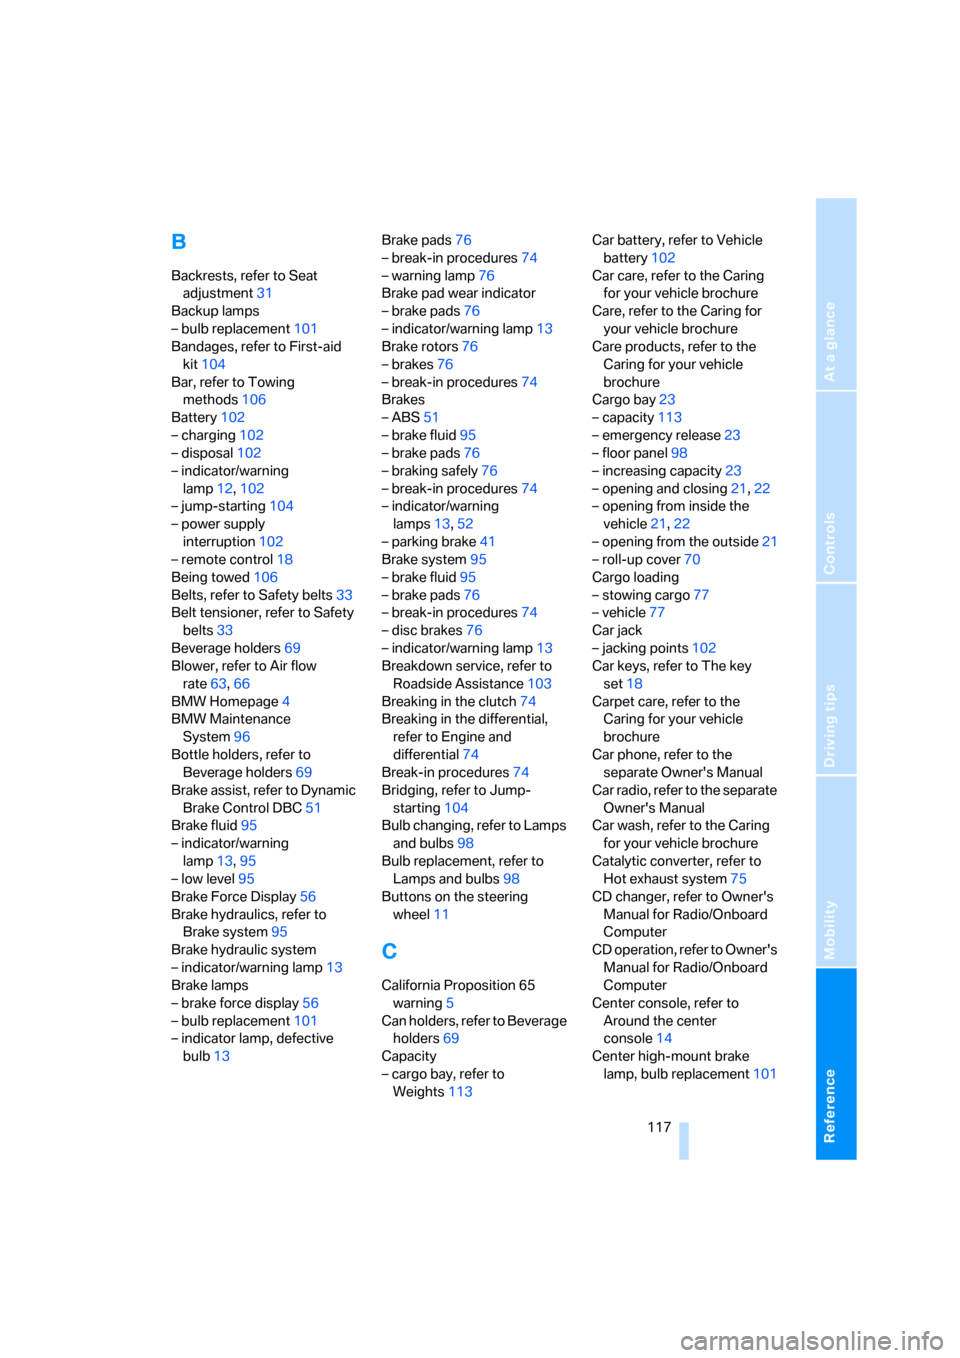
B
Backrests, refer to Seat
adjustment31
Backup lamps
– bulb replacement101
Bandages, refer to First-aid
kit104
Bar, refer to Towing
methods106
Battery102
– charging102
– disposal102
– indicator/warning
lamp12,102
– jump-starting104
– power supply
interruption102
– remote control18
Being towed106
Belts, refer to Safety belts33
Belt tensioner, refer to Safety
belts33
Beverage holders69
Blower, refer to Air flow
rate63,66
BMW Homepage4
BMW Maintenance
System96
Bottle holders, refer to
Beverage holders69
Brake assist, refer to Dynamic
Brake Control DBC51
Brake fluid95
– indicator/warning
lamp13,95
– low level95
Brake Force Display56
Brake hydraulics, refer to
Brake system95
Brake hydraulic system
– indicator/warning lamp13
Brake lamps
– brake force display56
– bulb replacement101
– indicator lamp, defective
bulb13Brake pads76
– break-in procedures74
– warning lamp76
Brake pad wear indicator
– brake pads76
– indicator/warning lamp13
Brake rotors76
– brakes76
– break-in procedures74
Brakes
– ABS51
– brake fluid95
– brake pads
76
– braking safely76
– break-in procedures74
– indicator/warning
lamps13,52
– parking brake41
Brake system95
– brake fluid95
– brake pads76
– break-in procedures74
– disc brakes76
– indicator/warning lamp13
Breakdown service, refer to
Roadside Assistance103
Breaking in the clutch74
Breaking in the differential,
refer to Engine and
differential74
Break-in procedures74
Bridging, refer to Jump-
starting104
Bulb changing, refer to Lamps
and bulbs98
Bulb replacement, refer to
Lamps and bulbs98
Buttons on the steering
wheel11
C
California Proposition 65
warning5
Can holders, refer to Beverage
holders69
Capacity
– cargo bay, refer to
Weights113Car battery, refer to Vehicle
battery102
Car care, refer to the Caring
for your vehicle brochure
Care, refer to the Caring for
your vehicle brochure
Care products, refer to the
Caring for your vehicle
brochure
Cargo bay23
– capacity113
– emergency release23
– floor panel98
– increasing capacity23
– opening and closing21,22
– opening from inside the
vehicle21,22
– opening from the outside21
– roll-up cover70
Cargo loading
– stowing cargo77
– vehicle77
Car jack
– jacking points102
Car keys, refer to The key
set18
Carpet care, refer to the
Caring for your vehicle
brochure
Car phone, refer to the
separate Owner's Manual
Car radio, refer to the separate
Owner's Manual
Car wash, refer to the Caring
for your vehicle brochure
Catalytic converter, refer to
Hot exhaust system75
CD changer, refer to Owner's
Manual for Radio/Onboard
Computer
CD operation, refer to Owner's
Manual for Radio/Onboard
Computer
Center console, refer to
Around the center
console14
Center high-mount brake
lamp, bulb replacement101
Page 120 of 132
Everything from A to Z
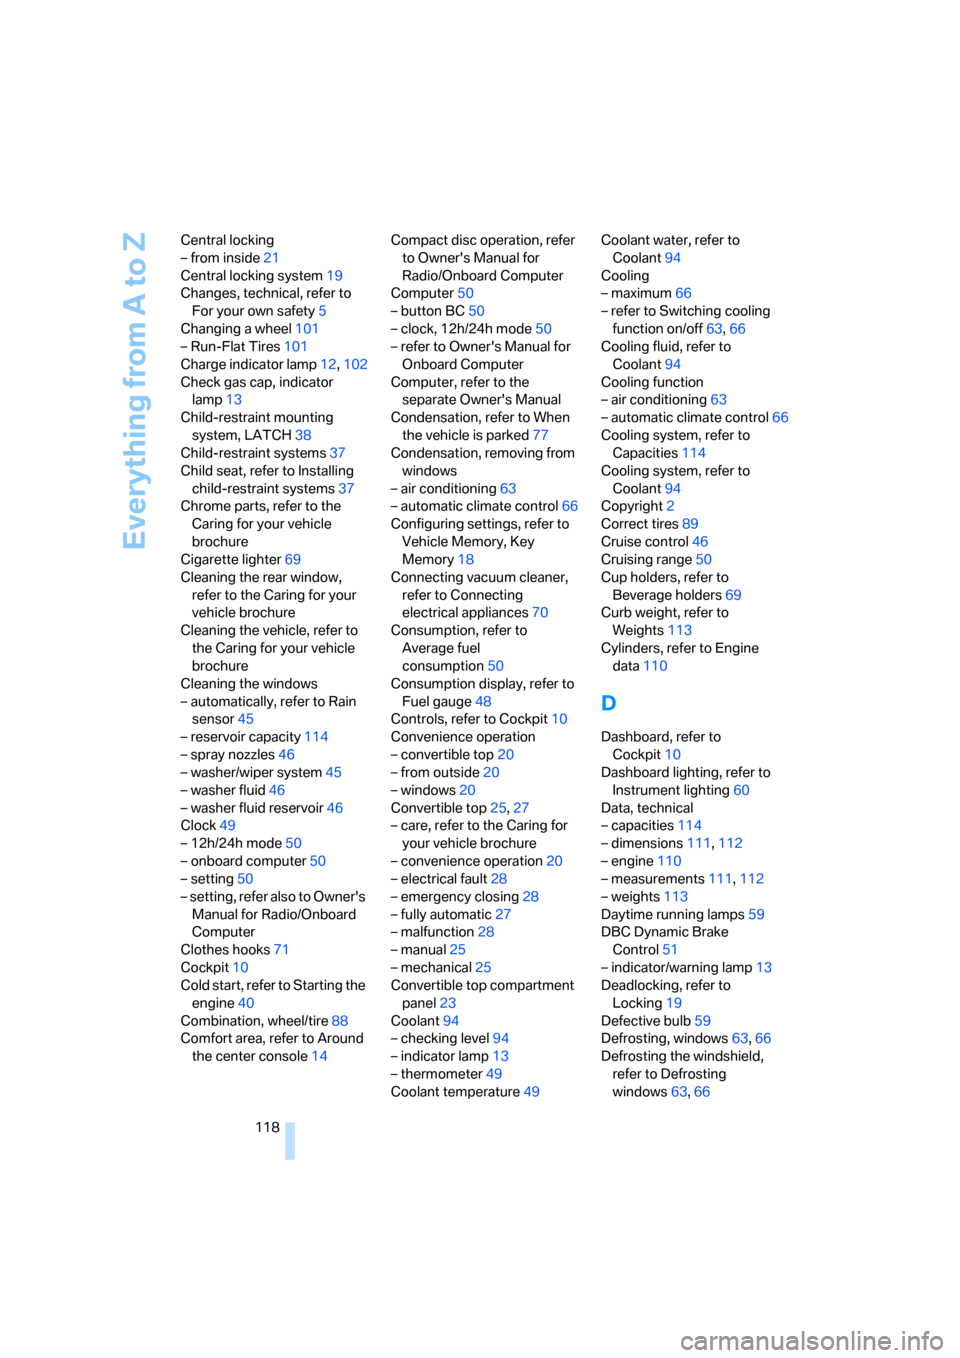
118 Central locking
– from inside21
Central locking system19
Changes, technical, refer to
For your own safety5
Changing a wheel101
– Run-Flat Tires101
Charge indicator lamp12,102
Check gas cap, indicator
lamp13
Child-restraint mounting
system, LATCH38
Child-restraint systems37
Child seat, refer to Installing
child-restraint systems37
Chrome parts, refer to the
Caring for your vehicle
brochure
Cigarette lighter69
Cleaning the rear window,
refer to the Caring for your
vehicle brochure
Cleaning the vehicle, refer to
the Caring for your vehicle
brochure
Cleaning the windows
– automatically, refer to Rain
sensor45
– reservoir capacity114
– spray nozzles46
– washer/wiper system45
– washer fluid46
– washer fluid reservoir46
Clock49
– 12h/24h mode50
– onboard computer50
– setting50
– setting, refer also to Owner's
Manual for Radio/Onboard
Computer
Clothes hooks71
Cockpit10
Cold start, refer to Starting the
engine40
Combination, wheel/tire88
Comfort area, refer to Around
the center console14Compact disc operation, refer
to Owner's Manual for
Radio/Onboard Computer
Computer50
– button BC50
– clock, 12h/24h mode50
– refer to Owner's Manual for
Onboard Computer
Computer, refer to the
separate Owner's Manual
Condensation, refer to When
the vehicle is parked77
Condensation, removing from
windows
– air conditioning63
– automatic climate control66
Configuring settings, refer to
Vehicle Memory, Key
Memory18
Connecting vacuum cleaner,
refer to Connecting
electrical appliances70
Consumption, refer to
Average fuel
consumption50
Consumption display, refer to
Fuel gauge48
Controls, refer to Cockpit10
Convenience operation
– convertible top20
– from outside20
– windows20
Convertible top25,27
– care, refer to the Caring for
your vehicle brochure
– convenience operation20
– electrical fault28
– emergency closing28
– fully automatic27
– malfunction28
– manual25
– mechanical25
Convertible top compartment
panel23
Coolant94
– checking level94
– indicator lamp13
– thermometer49
Coolant temperature49Coolant water, refer to
Coolant94
Cooling
– maximum66
– refer to Switching cooling
function on/off63,66
Cooling fluid, refer to
Coolant94
Cooling function
– air conditioning63
– automatic climate control66
Cooling system, refer to
Capacities114
Cooling system, refer to
Coolant94
Copyright2
Correct tires89
Cruise control46
Cruising range50
Cup holders, refer to
Beverage holders69
Curb weight, refer to
Weights113
Cylinders, refer to Engine
data110
D
Dashboard, refer to
Cockpit10
Dashboard lighting, refer to
Instrument lighting60
Data, technical
– capacities114
– dimensions111,112
– engine110
– measurements111,112
– weights113
Daytime running lamps59
DBC Dynamic Brake
Control51
– indicator/warning lamp13
Deadlocking, refer to
Locking19
Defective bulb59
Defrosting, windows63,66
Defrosting the windshield,
refer to Defrosting
windows63,66