brake light BMW Z4 3.0SI ROADSTER 2007 E85 Owner's Manual
[x] Cancel search | Manufacturer: BMW, Model Year: 2007, Model line: Z4 3.0SI ROADSTER, Model: BMW Z4 3.0SI ROADSTER 2007 E85Pages: 132, PDF Size: 3.14 MB
Page 14 of 132
Cockpit
12
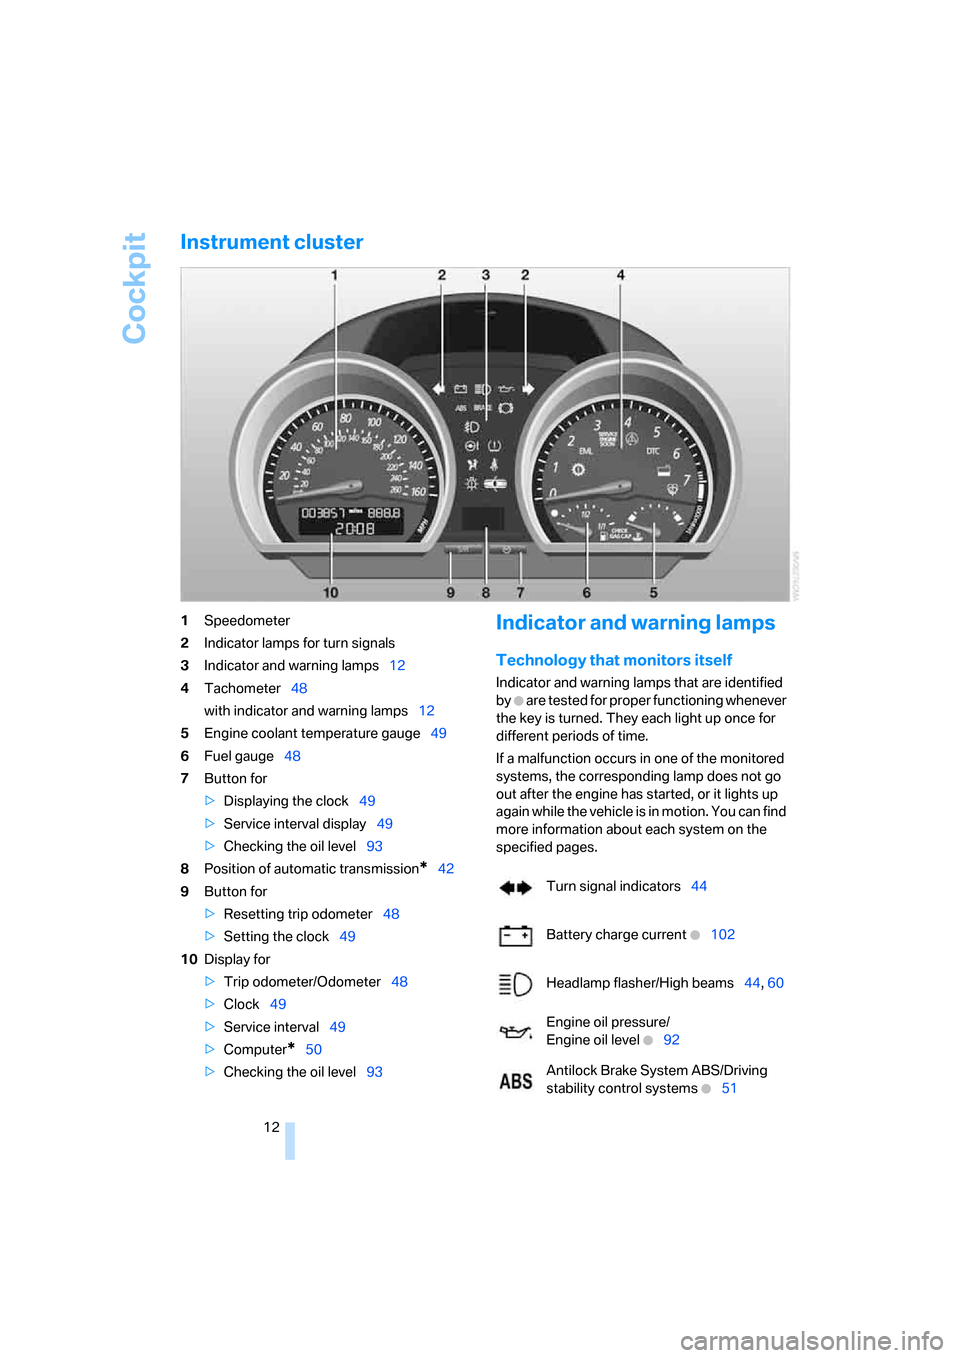
Instrument cluster
1Speedometer
2Indicator lamps for turn signals
3Indicator and warning lamps12
4Tachometer48
with indicator and warning lamps12
5Engine coolant temperature gauge49
6Fuel gauge48
7Button for
>Displaying the clock49
>Service interval display49
>Checking the oil level93
8Position of automatic transmission
*42
9Button for
>Resetting trip odometer48
>Setting the clock49
10Display for
>Trip odometer/Odometer48
>Clock49
>Service interval49
>Computer
*50
>Checking the oil level93
Indicator and warning lamps
Technology that monitors itself
Indicator and warning lamps that are identified
by
+ are tested for proper functioning whenever
the key is turned. They each light up once for
different periods of time.
If a malfunction occurs in one of the monitored
systems, the corresponding lamp does not go
out after the engine has started, or it lights up
again while the vehicle is in motion. You can find
more information about each system on the
specified pages.
Turn signal indicators44
Battery charge current
+102
Headlamp flasher/High beams44, 60
Engine oil pressure/
Engine oil level
+92
Antilock Brake System ABS/Driving
stability control systems
+51
Page 15 of 132
At a glance
Controls
Driving tips
Mobility Reference
13
Colors
The indicator and warning lamps can light up in
various colors and combinations.
>Red:
Stop the vehicle immediately
or
an important reminder
>Red and yellow:
Continue driving cautiously
>Yellow:
Have the system checked soon
or
for your information
>Green or blue:
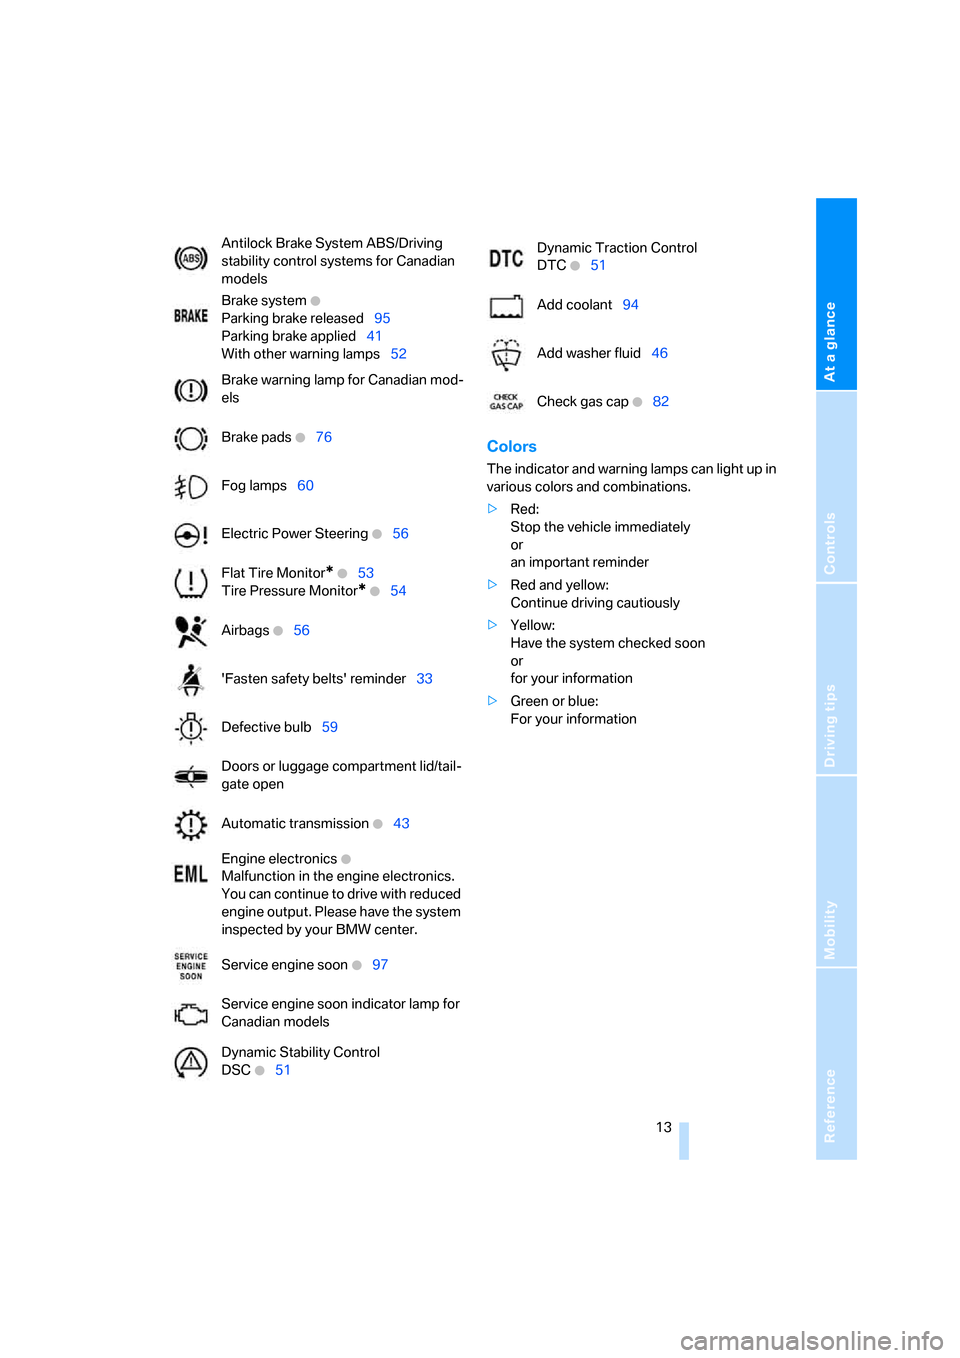
For your information Antilock Brake System ABS/Driving
stability control systems for Canadian
models
Brake system
+
Parking brake released95
Parking brake applied41
With other warning lamps52
Brake warning lamp for Canadian mod-
els
Brake pads
+76
Fog lamps60
Electric Power Steering
+56
Flat Tire Monitor
* +53
Tire Pressure Monitor
* +54
Airbags
+56
'Fasten safety belts' reminder33
Defective bulb59
Doors or luggage compartment lid/tail-
gate open
Automatic transmission
+43
Engine electronics
+
Malfunction in the engine electronics.
You can continue to drive with reduced
engine output. Please have the system
inspected by your BMW center.
Service engine soon
+97
Service engine soon indicator lamp for
Canadian models
Dynamic Stability Control
DSC
+51
Dynamic Traction Control
DTC
+51
Add coolant94
Add washer fluid46
Check gas cap
+82
Page 42 of 132
Driving
40
Driving
Ignition lock
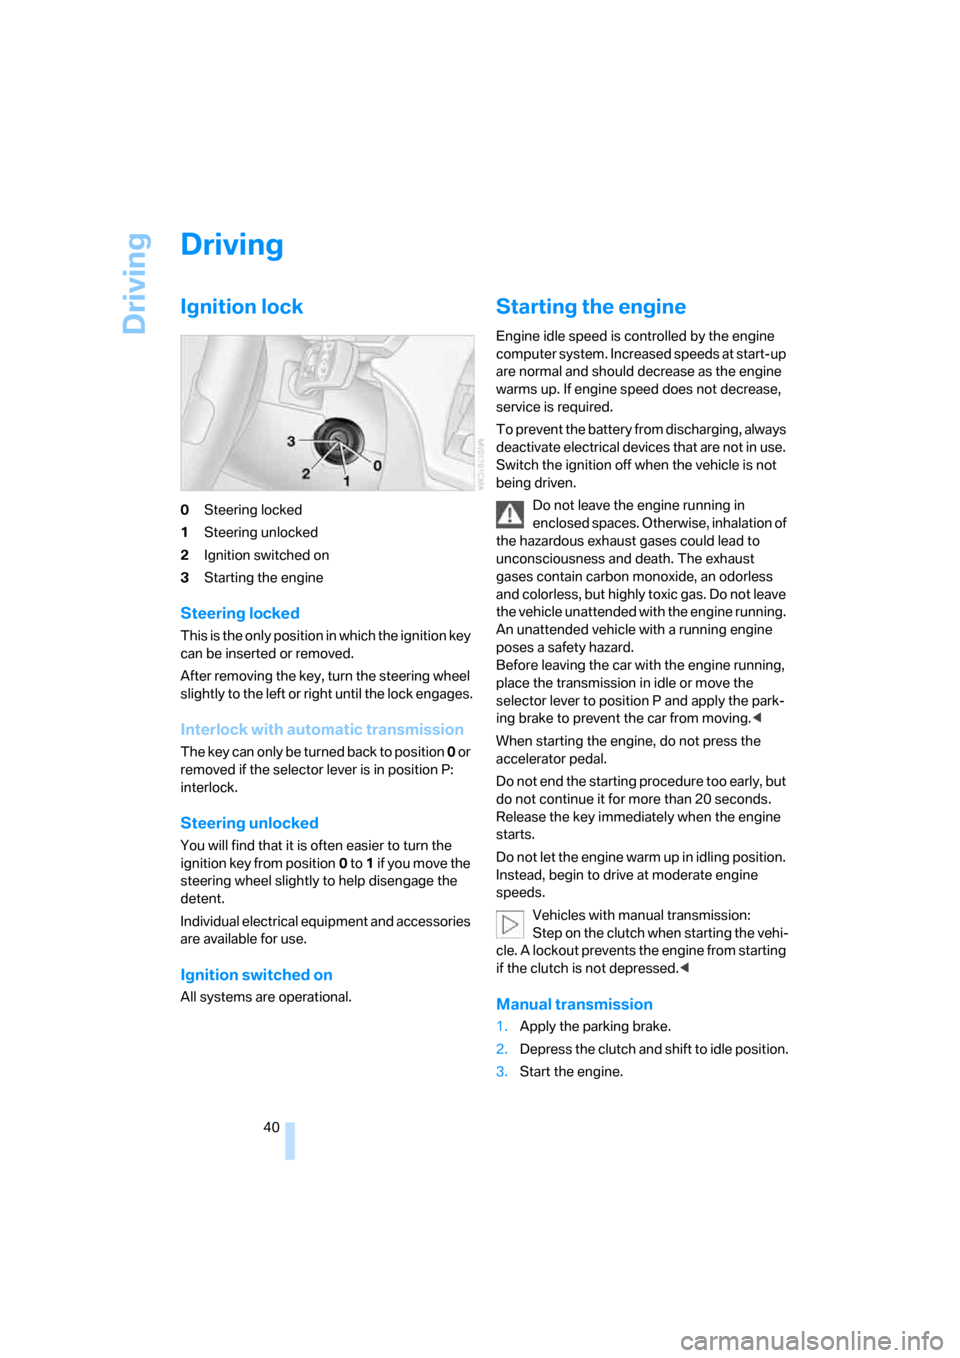
0Steering locked
1Steering unlocked
2Ignition switched on
3Starting the engine
Steering locked
This is the only position in which the ignition key
can be inserted or removed.
After removing the key, turn the steering wheel
slightly to the left or right until the lock engages.
Interlock with automatic transmission
The key can only be turned back to position 0 or
removed if the selector lever is in position P:
interlock.
Steering unlocked
You will find that it is often easier to turn the
ignition key from position0 to 1 if yo u m ove the
steering wheel slightly to help disengage the
detent.
Individual electrical equipment and accessories
are available for use.
Ignition switched on
All systems are operational.
Starting the engine
Engine idle speed is controlled by the engine
computer system. Increased speeds at start-up
are normal and should decrease as the engine
warms up. If engine speed does not decrease,
service is required.
To prevent the battery from discharging, always
deactivate electrical devices that are not in use.
Switch the ignition off when the vehicle is not
being driven.
Do not leave the engine running in
enclosed spaces. Otherwise, inhalation of
the hazardous exhaust gases could lead to
unconsciousness and death. The exhaust
gases contain carbon monoxide, an odorless
and colorless, but highly toxic gas. Do not leave
the vehicle unattended with the engine running.
An unattended vehicle with a running engine
poses a safety hazard.
Before leaving the car with the engine running,
place the transmission in idle or move the
selector lever to position P and apply the park-
ing brake to prevent the car from moving.<
When starting the engine, do not press the
accelerator pedal.
Do not end the starting procedure too early, but
do not continue it for more than 20 seconds.
Release the key immediately when the engine
starts.
Do not let the engine warm up in idling position.
Instead, begin to drive at moderate engine
speeds.
Vehicles with manual transmission:
Step on the clutch when starting the vehi-
cle. A lockout prevents the engine from starting
if the clutch is not depressed.<
Manual transmission
1.Apply the parking brake.
2.Depress the clutch and shift to idle position.
3.Start the engine.
Page 43 of 132
Reference
At a glance
Controls
Driving tips
Mobility
41
Automatic transmission
1.Depress the brake.
2.Start the engine.
Special starting conditions
In the following situations, press the accelerator
pedal halfway down when starting the engine:
>If the engine does not start on the first
attempt, for instance when it is extremely
hot or cold.
>If the engine is started at very low tempera-
tures, below approx. +57/–156, at high
altitudes above approx. 3,300 ft/1,000 m.
Avoid frequent starting attempts in quick
succession or repeated starting attempts
during which the engine does not start. Other-
wise, the fuel is not burned or inadequately
burned; there is a danger of overheating and
damaging the catalytic converter.<
Switching off the engine
Do not remove the key while the vehicle is
still moving. Otherwise, the steering lock
would engage when the steering wheel is
turned.
When you leave the vehicle, always remove the
key and engage the steering lock.
Apply the parking brake when parking on steep
gradients, otherwise the vehicle could start to
roll.<
You can have an acoustic signal set as a
reminder that the key is still in the ignition
switch after the driver's door has been
opened.<
Manual transmission
1.Turn the key to position 1 or 0.
2.Engage first gear or reverse gear.
3.Apply the parking brake.
Automatic transmission
1.With the car at a standstill, move the selec-
tor lever to position P.
2.Turn the key to position 1 or 0.
Parking brake
The parking brake is designed primarily to pre-
vent the vehicle from rolling when parked. It
operates against the rear wheels.
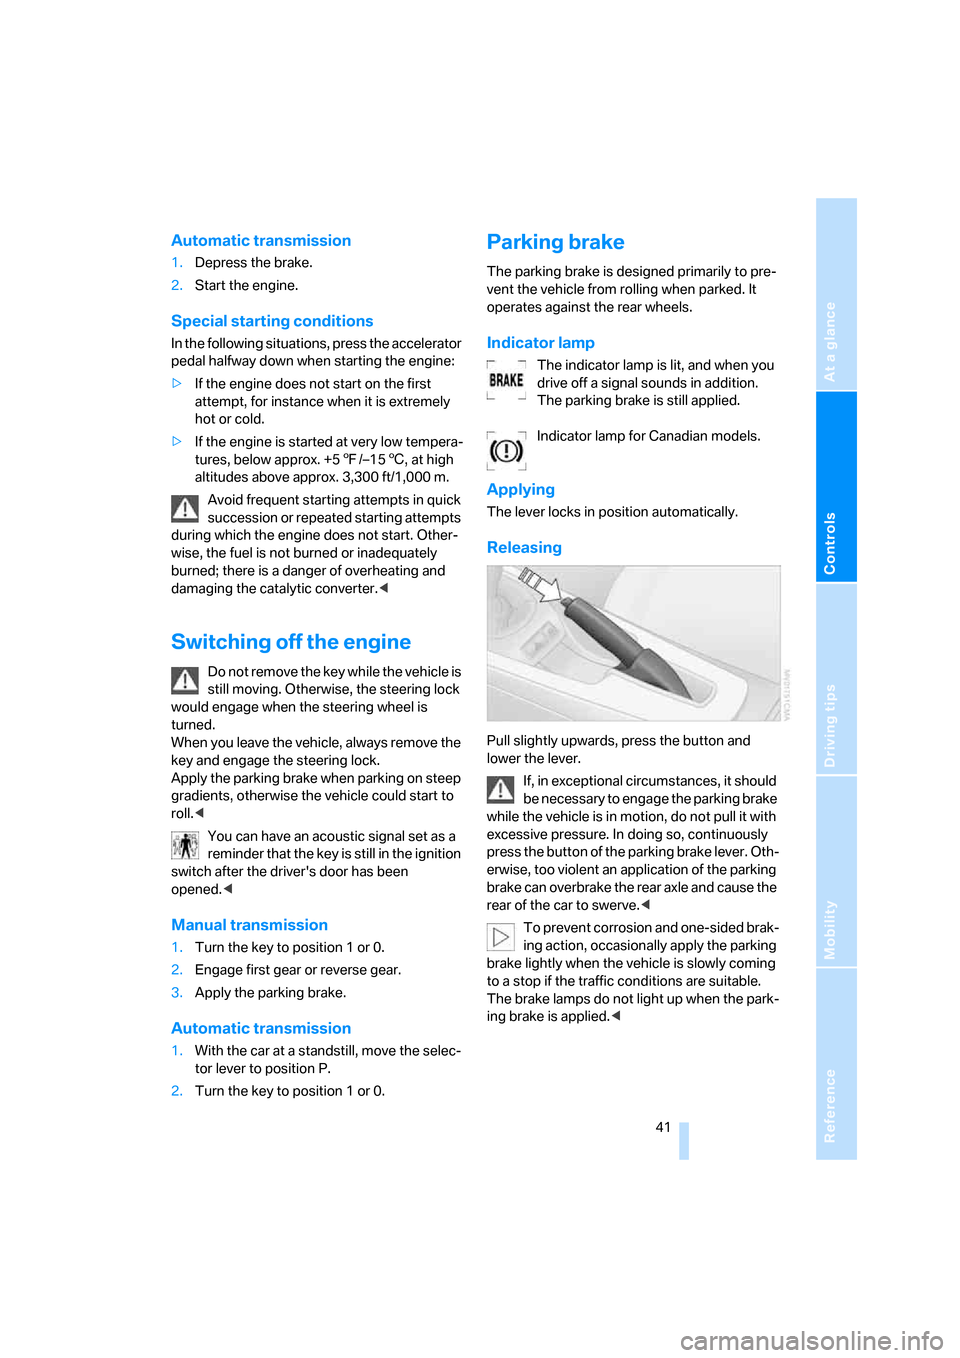
Indicator lamp
The indicator lamp is lit, and when you
drive off a signal sounds in addition.
The parking brake is still applied.
Indicator lamp for Canadian models.
Applying
The lever locks in position automatically.
Releasing
Pull slightly upwards, press the button and
lower the lever.
If, in exceptional circumstances, it should
be necessary to engage the parking brake
while the vehicle is in motion, do not pull it with
excessive pressure. In doing so, continuously
press the button of the parking brake lever. Oth-
erwise, too violent an application of the parking
brake can overbrake the rear axle and cause the
rear of the car to swerve.<
To prevent corrosion and one-sided brak-
ing action, occasionally apply the parking
brake lightly when the vehicle is slowly coming
to a stop if the traffic conditions are suitable.
The brake lamps do not light up when the park-
ing brake is applied.<
Page 44 of 132
Driving
42
Manual transmission
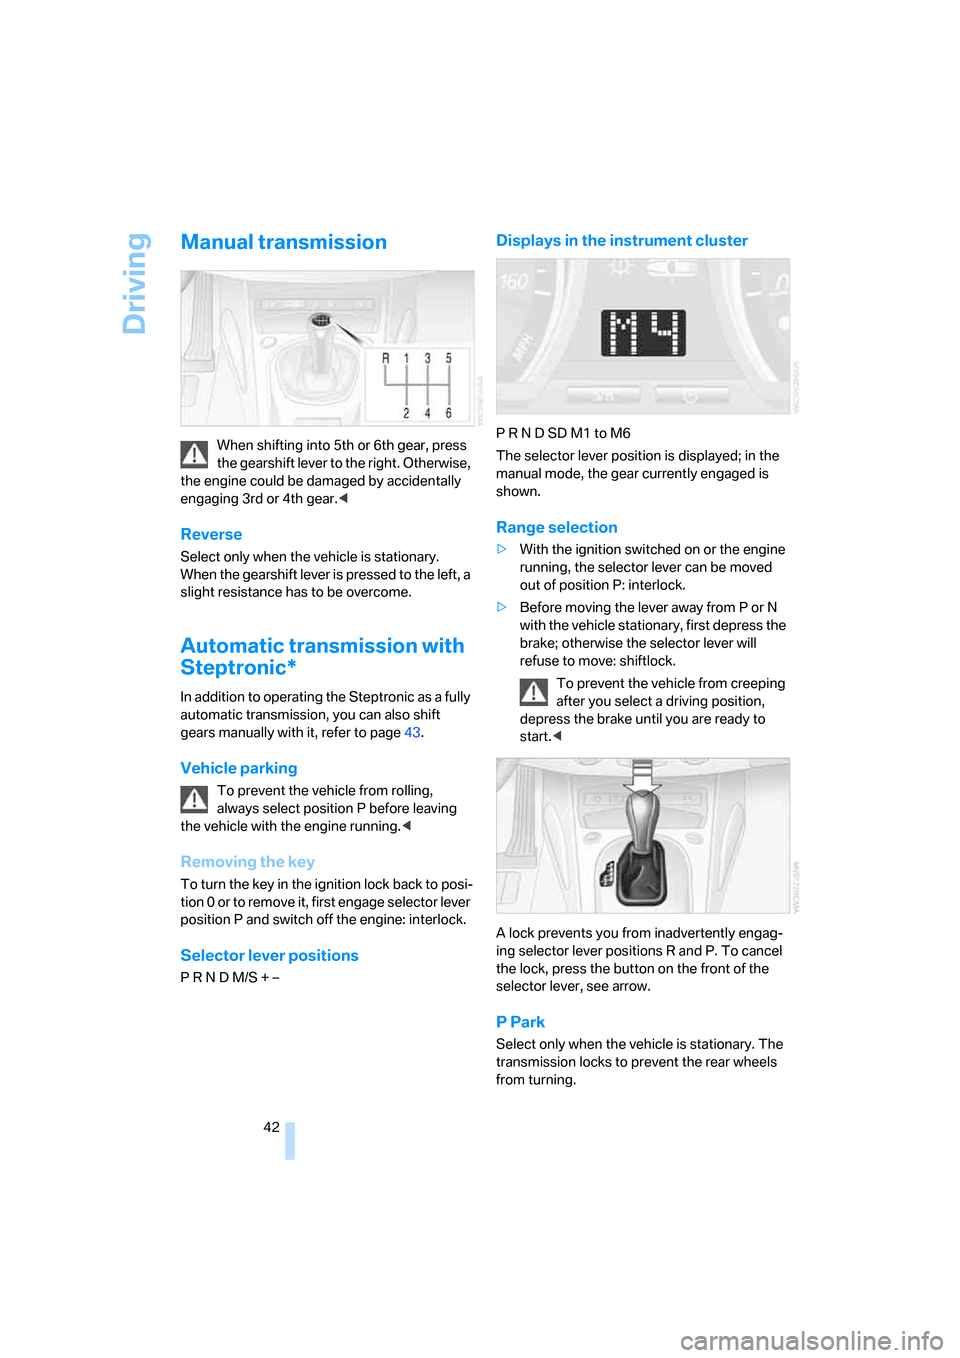
When shifting into 5th or 6th gear, press
the gearshift lever to the right. Otherwise,
the engine could be damaged by accidentally
engaging 3rd or 4th gear.<
Reverse
Select only when the vehicle is stationary.
When the gearshift lever is pressed to the left, a
slight resistance has to be overcome.
Automatic transmission with
Steptronic*
In addition to operating the Steptronic as a fully
automatic transmission, you can also shift
gears manually with it, refer to page43.
Vehicle parking
To prevent the vehicle from rolling,
always select position P before leaving
the vehicle with the engine running.<
Removing the key
To turn the key in the ignition lock back to posi-
tion 0 or to remove it, first engage selector lever
position P and switch off the engine: interlock.
Selector lever positions
P R N D M/S + –
Displays in the instrument cluster
P R N D SD M1 to M6
The selector lever position is displayed; in the
manual mode, the gear currently engaged is
shown.
Range selection
>With the ignition switched on or the engine
running, the selector lever can be moved
out of position P: interlock.
>Before moving the lever away from P or N
with the vehicle stationary, first depress the
brake; otherwise the selector lever will
refuse to move: shiftlock.
To prevent the vehicle from creeping
after you select a driving position,
depress the brake until you are ready to
start.<
A lock prevents you from inadvertently engag-
ing selector lever positions R and P. To cancel
the lock, press the button on the front of the
selector lever, see arrow.
P Park
Select only when the vehicle is stationary. The
transmission locks to prevent the rear wheels
from turning.
Page 53 of 132
Reference
At a glance
Controls
Driving tips
Mobility
51
Technology for driving comfort and safety
Driving stability control
systems
Your BMW is equipped with a s eries of systems
that help maintain driving stability even in
adverse driving situations.
Antilock Brake System ABS
ABS keeps the wheels from locking during
braking. Steering stability is maintained even
during full brake applications. In this way, active
safety is enhanced.
ABS is operational each time the engine is
started. Braking safely, refer to page75.
Electronic brake-force distribution
The system controls brake-force application at
the rear wheels in order to obtain increased sta-
bility in the vehicle's braking response.
Dynamic Brake Control DBC
When you apply the brakes rapidly, this system
automatically produces the maximum braking
force boost and thus helps to achieve the short-
est possible braking distance during full brak-
ing. At the same time, the benefits of the ABS
are also exploited.
As long as you want full braking to continue, do
not reduce pressure on the brake.
Dynamic Stability Control DSC
DSC prevents slip at the drive wheels while
starting off and accelerating the vehicle. DSC
also recognizes unstable vehicle conditions,
such as fishtailing or nose-diving. In these
cases, and subject to physical limits, DSC helps
to keep the vehicle on a steady course by
reducing engine speed and by applying brakes
at individual wheels.
The laws of physics cannot be repealed
even with DSC. It will always be the
driver's responsibility to drive in a manner that
matches road conditions. Therefore, do not limit the additional safety margin by practicing
risky driving.<
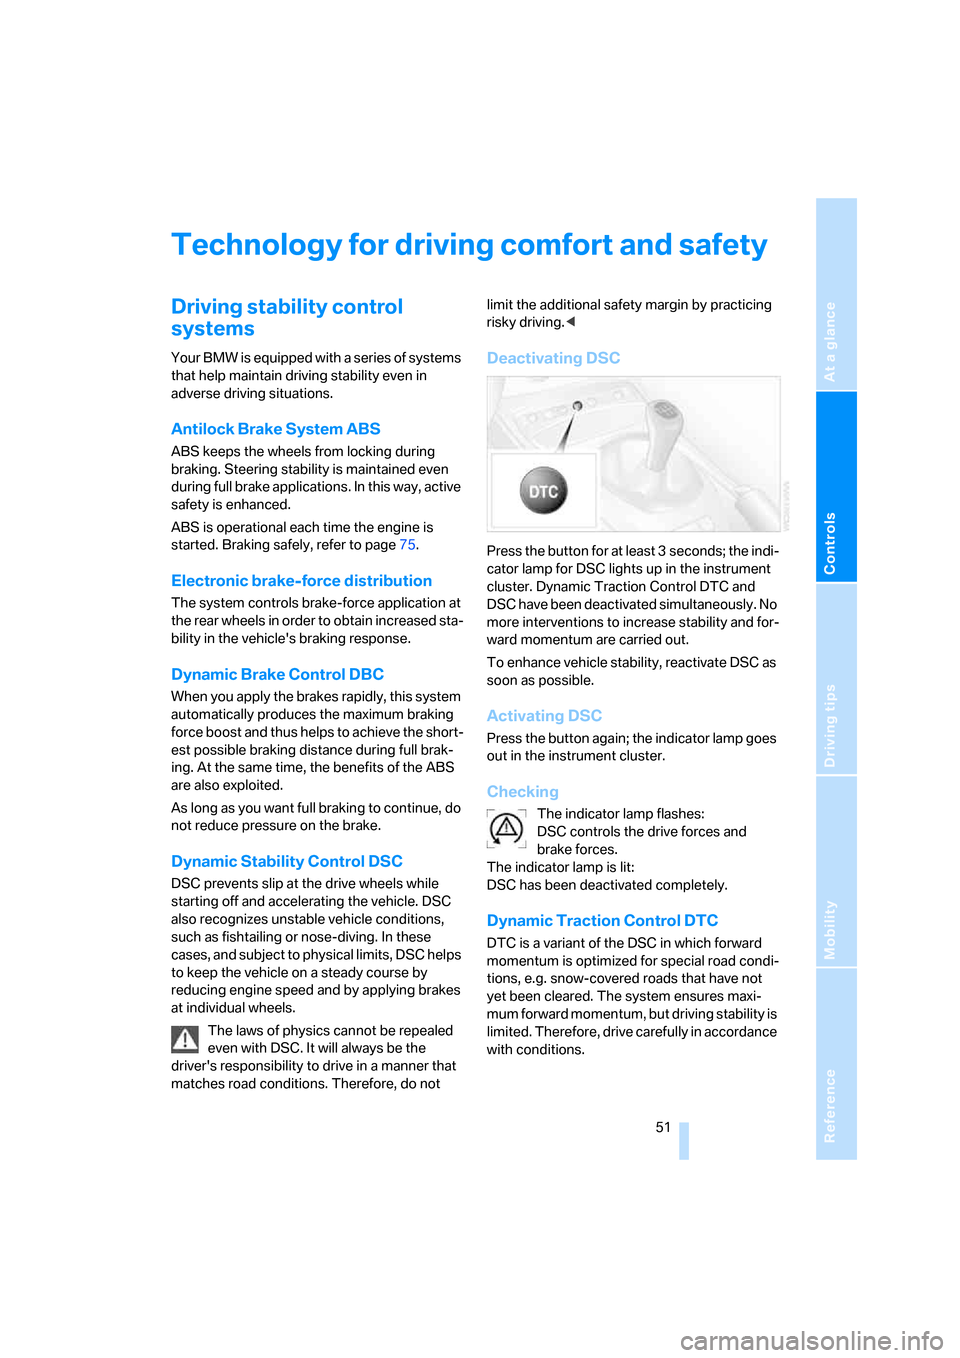
Deactivating DSC
Press the button for at least 3 seconds; the indi-
cator lamp for DSC lights up in the instrument
cluster. Dynamic Traction Control DTC and
DSC have been deactivated simultaneously. No
more interventions to increase stability and for-
ward momentum are carried out.
To enhance vehicle stability, reactivate DSC as
soon as possible.
Activating DSC
Press the button again; the indicator lamp goes
out in the instrument cluster.
Checking
The indicator lamp flashes:
DSC controls the drive forces and
brake forces.
The indicator lamp is lit:
DSC has been deactivated completely.
Dynamic Traction Control DTC
DTC is a variant of the DSC in which forward
momentum is optimized for special road condi-
tions, e.g. snow-covered roads that have not
yet been cleared. The system ensures maxi-
mum forward momentum, but driving stability is
limited. Therefore, drive carefully in accordance
with conditions.
Page 54 of 132
Technology for driving comfort and safety
52 In the following exceptional circumstances, it
may be effective to activate the DTC for a short
period:
>When driving on snow-covered grades, in
slush or on uncleared, snow-covered roads
>When rocking the vehicle or starting off in
deep snow or on loose surfaces
>When driving with snow chains
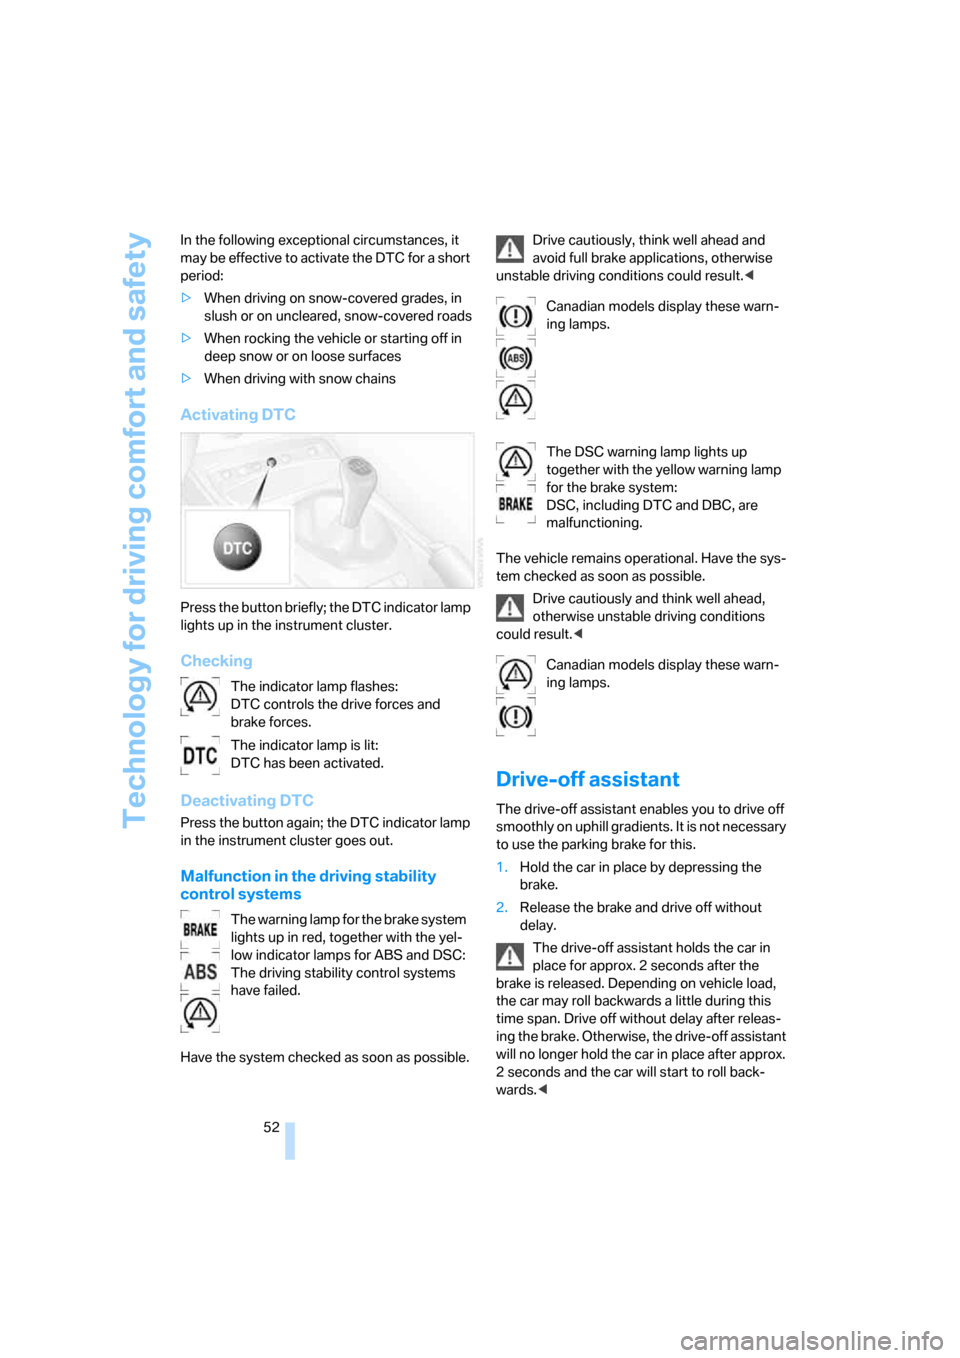
Activating DTC
Press the button briefly; the DTC indicator lamp
lights up in the instrument cluster.
Checking
Deactivating DTC
Press the button again; the DTC indicator lamp
in the instrument cluster goes out.
Malfunction in the driving stability
control systems
Have the system checked as soon as possible.Drive cautiously, think well ahead and
avoid full brake applications, otherwise
unstable driving conditions could result.<
The vehicle remains operational. Have the sys-
tem checked as soon as possible.
Drive cautiously and think well ahead,
otherwise unstable driving conditions
could result.<
Drive-off assistant
The drive-off assistant enables you to drive off
smoothly on uphill gradients. It is not necessary
to use the parking brake for this.
1.Hold the car in place by depressing the
brake.
2.Release the brake and drive off without
delay.
The drive-off assistant holds the car in
place for approx. 2 seconds after the
brake is released. Depending on vehicle load,
the car may roll backwards a little during this
time span. Drive off without delay after releas-
ing the brake. Otherwise, the drive-off assistant
will no longer hold the car in place after approx.
2 seconds and the car will start to roll back-
wards.< The indicator lamp flashes:
DTC controls the drive forces and
brake forces.
The indicator lamp is lit:
DTC has been activated.
The warning lamp for the brake system
lights up in red, together with the yel-
low indicator lamps for ABS and DSC:
The driving stability control systems
have failed.
Canadian models display these warn-
ing lamps.
The DSC warning lamp lights up
together with the yellow warning lamp
for the brake system:
DSC, including DTC and DBC, are
malfunctioning.
Canadian models display these warn-
ing lamps.
Page 55 of 132
Reference
At a glance
Controls
Driving tips
Mobility
53
Malfunction
The warning lamp for the brake system
lights up in yellow. The drive-off assis-
tant has failed. The car will not be held
in place after the brake is released. Have the
system checked as soon as possible.
Flat Tire Monitor FTM*
The concept
The Flat Tire Monitor monitors tire pressures
while the car is being driven. The system
reports any significant loss of pressure in one
tire in relation to another.
In the event of tire pressure loss, the rolling
radius of the tire changes, thereby affecting the
rotational speed of the wheels. This change is
detected, and a flat tire warning is issued to the
driver.
System requirements
To ensure a reliable flat tire warning, the system
must be initialized with the correct tire inflation
pressures.
The system must be reinitialized each
time a tire inflation pressure has been cor-
rected or a wheel or tire has been changed.<
System limitations
The Flat Tire Monitor is unable to warn
the driver of sudden, severe tire damage
caused by external factors, nor can it identify
the gradual loss of pressure that will inevitably
occur in all four tires over a lengthy period of
time.<
The system could issue a false warning or func-
tion in a delayed manner in the following situa-
tions:
>System was not initialized
>Driving on a snow-covered or slippery road
surface
>Performance-oriented driving: slip at the
drive wheels, high levels of lateral accelera-
tion
>Driving with snow chains attached
Initializing the system
The initialization is completed while you
are driving, and can be interrupted at any
time. Initialization is continued automatically
when you continue driving.
When driving with snow chains, do not initialize
the system.<
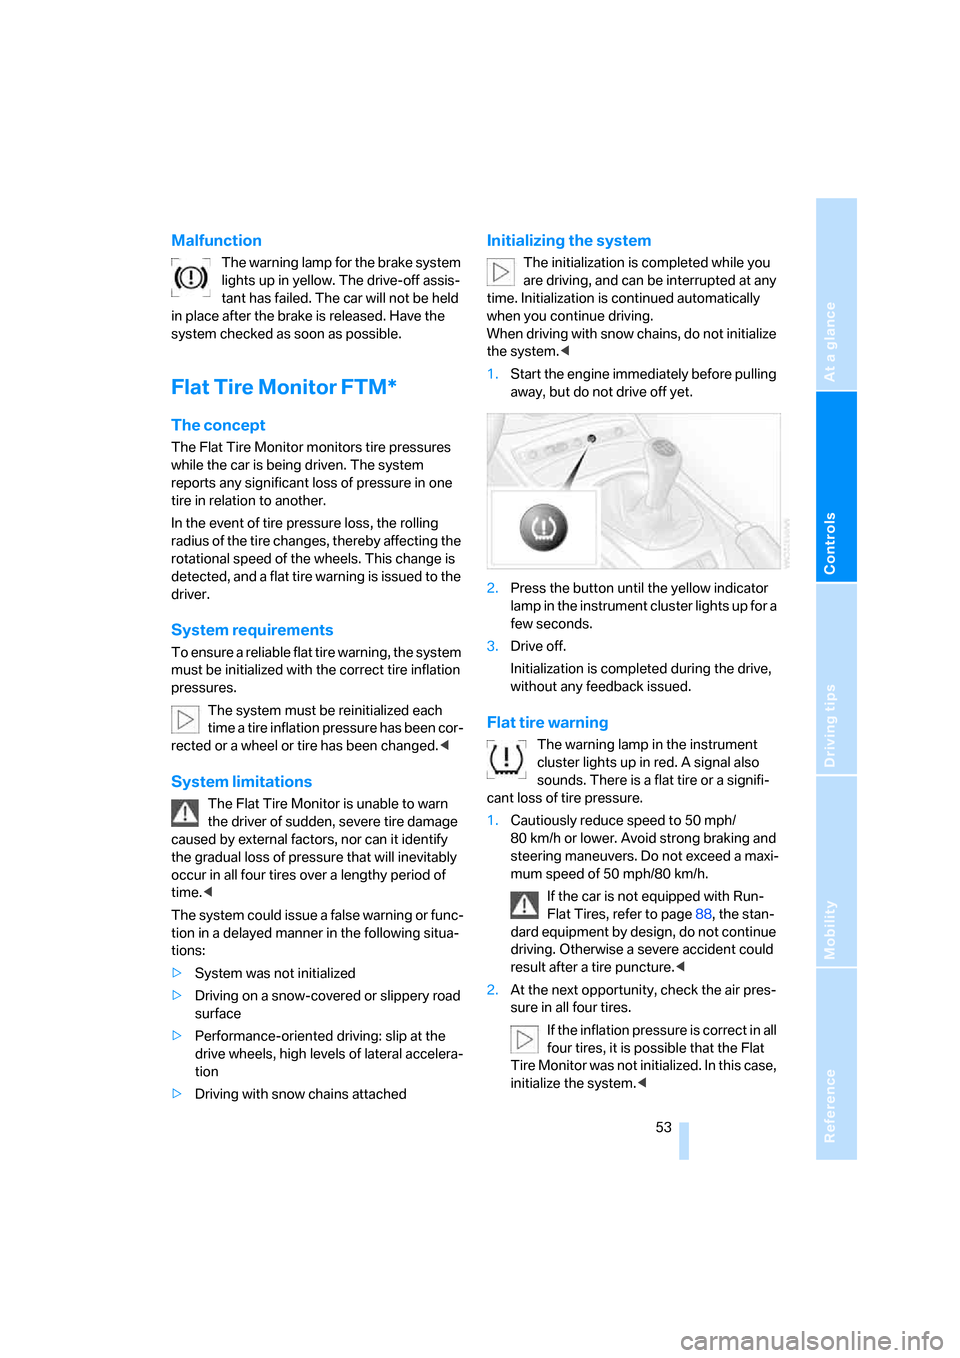
1.Start the engine immediately before pulling
away, but do not drive off yet.
2.Press the button until the yellow indicator
lamp in the instrument cluster lights up for a
few seconds.
3.Drive off.
Initialization is completed during the drive,
without any feedback issued.
Flat tire warning
The warning lamp in the instrument
cluster lights up in red. A signal also
sounds. There is a flat tire or a signifi-
cant loss of tire pressure.
1.Cautiously reduce speed to 50 mph/
80 km/h or lower. Avoid strong braking and
steering maneuvers. Do not exceed a maxi-
mum speed of 50 mph/80 km/h.
If the car is not equipped with Run-
Flat Tires, refer to page88, the stan-
dard equipment by design, do not continue
driving. Otherwise a severe accident could
result after a tire puncture.<
2.At the next opportunity, check the air pres-
sure in all four tires.
If the inflation pressure is correct in all
four tires, it is possible that the Flat
Tire Monitor was not initialized. In this case,
initialize the system.<
Page 77 of 132
Reference
At a glance
Controls
Driving tips
Mobility
75
cannot be ruled out that vehicle electronics and
the mobile communications device interfere
with one another. In addition, it is not ensured
that the radio waves emitted during transmis-
sion are directed outside of the vehicle inte-
rior.<
Hydroplaning
When driving on wet or slushy roads,
reduce vehicle speed. If you do not, a
wedge of water may form between the tires and
the road surface. This situation, known as
hydroplaning, means that the tire can com-
pletely lose contact with the road surface, so
that neither the car can be steered nor the brake
be properly applied.<
The risk of hydroplaning increases with declin-
ing tread depth on the tires, refer also to Mini-
mum tread depth on page87.
Driving through water
Drive through water on the road only if it is
not deeper than 1 ft/30 cm, and then only
at walking speed at the most. Otherwise, the
vehicle's engine, the electrical systems and the
transmission may be damaged.<
Moisture inside the vehicle
Make sure that the passenger compart-
ment does not become wet and that liq-
uids are transported in closed containers.
Otherwise, moisture could penetrate and dam-
age electronic components inside the vehicle.<
Use the parking brake on inclines
On inclines, keep the vehicle from rolling
by using the parking brake rather than by
slipping the clutch, which would lead to a high
degree of clutch wear.<
Braking safely
Your BMW is equipped with ABS as a standard
feature. Applying the brakes fully is the most
effective way of braking in situations in which
this is necessary. Since the vehicle maintains
steering responsiveness, you can still avoid possible obstacles with a minimum of steering
effort.
Pulsation at the brake pedal combines with
sounds from the hydraulic circuits to indicate to
the driver that ABS is in its active mode.
Wet roads
When roads are wet or there is heavy rain,
briefly exert gentle pressure on the brake pedal
every few miles. Watch traffic conditions to
ensure that this maneuver does not endanger
other road users. The resulting heat dries the
brake rotors and brake pads. Immediate braking
force is then available if necessary.
Inclines
To prevent overheating and, as a result,
diminished braking effectiveness, drive
down long or steep downhill grades in the gear
that requires the least braking. Otherwise, even
light but consistent pedal pressure can lead to
high temperatures, brake wear and possibly
even brake failure.<
You can increase the engine's braking effect by
shifting down, all the way to first gear if neces-
sary. This strategy helps you avoid placing
excessive loads on the brake system. Down-
shifting in manual mode of the automatic trans-
mission, refer to page43.
Never drive with the clutch held down,
with the transmission in idle or with the
engine switched off; otherwise, engine braking
action will not be present or there will be no
power assistance to the brakes or steering.
Never allow floor mats, carpets or any other
objects to protrude into the area around the
pedals, otherwise pedal function could be
impaired.<
Corrosion on the brake rotors
Limited vehicle use, extended periods with the
vehicle parked or in storage, and operating con-
ditions in which braking is restricted to gentle,
low-pressure applications will all increase the
tendency for corrosion to form on the rotors and
contamination to accumulate on the brake
pads. This occurs because the minimal pres-
Page 78 of 132
Special operating instructions
76 sure which must be exerted by the pads to
clean the rotors by brake applications is not
reached.
If the brake rotors are corroded, they will tend to
respond to braking with a pulsating effect which
even extended application will fail to cure.
Brake pads
The warning lamp lights up. The brake
pads have worn down to the minimum
safe limit. Have the brake pads
replaced as soon as possible.
When the vehicle is parked
Condensation forms while the air conditioning
or automatic climate control is in operation, and
then exits under the vehicle. Traces of con-
densed water on the ground underneath the
vehicle are thus normal.
Before driving into a car wash
For general information about taking care of
your BMW, refer to the Caring for your vehicle
brochure.
Cargo loading
Avoid overloading the vehicle so that the
permissible carrying capacity of the tires
is not exceeded. Otherwise, overheating and
inner damage to the tires may result. The ulti-
mate result can assume the form of a sudden air
loss.<
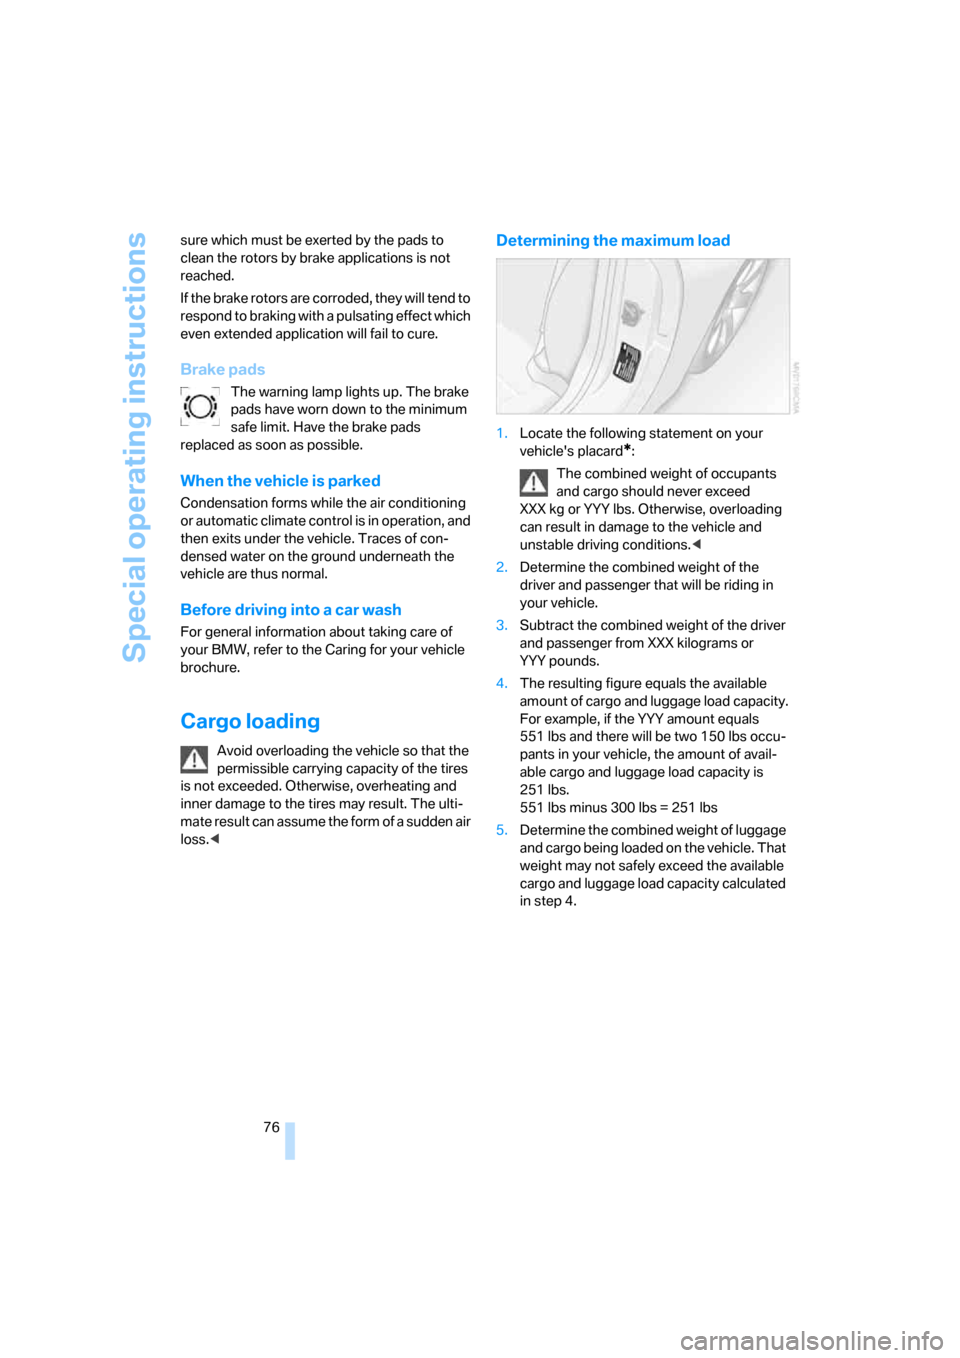
Determining the maximum load
1.Locate the following statement on your
vehicle's placard
*:
The combined weight of occupants
and cargo should never exceed
XXX kg or YYY lbs. Otherwise, overloading
can result in damage to the vehicle and
unstable driving conditions.<
2.Determine the combined weight of the
driver and passenger that will be riding in
your vehicle.
3.Subtract the combined weight of the driver
and passenger from XXX kilograms or
YYY pounds.
4.The resulting figure equals the available
amount of cargo and luggage load capacity.
For example, if the YYY amount equals
551 lbs and there will be two 150 lbs occu-
pants in your vehicle, the amount of avail-
able cargo and luggage load capacity is
251 lbs.
551 lbs minus 300 lbs = 251 lbs
5.Determine the combined weight of luggage
and cargo being loaded on the vehicle. That
weight may not safely exceed the available
cargo and luggage load capacity calculated
in step 4.