stop start BMW Z4 3.0SI ROADSTER 2007 E85 Owner's Manual
[x] Cancel search | Manufacturer: BMW, Model Year: 2007, Model line: Z4 3.0SI ROADSTER, Model: BMW Z4 3.0SI ROADSTER 2007 E85Pages: 132, PDF Size: 3.14 MB
Page 30 of 132
Opening and closing
28 for more than 2 seconds after the LED has gone
out.<
When the convertible top has been stored
in the convertible top compartment for an
extended period of time, e.g. in the winter
months because the hardtop was being used,
you may have to support the convertible top by
hand when closing it for the first time. If the con-
vertible top stops right before the closing phase
is completed, press against the front part of the
convertible top frame from the outside to help
the closing process along. Keep pressing the
button while doing so until the top starts mov-
ing on its own again.<
Indicator lamps
>The red LED in the button is lit while the
convertible top is in motion. It goes out as
soon as the opening or closing operation
has been completed.
>If the red LED in the button flashes after the
button has been released, then the opening
or closing operation has not yet been com-
pleted.
The movement can be continued in the
desired direction by pressing this button.
>If the yellow LED in the button comes on
when the button is pressed, the convertible
top compartment panel in the cargo bay has
been folded up. The convertible top cannot
be moved.
Interruption
The automatic sequence will be interrupted
immediately if you release the button that oper-
ates the top. The sequence can be continued in
the desired direction by pressing this button.
Do not close the side windows using the
power window buttons before the closing
procedure has been completed. Otherwise the
side windows may not close properly against
the rubber seal of the convertible top.<
Convenience operation
Remote control
Refer to page19.
Driver's door
Refer to page20.
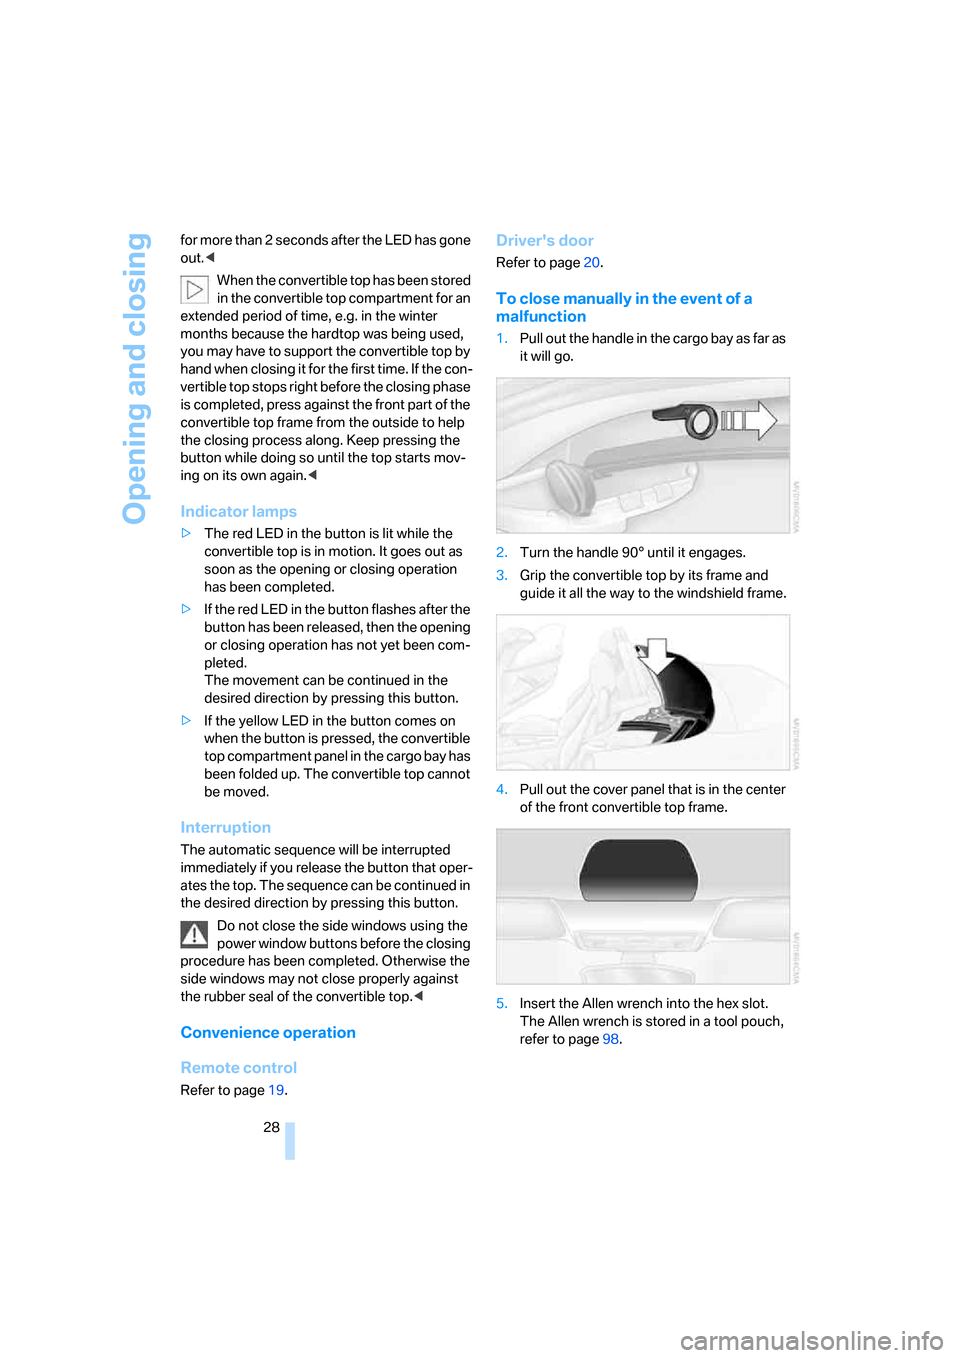
To close manually in the event of a
malfunction
1.Pull out the handle in the cargo bay as far as
it will go.
2.Turn the handle 90° until it engages.
3.Grip the convertible top by its frame and
guide it all the way to the windshield frame.
4.Pull out the cover panel that is in the center
of the front convertible top frame.
5.Insert the Allen wrench into the hex slot.
The Allen wrench is stored in a tool pouch,
refer to page98.
Page 43 of 132
Reference
At a glance
Controls
Driving tips
Mobility
41
Automatic transmission
1.Depress the brake.
2.Start the engine.
Special starting conditions
In the following situations, press the accelerator
pedal halfway down when starting the engine:
>If the engine does not start on the first
attempt, for instance when it is extremely
hot or cold.
>If the engine is started at very low tempera-
tures, below approx. +57/–156, at high
altitudes above approx. 3,300 ft/1,000 m.
Avoid frequent starting attempts in quick
succession or repeated starting attempts
during which the engine does not start. Other-
wise, the fuel is not burned or inadequately
burned; there is a danger of overheating and
damaging the catalytic converter.<
Switching off the engine
Do not remove the key while the vehicle is
still moving. Otherwise, the steering lock
would engage when the steering wheel is
turned.
When you leave the vehicle, always remove the
key and engage the steering lock.
Apply the parking brake when parking on steep
gradients, otherwise the vehicle could start to
roll.<
You can have an acoustic signal set as a
reminder that the key is still in the ignition
switch after the driver's door has been
opened.<
Manual transmission
1.Turn the key to position 1 or 0.
2.Engage first gear or reverse gear.
3.Apply the parking brake.
Automatic transmission
1.With the car at a standstill, move the selec-
tor lever to position P.
2.Turn the key to position 1 or 0.
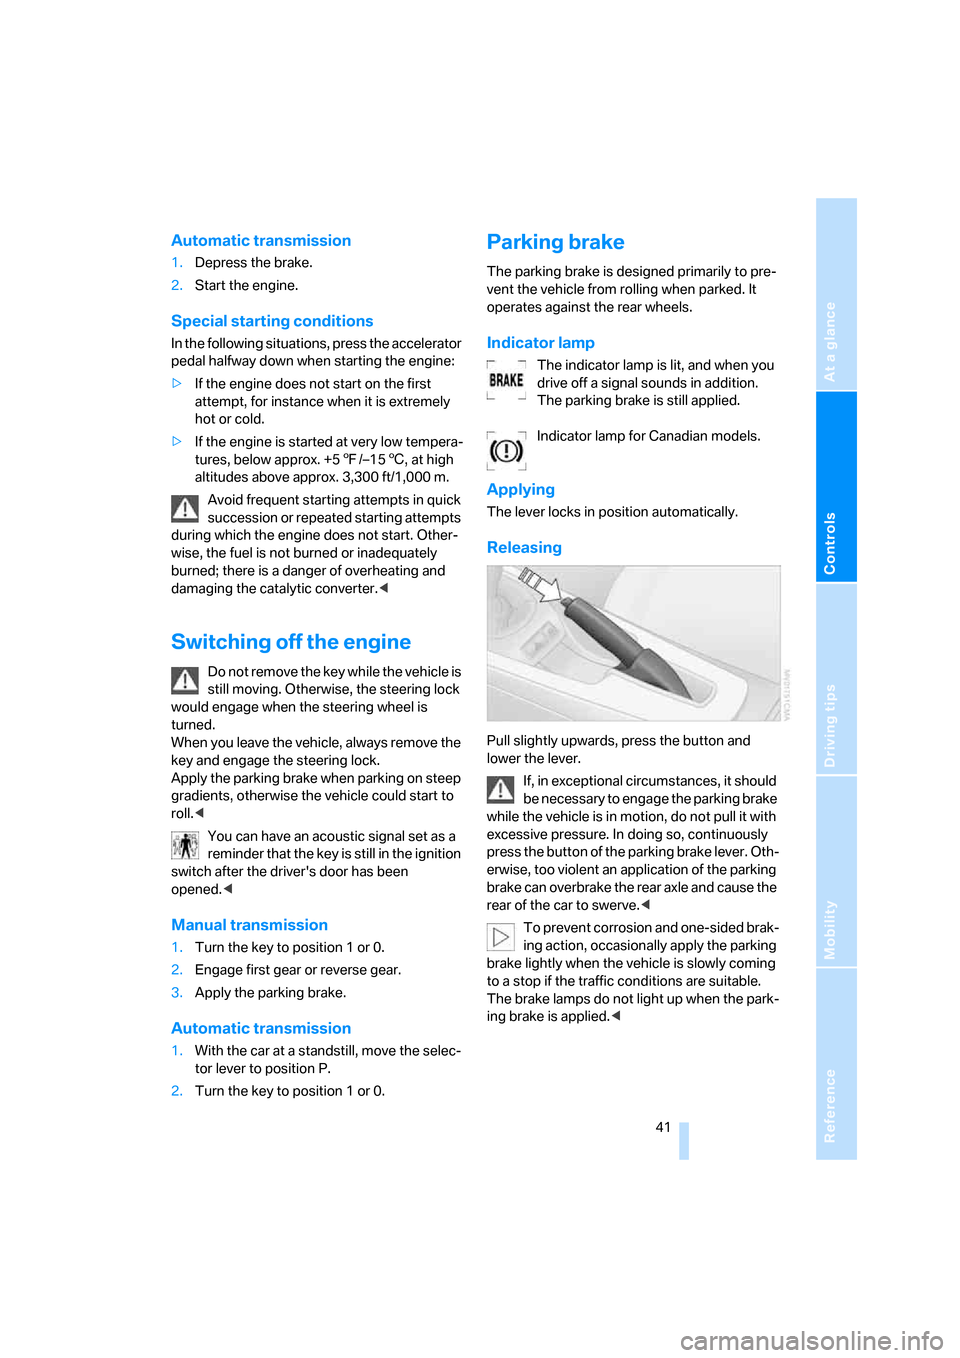
Parking brake
The parking brake is designed primarily to pre-
vent the vehicle from rolling when parked. It
operates against the rear wheels.
Indicator lamp
The indicator lamp is lit, and when you
drive off a signal sounds in addition.
The parking brake is still applied.
Indicator lamp for Canadian models.
Applying
The lever locks in position automatically.
Releasing
Pull slightly upwards, press the button and
lower the lever.
If, in exceptional circumstances, it should
be necessary to engage the parking brake
while the vehicle is in motion, do not pull it with
excessive pressure. In doing so, continuously
press the button of the parking brake lever. Oth-
erwise, too violent an application of the parking
brake can overbrake the rear axle and cause the
rear of the car to swerve.<
To prevent corrosion and one-sided brak-
ing action, occasionally apply the parking
brake lightly when the vehicle is slowly coming
to a stop if the traffic conditions are suitable.
The brake lamps do not light up when the park-
ing brake is applied.<
Page 51 of 132
Reference
At a glance
Controls
Driving tips
Mobility
49
Reserve
Once the fuel level has fallen to the reserve
zone of approx. 2.1 US gallons/8 liters, indicator
lamp 1 lights up continuously.
Do not drive until the fuel tank is empty
and refill it well in advance. Otherwise the
engine may not operate properly and damage
could result.<
When you switch on the ignition, the indicator
lamp comes on briefly to indicate an operational
check.
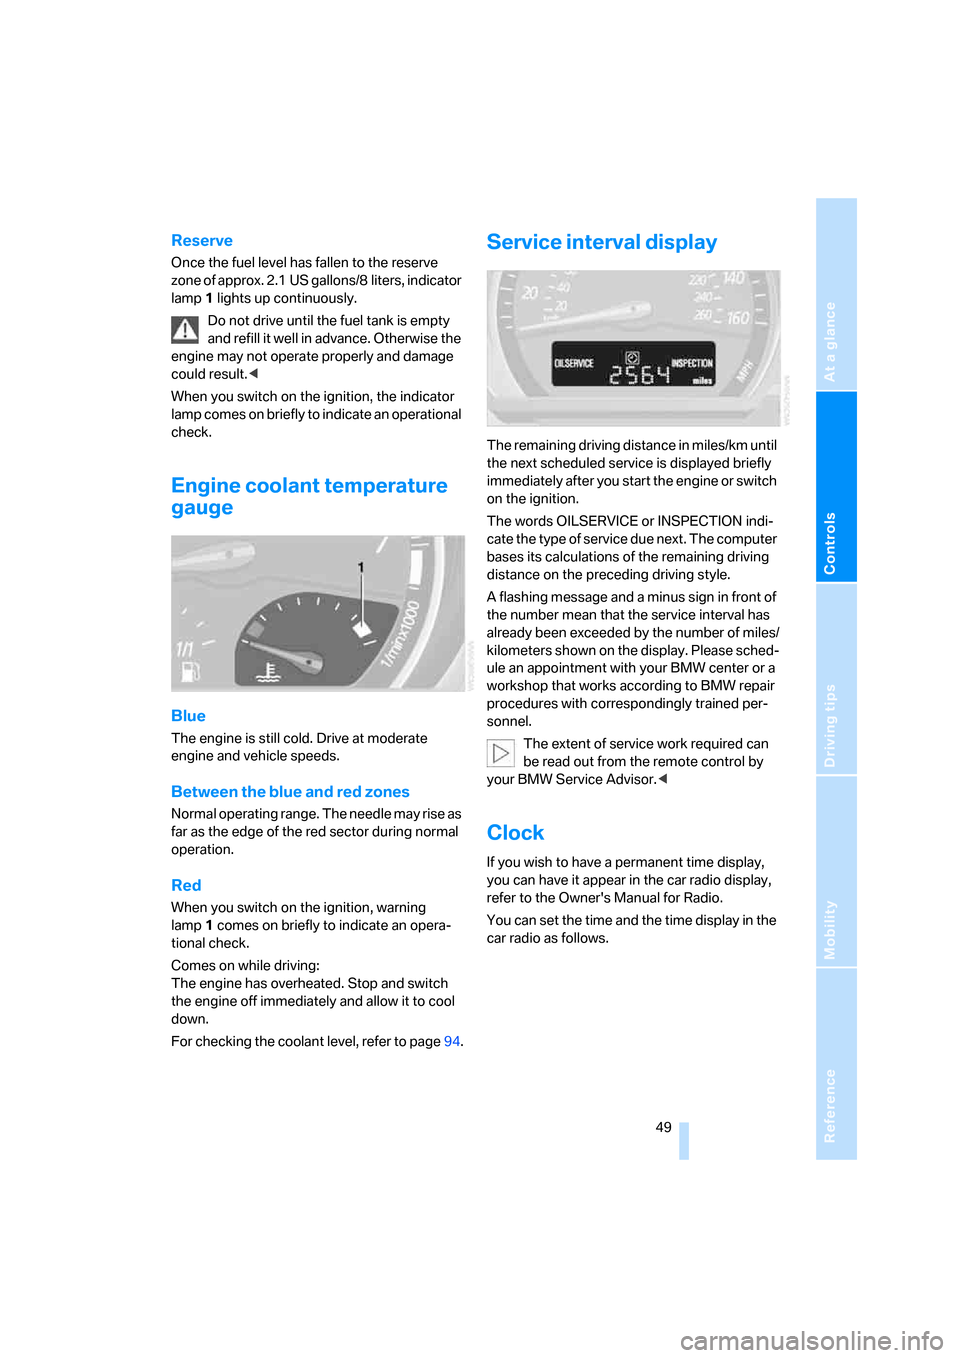
Engine coolant temperature
gauge
Blue
The engine is still cold. Drive at moderate
engine and vehicle speeds.
Between the blue and red zones
Normal operating range. The needle may rise as
far as the edge of the red sector during normal
operation.
Red
When you switch on the ignition, warning
lamp1 comes on briefly to indicate an opera-
tional check.
Comes on while driving:
The engine has overheated. Stop and switch
the engine off immediately and allow it to cool
down.
For checking the coolant level, refer to page94.
Service interval display
The remaining driving distance in miles/km until
the next scheduled service is displayed briefly
immediately after you start the engine or switch
on the ignition.
The words OILSERVICE or INSPECTION indi-
cate the type of service due next. The computer
bases its calculations of the remaining driving
distance on the preceding driving style.
A flashing message and a minus sign in front of
the number mean that the service interval has
already been exceeded by the number of miles/
kilometers shown on the display. Please sched-
ule an appointment with your BMW center or a
workshop that works according to BMW repair
procedures with correspondingly trained per-
sonnel.
The extent of service work required can
be read out from the remote control by
your BMW Service Advisor.<
Clock
If you wish to have a permanent time display,
you can have it appear in the car radio display,
refer to the Owner's Manual for Radio.
You can set the time and the time display in the
car radio as follows.
Page 94 of 132
Under the hood
92
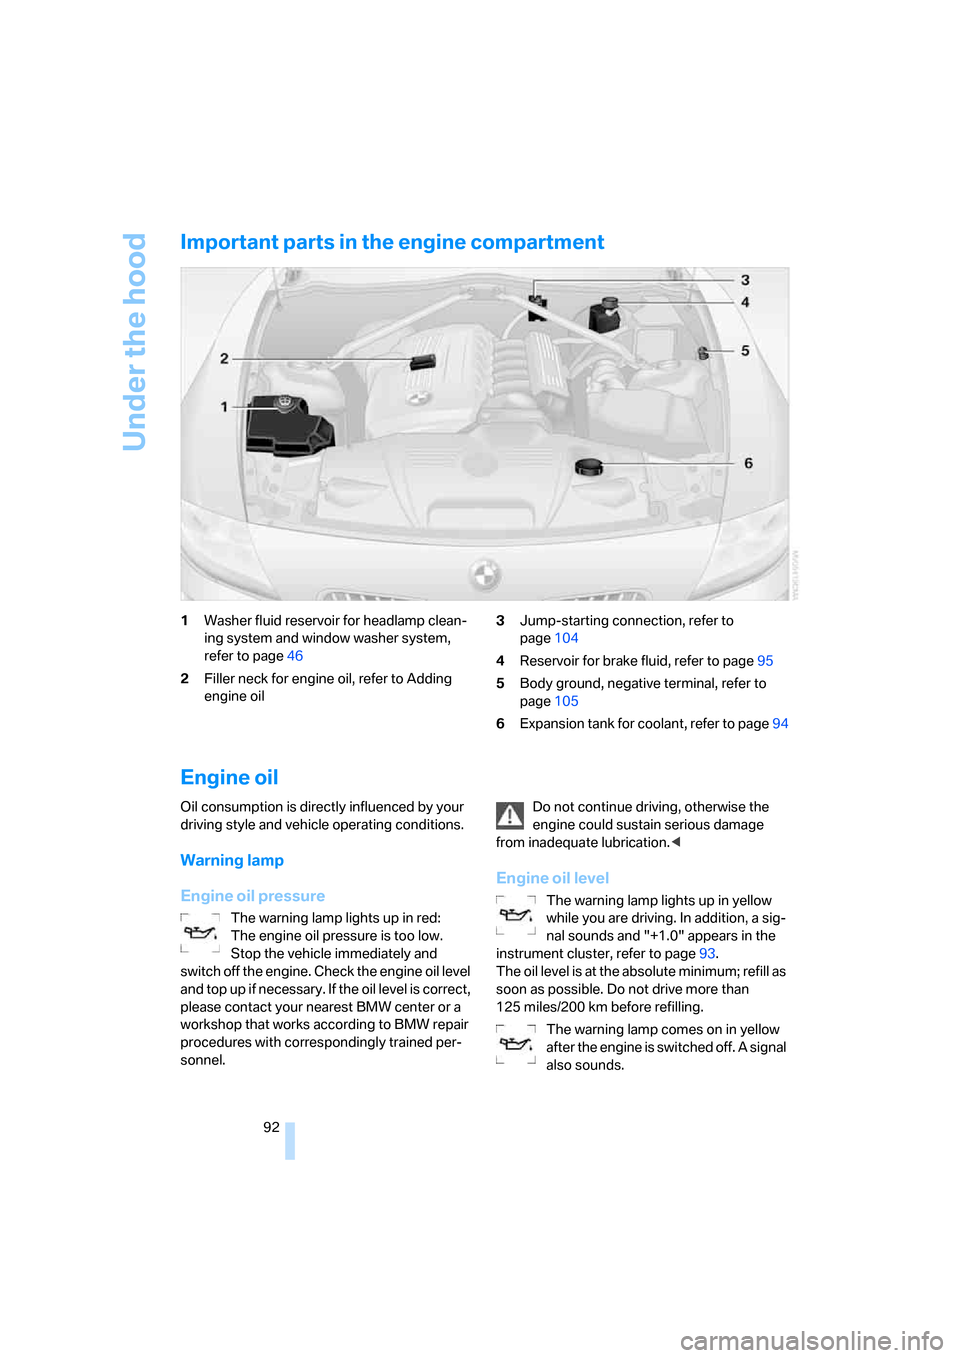
Important parts in the engine compartment
1Washer fluid reservoir for headlamp clean-
ing system and window washer system,
refer to page46
2Filler neck for engine oil, refer to Adding
engine oil3Jump-starting connection, refer to
page104
4Reservoir for brake fluid, refer to page95
5Body ground, negative terminal, refer to
page105
6Expansion tank for coolant, refer to page94
Engine oil
Oil consumption is directly influenced by your
driving style and vehicle operating conditions.
Warning lamp
Engine oil pressure
The warning lamp lights up in red:
The engine oil pressure is too low.
Stop the vehicle immediately and
switch off the engine. Check the engine oil level
and top up if necessary. If the oil level is correct,
please contact your nearest BMW center or a
workshop that works according to BMW repair
procedures with correspondingly trained per-
sonnel.Do not continue driving, otherwise the
engine could sustain serious damage
from inadequate lubrication.<
Engine oil level
The warning lamp lights up in yellow
while you are driving. In addition, a sig-
nal sounds and "+1.0" appears in the
instrument cluster, refer to page93.
The oil level is at the absolute minimum; refill as
soon as possible. Do not drive more than
125 miles/200 km before refilling.
The warning lamp comes on in yellow
after the engine is switched off. A signal
also sounds.
Page 95 of 132
Reference
At a glance
Controls
Driving tips
Mobility
93
Add engine oil at the earliest opportunity, e.g.
when you stop to refuel.
The warning lamp lights up in yellow
within 30 seconds after the engine is
started: the oil level sensor is defective.
It is not possible to issue a current or accurate
measurement. Have the system checked as
soon as possible.
Checking the oil level
Your car is equipped with an electronic oil-level
monitor.
For a precise measurement and display of the
oil level, it is necessary that the engine be at
operating temperature, i.e. after uninterrupted
driving for at least approx. 6.5 miles/10 km. You
can have the oil level displayed while you are
driving, or while the vehicle is at a standstill on a
level surface and the engine is running.
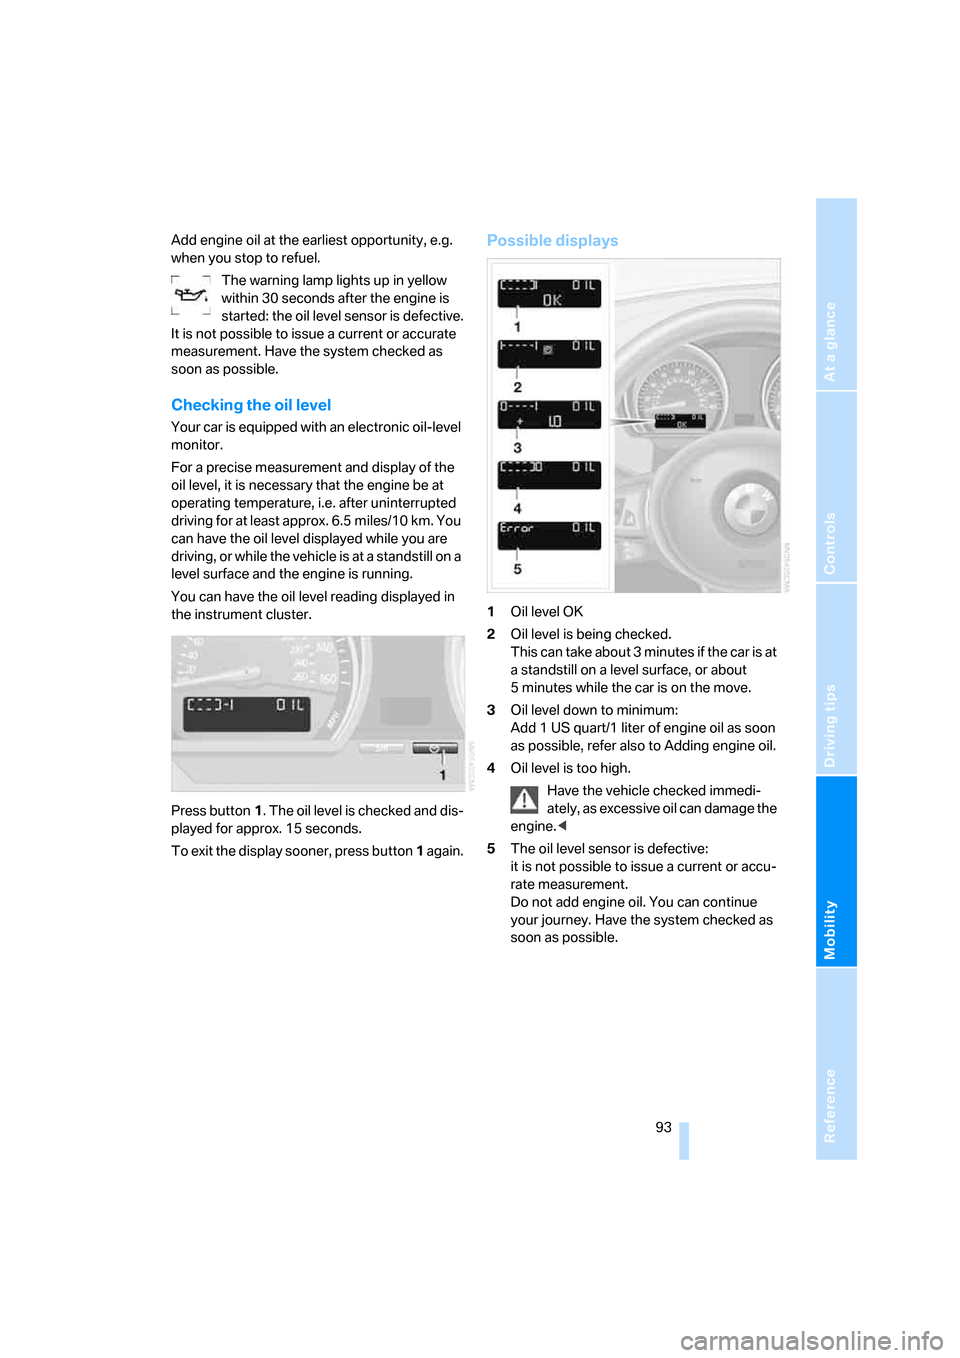
You can have the oil level reading displayed in
the instrument cluster.
Press button1. The oil level is checked and dis-
played for approx. 15 seconds.
To exit the display sooner, press button 1 again.
Possible displays
1Oil level OK
2Oil level is being checked.
This can take about 3 minutes if the car is at
a standstill on a level surface, or about
5 minutes while the car is on the move.
3Oil level down to minimum:
Add 1 US quart/1 liter of engine oil as soon
as possible, refer also to Adding engine oil.
4Oil level is too high.
Have the vehicle checked immedi-
ately, as excessive oil can damage the
engine.<
5The oil level sensor is defective:
it is not possible to issue a current or accu-
rate measurement.
Do not add engine oil. You can continue
your journey. Have the system checked as
soon as possible.
Page 107 of 132
Reference
At a glance
Controls
Driving tips
Mobility
105
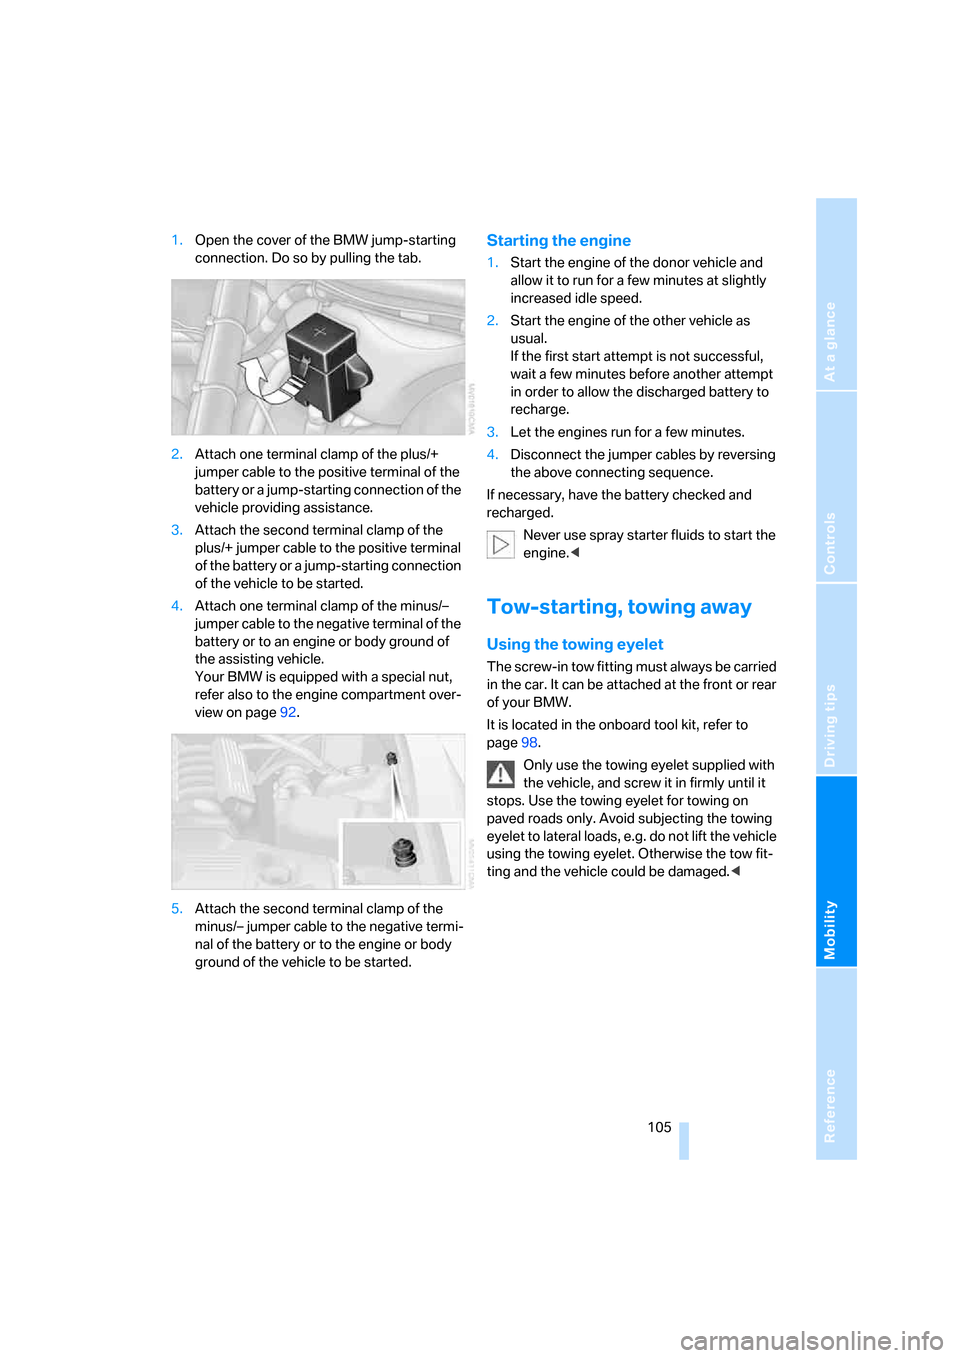
1.Open the cover of the BMW jump-starting
connection. Do so by pulling the tab.
2.Attach one terminal clamp of the plus/+
jumper cable to the positive terminal of the
battery or a jump-starting connection of the
vehicle providing assistance.
3.Attach the second terminal clamp of the
plus/+ jumper cable to the positive terminal
of the battery or a jump-starting connection
of the vehicle to be started.
4.Attach one terminal clamp of the minus/–
jumper cable to the negative terminal of the
battery or to an engine or body ground of
the assisting vehicle.
Your BMW is equipped with a special nut,
refer also to the engine compartment over-
view on page92.
5.Attach the second terminal clamp of the
minus/– jumper cable to the negative termi-
nal of the battery or to the engine or body
ground of the vehicle to be started.Starting the engine
1.Start the engine of the donor vehicle and
allow it to run for a few minutes at slightly
increased idle speed.
2.Start the engine of the other vehicle as
usual.
If the first start attempt is not successful,
wait a few minutes before another attempt
in order to allow the discharged battery to
recharge.
3.Let the engines run for a few minutes.
4.Disconnect the jumper cables by reversing
the above connecting sequence.
If necessary, have the battery checked and
recharged.
Never use spray starter fluids to start the
engine.<
Tow-starting, towing away
Using the towing eyelet
The screw-in tow fitting must always be carried
in the car. It can be attached at the front or rear
of your BMW.
It is located in the onboard tool kit, refer to
page98.
Only use the towing eyelet supplied with
the vehicle, and screw it in firmly until it
stops. Use the towing eyelet for towing on
paved roads only. Avoid subjecting the towing
eyelet to lateral loads, e.g. do not lift the vehicle
using the towing eyelet. Otherwise the tow fit-
ting and the vehicle could be damaged.<
Page 109 of 132
Reference
At a glance
Controls
Driving tips
Mobility
107
engine is cold. It is recommended to start the
engine using jumper cables, refer to
page104.<
1.Switch on hazard warning flashers, comply
with local regulations.
2.Turn the key to position 2.
3.Shift into 3rd gear.
4.Have the vehicle tow-started with the clutch
depressed and slowly release the clutch.
After the engine starts, immediately
depress the clutch again.
5.Stop at a suitable location, remove the tow
bar or rope and switch off the hazard warn-
ing flashers.
6.Have the vehicle checked.