steering BMW Z4 SDRIVE28I 2013 Owners Manual
[x] Cancel search | Manufacturer: BMW, Model Year: 2013, Model line: Z4 SDRIVE28I, Model: BMW Z4 SDRIVE28I 2013Pages: 220, PDF Size: 9.9 MB
Page 12 of 220
CockpitVehicle equipment
This chapter describes all series equipment as
well as country-specific and special equipment
offered for this model series.Therefore, it alsodescribes equipment that may not be found in
your vehicle, for instance due to the selected
special equipment or the country version. This
also applies to safety-related functions and sys‐
tems.
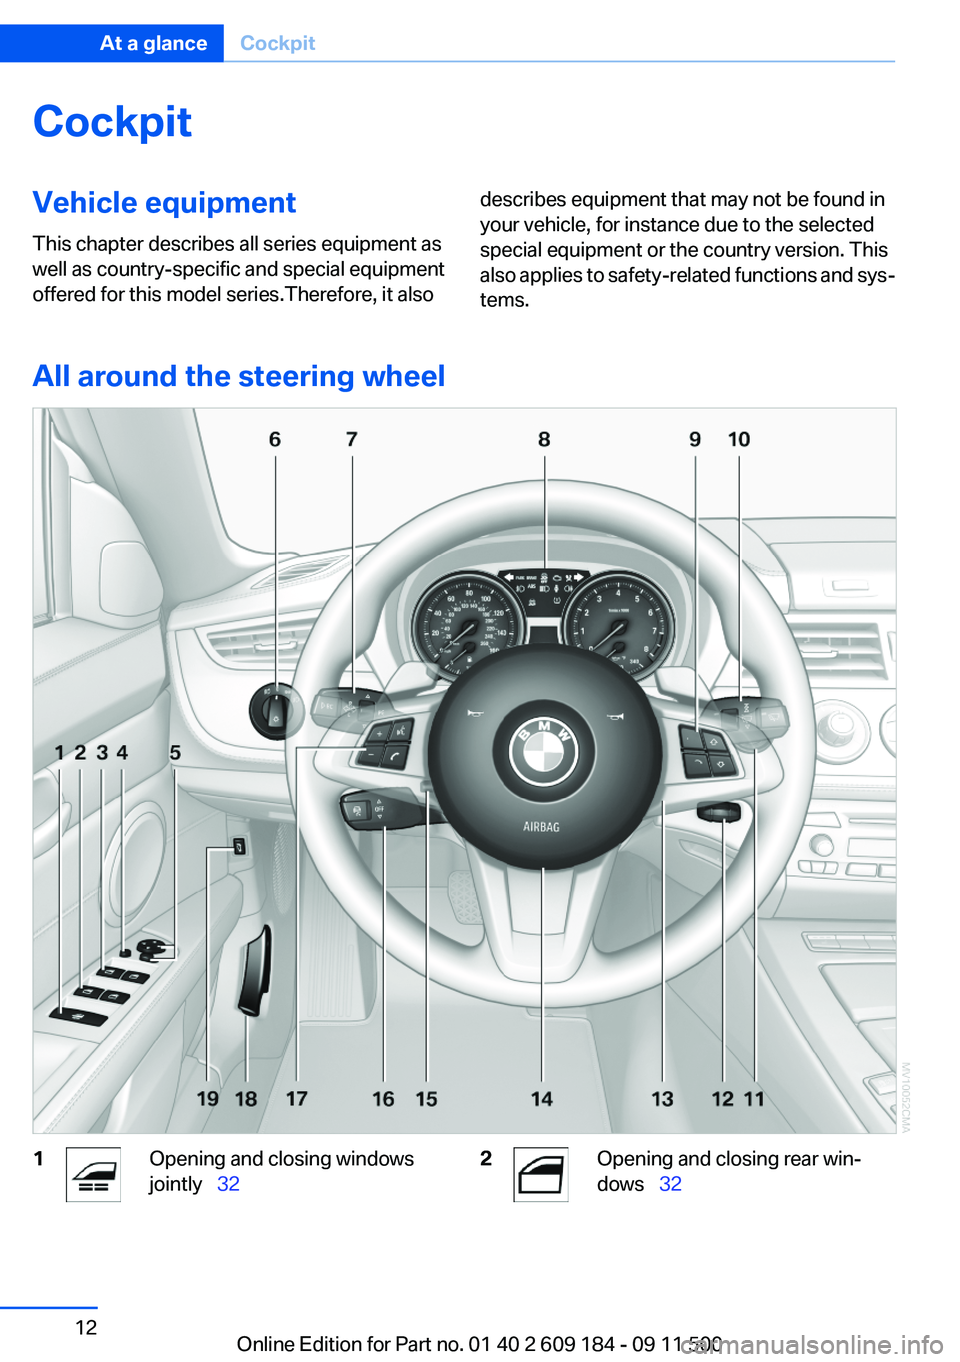
All around the steering wheel
1Opening and closing windows
jointly 322Opening and closing rear win‐
dows 32Seite 12At a glanceCockpit12
Online Edition for Part no. 01 40 2 609 184 - 09 11 500
Page 13 of 220
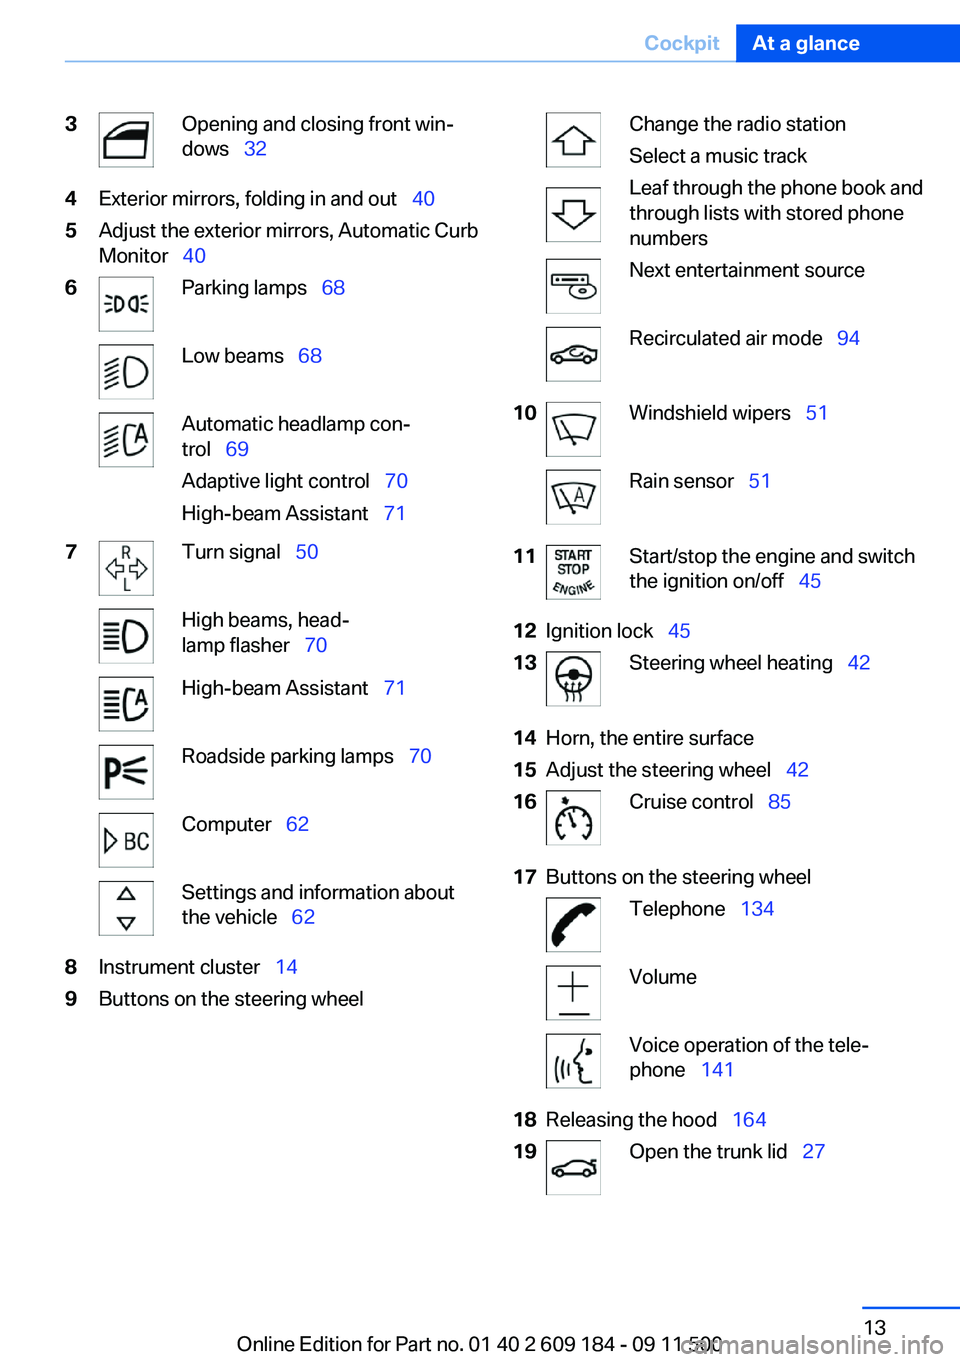
3Opening and closing front win‐
dows 324Exterior mirrors, folding in and out 405Adjust the exterior mirrors, Automatic Curb
Monitor 406Parking lamps 68Low beams 68Automatic headlamp con‐
trol 69
Adaptive light control 70
High-beam Assistant 717Turn signal 50High beams, head‐
lamp flasher 70High-beam Assistant 71Roadside parking lamps 70Computer 62Settings and information about
the vehicle 628Instrument cluster 149Buttons on the steering wheelChange the radio station
Select a music track
Leaf through the phone book and
through lists with stored phone
numbersNext entertainment sourceRecirculated air mode 9410Windshield wipers 51Rain sensor 5111Start/stop the engine and switch
the ignition on/off 4512Ignition lock 4513Steering wheel heating 4214Horn, the entire surface15Adjust the steering wheel 4216Cruise control 8517Buttons on the steering wheelTelephone 134VolumeVoice operation of the tele‐
phone 14118Releasing the hood 16419Open the trunk lid 27Seite 13CockpitAt a glance13
Online Edition for Part no. 01 40 2 609 184 - 09 11 500
Page 39 of 220
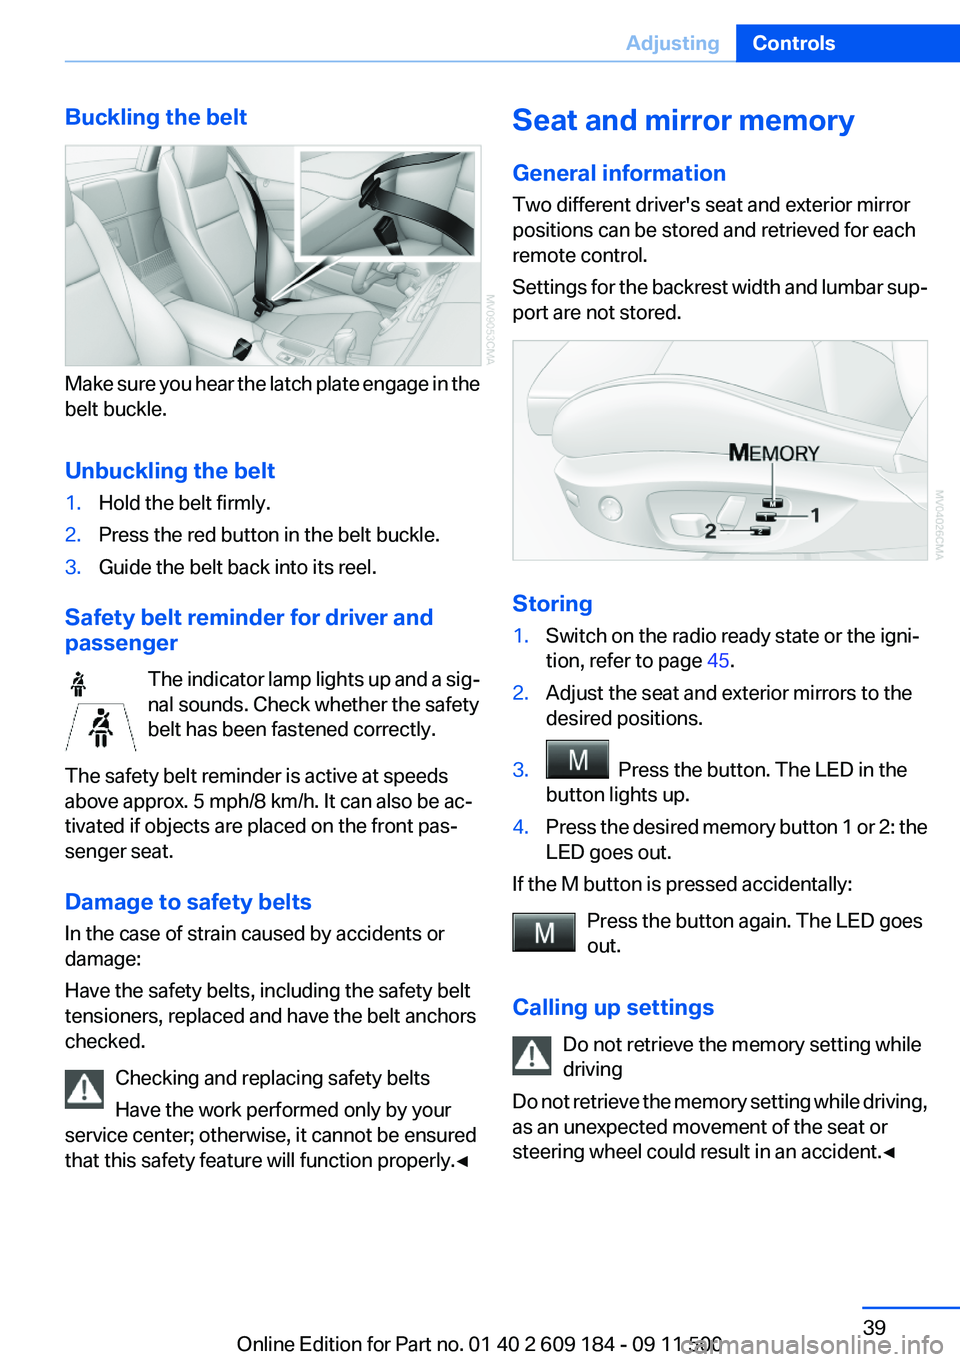
Buckling the belt
Make sure you hear the latch plate engage in the
belt buckle.
Unbuckling the belt
1.Hold the belt firmly.2.Press the red button in the belt buckle.3.Guide the belt back into its reel.
Safety belt reminder for driver and
passenger
The indicator lamp lights up and a sig‐
nal sounds. Check whether the safety
belt has been fastened correctly.
The safety belt reminder is active at speeds
above approx. 5 mph/8 km/h. It can also be ac‐
tivated if objects are placed on the front pas‐
senger seat.
Damage to safety belts
In the case of strain caused by accidents or
damage:
Have the safety belts, including the safety belt
tensioners, replaced and have the belt anchors
checked.
Checking and replacing safety belts
Have the work performed only by your
service center; otherwise, it cannot be ensured
that this safety feature will function properly.◀
Seat and mirror memory
General information
Two different driver's seat and exterior mirror
positions can be stored and retrieved for each
remote control.
Settings for the backrest width and lumbar sup‐
port are not stored.
Storing
1.Switch on the radio ready state or the igni‐
tion, refer to page 45.2.Adjust the seat and exterior mirrors to the
desired positions.3. Press the button. The LED in the
button lights up.4.Press the desired memory button 1 or 2: the
LED goes out.
If the M button is pressed accidentally:
Press the button again. The LED goes
out.
Calling up settings Do not retrieve the memory setting while
driving
Do not retrieve the memory setting while driving,
as an unexpected movement of the seat or
steering wheel could result in an accident.◀
Seite 39AdjustingControls39
Online Edition for Part no. 01 40 2 609 184 - 09 11 500
Page 42 of 220
Steering wheel
General information Do not adjust while driving
Do not adjust the steering wheel while
driving; otherwise, an unexpected movement
could result in an accident.◀
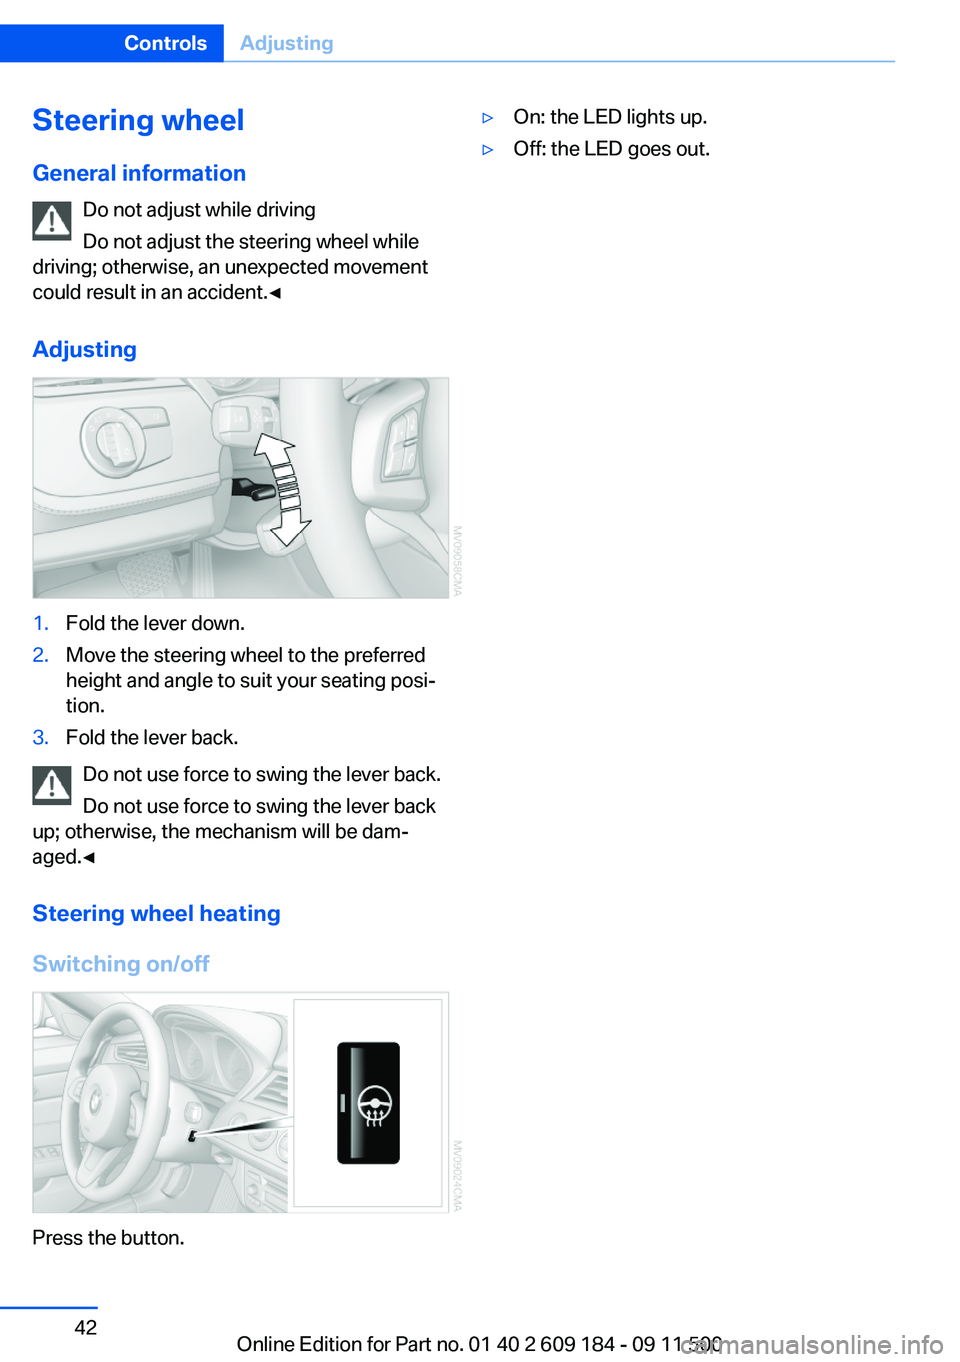
Adjusting1.Fold the lever down.2.Move the steering wheel to the preferred
height and angle to suit your seating posi‐
tion.3.Fold the lever back.
Do not use force to swing the lever back.
Do not use force to swing the lever back
up; otherwise, the mechanism will be dam‐
aged.◀
Steering wheel heating
Switching on/off
Press the button.
▷On: the LED lights up.▷Off: the LED goes out.Seite 42ControlsAdjusting42
Online Edition for Part no. 01 40 2 609 184 - 09 11 500
Page 47 of 220
Set the parking brake and further secure
the vehicle as required
Set the parking brake firmly when parking; oth‐
erwise, the vehicle could roll. On steep upward
and downward inclines, further secure the vehi‐
cle, for example, by turning the steering wheel in
the direction of the curb.◀
Manual transmission1.With the vehicle at a standstill, press the
Start/Stop button.2.Shift into first gear or reverse.3.Set the parking brake.4.Remove the remote control from the ignition
lock, refer to page 45.
Sport automatic transmission
1.With the vehicle at a standstill, press the
Start/Stop button.2.Set the parking brake.3.Remove the remote control from the ignition
lock, refer to page 45.
Automatic Engine Start/Stop
Function
The concept
The Automatic Engine Start/Stop Function
helps save fuel and lower emissions. The sys‐
tem automatically switches off the engine dur‐
ing a stop, e.g., in a traffic congestion or at traffic
lights. The ignition remains switched on. The
engine starts again automatically when the
clutch is pressed.
Automatic operation
The automatic engine start/stop function is op‐
erational after each engine start. It is activated
whenever you drive forward faster than 3 mph/
5 km/h.
Automatic engine stop
The engine is switched off automatically during
a stop under the following conditions:▷Neutral gear is engaged and the clutch pedal
is not depressed.▷The driver's safety belt is fastened or the
driver's door is closed.
When the engine is switched off, the air volume
of the air conditioner or automatic climate con‐
trol is reduced.
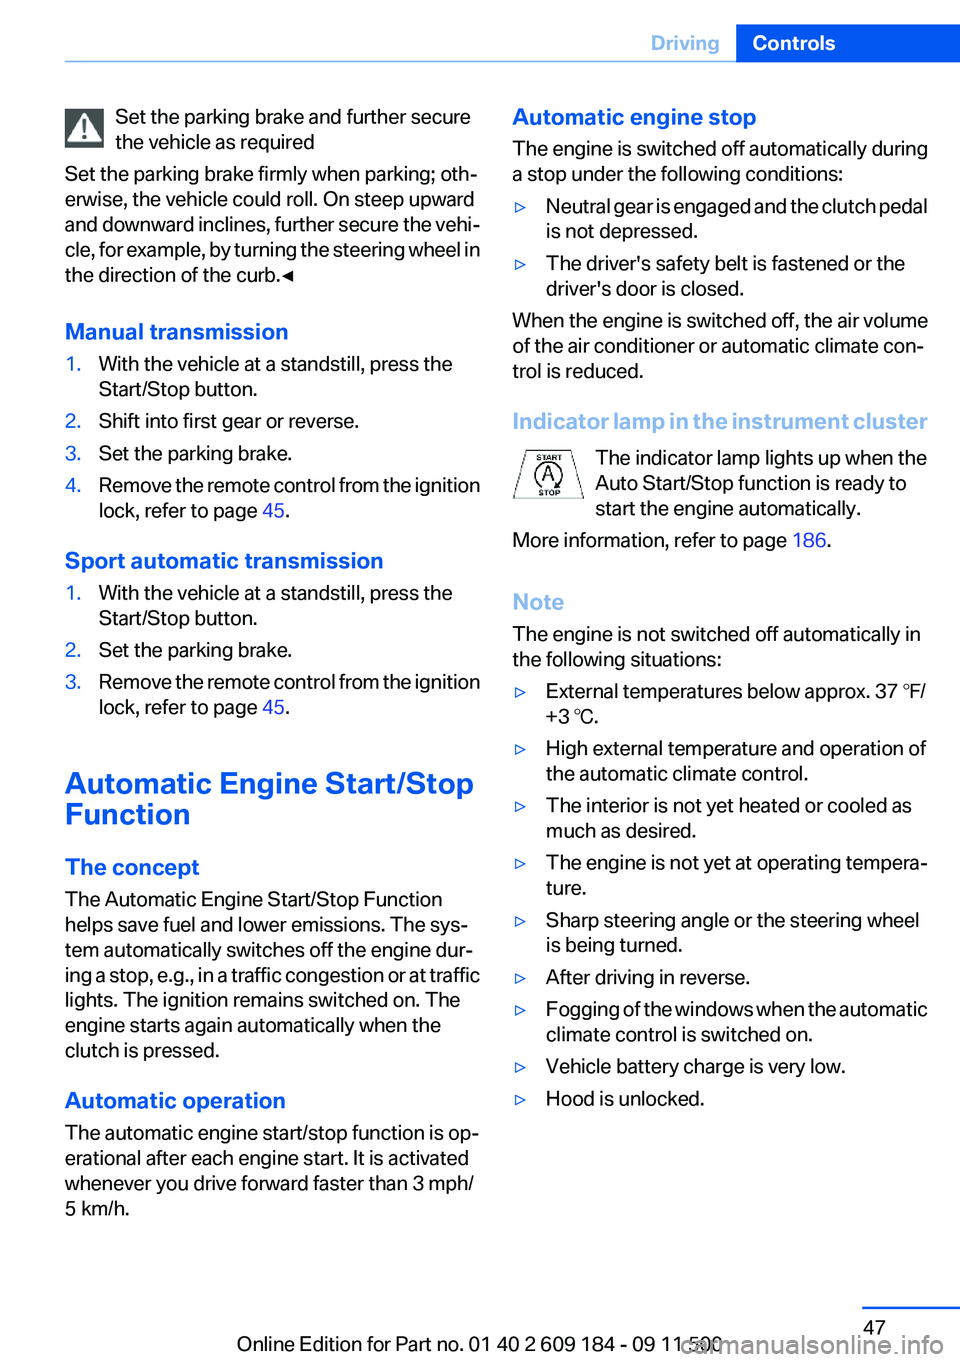
Indicator lamp in the instrument cluster The indicator lamp lights up when the
Auto Start/Stop function is ready to
start the engine automatically.
More information, refer to page 186.
Note
The engine is not switched off automatically in
the following situations:
▷External temperatures below approx. 37 ℉/
+3 ℃.▷High external temperature and operation of
the automatic climate control.▷The interior is not yet heated or cooled as
much as desired.▷The engine is not yet at operating tempera‐
ture.▷Sharp steering angle or the steering wheel
is being turned.▷After driving in reverse.▷Fogging of the windows when the automatic
climate control is switched on.▷Vehicle battery charge is very low.▷Hood is unlocked.Seite 47DrivingControls47
Online Edition for Part no. 01 40 2 609 184 - 09 11 500
Page 48 of 220
Parking the vehicle during an
automatic engine stop
The vehicle can be parked safely during an au‐
tomatic engine stop, such as when you wish to
leave the vehicle.1.Press the Start/Stop button. The ignition is
switched off. The Auto Start/Stop function
is deactivated.2.Set the parking brake.
Start the engine as usual using the Start/Stop
button.
Automatic engine start
To drive away, the engine starts automatically as
soon as the clutch pedal is depressed.
After the engine starts, accelerate as usual.
Safety mode
The engine does not start by itself after it is
switched off automatically if any of the following
conditions are fulfilled:
▷The driver's safety belt is unfastened or the
driver's door is open.▷Hood was unlocked.
The indicator lamp lights up.
The engine can only be started via the
Start/Stop button.
More information, refer to page 186.
Note
Even if you do not wish to drive away, the stop‐
ped engine still starts automatically in the fol‐
lowing situations:
▷The interior has heated up strongly with the
cooling function switched on.▷The steering wheel is turned.▷The vehicle begins to roll.▷Fogging of the windows when the automatic
climate control is switched on.▷Vehicle battery charge is very low.▷The interior has cooled down strongly with
the heating switched on.▷Low braking pressure, such as from de‐
pressing the brake pedal a number of times
consecutively.
Activating/deactivating the system
manually
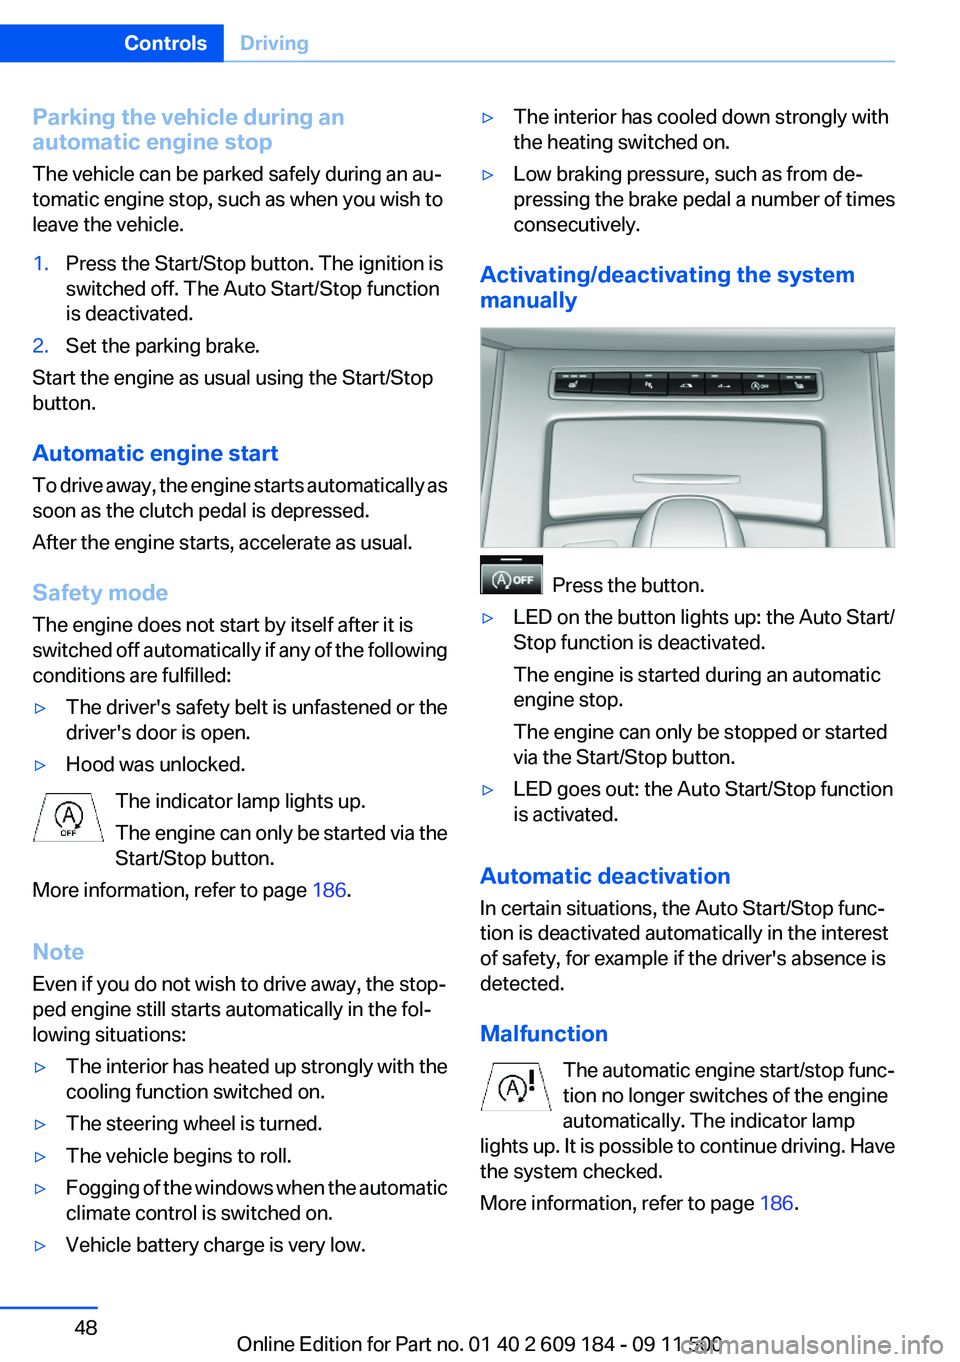
Press the button.
▷LED on the button lights up: the Auto Start/
Stop function is deactivated.
The engine is started during an automatic
engine stop.
The engine can only be stopped or started
via the Start/Stop button.▷LED goes out: the Auto Start/Stop function
is activated.
Automatic deactivation
In certain situations, the Auto Start/Stop func‐
tion is deactivated automatically in the interest
of safety, for example if the driver's absence is
detected.
Malfunction The automatic engine start/stop func‐
tion no longer switches of the engine
automatically. The indicator lamp
lights up. It is possible to continue driving. Have
the system checked.
More information, refer to page 186.
Seite 48ControlsDriving48
Online Edition for Part no. 01 40 2 609 184 - 09 11 500
Page 54 of 220
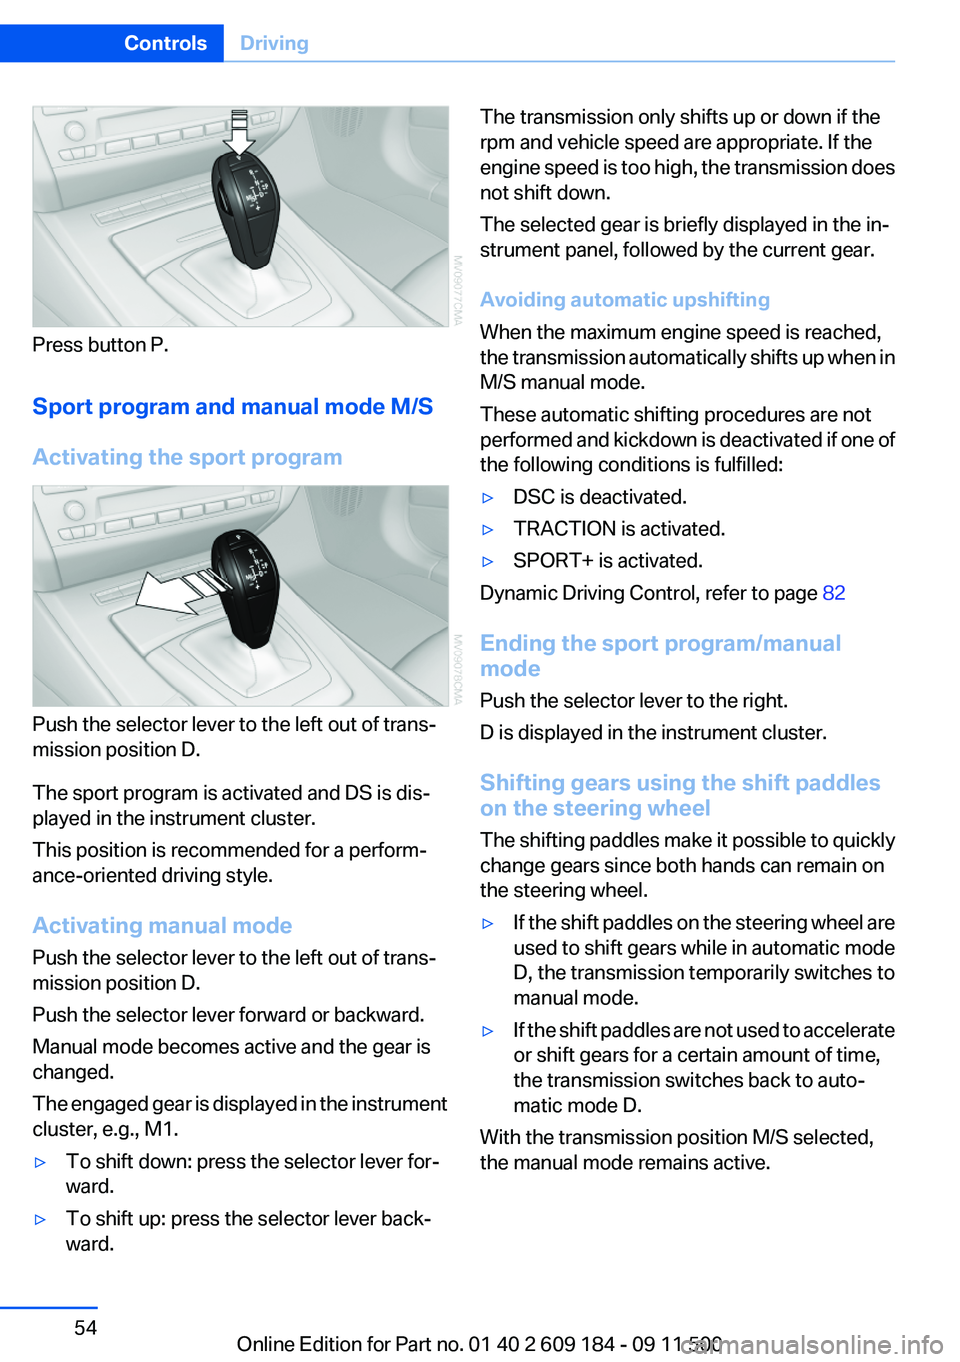
Press button P.
Sport program and manual mode M/S
Activating the sport program
Push the selector lever to the left out of trans‐
mission position D.
The sport program is activated and DS is dis‐
played in the instrument cluster.
This position is recommended for a perform‐
ance-oriented driving style.
Activating manual mode
Push the selector lever to the left out of trans‐
mission position D.
Push the selector lever forward or backward.
Manual mode becomes active and the gear is
changed.
The engaged gear is displayed in the instrument
cluster, e.g., M1.
▷To shift down: press the selector lever for‐
ward.▷To shift up: press the selector lever back‐
ward.The transmission only shifts up or down if the
rpm and vehicle speed are appropriate. If the
engine speed is too high, the transmission does
not shift down.
The selected gear is briefly displayed in the in‐
strument panel, followed by the current gear.
Avoiding automatic upshifting
When the maximum engine speed is reached,
the transmission automatically shifts up when in
M/S manual mode.
These automatic shifting procedures are not
performed and kickdown is deactivated if one of
the following conditions is fulfilled:▷DSC is deactivated.▷TRACTION is activated.▷SPORT+ is activated.
Dynamic Driving Control, refer to page 82
Ending the sport program/manual
mode
Push the selector lever to the right.
D is displayed in the instrument cluster.
Shifting gears using the shift paddles
on the steering wheel
The shifting paddles make it possible to quickly
change gears since both hands can remain on
the steering wheel.
▷If the shift paddles on the steering wheel are
used to shift gears while in automatic mode
D, the transmission temporarily switches to
manual mode.▷If the shift paddles are not used to accelerate
or shift gears for a certain amount of time,
the transmission switches back to auto‐
matic mode D.
With the transmission position M/S selected,
the manual mode remains active.
Seite 54ControlsDriving54
Online Edition for Part no. 01 40 2 609 184 - 09 11 500
Page 55 of 220
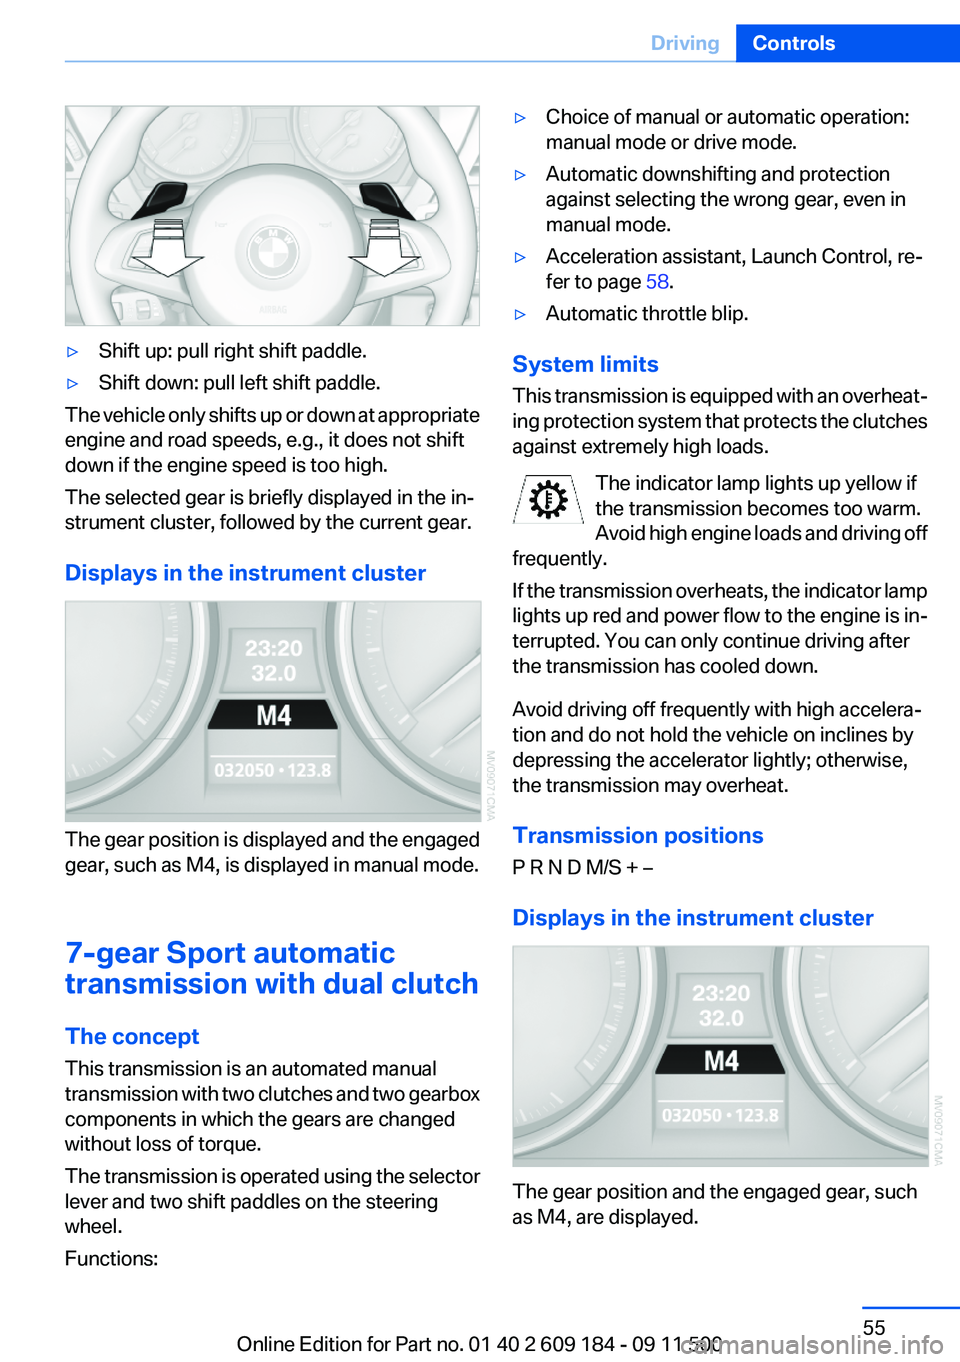
▷Shift up: pull right shift paddle.▷Shift down: pull left shift paddle.
The vehicle only shifts up or down at appropriate
engine and road speeds, e.g., it does not shift
down if the engine speed is too high.
The selected gear is briefly displayed in the in‐
strument cluster, followed by the current gear.
Displays in the instrument cluster
The gear position is displayed and the engaged
gear, such as M4, is displayed in manual mode.
7-gear Sport automatic
transmission with dual clutch
The concept
This transmission is an automated manual
transmission with two clutches and two gearbox
components in which the gears are changed
without loss of torque.
The transmission is operated using the selector
lever and two shift paddles on the steering
wheel.
Functions:
▷Choice of manual or automatic operation:
manual mode or drive mode.▷Automatic downshifting and protection
against selecting the wrong gear, even in
manual mode.▷Acceleration assistant, Launch Control, re‐
fer to page 58.▷Automatic throttle blip.
System limits
This transmission is equipped with an overheat‐
ing protection system that protects the clutches
against extremely high loads.
The indicator lamp lights up yellow if
the transmission becomes too warm.
Avoid high engine loads and driving off
frequently.
If the transmission overheats, the indicator lamp
lights up red and power flow to the engine is in‐
terrupted. You can only continue driving after
the transmission has cooled down.
Avoid driving off frequently with high accelera‐
tion and do not hold the vehicle on inclines by
depressing the accelerator lightly; otherwise,
the transmission may overheat.
Transmission positions
P R N D M/S + –
Displays in the instrument cluster
The gear position and the engaged gear, such
as M4, are displayed.
Seite 55DrivingControls55
Online Edition for Part no. 01 40 2 609 184 - 09 11 500
Page 57 of 220
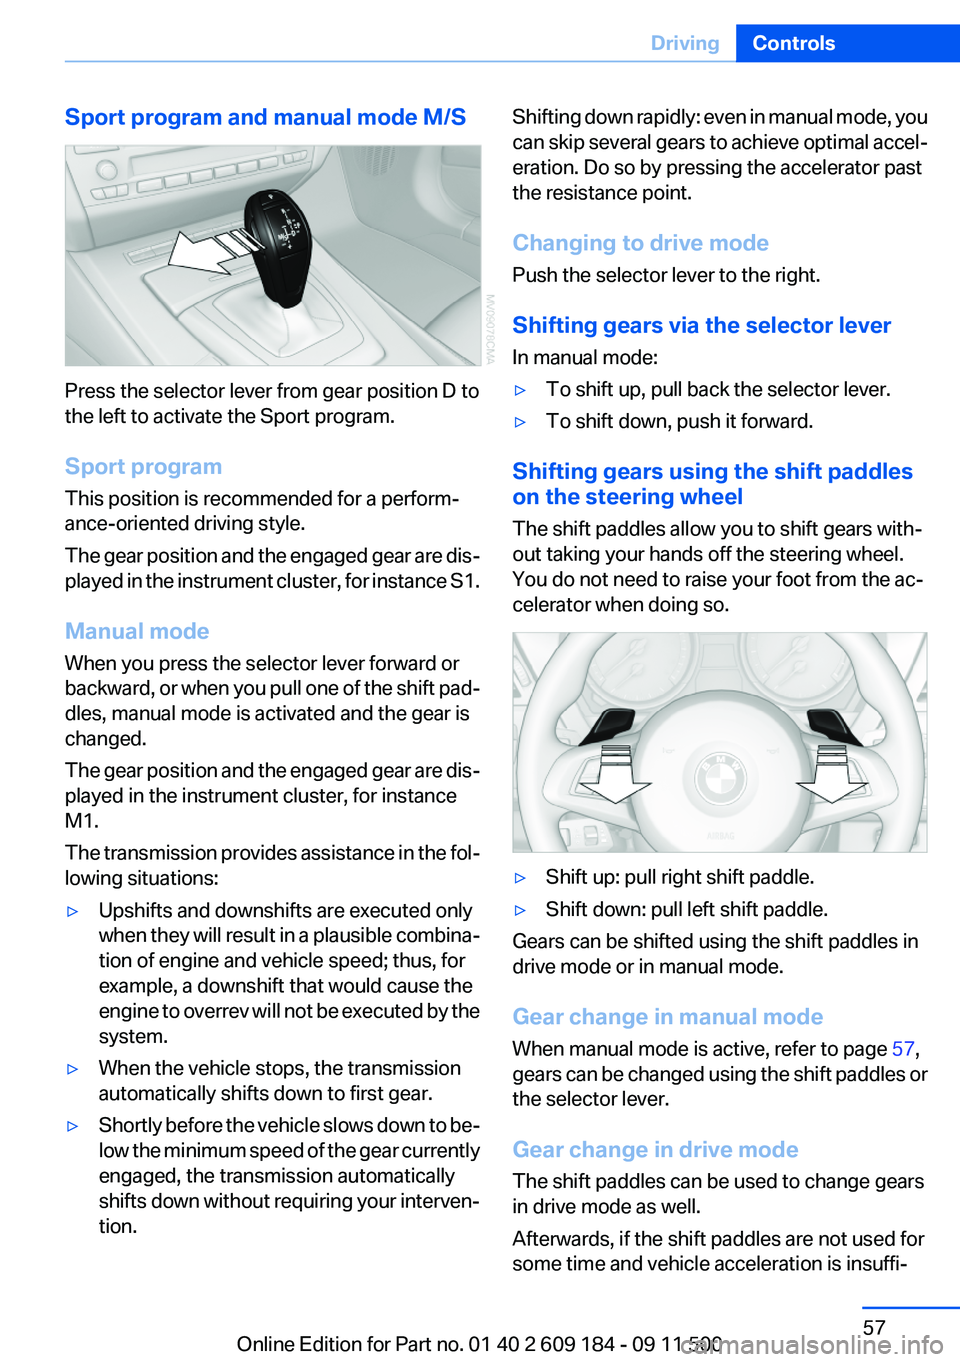
Sport program and manual mode M/S
Press the selector lever from gear position D to
the left to activate the Sport program.
Sport program
This position is recommended for a perform‐
ance-oriented driving style.
The gear position and the engaged gear are dis‐
played in the instrument cluster, for instance S1.
Manual mode
When you press the selector lever forward or
backward, or when you pull one of the shift pad‐
dles, manual mode is activated and the gear is
changed.
The gear position and the engaged gear are dis‐
played in the instrument cluster, for instance
M1.
The transmission provides assistance in the fol‐
lowing situations:
▷Upshifts and downshifts are executed only
when they will result in a plausible combina‐
tion of engine and vehicle speed; thus, for
example, a downshift that would cause the
engine to overrev will not be executed by the
system.▷When the vehicle stops, the transmission
automatically shifts down to first gear.▷Shortly before the vehicle slows down to be‐
low the minimum speed of the gear currently
engaged, the transmission automatically
shifts down without requiring your interven‐
tion.Shifting down rapidly: even in manual mode, you
can skip several gears to achieve optimal accel‐
eration. Do so by pressing the accelerator past
the resistance point.
Changing to drive mode
Push the selector lever to the right.
Shifting gears via the selector lever
In manual mode:▷To shift up, pull back the selector lever.▷To shift down, push it forward.
Shifting gears using the shift paddles
on the steering wheel
The shift paddles allow you to shift gears with‐
out taking your hands off the steering wheel.
You do not need to raise your foot from the ac‐
celerator when doing so.
▷Shift up: pull right shift paddle.▷Shift down: pull left shift paddle.
Gears can be shifted using the shift paddles in
drive mode or in manual mode.
Gear change in manual mode
When manual mode is active, refer to page 57,
gears can be changed using the shift paddles or
the selector lever.
Gear change in drive mode
The shift paddles can be used to change gears
in drive mode as well.
Afterwards, if the shift paddles are not used for
some time and vehicle acceleration is insuffi‐
Seite 57DrivingControls57
Online Edition for Part no. 01 40 2 609 184 - 09 11 500
Page 70 of 220
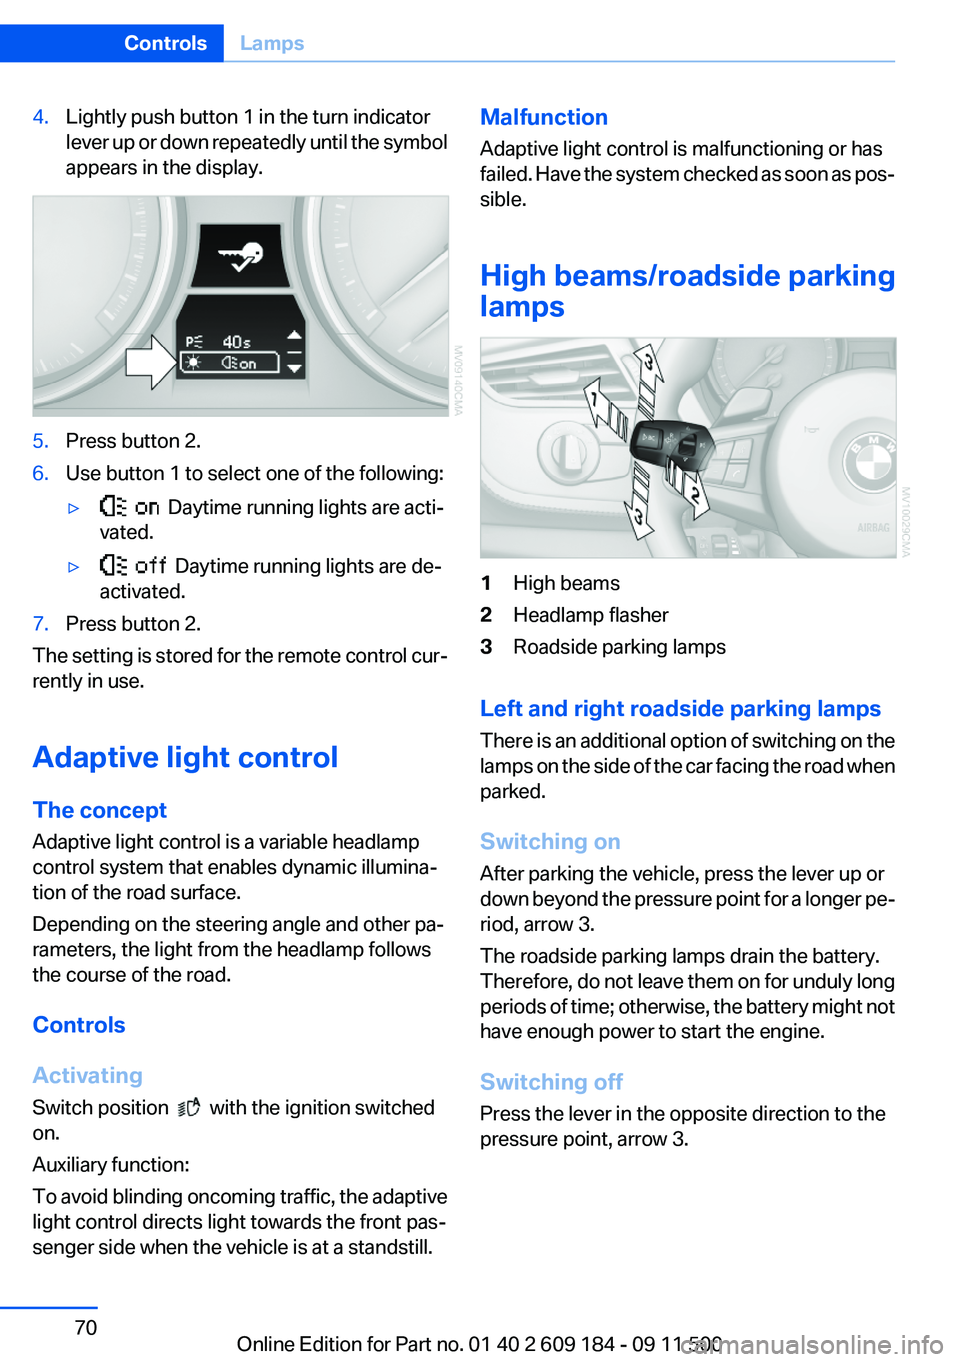
4.Lightly push button 1 in the turn indicator
lever up or down repeatedly until the symbol
appears in the display.5.Press button 2.6.Use button 1 to select one of the following:▷ Daytime running lights are acti‐
vated.▷ Daytime running lights are de‐
activated.7.Press button 2.
The setting is stored for the remote control cur‐
rently in use.
Adaptive light control
The concept
Adaptive light control is a variable headlamp
control system that enables dynamic illumina‐
tion of the road surface.
Depending on the steering angle and other pa‐
rameters, the light from the headlamp follows
the course of the road.
Controls
Activating
Switch position
with the ignition switched
on.
Auxiliary function:
To avoid blinding oncoming traffic, the adaptive
light control directs light towards the front pas‐
senger side when the vehicle is at a standstill.
Malfunction
Adaptive light control is malfunctioning or has
failed. Have the system checked as soon as pos‐
sible.
High beams/roadside parking
lamps1High beams2Headlamp flasher3Roadside parking lamps
Left and right roadside parking lamps
There is an additional option of switching on the
lamps on the side of the car facing the road when
parked.
Switching on
After parking the vehicle, press the lever up or
down beyond the pressure point for a longer pe‐
riod, arrow 3.
The roadside parking lamps drain the battery.
Therefore, do not leave them on for unduly long
periods of time; otherwise, the battery might not
have enough power to start the engine.
Switching off
Press the lever in the opposite direction to the
pressure point, arrow 3.
Seite 70ControlsLamps70
Online Edition for Part no. 01 40 2 609 184 - 09 11 500