seats BMW Z4 SDRIVE30I ROADSTER 2009 Owners Manual
[x] Cancel search | Manufacturer: BMW, Model Year: 2009, Model line: Z4 SDRIVE30I ROADSTER, Model: BMW Z4 SDRIVE30I ROADSTER 2009Pages: 248, PDF Size: 7.63 MB
Page 17 of 248
At a glance
15Reference
Controls
Driving tips
Communications
Navigation
Entertainment
Mobility
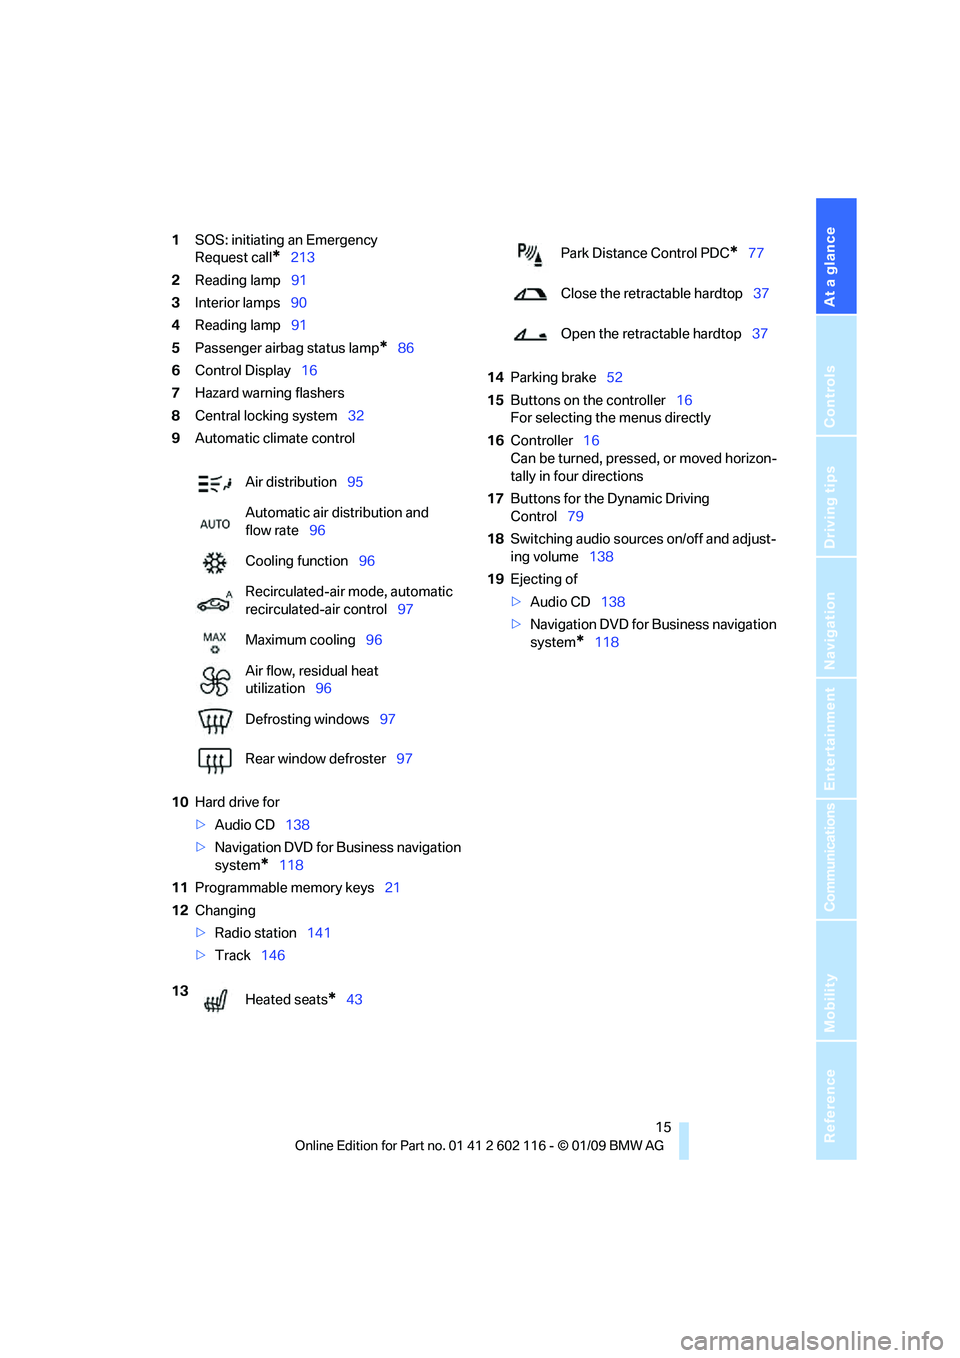
1SOS: initiating an Emergency
Request call
*213
2 Reading lamp 91
3 Interior lamps 90
4 Reading lamp 91
5 Passenger airbag status lamp
*86
6 Control Display 16
7 Hazard warning flashers
8 Central locking system 32
9 Automatic climate control
10 Hard drive for
>Audio CD 138
> Navigation DVD for Business navigation
system
*118
11 Programmable memory keys 21
12 Changing
>Radio station 141
> Track 146 14
Parking brake 52
15 Buttons on the controller 16
For selecting the menus directly
16 Controller 16
Can be turned, pressed, or moved horizon-
tally in four directions
17 Buttons for the Dynamic Driving
Control 79
18 Switching audio sources on/off and adjust-
ing volume 138
19 Ejecting of
>Audio CD 138
> Navigation DVD for Business navigation
system
*118
Air distribution
95
Automatic air distribution and
flow rate 96
Cooling function 96
Recirculated-air mode, automatic
recirculated-air control 97
Maximum cooling 96
Air flow, residual heat
utilization 96
Defrosting windows 97
Rear window defroster 97
13 Heated seats
*43
Park Distance Control PDC*77
Close the retractable hardtop 37
Open the retractable hardtop 37
Page 42 of 248
Opening and closing
40
2.
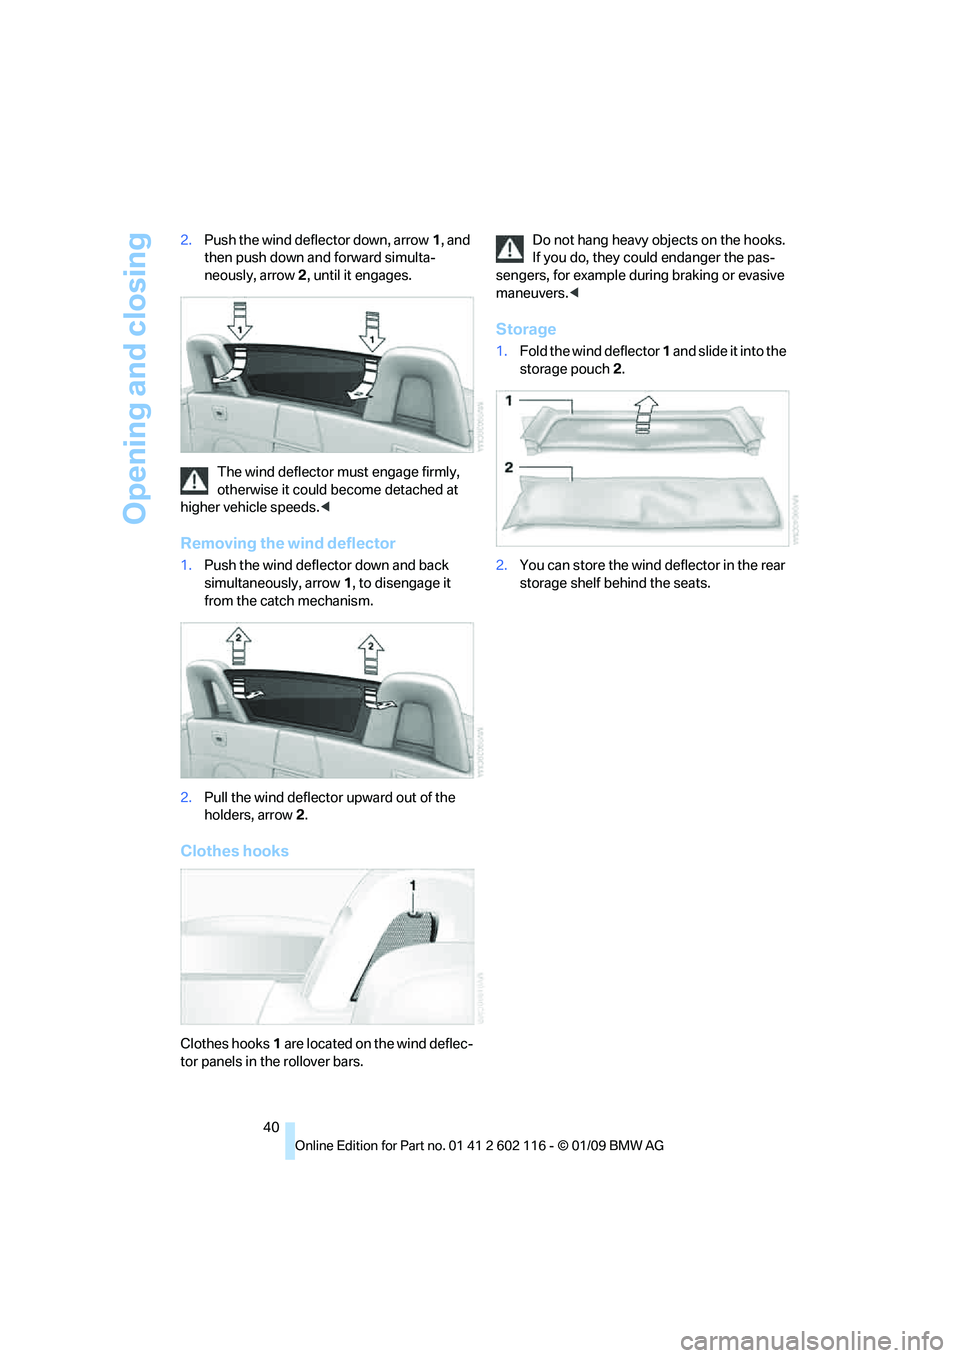
Push the wind deflector down, arrow 1, and
then push down and forward simulta-
neously, arrow 2, until it engages.
The wind deflector must engage firmly,
otherwise it could be come detached at
higher vehicle speeds. <
Removing the wind deflector
1.Push the wind deflector down and back
simultaneously, arrow 1, to disengage it
from the catch mechanism.
2. Pull the wind deflector upward out of the
holders, arrow 2.
Clothes hooks
Clothes hooks 1 are located on the wind deflec-
tor panels in the rollover bars. Do not hang heavy objects on the hooks.
If you do, they could endanger the pas-
sengers, for example during braking or evasive
maneuvers. <
Storage
1.Fold the wind deflector 1 and slide it into the
storage pouch 2 .
2. You can store the wind deflector in the rear
storage shelf behind the seats.
Page 43 of 248
Controls
41Reference
At a glance
Driving tips
Communications
Navigation
Entertainment
Mobility
Adjustments
Sitting safely
The ideal sitting position can make a vital con-
tribution to relaxed, fati gue-free driving. In con-
junction with the safe ty belts, the head
restraints and the airbags, the seated position
has a major influence on your safety in the event
of an accident. To ensu re that the safety sys-
tems operate with optimal efficiency, we
strongly urge you to observe the instructions
contained in the following section.
For additional information on transporting chil-
dren safely, refer to page 48.
Airbags
Always maintain an adequate distance
between yourself and the airbags. Always
grip the steering wheel on the rim, with your
hands in the 3 o'clock and 9 o'clock positions,
to minimize the risk of injury to the hands or
arms in the event of the airbag being triggered
off. No one and nothing is to come between the
airbags and the seat occupant.
Do not use the cover of the front airbag on the
passenger side as a st orage area. Make sure
that the passenger is sitting correctly, e.g.
keeping his or her feet or legs in the footwell
and not on the dashboard; otherwise, leg inju-
ries can occur if the front airbag deploys.
Make sure that passengers do not lean their
heads against the side airbag; otherwise, seri-
ous injuries could result if the airbag suddenly
deployed. <
Even if you follow all the instructions, injuries
resulting from contact with airbags cannot be
fully excluded, depending on the circum-
stances. The ignition and inflation noise may
provoke a mild hearing loss in extremely sensi-
tive individuals. This e ffect is usually only tem-
porary.
For airbag locations and additional information
on airbags, refer to page 85.
Safety belt
Before every drive, make sure that all occupants
wear their safety belts. Airbags complement the
safety belt as an additi onal safety device, but
they do not represent a substitute.
Your vehicle has two seats, each of which is
equipped with a safety belt.
Never allow more than one person to
wear a single safety belt. Never allow
infants or small children to ride in a passenger's
lap. Make sure that the be lt in the lap area sits
low across the hips and does not press against
the abdomen.
The safety belt must not rest against the throat,
run across sharp edges, pass over hard or frag-
ile objects or be pinched. Fasten the safety belt
so that it sits as snugly as possible against the
lap and shoulder withou t being twisted. Other-
wise the belt could slide over your hips and
injure your abdomen in the event of a frontal
collision.
Avoid wearing bulky clothing and regularly pull
the belt in the upper-bo dy area taut, otherwise
its restraining effect could be impaired. <
Safety belts, refer to page 44.
Seats
Note before adjusting
Never attempt to adjust your seat while
the vehicle is moving. The seat could
respond with unexpected movement, and the
ensuing loss of vehicle control could lead to an
accident.
On the passenger seat as well, do not incline
the backrest too far to th e rear while the vehicle
is being driven, otherwise there is a danger in
the event of an accident of sliding under the
safety belt, eliminating the protection normally
provided by the belt. <
Note the information on safety belt damage on
page 45.
Page 45 of 248
Controls
43Reference
At a glance
Driving tips
Communications
Navigation
Entertainment
Mobility
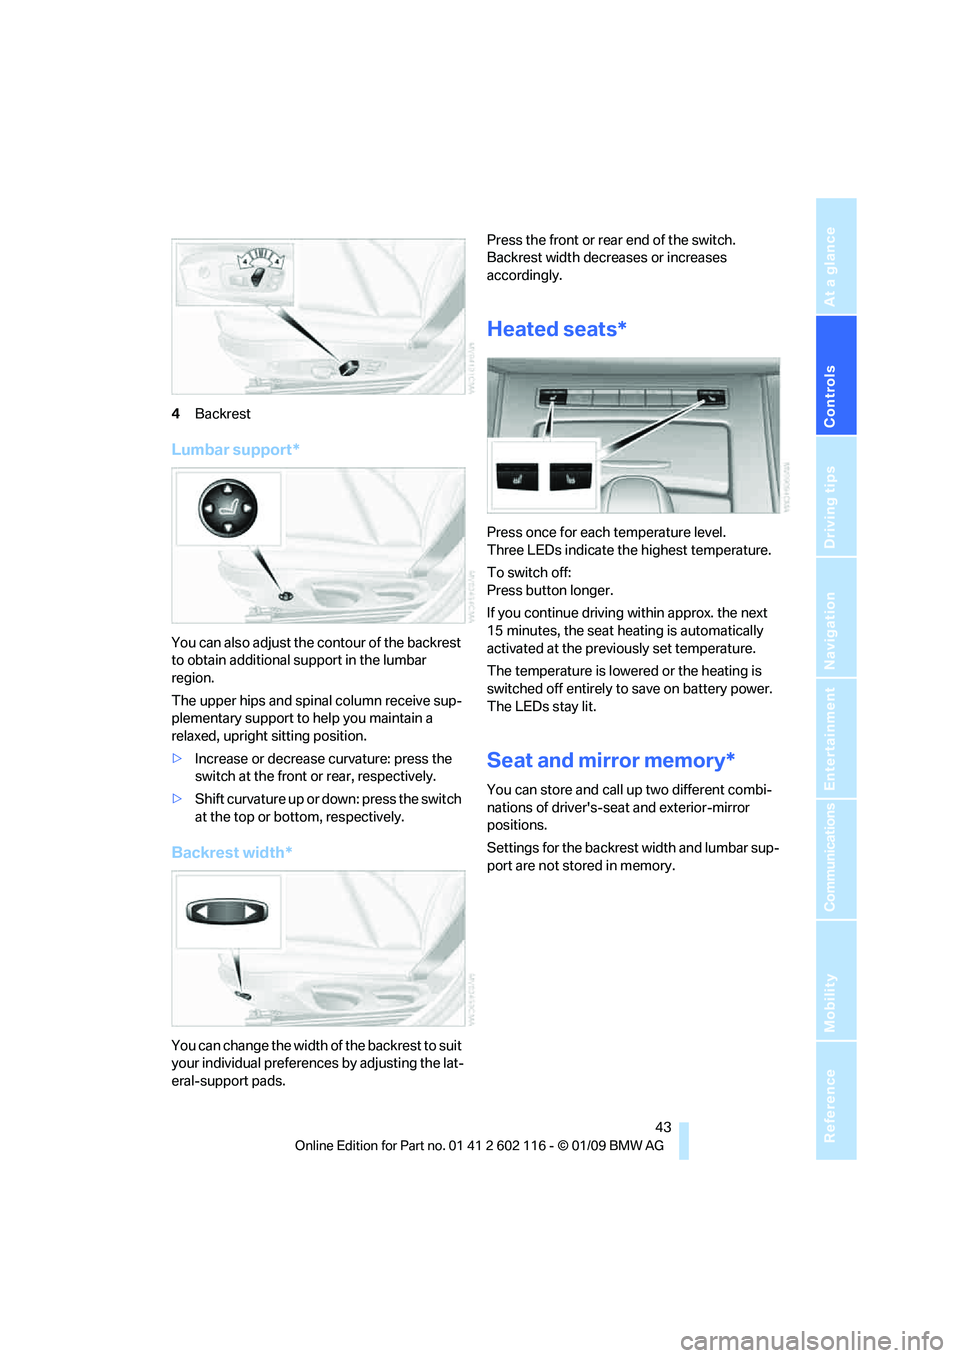
4Backrest
Lumbar support*
You can also adjust the contour of the backrest
to obtain additional support in the lumbar
region.
The upper hips and spinal column receive sup-
plementary support to help you maintain a
relaxed, upright sitting position.
> Increase or decrease curvature: press the
switch at the front or rear, respectively.
> Shift curvature up or down: press the switch
at the top or botto m, respectively.
Backrest width*
You can change the width of the backrest to suit
your individual preferences by adjusting the lat-
eral-support pads. Press the front or rear end of the switch.
Backrest width decreases or increases
accordingly.
Heated seats*
Press once for each temperature level.
Three LEDs indicate the highest temperature.
To switch off:
Press button longer.
If you continue driving
within approx. the next
15 minutes, the seat he ating is automatically
activated at the previously set temperature.
The temperature is lowered or the heating is
switched off entirely to save on battery power.
The LEDs stay lit.
Seat and mirror memory*
You can store and call up two different combi-
nations of driver's-sea t and exterior-mirror
positions.
Settings for the backrest width and lumbar sup-
port are not stored in memory.
Page 87 of 248
Controls
85Reference
At a glance
Driving tips
Communications
Navigation
Entertainment
Mobility
The TPMS malfunction indicator is combined
with the low tire pressure telltale. When the sys-
tem detects a malfunction, the telltale will flash
for approximately one minute and then remain
continuously lit. This sequence will continue
upon subsequent vehicle startups as long as
the malfunction exists. When the malfunction
indicator is illuminated, the system may not be
able to detect or signal low tire pressure as
intended. TPMS malfunctions may occur for a
variety of reasons, including the installation of
replacement or alternate tires or wheels on the
vehicle that prevent the TPMS from functioning
properly. Always check the TPMS malfunction
telltale after replacing one or more tires or
wheels on your vehicle to ensure that the
replacement or alternate tires and wheels allow
the TPMS to continue to function properly.
Servotronic*
The concept
The Servotronic varies the steering force
required to turn the wh eels depending on the
speed at which you are driving. When you are
driving at low speeds, power steering provides
more support, i. e. little effort is needed to turn
the wheels. Power steering support lessens as
your speed increases.
The system works automatically.
Malfunction
Malfunctions are displayed via Check Control
Airbags
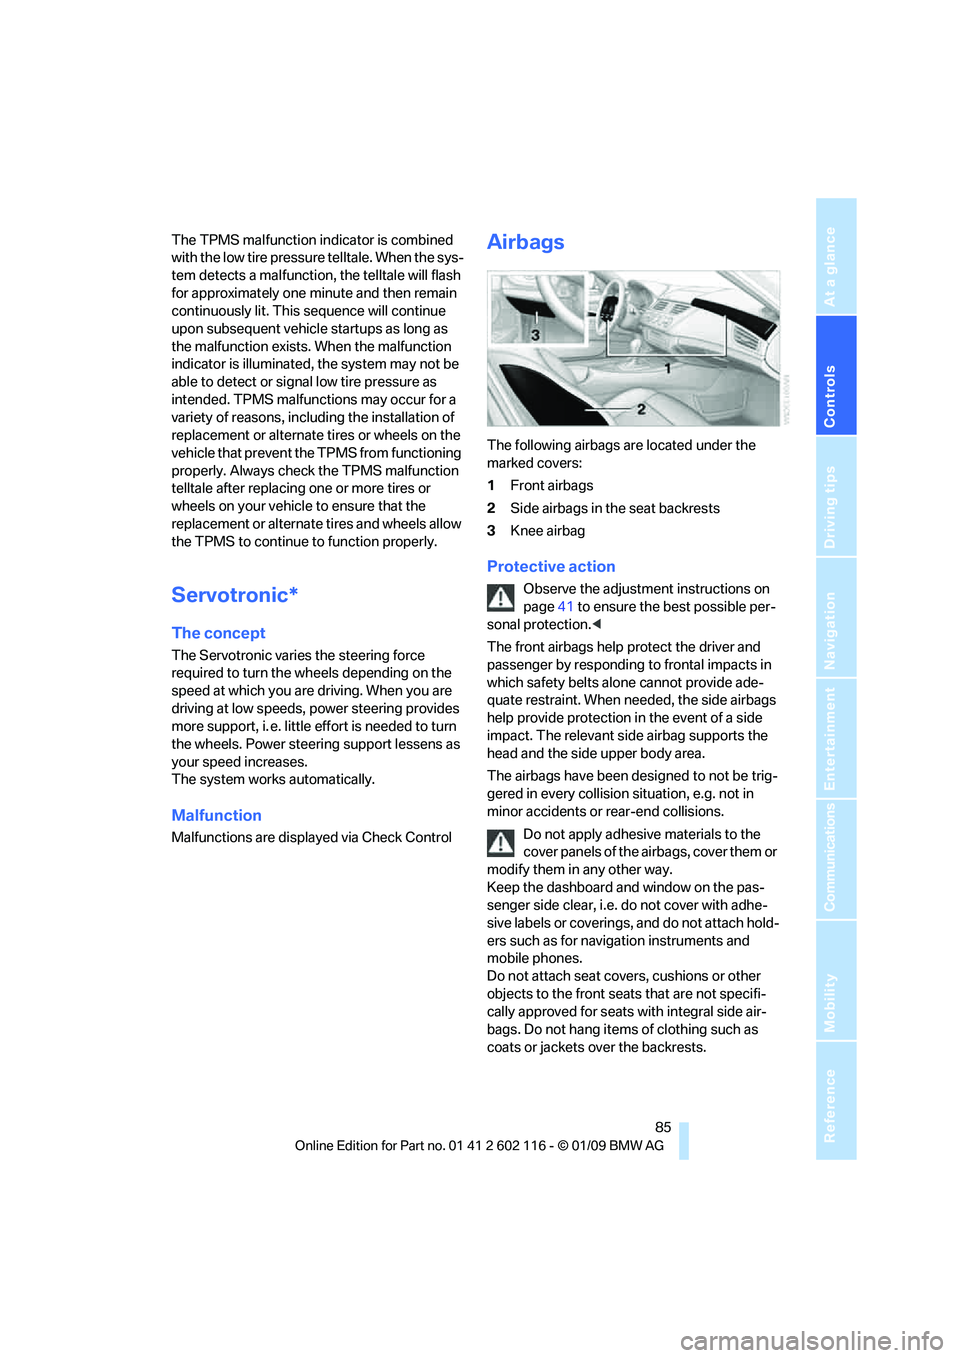
The following airbags are located under the
marked covers:
1 Front airbags
2 Side airbags in the seat backrests
3 Knee airbag
Protective action
Observe the adjustment instructions on
page 41 to ensure the best possible per-
sonal protection. <
The front airbags help protect the driver and
passenger by responding to frontal impacts in
which safety belts alone cannot provide ade-
quate restraint. When needed, the side airbags
help provide protection in the event of a side
impact. The relevant side airbag supports the
head and the side upper body area.
The airbags have been designed to not be trig-
gered in every collision situation, e.g. not in
minor accidents or rear-end collisions.
Do not apply adhesive materials to the
cover panels of the airbags, cover them or
modify them in any other way.
Keep the dashboard and window on the pas-
senger side clear, i.e. do not cover with adhe-
sive labels or coverings, and do not attach hold-
ers such as for navigation instruments and
mobile phones.
Do not attach seat cove rs, cushions or other
objects to the front seats that are not specifi-
cally approved for seats with integral side air-
bags. Do not hang items of clothing such as
coats or jackets over the backrests.
Page 88 of 248
Technology for driving comfort and safety
86
Do not attempt to remove
the airbag retention
system from the vehicle. Do not modify the indi-
vidual components of the system or its wiring in
any way. This includes the upholstered covers
of the steering wheel, the dashboard and the
seats. Do not attempt to remove or dismantle
the steering wheel.
Do not touch the individual components imme-
diately after the system has been triggered,
because there is a danger of burns.
In the event of malfunctions, deactivation or
triggering of the airbag restraint system, have
the testing, repair, remo val and disposal of air-
bag generators executed only by a BMW center
or a workshop that works according to repair
procedures of BMW with correspondingly
trained personnel and th at has the required
explosives licenses. Unprofessional attempts to
work on the system could lead to failure in an
emergency or to undesi red airbag activation,
either of which could resu lt in personal injury.<
Warning notices and information about the air-
bags can also be found on the sun visors.
Automatic deactivation of the
passenger airbags
The system determines whether the passenger
seat is occupied by meas uring the resistance of
the human body. Front, knee and side airbags
on the passenger side ar e activated or deacti-
vated accordingly.
Make sure that the passenger keeps his
or her feet in the footwell; otherwise, the
passenger airbags may not function properly. <
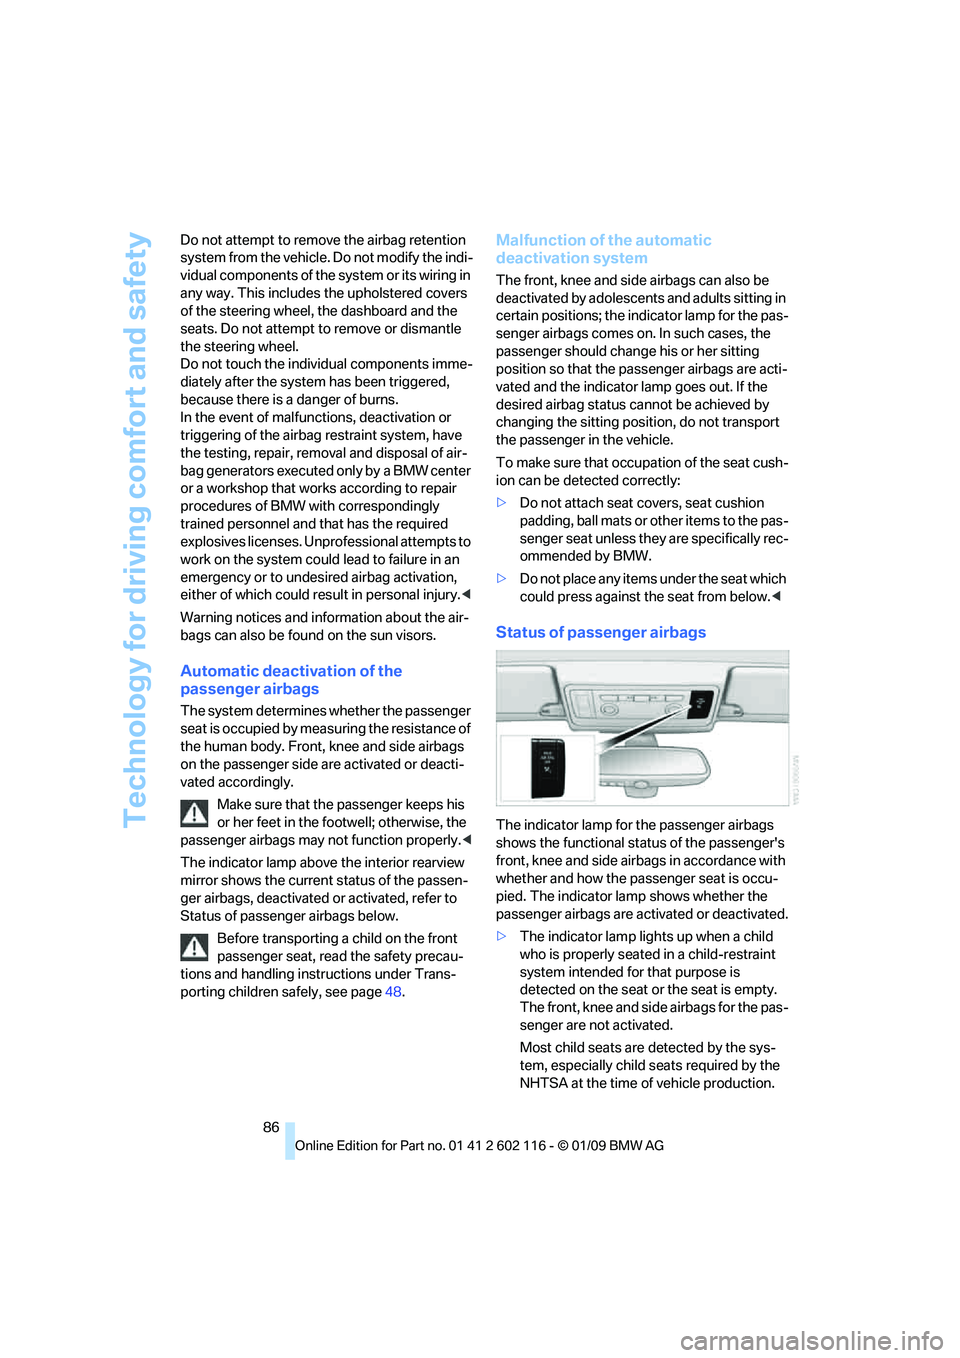
The indicator lamp above the interior rearview
mirror shows the current status of the passen-
ger airbags, deactivated or activated, refer to
Status of passenger airbags below.
Before transporting a child on the front
passenger seat, read the safety precau-
tions and handling instructions under Trans-
porting children safely, see page 48.
Malfunction of the automatic
deactivation system
The front, knee and side airbags can also be
deactivated by adolescents and adults sitting in
certain positions; the in dicator lamp for the pas-
senger airbags comes on. In such cases, the
passenger should change his or her sitting
position so that the pa ssenger airbags are acti-
vated and the indicator la mp goes out. If the
desired airbag status cannot be achieved by
changing the sitting posi tion, do not transport
the passenger in the vehicle.
To make sure that occupa tion of the seat cush-
ion can be detected correctly:
> Do not attach seat covers, seat cushion
padding, ball mats or other items to the pas-
senger seat unless they are specifically rec-
ommended by BMW.
> Do not place any items under the seat which
could press against the seat from below. <
Status of passenger airbags
The indicator lamp for the passenger airbags
shows the functional status of the passenger's
front, knee and side airbags in accordance with
whether and how the passenger seat is occu-
pied. The indicator lamp shows whether the
passenger airbags are activated or deactivated.
> The indicator lamp lights up when a child
who is properly seated in a child-restraint
system intended for that purpose is
detected on the seat or the seat is empty.
The front, knee and side airbags for the pas-
senger are not activated.
Most child seats are detected by the sys-
tem, especially child seats required by the
NHTSA at the time of vehicle production.
Page 105 of 248
Controls
103Reference
At a glance
Driving tips
Communications
Navigation
Entertainment
Mobility
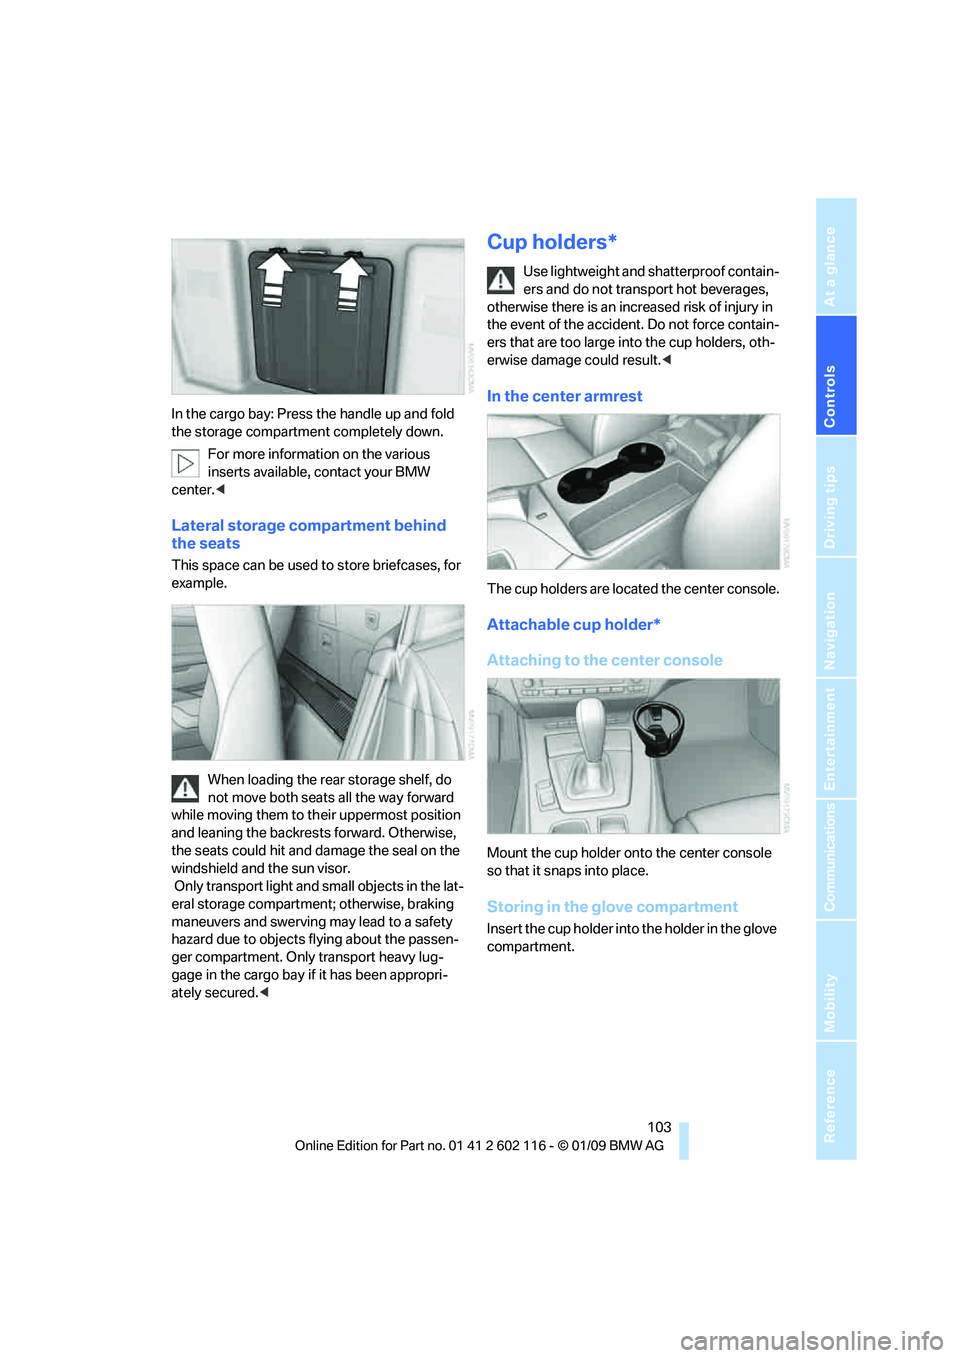
In the cargo bay: Press the handle up and fold
the storage compartment completely down.For more information on the various
inserts available, contact your BMW
center. <
Lateral storage compartment behind
the seats
This space can be used to store briefcases, for
example.
When loading the rear storage shelf, do
not move both seats all the way forward
while moving them to th eir uppermost position
and leaning the backrests forward. Otherwise,
the seats could hit and damage the seal on the
windshield and the sun visor.
Only transport light and small objects in the lat-
eral storage compartment; otherwise, braking
maneuvers and swerving may lead to a safety
hazard due to objects flying about the passen-
ger compartment. Only transport heavy lug-
gage in the cargo bay if it has been appropri-
ately secured. <
Cup holders*
Use lightweight and shatterproof contain-
ers and do not transp ort hot beverages,
otherwise there is an increased risk of injury in
the event of the accident. Do not force contain-
ers that are too large in to the cup holders, oth-
erwise damage could result. <
In the center armrest
The cup holders are located the center console.
Attachable cup holder*
Attaching to the center console
Mount the cup holder onto the center console
so that it snaps into place.
Storing in the glove compartment
Insert the cup holder into the holder in the glove
compartment.
Page 107 of 248
Controls
105Reference
At a glance
Driving tips
Communications
Navigation
Entertainment
Mobility
Enlarging the cargo bay
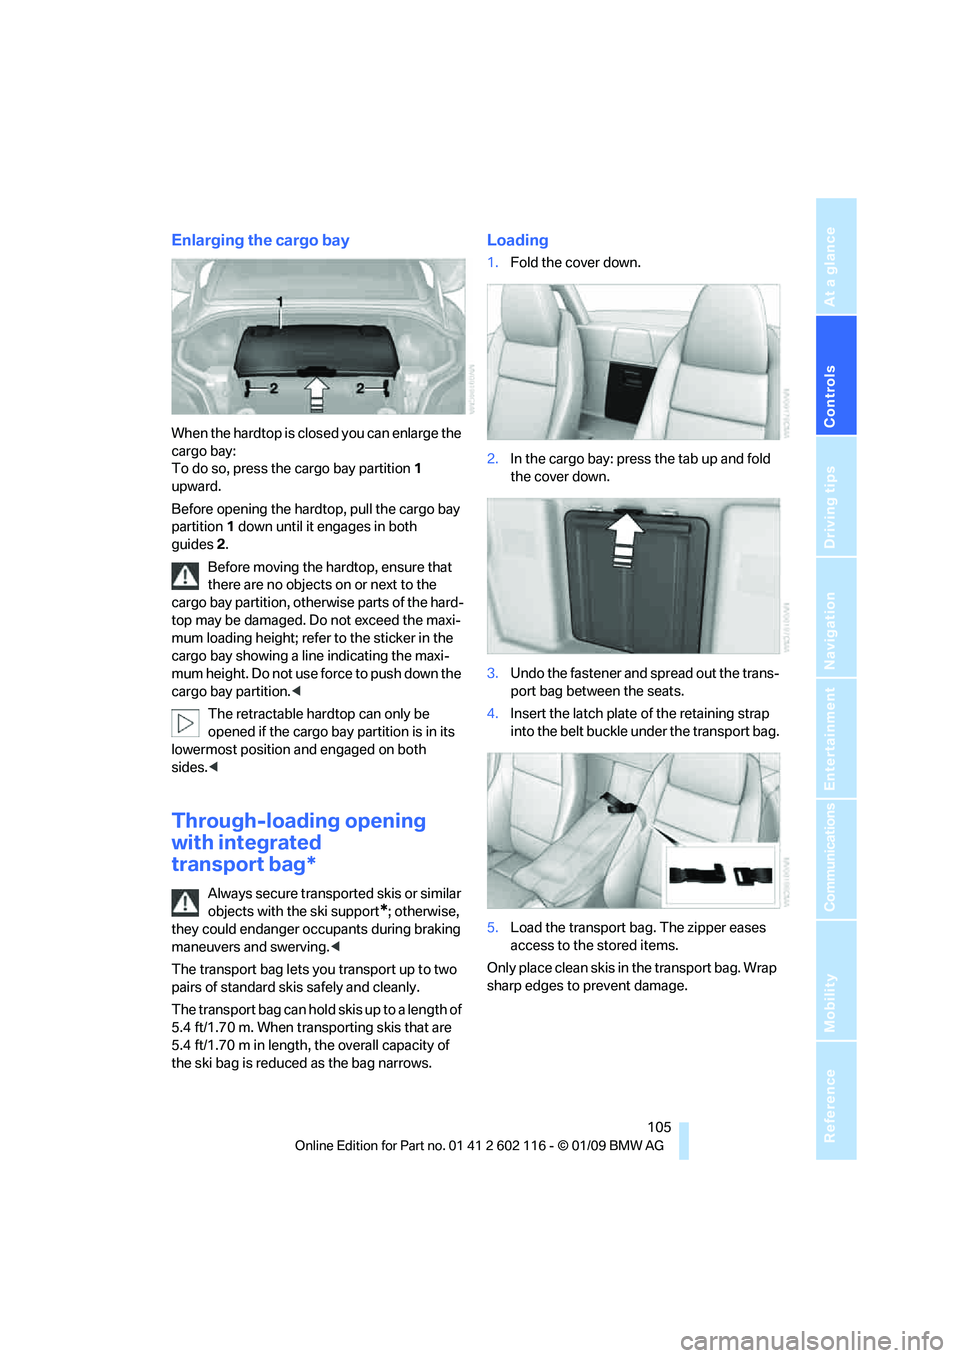
When the hardtop is closed you can enlarge the
cargo bay:
To do so, press the cargo bay partition 1
upward.
Before opening the hardtop, pull the cargo bay
partition 1 down until it engages in both
guides 2.
Before moving the hardtop, ensure that
there are no objects on or next to the
cargo bay partition, othe rwise parts of the hard-
top may be damaged. Do not exceed the maxi-
mum loading height; refer to the sticker in the
cargo bay showing a line indicating the maxi-
mum height. Do not use fo rce to push down the
cargo bay partition. <
The retractable hard top can only be
opened if the cargo bay partition is in its
lowermost position and engaged on both
sides. <
Through-loading opening
with integrated
transport bag*
Always secure transported skis or similar
objects with the ski support
*; otherwise,
they could endanger occupants during braking
maneuvers and swerving. <
The transport bag lets you transport up to two
pairs of standard skis safely and cleanly.
The transport bag can hold skis up to a length of
5.4 ft/1.70 m. When transporting skis that are
5.4 ft/1.70 m in length, th e overall capacity of
the ski bag is reduced as the bag narrows.
Loading
1. Fold the cover down.
2. In the cargo bay: press the tab up and fold
the cover down.
3. Undo the fastener and spread out the trans-
port bag between the seats.
4. Insert the latch plate of the retaining strap
into the belt buckle under the transport bag.
5. Load the transport bag. The zipper eases
access to the stored items.
Only place clean skis in the transport bag. Wrap
sharp edges to prevent damage.
Page 115 of 248
Driving tips
113Reference
At a glance
Controls
Communications
Navigation
Entertainment
Mobility
Before driving into a car wash
General information on caring for your BMW
can be found on page204.
With convenient access and automatic
transmission
Insert the remote control into the ignition
switch.
The engine can be switched off when the selec-
tor lever is in position N. Refer also to page 204.
With convenient access and 7-gear
sport automatic transm ission with dual
clutch
Insert the remote control into the ignition
switch.
The engine can be switched off when the trans-
mission is in position N. Refer also to page 205.
Cargo loading
To avoid loading the tires beyond their
approved carrying capacity, never over-
load the vehicle. Overlo ading can lead to over-
heating and increases the rate at which damage
develops inside the tires. This can ultimately
result in a sudden blow-out. <
Make sure that no liquids are spilled or
leak from their containers in the cargo
bay, as this could result in damage to the
vehicle. <
When storing objects in the rear storage
shelf, do not move both seats all the way
forward while moving th em to their uppermost
position and leaning the backrests forward.
Otherwise, the seats could hit and damage the
seal on the windshield, the sun visor and the
headliner. <
Determining loading limit
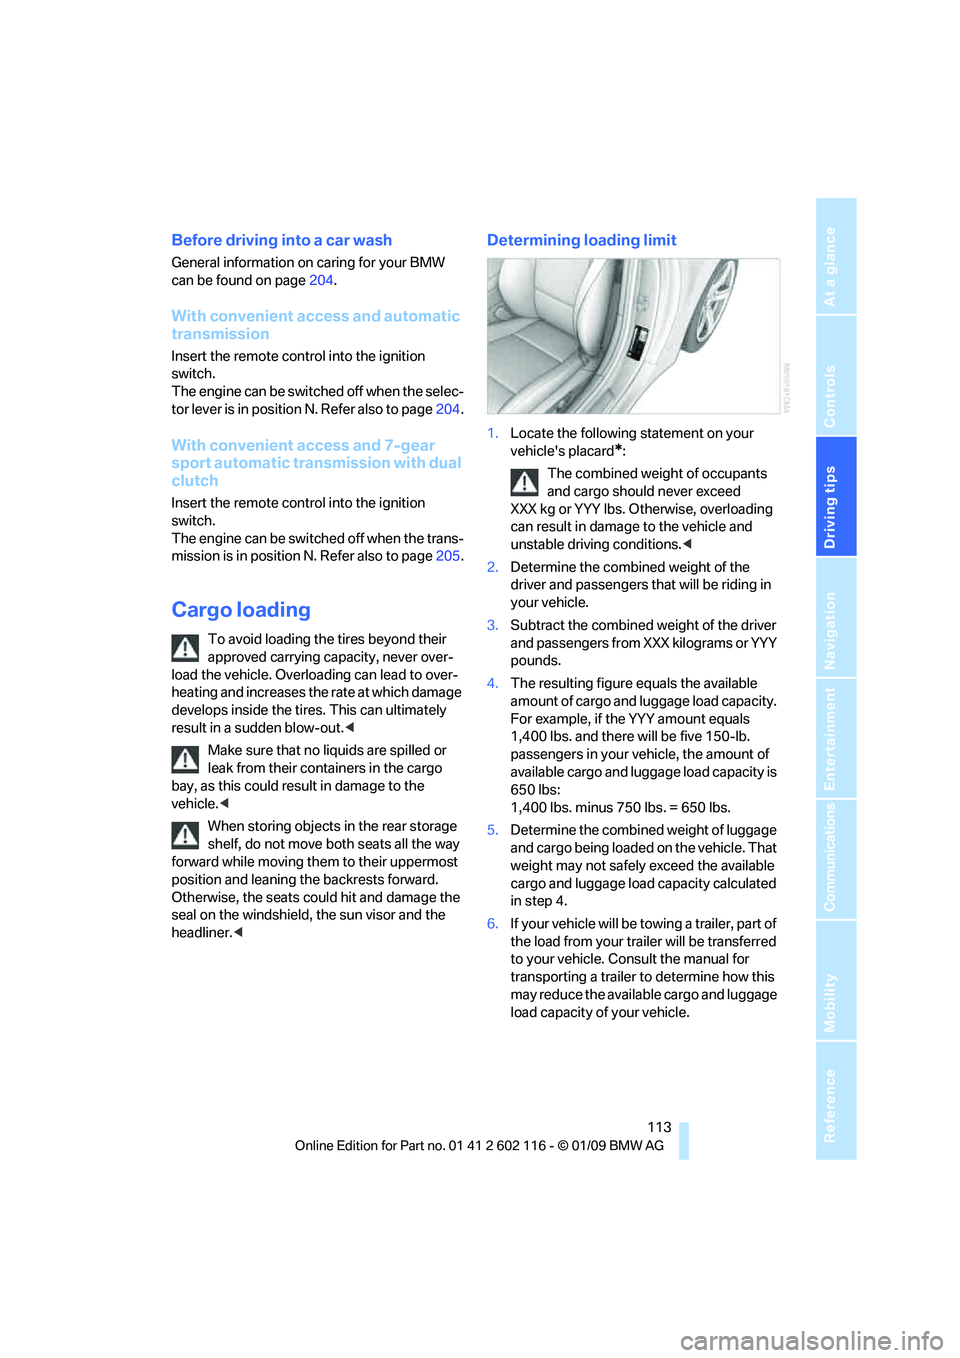
1.Locate the following statement on your
vehicle's placard
*:
The combined weight of occupants
and cargo should never exceed
XXX kg or YYY lbs. Otherwise, overloading
can result in damage to the vehicle and
unstable driving conditions.<
2. Determine the combined weight of the
driver and passengers that will be riding in
your vehicle.
3. Subtract the combined weight of the driver
and passengers from XXX kilograms or YYY
pounds.
4. The resulting figure equals the available
amount of cargo and luggage load capacity.
For example, if the YYY amount equals
1,400 lbs. and there will be five 150-lb.
passengers in your ve hicle, the amount of
available cargo and lugga ge load capacity is
650 lbs:
1,400 lbs. minus 750 lbs. = 650 lbs.
5. Determine the combined weight of luggage
and cargo being loaded on the vehicle. That
weight may not safely exceed the available
cargo and luggage load capacity calculated
in step 4.
6. If your vehicle will be towing a trailer, part of
the load from your tra iler will be transferred
to your vehicle. Consult the manual for
transporting a trailer to determine how this
may reduce the availa ble cargo and luggage
load capacity of your vehicle.
Page 116 of 248
Things to remember when driving
114
Load
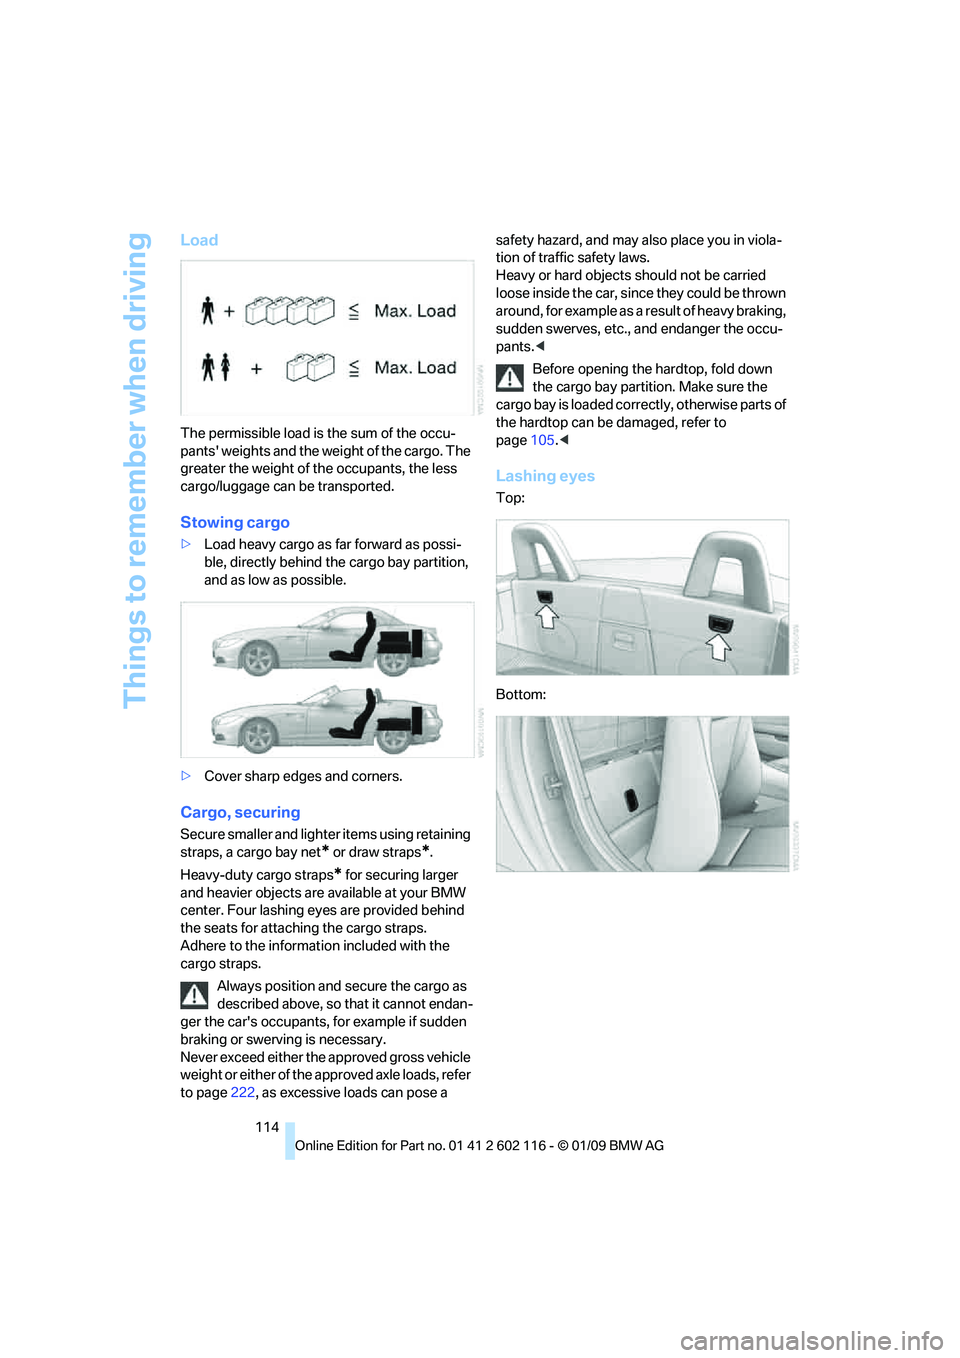
The permissible load is the sum of the occu-
pants' weights and the weight of the cargo. The
greater the weight of the occupants, the less
cargo/luggage can be transported.
Stowing cargo
>Load heavy cargo as far forward as possi-
ble, directly behind the cargo bay partition,
and as low as possible.
> Cover sharp edges and corners.
Cargo, securing
Secure smaller and lighter items using retaining
straps, a cargo bay net
* or draw straps*.
Heavy-duty cargo straps
* for securing larger
and heavier objects are available at your BMW
center. Four lashing eyes are provided behind
the seats for attaching the cargo straps.
Adhere to the informat ion included with the
cargo straps.
Always position and secure the cargo as
described above, so that it cannot endan-
ger the car's occupants, for example if sudden
braking or swerving is necessary.
Never exceed either the approved gross vehicle
weight or either of the a pproved axle loads, refer
to page 222, as excessive loads can pose a safety hazard, and may al
so place you in viola-
tion of traffic safety laws.
Heavy or hard objects should not be carried
loose inside the car, since they could be thrown
around, for example as a result of heavy braking,
sudden swerves, etc., and endanger the occu-
pants. <
Before opening the hardtop, fold down
the cargo bay partition. Make sure the
cargo bay is loaded correctly, otherwise parts of
the hardtop can be damaged, refer to
page 105.<
Lashing eyes
Top:
Bottom: