tow BMW Z4 SDRIVE30I ROADSTER 2009 Owners Manual
[x] Cancel search | Manufacturer: BMW, Model Year: 2009, Model line: Z4 SDRIVE30I ROADSTER, Model: BMW Z4 SDRIVE30I ROADSTER 2009Pages: 248, PDF Size: 7.63 MB
Page 9 of 248
7Reference
At a glance
Controls
Driving tips
Communications
Navigation
Entertainment
Mobility
Reporting safety defects
For US customers
The following only applies to vehicles owned
and operated in the US.
If you believe that your vehicle has a defect
which could cause a crash or could cause injury
or death, you should immediately inform the
National Highway Traffic Safety Administration,
NHTSA, in addition to notifying BMW of North
America, LLC, P.O. Box 1227, Westwood,
New Jersey 07675-1227, Telephone
1-800-831-1117.
If NHTSA receives similar complaints, it may
open an investigation, and if it finds that a safety
defect exists in a group of vehicles, it may order
a recall and remedy campaign. However,
NHTSA cannot become involved in individual
problems between you, yo ur dealer, or BMW of
North America, LLC.
To contact NHTSA, you may call the Vehicle
Safety Hotline toll-free at 1-888-327-4236
(TTY: 1-800-424-9153); go to
http://www.safercar.gov; or write to: Adminis-
trator, NHTSA, 400 Seventh Street, SW.,
Washington, DC 20590. You can also obtain
other information about motor vehicle safety
from http://www.safercar.gov
For Canadian customers
Canadian customers who wish to report a
safety-related defect to Transport Canada,
Defect Investigations and Recalls, may call
1-800-333-0510 toll-free from anywhere in
Canada or 1-613-993-9851 from the Ottawa
region and from other countries, or contact
Transport Canada by mail at: Transport Can-
ada, ASFAD, Place de Ville, Tower C,
330 Sparks Street, Ottawa, ON, K1A 0N5.
You can also obtain other information about
motor vehicle safety from http://www.tc.gc.ca
Page 24 of 248

Letters and numbers
22
Letters and numbers
Entering letters and numbers
1.Turn the controller: select the letters or
numbers.
2. Select additional letters or numbers if
needed.
3. "OK": confirm the entry.
Switching between letters and
numbers
Depending on the menu, you can switch
between entering letters and numbers:
Wordmatch concept during navigation
Entry of names and addresses: the selection is
narrowed down every time a letter is entered
and letters may be added automatically.
Destination search: the entries are continuously
compared to the data stored in the vehicle.
> The only letters of fered for entering
addresses are those for which data are
available.
> Town/city names can be entered with the
spelling used in any of the languages avail-
able on the Control Display.
SymbolFunction
Press the controller: delete one letter
or number
Press the controller for an extended
period: delete all letters or numbers
Enter a blank space
SymbolFunction
Entering letters
Entering numbers
Page 32 of 248
Opening and closing
30
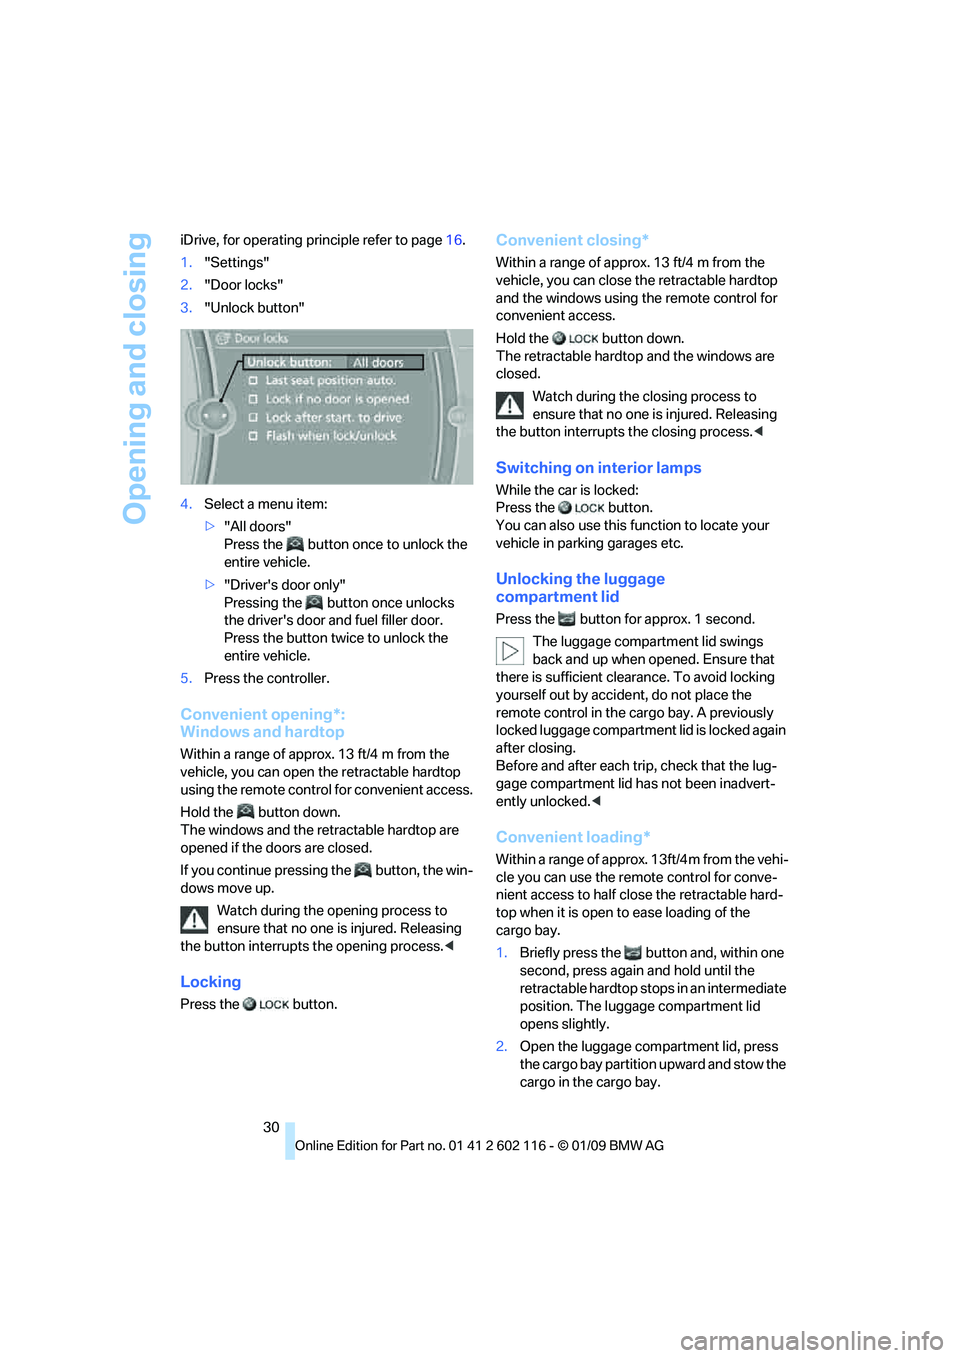
iDrive, for operating pr
inciple refer to page16.
1. "Settings"
2. "Door locks"
3. "Unlock button"
4. Select a menu item:
>"All doors"
Press the button on ce to unlock the
entire vehicle.
> "Driver's door only"
Pressing the button once unlocks
the driver's door and fuel filler door.
Press the button twic e to unlock the
entire vehicle.
5. Press the controller.
Convenient opening*:
Windows and hardtop
Within a range of approx. 13 ft/4 m from the
vehicle, you can open the retractable hardtop
using the remote contro l for convenient access.
Hold the button down.
The windows and the re tractable hardtop are
opened if the doors are closed.
If you continue pressing the button, the win-
dows move up.
Watch during the opening process to
ensure that no one is injured. Releasing
the button interrupts the opening process. <
Locking
Press the button.
Convenient closing*
Within a range of approx. 13 ft/4 m from the
vehicle, you can close the retractable hardtop
and the windows using the remote control for
convenient access.
Hold the button down.
The retractable hardto p and the windows are
closed.
Watch during the closing process to
ensure that no one is injured. Releasing
the button interrupts the closing process.<
Switching on interior lamps
While the car is locked:
Press the button.
You can also use this fu nction to locate your
vehicle in parking garages etc.
Unlocking the luggage
compartment lid
Press the button for approx. 1 second.
The luggage compartment lid swings
back and up when opened. Ensure that
there is sufficient clearance. To avoid locking
yourself out by accide nt, do not place the
remote control in the ca rgo bay. A previously
locked luggage compartment lid is locked again
after closing.
Before and after each tr ip, check that the lug-
gage compartment lid ha s not been inadvert-
ently unlocked. <
Convenient loading*
Within a range of approx. 13ft/4m from the vehi-
cle you can use the remote control for conve-
nient access to half clos e the retractable hard-
top when it is open to ease loading of the
cargo bay.
1. Briefly press the button and, within one
second, press again and hold until the
retractable hardtop stops in an intermediate
position. The luggage compartment lid
opens slightly.
2. Open the luggage compartment lid, press
the cargo bay partition upward and stow the
cargo in the cargo bay.
Page 35 of 248
Controls
33Reference
At a glance
Driving tips
Communications
Navigation
Entertainment
Mobility
Opening from inside
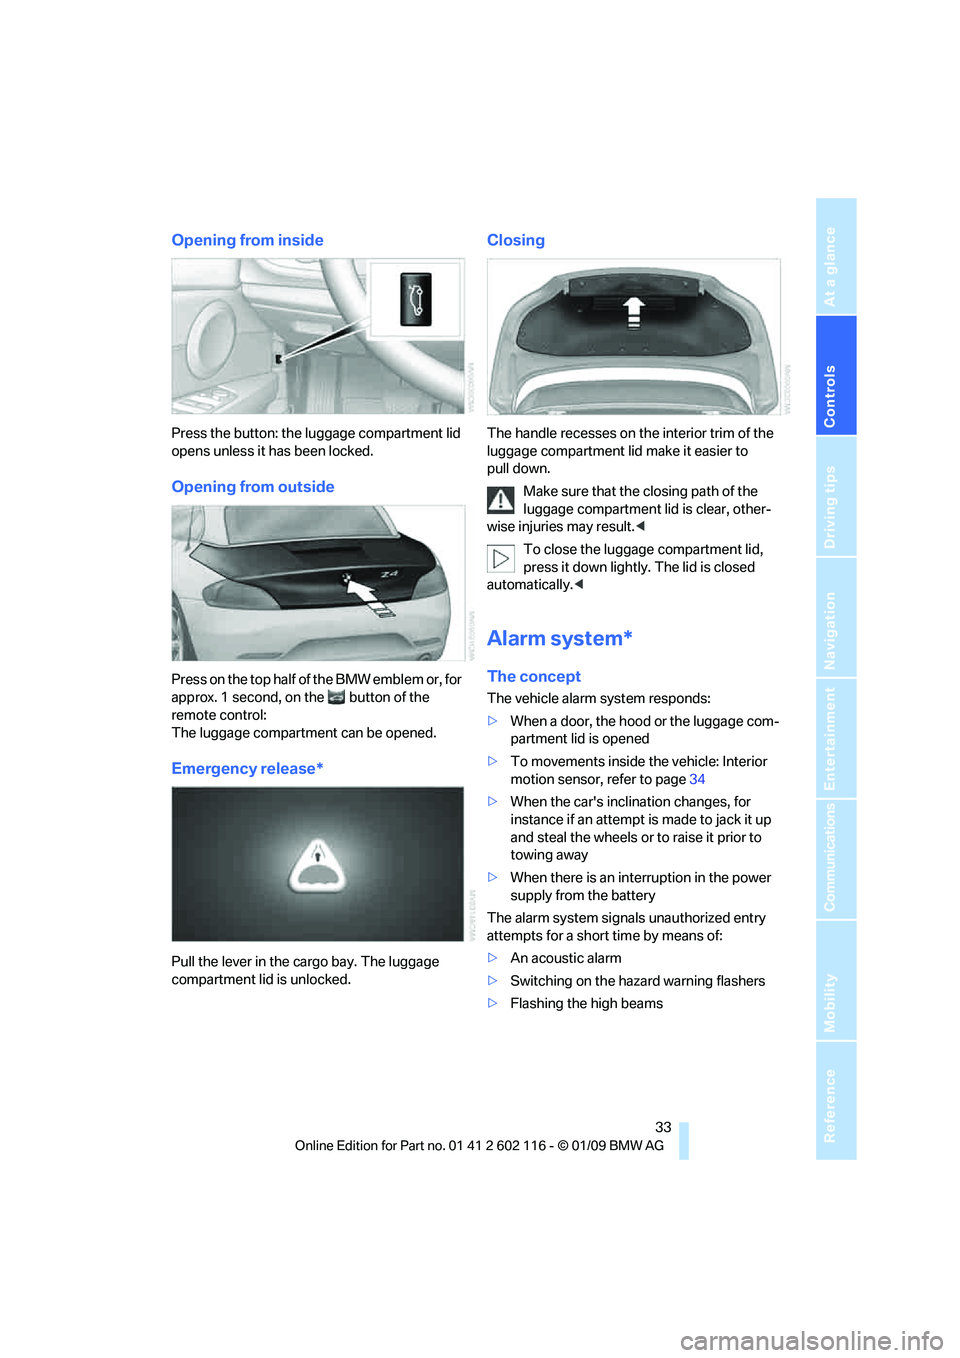
Press the button: the luggage compartment lid
opens unless it has been locked.
Opening from outside
Press on the top half of the BMW emblem or, for
approx. 1 second, on the button of the
remote control:
The luggage compartment can be opened.
Emergency release*
Pull the lever in the cargo bay. The luggage
compartment lid is unlocked.
Closing
The handle recesses on the interior trim of the
luggage compartment lid make it easier to
pull down.
Make sure that the closing path of the
luggage compartment lid is clear, other-
wise injuries may result. <
To close the luggage compartment lid,
press it down lightly. The lid is closed
automatically. <
Alarm system*
The concept
The vehicle alarm system responds:
>When a door, the hood or the luggage com-
partment lid is opened
> To movements inside the vehicle: Interior
motion sensor, refer to page 34
> When the car's inclination changes, for
instance if an attempt is made to jack it up
and steal the wheels or to raise it prior to
towing away
> When there is an interruption in the power
supply from the battery
The alarm system signals unauthorized entry
attempts for a short time by means of:
> An acoustic alarm
> Switching on the haza rd warning flashers
> Flashing the high beams
Page 36 of 248
Opening and closing
34
Arming and disarming
When you lock or unlock the vehicle, either with
the remote control or at the door lock, the alarm
system is armed or disarmed at the same time.
You can open the lugga ge compartment lid
using the button of the remote control even
if the alarm system is armed, refer to page 30.
The lid is locked and monitored again as soon
as it is closed.
Panic mode*
You can trigger the alar m system if you find
yourself in a dangerous situation:
Press the button for at least three seconds.
To switch off the alarm: press any button.
Switching off an alarm
> Unlock the car with the remote control, refer
to page 29.
> Insert the remote contro l all the way into the
ignition lock.
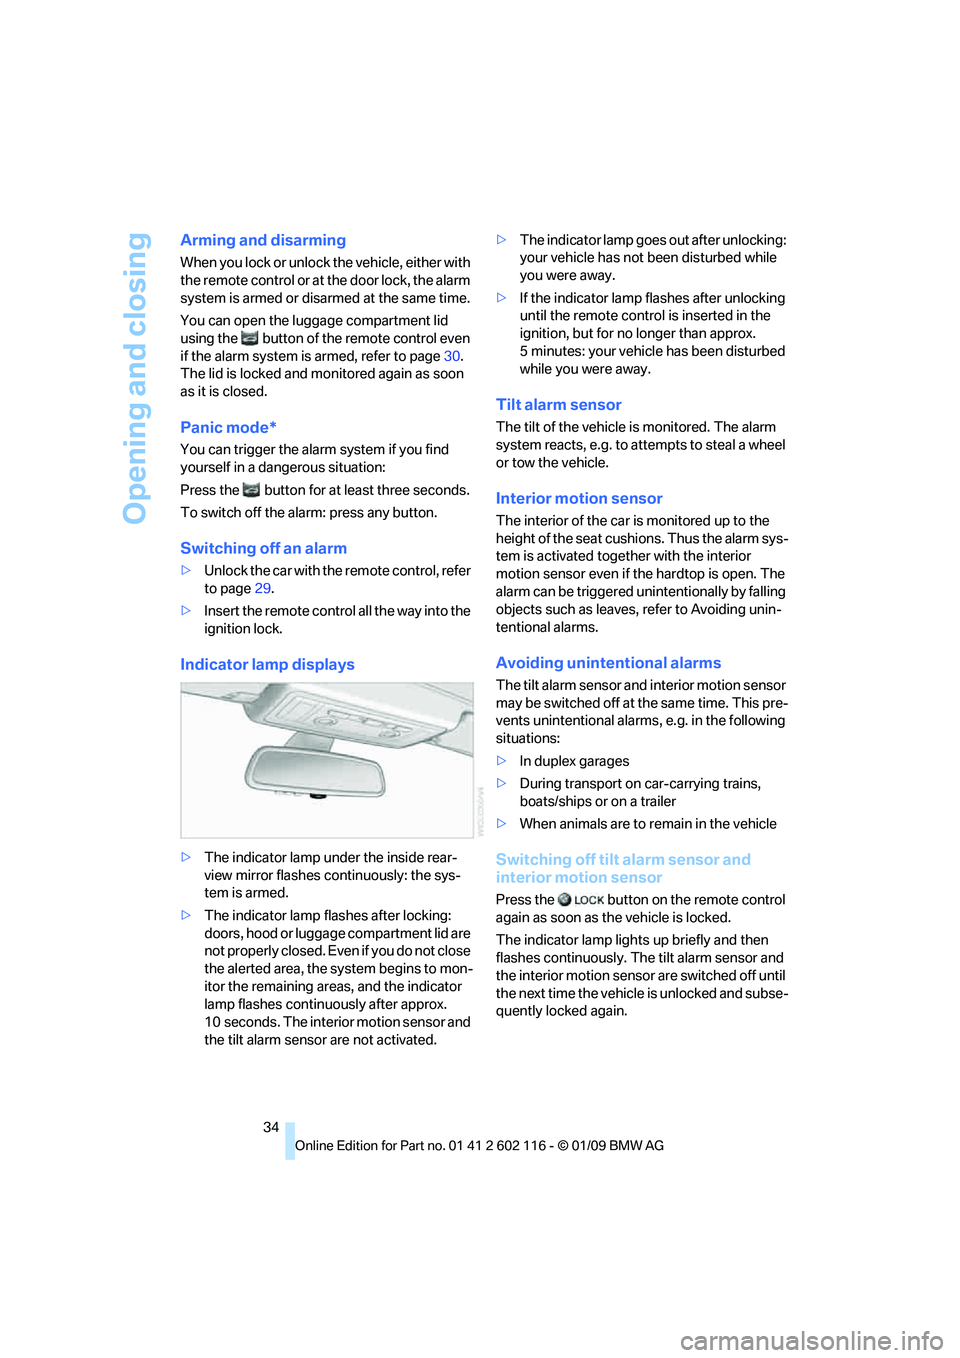
Indicator lamp displays
> The indicator lamp under the inside rear-
view mirror flashes continuously: the sys-
tem is armed.
> The indicator lamp flashes after locking:
doors, hood or luggage compartment lid are
not properly closed. Even if you do not close
the alerted area, the sy stem begins to mon-
itor the remaining area s, and the indicator
lamp flashes continuously after approx.
10 seconds. The interior motion sensor and
the tilt alarm sensor are not activated. >
The indicator lamp goes out after unlocking:
your vehicle has not been disturbed while
you were away.
> If the indicator lamp flashes after unlocking
until the remote control is inserted in the
ignition, but for no longer than approx.
5 minutes: your vehicle has been disturbed
while you were away.
Tilt alarm sensor
The tilt of the vehicle is monitored. The alarm
system reacts, e.g. to attempts to steal a wheel
or tow the vehicle.
Interior motion sensor
The interior of the car is monitored up to the
height of the seat cushions. Thus the alarm sys-
tem is activated togeth er with the interior
motion sensor even if the hardtop is open. The
alarm can be triggered unintentionally by falling
objects such as leaves, refer to Avoiding unin-
tentional alarms.
Avoiding unintentional alarms
The tilt alarm sensor and interior motion sensor
may be switched off at the same time. This pre-
vents unintentional alarms, e.g. in the following
situations:
> In duplex garages
> During transport on car-carrying trains,
boats/ships or on a trailer
> When animals are to remain in the vehicle
Switching off tilt alarm sensor and
interior motion sensor
Press the button on the remote control
again as soon as the vehicle is locked.
The indicator lamp light s up briefly and then
flashes continuously. The tilt alarm sensor and
the interior motion sensor are switched off until
the next time the vehicle is unlocked and subse-
quently locked again.
Page 56 of 248
Driving
54
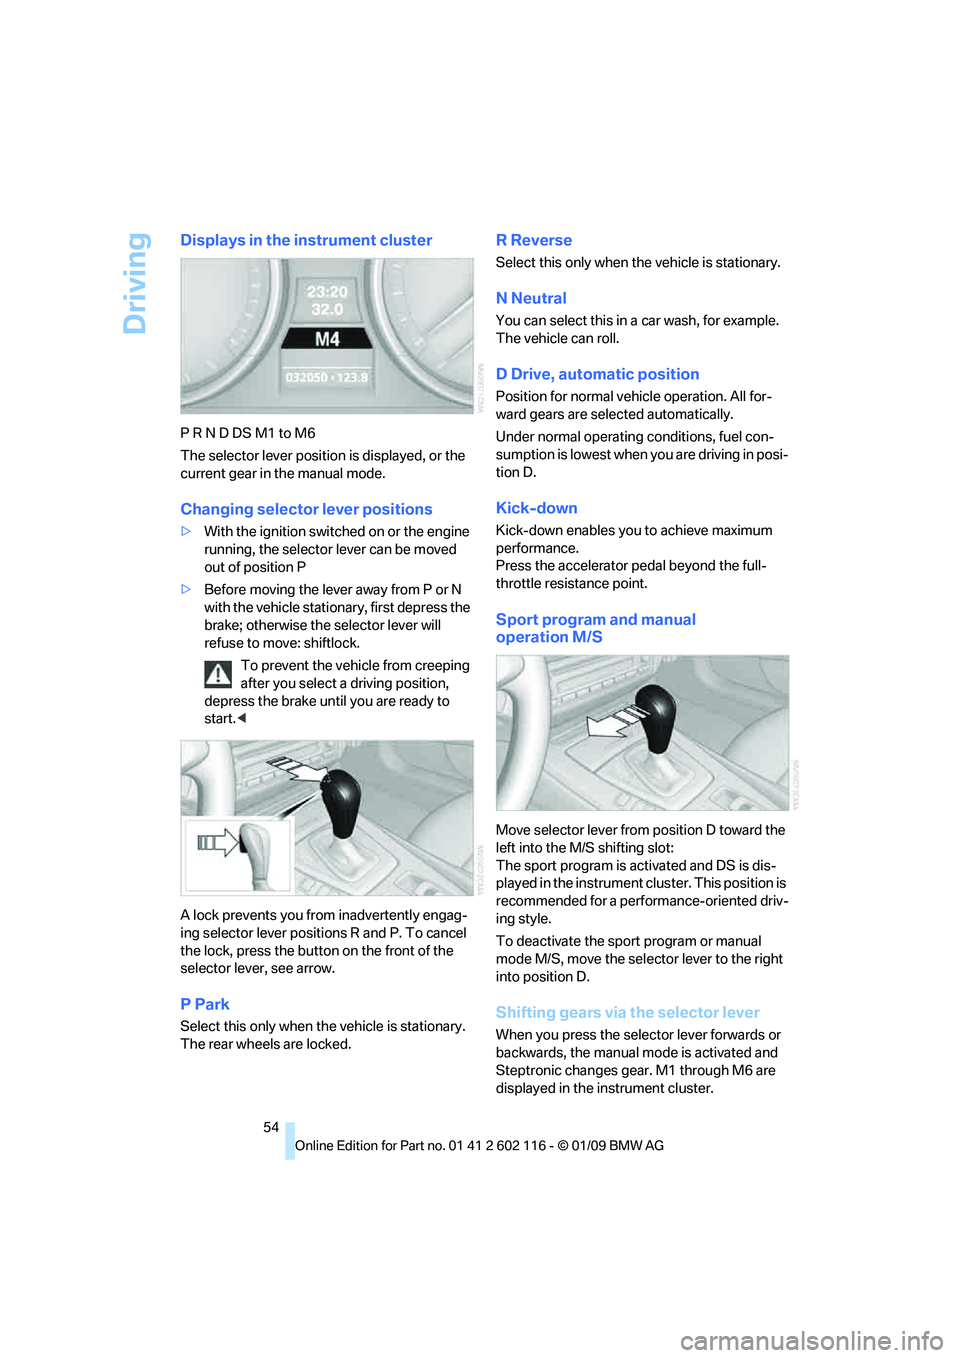
Displays in the instrument cluster
P R N D DS M1 to M6
The selector lever position is displayed, or the
current gear in the manual mode.
Changing selector lever positions
>With the ignition switched on or the engine
running, the selector lever can be moved
out of position P
> Before moving the lever away from P or N
with the vehicle stationary, first depress the
brake; otherwise the selector lever will
refuse to move: shiftlock.
To prevent the vehicle from creeping
after you select a driving position,
depress the brake until you are ready to
start. <
A lock prevents you from inadvertently engag-
ing selector lever positions R and P. To cancel
the lock, press the butto n on the front of the
selector lever, see arrow.
P Park
Select this only when th e vehicle is stationary.
The rear wheels are locked.
R Reverse
Select this only when th e vehicle is stationary.
N Neutral
You can select this in a car wash, for example.
The vehicle can roll.
D Drive, automatic position
Position for normal vehicle operation. All for-
ward gears are selected automatically.
Under normal operating conditions, fuel con-
sumption is lowest when you are driving in posi-
tion D.
Kick-down
Kick-down enables you to achieve maximum
performance.
Press the accelerator pedal beyond the full-
throttle resistance point.
Sport program and manual
operation M/S
Move selector lever from position D toward the
left into the M/S shifting slot:
The sport program is activated and DS is dis-
played in the instrument cl uster. This position is
recommended for a performance-oriented driv-
ing style.
To deactivate the spor t program or manual
mode M/S, move the sele ctor lever to the right
into position D.
Shifting gears via the selector lever
When you press the select or lever forwards or
backwards, the manual mode is activated and
Steptronic changes gear. M1 through M6 are
displayed in the instrument cluster.
Page 59 of 248
Controls
57Reference
At a glance
Driving tips
Communications
Navigation
Entertainment
Mobility
R Reverse
Select this only when the vehicle is stationary.
N Neutral
You can select this in a car wash, for example.
The vehicle can roll.
N remains engaged after the engine is
switched off if you leave the remote con-
trol in the ignition lock. Use this function in an
automatic car wash, for ex ample. P is automati-
cally engaged after approx. 30 minutes. <
D drive mode
In drive mode, all forward gears are shifted auto-
matically.
Kick-down
To accelerate rapidly, e.g. when passing, press
the accelerator down past the resistance point.
This provides maximum acceleration.
Sport program and manual
operation M/S
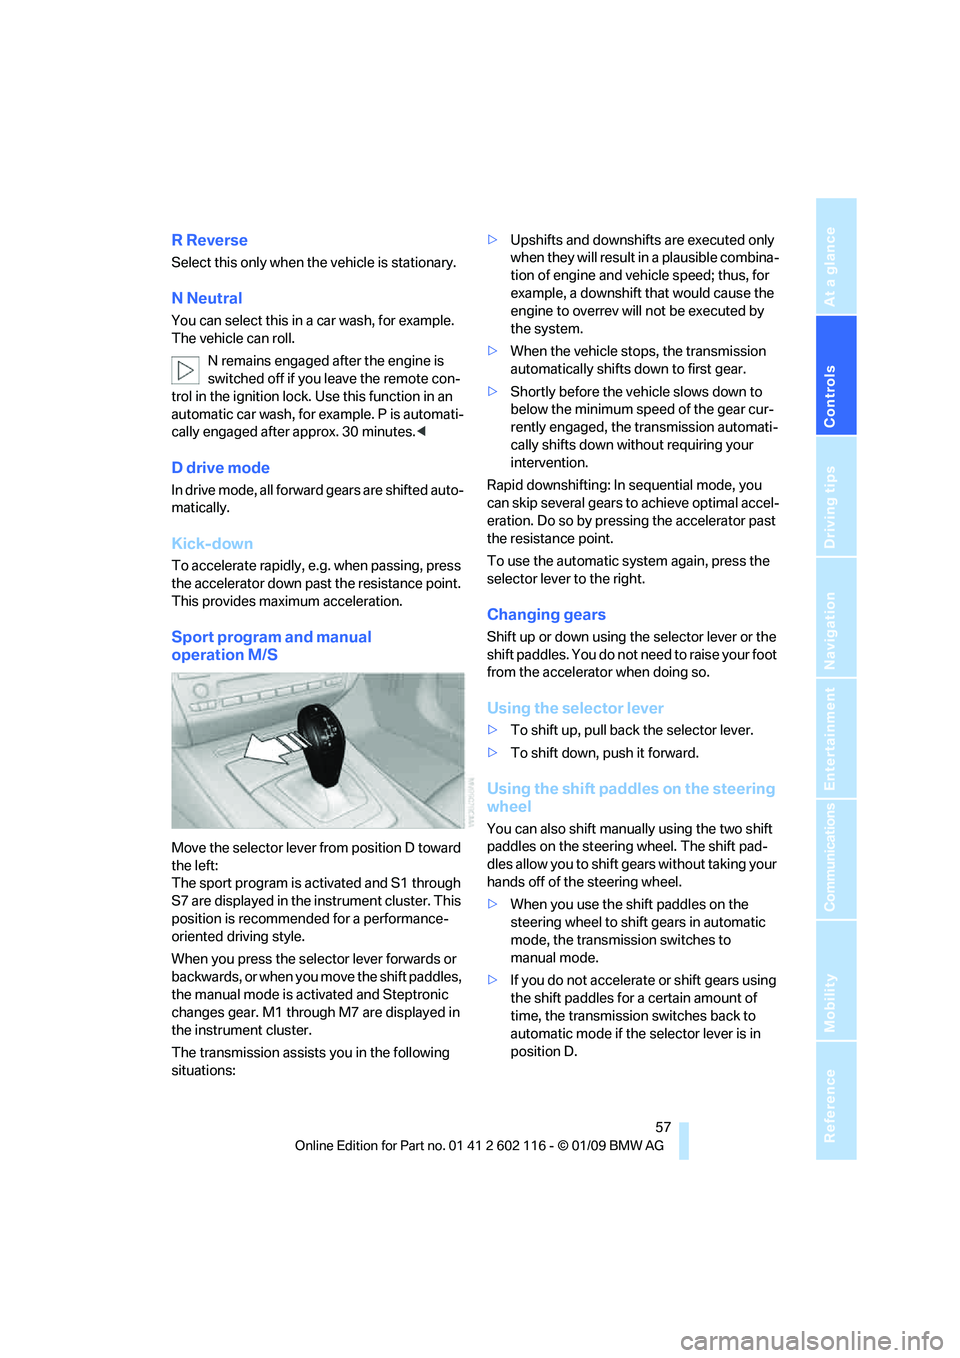
Move the selector lever from position D toward
the left:
The sport program is activated and S1 through
S7 are displayed in the instrument cluster. This
position is recommend ed for a performance-
oriented driving style.
When you press the selector lever forwards or
b a c k w a r d s , o r w h e n y o u m o v e t h e s h i f t p a d d l e s ,
the manual mode is ac tivated and Steptronic
changes gear. M1 through M7 are displayed in
the instrument cluster.
The transmission assists you in the following
situations: >
Upshifts and downshifts are executed only
when they will result in a plausible combina-
tion of engine and vehicle speed; thus, for
example, a downshift that would cause the
engine to overrev will not be executed by
the system.
> When the vehicle stops, the transmission
automatically shifts down to first gear.
> Shortly before the ve hicle slows down to
below the minimum speed of the gear cur-
rently engaged, the transmission automati-
cally shifts down without requiring your
intervention.
Rapid downshifting: In sequential mode, you
can skip several gears to achieve optimal accel-
eration. Do so by pressi ng the accelerator past
the resistance point.
To use the automatic system again, press the
selector lever to the right.
Changing gears
Shift up or down using th e selector lever or the
shift paddles. You do not ne ed to raise your foot
from the accelerator when doing so.
Using the selector lever
> To shift up, pull back the selector lever.
> To shift down, push it forward.
Using the shift paddles on the steering
wheel
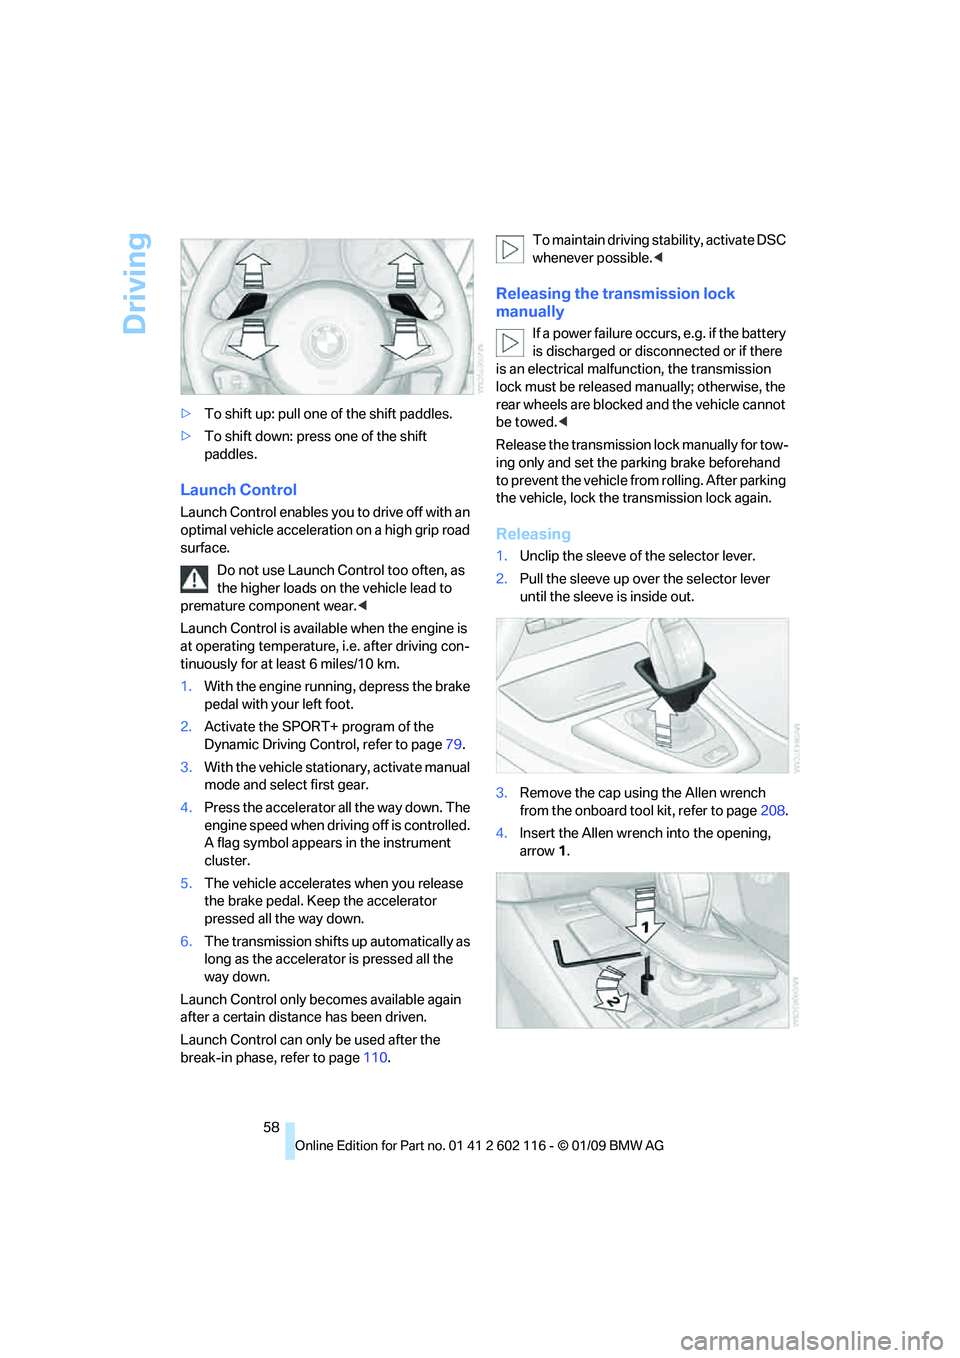
You can also shift manually using the two shift
paddles on the steering wheel. The shift pad-
dles allow you to shift ge ars without taking your
hands off of the steering wheel.
> When you use the shift paddles on the
steering wheel to shift gears in automatic
mode, the transmission switches to
manual mode.
> If you do not accelerate or shift gears using
the shift paddles for a certain amount of
time, the transmission switches back to
automatic mode if the selector lever is in
position D.
Page 60 of 248
Driving
58
>
To shift up: pull one of the shift paddles.
> To shift down: press one of the shift
paddles.
Launch Control
Launch Control enables you to drive off with an
optimal vehicle acceleration on a high grip road
surface.
Do not use Launch Control too often, as
the higher loads on the vehicle lead to
premature component wear. <
Launch Control is availa ble when the engine is
at operating temperature, i.e. after driving con-
tinuously for at least 6 miles/10 km.
1. With the engine running, depress the brake
pedal with your left foot.
2. Activate the SPORT+ program of the
Dynamic Driving Control, refer to page 79.
3. With the vehicle stationary, activate manual
mode and select first gear.
4. Press the accelerator all the way down. The
engine speed when driving off is controlled.
A flag symbol appears in the instrument
cluster.
5. The vehicle accelerates when you release
the brake pedal. Keep the accelerator
pressed all the way down.
6. The transmission shifts up automatically as
long as the accelerator is pressed all the
way down.
Launch Control only be comes available again
after a certain distance has been driven.
Launch Control can only be used after the
break-in phase, refer to page 110.To maintain driving stability, activate DSC
whenever possible.
<
Releasing the transmission lock
manually
If a power failure occurs, e.g. if the battery
is discharged or disconnected or if there
is an electrical malfun ction, the transmission
lock must be released manually; otherwise, the
rear wheels are blocked and the vehicle cannot
be towed. <
Release the transmission lock manually for tow-
ing only and set the parking brake beforehand
to prevent the vehicle from rolling. After parking
the vehicle, lock the transmission lock again.
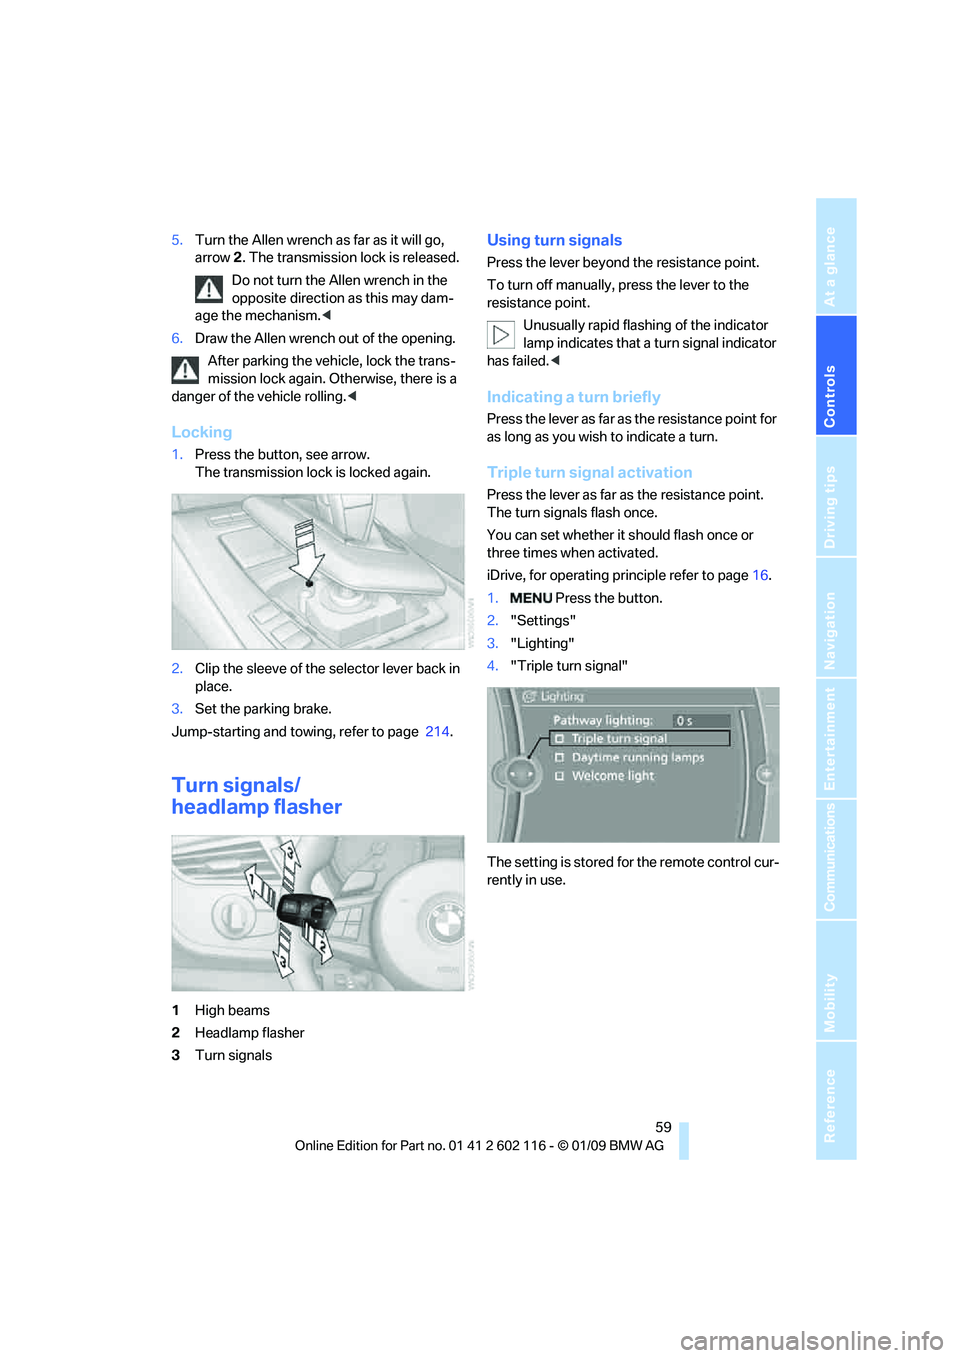
Releasing
1. Unclip the sleeve of the selector lever.
2. Pull the sleeve up over the selector lever
until the sleeve is inside out.
3. Remove the cap using the Allen wrench
from the onboard tool kit, refer to page 208.
4. Insert the Allen wrench into the opening,
arrow 1.
Page 61 of 248
Controls
59Reference
At a glance
Driving tips
Communications
Navigation
Entertainment
Mobility
5.Turn the Allen wrench as far as it will go,
arrow 2. The transmission lock is released.
Do not turn the Allen wrench in the
opposite direction as this may dam-
age the mechanism.<
6. Draw the Allen wrench out of the opening.
After parking the vehicle, lock the trans-
mission lock again. Otherwise, there is a
danger of the vehicle rolling. <
Locking
1.Press the button, see arrow.
The transmission lock is locked again.
2. Clip the sleeve of the selector lever back in
place.
3. Set the parking brake.
Jump-starting and towing, refer to page 214.
Turn signals/
headlamp flasher
1High beams
2 Headlamp flasher
3 Turn signals
Using turn signals
Press the lever beyond the resistance point.
To turn off manually, press the lever to the
resistance point.
Unusually rapid flashi ng of the indicator
lamp indicates that a turn signal indicator
has failed. <
Indicating a turn briefly
Press the lever as far as the resistance point for
as long as you wish to indicate a turn.
Triple turn signal activation
Press the lever as far as the resistance point.
The turn signals flash once.
You can set whether it should flash once or
three times when activated.
iDrive, for operating pr inciple refer to page16.
1. Press the button.
2. "Settings"
3. "Lighting"
4. "Triple turn signal"
The setting is stored for the remote control cur-
rently in use.
Page 79 of 248
Controls
77Reference
At a glance
Driving tips
Communications
Navigation
Entertainment
Mobility
Technology for driving comfort and safety
Park Distance Control PDC*
The concept
The PDC assists you with maneuvering in tight
parking spaces. Acoustic signals and a visual
indicator
warn you of the presence of an object
in front of
* or behind your ve hicle. To measure
the distance, there are four ultrasonic sensors
in either bumper.
These sensors have a range of approx. 6.5 ft/
2 m. However, an acoustic warning does not
sound until an object is approx. 24 in/60 cm
from the corner sensors, or approx. 5 ft/1.50 m
from the center sensors.
PDC is a parking aid that can indicate
objects when they are approached
slowly, as is usually th e case when parking.
Avoid approaching an obje ct a t h i g h s p e e d , o t h -
erwise physical circumstances may lead to the
system warning being issued too late. <
Switching on automatically
With the engine running or the ignition switched
on, the system is activated after approx. 1 sec-
ond when you engage reverse gear or move the
automatic transmission selector lever to
position R. Wait this short period before driving.
Switching off automatically
After approx. 165 ft/50 m of driving or above
approx. 20 mph or 30 km/h, the system
switches off and the LED goes out.
Signal tones
When nearing an object, its position is indicated
correspondingly by an in terval tone. As the dis-
tance between vehicle and object decreases,
the intervals between the tones become
shorter. If the distance to the nearest object
falls to below roughly 1 f t/30 cm, then a contin-
uous tone sounds.
An interval tone is interrupted after approx.
3seconds >
if you remain in front of an object that has
been detected by only one of the corner
sensors
> if you are driving parallel to a wall.
Malfunction
The indicator lamp in the instrument
cluster comes on. PDC is malfunc-
tioning. A message appears on the
Control Display. Have the system checked.
To avoid this problem, keep the sensors clean
and free of ice or snow in order to ensure that
they will continue to operate effectively. When
using a high-pressure cleaner, do not spray the
sensors for extended periods of time and only
from a distance of at least 4 in/10 cm.
PDC with visual warning
The approach of the vehicle to an object is
shown on the Control Display. Objects that are
farther away are displayed on the Control Dis-
play before a signal to ne sounds. The display
appears on the Control Display as soon as PDC
is activated.
System limitations
Even with PDC, final responsibility for
estimating the distance between the
vehicle and any obstructions always remains
with the driver. Even when sensors are pro-
vided, there is a blind spot in which objects can
no longer be detected. The system is also sub-
ject to the physical limit s that apply to all forms
of ultrasonic measurement, such as those
encountered with trailer towbars and hitches,
thin or wedge-shaped objects, etc. Low objects
that have already been displayed, e.g. curbs,
can disappear again from the detection area of
the sensors before or af ter a continuous tone
sounds. Higher, protruding objects, e.g. ledges,
cannot be detected. Therefore, always drive
cautiously, otherwise there is a risk of personal
injury or property damage.