ECU BMW Z4 SDRIVE35I 2009 Owners Manual
[x] Cancel search | Manufacturer: BMW, Model Year: 2009, Model line: Z4 SDRIVE35I, Model: BMW Z4 SDRIVE35I 2009Pages: 248, PDF Size: 7.63 MB
Page 3 of 248
Z4 sDrive30i
Z4 sDrive35iOwner's Manual for Vehicle
Congratulations, and thank you for choosing a BMW.
Thorough familiarity with your vehicle will provide you with
enhanced control and security when you drive it. We therefore
have this request:
Please take the time to read th is Owner's Manual and familiarize
yourself with the information that we have compiled for you
before starting off in your new vehicle. It contains important data
and instructions intended to a ssist you in gaining maximum use
and satisfaction from your BMW' s unique range of technical fea-
tures. The manual also contai ns information on maintenance
designed to enhance operating safety and contribute to main-
taining the value of your BMW throughout an extended
service life.
This manual is supplemented by a Service and Warranty Informa-
tion Booklet for US models or a Warranty and Service Guide
Booklet for Canadian models.
We wish you an enjoyable driving experience.
BMW AG
Page 23 of 248
At a glance
21Reference
Controls
Driving tips
Communications
Navigation
Entertainment
Mobility
Programmable memory keys
Certain iDrive functions can be stored on the
programmable memory keys and called up
directly, e.g. radio stations, navigation destina-
tions, phone numbers and entry points into
the menu.
Storing functions
1. Select the function via the iDrive.
2. ... Press the desired button
for longer than 2 seconds.
Example for programmable
memory keys
Switch the voice instructions for the navigation
on/off.
1. "Navigation"
2. "Map"
3. Select the symbol using the controller.
4. ... Press the desired button
for longer than 2 seconds.
Executing a function
... Press the button.
The function is executed immediately. This
means, for example, that the number is dialed
when a phone number is selected.
Displaying memory key assignments
Touch the button with a finger. Do not wear
gloves or use objects.
Displaying brief information
... Touch the button.
The key assignment is displayed at the top
edge of the screen.
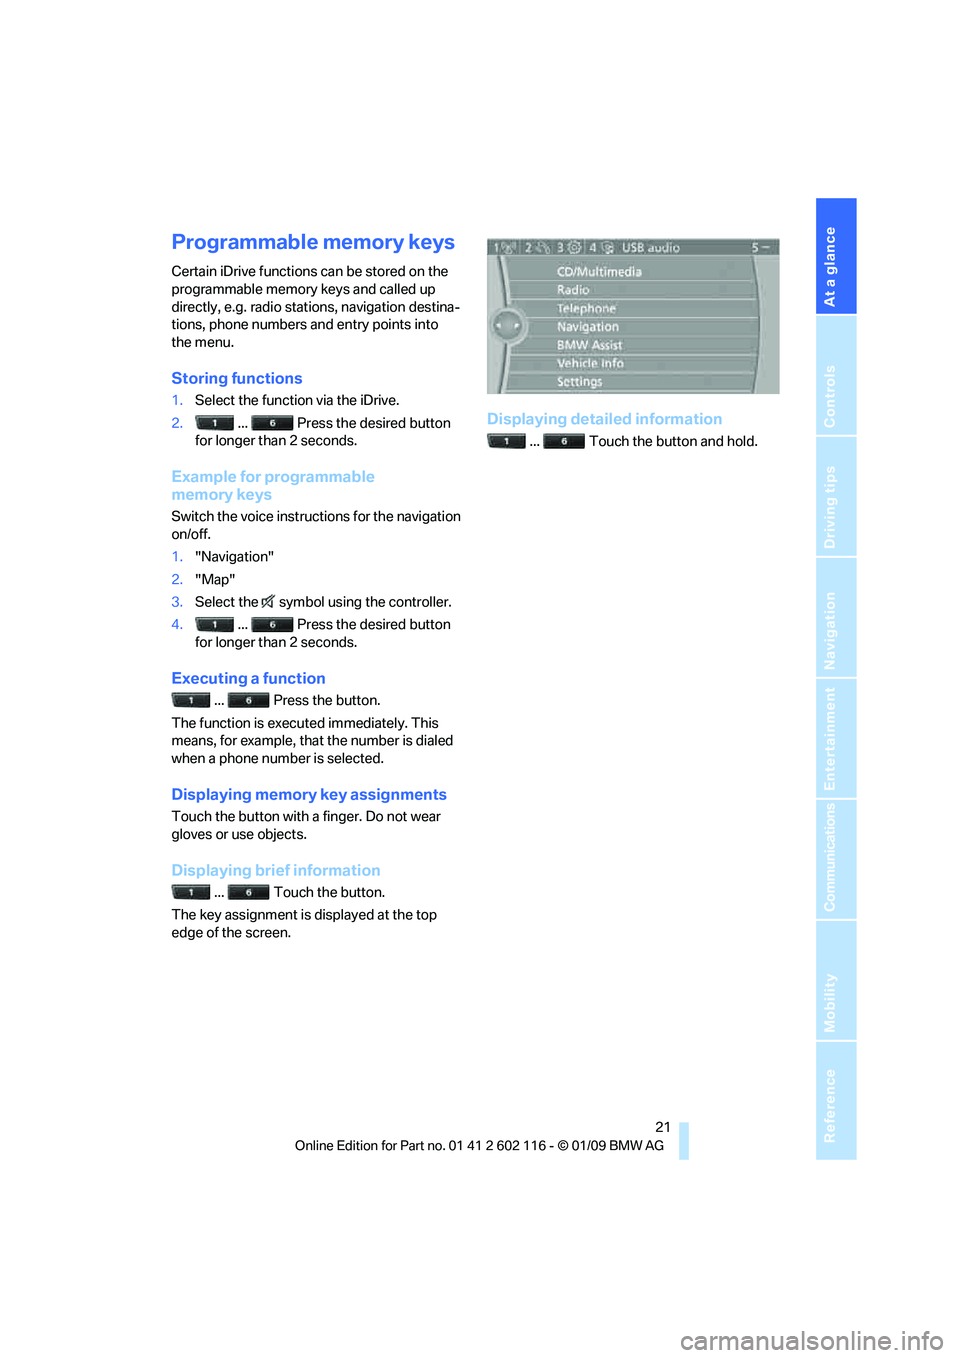
Displaying detailed information
... Touch the button and hold.
Page 50 of 248
Transporting children safely
48
Transporting children safely
The right place for children
Do not leave children unattended in the
vehicle, otherwise they could endanger
themselves and/or other persons by opening
the doors, for example. <
Children on the passenger seat
Always transport children under the age
of 13 or smaller than 5 ft/150 cm in a
child-restraint system suitable for their age,
weight and size, and with the passenger airbag
deactivated. Otherwise, there is an increased
risk of injury in the event of an accident or if the
airbags deploy. <
Children 13 years of age or older must be buck-
led in with a safety belt as soon as there no
longer is any child-restr aint system that is
appropriate for their age, size and weight.
For more information on automatic deactivation
of the passenger airbags refer to page 86.
Installing child-restraint
systems
After installing a child-restraint system on
the passenger seat, make sure that the
front and side airbags for the passenger are
deactivated; otherwise, there is an increased
risk of injury if the airbags deploy.
Observe the child-restraint system manufac-
turer's instructions when selecting, installing
and using child-restraint systems. Otherwise
the protective effect may be diminished. <
Standard child-restraint systems are designed
to be secured with a lap be lt or with the lap-belt
section of a lap-and-shou lder belt. Incorrectly
or improperly installed child-restraint systems
can increase the risk of injury to children.
Always follow the installa tion instructions for
the system with the greatest care.
On the passenger seat
After installing a child-restraint system on
the passenger seat, make sure that the
front and side airbags for the passenger are
deactivated, otherwise there is an increased
risk of injury if the airbags deploy. <
Seat position
Before installing a child-restraint system, move
the passenger seat as far back and up
* as pos-
sible to obtain the best possible position for
the belt.
Backrest width*
The backrest width of the passenger's
seat must be at its widest possible set-
ting. Do not change the setting after installing
the child seat. Otherwise the child seat's stabil-
ity on the passenger's seat is limited. <
1. Adjust the backrest width to its widest set-
ting, refer to page 43.
2. Install the child seat.
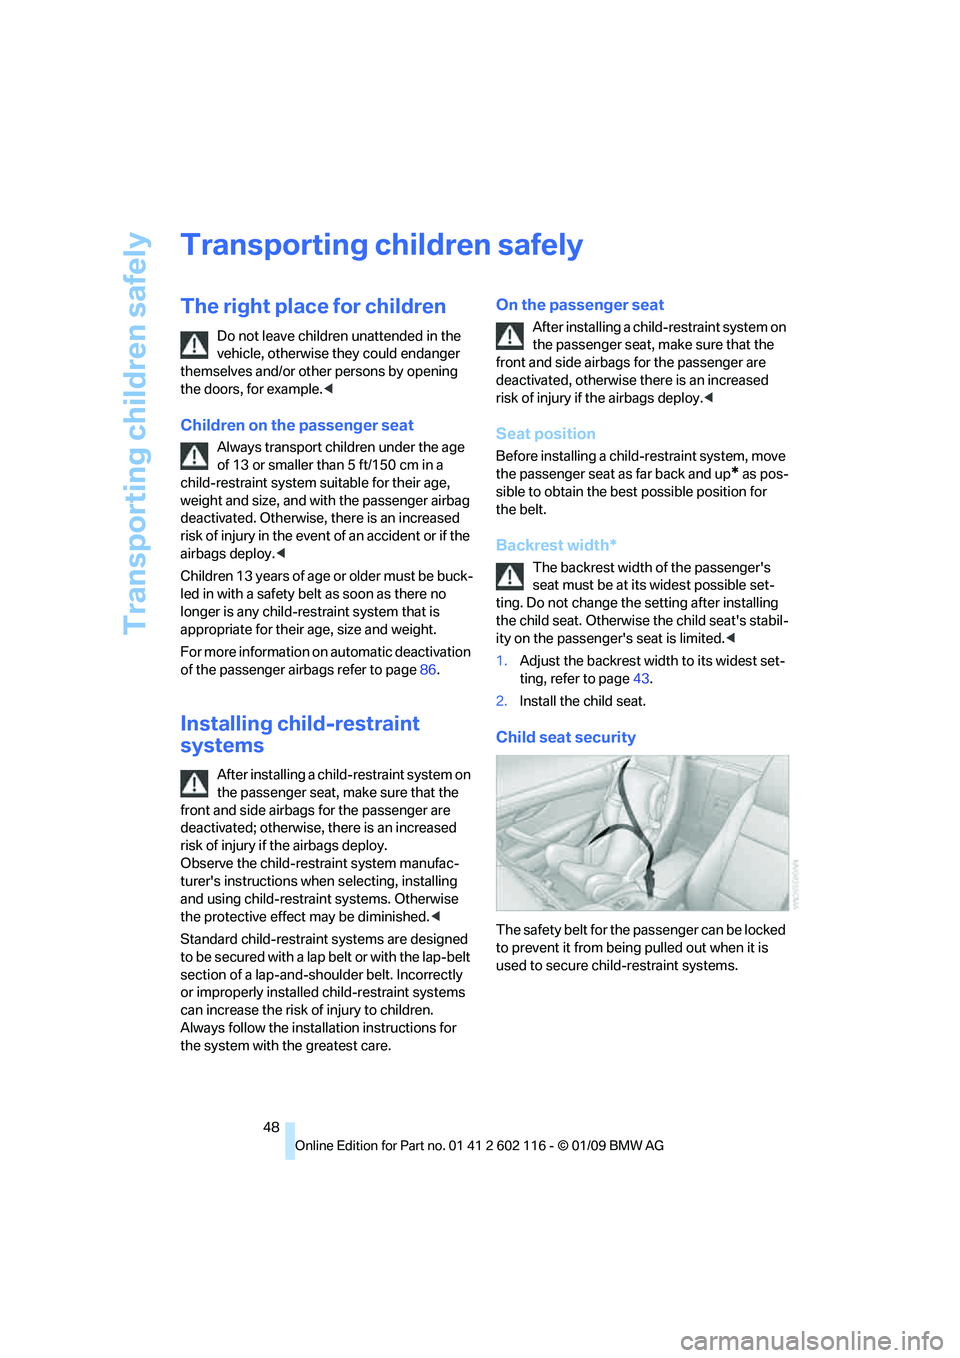
Child seat security
The safety belt for the passenger can be locked
to prevent it from being pulled out when it is
used to secure child-restraint systems.
Page 51 of 248
Controls
49Reference
At a glance
Driving tips
Communications
Navigation
Entertainment
Mobility
To Locking the safety belt
1.Secure the child-restraint system with
the belt.
2. Pull the belt strap all the way out.
3. Allow the belt strap to retract and pull it taut
against the child-restraint system.
The safety belt is locked.
To Unlocking the safety belt
1. Open the belt buckle.
2. Remove the child-restraint system.
3. Allow the safety belt strap to retract all
the way.
Page 55 of 248
Controls
53Reference
At a glance
Driving tips
Communications
Navigation
Entertainment
Mobility
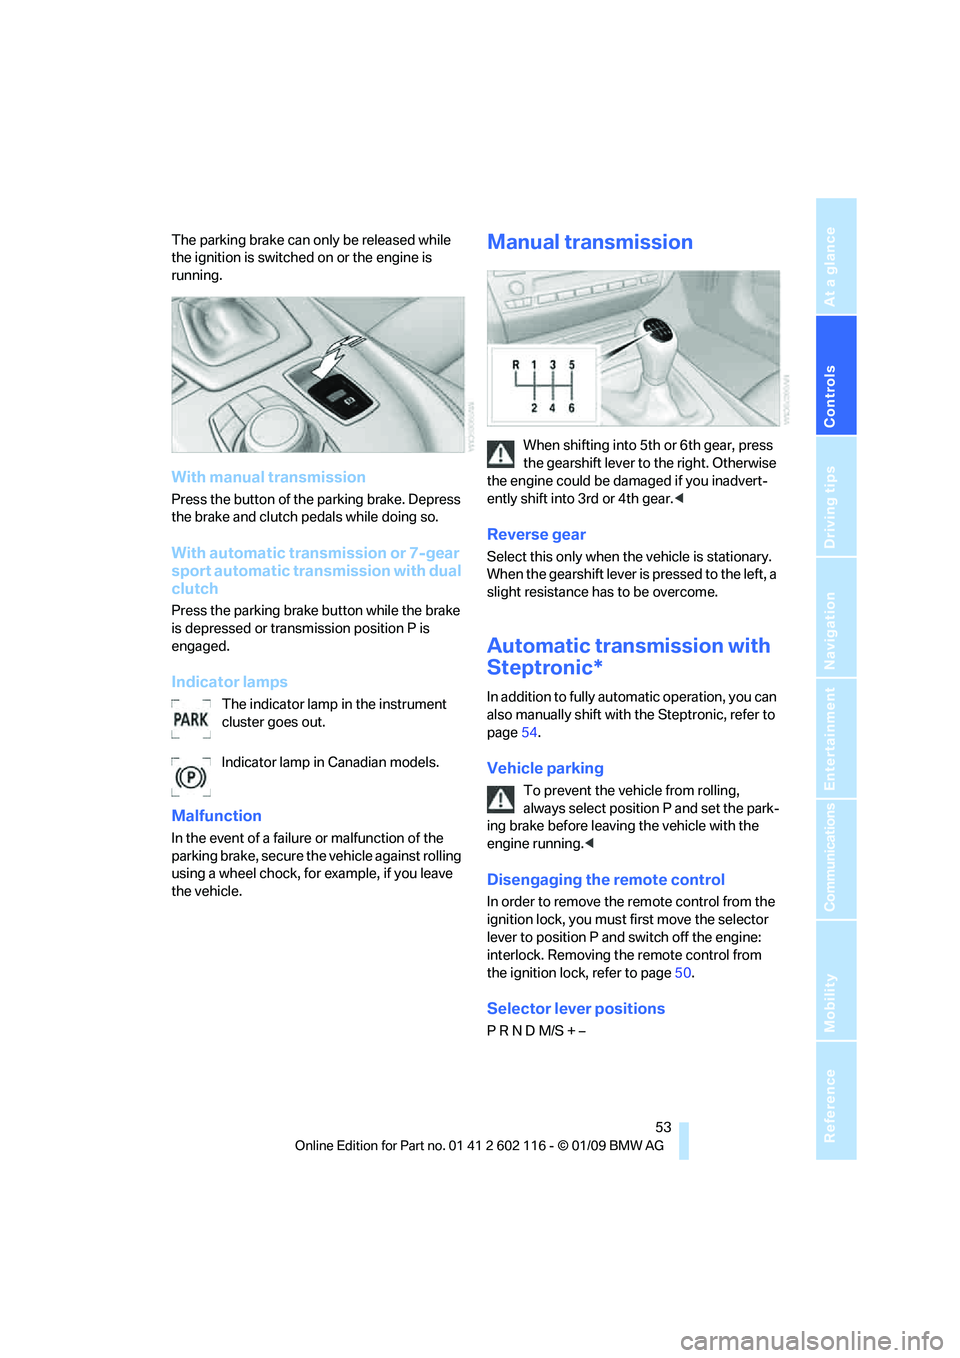
The parking brake can only be released while
the ignition is switched on or the engine is
running.
With manual transmission
Press the button of the parking brake. Depress
the brake and clutch pedals while doing so.
With automatic transmission or 7-gear
sport automatic transmission with dual
clutch
Press the parking brake button while the brake
is depressed or transmission position P is
engaged.
Indicator lamps
The indicator lamp in the instrument
cluster goes out.
Indicator lamp in Canadian models.
Malfunction
In the event of a failure or malfunction of the
parking brake, secure the vehicle against rolling
using a wheel chock, for example, if you leave
the vehicle.
Manual transmission
When shifting into 5th or 6th gear, press
the gearshift lever to the right. Otherwise
the engine could be da maged if you inadvert-
ently shift into 3rd or 4th gear. <
Reverse gear
Select this only when the vehicle is stationary.
When the gearshift lever is pressed to the left, a
slight resistance has to be overcome.
Automatic transmission with
Steptronic*
In addition to fully automatic operation, you can
also manually shift with the Steptronic, refer to
page 54.
Vehicle parking
To prevent the vehicle from rolling,
always select position P and set the park-
ing brake before leavin g the vehicle with the
engine running. <
Disengaging the remote control
In order to remove the remote control from the
ignition lock, you must first move the selector
lever to position P and switch off the engine:
interlock. Removing th e remote control from
the ignition lock, refer to page 50.
Selector lever positions
P R N D M/S + –
Page 57 of 248
Controls
55Reference
At a glance
Driving tips
Communications
Navigation
Entertainment
Mobility
Upshifts and downshifts are executed only
when they will result in a plausible combination
of engine and vehicle speed; thus, for example,
a downshift that would cause the engine to
overrev will not be executed by the system. The
gear selected is briefly displayed in the instru-
ment cluster, followed by the gear actually
in use.
Shifting gears via sh ift paddles* on the
steering wheel
The shift paddles allow yo u to shift gears with-
out taking your hands off of the steering wheel.
> When you use the shift paddles on the
steering wheel to shif t gears in automatic
mode, the transmission switches to
manual mode.
> If you do not accelerate or shift gears using
the shift paddles for a certain amount of
time, the transmission switches back to
automatic mode.
If the selector lever is in the M/S gear
plane, manual mode remains active. <
> To shift up: pull one of the shift paddles.
> To shift down: press one of the shift
paddles.
Upshifts and downshifts are executed only
when they will result in a plausible combination
of engine and vehicle speed; thus, for example,
a downshift that would cause the engine to
overrev will not be executed by the system. The
gear selected is briefly displayed in the instru-
ment cluster, followed by the gear actually
in use.
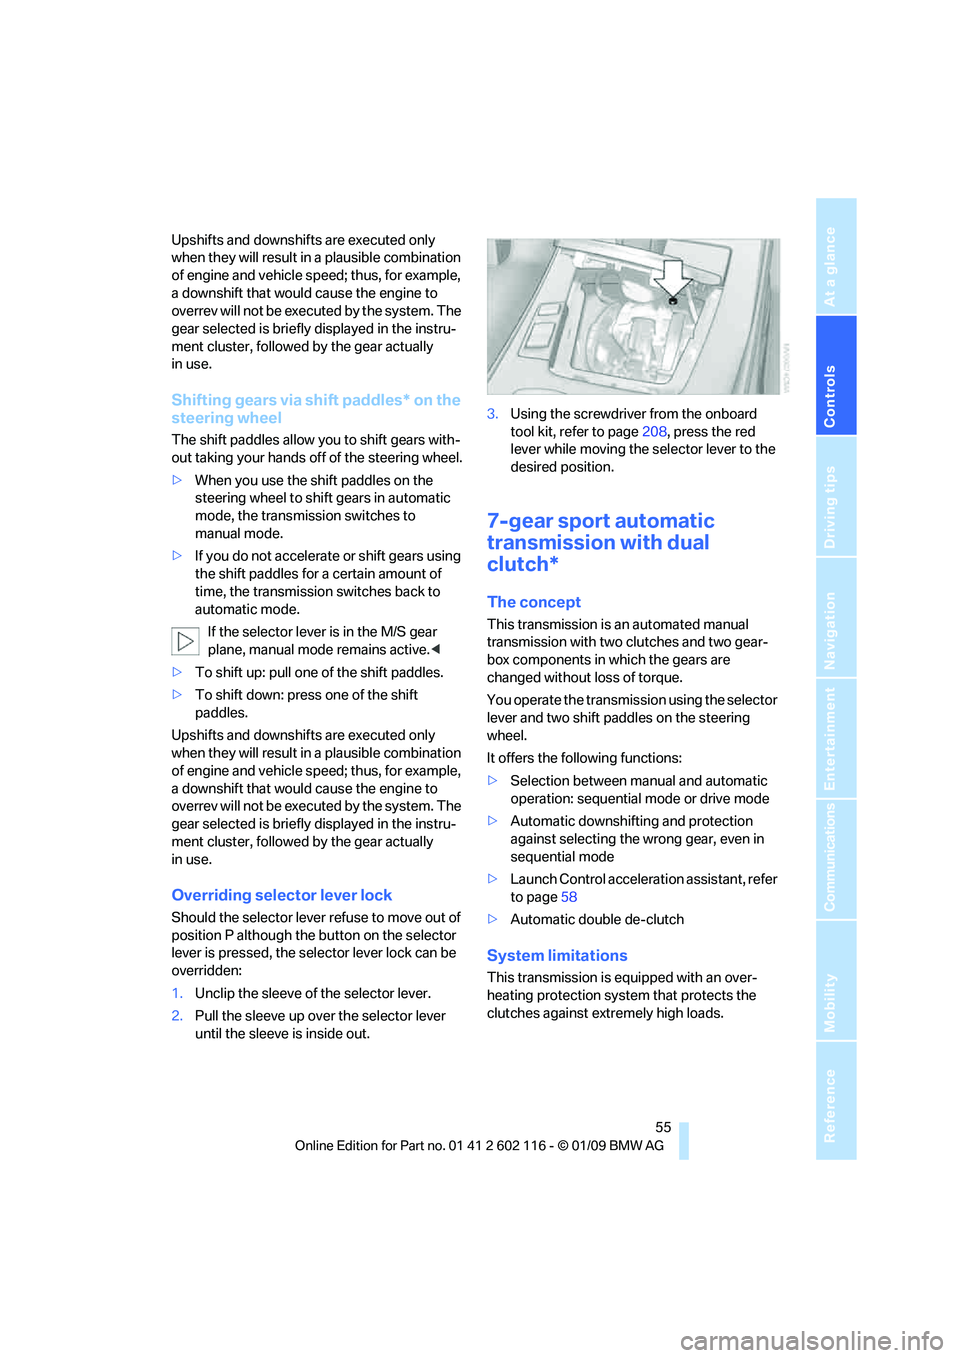
Overriding selector lever lock
Should the selector lever refuse to move out of
position P although the button on the selector
lever is pressed, the sele ctor lever lock can be
overridden:
1. Unclip the sleeve of the selector lever.
2. Pull the sleeve up over the selector lever
until the sleeve is inside out. 3.
Using the screwdriver from the onboard
tool kit, refer to page 208, press the red
lever while moving the selector lever to the
desired position.
7-gear sport automatic
transmission with dual
clutch*
The concept
This transmission is an automated manual
transmission with two clutches and two gear-
box components in which the gears are
changed without loss of torque.
You operate the transmission using the selector
lever and two shift paddles on the steering
wheel.
It offers the following functions:
> Selection between manual and automatic
operation: sequential mode or drive mode
> Automatic downshifting and protection
against selecting the wrong gear, even in
sequential mode
> Launch Control acceleration assistant, refer
to page 58
> Automatic double de-clutch
System limitations
This transmission is equipped with an over-
heating protection system that protects the
clutches against extremely high loads.
Page 59 of 248
Controls
57Reference
At a glance
Driving tips
Communications
Navigation
Entertainment
Mobility
R Reverse
Select this only when the vehicle is stationary.
N Neutral
You can select this in a car wash, for example.
The vehicle can roll.
N remains engaged after the engine is
switched off if you leave the remote con-
trol in the ignition lock. Use this function in an
automatic car wash, for ex ample. P is automati-
cally engaged after approx. 30 minutes. <
D drive mode
In drive mode, all forward gears are shifted auto-
matically.
Kick-down
To accelerate rapidly, e.g. when passing, press
the accelerator down past the resistance point.
This provides maximum acceleration.
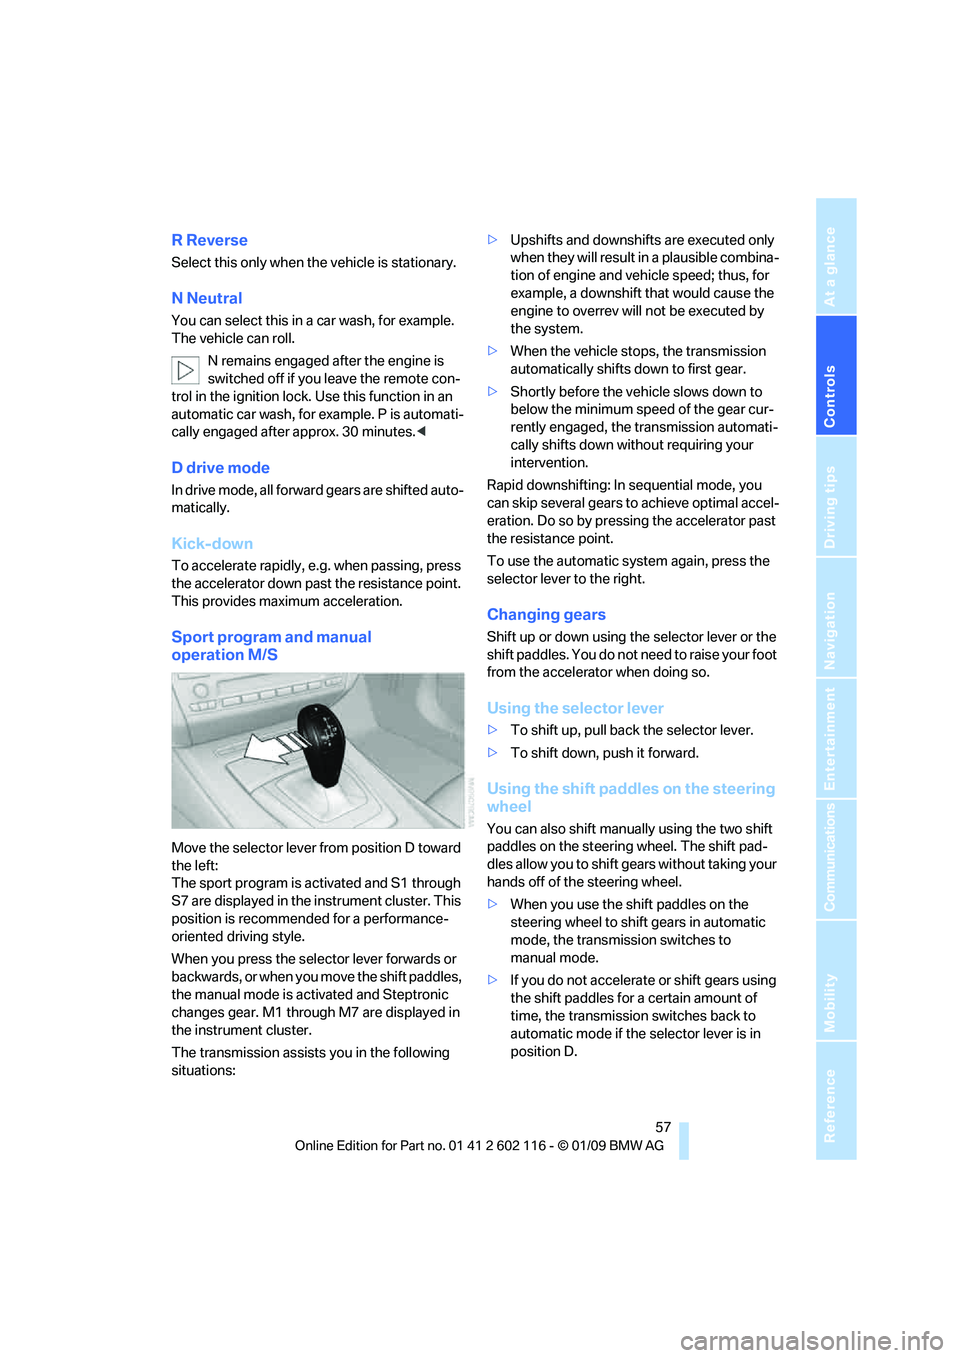
Sport program and manual
operation M/S
Move the selector lever from position D toward
the left:
The sport program is activated and S1 through
S7 are displayed in the instrument cluster. This
position is recommend ed for a performance-
oriented driving style.
When you press the selector lever forwards or
b a c k w a r d s , o r w h e n y o u m o v e t h e s h i f t p a d d l e s ,
the manual mode is ac tivated and Steptronic
changes gear. M1 through M7 are displayed in
the instrument cluster.
The transmission assists you in the following
situations: >
Upshifts and downshifts are executed only
when they will result in a plausible combina-
tion of engine and vehicle speed; thus, for
example, a downshift that would cause the
engine to overrev will not be executed by
the system.
> When the vehicle stops, the transmission
automatically shifts down to first gear.
> Shortly before the ve hicle slows down to
below the minimum speed of the gear cur-
rently engaged, the transmission automati-
cally shifts down without requiring your
intervention.
Rapid downshifting: In sequential mode, you
can skip several gears to achieve optimal accel-
eration. Do so by pressi ng the accelerator past
the resistance point.
To use the automatic system again, press the
selector lever to the right.
Changing gears
Shift up or down using th e selector lever or the
shift paddles. You do not ne ed to raise your foot
from the accelerator when doing so.
Using the selector lever
> To shift up, pull back the selector lever.
> To shift down, push it forward.
Using the shift paddles on the steering
wheel
You can also shift manually using the two shift
paddles on the steering wheel. The shift pad-
dles allow you to shift ge ars without taking your
hands off of the steering wheel.
> When you use the shift paddles on the
steering wheel to shift gears in automatic
mode, the transmission switches to
manual mode.
> If you do not accelerate or shift gears using
the shift paddles for a certain amount of
time, the transmission switches back to
automatic mode if the selector lever is in
position D.
Page 88 of 248
Technology for driving comfort and safety
86
Do not attempt to remove
the airbag retention
system from the vehicle. Do not modify the indi-
vidual components of the system or its wiring in
any way. This includes the upholstered covers
of the steering wheel, the dashboard and the
seats. Do not attempt to remove or dismantle
the steering wheel.
Do not touch the individual components imme-
diately after the system has been triggered,
because there is a danger of burns.
In the event of malfunctions, deactivation or
triggering of the airbag restraint system, have
the testing, repair, remo val and disposal of air-
bag generators executed only by a BMW center
or a workshop that works according to repair
procedures of BMW with correspondingly
trained personnel and th at has the required
explosives licenses. Unprofessional attempts to
work on the system could lead to failure in an
emergency or to undesi red airbag activation,
either of which could resu lt in personal injury.<
Warning notices and information about the air-
bags can also be found on the sun visors.
Automatic deactivation of the
passenger airbags
The system determines whether the passenger
seat is occupied by meas uring the resistance of
the human body. Front, knee and side airbags
on the passenger side ar e activated or deacti-
vated accordingly.
Make sure that the passenger keeps his
or her feet in the footwell; otherwise, the
passenger airbags may not function properly. <
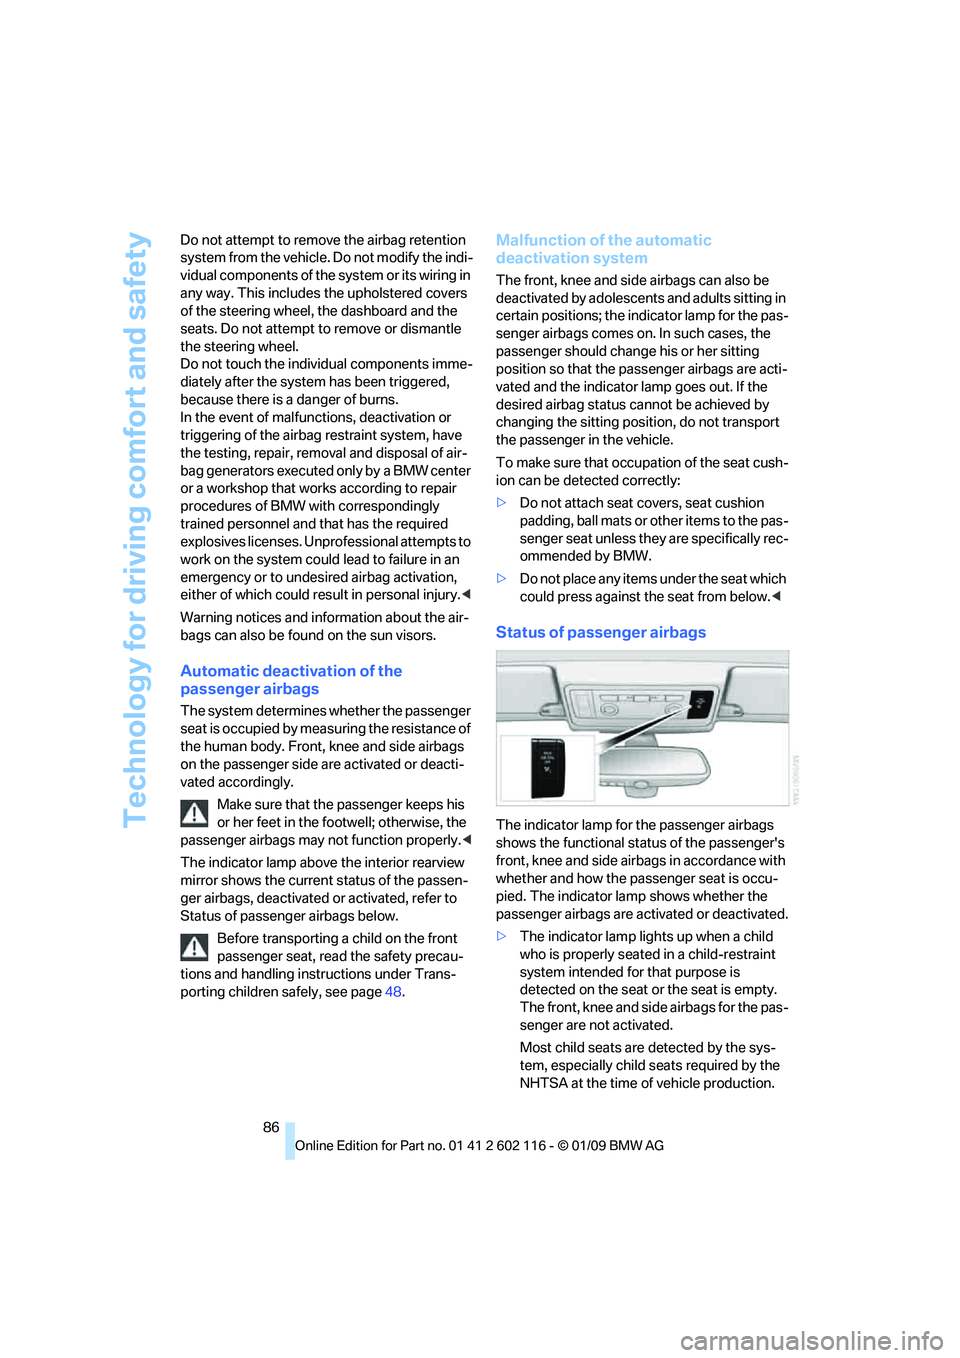
The indicator lamp above the interior rearview
mirror shows the current status of the passen-
ger airbags, deactivated or activated, refer to
Status of passenger airbags below.
Before transporting a child on the front
passenger seat, read the safety precau-
tions and handling instructions under Trans-
porting children safely, see page 48.
Malfunction of the automatic
deactivation system
The front, knee and side airbags can also be
deactivated by adolescents and adults sitting in
certain positions; the in dicator lamp for the pas-
senger airbags comes on. In such cases, the
passenger should change his or her sitting
position so that the pa ssenger airbags are acti-
vated and the indicator la mp goes out. If the
desired airbag status cannot be achieved by
changing the sitting posi tion, do not transport
the passenger in the vehicle.
To make sure that occupa tion of the seat cush-
ion can be detected correctly:
> Do not attach seat covers, seat cushion
padding, ball mats or other items to the pas-
senger seat unless they are specifically rec-
ommended by BMW.
> Do not place any items under the seat which
could press against the seat from below. <
Status of passenger airbags
The indicator lamp for the passenger airbags
shows the functional status of the passenger's
front, knee and side airbags in accordance with
whether and how the passenger seat is occu-
pied. The indicator lamp shows whether the
passenger airbags are activated or deactivated.
> The indicator lamp lights up when a child
who is properly seated in a child-restraint
system intended for that purpose is
detected on the seat or the seat is empty.
The front, knee and side airbags for the pas-
senger are not activated.
Most child seats are detected by the sys-
tem, especially child seats required by the
NHTSA at the time of vehicle production.
Page 105 of 248
Controls
103Reference
At a glance
Driving tips
Communications
Navigation
Entertainment
Mobility
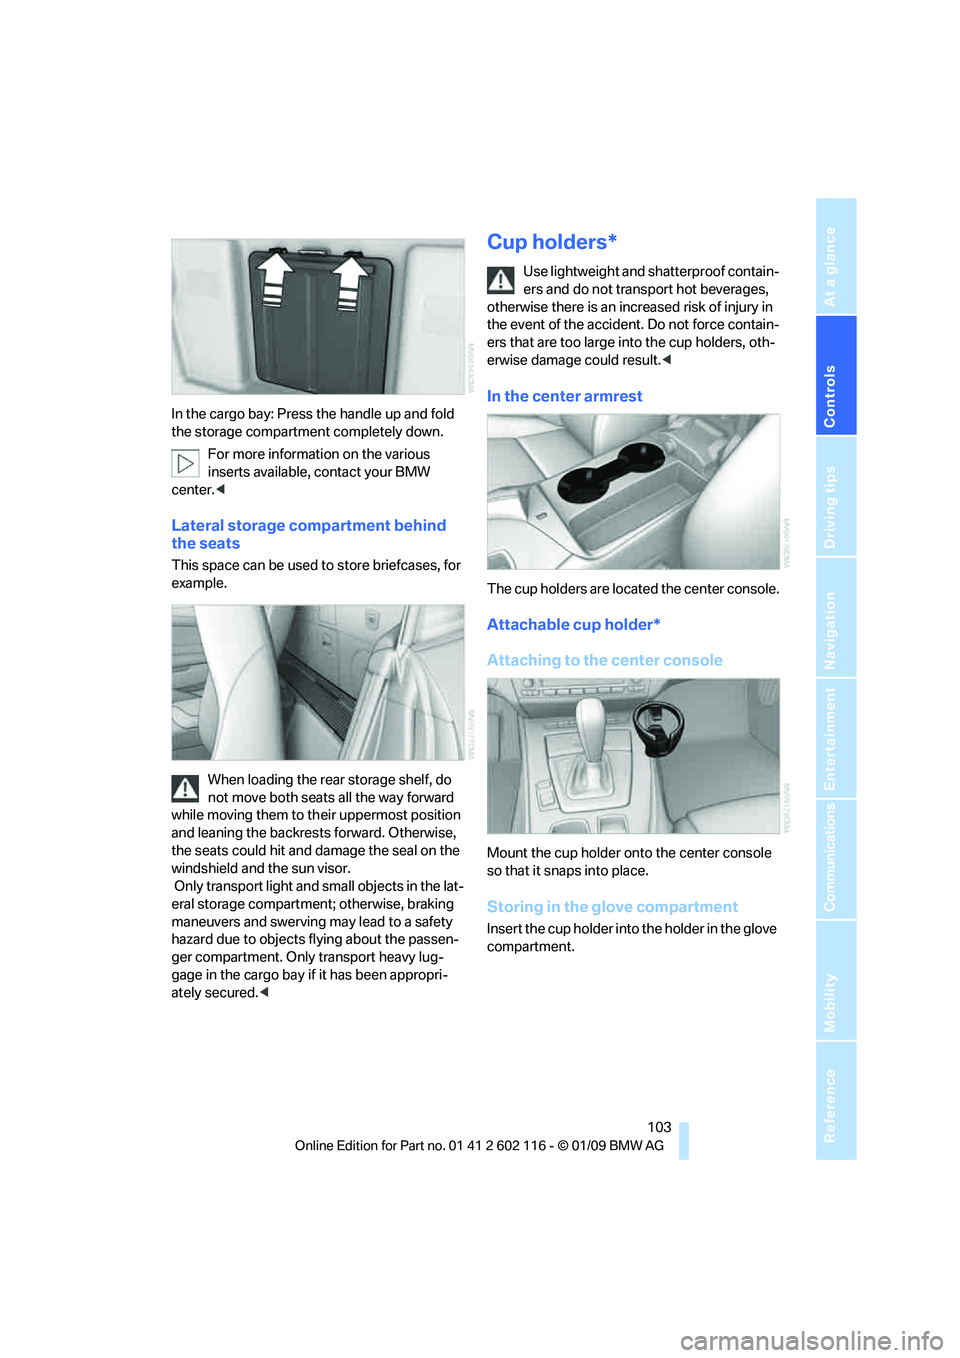
In the cargo bay: Press the handle up and fold
the storage compartment completely down.For more information on the various
inserts available, contact your BMW
center. <
Lateral storage compartment behind
the seats
This space can be used to store briefcases, for
example.
When loading the rear storage shelf, do
not move both seats all the way forward
while moving them to th eir uppermost position
and leaning the backrests forward. Otherwise,
the seats could hit and damage the seal on the
windshield and the sun visor.
Only transport light and small objects in the lat-
eral storage compartment; otherwise, braking
maneuvers and swerving may lead to a safety
hazard due to objects flying about the passen-
ger compartment. Only transport heavy lug-
gage in the cargo bay if it has been appropri-
ately secured. <
Cup holders*
Use lightweight and shatterproof contain-
ers and do not transp ort hot beverages,
otherwise there is an increased risk of injury in
the event of the accident. Do not force contain-
ers that are too large in to the cup holders, oth-
erwise damage could result. <
In the center armrest
The cup holders are located the center console.
Attachable cup holder*
Attaching to the center console
Mount the cup holder onto the center console
so that it snaps into place.
Storing in the glove compartment
Insert the cup holder into the holder in the glove
compartment.
Page 106 of 248
Practical interior accessories
104
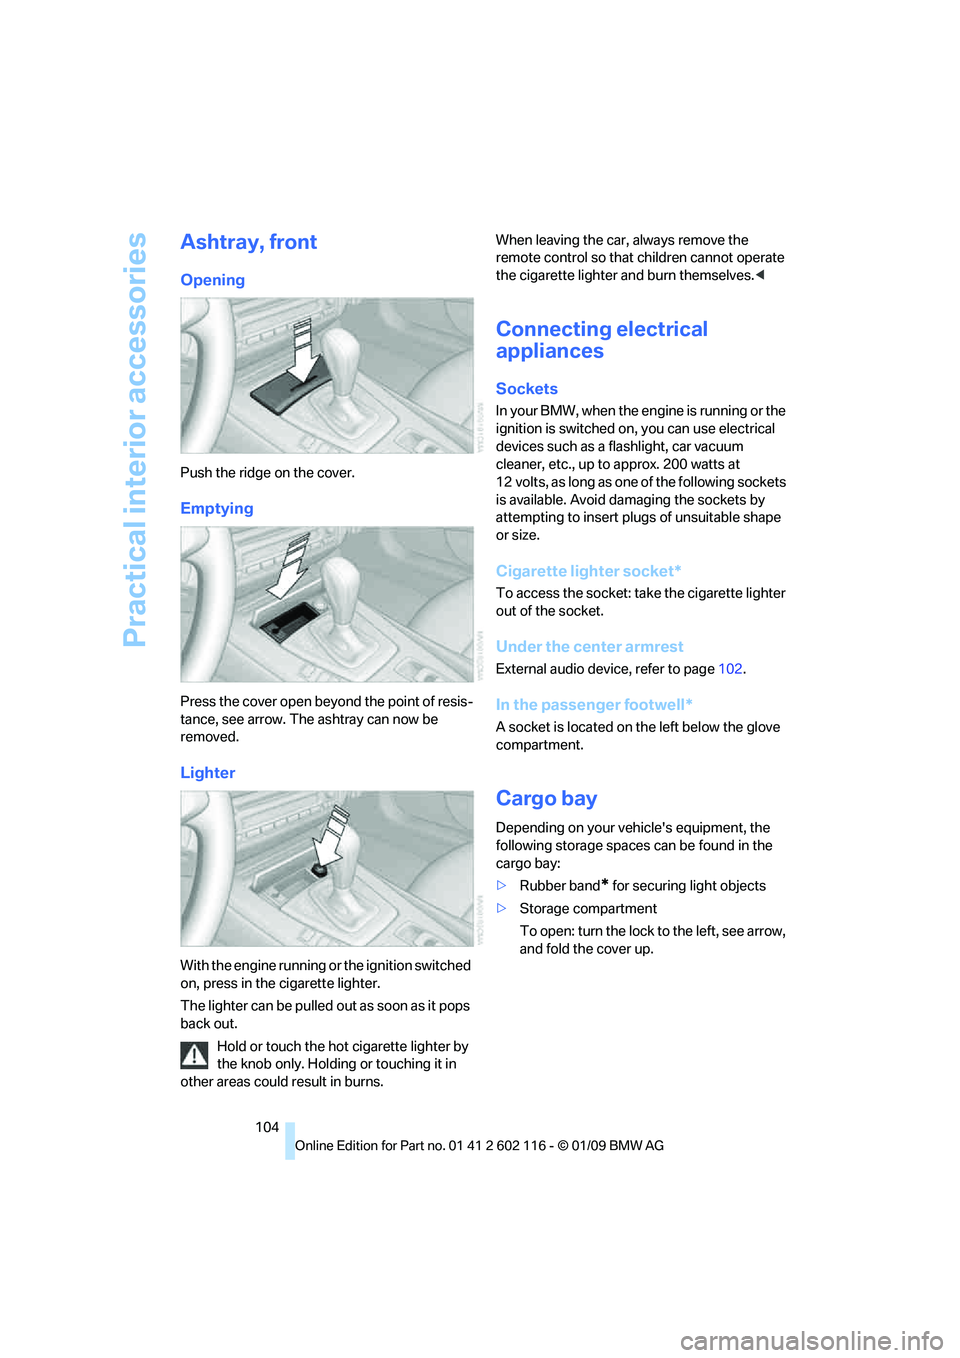
Ashtray, front
Opening
Push the ridge on the cover.
Emptying
Press the cover open beyond the point of resis-
tance, see arrow. The ashtray can now be
removed.
Lighter
With the engine running or the ignition switched
on, press in the cigarette lighter.
The lighter can be pulled out as soon as it pops
back out.
Hold or touch the hot cigarette lighter by
the knob only. Holding or touching it in
other areas could result in burns. When leaving the car,
always remove the
remote control so that children cannot operate
the cigarette lighter and burn themselves. <
Connecting electrical
appliances
Sockets
In your BMW, when the engine is running or the
ignition is switched on , you can use electrical
devices such as a flashlight, car vacuum
cleaner, etc., up to approx. 200 watts at
12 volts, as long as one of the following sockets
is available. Avoid damaging the sockets by
attempting to insert pl ugs of unsuitable shape
or size.
Cigarette lighter socket*
To access the socket: take the cigarette lighter
out of the socket.
Under the center armrest
External audio device, refer to page 102.
In the passenger footwell*
A socket is located on the left below the glove
compartment.
Cargo bay
Depending on your vehicle's equipment, the
following storage spaces can be found in the
cargo bay:
>Rubber band
* for securing light objects
> Storage compartment
To open: turn the lock to the left, see arrow,
and fold the cover up.