fuse box BMW Z4 SDRIVE35I 2009 Owners Manual
[x] Cancel search | Manufacturer: BMW, Model Year: 2009, Model line: Z4 SDRIVE35I, Model: BMW Z4 SDRIVE35I 2009Pages: 248, PDF Size: 7.63 MB
Page 57 of 248

Controls
55Reference
At a glance
Driving tips
Communications
Navigation
Entertainment
Mobility
Upshifts and downshifts are executed only
when they will result in a plausible combination
of engine and vehicle speed; thus, for example,
a downshift that would cause the engine to
overrev will not be executed by the system. The
gear selected is briefly displayed in the instru-
ment cluster, followed by the gear actually
in use.
Shifting gears via sh ift paddles* on the
steering wheel
The shift paddles allow yo u to shift gears with-
out taking your hands off of the steering wheel.
> When you use the shift paddles on the
steering wheel to shif t gears in automatic
mode, the transmission switches to
manual mode.
> If you do not accelerate or shift gears using
the shift paddles for a certain amount of
time, the transmission switches back to
automatic mode.
If the selector lever is in the M/S gear
plane, manual mode remains active. <
> To shift up: pull one of the shift paddles.
> To shift down: press one of the shift
paddles.
Upshifts and downshifts are executed only
when they will result in a plausible combination
of engine and vehicle speed; thus, for example,
a downshift that would cause the engine to
overrev will not be executed by the system. The
gear selected is briefly displayed in the instru-
ment cluster, followed by the gear actually
in use.
Overriding selector lever lock
Should the selector lever refuse to move out of
position P although the button on the selector
lever is pressed, the sele ctor lever lock can be
overridden:
1. Unclip the sleeve of the selector lever.
2. Pull the sleeve up over the selector lever
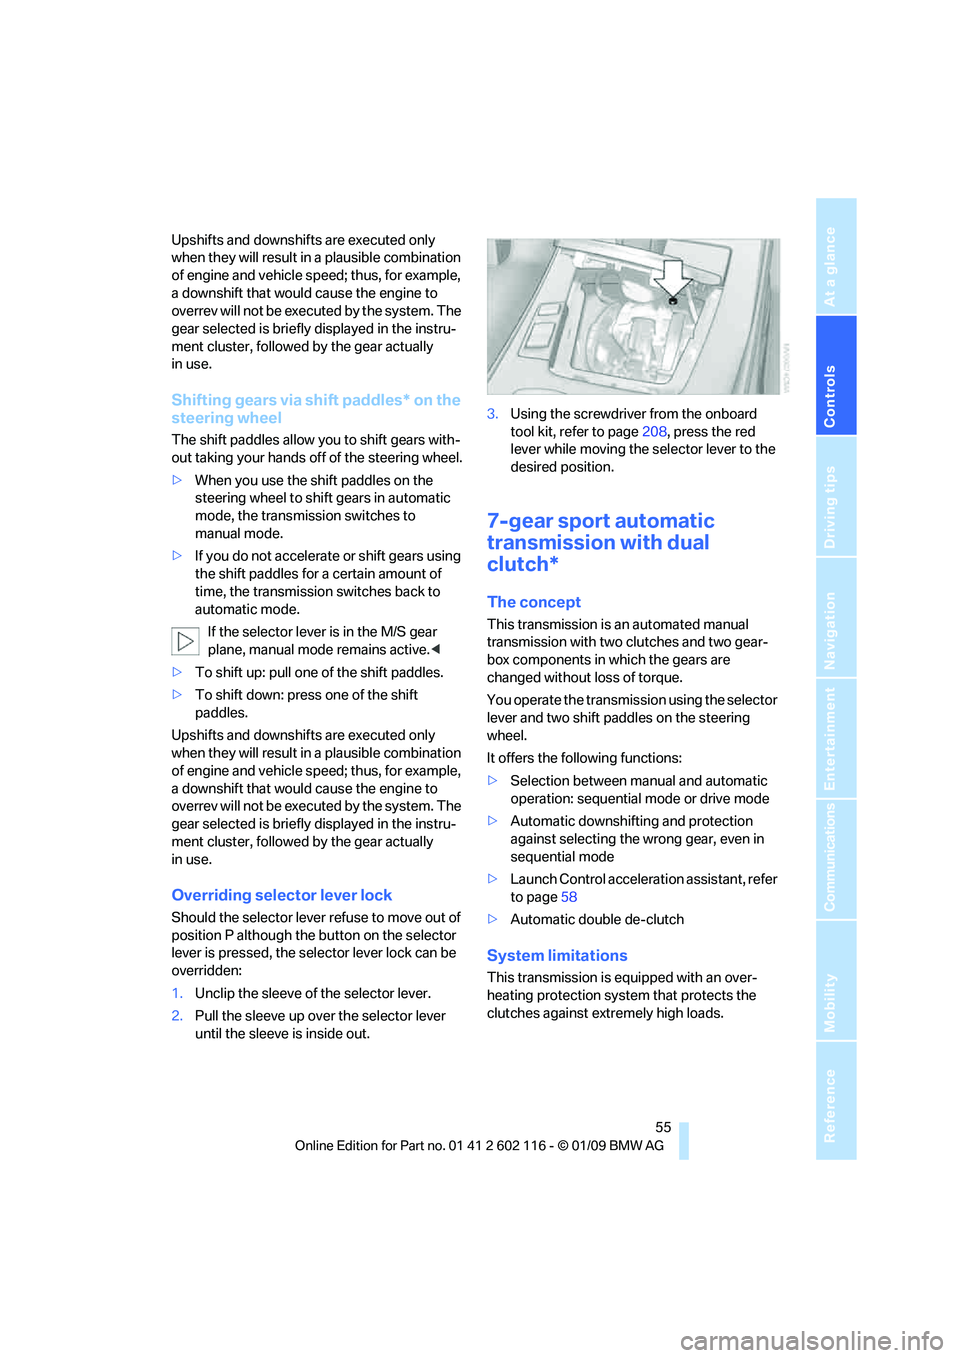
until the sleeve is inside out. 3.
Using the screwdriver from the onboard
tool kit, refer to page 208, press the red
lever while moving the selector lever to the
desired position.
7-gear sport automatic
transmission with dual
clutch*
The concept
This transmission is an automated manual
transmission with two clutches and two gear-
box components in which the gears are
changed without loss of torque.
You operate the transmission using the selector
lever and two shift paddles on the steering
wheel.
It offers the following functions:
> Selection between manual and automatic
operation: sequential mode or drive mode
> Automatic downshifting and protection
against selecting the wrong gear, even in
sequential mode
> Launch Control acceleration assistant, refer
to page 58
> Automatic double de-clutch
System limitations
This transmission is equipped with an over-
heating protection system that protects the
clutches against extremely high loads.
Page 214 of 248

Replacing components
212
Vehicle battery
Battery care
The battery is 100 % maintenance-free, the
electrolyte will last for the life of the battery
when the vehicle is operated in a temperate cli-
mate. Your BMW center will be glad to advise in
all matters concerning the battery.
Charging the battery
Only charge the battery in the vehicle via the
terminals in the engine compartment with the
engine off. Connections, refer to Jump starting
on page 214.
Disposal
Have old batteries disposed of by your
BMW center or hand them in to a recy-
cling center. Maintain th e battery in an upright
position for transport and storage. Always
secure the battery agains t tipping over during
transport. <
Power failure
After a temporary power lo ss, the functioning of
some equipment may be limited and require
reinitialization. Individual settings may likewise
have been lost and will have to be programmed:
> Time and date
These values must be updated, refer to
page 71.
> Radio
In some cases, statio ns may have to be
stored again, refer to page 142.
> Navigation system
Operability must be waited for, refer to
page 118.
> Seat and mirror memory
The positions must be stored again, refer to
page 43.
> Inside rearview mirror with digital compass
The system must be calibrated, refer to
page 101.
Fuses
Never attempt to repa ir a blown fuse and
do not replace a defective fuse with a sub-
stitute of another color or amperage rating, oth-
erwise this could lead to a circuit overload, ulti-
mately resulting in a fire in the vehicle. <
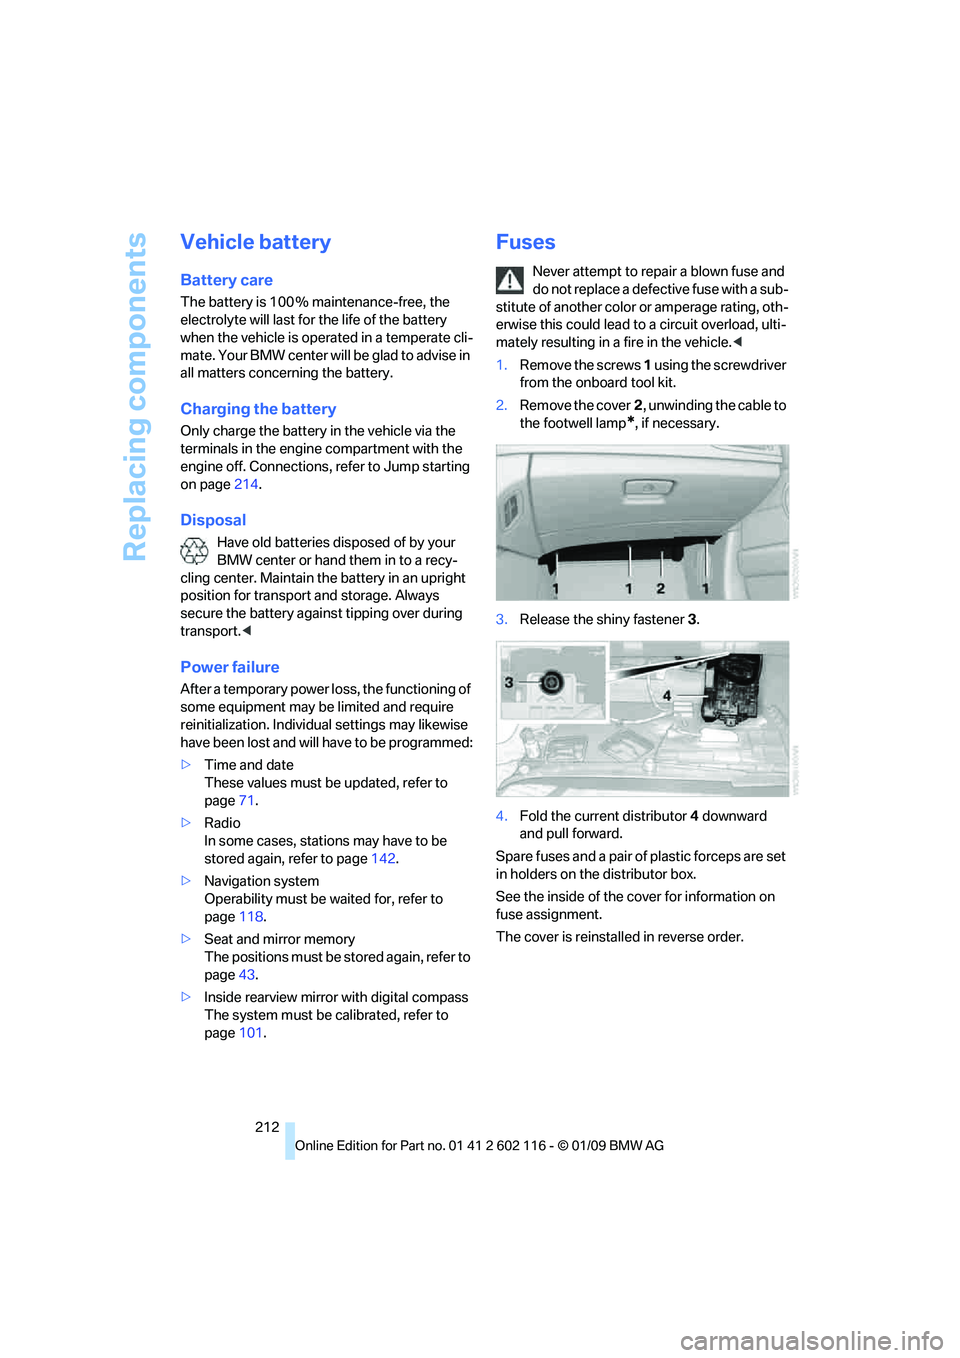
1. Remove the screws 1 using the screwdriver
from the onboard tool kit.
2. Remove the cover 2, unwinding the cable to
the footwell lamp
*, if necessary.
3. Release the shiny fastener 3.
4. Fold the current distributor 4 downward
and pull forward.
Spare fuses and a pair of plastic forceps are set
in holders on the distributor box.
See the inside of the cover for information on
fuse assignment.
The cover is reinsta lled in reverse order.