BMW Z4 SDRIVE35IS 2015 Owners Manual
Manufacturer: BMW, Model Year: 2015, Model line: Z4 SDRIVE35IS, Model: BMW Z4 SDRIVE35IS 2015Pages: 289, PDF Size: 7.16 MB
Page 121 of 289
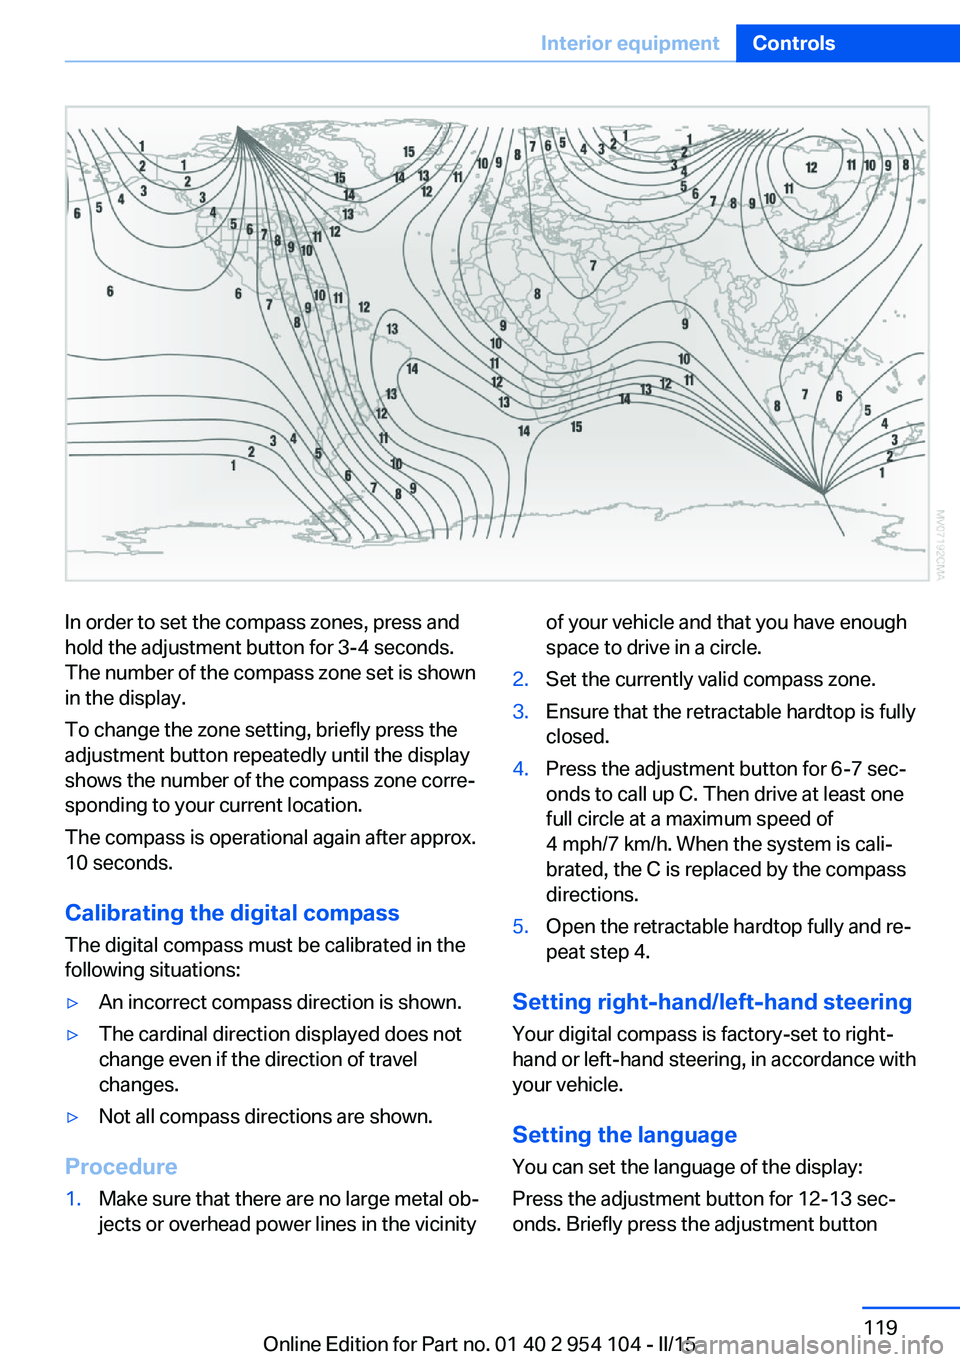
In order to set the compass zones, press and
hold the adjustment button for 3‑4 seconds.
The number of the compass zone set is shown
in the display.
To change the zone setting, briefly press the
adjustment button repeatedly until the display
shows the number of the compass zone corre‐
sponding to your current location.
The compass is operational again after approx.
10 seconds.
Calibrating the digital compass
The digital compass must be calibrated in the
following situations:▷An incorrect compass direction is shown.▷The cardinal direction displayed does not
change even if the direction of travel
changes.▷Not all compass directions are shown.
Procedure
1.Make sure that there are no large metal ob‐
jects or overhead power lines in the vicinityof your vehicle and that you have enough
space to drive in a circle.2.Set the currently valid compass zone.3.Ensure that the retractable hardtop is fully
closed.4.Press the adjustment button for 6‑7 sec‐
onds to call up C. Then drive at least one
full circle at a maximum speed of
4 mph/7 km/h. When the system is cali‐
brated, the C is replaced by the compass
directions.5.Open the retractable hardtop fully and re‐
peat step 4.
Setting right-hand/left-hand steering
Your digital compass is factory-set to right-
hand or left-hand steering, in accordance with
your vehicle.
Setting the language
You can set the language of the display:
Press the adjustment button for 12‑13 sec‐
onds. Briefly press the adjustment button
Seite 119Interior equipmentControls119
Online Edition for Part no. 01 40 2 954 104 - II/15
Page 122 of 289
again to switch between English "E" and Ger‐
man "O".
The setting is automatically saved after approx.
10 seconds.
Ashtray
Opening
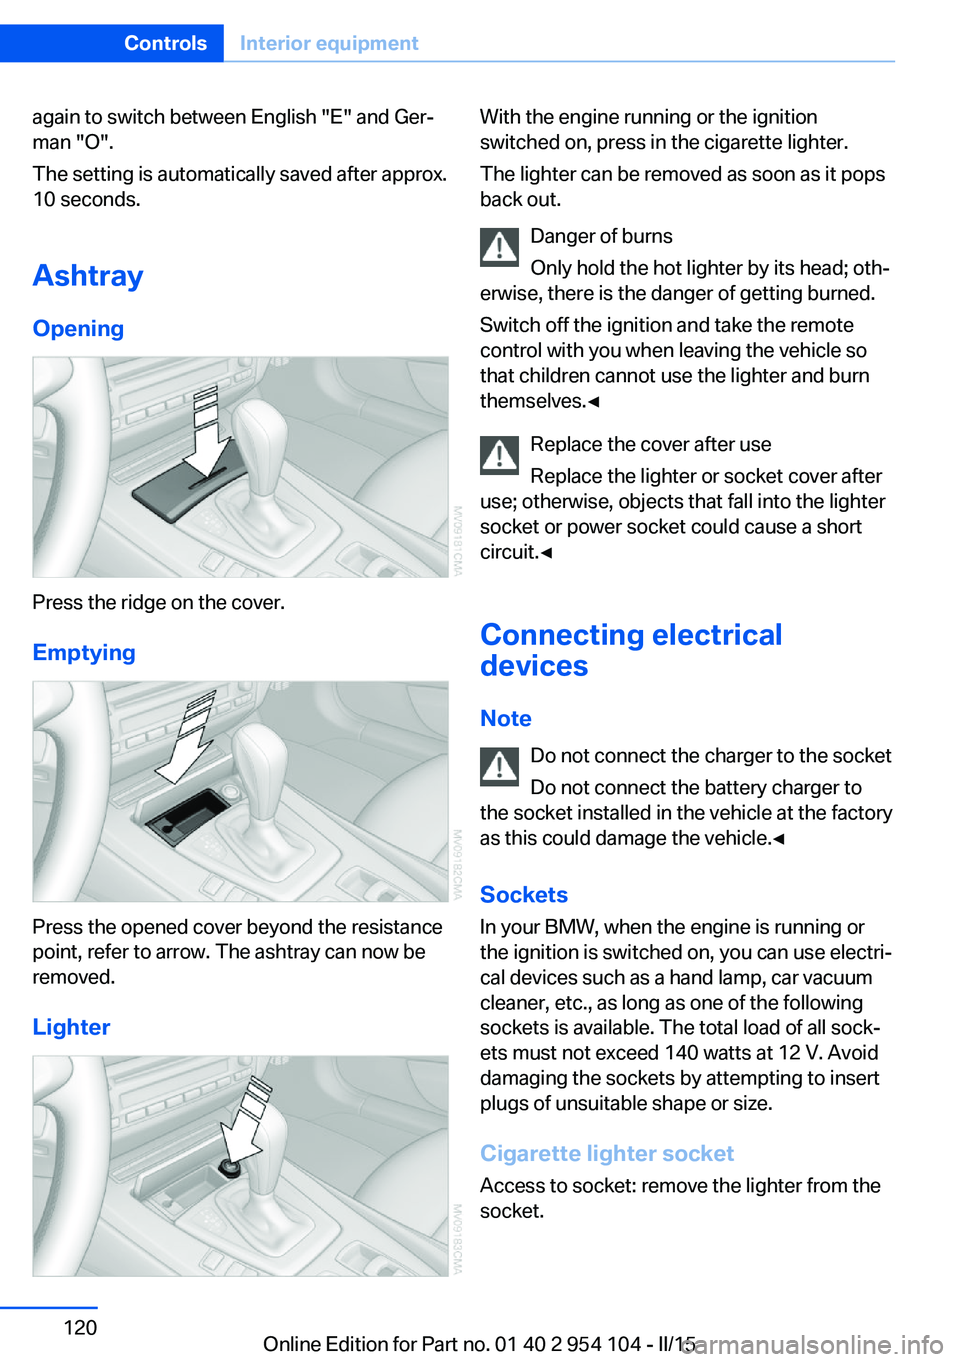
Press the ridge on the cover.
Emptying
Press the opened cover beyond the resistance
point, refer to arrow. The ashtray can now be
removed.
Lighter
With the engine running or the ignition
switched on, press in the cigarette lighter.
The lighter can be removed as soon as it pops
back out.
Danger of burns
Only hold the hot lighter by its head; oth‐
erwise, there is the danger of getting burned.
Switch off the ignition and take the remote
control with you when leaving the vehicle so
that children cannot use the lighter and burn
themselves.◀
Replace the cover after use
Replace the lighter or socket cover after
use; otherwise, objects that fall into the lighter
socket or power socket could cause a short
circuit.◀
Connecting electrical
devices
Note Do not connect the charger to the socket
Do not connect the battery charger to
the socket installed in the vehicle at the factory
as this could damage the vehicle.◀
Sockets
In your BMW, when the engine is running or
the ignition is switched on, you can use electri‐
cal devices such as a hand lamp, car vacuum
cleaner, etc., as long as one of the following
sockets is available. The total load of all sock‐
ets must not exceed 140 watts at 12 V. Avoid
damaging the sockets by attempting to insert
plugs of unsuitable shape or size.
Cigarette lighter socket Access to socket: remove the lighter from the
socket.Seite 120ControlsInterior equipment120
Online Edition for Part no. 01 40 2 954 104 - II/15
Page 123 of 289
Under the center armrest
External audio device, refer to page 125.
In the passenger footwell A socket is located on the left below the glove
compartment.
Cargo area
Depending on your vehicle's equipment, the
following storage spaces can be found in the
cargo area:▷Rubber band for securing light objects.▷Storage compartment.
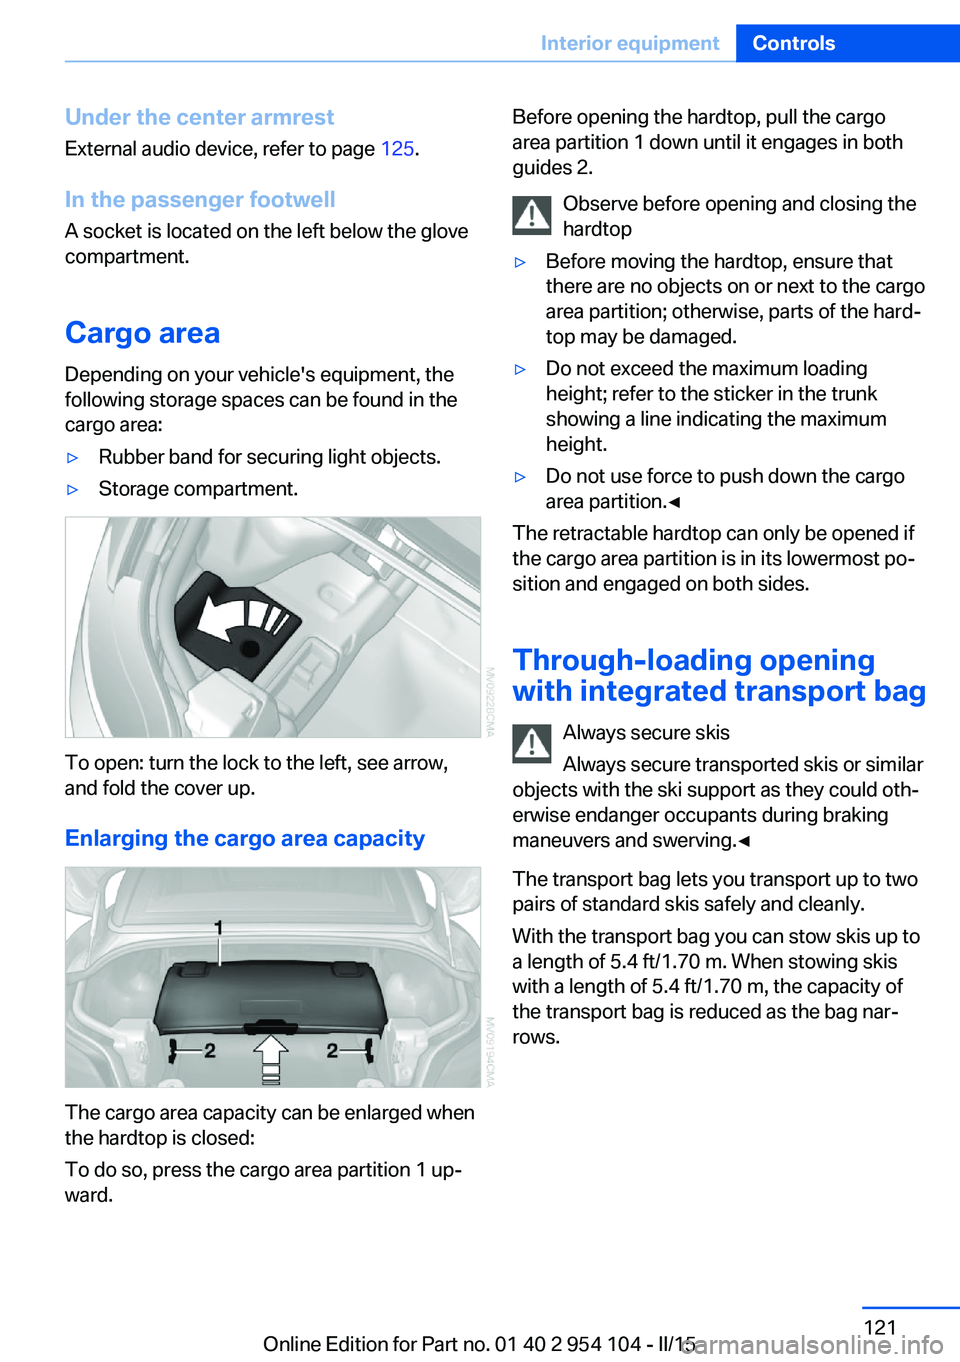
To open: turn the lock to the left, see arrow,
and fold the cover up.
Enlarging the cargo area capacity
The cargo area capacity can be enlarged when
the hardtop is closed:
To do so, press the cargo area partition 1 up‐
ward.
Before opening the hardtop, pull the cargo
area partition 1 down until it engages in both
guides 2.
Observe before opening and closing the
hardtop▷Before moving the hardtop, ensure that
there are no objects on or next to the cargo
area partition; otherwise, parts of the hard‐
top may be damaged.▷Do not exceed the maximum loading
height; refer to the sticker in the trunk
showing a line indicating the maximum
height.▷Do not use force to push down the cargo
area partition.◀
The retractable hardtop can only be opened if
the cargo area partition is in its lowermost po‐
sition and engaged on both sides.
Through-loading opening
with integrated transport bag
Always secure skis
Always secure transported skis or similar
objects with the ski support as they could oth‐
erwise endanger occupants during braking
maneuvers and swerving.◀
The transport bag lets you transport up to two
pairs of standard skis safely and cleanly.
With the transport bag you can stow skis up to a length of 5.4 ft/1.70 m. When stowing skis
with a length of 5.4 ft/1.70 m, the capacity of
the transport bag is reduced as the bag nar‐
rows.
Seite 121Interior equipmentControls121
Online Edition for Part no. 01 40 2 954 104 - II/15
Page 124 of 289
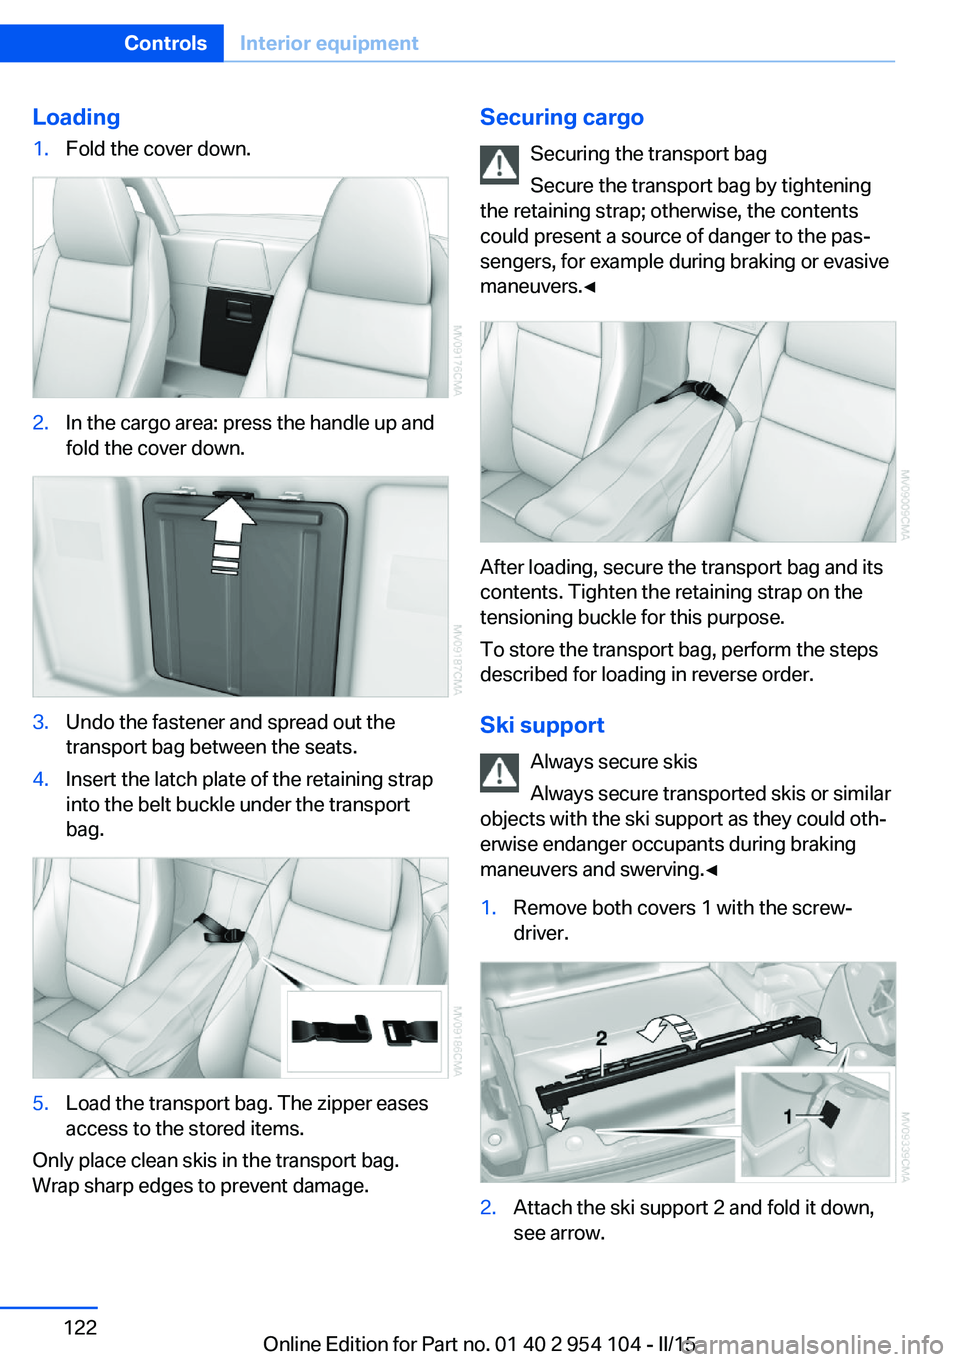
Loading1.Fold the cover down.2.In the cargo area: press the handle up and
fold the cover down.3.Undo the fastener and spread out the
transport bag between the seats.4.Insert the latch plate of the retaining strap
into the belt buckle under the transport
bag.5.Load the transport bag. The zipper eases
access to the stored items.
Only place clean skis in the transport bag.
Wrap sharp edges to prevent damage.
Securing cargo
Securing the transport bag
Secure the transport bag by tightening
the retaining strap; otherwise, the contents
could present a source of danger to the pas‐
sengers, for example during braking or evasive
maneuvers.◀
After loading, secure the transport bag and its
contents. Tighten the retaining strap on the
tensioning buckle for this purpose.
To store the transport bag, perform the steps
described for loading in reverse order.
Ski support Always secure skis
Always secure transported skis or similar
objects with the ski support as they could oth‐
erwise endanger occupants during braking
maneuvers and swerving.◀
1.Remove both covers 1 with the screw‐
driver.2.Attach the ski support 2 and fold it down,
see arrow.Seite 122ControlsInterior equipment122
Online Edition for Part no. 01 40 2 954 104 - II/15
Page 125 of 289
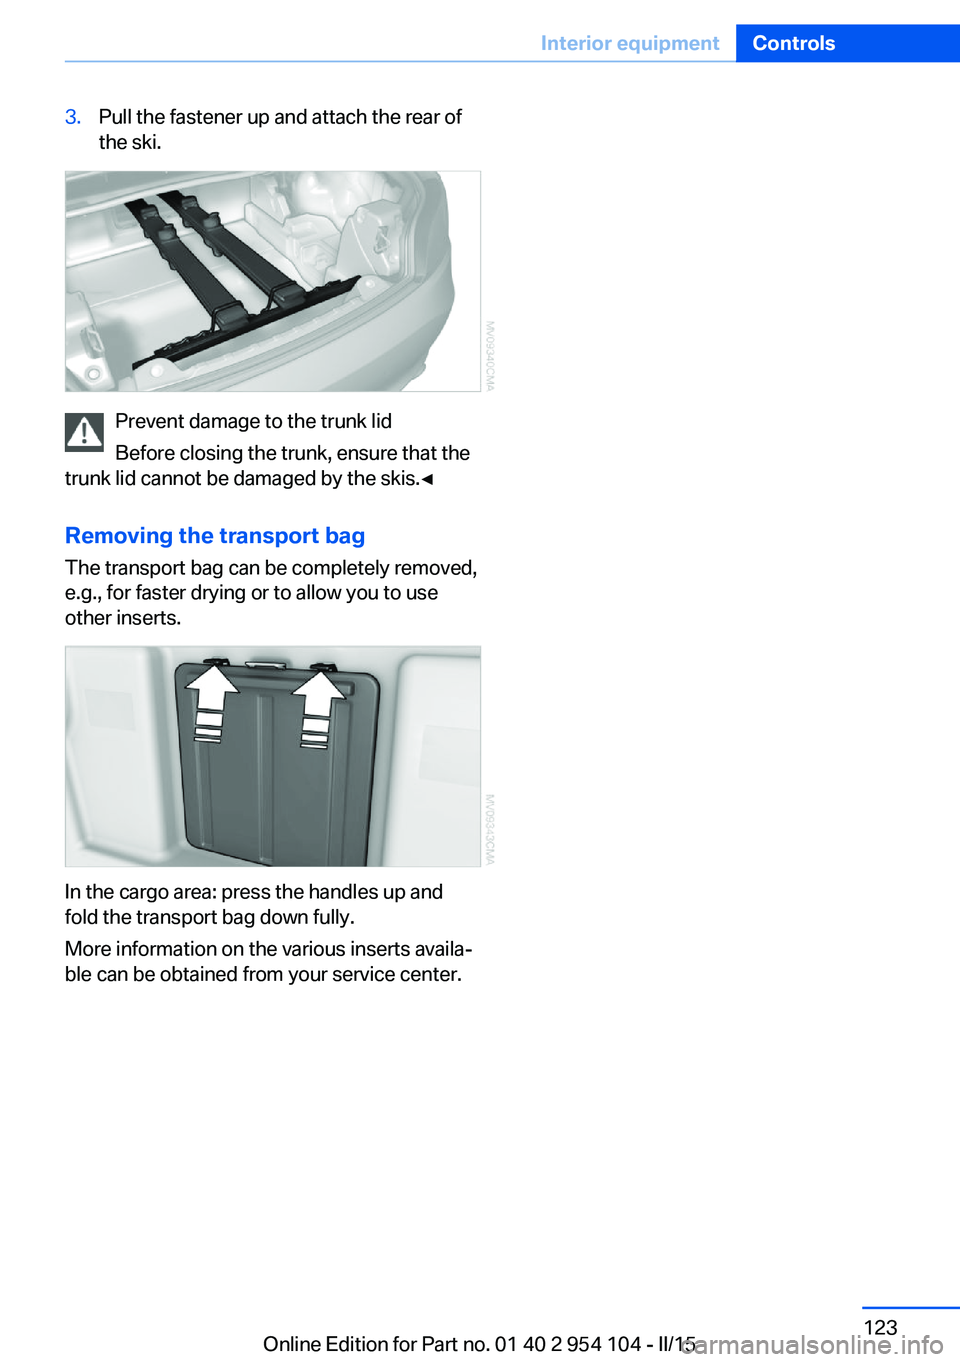
3.Pull the fastener up and attach the rear of
the ski.
Prevent damage to the trunk lid
Before closing the trunk, ensure that the
trunk lid cannot be damaged by the skis.◀
Removing the transport bag
The transport bag can be completely removed,
e.g., for faster drying or to allow you to use
other inserts.
In the cargo area: press the handles up and
fold the transport bag down fully.
More information on the various inserts availa‐
ble can be obtained from your service center.
Seite 123Interior equipmentControls123
Online Edition for Part no. 01 40 2 954 104 - II/15
Page 126 of 289
Storage compartmentsVehicle equipmentThis chapter describes all series equipment as
well as country-specific and special equipment
offered for this model series. Therefore, it also
describes equipment that may not be found in
your vehicle, for instance due to the selected
special equipment or the country version. This
also applies to safety-related functions and
systems.
When using the features and systems descri‐
bed here, adhere to local regulations.
Glove compartment
Opening
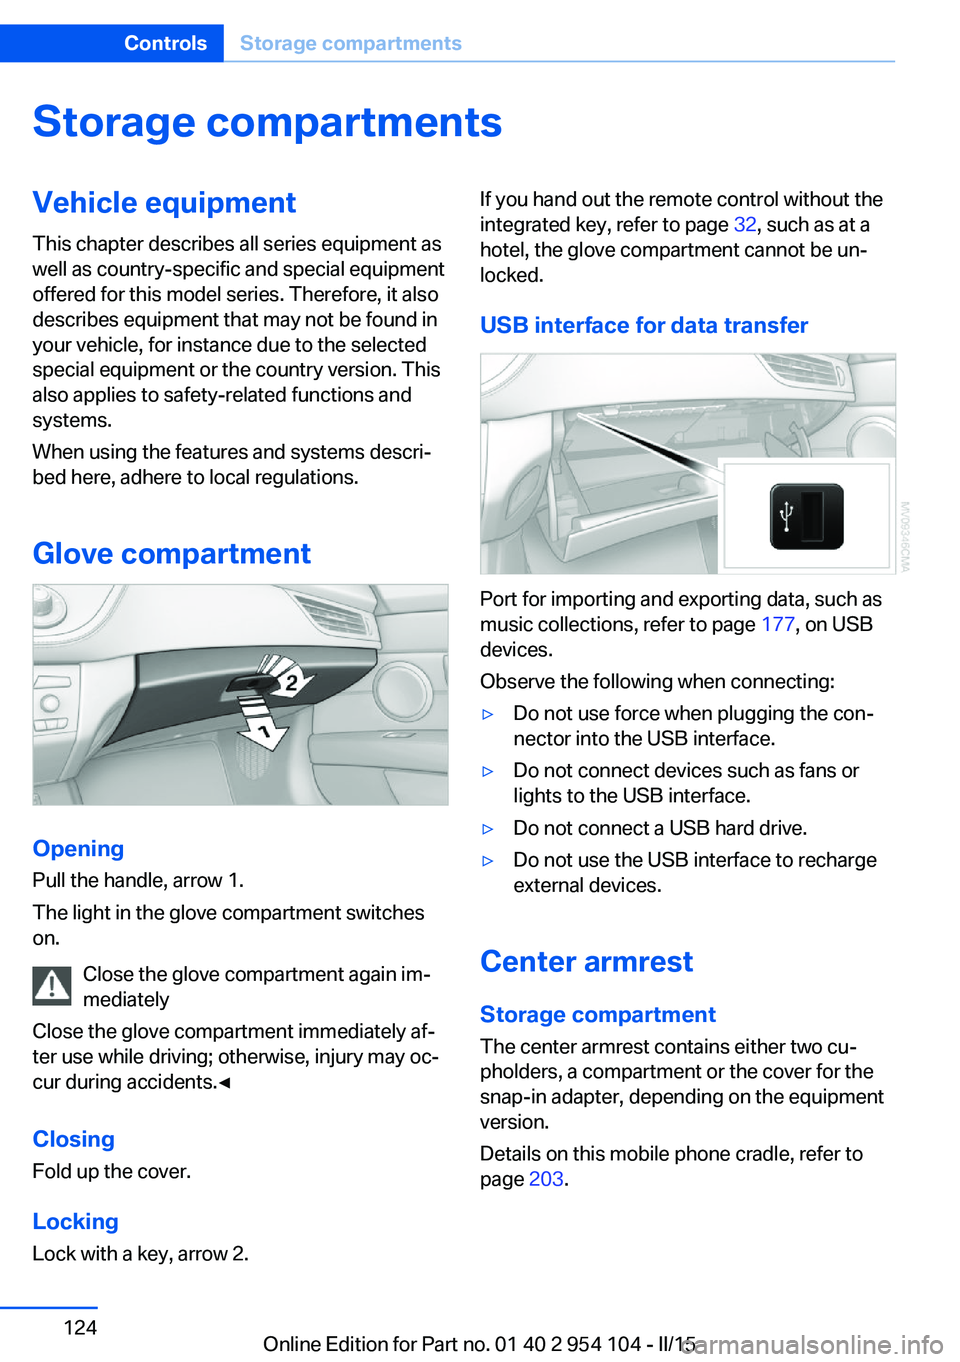
Pull the handle, arrow 1.
The light in the glove compartment switches
on.
Close the glove compartment again im‐
mediately
Close the glove compartment immediately af‐
ter use while driving; otherwise, injury may oc‐
cur during accidents.◀
ClosingFold up the cover.
Locking
Lock with a key, arrow 2.
If you hand out the remote control without the
integrated key, refer to page 32, such as at a
hotel, the glove compartment cannot be un‐
locked.
USB interface for data transfer
Port for importing and exporting data, such as
music collections, refer to page 177, on USB
devices.
Observe the following when connecting:
▷Do not use force when plugging the con‐
nector into the USB interface.▷Do not connect devices such as fans or
lights to the USB interface.▷Do not connect a USB hard drive.▷Do not use the USB interface to recharge
external devices.
Center armrest
Storage compartment The center armrest contains either two cu‐
pholders, a compartment or the cover for the
snap-in adapter, depending on the equipment
version.
Details on this mobile phone cradle, refer to
page 203.
Seite 124ControlsStorage compartments124
Online Edition for Part no. 01 40 2 954 104 - II/15
Page 127 of 289
Locking the storage compartment
When you lock the vehicle from the outside,
the storage compartment in the center armrest
is locked as well.
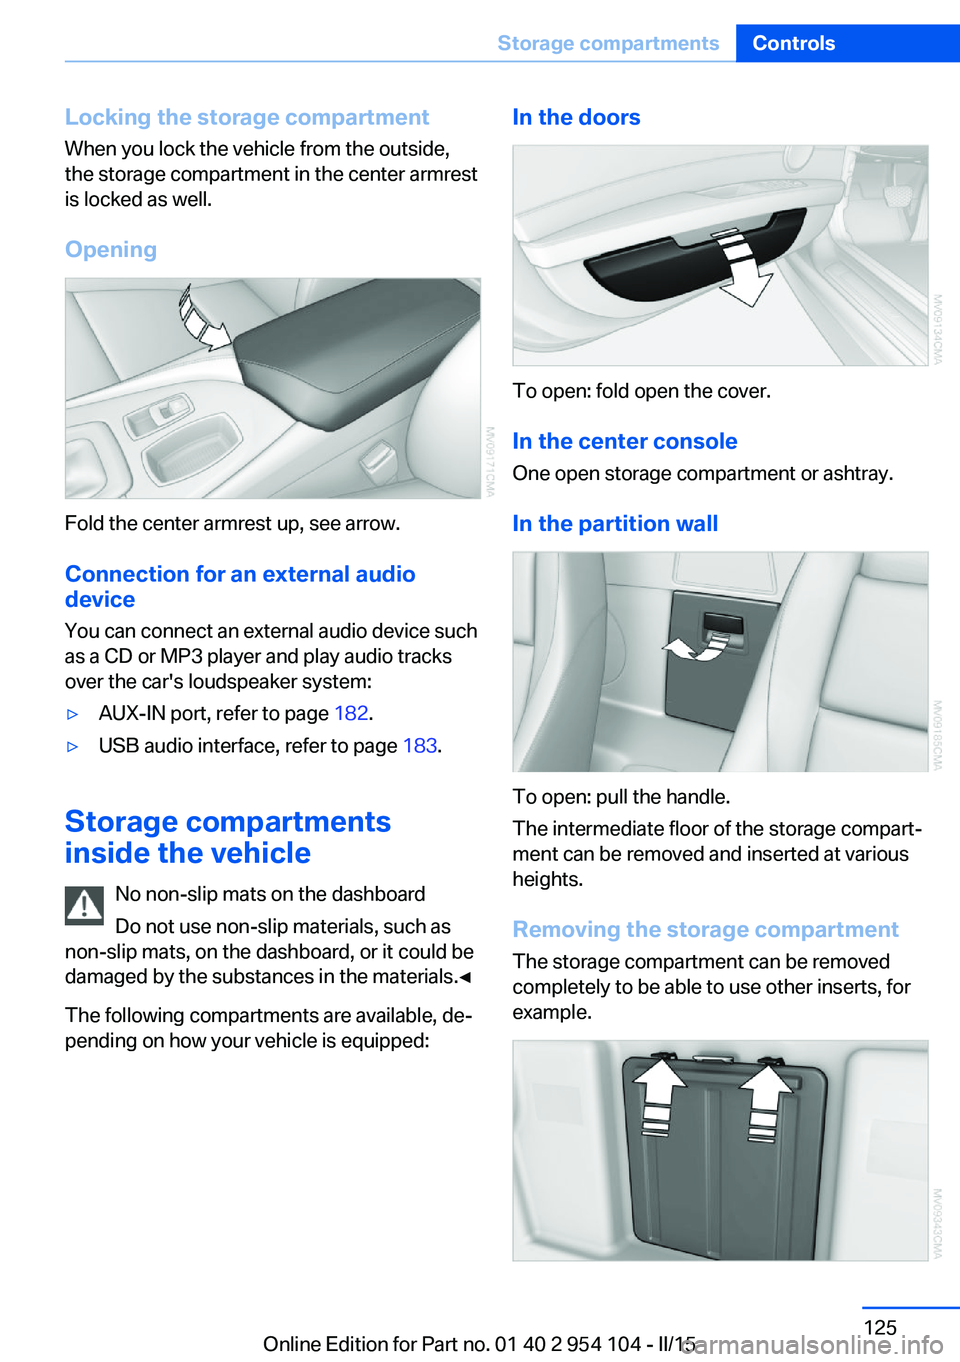
Opening
Fold the center armrest up, see arrow.Connection for an external audio
device
You can connect an external audio device such
as a CD or MP3 player and play audio tracks over the car's loudspeaker system:
▷AUX-IN port, refer to page 182.▷USB audio interface, refer to page 183.
Storage compartments
inside the vehicle
No non-slip mats on the dashboard
Do not use non-slip materials, such as
non-slip mats, on the dashboard, or it could be
damaged by the substances in the materials.◀
The following compartments are available, de‐
pending on how your vehicle is equipped:
In the doors
To open: fold open the cover.
In the center console One open storage compartment or ashtray.
In the partition wall
To open: pull the handle.
The intermediate floor of the storage compart‐
ment can be removed and inserted at various
heights.
Removing the storage compartment The storage compartment can be removed
completely to be able to use other inserts, for
example.
Seite 125Storage compartmentsControls125
Online Edition for Part no. 01 40 2 954 104 - II/15
Page 128 of 289
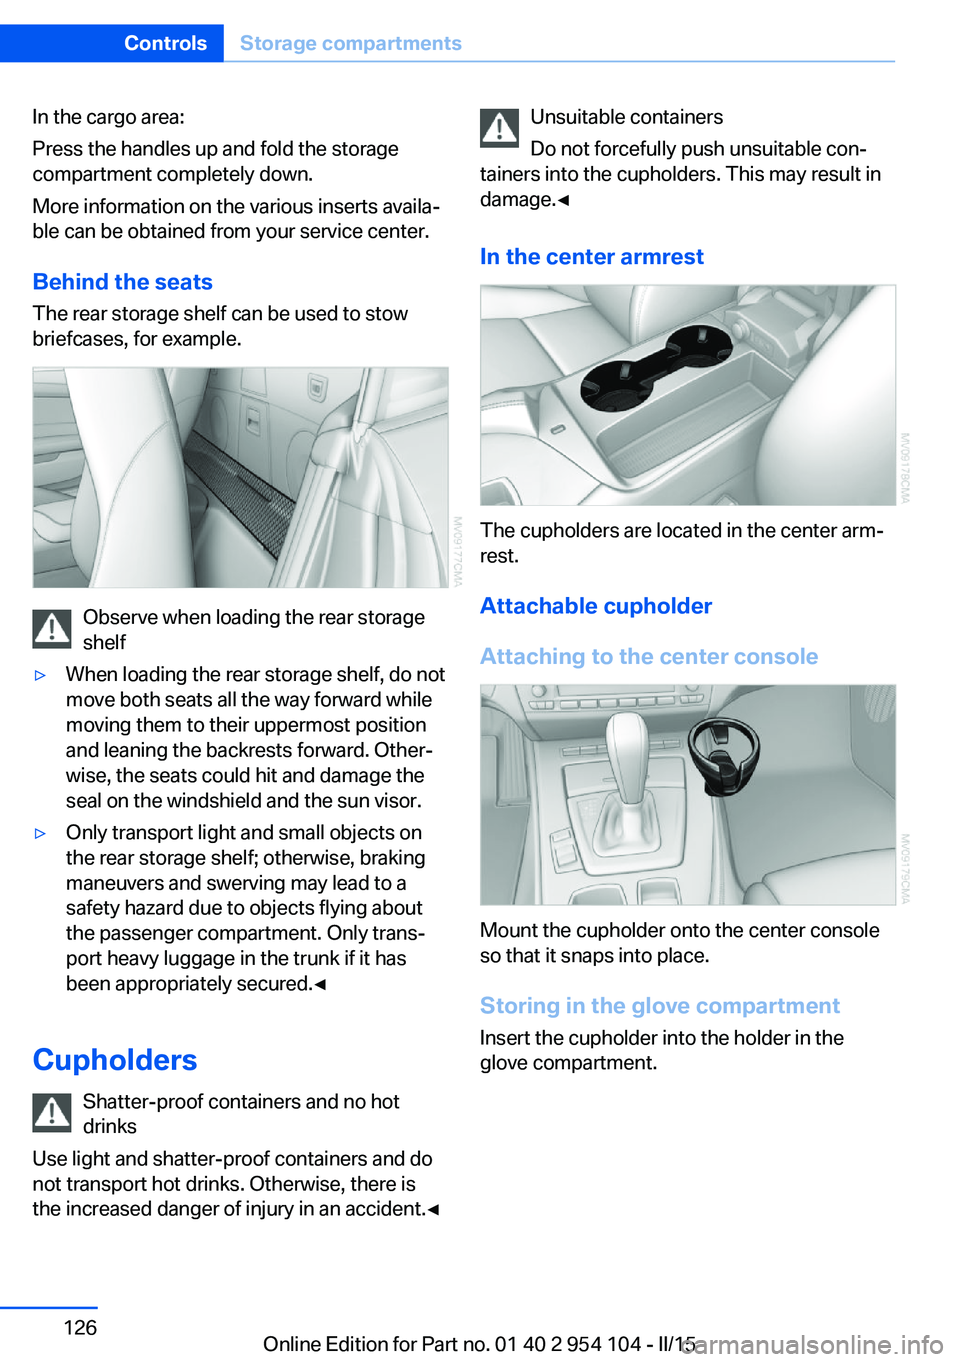
In the cargo area:
Press the handles up and fold the storage
compartment completely down.
More information on the various inserts availa‐
ble can be obtained from your service center.
Behind the seats The rear storage shelf can be used to stow
briefcases, for example.
Observe when loading the rear storage
shelf
▷When loading the rear storage shelf, do not
move both seats all the way forward while
moving them to their uppermost position
and leaning the backrests forward. Other‐
wise, the seats could hit and damage the
seal on the windshield and the sun visor.▷Only transport light and small objects on
the rear storage shelf; otherwise, braking
maneuvers and swerving may lead to a
safety hazard due to objects flying about
the passenger compartment. Only trans‐
port heavy luggage in the trunk if it has
been appropriately secured.◀
Cupholders
Shatter-proof containers and no hot
drinks
Use light and shatter-proof containers and do
not transport hot drinks. Otherwise, there is
the increased danger of injury in an accident.◀
Unsuitable containers
Do not forcefully push unsuitable con‐
tainers into the cupholders. This may result in
damage.◀
In the center armrest
The cupholders are located in the center arm‐
rest.
Attachable cupholder
Attaching to the center console
Mount the cupholder onto the center console
so that it snaps into place.
Storing in the glove compartment Insert the cupholder into the holder in the
glove compartment.
Seite 126ControlsStorage compartments126
Online Edition for Part no. 01 40 2 954 104 - II/15
Page 129 of 289

Seite 127Storage compartmentsControls127
Online Edition for Part no. 01 40 2 954 104 - II/15
Page 130 of 289

Online Edition for Part no. 01 40 2 954 104 - II/15