load BMW Z4 SDRIVE35IS 2015 Owners Manual
[x] Cancel search | Manufacturer: BMW, Model Year: 2015, Model line: Z4 SDRIVE35IS, Model: BMW Z4 SDRIVE35IS 2015Pages: 289, PDF Size: 7.16 MB
Page 37 of 289
Only the driver's door and the fuel
filler flap are unlocked. Pressing again
unlocks the entire vehicle.5.Press the controller.
Convenient opening: window and hardtop
When you are close to the vehicle, the remote
control for Comfort Access can be used to
open the retractable hardtop.
Press and hold the button on the remote
control.
The windows and the retractable hardtop are
opened if the doors are closed.
Hold the button down. When you are close
to the vehicle, the windows move up after the
hardtop is opened.
Monitor the opening process
Monitor the opening process to ensure
that no one becomes trapped; otherwise, inju‐
ries may result. Releasing the button interrupts
the opening process.◀
Locking
Press the button on the remote con‐
trol.
Locking from the outside
Do not lock the vehicle from the outside
if there are people in it, as the vehicle cannot
be unlocked from inside without special knowl‐
edge.◀
Convenient closing
When you are close to the vehicle, the remote
control for Comfort Access can be used to
close the retractable hardtop and the windows.
Press and hold the button on the re‐
mote control.
The retractable hardtop and the windows are
closed.
Monitor the closing process
Monitor the closing process to ensure
that no one becomes trapped.
Releasing the button stops the motion.◀
Switching on the interior lamps and courtesy lamps
Press the button on the remote con‐
trol with the vehicle locked.
Unlocking the trunk lid
Press the button on the remote control for
approx. one second.
Note the opening height of the trunk lid
During opening, the trunk lid pivots back
and up. Ensure that there is sufficient clear‐
ance when the trunk lid opens; otherwise,
damage may result.◀
To avoid locking yourself out of the vehicle, do
not place the remote control in the cargo area.
A previously locked trunk lid is locked again af‐
ter closing.
Before and after each trip, check that the trunk
lid has not been inadvertently unlocked.
Convenient loading
When you are close to the vehicle, the remote
control for Comfort Access can be used to par‐
tially tilt the open hardtop for more convenient
loading of the cargo area.
1. Briefly press the button on the remote
control.
Press again within one second and hold
until the retractable hardtop stops in an in‐
termediate position. The trunk lid opens
slightly.2.Open the trunk lid, press the cargo area
partition upward and stow the cargo in the
cargo area.Seite 35Opening and closingControls35
Online Edition for Part no. 01 40 2 954 104 - II/15
Page 46 of 289
Retractable hardtopGeneral information
Adhere to the following instructions:▷It is advisable that you close the retractable
hardtop when you park the vehicle. Not
only does the closed hardtop protect the
vehicle interior against unanticipated
weather damage, it also offers theft protec‐
tion. However, even when the hardtop is
closed, valuables should only be stored in
the locked cargo area.▷Do not attach roof rack systems to the re‐
tractable hardtop, and in particular do not
attach magnetic racks.▷Do not attach rack systems to the trunk lid,
and in particular do not attach magnetic
racks.▷When the retractable hardtop is operated,
the trunk lid swings back and up.
Before operating the retractable hardtop,
ensure that there is enough clearance, e.g.,
in tight parking spaces.▷If you open the hardtop while it is wet, e.g.,
after driving in the rain, water may drip into
the cargo area.
If necessary, remove items from the cargo
area beforehand to avoid water stains or
soiling.▷Opening and closing while the vehicle is
moving can cause air turbulence in the
cargo area.
Properly stow away objects in the cargo
area.▷At temperatures below 14 ℉/-10 ℃, the
retractable hardtop cannot be moved.
A message appears on the Control Display.
Do not touch the mechanism and keep
the opening path clear.
During opening and closing, do not reach into
the mechanism and keep children away from
the opening path of the retractable hardtop;
otherwise, there is the risk of injury.◀
Do not place objects on the retractable
hardtop.
Do not place any objects on the retractable
hardtop or on the trunk lid; otherwise, they
could fall during movements of the retractable
hardtop and cause damage or injury.◀
Before opening and closing Always open or close the hardtop fully.
Do not let the hardtop stop in an inter‐
mediate position when opening or closing.
Otherwise, there is the danger of personal in‐
jury since the hardtop will be lowered automat‐
ically after a few minutes.◀▷Observe the safety precautions above.▷Ensure that the trunk lid is closed.▷The vehicle should be parked on fairly level
ground. Excessive angle is indicated by a
light.▷Fold down the cargo area partition and
make sure it engages, refer to the instruc‐
tions below.▷Do not place any objects next to or on the
cargo area partition and close the storage
compartment on the left side of the cargo
area.▷Do not exceed the maximum loading
height under the cargo area partition; refer
to the label in the cargo area showing a line
indicating the maximum height.Seite 44ControlsOpening and closing44
Online Edition for Part no. 01 40 2 954 104 - II/15
Page 70 of 289
▷If the shift paddles are not used and the ve‐
hicle is not accelerated for a certain time,
the system switches back into automatic
mode if the selector lever is in transmission
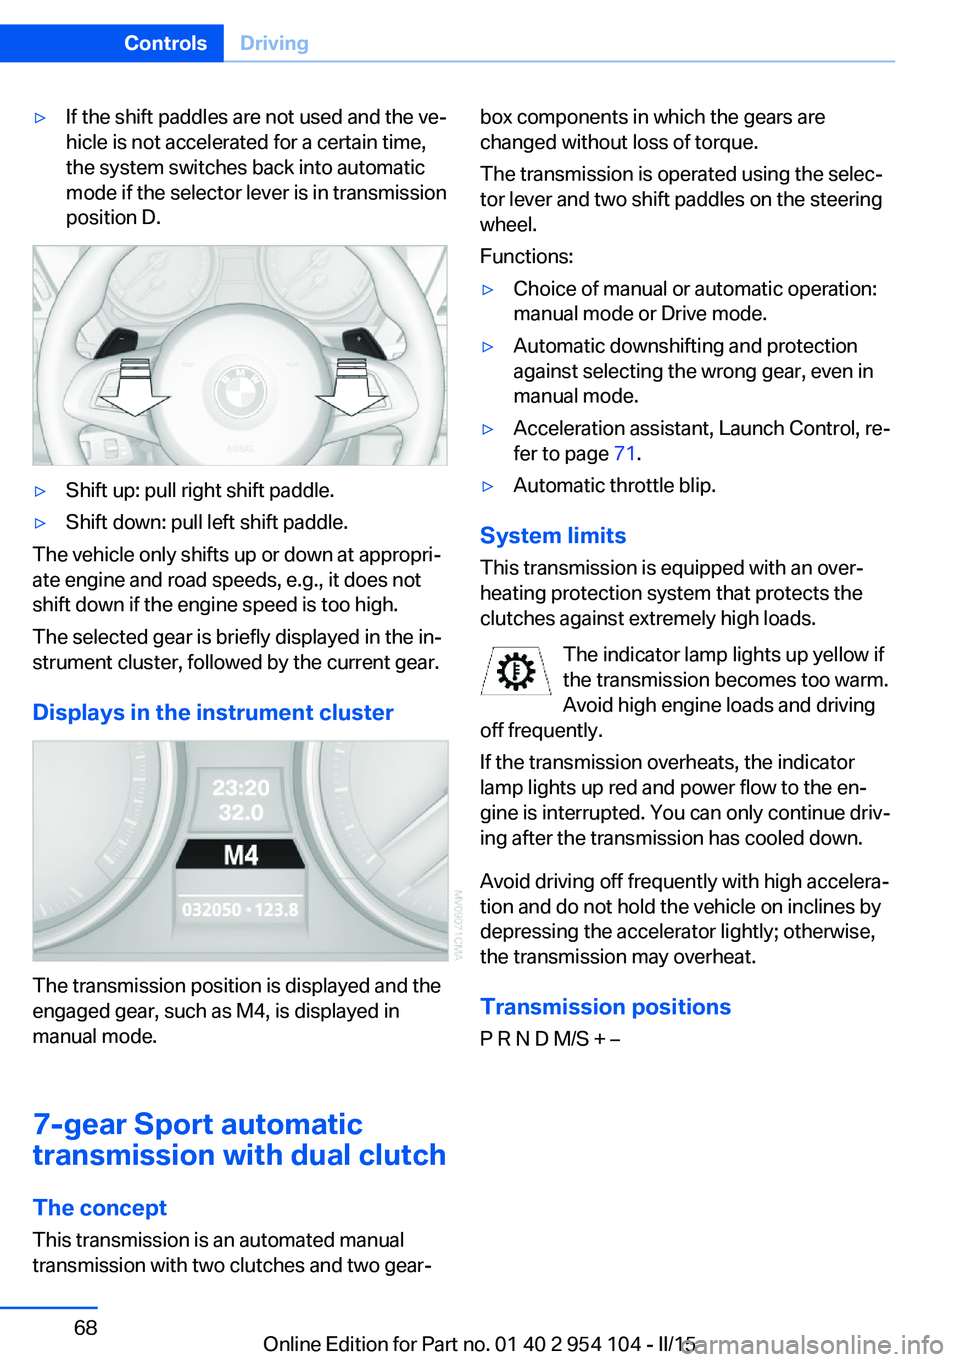
position D.▷Shift up: pull right shift paddle.▷Shift down: pull left shift paddle.
The vehicle only shifts up or down at appropri‐
ate engine and road speeds, e.g., it does not
shift down if the engine speed is too high.
The selected gear is briefly displayed in the in‐
strument cluster, followed by the current gear.
Displays in the instrument cluster
The transmission position is displayed and the
engaged gear, such as M4, is displayed in
manual mode.
7-gear Sport automatic
transmission with dual clutch
The concept This transmission is an automated manual
transmission with two clutches and two gear‐
box components in which the gears are
changed without loss of torque.
The transmission is operated using the selec‐
tor lever and two shift paddles on the steering
wheel.
Functions:▷Choice of manual or automatic operation:
manual mode or Drive mode.▷Automatic downshifting and protection
against selecting the wrong gear, even in
manual mode.▷Acceleration assistant, Launch Control, re‐
fer to page 71.▷Automatic throttle blip.
System limits
This transmission is equipped with an over‐
heating protection system that protects the
clutches against extremely high loads.
The indicator lamp lights up yellow if
the transmission becomes too warm.
Avoid high engine loads and driving
off frequently.
If the transmission overheats, the indicator
lamp lights up red and power flow to the en‐
gine is interrupted. You can only continue driv‐
ing after the transmission has cooled down.
Avoid driving off frequently with high accelera‐
tion and do not hold the vehicle on inclines by
depressing the accelerator lightly; otherwise,
the transmission may overheat.
Transmission positionsP R N D M/S + –
Seite 68ControlsDriving68
Online Edition for Part no. 01 40 2 954 104 - II/15
Page 73 of 289
▷Shift up: pull right shift paddle.▷Shift down: pull left shift paddle.
Gears can be shifted using the shift paddles in
Drive mode or in manual mode.
Gear change in manual mode
When manual mode is active, refer to page 70,
gears can be changed using the shift paddles
or the selector lever.
Gear change in Drive mode The shift paddles can be used to change gears
in Drive mode as well.
Afterwards, if the shift paddles are not used for
some time and vehicle acceleration is insuffi‐
cient, the forward gears are changed again au‐ tomatically.
Launch Control
Launch Control enables you to drive off with an
optimal vehicle acceleration on a high grip road
surface.
Do not use Launch Control too often
Do not use Launch Control too often, as
the higher loads on the vehicle lead to prema‐
ture component wear.◀
Launch Control is available when the engine is
at operating temperature, i.e., after driving con‐
tinuously for at least 6 miles/10 km.
1.With the engine running, depress the brake
pedal with your left foot.2.Activate the SPORT+ program of the Dy‐
namic Driving Control, refer to page 102.3.With the vehicle stationary, activate manual
mode and select first gear.4.Press the accelerator all the way down.
The engine speed when driving off is con‐
trolled. A flag symbol appears in the instru‐
ment cluster.5.The vehicle accelerates when you release
the brake pedal. Keep the accelerator
pressed all the way down.6.The transmission shifts up automatically as
long as the accelerator is pressed all the
way down.
Launch Control only becomes available again
after a certain distance has been driven.
Launch Control can only be used after the
break-in phase, refer to page 130.
To maintain driving stability, activate DSC
whenever possible.
Manually releasing and engaging the
transmission lock
If a power failure occurs, e.g., if the battery is
discharged or disconnected, the transmission
lock must be released manually, otherwise the
rear wheels are blocked and the vehicle cannot
be towed.
Release the transmission lock manually for
towing only and set the parking brake before‐
hand to prevent the vehicle from rolling. After
parking the vehicle, engage the transmission
lock again manually, refer to page 72.
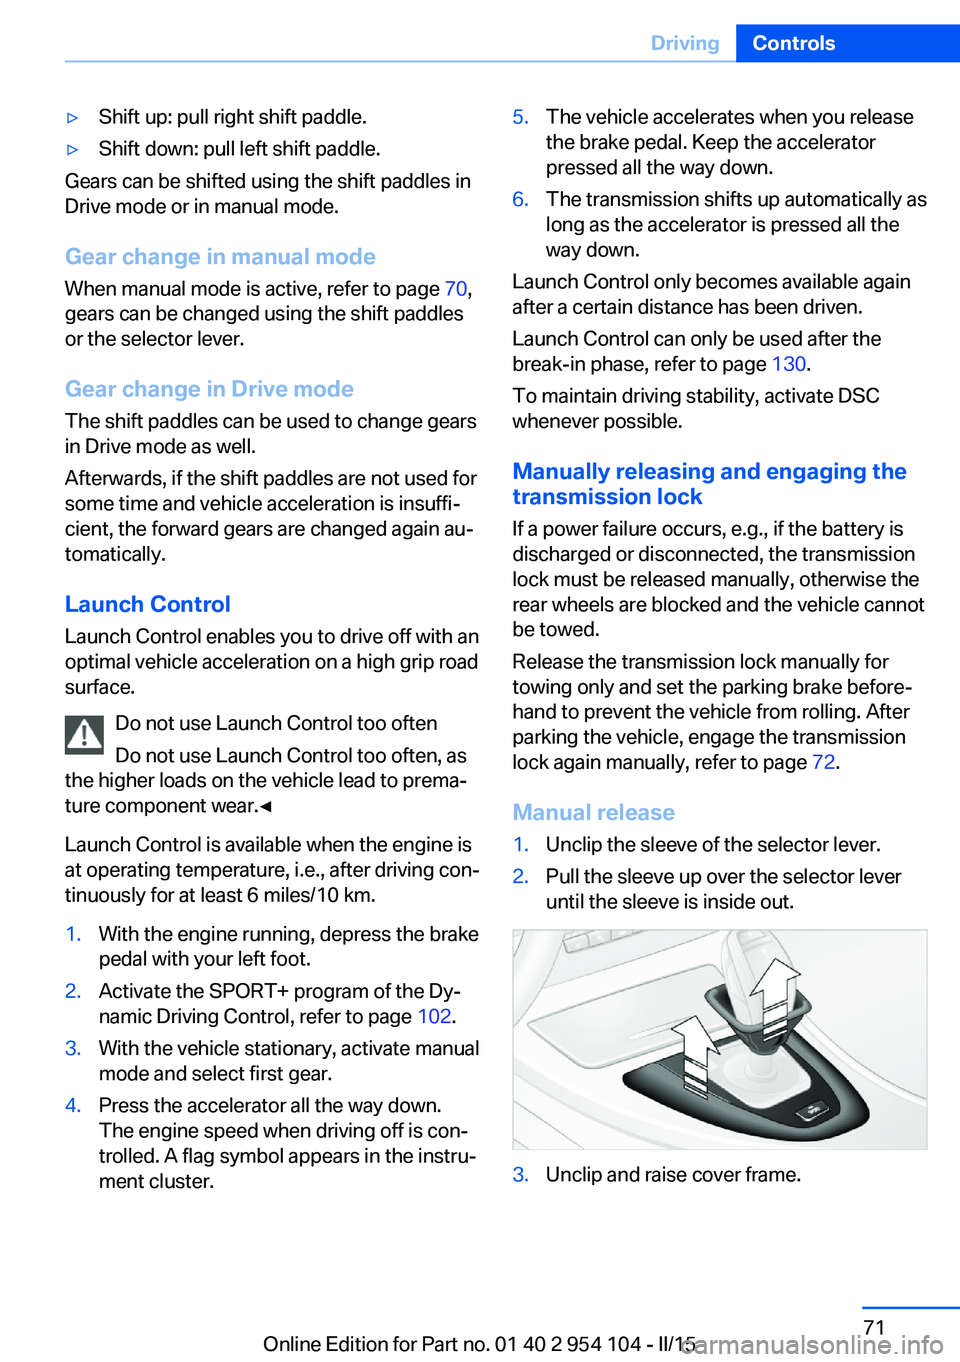
Manual release
1.Unclip the sleeve of the selector lever.2.Pull the sleeve up over the selector lever
until the sleeve is inside out.3.Unclip and raise cover frame.Seite 71DrivingControls71
Online Edition for Part no. 01 40 2 954 104 - II/15
Page 98 of 289
If an identification is not possible, please
contact the service center.2.Rectify the flat tire.
Run-flat tires
You can continue driving with a damaged tire
at speeds up to 50 mph/80 km/h.
Continued driving with a flat tire
If continuing to drive with a damaged tire:
1.Avoid sudden braking and steering maneu‐
vers.2.Do not exceed a speed of 50 mph/80 km/h.3.Check the air pressure in all four tires at
the next opportunity.
If the tire inflation pressure in all four tires
is correct, the Flat Tire Monitor may not
have been initialized. In this case, initialize
the system.
Possible driving distance with complete loss of
tire inflation pressure:
The possible driving distance after a loss of tire
inflation pressure depends on the cargo load
and the driving style and conditions.
For a vehicle containing an average load, the
possible driving distance is approx.
50 miles/80 km.
When the vehicle is driven with a damaged tire,
its handling characteristics change, e.g., re‐
duced lane stability during braking, a longer
braking distance, and altered self-steering
properties. Adjust your driving style accord‐
ingly. Avoid abrupt steering maneuvers or driv‐
ing over obstacles, e. g., curbs, potholes, etc.
Because the possible driving distance de‐
pends on how the vehicle is used during the
trip, the actual distance may be smaller or
greater depending on the driving speed, road
conditions, external temperature, cargo load,
etc.
Continued driving with a flat tire
Drive moderately and do not exceed a
speed of 50 mph/80 km/h.
A loss of tire inflation pressure results in a
change in the handling characteristics, e.g., re‐
duced lane stability during braking, a longer
braking distance and altered self-steering
properties.◀
Final tire failure
Vibrations or loud noises while driving
can indicate the final failure of the tire. Reduce
speed and stop; otherwise, pieces of the tire
could come loose and cause an accident. Do
not continue driving, and contact your service
center.◀
Tire Pressure Monitor TPMThe concept
The system monitors the tire pressure in the four mounted tires. The system issues a warn‐
ing if there is a significant loss of pressure in
one or more tires. Sensors in the tire valves
measure the tire pressure.
Notes Tire damage caused by external influen‐
ces
Sudden tire damage caused by external influ‐
ences cannot be indicated in advance.◀
To operate the system, also note the additional
information and instructions contained under
Tire inflation pressure, refer to page 228.
Functional requirement The system must have been reset while the in‐
flation pressure was correct; otherwise, reliable
signaling of pressure loss is not ensured.
Reset the system after adjusting the tire infla‐
tion pressure and after changing a tire or
wheel.Seite 96ControlsSafety96
Online Edition for Part no. 01 40 2 954 104 - II/15
Page 100 of 289
Low tire pressure messageThe warning lights come on in yellow
and red. A message appears on the
Control Display. In addition, a signal
sounds.▷There is a flat tire or a major loss in tire in‐
flation pressure.▷The system was not reset. The system
therefore issues warnings in case of devia‐
tions from the tire inflation pressures
stored last.1.Reduce your speed and stop cautiously.
Avoid sudden braking and steering maneu‐
vers.2.Check whether the vehicle is fitted with
regular tires or run-flat tires.
Run-flat tires, refer to page 98, are la‐
beled with a circular symbol containing the
letters RSC marked on the tire sidewall.
Do not continue driving without run-flat
tires
Do not continue driving if the vehicle is not
equipped with run-flat tires; continued driving
may result in serious accidents.◀
When a flat tire is indicated, DSC Dynamic Sta‐
bility Control is switched on if necessary.
Actions in the event of a flat tire Normal tires
1.Identify the damaged tire.
Do this by checking the air pressure in all
four tires.
If the tire inflation pressure in all four tires
is correct, the Tire Pressure Monitor may
not have been reset. Reset the system.
If an identification is not possible, please
contact the service center.2.Rectify the flat tire.
The use of tire sealant can damage the
TPM electronics. In this case, have theelectronics checked at the next opportu‐
nity and have them replaced if necessary.
Run-flat tires
You can continue driving with a damaged tire
at speeds up to 50 mph/80 km/h.
Continued driving with a flat tire If continuing to drive with a damaged tire:
1.Avoid sudden braking and steering maneu‐
vers.2.Do not exceed a speed of 50 mph/80 km/h.3.Check the air pressure in all four tires at
the next opportunity.
If the tire inflation pressure in all four tires
is correct, the Tire Pressure Monitor may
not have been reset. Reset the system.
Possible driving distance with complete loss of
tire inflation pressure:
The possible driving distance after a loss of tire
inflation pressure depends on the cargo load
and the driving style and conditions.
For a vehicle containing an average load, the
possible driving distance is approx.
50 miles/80 km.
When the vehicle is driven with a damaged tire,
its handling characteristics change, e.g., re‐
duced lane stability during braking, a longer
braking distance, and altered self-steering
properties. Adjust your driving style accord‐
ingly. Avoid abrupt steering maneuvers or driv‐
ing over obstacles, e. g., curbs, potholes, etc.
Because the possible driving distance de‐
pends on how the vehicle is used during the
trip, the actual distance may be smaller or
greater depending on the driving speed, road
conditions, external temperature, cargo load,
etc.
Continued driving with a flat tire
Drive moderately and do not exceed a
speed of 50 mph/80 km/h.
Seite 98ControlsSafety98
Online Edition for Part no. 01 40 2 954 104 - II/15
Page 106 of 289
Activating COMFORTPress the button repeatedly until
COMFORT is selected in the instru‐
ment cluster.
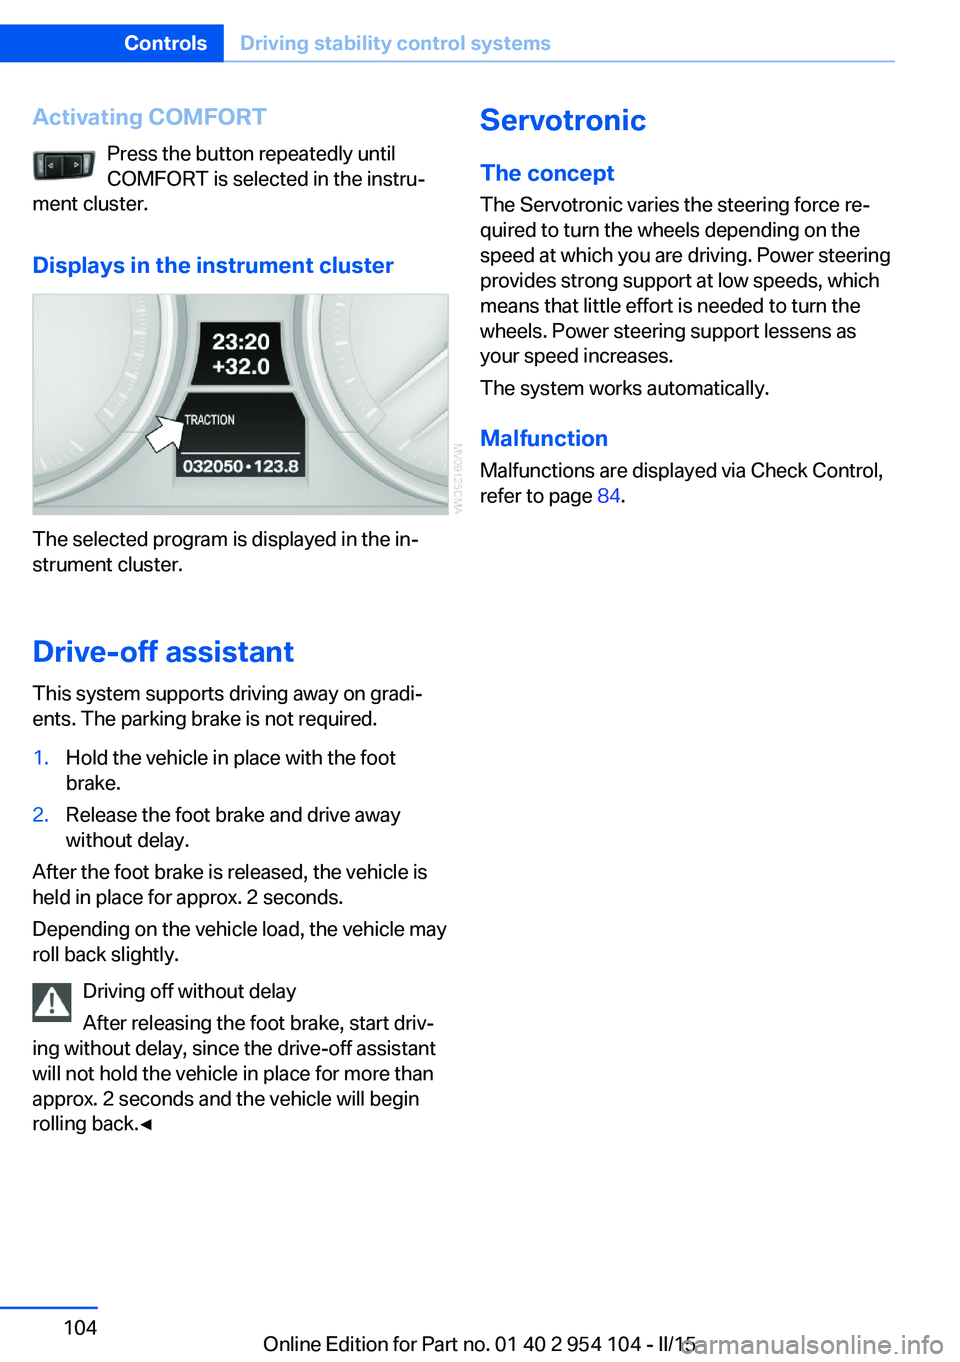
Displays in the instrument cluster
The selected program is displayed in the in‐
strument cluster.
Drive-off assistant
This system supports driving away on gradi‐
ents. The parking brake is not required.
1.Hold the vehicle in place with the foot
brake.2.Release the foot brake and drive away
without delay.
After the foot brake is released, the vehicle is
held in place for approx. 2 seconds.
Depending on the vehicle load, the vehicle may
roll back slightly.
Driving off without delay
After releasing the foot brake, start driv‐
ing without delay, since the drive-off assistant
will not hold the vehicle in place for more than
approx. 2 seconds and the vehicle will begin
rolling back.◀
Servotronic
The concept
The Servotronic varies the steering force re‐
quired to turn the wheels depending on the
speed at which you are driving. Power steering
provides strong support at low speeds, which
means that little effort is needed to turn the
wheels. Power steering support lessens as
your speed increases.
The system works automatically.
Malfunction
Malfunctions are displayed via Check Control,
refer to page 84.Seite 104ControlsDriving stability control systems104
Online Edition for Part no. 01 40 2 954 104 - II/15
Page 122 of 289
again to switch between English "E" and Ger‐
man "O".
The setting is automatically saved after approx.
10 seconds.
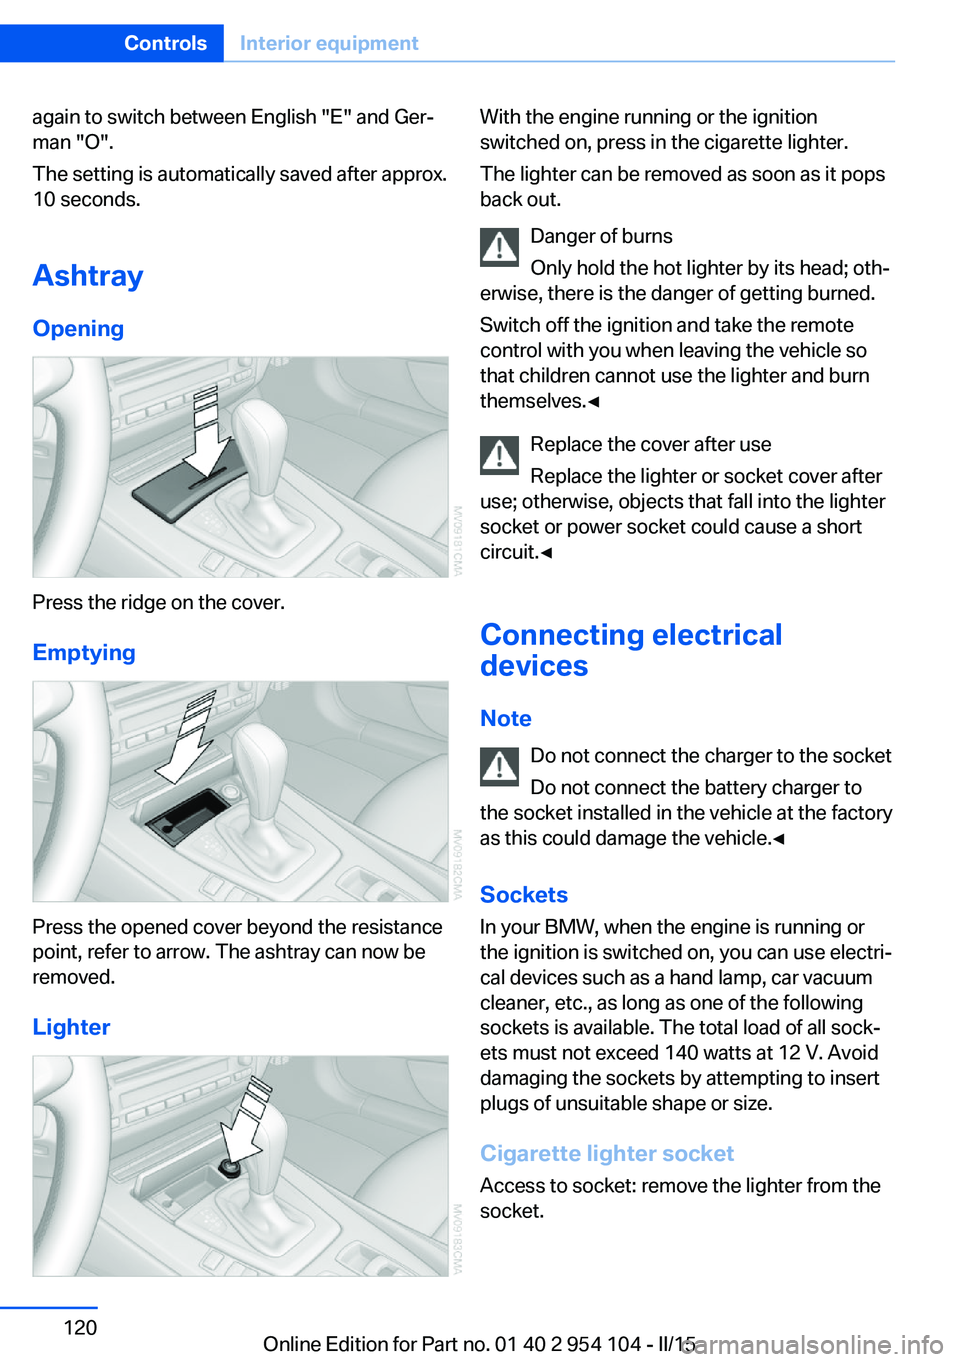
Ashtray
Opening
Press the ridge on the cover.
Emptying
Press the opened cover beyond the resistance
point, refer to arrow. The ashtray can now be
removed.
Lighter
With the engine running or the ignition
switched on, press in the cigarette lighter.
The lighter can be removed as soon as it pops
back out.
Danger of burns
Only hold the hot lighter by its head; oth‐
erwise, there is the danger of getting burned.
Switch off the ignition and take the remote
control with you when leaving the vehicle so
that children cannot use the lighter and burn
themselves.◀
Replace the cover after use
Replace the lighter or socket cover after
use; otherwise, objects that fall into the lighter
socket or power socket could cause a short
circuit.◀
Connecting electrical
devices
Note Do not connect the charger to the socket
Do not connect the battery charger to
the socket installed in the vehicle at the factory
as this could damage the vehicle.◀
Sockets
In your BMW, when the engine is running or
the ignition is switched on, you can use electri‐
cal devices such as a hand lamp, car vacuum
cleaner, etc., as long as one of the following
sockets is available. The total load of all sock‐
ets must not exceed 140 watts at 12 V. Avoid
damaging the sockets by attempting to insert
plugs of unsuitable shape or size.
Cigarette lighter socket Access to socket: remove the lighter from the
socket.Seite 120ControlsInterior equipment120
Online Edition for Part no. 01 40 2 954 104 - II/15
Page 123 of 289
Under the center armrest
External audio device, refer to page 125.
In the passenger footwell A socket is located on the left below the glove
compartment.
Cargo area
Depending on your vehicle's equipment, the
following storage spaces can be found in the
cargo area:▷Rubber band for securing light objects.▷Storage compartment.
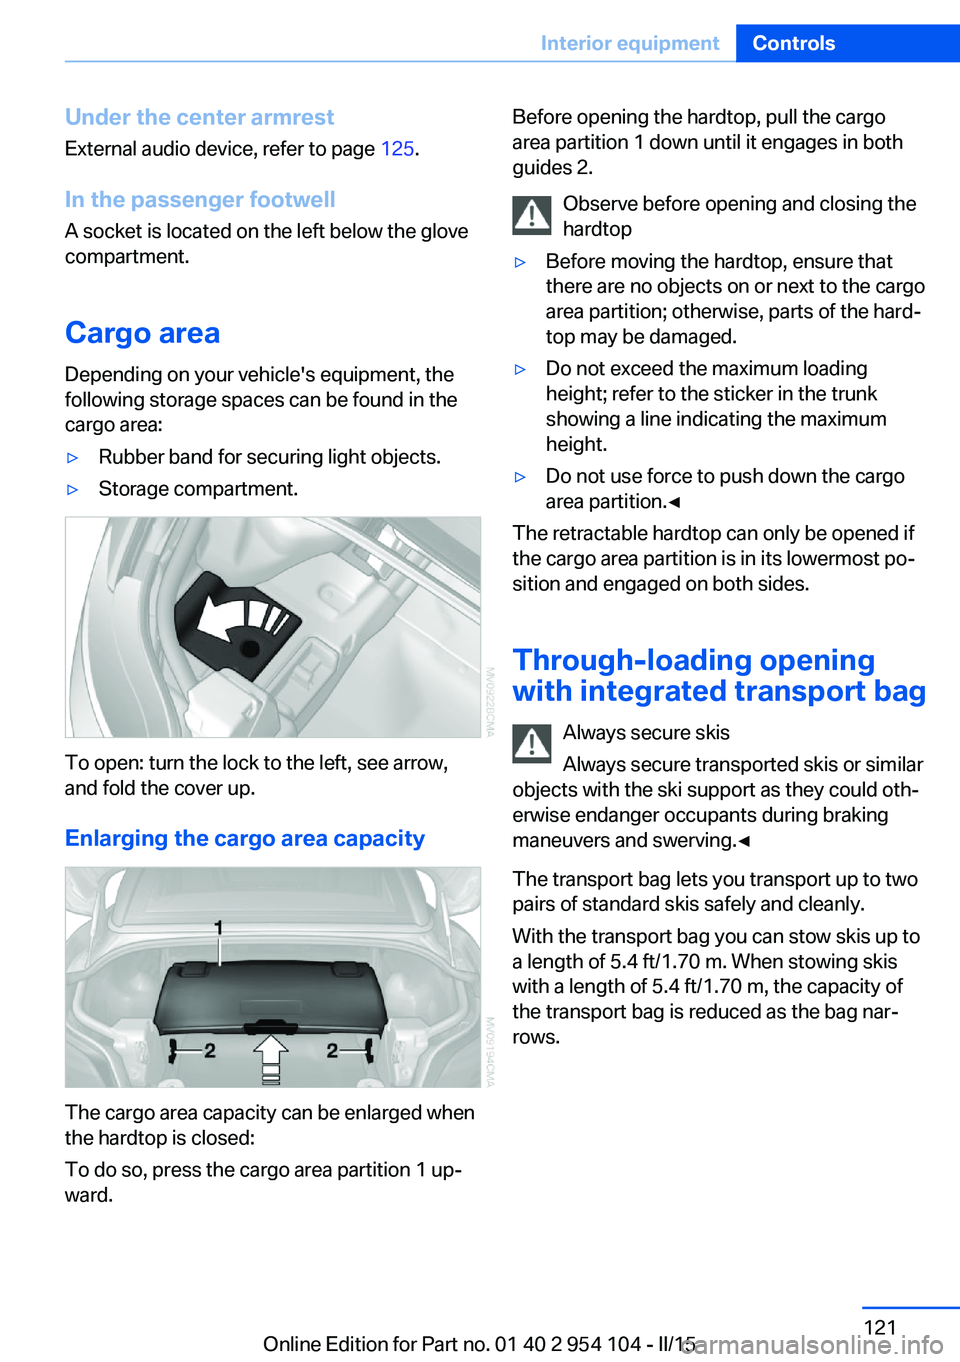
To open: turn the lock to the left, see arrow,
and fold the cover up.
Enlarging the cargo area capacity
The cargo area capacity can be enlarged when
the hardtop is closed:
To do so, press the cargo area partition 1 up‐
ward.
Before opening the hardtop, pull the cargo
area partition 1 down until it engages in both
guides 2.
Observe before opening and closing the
hardtop▷Before moving the hardtop, ensure that
there are no objects on or next to the cargo
area partition; otherwise, parts of the hard‐
top may be damaged.▷Do not exceed the maximum loading
height; refer to the sticker in the trunk
showing a line indicating the maximum
height.▷Do not use force to push down the cargo
area partition.◀
The retractable hardtop can only be opened if
the cargo area partition is in its lowermost po‐
sition and engaged on both sides.
Through-loading opening
with integrated transport bag
Always secure skis
Always secure transported skis or similar
objects with the ski support as they could oth‐
erwise endanger occupants during braking
maneuvers and swerving.◀
The transport bag lets you transport up to two
pairs of standard skis safely and cleanly.
With the transport bag you can stow skis up to a length of 5.4 ft/1.70 m. When stowing skis
with a length of 5.4 ft/1.70 m, the capacity of
the transport bag is reduced as the bag nar‐
rows.
Seite 121Interior equipmentControls121
Online Edition for Part no. 01 40 2 954 104 - II/15
Page 124 of 289
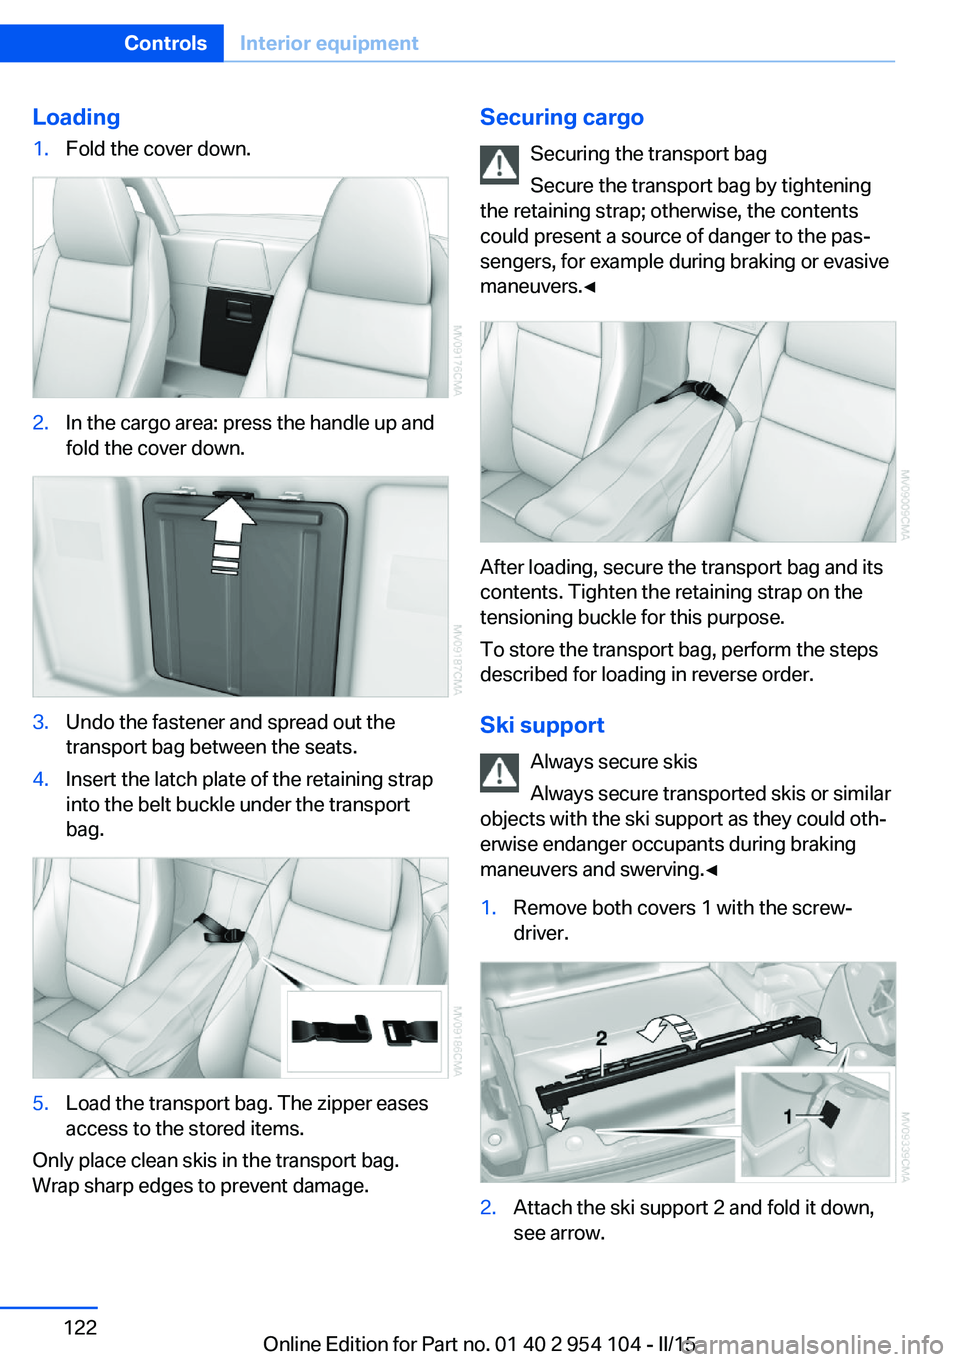
Loading1.Fold the cover down.2.In the cargo area: press the handle up and
fold the cover down.3.Undo the fastener and spread out the
transport bag between the seats.4.Insert the latch plate of the retaining strap
into the belt buckle under the transport
bag.5.Load the transport bag. The zipper eases
access to the stored items.
Only place clean skis in the transport bag.
Wrap sharp edges to prevent damage.
Securing cargo
Securing the transport bag
Secure the transport bag by tightening
the retaining strap; otherwise, the contents
could present a source of danger to the pas‐
sengers, for example during braking or evasive
maneuvers.◀
After loading, secure the transport bag and its
contents. Tighten the retaining strap on the
tensioning buckle for this purpose.
To store the transport bag, perform the steps
described for loading in reverse order.
Ski support Always secure skis
Always secure transported skis or similar
objects with the ski support as they could oth‐
erwise endanger occupants during braking
maneuvers and swerving.◀
1.Remove both covers 1 with the screw‐
driver.2.Attach the ski support 2 and fold it down,
see arrow.Seite 122ControlsInterior equipment122
Online Edition for Part no. 01 40 2 954 104 - II/15