airbag BMW Z8 2000 Owners Manual
[x] Cancel search | Manufacturer: BMW, Model Year: 2000, Model line: Z8, Model: BMW Z8 2000Pages: 172, PDF Size: 1.9 MB
Page 9 of 172
Contents
Overview
Controls and features
Cockpit14
Instrument cluster16
Indicator and warning lamps18
Hazard warning flashers22
Warning triangle22
First-aid kit22
Refueling23
Fuel quality24
Tire inflation pressure24
Locks and security systems:
Keys28
Electronic vehicle
immobilizer29
Central locking system30
Opening and closing Ð from
outside30
Using the key30
Using the remote control31
Opening and closing Ð from
inside34
Luggage compartment lid35
Alarm system36
Electric power windows38
The automatic convertible
top39
Adjustments:
Seats43
Steering wheel45
Mirrors45
Car Memory, Key Memory46
Passenger safety systems:
Safety belts48
Airbags49
Child restraints51
Child seat safety52
Driving:
Steering/Ignition lock53
Starting the engine54
Turning the engine off54
Parking brake55
Manual transmission56
Turn signal indicator/Headlamp
flasher56
Wiper/Washer system57
Rear window defroster58
Cruise control59
Everything under control:
Odometer60
Tachometer60
Fuel gauge60
Coolant temperature gauge61
Service Interval Display61
Clock62
Multi-Information Radio (MIR)62
Technology for safety and
driving convenience:
Dynamic Stability Control
(DSC)63
Dynamic Driving Control64
Tire Pressure Warning (RDW)65
Contents
Page 10 of 172
9n
Controls and features
Operation, care and maintenance
Lamps:
Side lamps/Low beams67
Instrument lighting67
High beams/Parking lamps68
Rear foglamp68
Interior lamps68
Reading lamps69
Controlling the climate for
pleasant driving:
Heating and ventilation/
Air conditioning70
Seat heating75
Interior conveniences:
Glove compartment76
Storage compartments76
Beverage can holder78
Cellular phone79
Ashtray79
Cigarette lighter80
Loading and transporting:
Cargo loading81
Special operating instructions:
Break-in procedures84
Driving notes85
Catalytic converter85
Antilock Brake System (ABS)86
Dynamic Brake Control
(DBC)88
Disc brakes88
Brake system89
Winter operation90
Power steering92
Cellular phone92
Radio reception92
Wind protection93
Hardtop94
Wheels and tires:
Tire inflation pressure96
Tire condition97
Tire replacement98
Tire rotation100
Wheel and tire
combinations101
Winter tires102
Snow chains102
Approved wheel and tire
specifications103
Under the hood:
Hood104
Engine compartment106
Washer fluids108
Washer nozzles108
Engine oil109
Coolant111
Brake fluid112
Vehicle Identification
Number113
Maintenance and care:
The BMW Maintenance
System114
Caring for your vehicle115
Airbags121
Storing your vehicle122
Laws and regulations:
Technical modifications123
California Proposition 65
Warning123
OBD interface socket124
Page 11 of 172

Contents
Owner service procedures
Advanced technology
Technical data
Replacement procedures:
Onboard tool kit128
Windshield wiper blades128
Lamps and bulbs129
Changing a wheel135
Battery136
Fuses138
In case of electrical
malfunction:
Fuel filler door140
Luggage compartment lid,
storage compartment140
Passenger-side door141
Closing the convertible top141
Giving and receiving
assistance:
Jump starting143
Towing144Airbags148
Radio reception148
Dynamic Stability Control
(DSC)149
Safety belt tensioner149
Interior rearview mirror with
automatic dimmer150
Xenon lamps151Engine data154
Dimensions155
Weights156
Capacities157
Electrical system158
Drive belts158
Page 18 of 172
17n
IndexDataTechnologyRepairsCar careControlsOverview
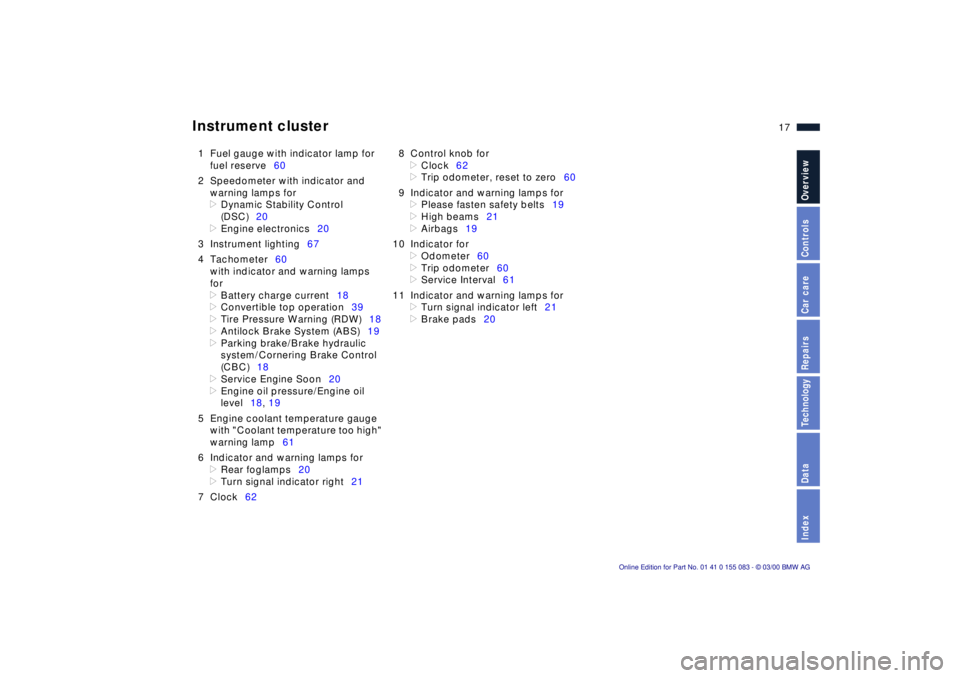
Instrument cluster
1 Fuel gauge with indicator lamp for
fuel reserve60
2 Speedometer with indicator and
warning lamps for
>
Dynamic Stability Control
(DSC)20
>
Engine electronics20
3 Instrument lighting67
4 Tachometer60
with indicator and warning lamps
for
>
Battery charge current18
>
Convertible top operation39
>
Tire Pressure Warning (RDW)18
>
Antilock Brake System (ABS)19
>
Parking brake/Brake hydraulic
system/Cornering Brake Control
(CBC)18
>
Service Engine Soon20
>
Engine oil pressure/Engine oil
level18, 19
5 Engine coolant temperature gauge
with "Coolant temperature too high"
warning lamp61
6 Indicator and warning lamps for
>
Rear foglamps20
>
Turn signal indicator right21
7 Clock628 Control knob for
>
Clock62
>
Trip odometer, reset to zero60
9 Indicator and warning lamps for
>
Please fasten safety belts19
>
High beams21
>
Airbags19
10 Indicator for
>
Odometer60
>
Trip odometer60
>
Service Interval61
11 Indicator and warning lamps for
>
Turn signal indicator left21
>
Brake pads20
Page 20 of 172
19n
IndexDataTechnologyRepairsCar careControlsOverview
Indicator and warning lamps
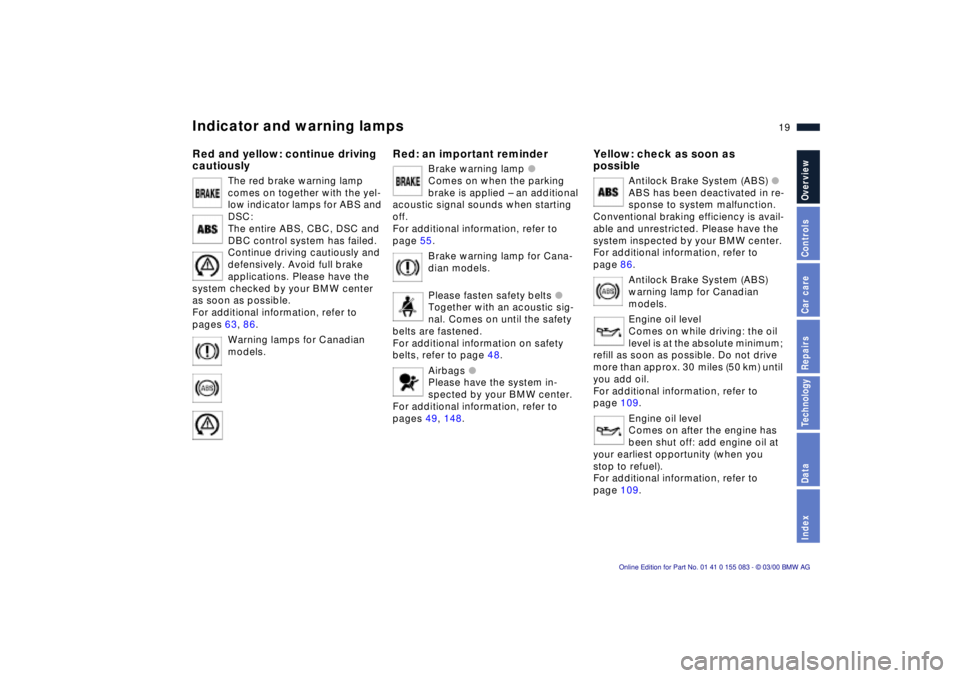
Red and yellow: continue driving
cautiously
The red brake warning lamp
comes on together with the yel-
low indicator lamps for ABS and
DSC:
The entire ABS, CBC, DSC and
DBC control system has failed.
Continue driving cautiously and
defensively. Avoid full brake
applications. Please have the
system checked by your BMW center
as soon as possible.
For additional information, refer to
pages 63, 86.
Warning lamps for Canadian
models.
Red: an important reminder
Brake warning lamp
l
Comes on when the parking
brake is applied Ð an additional
acoustic signal sounds when starting
off.
For additional information, refer to
page 55.
Brake warning lamp for Cana-
dian models.
Please fasten safety belts
l
Together with an acoustic sig-
nal. Comes on until the safety
belts are fastened.
For additional information on safety
belts, refer to page 48.
Airbags
l
Please have the system in-
spected by your BMW center.
For additional information, refer to
pages 49, 148.
Yellow: check as soon as
possible
Antilock Brake System (ABS)
l
ABS has been deactivated in re-
sponse to system malfunction.
Conventional braking efficiency is avail-
able and unrestricted. Please have the
system inspected by your BMW center.
For additional information, refer to
page 86.
Antilock Brake System (ABS)
warning lamp for Canadian
models.
Engine oil level
Comes on while driving: the oil
level is at the absolute minimum;
refill as soon as possible. Do not drive
more than approx. 30 miles (50 km) until
you add oil.
For additional information, refer to
page 109.
Engine oil level
Comes on after the engine has
been shut off: add engine oil at
your earliest opportunity (when you
stop to refuel).
For additional information, refer to
page 109.
Page 27 of 172
26n
Locks and security systems:
Keys28
Electronic vehicle
immobilizer29
Central locking system30
Opening and closing Ð from
outside30
Using the key30
Using the remote control31
Opening and closing Ð from
inside34
Luggage compartment lid35
Alarm system36
Electric power windows38
The automatic convertible
top39
Adjustments:
Seats43
Steering wheel45
Mirrors45
Car Memory, Key Memory46
Passenger safety systems:
Safety belts48
Airbags49
Child restraints51
Child seat safety52
Controls
Page 49 of 172
48n
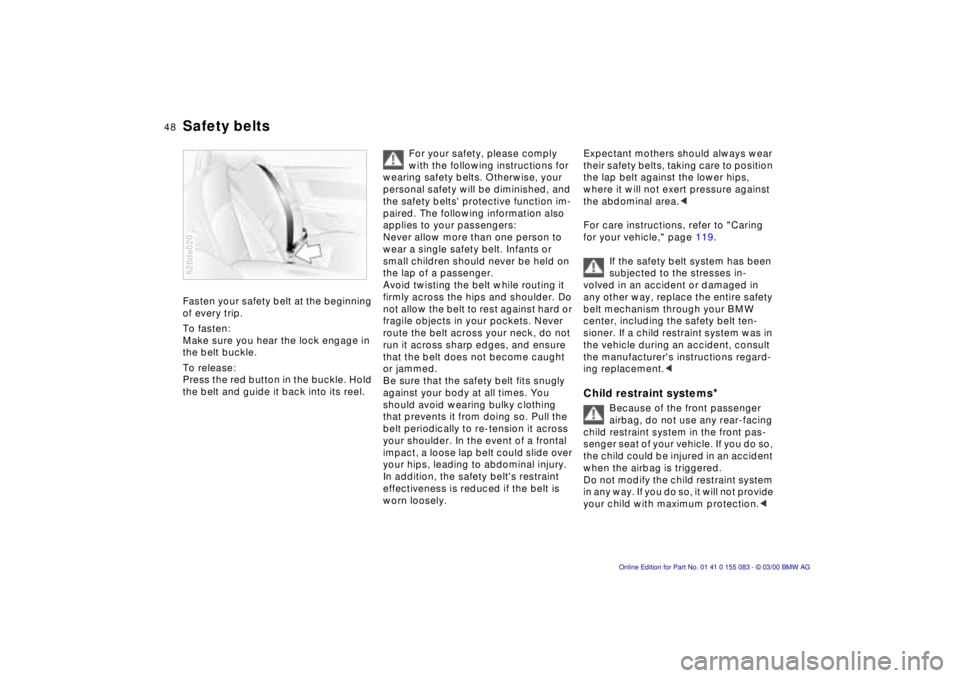
Fasten your safety belt at the beginning
of every trip.
To fasten:
Make sure you hear the lock engage in
the belt buckle.
To release:
Press the red button in the buckle. Hold
the belt and guide it back into its reel.
520de020
For your safety, please comply
with the following instructions for
wearing safety belts. Otherwise, your
personal safety will be diminished, and
the safety belts' protective function im-
paired. The following information also
applies to your passengers:
Never allow more than one person to
wear a single safety belt. Infants or
small children should never be held on
the lap of a passenger.
Avoid twisting the belt while routing it
firmly across the hips and shoulder. Do
not allow the belt to rest against hard or
fragile objects in your pockets. Never
route the belt across your neck, do not
run it across sharp edges, and ensure
that the belt does not become caught
or jammed.
Be sure that the safety belt fits snugly
against your body at all times. You
should avoid wearing bulky clothing
that prevents it from doing so. Pull the
belt periodically to re-tension it across
your shoulder. In the event of a frontal
impact, a loose lap belt could slide over
your hips, leading to abdominal injury.
In addition, the safety belt's restraint
effectiveness is reduced if the belt is
worn loosely.
Expectant mothers should always wear
their safety belts, taking care to position
the lap belt against the lower hips,
where it will not exert pressure against
the abdominal area.<
For care instructions, refer to "Caring
for your vehicle," page 119.
If the safety belt system has been
subjected to the stresses in-
volved in an accident or damaged in
any other way, replace the entire safety
belt mechanism through your BMW
center, including the safety belt ten-
sioner. If a child restraint system was in
the vehicle during an accident, consult
the manufacturer's instructions regard-
ing replacement.
Because of the front passenger
airbag, do not use any rear-facing
child restraint system in the front pas-
senger seat of your vehicle. If you do so,
the child could be injured in an accident
when the airbag is triggered.
Do not modify the child restraint system
in any way. If you do so, it will not provide
your child with maximum protection.<
Safety belts
Page 50 of 172
49n
IndexDataTechnologyRepairsCar careControlsOverview
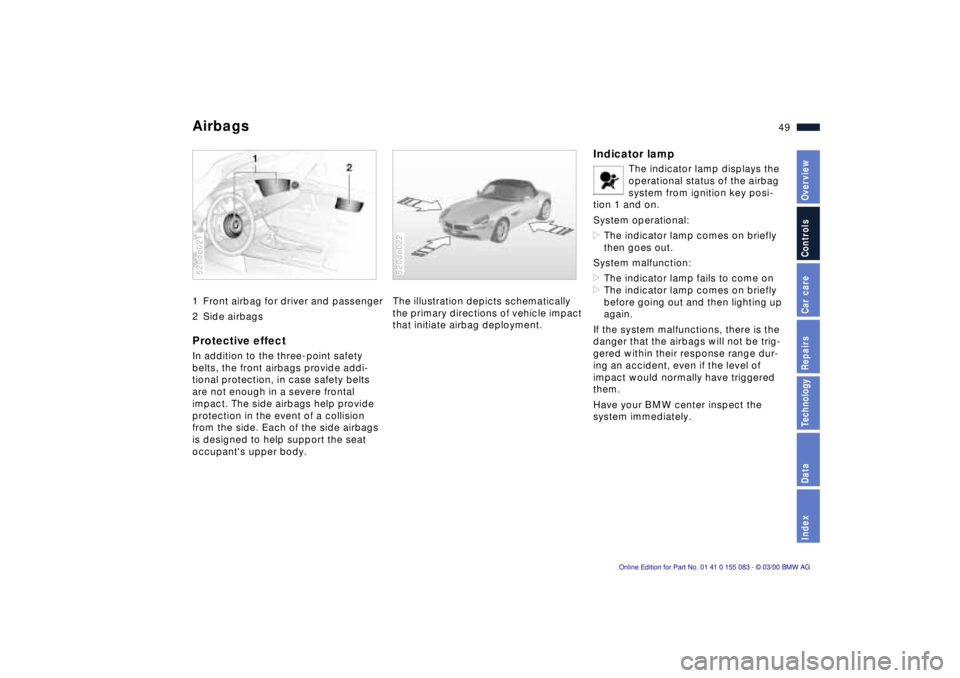
Airbags 1 Front airbag for driver and passenger
2 Side airbagsProtective effectIn addition to the three-point safety
belts, the front airbags provide addi-
tional protection, in case safety belts
are not enough in a severe frontal
impact. The side airbags help provide
protection in the event of a collision
from the side. Each of the side airbags
is designed to help support the seat
occupant's upper body.520de021
The illustration depicts schematically
the primary directions of vehicle impact
that initiate airbag deployment.520de022
Indicator lamp
The indicator lamp displays the
operational status of the airbag
system from ignition key posi-
tion 1 and on.
System operational:
>The indicator lamp comes on briefly
then goes out.
System malfunction:
>The indicator lamp fails to come on
>The indicator lamp comes on briefly
before going out and then lighting up
again.
If the system malfunctions, there is the
danger that the airbags will not be trig-
gered within their response range dur-
ing an accident, even if the level of
impact would normally have triggered
them.
Have your BMW center inspect the
system immediately.
Page 51 of 172
50n
AirbagsSitting correctly with airbags
Comply with the following instruc-
tions for the airbags, otherwise,
the airbags may not be able to provide
their maximum protection, with result-
ing risks to personal safety. All passen-
gers in the vehicle should be aware of
and comply with this information:
The airbags are supplemental restraint
devices designed to provide extra pro-
tection; they are not a substitute for
safety belts. Wear your safety belt at all
times. The airbags will not be triggered
in the event of a minor accident, a vehi-
cle roll-over, or collisions from the rear.
In these instances, the safety belt pro-
vides optimal protection.
Airbags are located under cover panels
in the steering wheel, in the instrument
panel and in the door side trim panels.
Assume a seating position that is com-
fortable and provides the greatest-pos-
sible distance between you and the air-
bags in your seating area. Always hold
the steering wheel by the rim Ð hands in
the "9 o'clock" and "3 o'clock" posi-
tions Ð otherwise, your hands or arms
could be injured if the airbag is trig-
gered.
Do not allow any objects to obstruct the
area between the airbag and the driver/
passenger.
Do not use the cover panel above the
front passenger airbag as a storage
area.
Do not apply adhesive materials to the
cover panels of the airbags, or cover or
modify them in any other way.
Do not use a rear-facing child seat in the
front passenger seat. If you use a child
restraint system, read carefully and
comply with the instructions on page 51.
Be sure that child seats are installed
correctly and with the greatest possible
distance between them and the side air-
bag. Do not allow children to lean out of
the child's seat in the direction of the
side trim panels. If they do so, serious
injuries can occur if the airbag is trig-
gered.<
Even when all these guidelines are ob-
served, there is still a small residual risk
of injury to the face, hands and arms
occurring from airbag deployment in
isolated instances.
The ignition and inflation noise may
cause a mild temporary hearing loss in
extremely sensitive individuals.
For additional information concerning
the airbag system, refer to pages 121
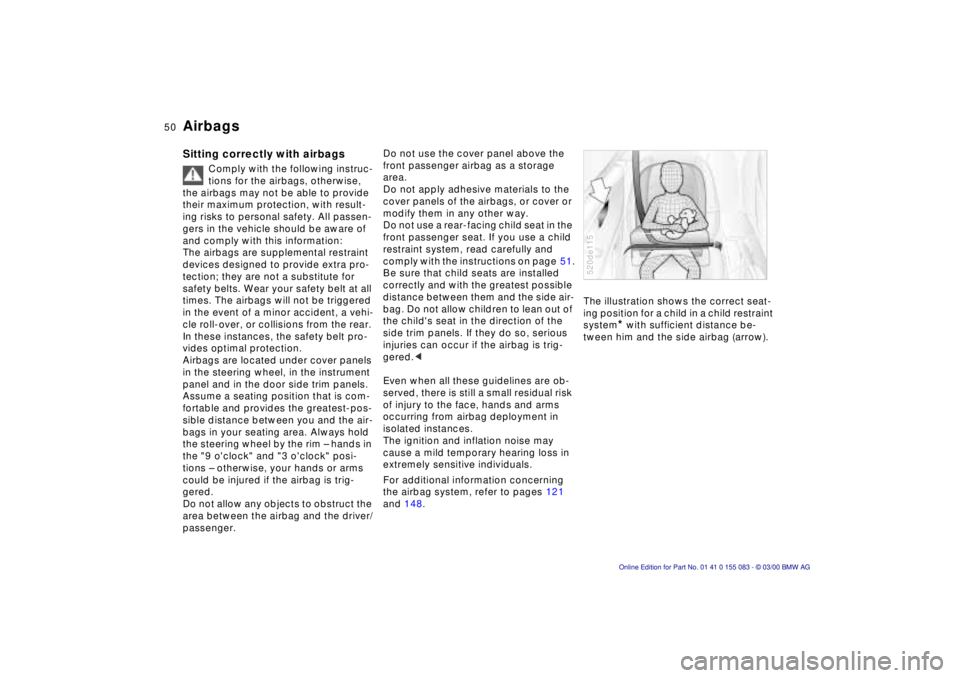
and 148.The illustration shows the correct seat-
ing position for a child in a child restraint
system
* with sufficient distance be-
tween him and the side airbag (arrow).
520de115
Page 52 of 172
51n
IndexDataTechnologyRepairsCar careControlsOverview
Airbags Child restraints
*
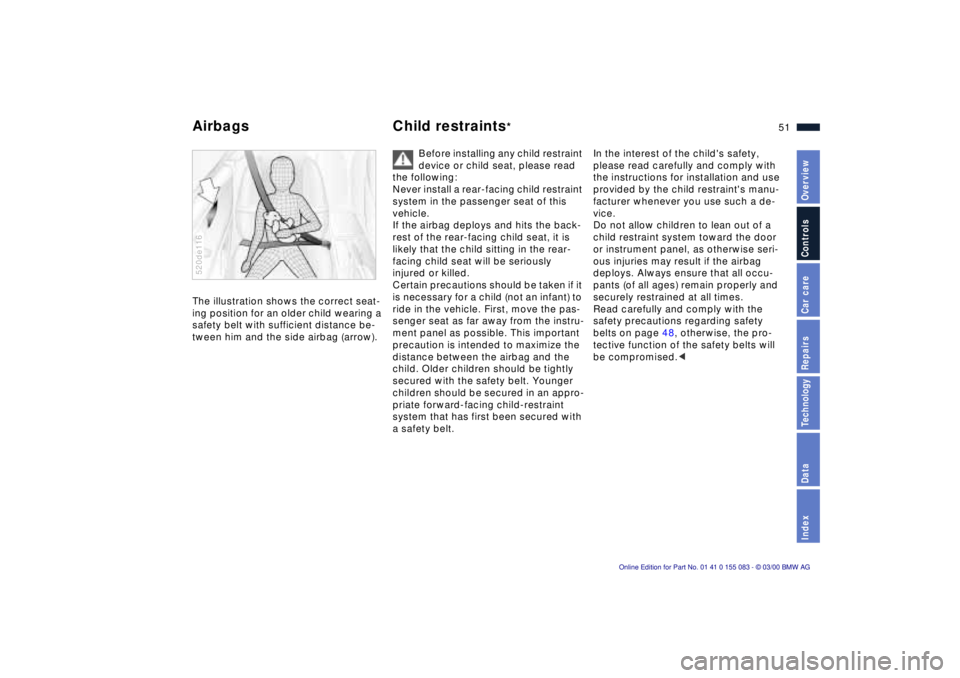
The illustration shows the correct seat-
ing position for an older child wearing a
safety belt with sufficient distance be-
tween him and the side airbag (arrow).520de116
Before installing any child restraint
device or child seat, please read
the following:
Never install a rear-facing child restraint
system in the passenger seat of this
vehicle.
If the airbag deploys and hits the back-
rest of the rear-facing child seat, it is
likely that the child sitting in the rear-
facing child seat will be seriously
injured or killed.
Certain precautions should be taken if it
is necessary for a child (not an infant) to
ride in the vehicle. First, move the pas-
senger seat as far away from the instru-
ment panel as possible. This important
precaution is intended to maximize the
distance between the airbag and the
child. Older children should be tightly
secured with the safety belt. Younger
children should be secured in an appro-
priate forward-facing child-restraint
system that has first been secured with
a safety belt.
In the interest of the child's safety,
please read carefully and comply with
the instructions for installation and use
provided by the child restraint's manu-
facturer whenever you use such a de-
vice.
Do not allow children to lean out of a
child restraint system toward the door
or instrument panel, as otherwise seri-
ous injuries may result if the airbag
deploys. Always ensure that all occu-
pants (of all ages) remain properly and
securely restrained at all times.
Read carefully and comply with the
safety precautions regarding safety
belts on page 48, otherwise, the pro-
tective function of the safety belts will
be compromised.<