light BUICK CENTURY 2003 Manual PDF
[x] Cancel search | Manufacturer: BUICK, Model Year: 2003, Model line: CENTURY, Model: BUICK CENTURY 2003Pages: 344, PDF Size: 2.57 MB
Page 258 of 344
Notice:Don't let anyone tell you that underin¯ation
or overin¯ation is all right. It's not. If your tires
don't have enough air (underin¯ation), you can get
the following:
·Too much ¯exing
·Too much heat
·Tire overloading
·Bad wear
·Bad handling
·Bad fuel economy
If your tires have too much air (overin¯ation), you
can get the following:
·Unusual wear
·Bad handling
·Rough ride
·Needless damage from road hazards
When to Check
Check your tires once a month or more.
Don't forget your compact spare tire. It should be at
60 psi (420 kPa).
How to Check
Use a good quality pocket-type gage to check tire
pressure. You can't tell if your tires are properly in¯ated
simply by looking at them. Radial tires may look
properly in¯ated even when they're underin¯ated.
Be sure to put the valve caps back on the valve stems.
They help prevent leaks by keeping out dirt and
moisture.
Tire Pressure Monitor System
If your vehicle has the tire in¯ation monitor system, it
can alert you to a large change in the pressure of
one tire. The system ªlearnsº the pressure at each tire
throughout the operating speed range of your vehicle.
The system normally takes between 45 and 90 minutes
of driving to learn the tire pressures. This time may
be longer depending on your individual driving habits.
Learning need not be accumulated during a single
trip. Once learned, the system will remember the tire
pressures until the system is recalibrated.
After the system has learned tire pressures with properly
in¯ated tires, the LOW TIRE light will come on if the
pressure in one tire becomes 12 psi (83 kPa) lower than
the other three tires. The tire in¯ation monitor system
won't alert you if the pressure in more than one tire is low,
if the system is not properly calibrated, or if the vehicle is
moving faster than 70 mph (110 km/h).
5-58
Page 259 of 344
The tire in¯ation monitor system detects differences in tire
rotation speeds that are caused by changes in tire
pressure. The system can alert you about a low tire ± but
it doesn't replace normal tire maintenance. See
Tires on
page 5-57.
When the LOW TIRE light comes on, you should stop
as soon as you can and check all your tires for damage.
(If a tire is ¯at, see
If a Tire Goes Flat on page 5-66.)
Also check the tire pressure in all four tires as soon as
you can. See
In¯ation -- Tire Pressure on page 5-57.
The LOW TIRE light will also be displayed (while
the ignition is on) until you reset (calibrate) the system.
Don't reset the tire in¯ation monitor system without
®rst correcting the cause of the problem and checking
and adjusting the pressure in all four tires. If you
reset the system when the tire pressures are incorrect,
the system will not work properly and may not alert
you when a tire is low.
Any time you adjust a tire's pressure, rotate your tires,
or have one or more tires repaired or replaced, you'll
need to reset (calibrate) the tire in¯ation monitor system.
You'll also need to reset the system whenever you
buy new tires and whenever the vehicle's battery has
been disconnected.To reset (calibrate) the system:
1. Turn the ignition to RUN.
2. Locate the red RESET button inside of your
instrument panel fuse block.
The fuse block is located under the cover labeled
FUSES, which is at the end of the instrument panel
on the passenger's side of the vehicle. The
RESET button is the ®rst button in the top row of
the fuse block.
3. Press and hold the RESET button for about ®ve
seconds.
The LOW TIRE light will come on and ¯ash three
times. Then it will go off. If the light doesn't go
off, see your dealer for service.
The system completes the calibration process during
driving.
The system normally takes 15 to 20 minutes of driving
in each of three speed ranges to ªlearnº tire pressures.
The speed ranges are 15 to 40 mph (25 to 65 km/h),
40 to 65 mph (65 to 105 km/h) and above 65 mph
(105 km/h). When learning is complete, the system will
alert you after two to eight minutes if a tire is 12 psi
(83 kPa) different from the other three tires. Detection
thresholds may be higher and detection times may
be longer on rough roads, curves and at high speeds.
The system is not capable of detection at speeds greater
than 70 mph (110 km/h).
5-59
Page 263 of 344
Uniform Tire Quality Grading
Quality grades can be found where applicable on the
tire sidewall between tread shoulder and maximum
section width. For example:
Treadwear 200 Traction AA Temperature A
The following information relates to the system
developed by the United States National Highway
Traffic Safety Administration, which grades tires by
treadwear, traction and temperature performance. (This
applies only to vehicles sold in the United States.)
The grades are molded on the sidewalls of most
passenger car tires. The Uniform Tire Quality Grading
system does not apply to deep tread, winter-type
snow tires, space-saver or temporary use spare tires,
tires with nominal rim diameters of 10 to 12 inches
(25 to 30 cm), or to some limited-production tires.
While the tires available on General Motors passenger
cars and light trucks may vary with respect to these
grades, they must also conform to federal safety
requirements and additional General Motors Tire
Performance Criteria (TPC) standards.
Treadwear
The treadwear grade is a comparative rating based on
the wear rate of the tire when tested under controlled
conditions on a speci®ed government test course.
For example, a tire graded 150 would wear one and
a half (1.5) times as well on the government course as
a tire graded 100. The relative performance of tires
depends upon the actual conditions of their use,
however, and may depart signi®cantly from the norm
due to variations in driving habits, service practices and
differences in road characteristics and climate.
Traction ± AA, A, B, C
The traction grades, from highest to lowest, are AA, A,
B, and C. Those grades represent the tire's ability
to stop on wet pavement as measured under controlled
conditions on speci®ed government test surfaces of
asphalt and concrete. A tire marked C may have poor
traction performance. Warning: The traction grade
assigned to this tire is based on straight-ahead braking
traction tests, and does not include acceleration,
cornering, hydroplaning, or peak traction characteristics.
5-63
Page 286 of 344
Vehicle Care/Appearance Materials
(cont'd)
Description Usage
Finish EnhancerRemoves dust,
®ngerprints, and surface
contaminants, Spray on
wipe off.
Swirl Remover PolishRemoves swirl marks,
®ne scratches and other
light surface
contamination.
Cleaner WaxRemoves light scratches
and protects ®nish.
Foaming Tire Shine Low
GlossCleans, shines and
protects in one easy step,
no wiping necessary.
Wash Wax ConcentrateMedium foaming
shampoo. Cleans and
lightly waxes.
Biodegradable and
phosphate free.
Vehicle Care/Appearance Materials
(cont'd)
Description Usage
Spot LifterQuickly and easily
removes spots and stains
from carpets, vinyl and
cloth upholstery.
Odor EliminatorOdorless spray odor
eliminator used on
fabrics, vinyl, leather and
carpet.
See your General Motors parts department for these
products. See
Part D: Recommended Fluids and
Lubricants on page 6-16.
5-86
Page 290 of 344
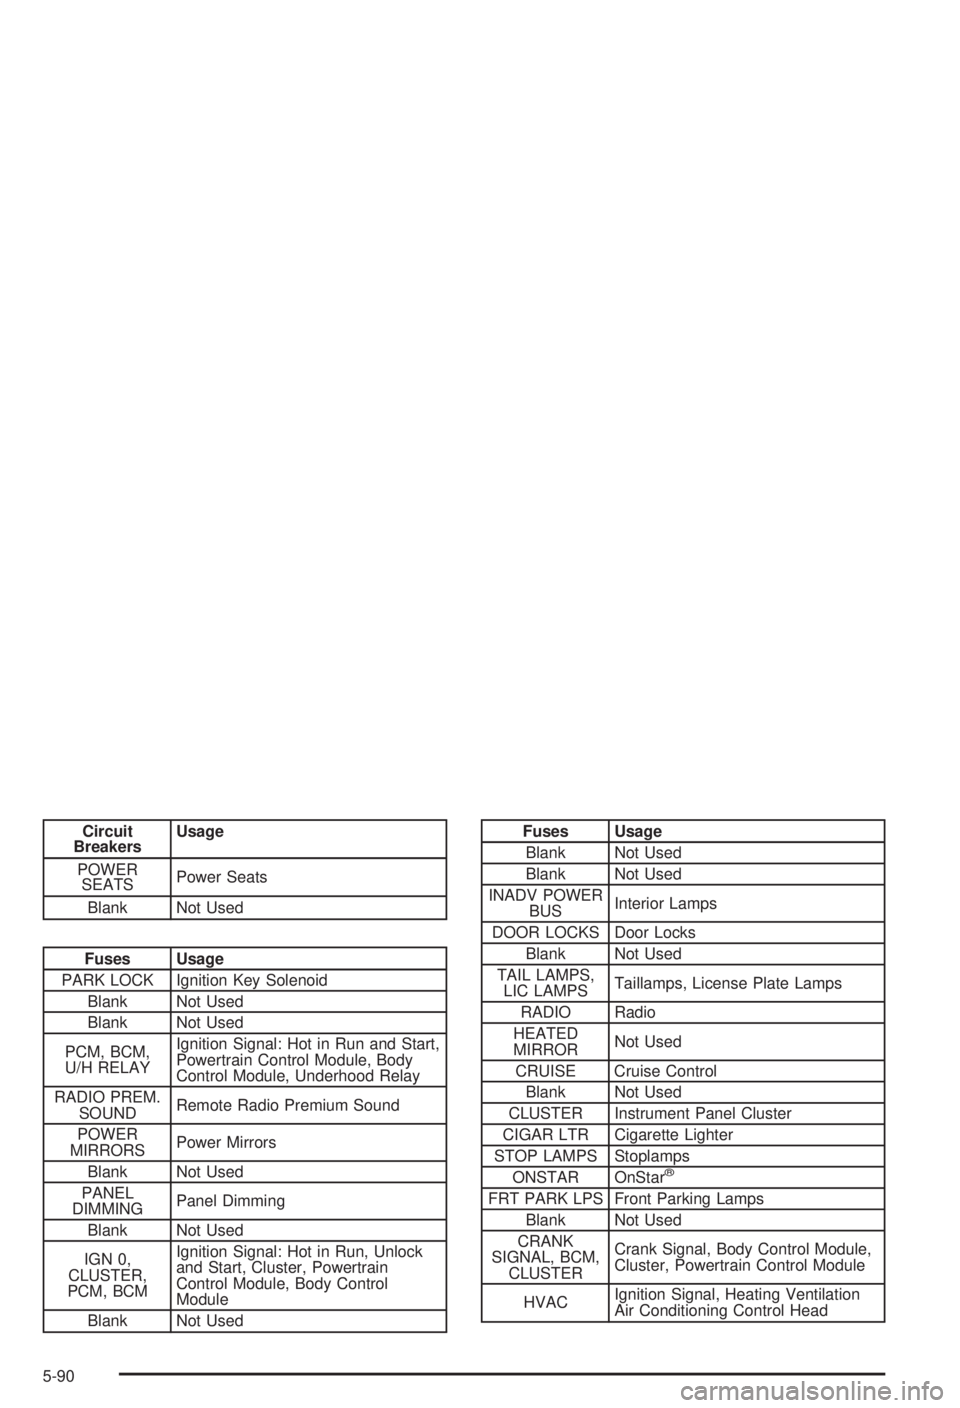
Circuit
BreakersUsage
POWER
SEATSPower Seats
Blank Not Used
Fuses Usage
PARK LOCK Ignition Key Solenoid
Blank Not Used
Blank Not Used
PCM, BCM,
U/H RELAYIgnition Signal: Hot in Run and Start,
Powertrain Control Module, Body
Control Module, Underhood Relay
RADIO PREM.
SOUNDRemote Radio Premium Sound
POWER
MIRRORSPower Mirrors
Blank Not Used
PANEL
DIMMINGPanel Dimming
Blank Not Used
IGN 0,
CLUSTER,
PCM, BCMIgnition Signal: Hot in Run, Unlock
and Start, Cluster, Powertrain
Control Module, Body Control
Module
Blank Not Used
Fuses Usage
Blank Not Used
Blank Not Used
INADV POWER
BUSInterior Lamps
DOOR LOCKS Door Locks
Blank Not Used
TAIL LAMPS,
LIC LAMPSTaillamps, License Plate Lamps
RADIO Radio
HEATED
MIRRORNot Used
CRUISE Cruise Control
Blank Not Used
CLUSTER Instrument Panel Cluster
CIGAR LTR Cigarette Lighter
STOP LAMPS Stoplamps
ONSTAR OnStar
ž
FRT PARK LPS Front Parking Lamps
Blank Not Used
CRANK
SIGNAL, BCM,
CLUSTERCrank Signal, Body Control Module,
Cluster, Powertrain Control Module
HVACIgnition Signal, Heating Ventilation
Air Conditioning Control Head
5-90
Page 292 of 344
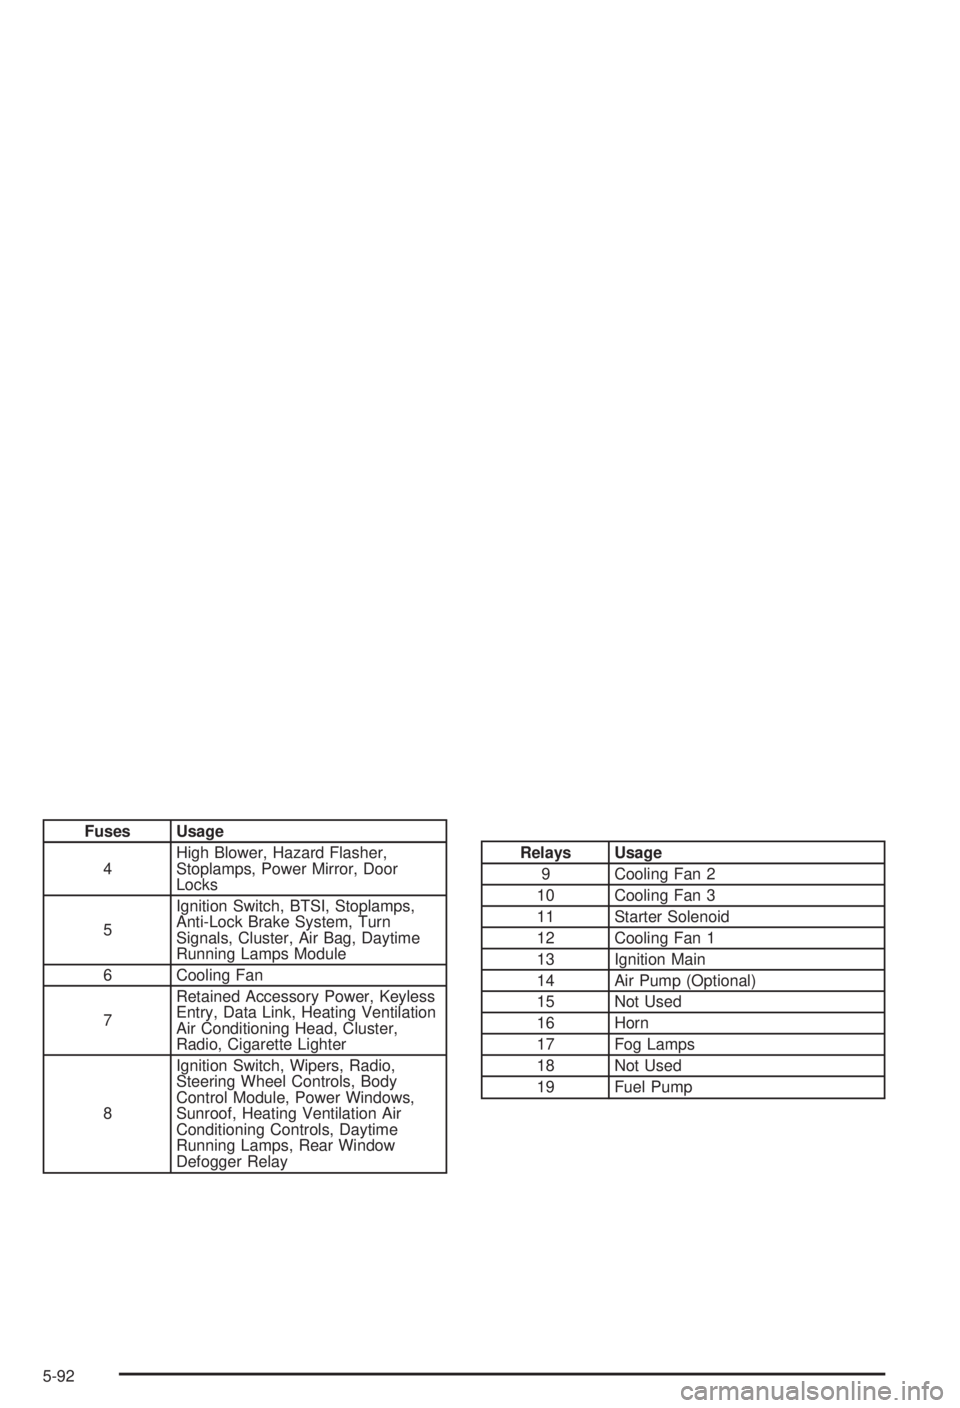
Fuses Usage
4High Blower, Hazard Flasher,
Stoplamps, Power Mirror, Door
Locks
5Ignition Switch, BTSI, Stoplamps,
Anti-Lock Brake System, Turn
Signals, Cluster, Air Bag, Daytime
Running Lamps Module
6 Cooling Fan
7Retained Accessory Power, Keyless
Entry, Data Link, Heating Ventilation
Air Conditioning Head, Cluster,
Radio, Cigarette Lighter
8Ignition Switch, Wipers, Radio,
Steering Wheel Controls, Body
Control Module, Power Windows,
Sunroof, Heating Ventilation Air
Conditioning Controls, Daytime
Running Lamps, Rear Window
Defogger Relay
Relays Usage
9 Cooling Fan 2
10 Cooling Fan 3
11 Starter Solenoid
12 Cooling Fan 1
13 Ignition Main
14 Air Pump (Optional)
15 Not Used
16 Horn
17 Fog Lamps
18 Not Used
19 Fuel Pump
5-92
Page 302 of 344
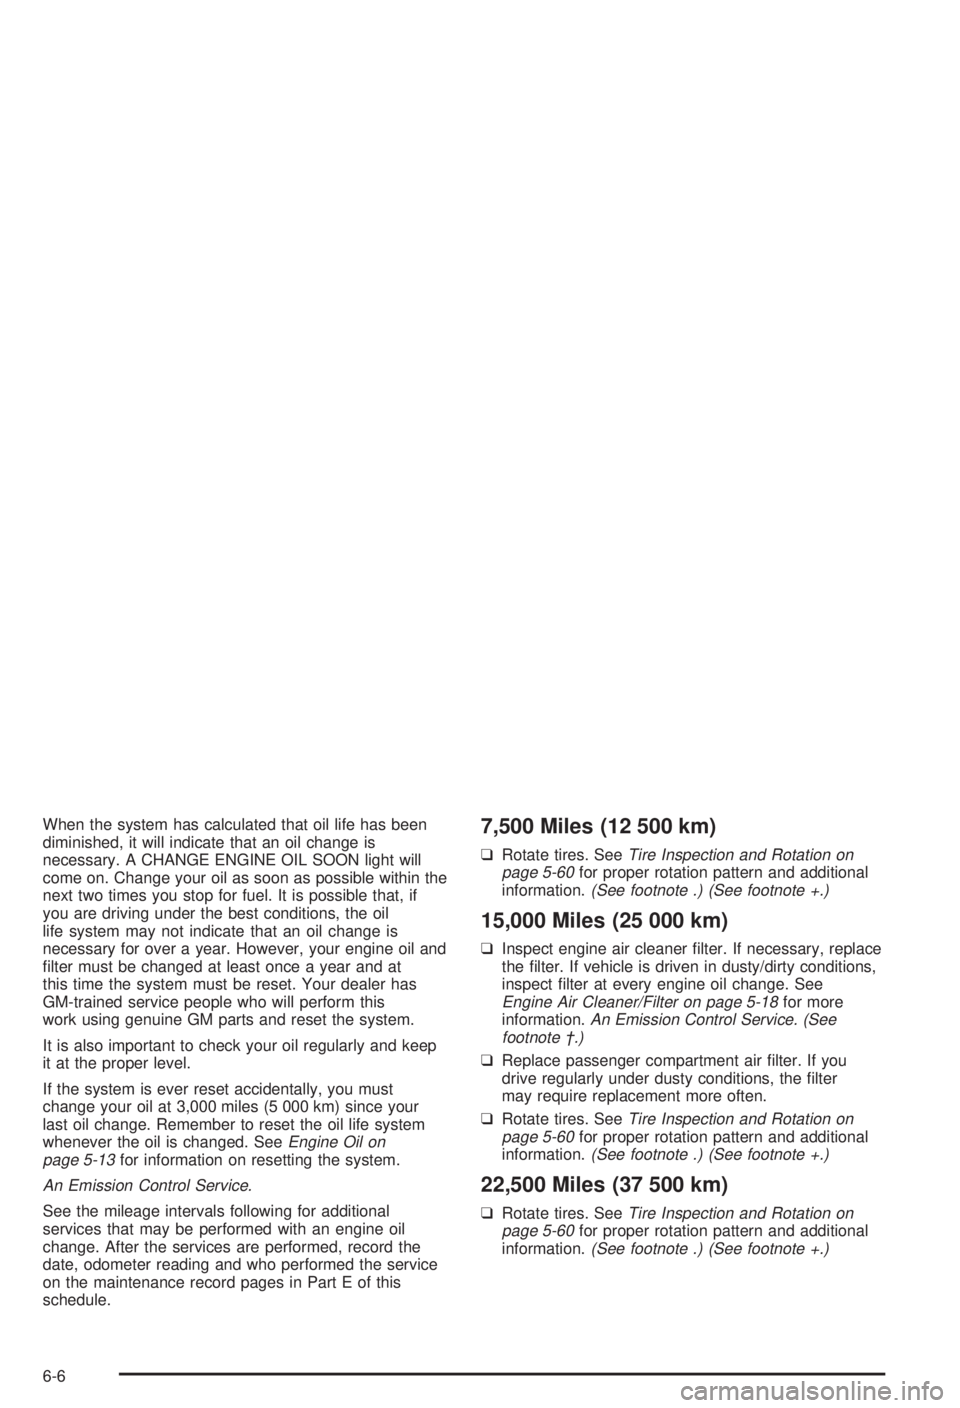
When the system has calculated that oil life has been
diminished, it will indicate that an oil change is
necessary. A CHANGE ENGINE OIL SOON light will
come on. Change your oil as soon as possible within the
next two times you stop for fuel. It is possible that, if
you are driving under the best conditions, the oil
life system may not indicate that an oil change is
necessary for over a year. However, your engine oil and
®lter must be changed at least once a year and at
this time the system must be reset. Your dealer has
GM-trained service people who will perform this
work using genuine GM parts and reset the system.
It is also important to check your oil regularly and keep
it at the proper level.
If the system is ever reset accidentally, you must
change your oil at 3,000 miles (5 000 km) since your
last oil change. Remember to reset the oil life system
whenever the oil is changed. See
Engine Oil on
page 5-13for information on resetting the system.
An Emission Control Service.
See the mileage intervals following for additional
services that may be performed with an engine oil
change. After the services are performed, record the
date, odometer reading and who performed the service
on the maintenance record pages in Part E of this
schedule.
7,500 Miles (12 500 km)
qRotate tires. SeeTire Inspection and Rotation on
page 5-60for proper rotation pattern and additional
information.(See footnote .) (See footnote +.)
15,000 Miles (25 000 km)
qInspect engine air cleaner ®lter. If necessary, replace
the ®lter. If vehicle is driven in dusty/dirty conditions,
inspect ®lter at every engine oil change. See
Engine Air Cleaner/Filter on page 5-18for more
information.An Emission Control Service. (See
footnote ².)
qReplace passenger compartment air ®lter. If you
drive regularly under dusty conditions, the ®lter
may require replacement more often.
qRotate tires. See
Tire Inspection and Rotation on
page 5-60for proper rotation pattern and additional
information.(See footnote .) (See footnote +.)
22,500 Miles (37 500 km)
qRotate tires. SeeTire Inspection and Rotation on
page 5-60for proper rotation pattern and additional
information.(See footnote .) (See footnote +.)
6-6
Page 307 of 344
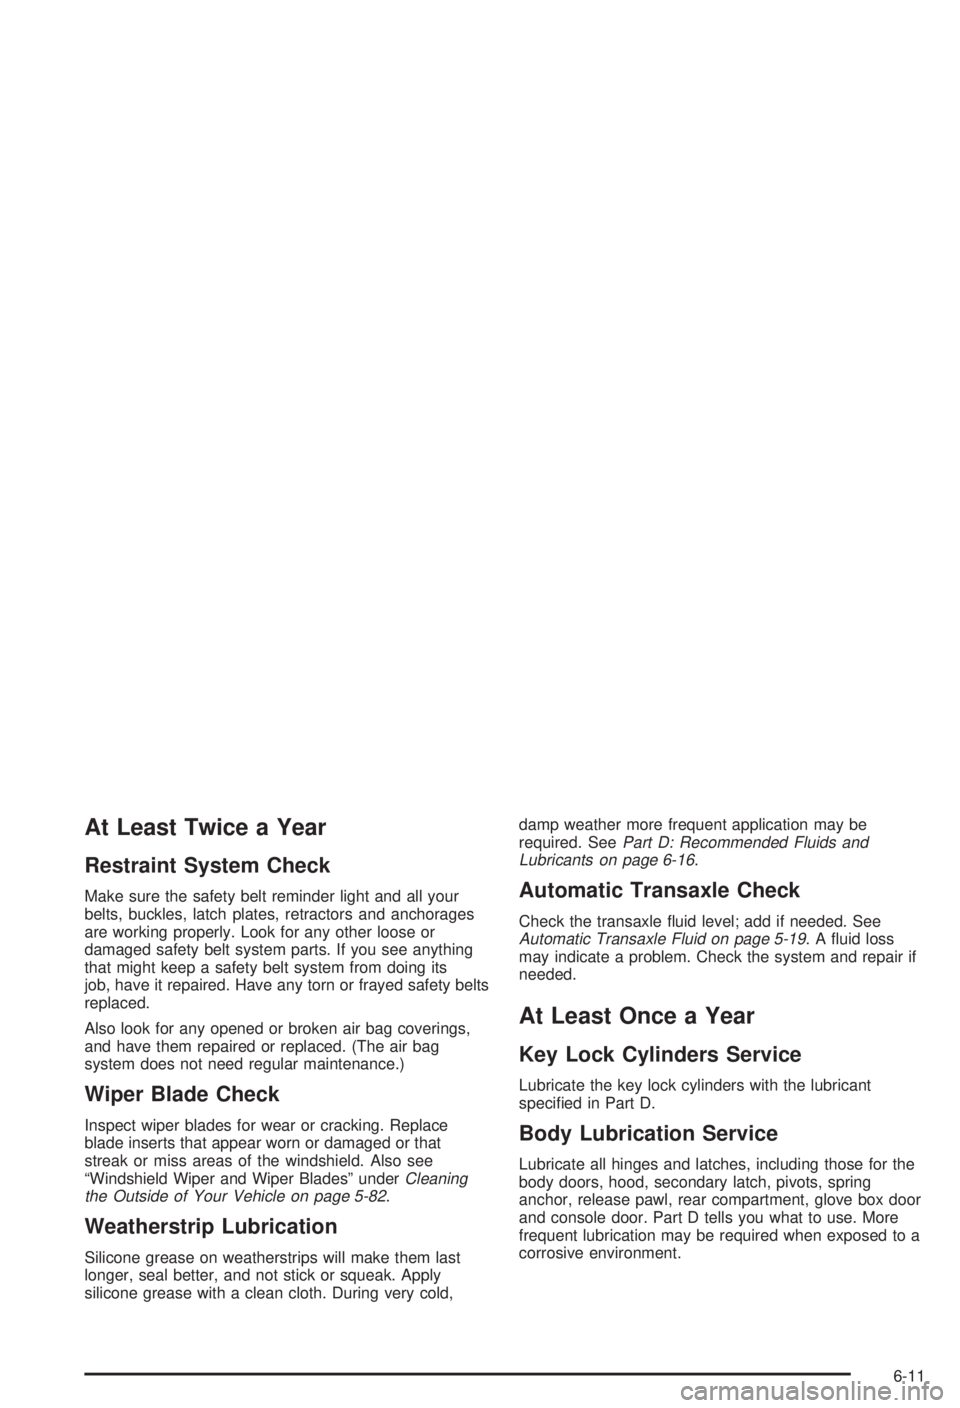
At Least Twice a Year
Restraint System Check
Make sure the safety belt reminder light and all your
belts, buckles, latch plates, retractors and anchorages
are working properly. Look for any other loose or
damaged safety belt system parts. If you see anything
that might keep a safety belt system from doing its
job, have it repaired. Have any torn or frayed safety belts
replaced.
Also look for any opened or broken air bag coverings,
and have them repaired or replaced. (The air bag
system does not need regular maintenance.)
Wiper Blade Check
Inspect wiper blades for wear or cracking. Replace
blade inserts that appear worn or damaged or that
streak or miss areas of the windshield. Also see
ªWindshield Wiper and Wiper Bladesº under
Cleaning
the Outside of Your Vehicle on page 5-82.
Weatherstrip Lubrication
Silicone grease on weatherstrips will make them last
longer, seal better, and not stick or squeak. Apply
silicone grease with a clean cloth. During very cold,damp weather more frequent application may be
required. See
Part D: Recommended Fluids and
Lubricants on page 6-16.
Automatic Transaxle Check
Check the transaxle ¯uid level; add if needed. SeeAutomatic Transaxle Fluid on page 5-19. A ¯uid loss
may indicate a problem. Check the system and repair if
needed.
At Least Once a Year
Key Lock Cylinders Service
Lubricate the key lock cylinders with the lubricant
speci®ed in Part D.
Body Lubrication Service
Lubricate all hinges and latches, including those for the
body doors, hood, secondary latch, pivots, spring
anchor, release pawl, rear compartment, glove box door
and console door. Part D tells you what to use. More
frequent lubrication may be required when exposed to a
corrosive environment.
6-11
Page 329 of 344
A
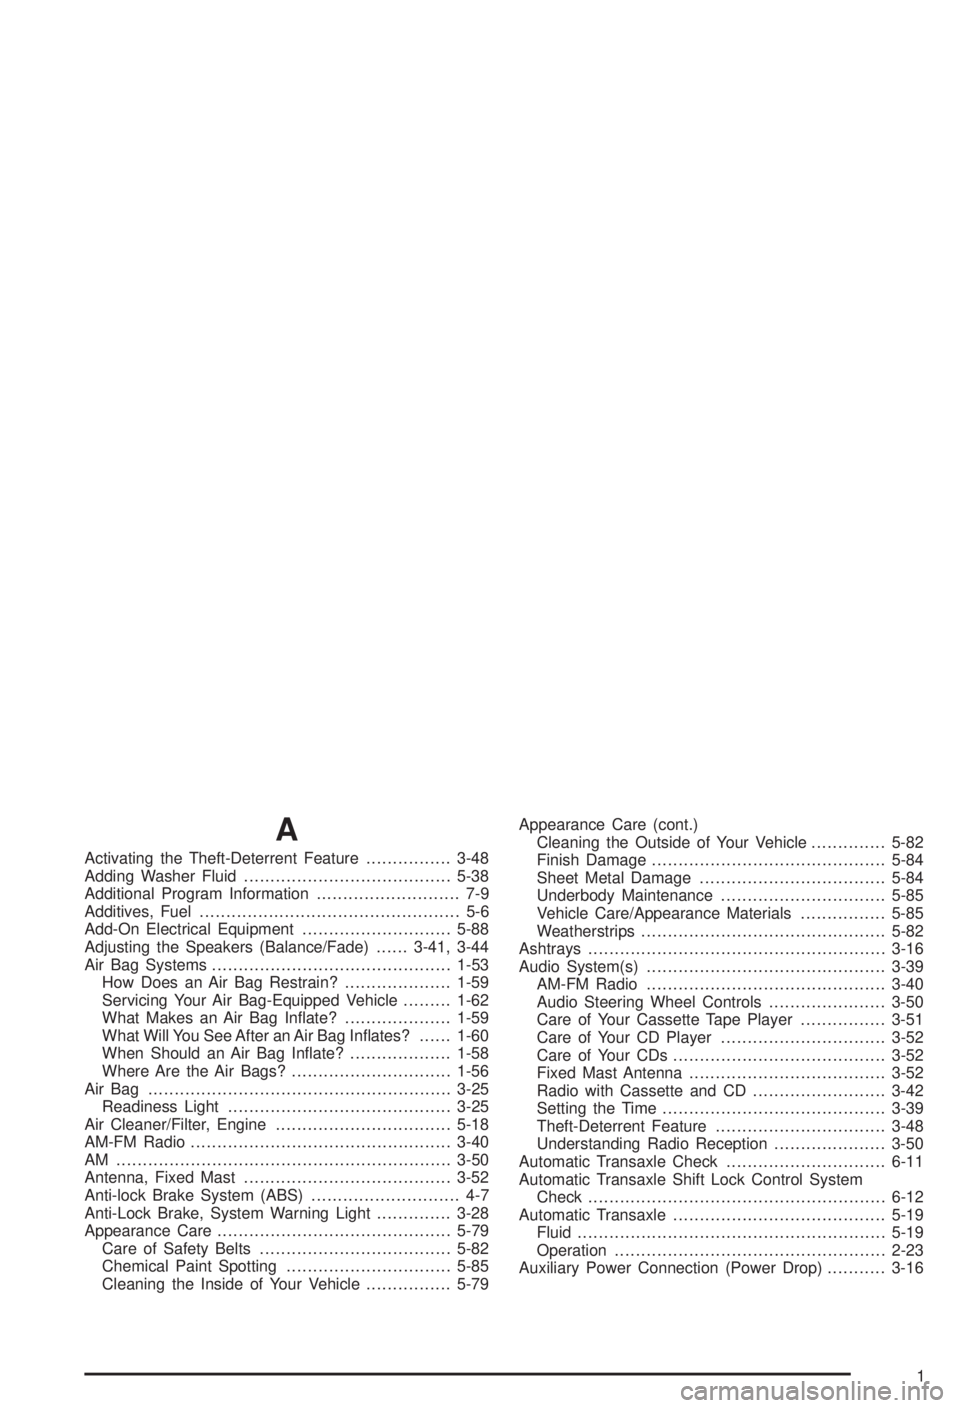
Activating the Theft-Deterrent Feature................3-48
Adding Washer Fluid.......................................5-38
Additional Program Information........................... 7-9
Additives, Fuel................................................. 5-6
Add-On Electrical Equipment............................5-88
Adjusting the Speakers (Balance/Fade)......3-41, 3-44
Air Bag Systems.............................................1-53
How Does an Air Bag Restrain?....................1-59
Servicing Your Air Bag-Equipped Vehicle.........1-62
What Makes an Air Bag In¯ate?....................1-59
What Will You See After an Air Bag In¯ates?......1-60
When Should an Air Bag In¯ate?...................1-58
Where Are the Air Bags?..............................1-56
Air Bag .........................................................3-25
Readiness Light..........................................3-25
Air Cleaner/Filter, Engine.................................5-18
AM-FM Radio.................................................3-40
AM ...............................................................3-50
Antenna, Fixed Mast.......................................3-52
Anti-lock Brake System (ABS)............................ 4-7
Anti-Lock Brake, System Warning Light..............3-28
Appearance Care............................................5-79
Care of Safety Belts....................................5-82
Chemical Paint Spotting...............................5-85
Cleaning the Inside of Your Vehicle................5-79Appearance Care (cont.)
Cleaning the Outside of Your Vehicle..............5-82
Finish Damage............................................5-84
Sheet Metal Damage...................................5-84
Underbody Maintenance...............................5-85
Vehicle Care/Appearance Materials................5-85
Weatherstrips..............................................5-82
Ashtrays........................................................3-16
Audio System(s).............................................3-39
AM-FM Radio.............................................3-40
Audio Steering Wheel Controls......................3-50
Care of Your Cassette Tape Player................3-51
Care of Your CD Player...............................3-52
Care of Your CDs........................................3-52
Fixed Mast Antenna.....................................3-52
Radio with Cassette and CD.........................3-42
Setting the Time..........................................3-39
Theft-Deterrent Feature................................3-48
Understanding Radio Reception.....................3-50
Automatic Transaxle Check..............................6-11
Automatic Transaxle Shift Lock Control System
Check........................................................6-12
Automatic Transaxle........................................5-19
Fluid..........................................................5-19
Operation...................................................2-23
Auxiliary Power Connection (Power Drop)...........3-16
1
Page 330 of 344
B
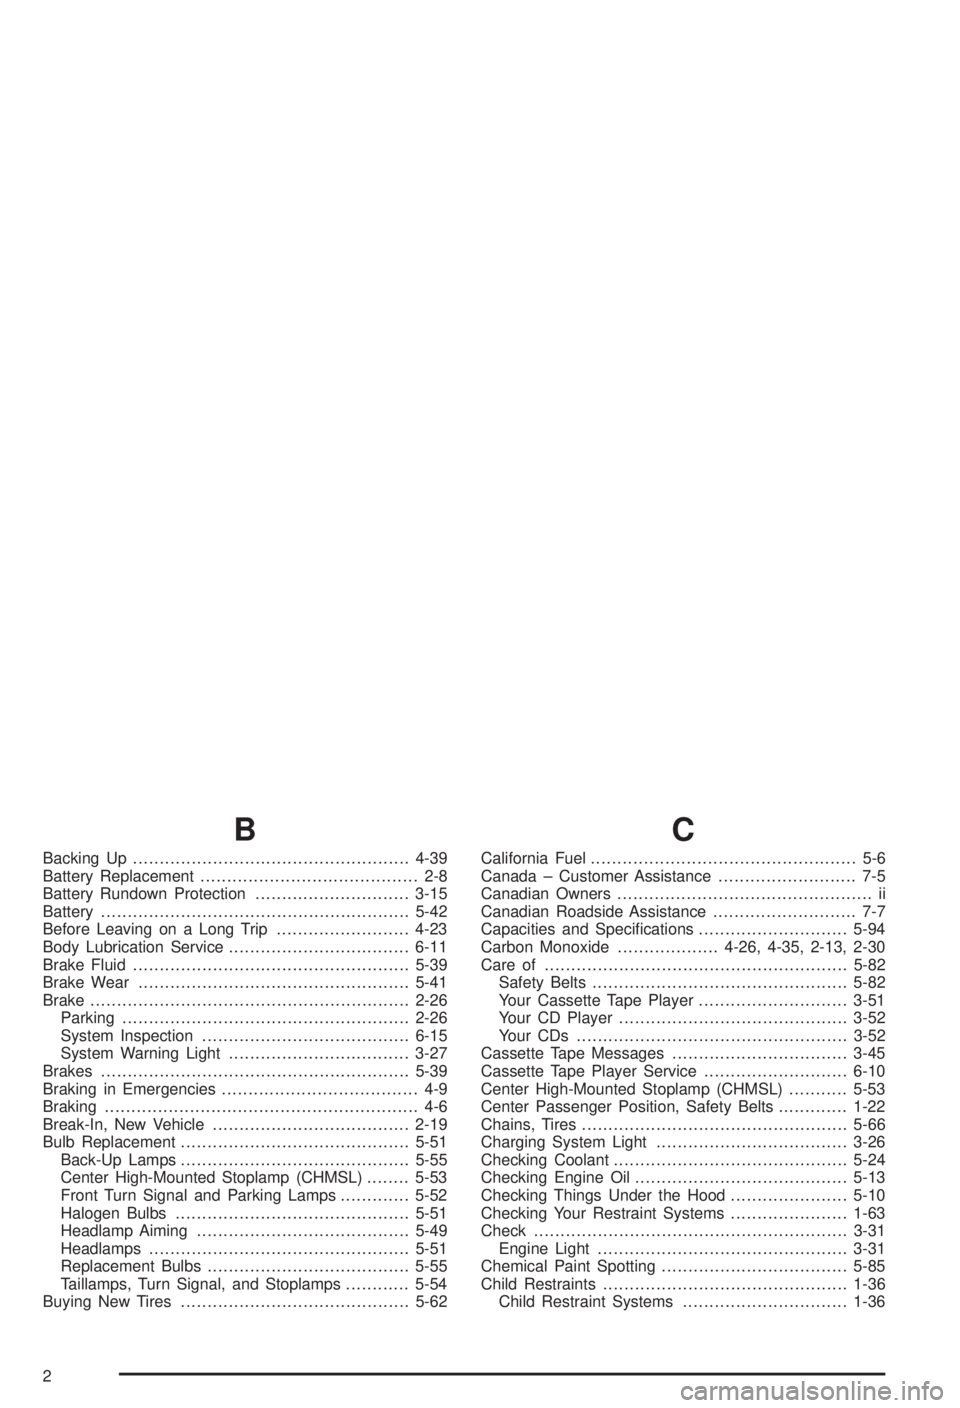
Backing Up....................................................4-39
Battery Replacement......................................... 2-8
Battery Rundown Protection.............................3-15
Battery..........................................................5-42
Before Leaving on a Long Trip.........................4-23
Body Lubrication Service..................................6-11
Brake Fluid....................................................5-39
Brake Wear...................................................5-41
Brake............................................................2-26
Parking......................................................2-26
System Inspection.......................................6-15
System Warning Light..................................3-27
Brakes..........................................................5-39
Braking in Emergencies..................................... 4-9
Braking........................................................... 4-6
Break-In, New Vehicle.....................................2-19
Bulb Replacement...........................................5-51
Back-Up Lamps...........................................5-55
Center High-Mounted Stoplamp (CHMSL)........5-53
Front Turn Signal and Parking Lamps.............5-52
Halogen Bulbs............................................5-51
Headlamp Aiming........................................5-49
Headlamps.................................................5-51
Replacement Bulbs......................................5-55
Taillamps, Turn Signal, and Stoplamps............5-54
Buying New Tires...........................................5-62
C
California Fuel.................................................. 5-6
Canada ± Customer Assistance.......................... 7-5
Canadian Owners................................................ ii
Canadian Roadside Assistance........................... 7-7
Capacities and Speci®cations............................5-94
Carbon Monoxide...................4-26, 4-35, 2-13, 2-30
Care of.........................................................5-82
Safety Belts................................................5-82
Your Cassette Tape Player............................3-51
Your CD Player...........................................3-52
Your CDs ...................................................3-52
Cassette Tape Messages.................................3-45
Cassette Tape Player Service...........................6-10
Center High-Mounted Stoplamp (CHMSL)...........5-53
Center Passenger Position, Safety Belts.............1-22
Chains, Tires..................................................5-66
Charging System Light....................................3-26
Checking Coolant............................................5-24
Checking Engine Oil........................................5-13
Checking Things Under the Hood......................5-10
Checking Your Restraint Systems......................1-63
Check...........................................................3-31
Engine Light...............................................3-31
Chemical Paint Spotting...................................5-85
Child Restraints..............................................1-36
Child Restraint Systems...............................1-36
2