remote start BUICK CENTURY 2003 Owner's Manual
[x] Cancel search | Manufacturer: BUICK, Model Year: 2003, Model line: CENTURY, Model: BUICK CENTURY 2003Pages: 344, PDF Size: 2.57 MB
Page 71 of 344
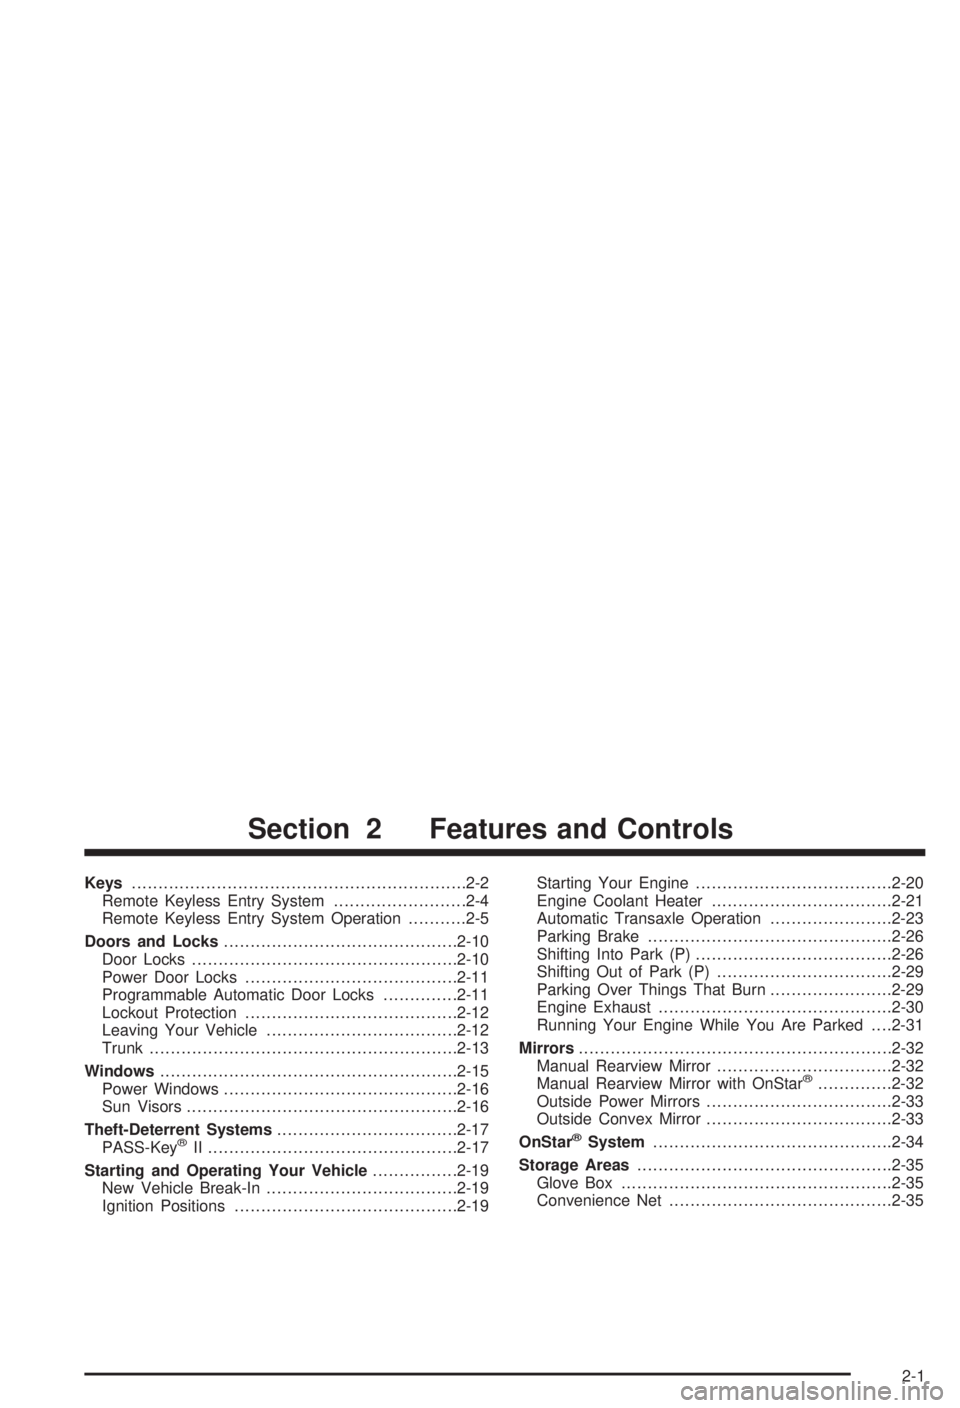
Keys...............................................................2-2
Remote Keyless Entry System.........................2-4
Remote Keyless Entry System Operation...........2-5
Doors and Locks............................................2-10
Door Locks..................................................2-10
Power Door Locks........................................2-11
Programmable Automatic Door Locks..............2-11
Lockout Protection........................................2-12
Leaving Your Vehicle....................................2-12
Trunk..........................................................2-13
Windows........................................................2-15
Power Windows............................................2-16
Sun Visors...................................................2-16
Theft-Deterrent Systems..................................2-17
PASS-Key
žII ...............................................2-17
Starting and Operating Your Vehicle................2-19
New Vehicle Break-In....................................2-19
Ignition Positions..........................................2-19Starting Your Engine.....................................2-20
Engine Coolant Heater..................................2-21
Automatic Transaxle Operation.......................2-23
Parking Brake..............................................2-26
Shifting Into Park (P).....................................2-26
Shifting Out of Park (P).................................2-29
Parking Over Things That Burn.......................2-29
Engine Exhaust............................................2-30
Running Your Engine While You Are Parked. . . .2-31
Mirrors...........................................................2-32
Manual Rearview Mirror.................................2-32
Manual Rearview Mirror with OnStar
ž..............2-32
Outside Power Mirrors...................................2-33
Outside Convex Mirror...................................2-33
OnStar
žSystem.............................................2-34
Storage Areas................................................2-35
Glove Box...................................................2-35
Convenience Net..........................................2-35
Section 2 Features and Controls
2-1
Page 76 of 344
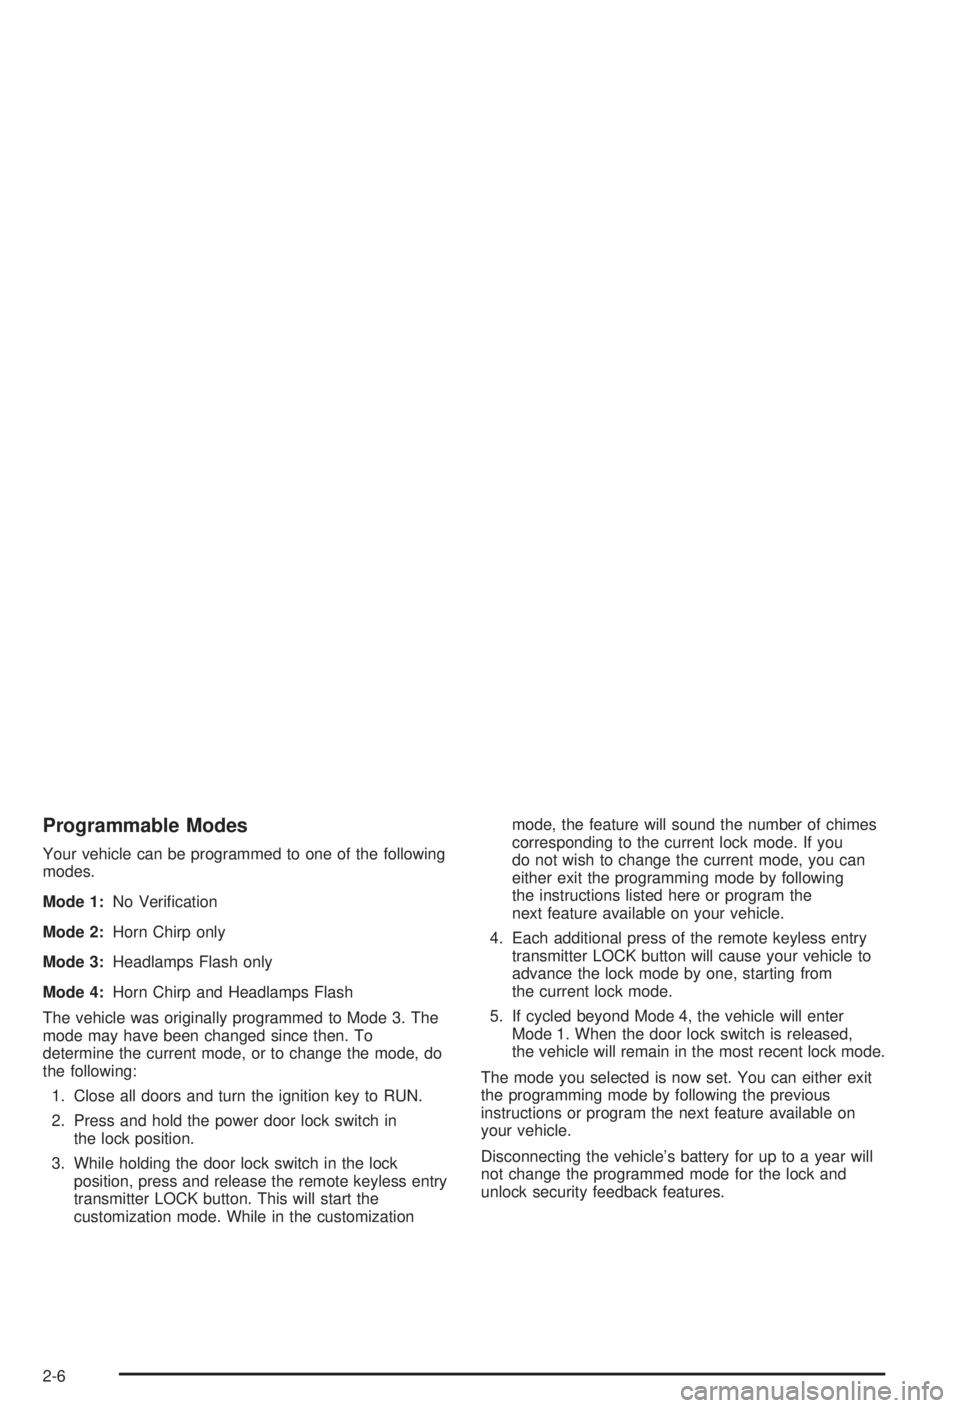
Programmable Modes
Your vehicle can be programmed to one of the following
modes.
Mode 1:No Veri®cation
Mode 2:Horn Chirp only
Mode 3:Headlamps Flash only
Mode 4:Horn Chirp and Headlamps Flash
The vehicle was originally programmed to Mode 3. The
mode may have been changed since then. To
determine the current mode, or to change the mode, do
the following:
1. Close all doors and turn the ignition key to RUN.
2. Press and hold the power door lock switch in
the lock position.
3. While holding the door lock switch in the lock
position, press and release the remote keyless entry
transmitter LOCK button. This will start the
customization mode. While in the customizationmode, the feature will sound the number of chimes
corresponding to the current lock mode. If you
do not wish to change the current mode, you can
either exit the programming mode by following
the instructions listed here or program the
next feature available on your vehicle.
4. Each additional press of the remote keyless entry
transmitter LOCK button will cause your vehicle to
advance the lock mode by one, starting from
the current lock mode.
5. If cycled beyond Mode 4, the vehicle will enter
Mode 1. When the door lock switch is released,
the vehicle will remain in the most recent lock mode.
The mode you selected is now set. You can either exit
the programming mode by following the previous
instructions or program the next feature available on
your vehicle.
Disconnecting the vehicle's battery for up to a year will
not change the programmed mode for the lock and
unlock security feedback features.
2-6
Page 120 of 344
Interior Lamps
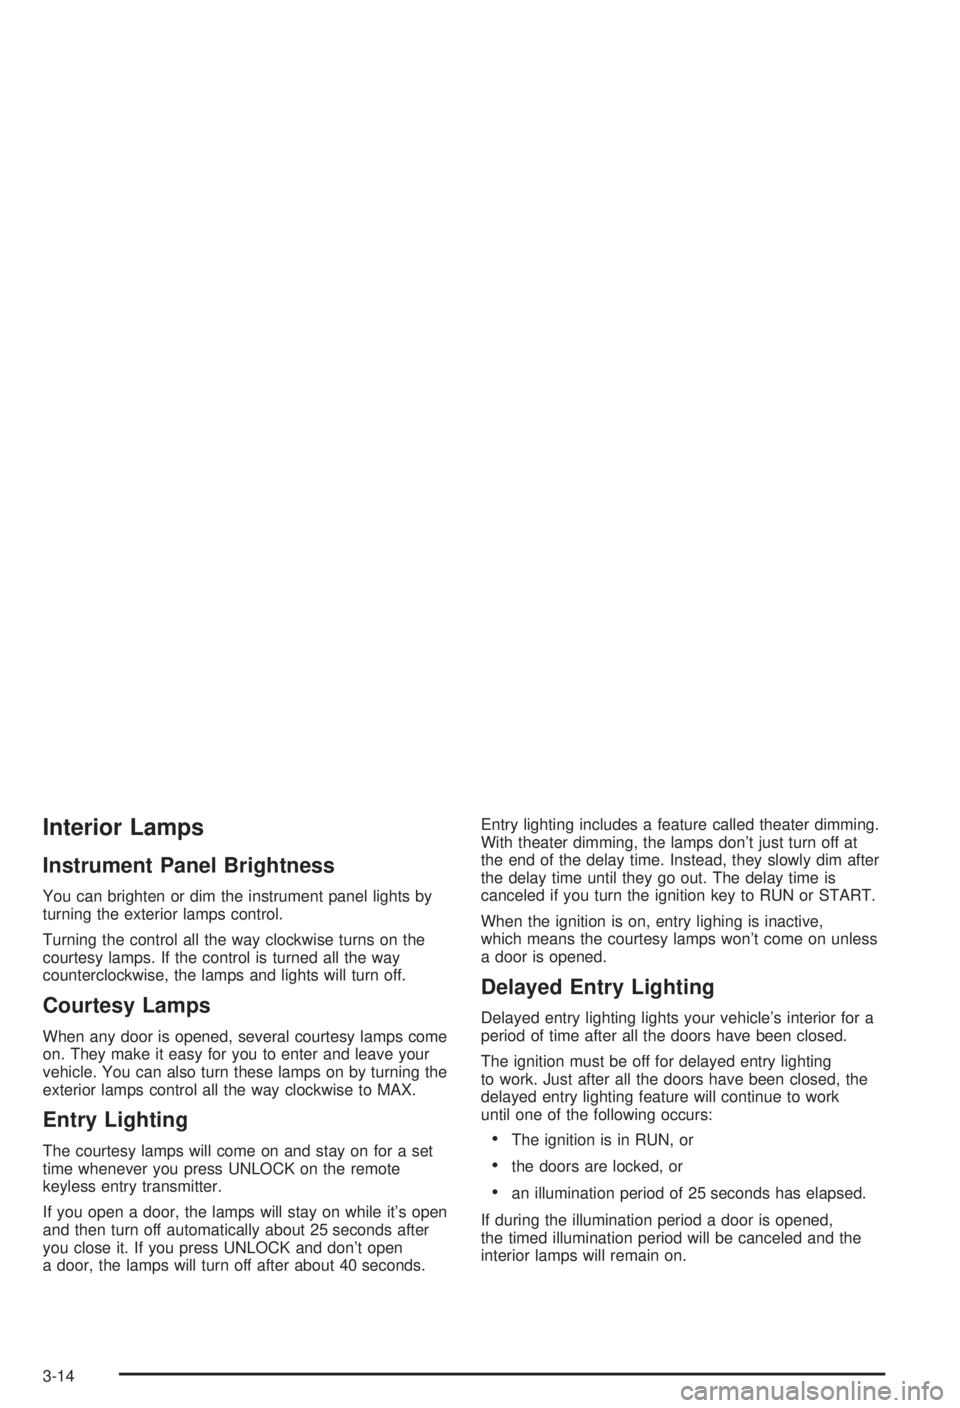
Instrument Panel Brightness
You can brighten or dim the instrument panel lights by
turning the exterior lamps control.
Turning the control all the way clockwise turns on the
courtesy lamps. If the control is turned all the way
counterclockwise, the lamps and lights will turn off.
Courtesy Lamps
When any door is opened, several courtesy lamps come
on. They make it easy for you to enter and leave your
vehicle. You can also turn these lamps on by turning the
exterior lamps control all the way clockwise to MAX.
Entry Lighting
The courtesy lamps will come on and stay on for a set
time whenever you press UNLOCK on the remote
keyless entry transmitter.
If you open a door, the lamps will stay on while it's open
and then turn off automatically about 25 seconds after
you close it. If you press UNLOCK and don't open
a door, the lamps will turn off after about 40 seconds.Entry lighting includes a feature called theater dimming.
With theater dimming, the lamps don't just turn off at
the end of the delay time. Instead, they slowly dim after
the delay time until they go out. The delay time is
canceled if you turn the ignition key to RUN or START.
When the ignition is on, entry lighing is inactive,
which means the courtesy lamps won't come on unless
a door is opened.
Delayed Entry Lighting
Delayed entry lighting lights your vehicle's interior for a
period of time after all the doors have been closed.
The ignition must be off for delayed entry lighting
to work. Just after all the doors have been closed, the
delayed entry lighting feature will continue to work
until one of the following occurs:
·The ignition is in RUN, or
·the doors are locked, or
·an illumination period of 25 seconds has elapsed.
If during the illumination period a door is opened,
the timed illumination period will be canceled and the
interior lamps will remain on.
3-14
Page 213 of 344
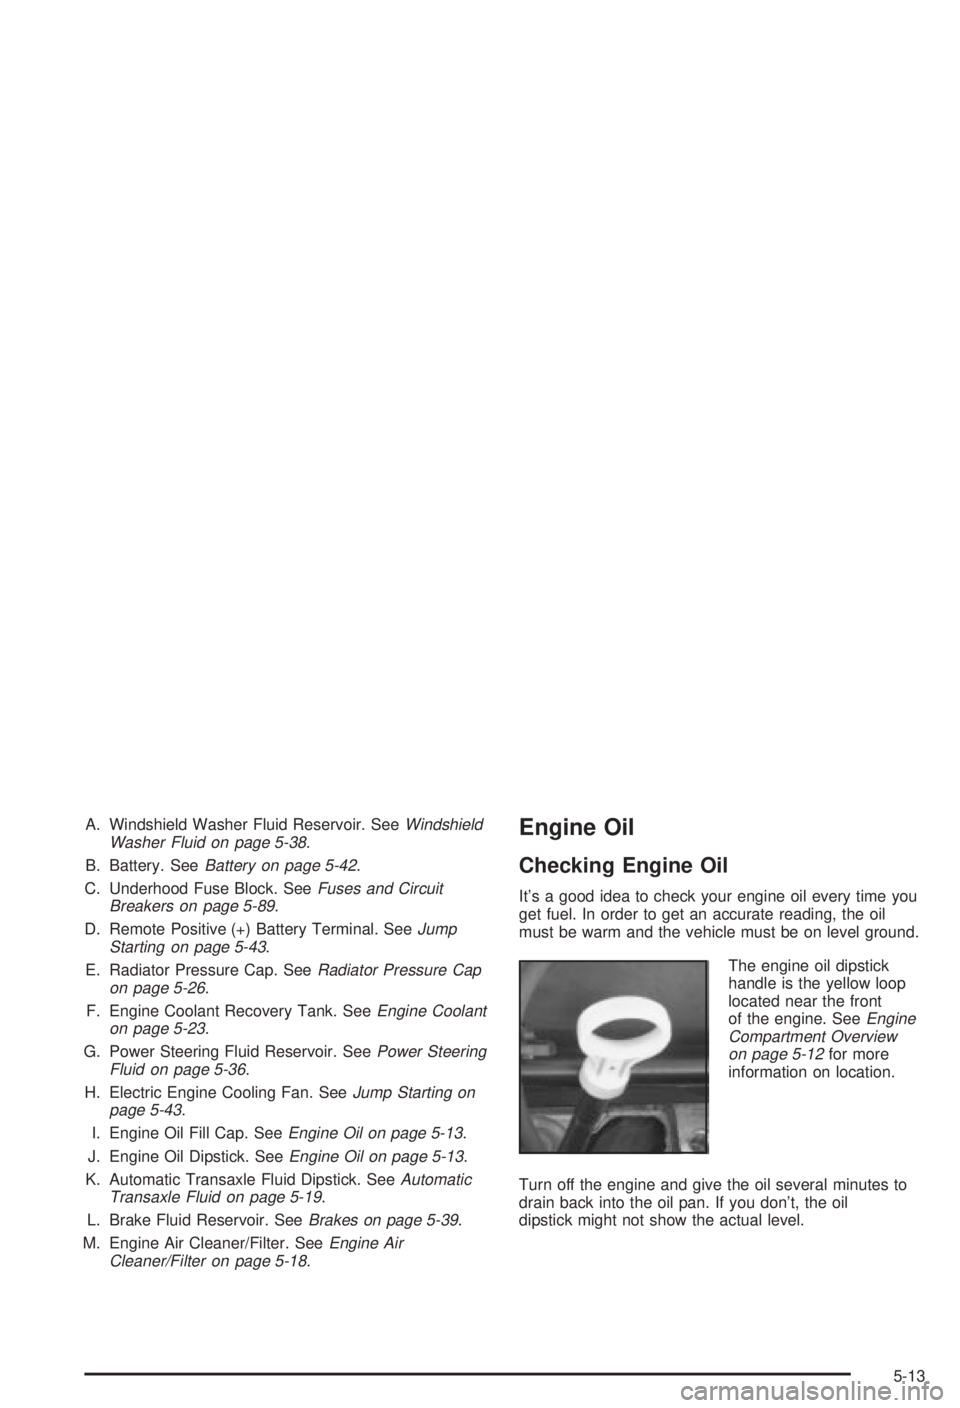
A. Windshield Washer Fluid Reservoir. SeeWindshield
Washer Fluid on page 5-38.
B. Battery. See
Battery on page 5-42.
C. Underhood Fuse Block. See
Fuses and Circuit
Breakers on page 5-89.
D. Remote Positive (+) Battery Terminal. See
Jump
Starting on page 5-43.
E. Radiator Pressure Cap. See
Radiator Pressure Cap
on page 5-26.
F. Engine Coolant Recovery Tank. See
Engine Coolant
on page 5-23.
G. Power Steering Fluid Reservoir. See
Power Steering
Fluid on page 5-36.
H. Electric Engine Cooling Fan. See
Jump Starting on
page 5-43.
I. Engine Oil Fill Cap. See
Engine Oil on page 5-13.
J. Engine Oil Dipstick. See
Engine Oil on page 5-13.
K. Automatic Transaxle Fluid Dipstick. See
Automatic
Transaxle Fluid on page 5-19.
L. Brake Fluid Reservoir. See
Brakes on page 5-39.
M. Engine Air Cleaner/Filter. See
Engine Air
Cleaner/Filter on page 5-18.
Engine Oil
Checking Engine Oil
It's a good idea to check your engine oil every time you
get fuel. In order to get an accurate reading, the oil
must be warm and the vehicle must be on level ground.
The engine oil dipstick
handle is the yellow loop
located near the front
of the engine. See
Engine
Compartment Overview
on page 5-12
for more
information on location.
Turn off the engine and give the oil several minutes to
drain back into the oil pan. If you don't, the oil
dipstick might not show the actual level.
5-13
Page 244 of 344
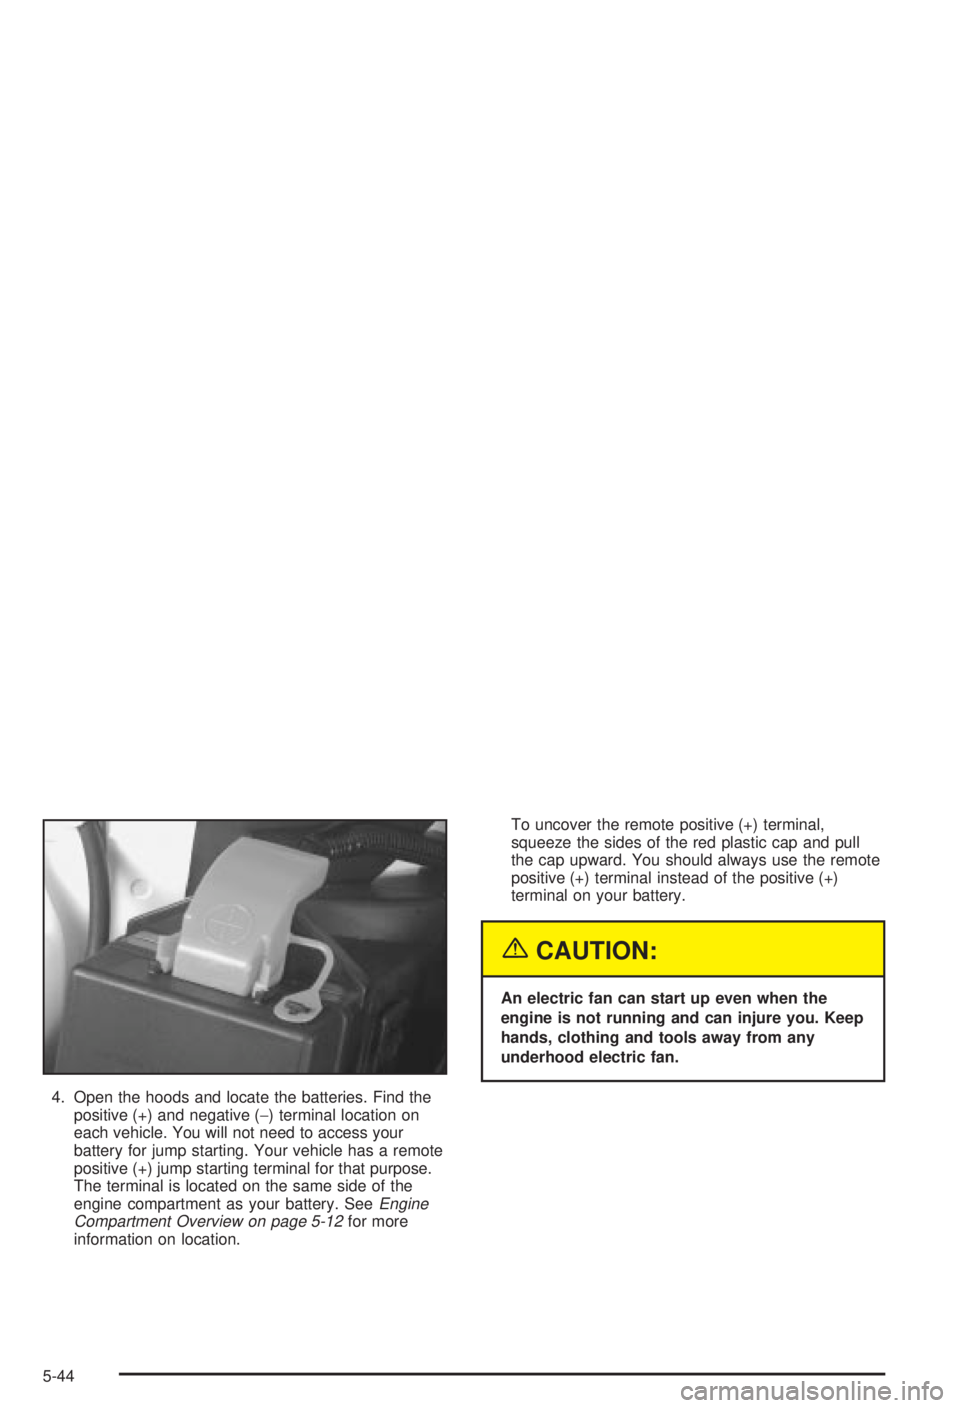
4. Open the hoods and locate the batteries. Find the
positive (+) and negative (-) terminal location on
each vehicle. You will not need to access your
battery for jump starting. Your vehicle has a remote
positive (+) jump starting terminal for that purpose.
The terminal is located on the same side of the
engine compartment as your battery. See
Engine
Compartment Overview on page 5-12for more
information on location.To uncover the remote positive (+) terminal,
squeeze the sides of the red plastic cap and pull
the cap upward. You should always use the remote
positive (+) terminal instead of the positive (+)
terminal on your battery.
{CAUTION:
An electric fan can start up even when the
engine is not running and can injure you. Keep
hands, clothing and tools away from any
underhood electric fan.
5-44
Page 247 of 344
Don't let the other end touch anything until the next
step. The other end of the negative (-) cable
doesn'tgo to the dead battery. It goes to a heavy,
unpainted metal part, or to the remote negative (-)
terminal on the vehicle with the dead battery.
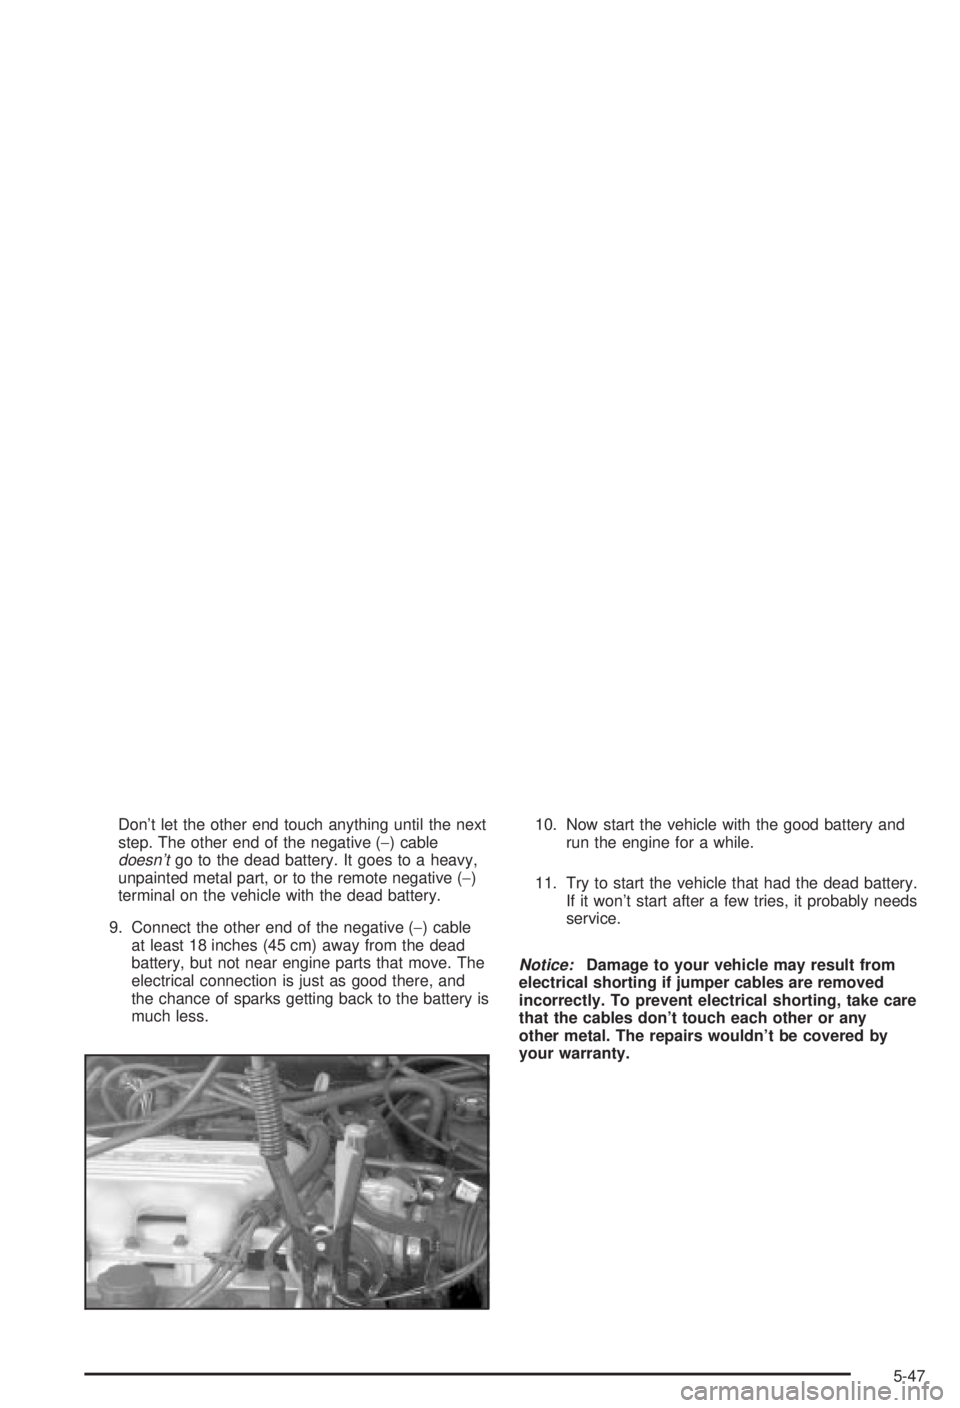
9. Connect the other end of the negative (-) cable
at least 18 inches (45 cm) away from the dead
battery, but not near engine parts that move. The
electrical connection is just as good there, and
the chance of sparks getting back to the battery is
much less.10. Now start the vehicle with the good battery and
run the engine for a while.
11. Try to start the vehicle that had the dead battery.
If it won't start after a few tries, it probably needs
service.
Notice:Damage to your vehicle may result from
electrical shorting if jumper cables are removed
incorrectly. To prevent electrical shorting, take care
that the cables don't touch each other or any
other metal. The repairs wouldn't be covered by
your warranty.
5-47
Page 290 of 344
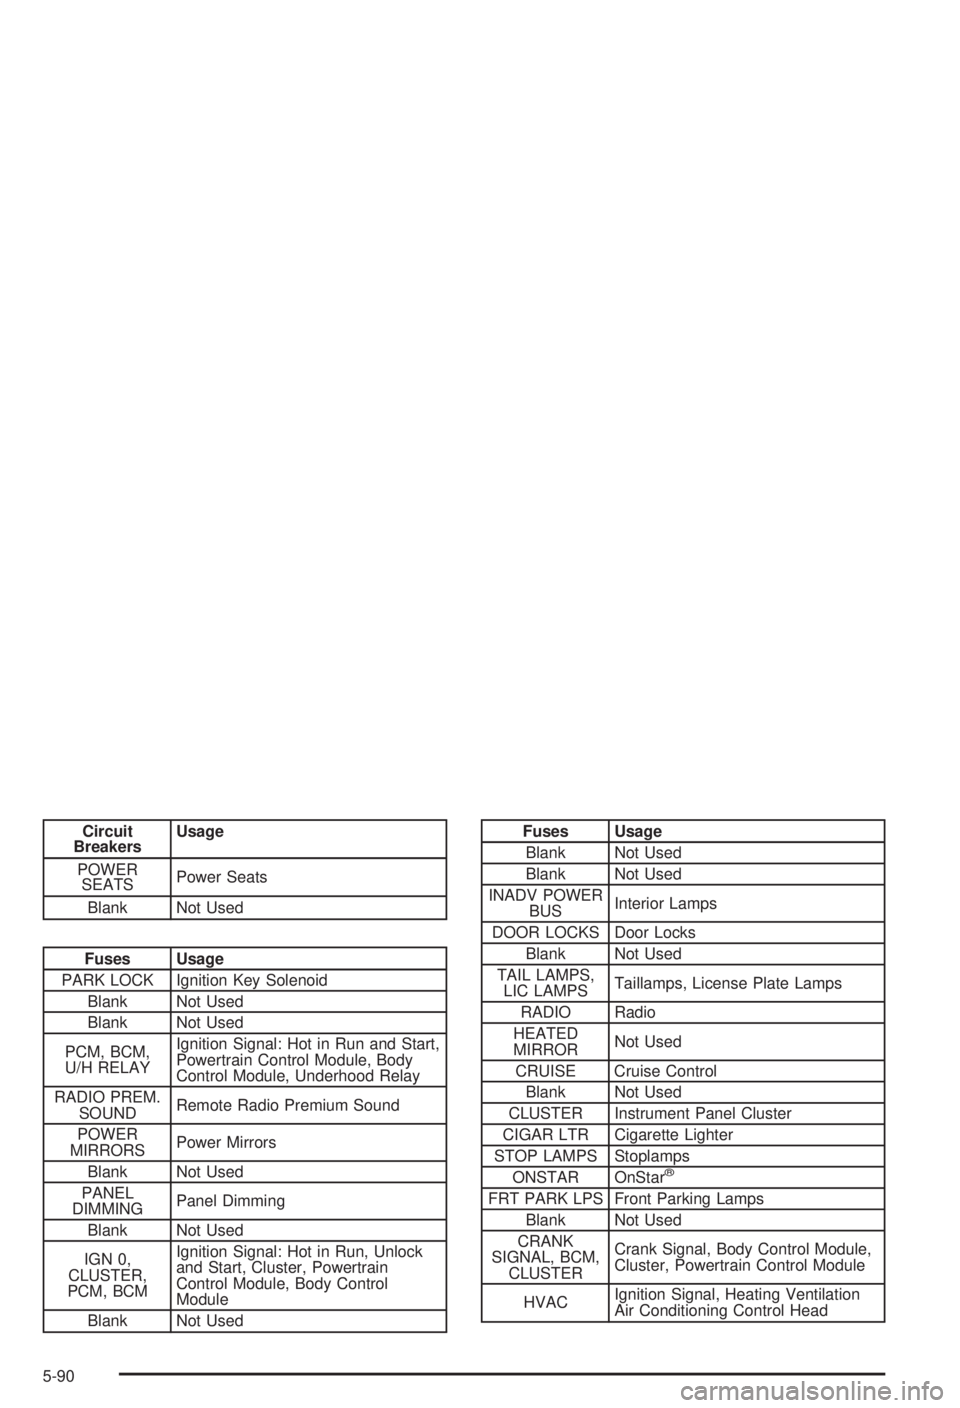
Circuit
BreakersUsage
POWER
SEATSPower Seats
Blank Not Used
Fuses Usage
PARK LOCK Ignition Key Solenoid
Blank Not Used
Blank Not Used
PCM, BCM,
U/H RELAYIgnition Signal: Hot in Run and Start,
Powertrain Control Module, Body
Control Module, Underhood Relay
RADIO PREM.
SOUNDRemote Radio Premium Sound
POWER
MIRRORSPower Mirrors
Blank Not Used
PANEL
DIMMINGPanel Dimming
Blank Not Used
IGN 0,
CLUSTER,
PCM, BCMIgnition Signal: Hot in Run, Unlock
and Start, Cluster, Powertrain
Control Module, Body Control
Module
Blank Not Used
Fuses Usage
Blank Not Used
Blank Not Used
INADV POWER
BUSInterior Lamps
DOOR LOCKS Door Locks
Blank Not Used
TAIL LAMPS,
LIC LAMPSTaillamps, License Plate Lamps
RADIO Radio
HEATED
MIRRORNot Used
CRUISE Cruise Control
Blank Not Used
CLUSTER Instrument Panel Cluster
CIGAR LTR Cigarette Lighter
STOP LAMPS Stoplamps
ONSTAR OnStar
ž
FRT PARK LPS Front Parking Lamps
Blank Not Used
CRANK
SIGNAL, BCM,
CLUSTERCrank Signal, Body Control Module,
Cluster, Powertrain Control Module
HVACIgnition Signal, Heating Ventilation
Air Conditioning Control Head
5-90
Page 291 of 344
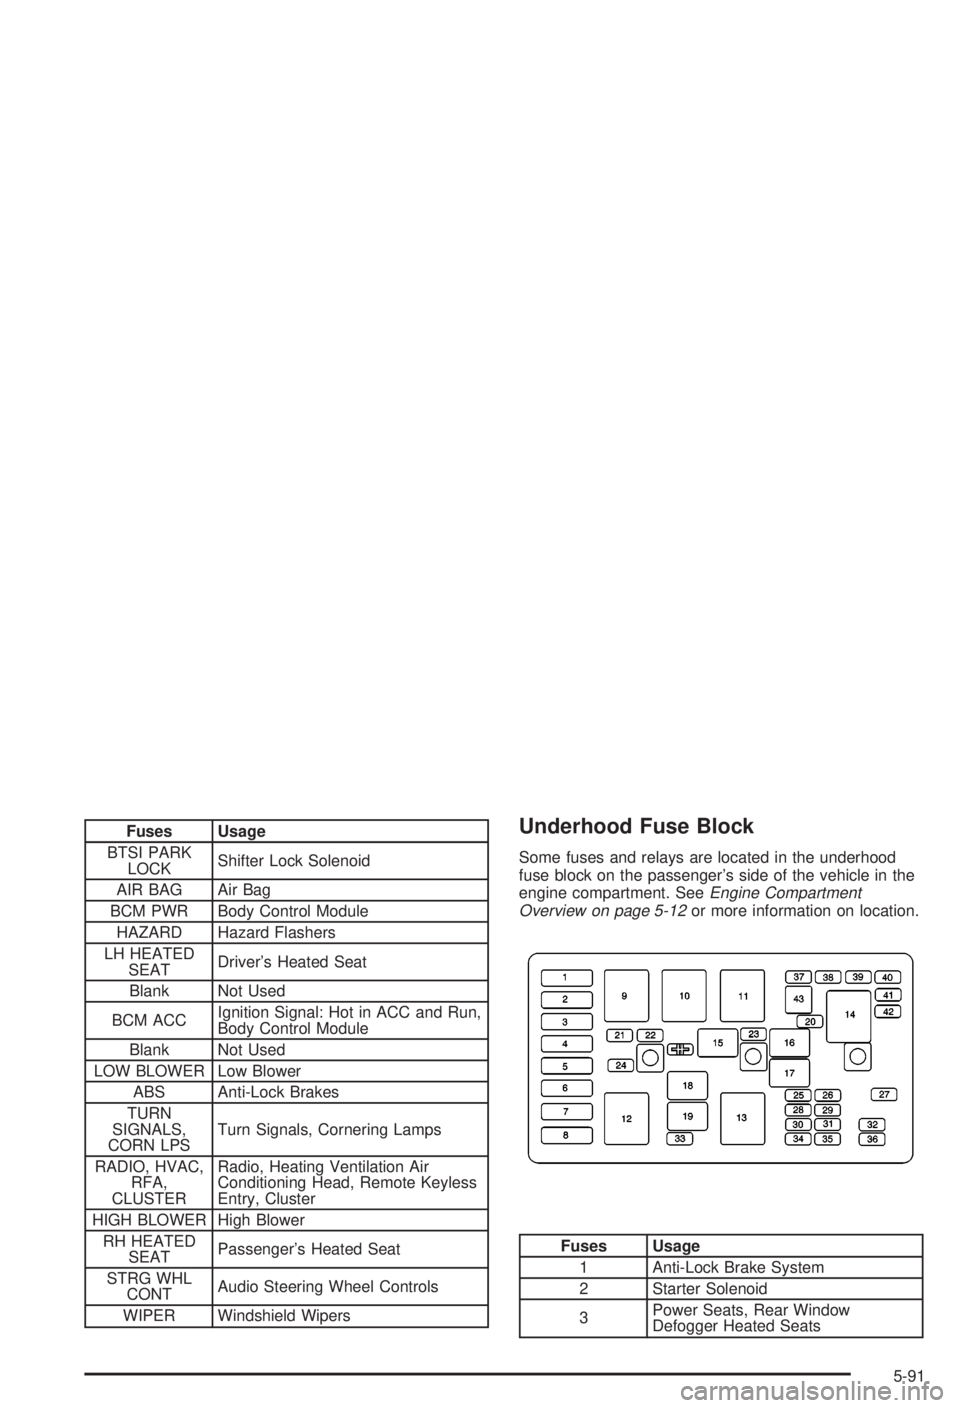
Fuses Usage
BTSI PARK
LOCKShifter Lock Solenoid
AIR BAG Air Bag
BCM PWR Body Control Module
HAZARD Hazard Flashers
LH HEATED
SEATDriver's Heated Seat
Blank Not Used
BCM ACCIgnition Signal: Hot in ACC and Run,
Body Control Module
Blank Not Used
LOW BLOWER Low Blower
ABS Anti-Lock Brakes
TURN
SIGNALS,
CORN LPSTurn Signals, Cornering Lamps
RADIO, HVAC,
RFA,
CLUSTERRadio, Heating Ventilation Air
Conditioning Head, Remote Keyless
Entry, Cluster
HIGH BLOWER High Blower
RH HEATED
SEATPassenger's Heated Seat
STRG WHL
CONTAudio Steering Wheel Controls
WIPER Windshield WipersUnderhood Fuse Block
Some fuses and relays are located in the underhood
fuse block on the passenger's side of the vehicle in the
engine compartment. See
Engine Compartment
Overview on page 5-12or more information on location.
Fuses Usage
1 Anti-Lock Brake System
2 Starter Solenoid
3Power Seats, Rear Window
Defogger Heated Seats
5-91
Page 335 of 344
How to Check Power Steering Fluid..................5-37
How to Check........................................5-20, 5-58
How to Use This Manual...................................... ii
How to Wear Safety Belts Properly...................1-12
Hydroplaning..................................................4-19
I
If No Steam Is Coming From Your Engine..........5-28
If Steam Is Coming From Your Engine...............5-27
If the Light Is Flashing.....................................3-32
If the Light Is On Steady.................................3-32
If You Are Stuck in Sand, Mud, Ice or Snow.......4-31
If You Do Decide To Pull A Trailer.....................4-36
If You're Caught in a Blizzard...........................4-29
Ignition Positions.............................................2-19
Ignition Transaxle Lock Check..........................6-13
Illumination on Remote Activation........................ 2-8
Infants and Young Children, Restraints...............1-32
In¯ation Ð Tire Pressure.................................5-57
Inspection......................................................6-15
Brake System.............................................6-15
Engine Cooling System................................6-14
Exhaust System..........................................6-14
Fuel System...............................................6-14
Part C - Periodic Maintenance.......................6-14
Steering, Suspension and Front Drive Axle
Boot and Seal.........................................6-14
Throttle System...........................................6-15Inspection (cont.)
Instrument Panel Brightness.............................3-14
Instrument Panel Fuse Block............................5-89
Instrument Panel.............................................3-23
Cluster.......................................................3-23
Overview..................................................... 3-2
Interior Lamps................................................3-14J
Jump Starting.................................................5-43
K
Key Lock Cylinders Service..............................6-11
Keyless Entry System....................................... 2-4
Keys............................................................... 2-2
L
Lamps...........................................................3-11
Exterior......................................................3-11
Interior.......................................................3-14
Lap Belt........................................................1-22
Lap-Shoulder Belt...................................1-13, 1-24
LATCH System...............................................1-42
Child Restraints...........................................1-42
7