set clock BUICK CENTURY 2005 Owner's Manual
[x] Cancel search | Manufacturer: BUICK, Model Year: 2005, Model line: CENTURY, Model: BUICK CENTURY 2005Pages: 348, PDF Size: 2.32 MB
Page 115 of 348

When it is dark enough outside, the front turn signal
lamps will turn off and the vehicle’s headlamps
and parking lamps will turn on. The other lamps that
come on with the headlamps will also come on.
When it is bright enough outside, the headlamps will go
off and the front turn signal lamps will come on.
To idle the vehicle with the DRL and automatic
headlamp control off, set the parking brake while the
ignition is in OFF or LOCK. Then start the vehicle.
The DRL, headlamps and parking lamps will stay off
until the parking brake is released.
To turn off the automatic headlamp feature when it is
dark outside, move the exterior lamp control to the
parking lamp position. The parking lamps will remain
illuminated and the headlamps will turn off. The
fog lamps will also go on if they were on previously.
As with any vehicle, the regular headlamp system
should be turned on when needed.Cornering Lamps
The cornering lamps are designed to come on to
provide additional light when a turn signal lamp
is activated.
Interior Lamps
The interior lamps can be controlled, or automatically
turn on or off under certain conditions. They are
explained in the following text.
Instrument Panel Brightness
The instrument panel lights can be brightened or
dimmed by turning the exterior lamps knob.
Turning the control all the way clockwise turns on the
courtesy lamps.
Courtesy Lamps
When any door is opened, several courtesy lamps come
on to make it easier to enter and exit the vehicle.
These lamps can also be turned on by turning the
exterior lamps control all the way clockwise to MAX.
3-15
Page 119 of 348

VENT (Ventilation):This mode brings in outside air
and directs it through the instrument panel outlets.
BI-LEV (Bi-Level):This mode directs approximately
half of the air to the instrument panel outlets, and then
directs most of the remaining air to the �oor outlets.
Some air may be directed toward the windshield.
HTR (Heater):This mode directs most of the air to the
�oor outlets, with some air directed to the outboard
outlets, for the side windows, and some air directed to
the windshield.
BLEND:This mode directs half of the air to go to the
�oor outlets and half to the defroster and side window
outlets. The air-conditioning compressor will run
automatically in this setting unless the outside
temperature is below 40°F (4°C).
The right knob can also be used for the defrost mode.
Information on defrosting and defogging can be
found later in this section.
9FAN:The left knob controls the fan speed.
OFF:Turn the knob all the way counterclockwise to
turn off the fan.LO (Low Fan Speed):This setting creates the lowest
fan speed.
HI (High Fan Speed):This setting creates the highest
fan speed.
DRIVER (Driver’s Side Temperature):The lever on
the left adjusts the air temperature for the driver’s
side outlets. Slide the lever up to raise the temperature
and down to lower the temperature.
PASSENGER (Passenger’s Side Temperature):
The lever on the right adjusts the air temperature for the
passenger’s side outlets. Slide the lever up to raise
the temperature and down to lower the temperature.
A/C (Air Conditioning):Press this button to turn
the air-conditioning on and off. An indicator light above
the button will come on when the air conditioning is
on. During daylight hours the interior lighting control
might need adjustment to the highest setting in order
for the indicator light to be seen. The system will
cool and dehumidify the air inside the vehicle when the
A/C indicator light is on.
On very hot days, open the windows long enough to let
hot, inside air escape. This reduces the time for the
vehicle to cool down.
3-19
Page 160 of 348

Cassette Tape Messages
If an error message appears on the display, it could be
for one of the following reasons:
TIGHT TAPE:The tape is tight and the player
cannot turn the tape hubs. Remove the tape.
Hold the tape with the open end down and try to
turn the right hub counterclockwise with a pencil.
Turn the tape over and repeat. If the hubs do
not turn easily, your tape may be damaged and
should not be used in the player. Try a new tape to
make sure your player is working properly.
BROKEN TAPE:The tape is broken. Try a
new tape.
CLEAN PLAYER:If this message appears on the
display, the cassette tape player needs to be cleaned.
It will still play tapes, but you should clean it as soon as
possible to prevent damage to the tapes and player.
SeeCare of Your Cassette Tape Player on page 3-65.
If any error occurs repeatedly or if an error cannot
be corrected, contact your dealer. If your radio displays
an error number, write it down and provide it to your
dealer when reporting the problem.
CD Adapter Kits
It is possible to use a portable CD player with your
cassette tape player after activating the bypass feature
on your tape player.
To activate the bypass feature, use the following steps:
1. Turn the ignition on.
2. Turn the radio off.
3. Insert the adapter into the cassette slot.
4. Press and hold the CD TAPE button until READY
appears on the display.
The override feature will remain active until the eject
button is pressed.
Playing a CD
Insert a CD partway into the slot, label side up.
The player will pull it in. The CD should begin playing.
If you want to insert a CD while the ignition or the radio
is off, �rst press the eject button or DISP.
If you turn off the ignition or radio with a CD in the
player, it will stay in the player. When you turn on the
ignition or system, the CD will start playing where
it stopped, if it was the last selected audio source.
3-60
Page 283 of 348

Removing the Flat Tire and
Installing the Spare Tire
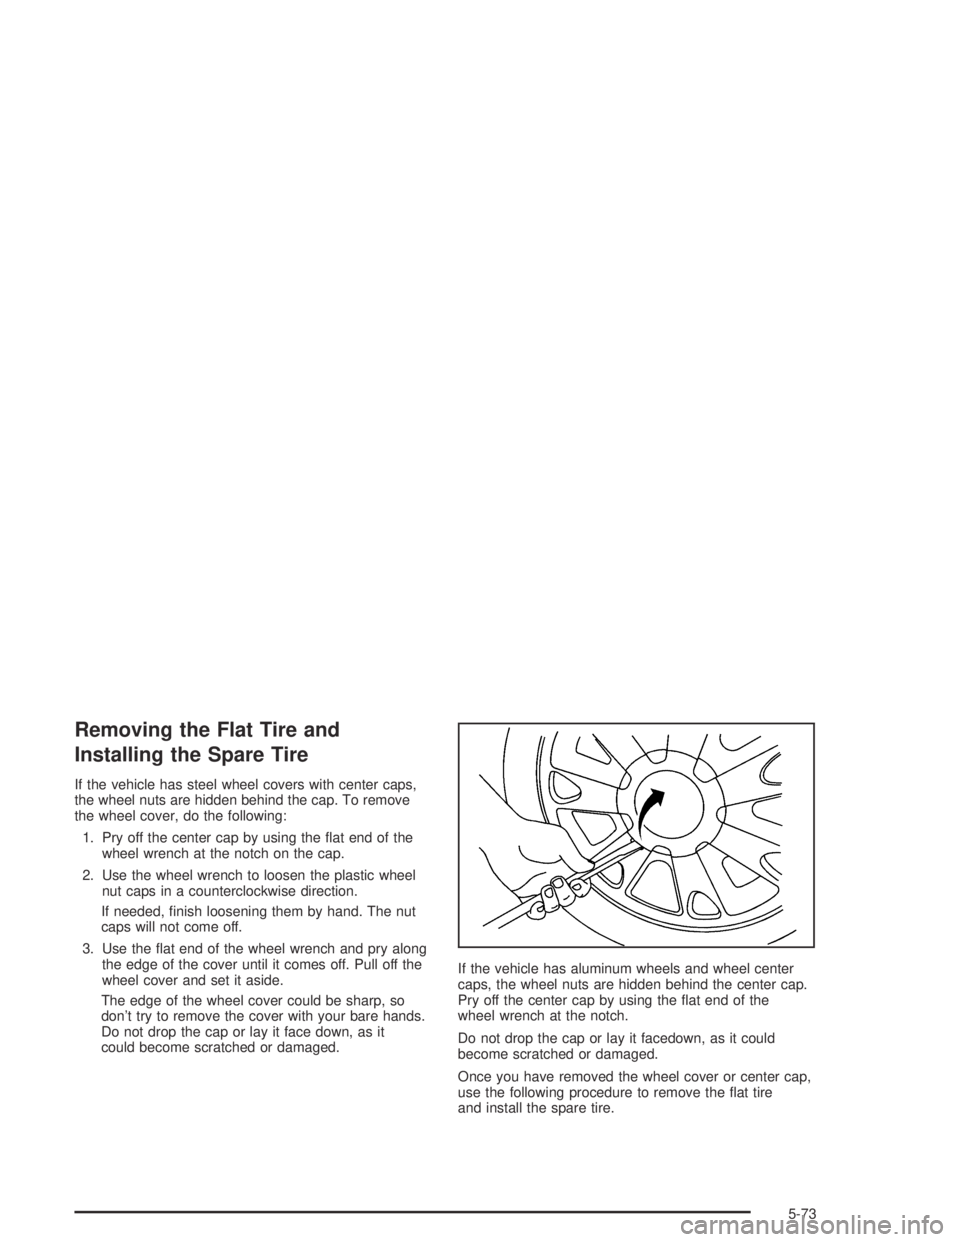
If the vehicle has steel wheel covers with center caps,
the wheel nuts are hidden behind the cap. To remove
the wheel cover, do the following:
1. Pry off the center cap by using the �at end of the
wheel wrench at the notch on the cap.
2. Use the wheel wrench to loosen the plastic wheel
nut caps in a counterclockwise direction.
If needed, �nish loosening them by hand. The nut
caps will not come off.
3. Use the �at end of the wheel wrench and pry along
the edge of the cover until it comes off. Pull off the
wheel cover and set it aside.
The edge of the wheel cover could be sharp, so
don’t try to remove the cover with your bare hands.
Do not drop the cap or lay it face down, as it
could become scratched or damaged.If the vehicle has aluminum wheels and wheel center
caps, the wheel nuts are hidden behind the center cap.
Pry off the center cap by using the �at end of the
wheel wrench at the notch.
Do not drop the cap or lay it facedown, as it could
become scratched or damaged.
Once you have removed the wheel cover or center cap,
use the following procedure to remove the �at tire
and install the spare tire.
5-73