ECO mode BUICK ENCLAVE 2008 Owner's Manual
[x] Cancel search | Manufacturer: BUICK, Model Year: 2008, Model line: ENCLAVE, Model: BUICK ENCLAVE 2008Pages: 436
Page 114 of 436
Mirrors
Automatic Dimming Rearview Mirror
The vehicle may have an automatic dimming rearview
mirror with OnStar®and/or a compass display.
Vehicles with OnStar have three control buttons located
at the bottom of the mirror. See your dealer/retailer for
more information on the system and how to subscribe to
OnStar. SeeOnStar
®System on page 2-46for more
information about the services OnStar provides.
O(On/Off):Press to turn the dimming feature on or off.
Automatic Dimming Mirror Operation
Automatic dimming reduces the glare of lights from
behind the vehicle. The dimming feature comes on and
the indicator light illuminates each time the vehicle is
started.
Cleaning the Mirror
Do not spray glass cleaner directly on the mirror. Use a
soft towel dampened with water.
Compass
Compass Operation
There is a compass display in the upper right corner of
the mirror.
Press
Oto turn the compass display on or off.
Compass Calibration
Press and holdOto activate the compass calibration
mode. CAL displays in the compass window on the
mirror.
The compass can be calibrated by driving the vehicle in
circles at 5 mph (8 km/h) or less until the display
reads a direction.
If after a few seconds the display does not show a
compass direction, (N for North for example), there may
be a strong magnetic �eld interfering with the compass.
Interference can be caused by a magnetic antenna
mount, note pad holder, or similar object. If CAL displays
in the compass window, the compass may need to be
reset or calibrated.
2-34
Page 131 of 436
Do not use this system with any garage door opener
that does not have the stop and reverse feature.
This includes any garage door opener model
manufactured before April 1, 1982.
Read the instructions completely before attempting to
program the transmitter. Because of the steps involved,
it may be helpful to have another person assist with
programming the transmitter.
Be sure to keep the original remote control transmitter for
use in other vehicles, as well as, for future programming.
Only the original remote control transmitter is needed for
Fixed Code programming. The programmed buttons
should be erased when the vehicle is sold or the lease
ends. See “Erasing Universal Home Remote Buttons”
later in this section.
Park the vehicle outside of the garage when
programming a garage door. Be sure that people and
objects are clear of the garage door or gate that is being
programmed.Programming Universal Home
Remote — Rolling Code
For questions or help programming the Universal Home
Remote System, call 1-866-572-2728 or go to
learcar2u.com.
Most garage door openers sold after 1996 are Rolling
Code units.
Programming a garage door opener involves
time-sensitive actions, so read the entire procedure
before starting. Otherwise, the device will time out and
the procedure will have to be repeated.
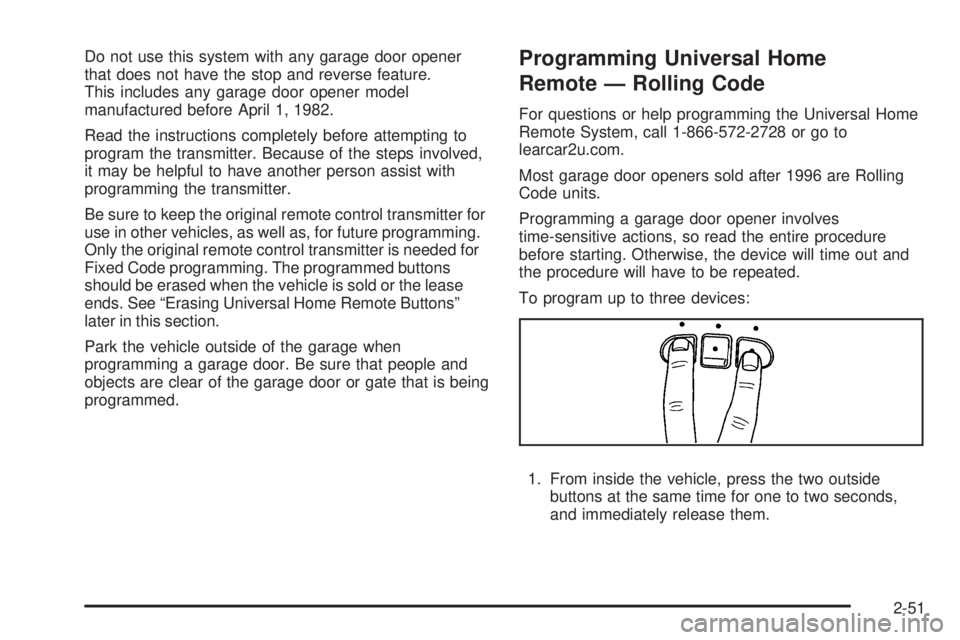
To program up to three devices:
1. From inside the vehicle, press the two outside
buttons at the same time for one to two seconds,
and immediately release them.
2-51
Page 135 of 436
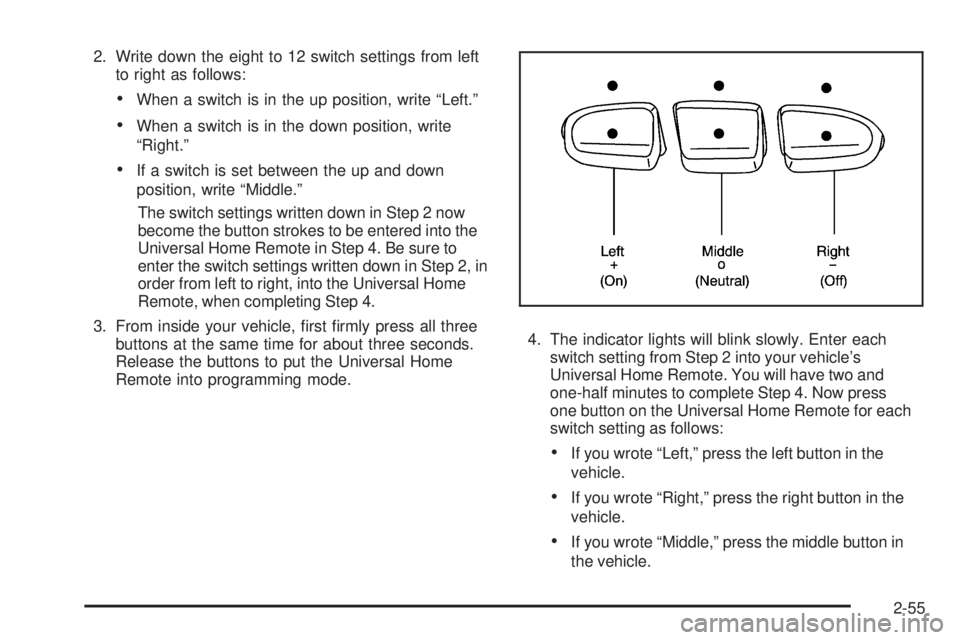
2. Write down the eight to 12 switch settings from left
to right as follows:
When a switch is in the up position, write “Left.”
When a switch is in the down position, write
“Right.”
If a switch is set between the up and down
position, write “Middle.”
The switch settings written down in Step 2 now
become the button strokes to be entered into the
Universal Home Remote in Step 4. Be sure to
enter the switch settings written down in Step 2, in
order from left to right, into the Universal Home
Remote, when completing Step 4.
3. From inside your vehicle, �rst �rmly press all three
buttons at the same time for about three seconds.
Release the buttons to put the Universal Home
Remote into programming mode.4. The indicator lights will blink slowly. Enter each
switch setting from Step 2 into your vehicle’s
Universal Home Remote. You will have two and
one-half minutes to complete Step 4. Now press
one button on the Universal Home Remote for each
switch setting as follows:
If you wrote “Left,” press the left button in the
vehicle.
If you wrote “Right,” press the right button in the
vehicle.
If you wrote “Middle,” press the middle button in
the vehicle.
2-55
Page 192 of 436
Relearn Remote Key
To access this display, the vehicle must be in PARK (P).
This display allows you to match Remote Keyless
Entry (RKE) transmitters to your vehicle. To match
an RKE transmitter to your vehicle:
1. Press the vehicle information button until
PRESS
VTO RELEARN REMOTE KEY displays.
2. Press the set/reset button until REMOTE KEY
LEARNING ACTIVE is displayed.
3. Press and hold the lock and unlock buttons on
the �rst transmitter at the same time for about
15 seconds.
On vehicles with memory recall seats, the �rst
transmitter learned will match driver 1 and
the second will match driver 2.
A chime will sound indicating that the transmitter is
matched.
4. To match additional transmitters at this time,
repeat Step 3.
Each vehicle can have a maximum of
eight transmitters matched to it.
5. To exit the programming mode, you must cycle the
key to LOCK/OFF.
Blank Display
This display shows no information.
Customization Menu Items
U
(Customization):Press this button to enter
the feature settings menu. This display allows you
to customize the feature settings on your vehicle.
SeeDIC Vehicle Customization on page 3-66for
more information.
DIC Compass
Your vehicle may have a compass in the Driver
Information Center (DIC). The information below
explains how to operate this feature in the DIC.
If your vehicle has a compass in the mirror, see
Compass on page 2-34.
Compass Zone
Your dealer/retailer will set the correct zone for your
location. If the zone is not set to your location or
you drive out of the areas, the variance needs to
be changed to the appropriate zone.
3-54
Page 220 of 436
To return to the manual mode, press until Manual
displays or start to manually adjust the bass and
depending on the radio, midrange, or treble by
pressing the
fknob.
Adjusting the Speakers (Balance/Fade)
`
BAL/FADE (Balance/Fade):To adjust balance
or fade, press the
`if the radio has this symbol, or
the
fknob until the speaker control tabs display.
Continue pressing to highlight the desired tab, or press
the pushbutton positioned under the desired tab. Turn
the
fknob clockwise or counterclockwise to adjust the
setting. The setting can also be adjusted by pressing
either SEEK arrow,
\FWD, orsREV until the
desired levels are obtained.
The radio may be capable of adjusting balance or fade to
the middle position by pressing the pushbutton positioned
under the BAL or FADE tab for more than two seconds.
The radio beeps once and the level adjusts to the middle
position.
The radio may also be capable of adjusting all speaker
and tone controls to the middle position by pressing
the
fknob for more than two seconds until the radio
beeps once.
Finding a Category (CAT) Station
(XM™ Satellite Radio Service Only)
CAT (Category):The radio may have the CAT button
feature. To select and �nd a desired category:
1. Press the BAND button until the XM frequency
displays. Press the CAT button to display the
category tabs on the radio display. Continue
pressing the CAT button until the desired
category name displays.
2. Press either of the two buttons below the desired
category tab to immediately tune to the �rst XM
station associated with that category.
3. Turn the
fknob, press the buttons below the right
or left arrows displayed, or press the SEEK arrows
to go to the previous or to the next XM station
within the selected category.
4. To exit the category search mode, press the FAV
button or BAND button to display favorites again.
Undesired XM categories can be removed through the
setup menu. To remove an undesired category:
1. Press the MENU button to display the radio
setup menu.
2. Press the pushbutton located below the
XM CAT tab.
3-82
Page 228 of 436
Order of Play
Tracks recorded to the CD-R or CD-RW are played in
the following order:
Play begins from the �rst track in the �rst playlist
and continues sequentially through all tracks in
each playlist. When the last track of the last playlist
has played, play continues from the �rst track of
the �rst playlist.
Play begins from the �rst track in the �rst folder
and continues sequentially through all tracks in each
folder. When the last track of the last folder has
played, play continues from the �rst track of the
�rst folder.
When play enters a new folder, the display does not
automatically show the new folder name unless the folder
mode has been chosen as the default display. The new
track name displays.
File System and Naming
The song name that displays is the song name that is
contained in the ID3 tag. If the song name is not present
in the ID3 tag, then the radio displays the �le name
without the extension (such as .mp3) as the track name.
Track names longer than 32 characters or four pages
are shortened. The display does not show parts of words
on the last page of text and the extension of the �lename
is not displayed.
Preprogrammed Playlists
Preprogrammed playlists that were created using
WinAmp™, MusicMatch™, or Real Jukebox™ software
can be accessed, however, you do not have playlist
editing capability using the radio. These playlists are
treated as special folders containing compressed audio
song �les.
Playing an MP3
Insert a CD partway into the slot (Single CD Player),
or press the load button and wait for the message
to insert disc (Six-Disc CD Player), label side up.
The player pulls it in, and the CD should begin playing.
f(Tune):Turn this knob to select MP3 �les on the
CD currently playing.
©SEEK¨:Press the left SEEK arrow to go to the
start of the current MP3 �le, if more than ten seconds
have played. Press the right SEEK arrow to go to
the next MP3 �le. If either SEEK arrow is held or
pressed multiple times, the player continues moving
backward or forward through MP3 �les on the CD.
Sc(Previous Folder):Press the pushbutton
positioned under the Folder tab to go to the �rst track
in the previous folder.
3-90
Page 230 of 436
Now the album name displays on the second line
between the arrows and songs from the current
album begins to play. Once all songs from that album
have played, the player moves to the next album in
alphabetical order on the CD and begins playing
MP3 �les from that album.
To exit music navigator mode, press the pushbutton
below the Back tab to return to normal MP3 playback.
XM Radio Messages
XL (Explicit Language Channels):These channels,
or any others, can be blocked at a customer’s request,
by calling 1-800-852-XMXM (9696).
XM Updating:The encryption code in the receiver is
being updated, and no action is required. This process
should take no longer than 30 seconds.
No XM Signal:The system is functioning correctly,
but the vehicle is in a location that is blocking the XM™
signal. When the vehicle is moved into an open area,
the signal should return.
Loading XM:The audio system is acquiring and
processing audio and text data. No action is needed.
This message should disappear shortly.Channel Off Air:This channel is not currently in
service. Tune in to another channel.
Channel Unauth:This channel is blocked or cannot be
received with your XM Subscription package.
Channel Unavail:This previously assigned channel is
no longer assigned. Tune to another station. If this station
was one of the presets, choose another station for that
preset button.
No Artist Info:No artist information is available at this
time on this channel. The system is working properly.
No Title Info:No song title information is available
at this time on this channel. The system is working
properly.
No CAT Info:No category information is available
at this time on this channel. The system is working
properly.
No Information:No text or informational messages are
available at this time on this channel. The system is
working properly.
CAT Not Found:There are no channels available for
the selected category. The system is working properly.
3-92
Page 252 of 436
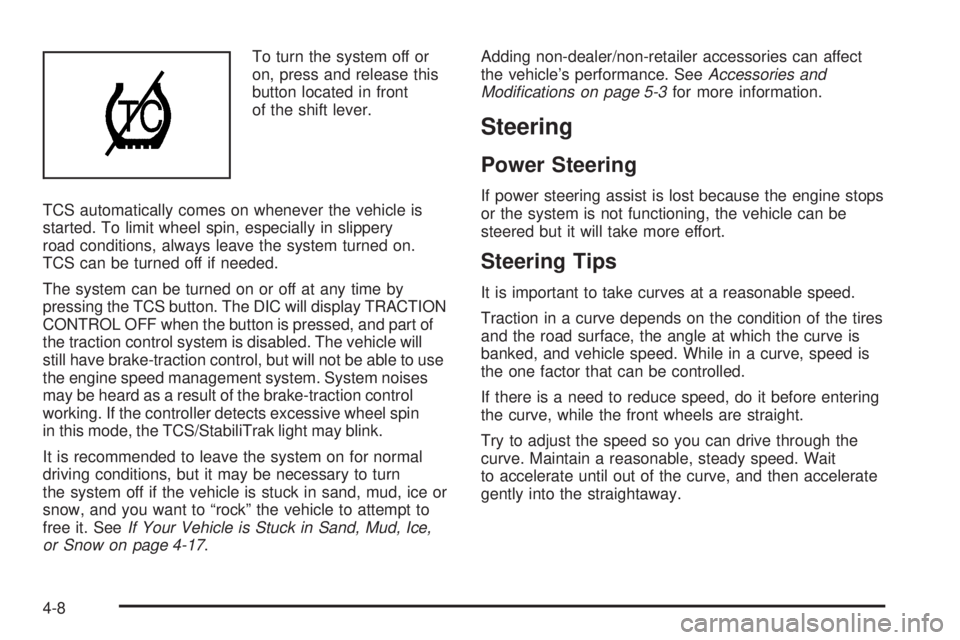
To turn the system off or
on, press and release this
button located in front
of the shift lever.
TCS automatically comes on whenever the vehicle is
started. To limit wheel spin, especially in slippery
road conditions, always leave the system turned on.
TCS can be turned off if needed.
The system can be turned on or off at any time by
pressing the TCS button. The DIC will display TRACTION
CONTROL OFF when the button is pressed, and part of
the traction control system is disabled. The vehicle will
still have brake-traction control, but will not be able to use
the engine speed management system. System noises
may be heard as a result of the brake-traction control
working. If the controller detects excessive wheel spin
in this mode, the TCS/StabiliTrak light may blink.
It is recommended to leave the system on for normal
driving conditions, but it may be necessary to turn
the system off if the vehicle is stuck in sand, mud, ice or
snow, and you want to “rock” the vehicle to attempt to
free it. SeeIf Your Vehicle is Stuck in Sand, Mud, Ice,
or Snow on page 4-17.Adding non-dealer/non-retailer accessories can affect
the vehicle’s performance. SeeAccessories and
Modifications on page 5-3for more information.
Steering
Power Steering
If power steering assist is lost because the engine stops
or the system is not functioning, the vehicle can be
steered but it will take more effort.
Steering Tips
It is important to take curves at a reasonable speed.
Traction in a curve depends on the condition of the tires
and the road surface, the angle at which the curve is
banked, and vehicle speed. While in a curve, speed is
the one factor that can be controlled.
If there is a need to reduce speed, do it before entering
the curve, while the front wheels are straight.
Try to adjust the speed so you can drive through the
curve. Maintain a reasonable, steady speed. Wait
to accelerate until out of the curve, and then accelerate
gently into the straightaway.
4-8
Page 311 of 436
If the coolant in the recovery tank is constantly low, you
should have a dealer/retailer service department inspect
the vehicle for leaks.
Notice:If the pressure cap is not tightly installed,
coolant loss and possible engine damage may occur.
Be sure the cap is properly and tightly secured.
Radiator Pressure Cap
Notice:The radiator cap on your vehicle is a
pressure-type cap and must be tightly installed to
prevent coolant loss and possible engine damage
from overheating. Be sure the arrows on the cap line
up with the over�ow tube on the radiator �ller neck.
SeeEngine Compartment Overview on page 5-14for
more information on location.
Coolant Surge Tank Pressure Cap
Notice:If the pressure cap is not tightly installed,
coolant loss and possible engine damage may occur.
Be sure the cap is properly and tightly secured.
SeeEngine Compartment Overview on page 5-14for
more information on location.
Engine Overheating
The vehicle has several indicators to warn of engine
overheating.
You will �nd a warning light about a hot engine as well
as an engine coolant temperature gage on your
vehicle’s instrument panel cluster.
You may decide not to lift the hood when this warning
appears, but instead get service help right away.
SeeRoadside Assistance Program on page 7-7.
If you do decide to lift the hood, make sure the vehicle
is parked on a level surface.
Then check to see if the engine cooling fans are running.
If the engine is overheating, both fans should be running.
If they are not, do not continue to run the engine and
have the vehicle serviced.
Notice:Engine damage from running the engine
without coolant is not covered by the warranty.
Notice:If the engine catches �re while driving with
no coolant, the vehicle can be badly damaged.
The costly repairs would not be covered by
the vehicle warranty. SeeOverheated Engine
Protection Operating Mode on page 5-37for
information on driving to a safe place in an
emergency.
5-35
Page 340 of 436
Intended Outboard Sidewall:The side of an
asymmetrical tire, that must always face outward
when mounted on a vehicle.
Kilopascal (kPa)
:The metric unit for air pressure.
Light Truck (LT-Metric) Tire
:A tire used on
light duty trucks and some multipurpose passenger
vehicles.
Load Index
:An assigned number ranging from
1 to 279 that corresponds to the load carrying
capacity of a tire.
Maximum In�ation Pressure
:The maximum air
pressure to which a cold tire can be in�ated.
The maximum air pressure is molded onto the
sidewall.
Maximum Load Rating
:The load rating for a tire
at the maximum permissible in�ation pressure
for that tire.
Maximum Loaded Vehicle Weight
:The sum of
curb weight, accessory weight, vehicle capacity
weight, and production options weight.Normal Occupant Weight
:The number of
occupants a vehicle is designed to seat multiplied
by 150 lbs (68 kg). SeeLoading the Vehicle on
page 4-18.
Occupant Distribution
:Designated seating
positions.
Outward Facing Sidewall
:The side of an
asymmetrical tire that has a particular side that
faces outward when mounted on a vehicle.
The side of the tire that contains a whitewall,
bears white lettering, or bears manufacturer,
brand, and/or model name molding that is higher
or deeper than the same moldings on the other
sidewall of the tire.
Passenger (P-Metric) Tire
:A tire used on
passenger cars and some light duty trucks and
multipurpose vehicles.
Recommended In�ation Pressure
:Vehicle
manufacturer’s recommended tire in�ation
pressure as shown on the tire placard.
SeeInflation - Tire Pressure on page 5-66
andLoading the Vehicle on page 4-18.
5-64