low oil pressure BUICK ENCLAVE 2009 Owner's Manual
[x] Cancel search | Manufacturer: BUICK, Model Year: 2009, Model line: ENCLAVE, Model: BUICK ENCLAVE 2009Pages: 412
Page 4 of 412
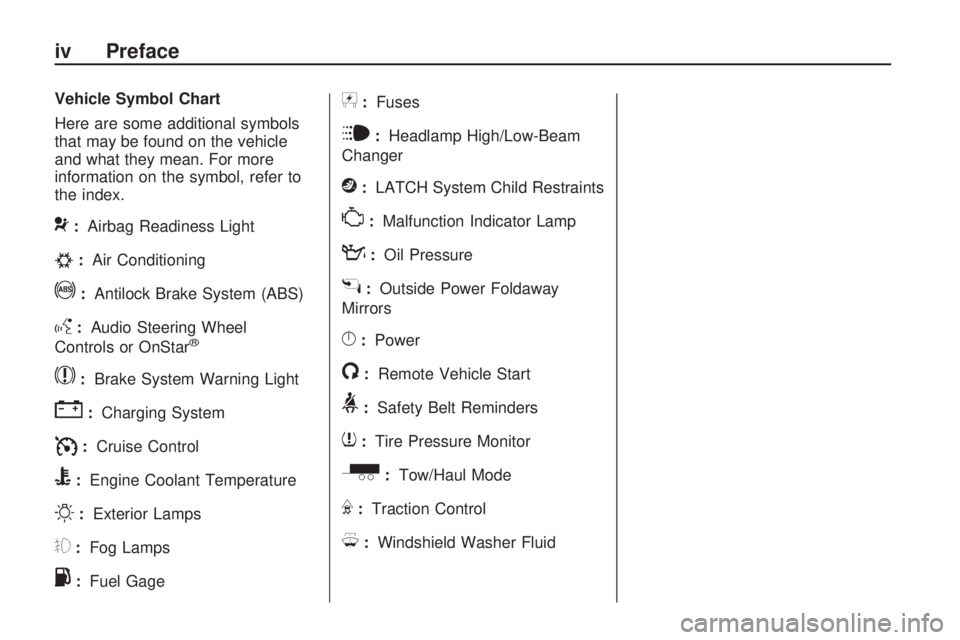
Vehicle Symbol Chart
Here are some additional symbols
that may be found on the vehicle
and what they mean. For more
information on the symbol, refer to
the index.
9:Airbag Readiness Light
#:Air Conditioning
!:Antilock Brake System (ABS)
g:Audio Steering Wheel
Controls or OnStar®
$:Brake System Warning Light
":Charging System
I:Cruise Control
B:Engine Coolant Temperature
O:Exterior Lamps
#:Fog Lamps
.:Fuel Gage
+:Fuses
i:Headlamp High/Low-Beam
Changer
j:LATCH System Child Restraints
*:Malfunction Indicator Lamp
::Oil Pressure
g:Outside Power Foldaway
Mirrors
}:Power
/:Remote Vehicle Start
>:Safety Belt Reminders
7:Tire Pressure Monitor
_:Tow/Haul Mode
F:Traction Control
M:Windshield Washer Fluid
iv Preface
Page 71 of 412
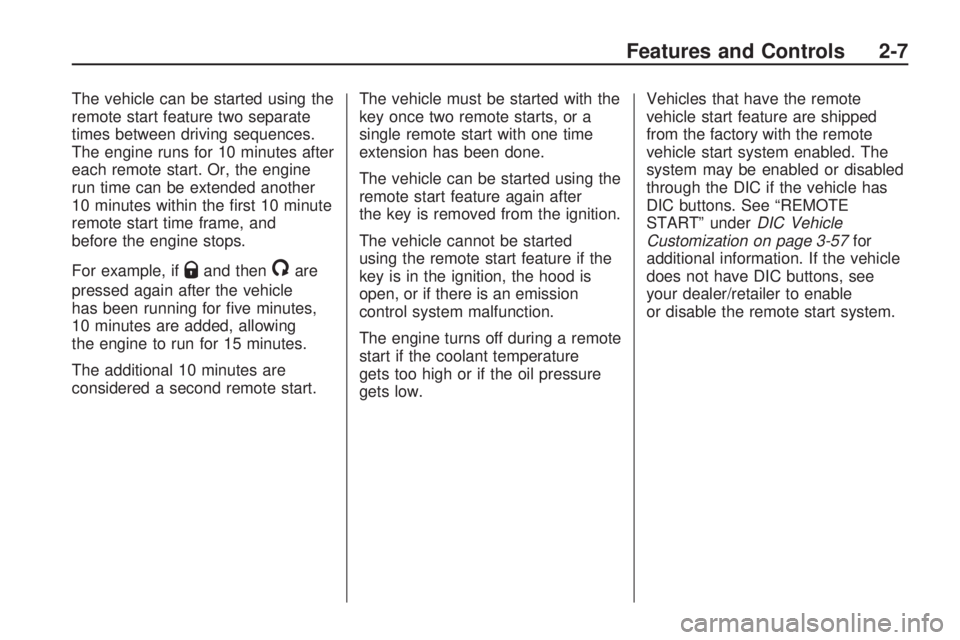
The vehicle can be started using the
remote start feature two separate
times between driving sequences.
The engine runs for 10 minutes after
each remote start. Or, the engine
run time can be extended another
10 minutes within the �rst 10 minute
remote start time frame, and
before the engine stops.
For example, if
Qand then/are
pressed again after the vehicle
has been running for �ve minutes,
10 minutes are added, allowing
the engine to run for 15 minutes.
The additional 10 minutes are
considered a second remote start.The vehicle must be started with the
key once two remote starts, or a
single remote start with one time
extension has been done.
The vehicle can be started using the
remote start feature again after
the key is removed from the ignition.
The vehicle cannot be started
using the remote start feature if the
key is in the ignition, the hood is
open, or if there is an emission
control system malfunction.
The engine turns off during a remote
start if the coolant temperature
gets too high or if the oil pressure
gets low.Vehicles that have the remote
vehicle start feature are shipped
from the factory with the remote
vehicle start system enabled. The
system may be enabled or disabled
through the DIC if the vehicle has
DIC buttons. See “REMOTE
START” underDIC Vehicle
Customization on page 3-57for
additional information. If the vehicle
does not have DIC buttons, see
your dealer/retailer to enable
or disable the remote start system.
Features and Controls 2-7
Page 157 of 412

If this has been done and the
vehicle still does not pass the
inspection for lack of OBD II
system readiness, your dealer/
retailer can prepare the vehicle for
inspection.
Oil Pressure Light
{CAUTION
Do not keep driving if the oil
pressure is low. The engine can
become so hot that it catches �re.
Someone could be burned. Check
the oil as soon as possible and
have the vehicle serviced.
Notice:Lack of proper engine oil
maintenance can damage the
engine. The repairs would not be
covered by the vehicle warranty.
Always follow the maintenance
schedule in this manual for
changing engine oil.The oil pressure light should come
on brie�y as the engine is started.
If it does not come on have the
vehicle serviced by your
dealer/retailer.
If the light comes on and stays on, it
means that oil is not �owing through
the engine properly. The vehicle
could be low on oil and might have
some other system problem.
Security Light
This light �ashes when the security
system is activated.
For more information, see
Theft-Deterrent Systems on
page 2-16.
Fog Lamp Light
The fog lamp light comes on when
the fog lamps are in use.
The light goes out when the fog
lamps are turned off. SeeFog Lamps
on page 3-14for more information.
Instrument Panel 3-39
Page 160 of 412

DIC Buttons
The buttons are the set/reset,
customization, vehicle information,
and trip/fuel buttons. The button
functions are detailed in the
following pages.
V(Set/Reset):Press this button to
set or reset certain functions and
to turn off or acknowledge
messages on the DIC.
U(Customization):Press this
button to customize the feature
settings on your vehicle. SeeDIC
Vehicle Customization on page 3-57
for more information.
T(Vehicle Information):Press
this button to display the oil life,
park assist on vehicles with
this feature, units, tire pressure
readings on vehicles with this
feature, Remote Keyless Entry
(RKE) transmitter programming, and
compass calibration and zone
setting on vehicles with this feature.
3(Trip/Fuel):Press this
button to display the odometer, trip
odometers, fuel range, average
economy, timer, fuel used,
and average speed.
Vehicle Information Menu
Items
T(Vehicle Information):Press
this button to scroll through the
following menu items:
OIL LIFE
Press the vehicle information button
until OIL LIFE REMAINING
displays. This display shows an
estimate of the oil’s remaining useful
life. If you see 99% OIL LIFE
REMAINING on the display, that
means 99% of the current oil
life remains. The engine oil life
system will alert you to change the
oil on a schedule consistent with
your driving conditions.
When the remaining oil life is low,
the CHANGE ENGINE OIL
SOON message will appear on the
display. See “CHANGE ENGINE
OIL SOON” underDIC Warnings
and Messages on page 3-48.
You should change the oil as soon
as you can. SeeEngine Oil on
page 5-11. In addition to the engine
3-42 Instrument Panel
Page 161 of 412

oil life system monitoring the oil life,
additional maintenance is
recommended in the Maintenance
Schedule in this manual. See
Scheduled Maintenance on page 6-3
for more information.
Remember, you must reset the OIL
LIFE display yourself after each
oil change. It will not reset
itself. Also, be careful not to reset
the OIL LIFE display accidentally at
any time other than when the oil
has just been changed. It cannot be
reset accurately until the next oil
change. To reset the engine oil life
system, seeEngine Oil Life
System on page 5-13.
PARK ASSIST
If your vehicle has the Ultrasonic
Rear Parking Assist (URPA) system,
press the vehicle information
button until PARK ASSIST displays.
This display allows the system to
be turned on or off. Once in
this display, press the set/reset
button to select between ON
or OFF. If you choose ON, thesystem will be turned on. If you
choose OFF, the system will
be turned off. The URPA system
automatically turns back on
after each vehicle start. When the
URPA system is turned off and
the vehicle is shifted out of P (Park),
the DIC will display the PARK
ASSIST OFF message as a
reminder that the system has been
turned off. SeeDIC Warnings
and Messages on page 3-48and
Ultrasonic Rear Parking Assist
(URPA) on page 2-34for more
information.
UNITS
Press the vehicle information button
until UNITS displays. This display
allows you to select between English
or Metric units of measurement.
Once in this display, press the
set/reset button to select between
ENGLISH or METRIC units. All
of the vehicle information will then
be displayed in the unit of
measurement selected.FRONT TIRES or REAR TIRES
On vehicles with the Tire Pressure
Monitor System (TPMS), the
pressure for each tire can be viewed
in the DIC. The tire pressure will
be shown in either pounds per
square inch (psi) or kilopascals
(kPa). Press the vehicle information
button until the DIC displays
FRONT TIRES PSI (kPa) LEFT ##
RIGHT ##. Press the vehicle
information button again until the
DIC displays REAR TIRES PSI
(kPa) LEFT ## RIGHT ##.
If a low or high tire pressure
condition is detected by the system
while driving, a message advising
you to check the pressure in a
speci�c tire will appear in the
display. SeeInflation - Tire Pressure
on page 5-42andDIC Warnings
and Messages on page 3-48
for more information.
Instrument Panel 3-43
Page 167 of 412
message stays on, see your
dealer/retailer right away. See
All-Wheel Drive (AWD) System on
page 4-7for more information.
AUTOMATIC LIGHT
CONTROL OFF
This message displays when the
automatic headlamps are turned off.
This message clears itself after
10 seconds.
AUTOMATIC LIGHT
CONTROL ON
This message displays when the
automatic headlamps are turned on.
This message clears itself after
10 seconds.
BATTERY SAVER ACTIVE
This message displays when
the system detects that the battery
voltage is dropping below
expected levels. The battery saver
system starts reducing certain
features of the vehicle that you may
be able to notice. At the point
that the features are disabled, thismessage is displayed. It means that
the vehicle is trying to save the
charge in the battery.
Turn off all unnecessary accessories
to allow the battery to recharge.
The normal battery voltage range is
11.5 to 15.5 volts.
CHANGE ENGINE OIL SOON
This message displays when
the engine oil needs to be changed.
When you change the engine oil,
be sure to reset the CHANGE
ENGINE OIL SOON message. See
Engine Oil Life System on
page 5-13for information on how to
reset the message. SeeEngine
Oil on page 5-11andScheduled
Maintenance on page 6-3for more
information.
CHECK TIRE PRESSURE
On vehicles with the Tire Pressure
Monitor System (TPMS), this
message displays when the
pressure in one or more of the
vehicle’s tires needs to be checked.This message also displays LEFT
FRONT, RIGHT FRONT, LEFT
REAR, or RIGHT REAR to indicate
which tire needs to be checked.
You can receive more than one tire
pressure message at a time. To
read the other messages that may
have been sent at the same
time, press the set/reset button. If a
tire pressure message appears
on the DIC, stop as soon as
you can. Have the tire pressures
checked and set to those shown on
the Tire Loading Information
label. SeeTires on page 5-36,
Loading the Vehicle on page 4-16,
andInflation - Tire Pressure on
page 5-42. The DIC also shows the
tire pressure values. SeeDIC
Operation and Displays on
page 3-41. If the tire pressure is
low, the low tire pressure warning
light comes on. SeeTire Pressure
Light on page 3-36.
Instrument Panel 3-49
Page 170 of 412
LEFT REAR DOOR OPEN
This message displays and a chime
sounds if the driver side rear
door is not fully closed and the
vehicle is shifted out of P (Park).
Stop and turn off the vehicle, check
the door for obstructions, and
close the door again. Check to see
if the message still appears on
the DIC.
LIFTGATE OPEN
This message displays and a chime
sounds if the liftgate is open while
the ignition is in ON/RUN. Turn off
the vehicle and check the liftgate.
Restart the vehicle and check for the
message on the DIC display.
OIL PRESSURE LOW STOP
ENGINE
Notice:If you drive your vehicle
while the engine oil pressure
is low, severe engine damage
may occur. If a low oil pressure
warning appears on the Driver
Information Center (DIC), stop the
vehicle as soon as possible.
Do not drive the vehicle until the
cause of the low oil pressure
is corrected. SeeEngine Oil on
page 5-11for more information.
This message displays if low
oil pressure levels occur. Stop the
vehicle as soon as safely possible
and do not operate it until the cause
of the low oil pressure has been
corrected. Check the oil as soon as
possible and have your vehicle
serviced by your dealer/retailer. See
Engine Oil on page 5-11.
PARK ASSIST OFF
If your vehicle has the Ultrasonic
Rear Parking Assist (URPA) system,
after the vehicle has been started
and shifted out of P (Park), this
message displays to remind
the driver that the URPA system
has been turned off. Press the
set/reset button to acknowledge this
message and clear it from the
DIC display. To turn the URPA
system back on, seeUltrasonic Rear
Parking Assist (URPA) on
page 2-34.
PASSENGER DOOR OPEN
This message displays and a chime
sounds if the passenger door is
not fully closed and the vehicle is
shifted out of P (Park). Stop and turn
off the vehicle, check the door for
obstructions, and close the door
again. Check to see if the message
still appears on the DIC.
3-52 Instrument Panel
Page 246 of 412

Hydroplaning
Hydroplaning is dangerous. Water
can build up under your vehicle’s
tires so they actually ride on
the water. This can happen if the
road is wet enough and you
are going fast enough. When your
vehicle is hydroplaning, it has little or
no contact with the road.
There is no hard and fast rule about
hydroplaning. The best advice is
to slow down when the road is wet.
Other Rainy Weather Tips
Besides slowing down, other wet
weather driving tips include:
Allow extra following distance.
Pass with caution.
Keep windshield wiping
equipment in good shape.
Keep the windshield washer �uid
reservoir �lled.
Have good tires with proper tread
depth. SeeTires on page 5-36.
Turn off cruise control.
Before Leaving on a
Long Trip
To prepare your vehicle for a long
trip, consider having it serviced
by your dealer/retailer before
departing.
Things to check on your own
include:
Windshield Washer Fluid:
Reservoir full? Windows
clean — inside and outside?
Wiper Blades:In good shape?
Fuel, Engine Oil, Other Fluids:All
levels checked?
Lamps:Do they all work and are
lenses clean?
Tires:Are treads good? Are tires
in�ated to recommended
pressure?
Weather and Maps:Safe to
travel? Have up-to-date maps?
Highway Hypnosis
Always be alert and pay attention
to your surroundings while driving.
If you become tired or sleepy, �nd a
safe place to park your vehicle
and rest.
Other driving tips include:
Keep the vehicle well ventilated.
Keep interior temperature cool.
Keep your eyes moving — scan
the road ahead and to the sides.
Check the rearview mirror and
vehicle instruments often.
4-12 Driving Your Vehicle
Page 277 of 412

Checking Things
Under the Hood
{CAUTION
An electric fan under the hood can
start up and injure you even when
the engine is not running. Keep
hands, clothing, and tools away
from any underhood electric fan.
{CAUTION
Things that burn can get on hot
engine parts and start a �re.
These include liquids like fuel, oil,
coolant, brake �uid, windshield
washer and other �uids, and
plastic or rubber. You or others
could be burned. Be careful not to
drop or spill things that will burn
onto a hot engine.
Hood Release
To open the hood:
1. Pull the hood release handle with
this symbol on it. It is located
under the instrument panel on
the driver side of the vehicle.
2. At the front of the vehicle, pull up
on the bottom center of the grille,
and push the secondary hood
release to the left.3. After the lid has been partially
lifted, a gas strut automatically
lifts and holds the hood in
the fully open position.
Before closing the hood, be sure all
�ller caps are on properly.
Pull the hood down to close. Lower
the hood until the lifting pressure of
the strut is reduced. Then allow the
hood to fall and latch into place
under its own weight. Check to make
sure the hood is closed. If the hood
does not fully latch, gently push the
hood down at the front and center
until it is completely latched.
Service and Appearance Care 5-9
Page 279 of 412
A. Radiator Pressure Cap. See
Cooling System on page 5-16.
B. Engine Coolant Recovery Cap.
SeeCooling System on
page 5-16.
C. Remote Negative (−) Terminal.
SeeJump Starting on page 5-28.
D.Underhood Fuse Block on
page 5-94.
E. Remote Positive (+) Terminal.
SeeJump Starting on page 5-28.
F.Power Steering Fluid on
page 5-22.
G. Engine Oil Fill Cap. See “When
to Add Engine Oil” underEngine
Oil on page 5-11.
H. Engine Oil Dipstick. See
“Checking Engine Oil” under
Engine Oil on page 5-11.
I. Automatic Transmission Fluid
Dipstick. See “Checking the
Fluid Level” underAutomatic
Transmission Fluid on page 5-15.
J. Brake Master Cylinder Reservoir.
See “Brake Fluid” underBrakes
on page 5-24.K.Engine Air Cleaner/Filter on
page 5-14.
L. Windshield Washer Fluid
Reservoir. See “Adding Washer
Fluid” underWindshield
Washer Fluid on page 5-23.
Engine Oil
Checking Engine Oil
It is a good idea to check the
engine oil every time you get fuel. In
order to get an accurate reading,
the oil must be warm and the vehicle
must be on level ground.
The engine oil dipstick handle is a
yellow loop. SeeEngine
Compartment Overview on
page 5-10for the location of the
engine oil dipstick.
1. Turn off the engine and give the
oil several minutes to drain back
into the oil pan. If you do not
do this, the oil dipstick might not
show the actual level.2. Pull out the dipstick and clean it
with a paper towel or cloth, then
push it back in all the way.
Remove it again, keeping the tip
down, and check the level.
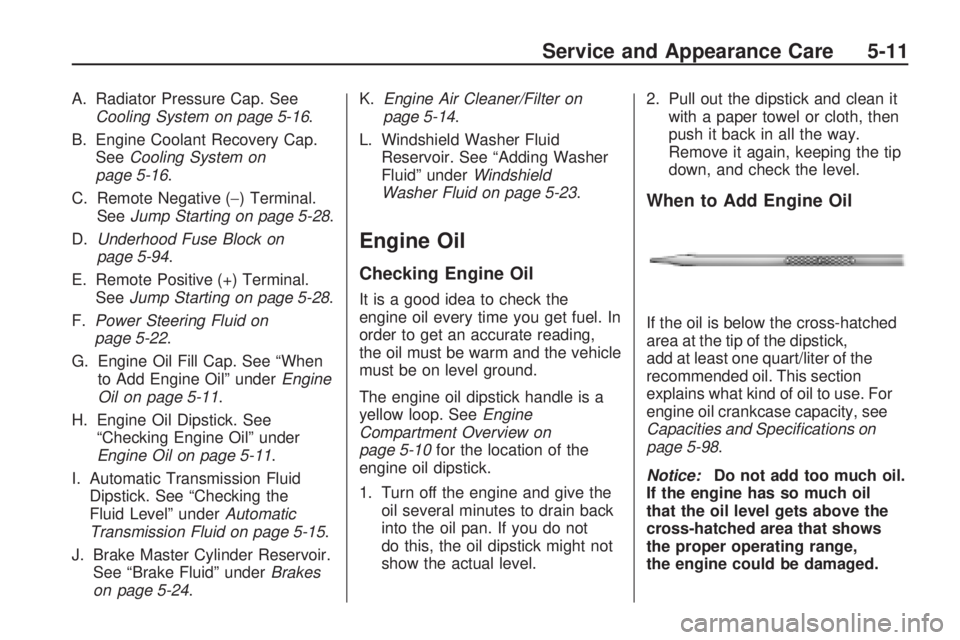
When to Add Engine Oil
If the oil is below the cross-hatched
area at the tip of the dipstick,
add at least one quart/liter of the
recommended oil. This section
explains what kind of oil to use. For
engine oil crankcase capacity, see
Capacities and Specifications on
page 5-98.
Notice:Do not add too much oil.
If the engine has so much oil
that the oil level gets above the
cross-hatched area that shows
the proper operating range,
the engine could be damaged.
Service and Appearance Care 5-11