chime BUICK ENCLAVE 2010 User Guide
[x] Cancel search | Manufacturer: BUICK, Model Year: 2010, Model line: ENCLAVE, Model: BUICK ENCLAVE 2010Pages: 438, PDF Size: 2.47 MB
Page 152 of 438
5-34 Instruments and Controls
Engine Oil Messages
CHANGE ENGINE OIL SOON
This message displays when the
engine oil needs to be changed.
When you change the engine oil, be
sure to reset the CHANGE ENGINE
OIL SOON message. SeeEngine
Oil Life System
on page 10‑10for
information on how to reset the
message. See Engine Oil
on
page 10‑8and Scheduled
Maintenanceon page 11‑2for
more information.
OIL PRESSURE LOW STOP
ENGINE
Notice: If you drive your vehicle
while the engine oil pressure is
low, severe engine damage
may occur. If a low oil pressure
warning appears on the
instrument panel cluster and/or
DIC, stop the vehicle as soon as possible. Do not drive the vehicle
until the cause of the low oil
pressure is corrected. See
Engine
Oil
on page 10‑8for more
information.
This message displays if low oil
pressure levels occur. Stop the
vehicle as soon as safely possible
and do not operate it until the cause
of the low oil pressure has been
corrected. Check the oil as soon as
possible and have your vehicle
serviced by your dealer/retailer.
See Engine Oil on page 10‑8.
Engine Power Messages
ENGINE POWER IS REDUCED
This message displays and a chime
sounds when the cooling system
temperature gets too hot and the
engine further enters the engine
coolant protection mode. See
Engine Overheating
on page 10‑18for further information. This message also displays when
the vehicle's engine power is
reduced. Reduced engine power
can affect the vehicle's ability to
accelerate. If this message is on,
but there is no reduction in
performance, proceed to your
destination. The performance may
be reduced the next time the vehicle
is driven. The vehicle may be driven
at a reduced speed while this
message is on, but acceleration and
speed may be reduced. Anytime
this message stays on, the vehicle
should be taken to your dealer/
retailer for service as soon as
possible.
Fuel System Messages
FUEL LEVEL LOW
This message displays and a chime
sounds if the fuel level is low. Refuel
as soon as possible. See
Fuel Gage
on page 5‑14andFuelon
page 9‑39for more information.
Page 153 of 438
Instruments and Controls 5-35
TIGHTEN GAS CAP
This message may display along
with the check engine light on the
instrument panel cluster if the
vehicle's fuel cap is not tightened
properly. SeeMalfunction Indicator
Lamp
on page 5‑18. Reinstall the
fuel cap fully. See Filling the Tank
on page 9‑42. The diagnostic
system can determine if the fuel cap
has been left off or improperly
installed. A loose or missing fuel
cap allows fuel to evaporate into the
atmosphere. A few driving trips with
the cap properly installed should
turn this light and message off.
Key and Lock Messages
REMOTE KEY LEARNING
ACTIVE
This message displays while you
are matching a Remote Keyless
Entry (RKE) transmitter to your
vehicle. See “Matching
Transmitter(s) to Your Vehicle” under
Remote Keyless Entry (RKE)
System Operation
on page 2‑3and Driver Information Center (DIC)on page 5‑25for more information.
REPLACE BATTERY IN
REMOTE KEY
This message displays if a Remote
Keyless Entry (RKE) transmitter
battery is low. The battery needs to
be replaced in the transmitter. See
“Battery Replacement” under
Remote Keyless Entry (RKE)
System Operation on page 2‑3.
Lamp Messages
AUTOMATIC LIGHT
CONTROL OFF
This message displays when the
automatic headlamps are turned off.
This message clears itself after
10 seconds.
AUTOMATIC LIGHT
CONTROL ON
This message displays when the
automatic headlamps are turned on.
This message clears itself after
10 seconds.
TURN SIGNAL ON
This message displays and a chime
sounds if a turn signal is left on for
3/4 of a mile (1.2 km). Move the turn
signal/multifunction lever to the off
position.
Object Detection System
Messages
PARK ASSIST OFF
If your vehicle has the Ultrasonic
Rear Parking Assist (URPA) system,
after the vehicle has been started
and shifted out of P (Park), this
message displays to remind the
driver that the URPA system has
been turned off or to notify the driver
that the system has turned itself off.
Page 157 of 438

Instruments and Controls 5-39
TRANSMISSION HOT IDLE
ENGINE
Notice:If you drive your vehicle
while the transmission fluid is
overheating and the transmission
temperature warning is displayed
on the instrument panel cluster
and/or DIC, you can damage the
transmission. This could lead to
costly repairs that would not be
covered by your warranty.
Do not drive your vehicle with
overheated transmission fluid
or while the transmission
temperature warning is displayed.
This message displays and a chime
sounds if the transmission fluid in
the vehicle gets hot. Driving with the
transmission fluid temperature high
can cause damage to the vehicle.
Stop the vehicle and let it idle to
allow the transmission to cool. This
message clears when the fluid
temperature reaches a safe level.
Vehicle Reminder
Messages
ICE POSSIBLE DRIVE
WITH CARE
This message displays when the
outside air temperature is cold
enough to create icy road
conditions. Adjust your driving
accordingly.
Vehicle Speed Messages
SPEED LIMITED TO
XXX MPH (KM/H)
This message displays when your
vehicle speed is limited to 80 mph
(128 km/h) because the vehicle
detects a problem in the speed
variable assist steering system.
Have your vehicle serviced by your
dealer/retailer.
Washer Fluid Messages
WASHER FLUID LOW ADD
FLUID
This message displays when the
windshield washer fluid is low.
Fill the windshield washer fluid
reservoir as soon as possible.
See Engine Compartment Overview
on page 10‑6for the location of the
windshield washer fluid reservoir.
Also, see Washer Fluid
on
page 10‑21for more information.
Page 161 of 438
Instruments and Controls 5-43
NO CHANGE:No change will be
made to this feature. The current
setting will remain.
To select a setting, press the set/
reset button while the desired
setting is displayed on the DIC.
DELAY DOOR LOCK
This feature allows you to select
whether or not the locking of the
vehicle's doors and liftgate will be
delayed. When locking the doors
and liftgate with the power door lock
switch and a door or the liftgate is
open, this feature will delay locking
the doors and liftgate until
five seconds after the last door is
closed. You will hear three chimes
to signal that the delayed locking
feature is in use. The key must be
out of the ignition for this feature to
work. You can temporarily override
delayed locking by pressing the
power door lock switch twice or the
lock button on the RKE transmitter
twice. See Delayed Locking
on
page 2‑7for more information. Press the customization button until
DELAY DOOR LOCK appears on
the DIC display. Press the set/reset
button once to access the settings
for this feature. Then press the
customization button to scroll
through the following settings:
OFF:
There will be no delayed
locking of the vehicle's doors.
ON (default): The doors will not
lock until five seconds after the last
door or the liftgate is closed.
NO CHANGE: No change will be
made to this feature. The current
setting will remain.
To select a setting, press the set/
reset button while the desired
setting is displayed on the DIC.
EXIT LIGHTING
This feature allows you to select the
amount of time you want the
exterior lamps to remain on when it
is dark enough outside. This
happens after the key is turned from
ON/RUN to LOCK/OFF. Press the customization button until
EXIT LIGHTING appears on the DIC
display. Press the set/reset button
once to access the settings for
this feature. Then press the
customization button to scroll
through the following settings:
OFF:
The exterior lamps will not
turn on.
30 SECONDS (default): The
exterior lamps will stay on for
30 seconds.
1 MINUTE: The exterior lamps will
stay on for one minute.
2 MINUTES: The exterior lamps will
stay on for two minutes.
NO CHANGE: No change will be
made to this feature. The current
setting will remain.
To select a setting, press the set/
reset button while the desired
setting is displayed on the DIC.
Page 162 of 438
5-44 Instruments and Controls
APPROACH LIGHTING
This feature allows you to select
whether or not to have the exterior
lights turn on briefly during low light
periods after unlocking the vehicle
using the Remote Keyless Entry
(RKE) transmitter.
Press the customization button until
APPROACH LIGHTING appears on
the DIC display. Press the set/reset
button once to access the settings
for this feature. Then press the
customization button to scroll
through the following settings:
OFF:The exterior lights will not
turn on when you unlock the vehicle
with the RKE transmitter.
ON (default): If it is dark enough
outside, the exterior lights will turn
on briefly when you unlock the
vehicle with the RKE transmitter.
The lights will remain on for
20 seconds or until the lock button
on the RKE transmitter is pressed,
or the vehicle is no longer off. See
Remote Keyless Entry (RKE)
System Operationon page 2‑3for
more information.
NO CHANGE : No change will be
made to this feature. The current
setting will remain.
To select a setting, press the set/
reset button while the desired
setting is displayed on the DIC.
CHIME VOLUME
This feature allows you to select the
volume level of the chime.
Press the customization button until
CHIME VOLUME appears on the
DIC display. Press the set/reset
button once to access the settings
for this feature. Then press the
customization button to scroll
through the following settings:
NORMAL: The chime volume will
be set to a normal level.
LOUD: The chime volume will be
set to a loud level. NO CHANGE:
No change will be
made to this feature. The current
setting will remain.
There is no default for chime
volume. The volume will stay at the
last known setting.
To select a setting, press the set/
reset button while the desired
setting is displayed on the DIC.
PARK TILT MIRRORS
If your vehicle has this feature, it
allows you to select whether or
not the outside mirror(s) will
automatically tilt down when the
vehicle is shifted into R (Reverse).
See Park Tilt Mirrors
on page 2‑17for more information.
Page 172 of 438

6-2 Lighting
It controls the following systems:
.Headlamps
.Taillamps
.Parking Lamps
.License Plate Lamps
.Instrument Panel Lights
.Fog Lamps
The exterior lamps control has four
positions:
9(Off): Briefly turn to this position
to turn the automatic light control off
or on again.
AUTO (Automatic): Turns the
headlamps on automatically at
normal brightness, together with the
following:
.Parking Lamps
.Taillamps
.License Plate Lamps
.Instrument Panel Lights ;
(Parking Lamps): Turns the
parking lamps on together with the
following:
.Taillamps
.License Plate Lamps
.Instrument Panel Lights
2 (Headlamps): Turns the
headlamps on together with the
following lamps listed below.
A warning chime sounds if the
driver's door is opened when the
ignition switch is off and the
headlamps are on.
.Parking Lamps
.Taillamps
.License Plate Lamps
.Instrument Panel Lights
# (Fog Lamps): Push the fog
lamps control in to turn on the fog
lamps.
See Fog Lamps on page 6‑5.
Headlamp High/
Low-Beam Changer
2 3
Headlamp High/Low Beam
Changer: Push the turn signal/lane
change lever away from you to turn
the high beams on.
Pull the lever towards you to return
to low beams.
This indicator light turns on in the
instrument panel cluster when the
high beam headlamps are on.
Page 174 of 438
6-4 Lighting
Adaptive Forward
Lighting (AFL)
Vehicles with the Adaptive Forward
Lighting System (AFS) have
headlamps that swivel to the left or
right when making a turn to provide
better lighting. To enable AFS, set
the exterior lamp switch to the
AUTO position. Move the switch out
of the AUTO position to turn off the
system. SeeExterior Lamp Controls
on page 6‑1.
AFS operates when the vehicle
speed is greater than 2 mph
(3 km/h). AFS does not operate
when the transmission is in
R (Reverse). AFS is not immediately
operable after starting the vehicle;
driving a short distance is required
to calibrate the AFS.
Hazard Warning Flashers
|
Hazard Warning Flasher:
Press this button located on the
instrument panel below the audio
system, to make the front and rear turn signal lamps flash on and off.
This warns others that you are
having trouble. Press again to turn
the flashers off.
The turn signals do not work while
the hazard warning flashers are on.
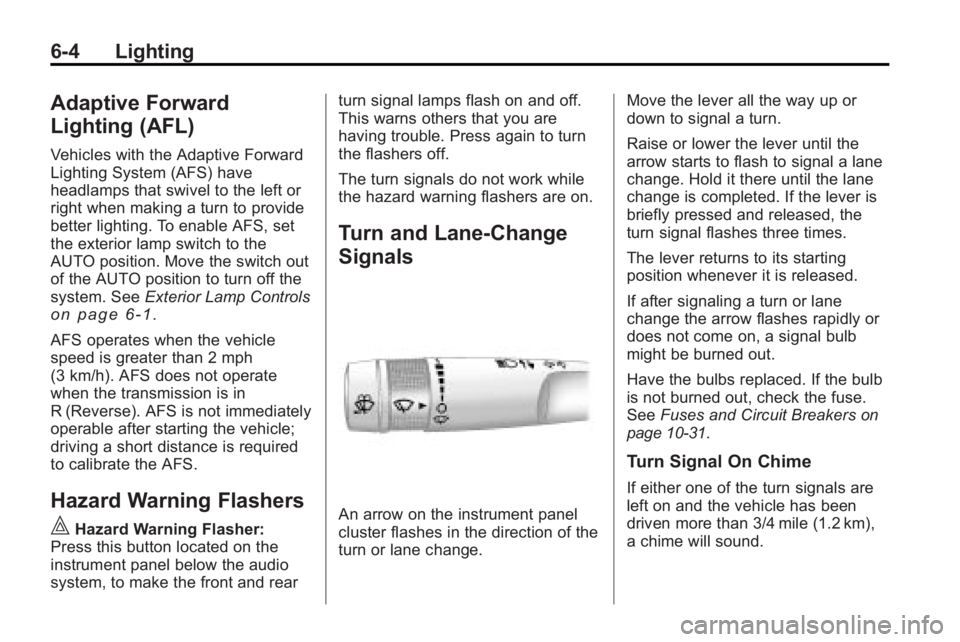
Turn and Lane-Change
Signals
An arrow on the instrument panel
cluster flashes in the direction of the
turn or lane change.
Move the lever all the way up or
down to signal a turn.
Raise or lower the lever until the
arrow starts to flash to signal a lane
change. Hold it there until the lane
change is completed. If the lever is
briefly pressed and released, the
turn signal flashes three times.
The lever returns to its starting
position whenever it is released.
If after signaling a turn or lane
change the arrow flashes rapidly or
does not come on, a signal bulb
might be burned out.
Have the bulbs replaced. If the bulb
is not burned out, check the fuse.
See
Fuses and Circuit Breakers
on
page 10‑31.
Turn Signal On Chime
If either one of the turn signals are
left on and the vehicle has been
driven more than 3/4 mile (1.2 km),
a chime will sound.
Page 270 of 438
9-28 Driving and Operating
Notice:Driving with the parking
brake on can overheat the brake
system and cause premature
wear or damage to brake system
parts. Make sure that the parking
brake is fully released and the
brake warning light is off before
driving.
To release the parking brake, hold
the regular brake pedal down, then
push down momentarily on the
parking brake pedal until you feel
the pedal release. Slowly pull your
foot up off the park brake pedal.
If the parking brake is not released
when you begin to drive, the brake
system warning light will be on and
a chime will sound warning you that
the parking brake is still on.
If you are towing a trailer and are
parking on a hill, see Trailer Towing
on page 9‑50.
Brake Assist
This vehicle has a Brake Assist
feature designed to assist the driver
in stopping or decreasing vehicle
speed in emergency driving
conditions. This feature uses the
stability system hydraulic brake
control module to supplement the
power brake system under
conditions where the driver has
quickly and forcefully applied the
brake pedal in an attempt to quickly
stop or slow down the vehicle. The
stability system hydraulic brake
control module increases brake
pressure at each corner of the
vehicle until the ABS activates.
Minor brake pedal pulsations or
pedal movement during this time is
normal and the driver should
continue to apply the brake pedal as
the driving situation dictates. The
Brake Assist feature will
automatically disengage when the
brake pedal is released or brake
pedal pressure is quickly
decreased.
Ride Control Systems
StabiliTrak System
The vehicle has the StabiliTrak
system which combines antilock
brake, traction and stability control
systems and helps the driver
maintain directional control of the
vehicle in most driving conditions.
When you first start the vehicle and
begin to drive away, the system
performs several diagnostic checks
to ensure there are no problems.
The system may be heard or felt
while it is working. This is normal
and does not mean there is a
problem with the vehicle. The
system should initialize before the
vehicle reaches 32 km/h (20 mph).
In some cases, it may take
approximately 3.2 km (2 miles) of
driving before the system initializes.
If the system fails to turn on or
activate, the StabiliTrak light along
with one of the following messages
Page 309 of 438
Vehicle Care 10-11
To reset the Engine Oil Life System:
1. Turn the ignition to ON/RUN,with the engine off.
2. Press the vehicle information button until OIL LIFE
REMAINING displays.
3. Press and hold the set/reset button until 100% is displayed.
Three chimes sound and the
CHANGE ENGINE OIL SOON
message goes off.
4. Turn the key to LOCK/OFF.
If the CHANGE ENGINE OIL SOON
message comes back on when the
vehicle is started, the engine oil life
system has not reset. Repeat the
procedure.What to Do with Used Oil
Used engine oil contains certain
elements that can be unhealthy for
your skin and could even cause
cancer. Do not let used oil stay on
your skin for very long. Clean your
skin and nails with soap and water,
or a good hand cleaner. Wash or
properly dispose of clothing or rags
containing used engine oil. See the
manufacturer's warnings about the
use and disposal of oil products.
Used oil can be a threat to the
environment. If you change your
own oil, be sure to drain all the oil
from the filter before disposal. Never
dispose of oil by putting it in the
trash, pouring it on the ground, into
sewers, or into streams or bodies of
water. Recycle it by taking it to a
place that collects used oil.
Automatic Transmission
Fluid
It is not necessary to check the
transmission fluid level.
A transmission fluid leak is the only
reason for fluid loss. If a leak
occurs, take the vehicle to the
dealer/retailer and have it repaired
as soon as possible.
Change the fluid at the intervals
listed in Scheduled Maintenance
on
page 11‑2, and be sure to use the
transmission fluid listed in
Recommended Fluids and
Lubricants on page 11‑7.