headlamp BUICK ENCLAVE 2010 User Guide
[x] Cancel search | Manufacturer: BUICK, Model Year: 2010, Model line: ENCLAVE, Model: BUICK ENCLAVE 2010Pages: 438, PDF Size: 2.47 MB
Page 158 of 438
5-40 Instruments and Controls
Vehicle
Personalization
Your vehicle may have
customization capabilities that allow
you to program certain features to
one preferred setting. Customization
features can only be programmed to
one setting on the vehicle and
cannot be programmed to a
preferred setting for two different
drivers.
All of the customization options may
not be available on your vehicle.
Only the options available will be
displayed on the DIC.
The default settings for the
customization features were set
when your vehicle left the factory,
but may have been changed from
their default state since then.
The customization preferences are
automatically recalled.
To change customization
preferences, use the following
procedure.
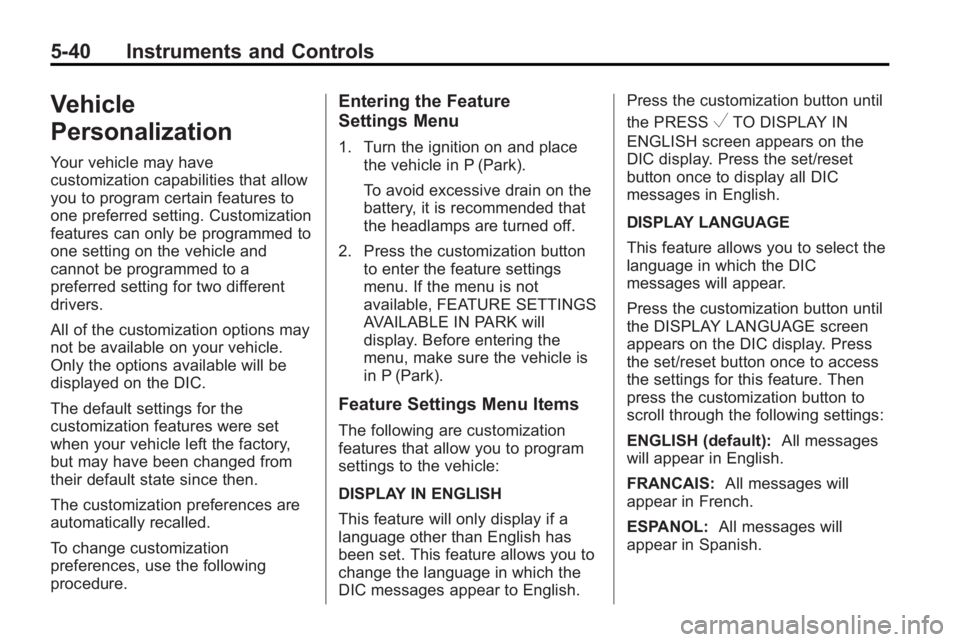
Entering the Feature
Settings Menu
1. Turn the ignition on and placethe vehicle in P (Park).
To avoid excessive drain on the
battery, it is recommended that
the headlamps are turned off.
2. Press the customization button to enter the feature settings
menu. If the menu is not
available, FEATURE SETTINGS
AVAILABLE IN PARK will
display. Before entering the
menu, make sure the vehicle is
in P (Park).
Feature Settings Menu Items
The following are customization
features that allow you to program
settings to the vehicle:
DISPLAY IN ENGLISH
This feature will only display if a
language other than English has
been set. This feature allows you to
change the language in which the
DIC messages appear to English. Press the customization button until
the PRESS
VTO DISPLAY IN
ENGLISH screen appears on the
DIC display. Press the set/reset
button once to display all DIC
messages in English.
DISPLAY LANGUAGE
This feature allows you to select the
language in which the DIC
messages will appear.
Press the customization button until
the DISPLAY LANGUAGE screen
appears on the DIC display. Press
the set/reset button once to access
the settings for this feature. Then
press the customization button to
scroll through the following settings:
ENGLISH (default): All messages
will appear in English.
FRANCAIS: All messages will
appear in French.
ESPANOL: All messages will
appear in Spanish.
Page 171 of 438
Lighting 6-1
Lighting
Exterior Lighting
Exterior Lamp Controls . . . . . . . . 6-1
Headlamp High/Low-BeamChanger . . . . . . . . . . . . . . . . . . . . . 6-2
Flash-to-Pass . . . . . . . . . . . . . . . . . 6-3
Daytime Running Lamps (DRL)/Automatic Headlamp
System . . . . . . . . . . . . . . . . . . . . . . 6-3
Delayed Headlamps . . . . . . . . . . 6-3
Adaptive Forward Lighting (AFL) . . . . . . . . . . . . . . . 6-4
Hazard Warning Flashers . . . . . 6-4
Turn and Lane-Change Signals . . . . . . . . . . . . . . . . . . . . . . 6-4
Fog Lamps . . . . . . . . . . . . . . . . . . . . 6-5
Interior Lighting
Instrument Panel Illumination Control . . . . . . . . . . . . . . . . . . . . . . 6-5
Dome Lamps . . . . . . . . . . . . . . . . . 6-5
Reading Lamps . . . . . . . . . . . . . . . 6-5
Lighting Features
Entry Lighting . . . . . . . . . . . . . . . . . 6-6
Delayed Entry Lighting . . . . . . . . 6-6
Delayed Exit Lighting . . . . . . . . . 6-6
Parade Dimming . . . . . . . . . . . . . . 6-7
Battery Load Management . . . . 6-7
Battery Power Protection . . . . . . 6-8
Exterior Lighting
Exterior Lamp Controls
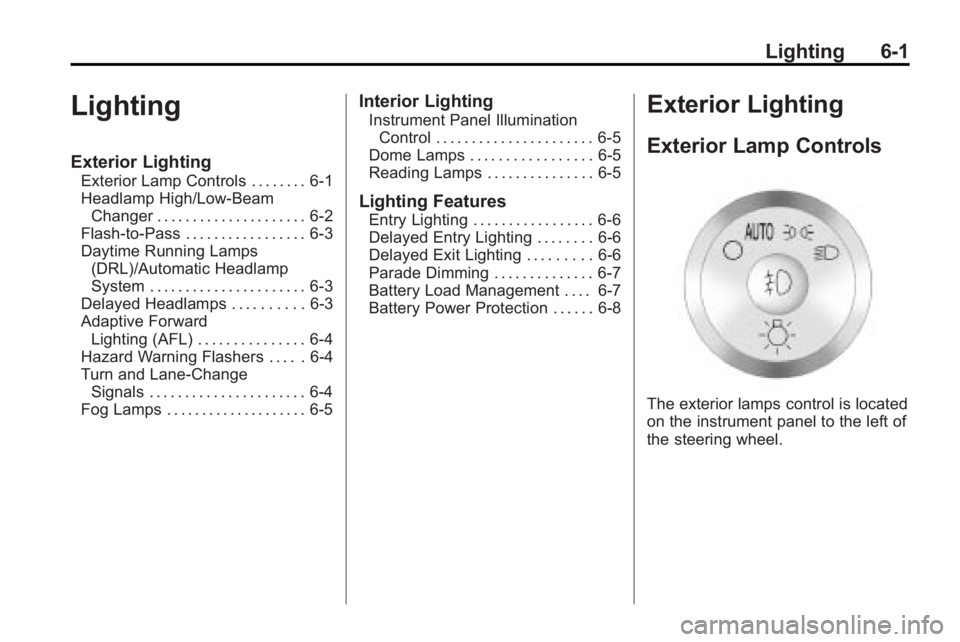
The exterior lamps control is located
on the instrument panel to the left of
the steering wheel.
Page 172 of 438

6-2 Lighting
It controls the following systems:
.Headlamps
.Taillamps
.Parking Lamps
.License Plate Lamps
.Instrument Panel Lights
.Fog Lamps
The exterior lamps control has four
positions:
9(Off): Briefly turn to this position
to turn the automatic light control off
or on again.
AUTO (Automatic): Turns the
headlamps on automatically at
normal brightness, together with the
following:
.Parking Lamps
.Taillamps
.License Plate Lamps
.Instrument Panel Lights ;
(Parking Lamps): Turns the
parking lamps on together with the
following:
.Taillamps
.License Plate Lamps
.Instrument Panel Lights
2 (Headlamps): Turns the
headlamps on together with the
following lamps listed below.
A warning chime sounds if the
driver's door is opened when the
ignition switch is off and the
headlamps are on.
.Parking Lamps
.Taillamps
.License Plate Lamps
.Instrument Panel Lights
# (Fog Lamps): Push the fog
lamps control in to turn on the fog
lamps.
See Fog Lamps on page 6‑5.
Headlamp High/
Low-Beam Changer
2 3
Headlamp High/Low Beam
Changer: Push the turn signal/lane
change lever away from you to turn
the high beams on.
Pull the lever towards you to return
to low beams.
This indicator light turns on in the
instrument panel cluster when the
high beam headlamps are on.
Page 173 of 438

Lighting 6-3
Flash-to-Pass
This feature is used to signal to the
vehicle ahead that you want
to pass.
If the headlamps are off or in the
low-beam position, pull the turn
signal lever toward you to
momentarily switch to high-beams.
Release the lever to turn the
high-beam headlamps off.
Daytime Running Lamps
(DRL)/Automatic
Headlamp System
Daytime Running Lamps (DRL) can
make it easier for others to see the
front of your vehicle during the day.
Fully functional daytime running
lamps are required on all vehicles
first sold in Canada.
A light sensor on top of the
instrument panel makes the DRL
work, so do not cover the sensor.The DRL system's automatic control
makes the DRL lights come on
when the following conditions
are met:
.The ignition is in the ON/RUN
position.
.The exterior lamps control is
in AUTO.
.The engine is running.
When the DRL are on, only the DRL
lights will be on. The headlamps,
taillamps, sidemarker, and other
lamps will not be on. The instrument
panel and cluster will also not be lit.
When it is dark enough outside, the
DRL lights will turn off and the
headlamps and parking lamps will
turn on. The other lamps that come
on with the headlamps will also
come on.
When it is bright enough outside,
the headlamps will go off and the
DRL will come on.
The regular headlamp system
should be turned on when it is
needed.
Delayed Headlamps
Delayed headlamps provide a
period of exterior lighting as you
leave the area around the vehicle.
This feature is activated when the
headlamps are on due to the
automatic headlamps control
feature, and when the ignition is
turned off. The headlamps remain
on until the exterior lamps control is
moved to the parking lamps position
or until the pre-selected delayed
headlamp lighting period has ended.
If the ignition is turned off with the
exterior lamp control in the parking
lamps or headlamps position, the
delayed headlamps cycle will not
occur.
To disable the delayed headlamps
feature or change the time of delay,
see Vehicle Personalization
on
page 5‑40.
Page 174 of 438
6-4 Lighting
Adaptive Forward
Lighting (AFL)
Vehicles with the Adaptive Forward
Lighting System (AFS) have
headlamps that swivel to the left or
right when making a turn to provide
better lighting. To enable AFS, set
the exterior lamp switch to the
AUTO position. Move the switch out
of the AUTO position to turn off the
system. SeeExterior Lamp Controls
on page 6‑1.
AFS operates when the vehicle
speed is greater than 2 mph
(3 km/h). AFS does not operate
when the transmission is in
R (Reverse). AFS is not immediately
operable after starting the vehicle;
driving a short distance is required
to calibrate the AFS.
Hazard Warning Flashers
|
Hazard Warning Flasher:
Press this button located on the
instrument panel below the audio
system, to make the front and rear turn signal lamps flash on and off.
This warns others that you are
having trouble. Press again to turn
the flashers off.
The turn signals do not work while
the hazard warning flashers are on.
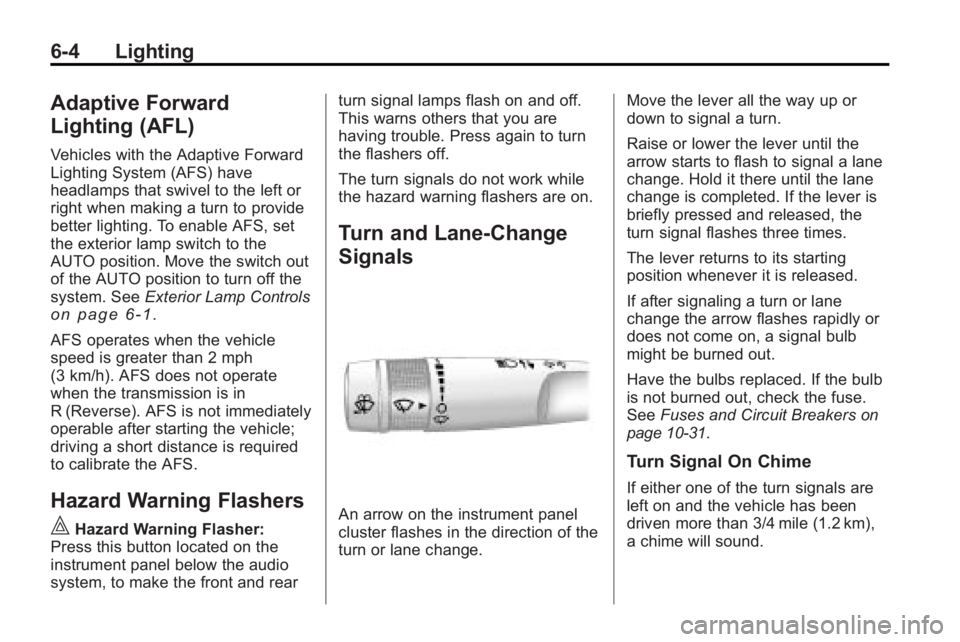
Turn and Lane-Change
Signals
An arrow on the instrument panel
cluster flashes in the direction of the
turn or lane change.
Move the lever all the way up or
down to signal a turn.
Raise or lower the lever until the
arrow starts to flash to signal a lane
change. Hold it there until the lane
change is completed. If the lever is
briefly pressed and released, the
turn signal flashes three times.
The lever returns to its starting
position whenever it is released.
If after signaling a turn or lane
change the arrow flashes rapidly or
does not come on, a signal bulb
might be burned out.
Have the bulbs replaced. If the bulb
is not burned out, check the fuse.
See
Fuses and Circuit Breakers
on
page 10‑31.
Turn Signal On Chime
If either one of the turn signals are
left on and the vehicle has been
driven more than 3/4 mile (1.2 km),
a chime will sound.
Page 175 of 438
Lighting 6-5
Fog Lamps
Use the fog lamps for better vision
in foggy or misty conditions.
The fog lamps button is on the
exterior lamps control to the left of
the steering column.
#(Fog Lamps):Press the exterior
lamps button to turn the fog lamps
on or off. A light comes on in the
instrument panel cluster when the
fog lamps are in use. The ignition
must be on for the fog lamps
to work.
When the headlamps are changed
to high-beam, the fog lamps turn off.
The fog lamps come back on again
when the high-beam headlamps are
turned off.
Some localities have laws that
require the headlamps to be on
along with the fog lamps.
Interior Lighting
Instrument Panel
Illumination Control
D
(Instrument Panel
Brightness): The knob with this
symbol on it is next to the exterior
lamps control to the left of the
steering wheel. Push the knob in
all the way until it extends out and
then turn the knob clockwise or
counterclockwise to brighten or dim
the lights. Push the knob back in
when finished.
Dome Lamps
The dome lamps are located in the
overhead console and above the
rear seat passengers.
The dome lamps automatically
come on when a door is opened,
unless the dome lamp override
button is pressed in. The lamps can also be turned on
and off by turning the instrument
panel brightness control clockwise
to the farthest position.
Dome Lamp Override
The dome lamp override button is
next to the exterior lamps control.
E
(Dome Lamp Override): Press
the button in and the dome lamps
remain off when a door is opened.
Press the button again to return it to
the extended position so that the
dome lamps come on when a door
is opened.
Reading Lamps
Press the button near each lamp to
turn them on or off.
Page 177 of 438
Lighting 6-7
Parade Dimming
This feature automatically prohibits
the dimming of the instrument panel
displays in daylight while the
headlamps are on so that the
displays are still able to be seen.
Battery Load
Management
The vehicle has Electric Power
Management (EPM) that estimates
the battery's temperature and state
of charge. It then adjusts the voltage
for best performance and extended
life of the battery.
When the battery's state of charge
is low, the voltage is raised slightly
to quickly bring the charge back up.
When the state of charge is high,
the voltage is lowered slightly to
prevent overcharging. If the vehicle
has a voltmeter gage or a voltage
display on the Driver Information
Center (DIC), you may see thevoltage move up or down. This is
normal. If there is a problem, an
alert will be displayed.
The battery can be discharged at
idle if the electrical loads are very
high. This is true for all vehicles.
This is because the generator
(alternator) may not be spinning fast
enough at idle to produce all the
power that is needed for very high
electrical loads.
A high electrical load occurs when
several of the following are on, such
as: headlamps, high beams, fog
lamps, rear window defogger,
climate control fan at high speed,
heated seats, engine cooling fans,
trailer loads, and loads plugged into
accessory power outlets.
EPM works to prevent excessive
discharge of the battery. It does this
by balancing the generator's output
and the vehicle's electrical needs.
It can increase engine idle speed to
generate more power, whenever
needed. It can temporarily reduce
the power demands of some
accessories.
Normally, these actions occur in
steps or levels, without being
noticeable. In rare cases at the
highest levels of corrective action,
this action may be noticeable to the
driver. If so, a Driver Information
Center (DIC) message might be
displayed, such as BATTERY
SAVER ACTIVE, BATTERY
VOLTAGE LOW, or LOW BATTERY.
If one of these messages displays,
it is recommended that the driver
reduce the electrical loads as much
as possible. See
Driver Information
Center (DIC) on page 5‑25.
Page 178 of 438
6-8 Lighting
Battery Power Protection
This feature helps prevent the
battery from being drained, if the
interior courtesy lamps, reading/map
lamps, visor vanity lamps or trunk
lamp are accidentally left on. If any
of these lamps are left on, they
automatically turn off after
10 minutes, if the ignition is off. The
lamps will not come back on again
until one of the following occurs:
.The ignition is turned on.
.The exterior lamps control is
turned off, then on again.
The headlamps will timeout after
10 minutes, if they are manually
turned on while the ignition is on
or off.
Page 253 of 438
Driving and Operating 9-11
Repeat this until help arrives but
only when you feel really
uncomfortable from the cold. Moving
about to keep warm also helps.
If it takes some time for help to
arrive, now and then when you run
the engine, push the accelerator
pedal slightly so the engine runs
faster than the idle speed. This
keeps the battery charged to restart
the vehicle and to signal for help
with the headlamps. Do this as little
as possible to save fuel.
If the Vehicle is Stuck
Slowly and cautiously spin the
wheels to free the vehicle when
stuck in sand, mud, ice, or snow.
If the vehicle has a traction system,
it can often help to free a stuck
vehicle. Refer to the vehicle's
traction system in the Index.If stuck too severely for the traction
system to free the vehicle, turn the
traction system off and use the
rocking method.
{WARNING
If the vehicle's tires spin at high
speed, they can explode, and you
or others could be injured. The
vehicle can overheat, causing an
engine compartment fire or other
damage. Spin the wheels as little
as possible and avoid going
above 55 km/h (35 mph) as
shown on the speedometer.
For information about using tire
chains on the vehicle, see Tire
Chains on page 10‑57.
Rocking the Vehicle to Get
it Out
Turn the steering wheel left and
right to clear the area around the
front wheels. Turn off any traction or
stability system. Shift back and forth
between R (Reverse) and a forward
gear, spinning the wheels as little as
possible. To prevent transmission
wear, wait until the wheels stop
spinning before shifting gears.
Release the accelerator pedal while
shifting, and press lightly on the
accelerator pedal when the
transmission is in gear. Slowly
spinning the wheels in the forward
and reverse directions causes a
rocking motion that could free the
vehicle. If that does not get the
vehicle out after a few tries, it might
need to be towed out. If the vehicle
does need to be towed out, see
Towing the Vehicle on page 10‑85.
Page 297 of 438

Driving and Operating 9-55
They should be connected by your
dealer/retailer or a qualified service
center.
If the back-up lamp circuit is not
functional, contact your dealer/
retailer.
If a remote (non-vehicle) battery is
being charged, press the Tow/Haul
mode switch located on the center
console near the climate controls.
This will boost the vehicle system
voltage and properly charge the
battery. If the trailer is too light for
Tow/Haul mode, turn on the
headlamps (Non-HID only) as a
second way to boost the vehicle
system and charge the battery.Electric Trailer Brake Control
Wiring Provisions
These wiring provisions for an
electric trailer brake controller are
included with the vehicle as part of
the trailer wiring package. The
instrument panel contains blunt cut
wires behind the steering column for
the electric trailer brake controller.
The harness contains the following
wires:
.Red/Black: Power Supply
.White: Brake Switch Signal
.Gray: Illumination
.Dark Blue: Trailer Brake Signal
.Black: Ground
The electric trailer brake controller
should be installed by your dealer/
retailer or a qualified service center.
Conversions and
Add-Ons
Add-On Electrical
Equipment
Notice: Do not add anything
electrical to the vehicle unless
you check with your dealer/
retailer first. Some electrical
equipment can damage the
vehicle and the damage would
not be covered by the vehicle's
warranty. Some add-on electrical
equipment can keep other
components from working as
they should.
Add-on equipment can drain the
vehicle battery, even if the vehicle is
not operating.
The vehicle has an airbag system.
Before attempting to add anything
electrical to the vehicle, see
Servicing the Airbag-Equipped
Vehicle
on page 3‑41and Adding
Equipment to the Airbag-Equipped
Vehicle on page 3‑42.