steering BUICK ENCLAVE 2010 Service Manual
[x] Cancel search | Manufacturer: BUICK, Model Year: 2010, Model line: ENCLAVE, Model: BUICK ENCLAVE 2010Pages: 438, PDF Size: 2.47 MB
Page 290 of 438
9-48 Driving and Operating
Following Distance
Stay at least twice as far behind the
vehicle ahead as you would when
driving the vehicle without a trailer.
This can help to avoid situations
that require heavy braking and
sudden turns.
Passing
More passing distance is needed
when towing a trailer. Because the
rig is longer, it is necessary to go
farther beyond the passed vehicle
before returning to the lane.
Backing Up
Hold the bottom of the steering
wheel with one hand. To move the
trailer to the left, move that hand to
the left. To move the trailer to the
right, move your hand to the right.
Always back up slowly and,
if possible, have someone
guide you.
Making Turns
Notice:Making very sharp turns
while trailering could cause the
trailer to come in contact with the
vehicle. The vehicle could be
damaged. Avoid making very
sharp turns while trailering.
When turning with a trailer, make
wider turns than normal so the
trailer will not strike soft shoulders,
curbs, road signs, trees or other
objects. Use the turn signal well in
advance and avoid jerky or sudden
maneuvers.
Turn Signals When Towing a
Trailer
The turn signal indicators on the
instrument panel flash whenever
signaling a turn or lane change.
Properly hooked up, the trailer
lamps also flash, telling other
drivers the vehicle is turning,
changing lanes or stopping. When towing a trailer, the arrows on
the instrument panel flash for turns
even if the bulbs on the trailer are
burned out. Check occasionally to
be sure the trailer bulbs are still
working.
Driving On Grades
Reduce speed and shift to a
lower gear before starting down a
long or steep downgrade. If the
transmission is not shifted down, the
brakes might have to be used so
much that they would get hot and no
longer work well.
The vehicle can tow in D (Drive).
Use a lower gear if the transmission
shifts too often.
Page 297 of 438

Driving and Operating 9-55
They should be connected by your
dealer/retailer or a qualified service
center.
If the back-up lamp circuit is not
functional, contact your dealer/
retailer.
If a remote (non-vehicle) battery is
being charged, press the Tow/Haul
mode switch located on the center
console near the climate controls.
This will boost the vehicle system
voltage and properly charge the
battery. If the trailer is too light for
Tow/Haul mode, turn on the
headlamps (Non-HID only) as a
second way to boost the vehicle
system and charge the battery.Electric Trailer Brake Control
Wiring Provisions
These wiring provisions for an
electric trailer brake controller are
included with the vehicle as part of
the trailer wiring package. The
instrument panel contains blunt cut
wires behind the steering column for
the electric trailer brake controller.
The harness contains the following
wires:
.Red/Black: Power Supply
.White: Brake Switch Signal
.Gray: Illumination
.Dark Blue: Trailer Brake Signal
.Black: Ground
The electric trailer brake controller
should be installed by your dealer/
retailer or a qualified service center.
Conversions and
Add-Ons
Add-On Electrical
Equipment
Notice: Do not add anything
electrical to the vehicle unless
you check with your dealer/
retailer first. Some electrical
equipment can damage the
vehicle and the damage would
not be covered by the vehicle's
warranty. Some add-on electrical
equipment can keep other
components from working as
they should.
Add-on equipment can drain the
vehicle battery, even if the vehicle is
not operating.
The vehicle has an airbag system.
Before attempting to add anything
electrical to the vehicle, see
Servicing the Airbag-Equipped
Vehicle
on page 3‑41and Adding
Equipment to the Airbag-Equipped
Vehicle on page 3‑42.
Page 299 of 438
Vehicle Care 10-1
Vehicle Care
General Information
General Information . . . . . . . . . . 10-2
California Proposition65 Warning . . . . . . . . . . . . . . . . . 10-3
California Perchlorate Materials Requirements . . . . 10-3
Accessories and Modifications . . . . . . . . . . . . . . . 10-3
Vehicle Checks
Doing Your OwnService Work . . . . . . . . . . . . . . . 10-4
Hood . . . . . . . . . . . . . . . . . . . . . . . . 10-4
Engine Compartment Overview . . . . . . . . . . . . . . . . . . . 10-6
Engine Cover . . . . . . . . . . . . . . . . 10-7
Engine Oil . . . . . . . . . . . . . . . . . . . 10-8
Engine Oil Life System . . . . . 10-10
Automatic Transmission Fluid . . . . . . . . . . . . . . . . . . . . . . 10-11
Engine Air Cleaner/Filter . . . . 10-12
Cooling System . . . . . . . . . . . . 10-14
Engine Coolant . . . . . . . . . . . . . 10-14
Engine Overheating . . . . . . . . 10-18 Overheated Engine
Protection
Operating Mode . . . . . . . . . . . 10-20
Power Steering Fluid . . . . . . . 10-20
Washer Fluid . . . . . . . . . . . . . . . 10-21
Brakes . . . . . . . . . . . . . . . . . . . . . 10-22
Brake Fluid . . . . . . . . . . . . . . . . . 10-23
Battery . . . . . . . . . . . . . . . . . . . . . 10-25
All-Wheel Drive . . . . . . . . . . . . . 10-25
Starter Switch Check . . . . . . . 10-25
Automatic Transmission Shift Lock Control System
Check . . . . . . . . . . . . . . . . . . . . . 10-26
Ignition Transmission Lock Check . . . . . . . . . . . . . . . . . . . . . 10-26
Park Brake and P (Park) Mechanism Check . . . . . . . . 10-26
Wiper Blade Replacement . . . . . . . . . . . . . . 10-27
Windshield Replacement . . . 10-28
Headlamp Aiming
Headlamp Aiming . . . . . . . . . . 10-28
Bulb Replacement
Bulb Replacement . . . . . . . . . . 10-28
Halogen Bulbs . . . . . . . . . . . . . . 10-28
High Intensity Discharge (HID) Lighting . . . . . . . . . . . . . 10-29 Taillamps, Turn Signal,
Sidemarker, and
Stoplamps . . . . . . . . . . . . . . . . 10-29
License Plate Lamp . . . . . . . . 10-30
Replacement Bulbs . . . . . . . . . 10-30
Electrical System
High Voltage Devices and Wiring . . . . . . . . . . . . . . . . . . . . . 10-30
Electrical System Overload . . . . . . . . . . . . . . . . . . 10-31
Fuses and Circuit Breakers . . . . . . . . . . . . . . . . . . 10-31
Engine Compartment Fuse Block . . . . . . . . . . . . . . . . . . . . . 10-31
Instrument Panel Fuse Block . . . . . . . . . . . . . . . . . . . . . 10-35
Wheels and Tires
Tires . . . . . . . . . . . . . . . . . . . . . . . . 10-37
Tire Sidewall Labeling . . . . . . 10-38
Tire Designations . . . . . . . . . . . 10-40
Tire Terminology and
Definitions . . . . . . . . . . . . . . . . 10-41
Tire Pressure . . . . . . . . . . . . . . . 10-44
Tire Pressure Monitor System . . . . . . . . . . . . . . . . . . . 10-45
Tire Pressure Monitor Operation . . . . . . . . . . . . . . . . . 10-46
Page 305 of 438
Vehicle Care 10-7
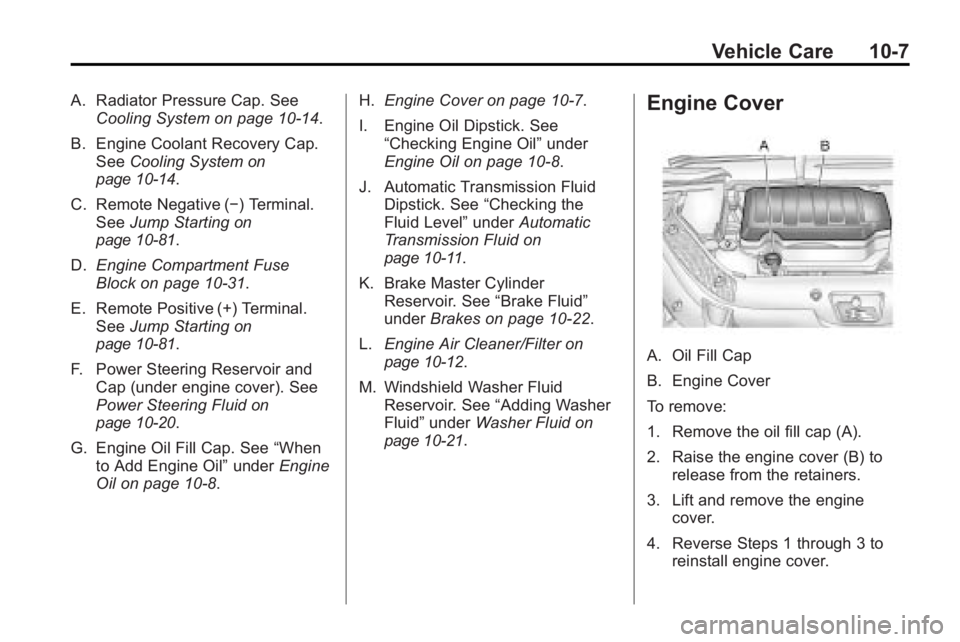
A. Radiator Pressure Cap. SeeCooling System on page 10‑14.
B. Engine Coolant Recovery Cap. See Cooling System
on
page 10‑14.
C. Remote Negative (−) Terminal. See Jump Starting
on
page 10‑81.
D. Engine Compartment Fuse
Block on page 10‑31.
E. Remote Positive (+) Terminal. See Jump Starting
on
page 10‑81.
F. Power Steering Reservoir and Cap (under engine cover). See
Power Steering Fluid
on
page 10‑20.
G. Engine Oil Fill Cap. See “When
to Add Engine Oil” underEngine
Oil on page 10‑8. H.
Engine Cover on page 10‑7.
I. Engine Oil Dipstick. See “Checking Engine Oil” under
Engine Oil on page 10‑8.
J. Automatic Transmission Fluid Dipstick. See “Checking the
Fluid Level” underAutomatic
Transmission Fluid
on
page 10‑11.
K. Brake Master Cylinder Reservoir. See “Brake Fluid”
under Brakes on page 10‑22.
L. Engine Air Cleaner/Filter
on
page 10‑12.
M. Windshield Washer Fluid Reservoir. See “Adding Washer
Fluid” under Washer Fluid
on
page 10‑21.
Engine Cover
A. Oil Fill Cap
B. Engine Cover
To remove:
1. Remove the oil fill cap (A).
2. Raise the engine cover (B) to release from the retainers.
3. Lift and remove the engine cover.
4. Reverse Steps 1 through 3 to reinstall engine cover.
Page 318 of 438
10-20 Vehicle Care
If the overheat warning is displayed
with no sign of steam:
1. Turn the air conditioning off.
2. Turn the heater on to the highesttemperature and to the highest
fan speed. Open the windows as
necessary.
3. If in a traffic jam, shift to N (Neutral), otherwise, shift to
the highest gear while
driving —D (Drive) or L (Low).
If the temperature overheat gage is
no longer in the overheat zone or an
overheat warning no longer
displays, the vehicle can be driven.
Continue to drive the vehicle slow
for about 10 minutes. Keep a safe
vehicle distance from the car in front
of you. If the warning does not come
back on, continue to drive normally.
If the warning continues, pull over,
stop, and park the vehicle
right away. If there is no sign of steam, idle the
engine for three minutes while
parked. If the warning is still
displayed, turn off the engine until it
cools down. Also, see
“Overheated
Engine Protection Operating Mode”
next in this section.
Overheated Engine
Protection
Operating Mode
This emergency operating mode lets
the vehicle be driven to a safe place
in an emergency situation. If an
overheated engine condition exists,
an overheat protection mode which
alternates firing groups of cylinders
helps prevent engine damage. In
this mode, there is a significant loss
in power and engine performance.
The temperature gage indicates an
overheat condition exists. Driving
extended distances and/or towing a
trailer in the overheat protection
mode should be avoided. Notice:
After driving in the
overheated engine protection
operating mode, to avoid engine
damage, allow the engine to cool
before attempting any repair. The
engine oil will be severely
degraded. Repair the cause of
coolant loss, change the oil and
reset the oil life system. See
Engine Oil on page 10‑8.
Power Steering Fluid
The power steering fluid reservoir is
located under the engine cover on
the passenger side of the vehicle.
See Engine Compartment Overview
on page 10‑6for reservoir location.
Page 319 of 438

Vehicle Care 10-21
When to Check Power Steering
Fluid
It is not necessary to regularly
check power steering fluid unless
you suspect there is a leak in the
system or you hear an unusual
noise. A fluid loss in this system
could indicate a problem. Have the
system inspected and repaired.
How to Check Power Steering
Fluid
To check the power steering fluid:
1. Turn the key off and let theengine compartment cool down.
2. Remove the engine cover. See Engine Cover on page 10‑7.
3. Wipe the cap and the top of the reservoir clean. 4. Unscrew the cap and wipe the
dipstick with a clean rag.
5. Replace the cap and completely tighten it.
6. Remove the cap again and look at the fluid level on the dipstick.
The fluid level should be
somewhere between MAX and
MIN line on the dipstick in room
temperature. If the fluid is on or
below MIN line, you should add fluid
close to MAX Line.
What to Use
To determine what kind of fluid to
use, see Recommended Fluids and
Lubricants
on page 11‑7. Always
use the proper fluid. Notice:
Use of the incorrect fluid
may damage the vehicle and the
damages may not be covered by
the vehicle's warranty. Always
use the correct fluid listed in
Recommended Fluids and
Lubricants on page 11‑7.
Washer Fluid
What to Use
When adding windshield washer
fluid, be sure to read the
manufacturer's instructions before
use. If the vehicle will be operating
in an area where the temperature
may fall below freezing, use a fluid
that has sufficient protection against
freezing.
Page 334 of 438

10-36 Vehicle Care
FusesUsage
HVAC Heating,
Ventilation and
Air Conditioning
INADV/
PWR/LED Inadvertent
Power LED
INFOTMNT Infotainment
LT/TRN/SIG Driver Side Turn
Signal
MSM Memory Seat
Module
PDM Power Mirrors,
Liftgate Release
PWR MODE Power Mode
PWR/MIR Power Mirrors RDO Radio
REAR WPR Rear Wiper
RT/TRN/SIG Passenger Side
Turn Signal
SPARE Spare
STR/WHL/ ILLUM Steering Wheel
Illumination
Relay Side Relays Usage
LT/PWR/ SEAT Driver Side Power
Seat Relay
RT/PWR/ SEAT Passenger Side
Power Seat Relay
PWR/WNDW Power Windows
Relay
PWR/
COLUMN Power Steering
Column Relay
L/GATE Liftgate Relay
LCK Power Lock Relay
REAR/WSW Rear Window
Washer Relay
UNLCK Power Unlock
Relay
Page 339 of 438
Vehicle Care 10-41
(E) Rim Diameter:Diameter of
the wheel in inches.
(F) Service Description
:These
characters represent the load
index and speed rating of the
tire. The load index represents
the load carry capacity a tire is
certified to carry. The speed
rating is the maximum speed a
tire is certified to carry a load.
Tire Terminology and
Definitions
Air Pressure:The amount of
air inside the tire pressing
outward on each square inch of
the tire. Air pressure is
expressed in psi (pounds per
square inch) or kPa (kilopascal). Accessory Weight
:This
means the combined weight
of optional accessories.
Some examples of optional
accessories are, automatic
transmission, power steering,
power brakes, power windows,
power seats, and air
conditioning.
Aspect Ratio
:The relationship
of a tire's height to its width.
Belt
:A rubber coated layer of
cords that is located between
the plies and the tread. Cords
may be made from steel or other
reinforcing materials.
Bead
:The tire bead contains
steel wires wrapped by steel
cords that hold the tire onto
the rim. Bias Ply Tire
:A pneumatic tire
in which the plies are laid at
alternate angles less than
90 degrees to the centerline of
the tread.
Cold Tire Pressure
:The
amount of air pressure in a tire,
measured in psi (pounds per
square inch) or kPa (kilopascal)
before a tire has built up heat
from driving. See Tire Pressure
on page 10‑44.
Curb Weight
:The weight of a
motor vehicle with standard and
optional equipment including the
maximum capacity of fuel, oil,
and coolant, but without
passengers and cargo.
Page 356 of 438

10-58 Vehicle Care
If a Tire Goes Flat
It is unusual for a tire to blowout
while you are driving, especially if
you maintain your vehicle's tires
properly. If air goes out of a tire, it is
much more likely to leak out slowly.
But if you should ever have a
blowout, here are a few tips about
what to expect and what to do:
If a front tire fails, the flat tire
creates a drag that pulls the vehicle
toward that side. Take your foot off
the accelerator pedal and grip the
steering wheel firmly. Steer to
maintain lane position, and then
gently brake to a stop well out of the
traffic lane.A rear blowout, particularly on a
curve, acts much like a skid and
may require the same correction
you would use in a skid. In any rear
blowout remove your foot from the
accelerator pedal. Get the vehicle
under control by steering the
way you want the vehicle to go.
It may be very bumpy and noisy, but
you can still steer. Gently brake to a
stop, well off the road if possible.{WARNING
Lifting a vehicle and getting
under it to do maintenance or
repairs is dangerous without the
appropriate safety equipment and
training. If a jack is provided with
the vehicle, it is designed only for
changing a flat tire. If it is used for
anything else, you or others could
be badly injured or killed if the
vehicle slips off the jack. If a jack
is provided with the vehicle, only
use it for changing a flat tire.
If a tire goes flat, avoid further tire
and wheel damage by driving slowly
to a level place. Turn on the hazard
warning flashers. See Hazard
Warning Flashers on page 6‑4.
Page 386 of 438

10-88 Vehicle Care
4. Clamp the steering wheel in astraight-ahead position with a
clamping device designed for
towing.
5. Remove the key from the ignition.
6. Secure the vehicle to the dolly.
7. Release the parking brake.
Towing the Vehicle From
the Rear
Notice: Towing the vehicle from
the rear could damage it. Also,
repairs would not be covered by
the vehicle warranty. Never have
the vehicle towed from the rear.
Do not tow the vehicle from the rear.
Appearance Care
Exterior Care
Cleaning Exterior Lamps/
Lenses
Use only lukewarm or cold water, a
soft cloth and a car washing soap to
clean exterior lamps and lenses.
Follow instructions under “Washing
the Vehicle” later in this section.
Finish Care
Occasional waxing or mild polishing
of the vehicle by hand may be
necessary to remove residue from
the paint finish. Approved cleaning
products can be obtained from your
dealer/retailer.
If the vehicle has a basecoat/
clearcoat paint finish, the clearcoat
gives more depth and gloss to the
colored basecoat. Always use
waxes and polishes that are
non-abrasive and made for a
basecoat/clearcoat paint finish.