lock BUICK ENCLAVE 2010 Workshop Manual
[x] Cancel search | Manufacturer: BUICK, Model Year: 2010, Model line: ENCLAVE, Model: BUICK ENCLAVE 2010Pages: 438, PDF Size: 2.47 MB
Page 127 of 438
Instruments and Controls 5-9
Enabling/Disabling the Digital
Radio Clock
To enable or disable the radio clock
display:
1. Press
Huntil the clock and date
setting menus appear.
2. Press the pushbutton located under the forward arrow label
until the menu for default clock
and date settings appear.
3. Press the pushbutton located under the currently displayed
status of either ON or OFF to
toggle the radio clock display on
or off. The ON display indicates
the radio clock display is
disabled and the OFF display
indicates the radio clock display
is enabled.
.If the radio clock display is
turned on, the screen
displays Radio Clock ON
for 10 seconds, then returns
to the original clock
display menu.
.If the radio clock display is
turned off, the screen
displays Radio Clock OFF
for 10 seconds. The menus
for clock and date settings
are removed, and ON
displays as a current status
indicating that the clock
display can be turned on.
If the radio clock and analog clock
are not synchronized. Use the
procedure below to synchronize
both clocks.
Setting the Digital Radio Clock
Adjusting the Time and Date
1. Turn the ignition key to ACC/ ACCESSORY or ON/RUN, then
press
O, to turn the radio on.
2. Press
Gto display HR, MIN,
MM, DD, YYYY (hour, minute,
month, day, and year). 3. Press the pushbutton located
under any one of the labels to be
changed.
4. To increase the time or date, do one of the following:
.Press the pushbutton below
the selected label.
.Press¨SEEK.
.Press\FWD.
.Turnfclockwise.
5. To decrease the time or date, do one of the following:
.Press©SEEK.
.PresssREV.
.Turnfcounter-clockwise.
Page 129 of 438
Instruments and Controls 5-11
When adding electrical equipment,
be sure to follow the proper
installation instructions included with
the equipment.
Notice:Improper use of the
power outlet can cause damage
not covered by the vehicle
warranty. Do not hang any type of
accessory or accessory bracket
from the plug because the power
outlets are designed for
accessory power plugs only.
Power Outlet 120 Volt
Alternative Current
The vehicle may have a power
outlet that can be used to plug in
electrical equipment that uses a
maximum limit of 150 watts.
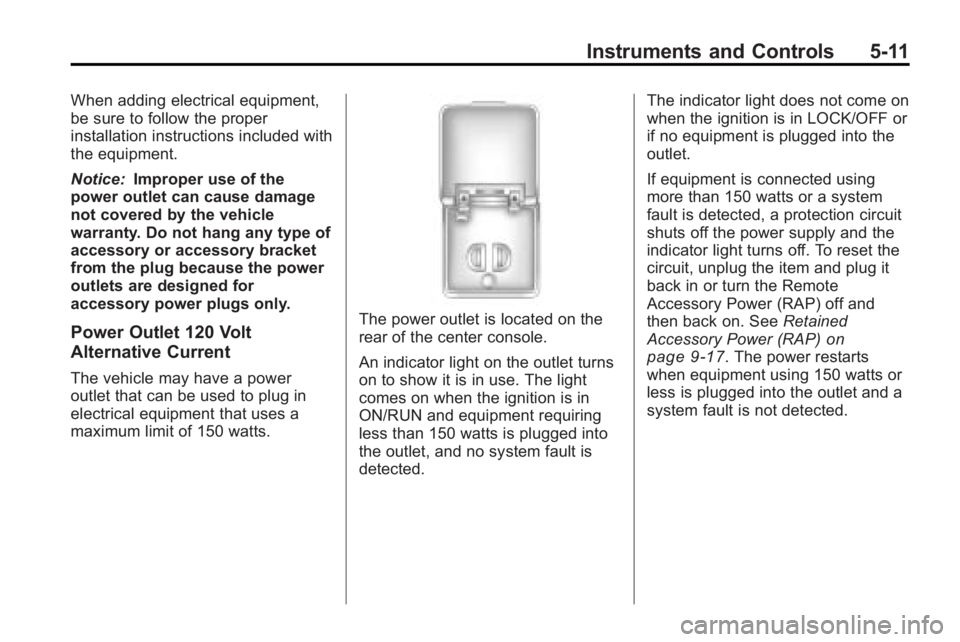
The power outlet is located on the
rear of the center console.
An indicator light on the outlet turns
on to show it is in use. The light
comes on when the ignition is in
ON/RUN and equipment requiring
less than 150 watts is plugged into
the outlet, and no system fault is
detected. The indicator light does not come on
when the ignition is in LOCK/OFF or
if no equipment is plugged into the
outlet.
If equipment is connected using
more than 150 watts or a system
fault is detected, a protection circuit
shuts off the power supply and the
indicator light turns off. To reset the
circuit, unplug the item and plug it
back in or turn the Remote
Accessory Power (RAP) off and
then back on. See
Retained
Accessory Power (RAP)
on
page 9‑17. The power restarts
when equipment using 150 watts or
less is plugged into the outlet and a
system fault is not detected.
Page 140 of 438
5-22 Instruments and Controls
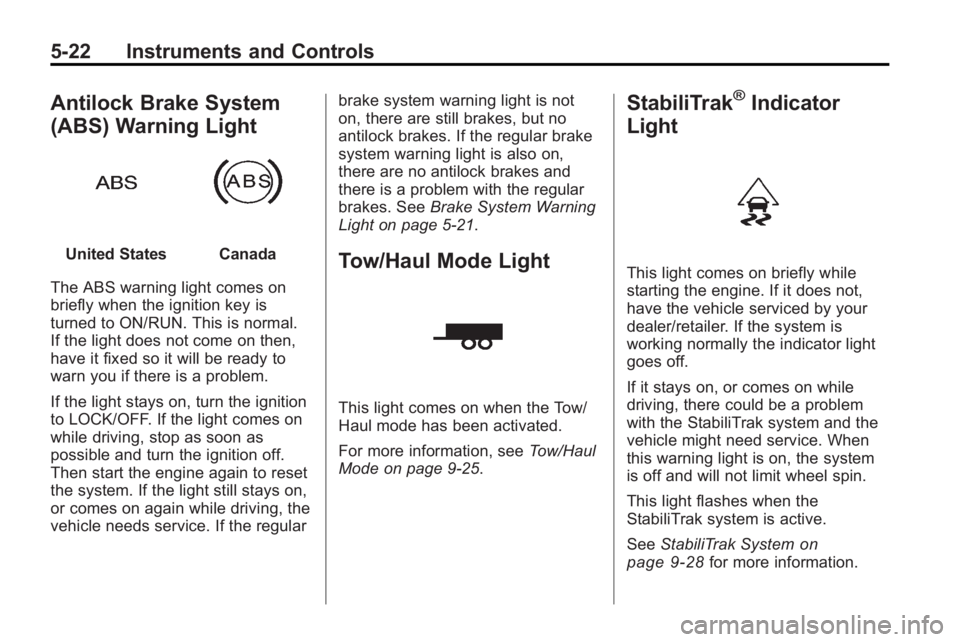
Antilock Brake System
(ABS) Warning Light
United StatesCanada
The ABS warning light comes on
briefly when the ignition key is
turned to ON/RUN. This is normal.
If the light does not come on then,
have it fixed so it will be ready to
warn you if there is a problem.
If the light stays on, turn the ignition
to LOCK/OFF. If the light comes on
while driving, stop as soon as
possible and turn the ignition off.
Then start the engine again to reset
the system. If the light still stays on,
or comes on again while driving, the
vehicle needs service. If the regular brake system warning light is not
on, there are still brakes, but no
antilock brakes. If the regular brake
system warning light is also on,
there are no antilock brakes and
there is a problem with the regular
brakes. See
Brake System Warning
Light on page 5‑21.Tow/Haul Mode Light
This light comes on when the Tow/
Haul mode has been activated.
For more information, see Tow/Haul
Mode on page 9‑25.
StabiliTrak®Indicator
Light
This light comes on briefly while
starting the engine. If it does not,
have the vehicle serviced by your
dealer/retailer. If the system is
working normally the indicator light
goes off.
If it stays on, or comes on while
driving, there could be a problem
with the StabiliTrak system and the
vehicle might need service. When
this warning light is on, the system
is off and will not limit wheel spin.
This light flashes when the
StabiliTrak system is active.
See StabiliTrak System
on
page 9‑28for more information.
Page 146 of 438
5-28 Instruments and Controls
If a low tire pressure condition is
detected by the system while
driving, a message advising you
add air to a specific tire will appear
in the display. SeeTire Pressure
on
page 10‑44and Tire Messageson
page 5‑37for more information.
If the tire pressure display shows
dashes instead of a value, there
may be a problem with your vehicle.
If this consistently occurs, see your
dealer/retailer for service.
RELEARN REMOTE KEY
This display allows you to match
Remote Keyless Entry (RKE)
transmitters to your vehicle. This
procedure will erase all previously
learned transmitters. Therefore, they
must be relearned as additional
transmitters. To match an RKE transmitter to your
vehicle:
1. Press the vehicle information
button until PRESS
VTO
RELEARN REMOTE KEY
displays.
2. Press the set/reset button until REMOTE KEY LEARNING
ACTIVE is displayed.
3. Press and hold the lock and unlock buttons on the first
transmitter at the same time for
about 15 seconds.
On vehicles with memory recall
seats, the first transmitter
learned will match driver 1 and
the second will match driver 2.
A chime will sound indicating
that the transmitter is matched. 4. To match additional transmitters
at this time, repeat Step 3.
Each vehicle can have a
maximum of eight transmitters
matched to it.
5. To exit the programming mode, you must cycle the key to
LOCK/OFF.
COMPASS ZONE SETTING
This display will be available if the
vehicle has a compass. See
Compass
on page 5‑6for more
information.
COMPASS RECALIBRATION
This display will be available if the
vehicle has a compass. See
Compass
on page 5‑6for more
information.
Blank Display
This display shows no information.
Page 153 of 438
Instruments and Controls 5-35
TIGHTEN GAS CAP
This message may display along
with the check engine light on the
instrument panel cluster if the
vehicle's fuel cap is not tightened
properly. SeeMalfunction Indicator
Lamp
on page 5‑18. Reinstall the
fuel cap fully. See Filling the Tank
on page 9‑42. The diagnostic
system can determine if the fuel cap
has been left off or improperly
installed. A loose or missing fuel
cap allows fuel to evaporate into the
atmosphere. A few driving trips with
the cap properly installed should
turn this light and message off.
Key and Lock Messages
REMOTE KEY LEARNING
ACTIVE
This message displays while you
are matching a Remote Keyless
Entry (RKE) transmitter to your
vehicle. See “Matching
Transmitter(s) to Your Vehicle” under
Remote Keyless Entry (RKE)
System Operation
on page 2‑3and Driver Information Center (DIC)on page 5‑25for more information.
REPLACE BATTERY IN
REMOTE KEY
This message displays if a Remote
Keyless Entry (RKE) transmitter
battery is low. The battery needs to
be replaced in the transmitter. See
“Battery Replacement” under
Remote Keyless Entry (RKE)
System Operation on page 2‑3.
Lamp Messages
AUTOMATIC LIGHT
CONTROL OFF
This message displays when the
automatic headlamps are turned off.
This message clears itself after
10 seconds.
AUTOMATIC LIGHT
CONTROL ON
This message displays when the
automatic headlamps are turned on.
This message clears itself after
10 seconds.
TURN SIGNAL ON
This message displays and a chime
sounds if a turn signal is left on for
3/4 of a mile (1.2 km). Move the turn
signal/multifunction lever to the off
position.
Object Detection System
Messages
PARK ASSIST OFF
If your vehicle has the Ultrasonic
Rear Parking Assist (URPA) system,
after the vehicle has been started
and shifted out of P (Park), this
message displays to remind the
driver that the URPA system has
been turned off or to notify the driver
that the system has turned itself off.
Page 156 of 438
5-38 Instruments and Controls
SERVICE TIRE MONITOR
SYSTEM
On vehicles with the Tire Pressure
Monitor System (TPMS), this
message displays if a part on the
TPMS is not working properly. The
tire pressure light also flashes and
then remains on during the same
ignition cycle. SeeTire Pressure
Light
on page 5‑23. Several
conditions may cause this message
to appear. See Tire Pressure
Monitor Operation
on page 10‑46for
more information. If the warning
comes on and stays on, there may
be a problem with the TPMS.
See your dealer/retailer.
TIRE LEARNING ACTIVE
This message displays when the
Tire Pressure Monitor System
(TPMS) is re-learning the tire
positions on your vehicle. The tire
positions must be re-learned after rotating the tires or after replacing a
tire or sensor. See
Tire Rotation
on
page 10‑50, Tire Pressure Monitor
Systemon page 10‑45, and Tire
Pressureon page 10‑44for more
information.
Transmission Messages
ALL WHEEL DRIVE OFF
If your vehicle has the All-Wheel
Drive (AWD) system, this message
displays when there is a compact
spare tire on the vehicle, when the
Antilock Brake System (ABS)
warning light comes on, or when the
rear differential fluid is overheating.
This message turns off when the
differential fluid cools.
The AWD system is disabled until
the compact spare tire is replaced
by a full-size tire. If the warning
message is still on after putting on
the full-size tire, you need to reset
the warning message. To reset the warning message, turn the ignition
off and then back on again after
30 seconds. If the message stays
on, see your dealer/retailer right
away. See
All-Wheel Drive
on
page 9‑26for more information.
SERVICE ALL WHEEL DRIVE
If your vehicle has the All-Wheel
Drive (AWD) system, this message
displays if there is a problem with
this system. If this message
appears, stop as soon as possible
and turn off the vehicle. Restart the
vehicle after 30 seconds and check
for the message on the DIC display.
If the message is still displayed or
appears again when you begin
driving, the AWD system needs
service. See your dealer/retailer.
SERVICE TRANSMISSION
This message displays when there
is a problem with the transmission.
See your dealer/retailer for service.
Page 159 of 438
Instruments and Controls 5-41
NO CHANGE:No change will be
made to this feature. The current
setting will remain.
To select a setting, press the
set/reset button while the desired
setting is displayed on the DIC.
AUTO DOOR LOCK
This feature allows you to select
when the vehicle's doors will
automatically lock. See Automatic
Door Locks
on page 2‑8for more
information.
Press the customization button until
AUTO DOOR LOCK appears on the
DIC display. Press the set/reset
button once to access the settings
for this feature. Then press the
customization button to scroll
through the following settings:
SHIFT OUT OF PARK (default):
The doors will automatically lock
when the vehicle is shifted out of
P (Park). AT VEHICLE SPEED:
The doors
will automatically lock when the
vehicle speed is above 8 mph
(13 km/h) for three seconds.
NO CHANGE: No change will be
made to this feature. The current
setting will remain.
To select a setting, press the set/
reset button while the desired
setting is displayed on the DIC.
AUTO DOOR UNLOCK
This feature allows you to select
whether or not to turn off the
automatic door unlocking feature.
It also allows you to select which
doors and when the doors will
automatically unlock. See Automatic
Door Locks
on page 2‑8for more
information.
Press the customization button until
AUTO DOOR UNLOCK appears on
the DIC display. Press the set/reset
button once to access the settings for this feature. Then press the
customization button to scroll
through the following settings:
OFF:
None of the doors will
automatically unlock.
DRIVER AT KEY OUT: Only the
driver's door will unlock when the
key is taken out of the ignition.
DRIVER IN PARK: Only the
driver's door will unlock when the
vehicle is shifted into P (Park) .
ALL AT KEY OUT: All of the doors
will unlock when the key is taken
out of the ignition.
ALL IN PARK (default): All of the
doors will unlock when the vehicle is
shifted into P (Park).
NO CHANGE: No change will be
made to this feature. The current
setting will remain.
To select a setting, press the
set/reset button while the desired
setting is displayed on the DIC.
Page 160 of 438
5-42 Instruments and Controls
REMOTE DOOR LOCK
This feature allows you to select the
type of feedback you will receive
when locking the vehicle with the
Remote Keyless Entry (RKE)
transmitter. You will not receive
feedback when locking the vehicle
with the RKE transmitter if the doors
are open. SeeRemote Keyless
Entry (RKE) System Operation
on
page 2‑3for more information.
Press the customization button until
REMOTE DOOR LOCK appears on
the DIC display. Press the set/reset
button once to access the settings
for this feature. Then press the
customization button to scroll
through the following settings:
OFF: There will be no feedback
when you press the lock button on
the RKE transmitter. LIGHTS ONLY:
The exterior lamps
will flash when you press the lock
button on the RKE transmitter.
HORN ONLY: The horn will sound
on the second press of the lock
button on the RKE transmitter.
HORN & LIGHTS (default): The
exterior lamps will flash when you
press the lock button on the RKE
transmitter, and the horn will sound
when the lock button is pressed
again within five seconds of the
previous command.
NO CHANGE: No change will be
made to this feature. The current
setting will remain.
To select a setting, press the set/
reset button while the desired
setting is displayed on the DIC. REMOTE DOOR UNLOCK
This feature allows you to select the
type of feedback you will receive
when unlocking the vehicle with the
Remote Keyless Entry (RKE)
transmitter. You will not receive
feedback when unlocking the
vehicle with the RKE transmitter if
the doors are open. See
Remote
Keyless Entry (RKE) System
Operationon page 2‑3for more
information.
Press the customization button until
REMOTE DOOR UNLOCK appears
on the DIC display. Press the set/
reset button once to access the
settings for this feature. Then press
the customization button to scroll
through the following settings:
LIGHTS OFF: The exterior lamps
will not flash when you press the
unlock button on the RKE
transmitter.
LIGHTS ON (default): The exterior
lamps will flash when you press
the unlock button on the RKE
transmitter.
Page 161 of 438
Instruments and Controls 5-43
NO CHANGE:No change will be
made to this feature. The current
setting will remain.
To select a setting, press the set/
reset button while the desired
setting is displayed on the DIC.
DELAY DOOR LOCK
This feature allows you to select
whether or not the locking of the
vehicle's doors and liftgate will be
delayed. When locking the doors
and liftgate with the power door lock
switch and a door or the liftgate is
open, this feature will delay locking
the doors and liftgate until
five seconds after the last door is
closed. You will hear three chimes
to signal that the delayed locking
feature is in use. The key must be
out of the ignition for this feature to
work. You can temporarily override
delayed locking by pressing the
power door lock switch twice or the
lock button on the RKE transmitter
twice. See Delayed Locking
on
page 2‑7for more information. Press the customization button until
DELAY DOOR LOCK appears on
the DIC display. Press the set/reset
button once to access the settings
for this feature. Then press the
customization button to scroll
through the following settings:
OFF:
There will be no delayed
locking of the vehicle's doors.
ON (default): The doors will not
lock until five seconds after the last
door or the liftgate is closed.
NO CHANGE: No change will be
made to this feature. The current
setting will remain.
To select a setting, press the set/
reset button while the desired
setting is displayed on the DIC.
EXIT LIGHTING
This feature allows you to select the
amount of time you want the
exterior lamps to remain on when it
is dark enough outside. This
happens after the key is turned from
ON/RUN to LOCK/OFF. Press the customization button until
EXIT LIGHTING appears on the DIC
display. Press the set/reset button
once to access the settings for
this feature. Then press the
customization button to scroll
through the following settings:
OFF:
The exterior lamps will not
turn on.
30 SECONDS (default): The
exterior lamps will stay on for
30 seconds.
1 MINUTE: The exterior lamps will
stay on for one minute.
2 MINUTES: The exterior lamps will
stay on for two minutes.
NO CHANGE: No change will be
made to this feature. The current
setting will remain.
To select a setting, press the set/
reset button while the desired
setting is displayed on the DIC.
Page 162 of 438
5-44 Instruments and Controls
APPROACH LIGHTING
This feature allows you to select
whether or not to have the exterior
lights turn on briefly during low light
periods after unlocking the vehicle
using the Remote Keyless Entry
(RKE) transmitter.
Press the customization button until
APPROACH LIGHTING appears on
the DIC display. Press the set/reset
button once to access the settings
for this feature. Then press the
customization button to scroll
through the following settings:
OFF:The exterior lights will not
turn on when you unlock the vehicle
with the RKE transmitter.
ON (default): If it is dark enough
outside, the exterior lights will turn
on briefly when you unlock the
vehicle with the RKE transmitter.
The lights will remain on for
20 seconds or until the lock button
on the RKE transmitter is pressed,
or the vehicle is no longer off. See
Remote Keyless Entry (RKE)
System Operationon page 2‑3for
more information.
NO CHANGE : No change will be
made to this feature. The current
setting will remain.
To select a setting, press the set/
reset button while the desired
setting is displayed on the DIC.
CHIME VOLUME
This feature allows you to select the
volume level of the chime.
Press the customization button until
CHIME VOLUME appears on the
DIC display. Press the set/reset
button once to access the settings
for this feature. Then press the
customization button to scroll
through the following settings:
NORMAL: The chime volume will
be set to a normal level.
LOUD: The chime volume will be
set to a loud level. NO CHANGE:
No change will be
made to this feature. The current
setting will remain.
There is no default for chime
volume. The volume will stay at the
last known setting.
To select a setting, press the set/
reset button while the desired
setting is displayed on the DIC.
PARK TILT MIRRORS
If your vehicle has this feature, it
allows you to select whether or
not the outside mirror(s) will
automatically tilt down when the
vehicle is shifted into R (Reverse).
See Park Tilt Mirrors
on page 2‑17for more information.