wheel size BUICK ENCLAVE 2010 Owner's Manual
[x] Cancel search | Manufacturer: BUICK, Model Year: 2010, Model line: ENCLAVE, Model: BUICK ENCLAVE 2010Pages: 438, PDF Size: 2.47 MB
Page 92 of 438
3-42 Seats and Restraints
Adding Equipment to the
Airbag-Equipped Vehicle
Q: Is there anything I might addto or change about the vehicle
that could keep the airbags
from working properly?
A: Yes. If you add things that
change the vehicle's frame,
bumper system, height, front end
or side sheet metal, they may
keep the airbag system from
working properly. Changing or
moving any parts of the front
seats, safety belts, the airbag
sensing and diagnostic module,
steering wheel, instrument
panel, roof-rail airbag modules,
ceiling headliner or pillar garnish
trim, overhead console, front
sensors, side impact sensors,
rollover sensor module, or airbag
wiring can affect the operation of
the airbag system.
In addition, the vehicle has a
passenger sensing system for
the right front passenger position, which includes sensors
that are part of the passenger
seat. The passenger sensing
system may not operate properly
if the original seat trim is
replaced with non-GM covers,
upholstery or trim, or with GM
covers, upholstery or trim
designed for a different vehicle.
Any object, such as an
aftermarket seat heater or a
comfort enhancing pad or
device, installed under or on top
of the seat fabric, could also
interfere with the operation of
the passenger sensing system.
This could either prevent proper
deployment of the passenger
airbag(s) or prevent the
passenger sensing system from
properly turning off the
passenger airbag(s). See
Passenger Sensing System
on
page 3‑37.
If you have questions, call
Customer Assistance. The
phone numbers and addresses
for Customer Assistance are in Step Two of the Customer
Satisfaction Procedure in this
manual.
If the vehicle has rollover
roof-rail airbags, see
Different
Size Tires and Wheels
on
page 10‑54for additional
important information.
Q: Because I have a disability, I have to get my vehicle
modified. How can I find out
whether this will affect my
airbag system?
A: If you have questions, call
Customer Assistance. The
phone numbers and addresses
for Customer Assistance are in
Step Two of the Customer
Satisfaction Procedure in this
manual.
In addition, your dealer/retailer and
the service manual have information
about the location of the airbag
sensors, sensing and diagnostic
module and airbag wiring.
Page 156 of 438
5-38 Instruments and Controls
SERVICE TIRE MONITOR
SYSTEM
On vehicles with the Tire Pressure
Monitor System (TPMS), this
message displays if a part on the
TPMS is not working properly. The
tire pressure light also flashes and
then remains on during the same
ignition cycle. SeeTire Pressure
Light
on page 5‑23. Several
conditions may cause this message
to appear. See Tire Pressure
Monitor Operation
on page 10‑46for
more information. If the warning
comes on and stays on, there may
be a problem with the TPMS.
See your dealer/retailer.
TIRE LEARNING ACTIVE
This message displays when the
Tire Pressure Monitor System
(TPMS) is re-learning the tire
positions on your vehicle. The tire
positions must be re-learned after rotating the tires or after replacing a
tire or sensor. See
Tire Rotation
on
page 10‑50, Tire Pressure Monitor
Systemon page 10‑45, and Tire
Pressureon page 10‑44for more
information.
Transmission Messages
ALL WHEEL DRIVE OFF
If your vehicle has the All-Wheel
Drive (AWD) system, this message
displays when there is a compact
spare tire on the vehicle, when the
Antilock Brake System (ABS)
warning light comes on, or when the
rear differential fluid is overheating.
This message turns off when the
differential fluid cools.
The AWD system is disabled until
the compact spare tire is replaced
by a full-size tire. If the warning
message is still on after putting on
the full-size tire, you need to reset
the warning message. To reset the warning message, turn the ignition
off and then back on again after
30 seconds. If the message stays
on, see your dealer/retailer right
away. See
All-Wheel Drive
on
page 9‑26for more information.
SERVICE ALL WHEEL DRIVE
If your vehicle has the All-Wheel
Drive (AWD) system, this message
displays if there is a problem with
this system. If this message
appears, stop as soon as possible
and turn off the vehicle. Restart the
vehicle after 30 seconds and check
for the message on the DIC display.
If the message is still displayed or
appears again when you begin
driving, the AWD system needs
service. See your dealer/retailer.
SERVICE TRANSMISSION
This message displays when there
is a problem with the transmission.
See your dealer/retailer for service.
Page 268 of 438
9-26 Driving and Operating
Automatic Engine Grade
Braking
Automatic Engine Grade Braking
assists when driving on a downhill
grade. It maintains vehicle speed by
automatically implementing a shift
schedule that uses the engine and
the transmission to slow the vehicle.
The system will automatically
command downshifts to reduce
vehicle speed, until the brake pedal
is no longer being pressed.
While in the Electronic Range
Select (ERS) mode, grade braking
is deactivated, allowing the driver to
select a range and limiting the
highest gear available. Grade
braking is available for normal
driving and in Tow/Haul mode.
SeeAutomatic Transmission
on
page 9‑23.
Drive Systems
All-Wheel Drive
With this feature, engine power is
always sent to all four wheels. It is
fully automatic, and adjusts itself as
needed for road conditions.
When using a compact spare tire on
an AWD vehicle, the system
automatically detects the compact
spare and disables AWD. To restore
AWD operation and prevent
excessive wear on system, replace
the compact spare with a full-size
tire as soon as possible. See
Compact Spare Tire
on page 10‑80for more information.
Brakes
Antilock Brake
System (ABS)
This vehicle has the Antilock Brake
System (ABS), an advanced
electronic braking system that helps
prevent a braking skid.
When the engine is started and the
vehicle begins to drive away, ABS
checks itself. A momentary motor or
clicking noise might be heard while
this test is going on, and it might
even be noticed that the brake
pedal moves a little. This is normal.
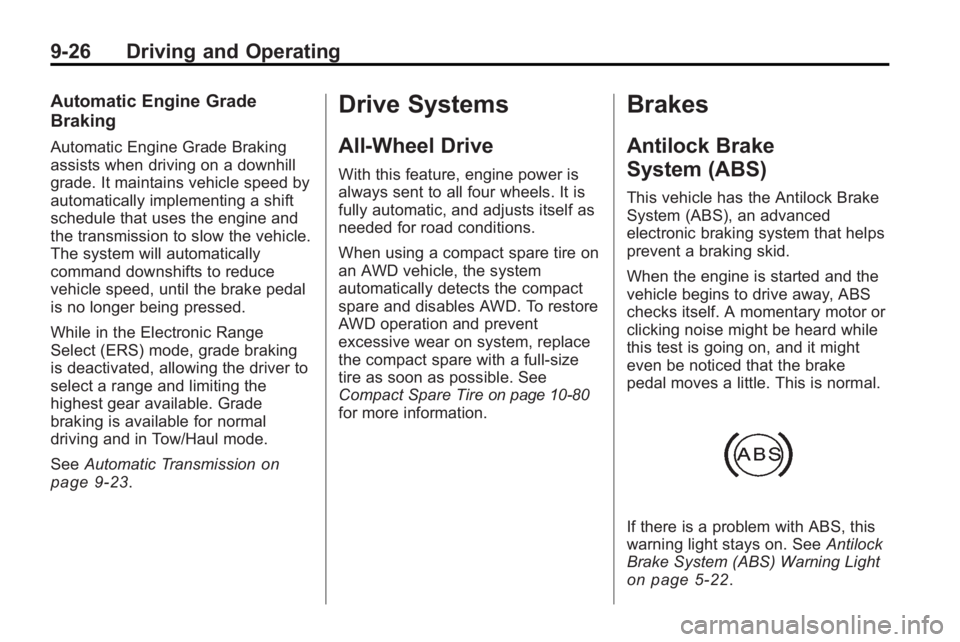
If there is a problem with ABS, this
warning light stays on. See Antilock
Brake System (ABS) Warning Light
on page 5‑22.
Page 300 of 438
10-2 Vehicle Care
Tire Inspection . . . . . . . . . . . . . . 10-50
Tire Rotation . . . . . . . . . . . . . . . 10-50
When It Is Time for NewTires . . . . . . . . . . . . . . . . . . . . . . 10-51
Buying New Tires . . . . . . . . . . . 10-52
Different Size Tires and
Wheels . . . . . . . . . . . . . . . . . . . 10-54
Uniform Tire Quality Grading . . . . . . . . . . . . . . . . . . . 10-54
Wheel Alignment and Tire Balance . . . . . . . . . . . . . . . . . . . 10-56
Wheel Replacement . . . . . . . . 10-56
Tire Chains . . . . . . . . . . . . . . . . . 10-57
If a Tire Goes Flat . . . . . . . . . . 10-58
Tire Sealant and Compressor Kit . . . . . . . . . . . 10-60
Storing the Tire Sealant and Compressor Kit . . . . . . . . . . . 10-68
Tire Changing . . . . . . . . . . . . . . 10-68
Secondary Latch System . . . 10-78
Compact Spare Tire . . . . . . . . 10-80Jump Starting
Jump Starting . . . . . . . . . . . . . . 10-81
Towing
Towing the Vehicle . . . . . . . . . 10-85
Recreational Vehicle Towing . . . . . . . . . . . . . . . . . . . . 10-85
Appearance Care
Exterior Care . . . . . . . . . . . . . . . 10-88
Interior Care . . . . . . . . . . . . . . . . 10-92
Floor Mats . . . . . . . . . . . . . . . . . . 10-95
General Information
For service and parts needs, visit
your dealer/retailer. You will receive
genuine GM parts and GM-trained
and supported service people.
Genuine GM parts have one of
these marks:
Page 349 of 438
Vehicle Care 10-51
{WARNING
Rust or dirt on a wheel, or on the
parts to which it is fastened, can
make wheel nuts become loose
after time. The wheel could come
off and cause an accident. When
changing a wheel, remove any
rust or dirt from places where the
wheel attaches to the vehicle. In
an emergency, use a cloth or a
paper towel to do this; but be sure
to use a scraper or wire brush
later, if needed, to get all the rust
or dirt off. SeeIf a Tire Goes Flat
on page 10‑58.
Make sure the spare tire, if the
vehicle has one, is stored
securely. Push, pull, and then try
to rotate or turn the tire. If it
moves, tighten the cable. See
Tire Changing
on page 10‑68.
When It Is Time for New
Tires
Various factors, such as
maintenance, temperatures, driving
speeds, vehicle loading, and road
conditions influence when you need
new tires.
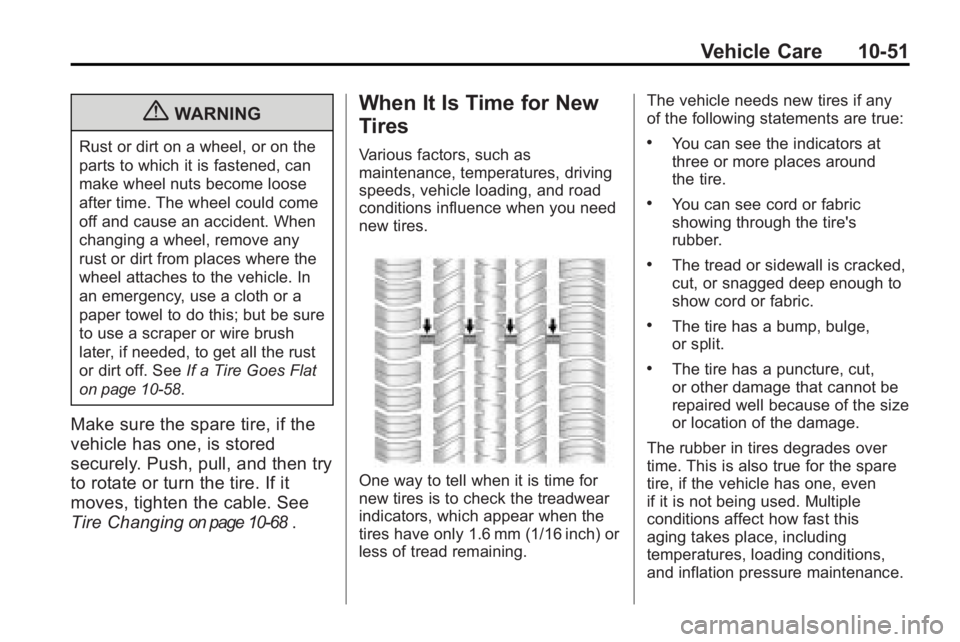
One way to tell when it is time for
new tires is to check the treadwear
indicators, which appear when the
tires have only 1.6 mm (1/16 inch) or
less of tread remaining. The vehicle needs new tires if any
of the following statements are true:
.You can see the indicators at
three or more places around
the tire.
.You can see cord or fabric
showing through the tire's
rubber.
.The tread or sidewall is cracked,
cut, or snagged deep enough to
show cord or fabric.
.The tire has a bump, bulge,
or split.
.The tire has a puncture, cut,
or other damage that cannot be
repaired well because of the size
or location of the damage.
The rubber in tires degrades over
time. This is also true for the spare
tire, if the vehicle has one, even
if it is not being used. Multiple
conditions affect how fast this
aging takes place, including
temperatures, loading conditions,
and inflation pressure maintenance.
Page 351 of 438
Vehicle Care 10-53
{WARNING
Mixing tires could cause you
to lose control while driving.
If you mix tires of different
sizes, brands, or types (radial
and bias-belted tires), the
vehicle may not handle
properly, and you could have
a crash. Using tires of different
sizes, brands, or types may
also cause damage to your
vehicle. Be sure to use the
correct size, brand, and type
of tires on all wheels. It is all
right to drive with your
compact spare temporarily, as
it was developed for use on
your vehicle. See Compact
Spare Tire
on page 10‑80.
{WARNING
If you use bias-ply tires on the
vehicle, the wheel rim flanges
could develop cracks after
many miles of driving. A tire
and/or wheel could fail
suddenly, causing a crash.
Use only radial-ply tires with
the wheels on the vehicle.
If you must replace your
vehicle's tires with those that do
not have a TPC Spec number,
make sure they are the same
size, load range, speed rating,
and construction type (radial and
bias-belted tires) as your
vehicle's original tires. Vehicles that have a tire
pressure monitoring system
could give an inaccurate
low-pressure warning if non-TPC
Spec rated tires are installed on
your vehicle. Non-TPC Spec
rated tires may give a
low-pressure warning that is
higher or lower than the proper
warning level you would get with
TPC Spec rated tires. See
Tire
Pressure Monitor System
on
page 10‑45
.
Your vehicle's original
equipment tires are listed on the
Tire and Loading Information
Label. See Vehicle Load Limits
on page 9‑12, for more
information about the Tire and
Loading Information Label and
its location on your vehicle.
Page 352 of 438

10-54 Vehicle Care
Different Size Tires and
Wheels
If you add wheels or tires that are a
different size than your original
equipment wheels and tires, this
could affect the way your vehicle
performs, including its braking, ride
and handling characteristics,
stability, and resistance to rollover.
Additionally, if your vehicle has
electronic systems such as anti-lock
brakes, rollover airbags, traction
control, and electronic stability
control, the performance of these
systems can be affected.
{WARNING
If you add different sized wheels,
your vehicle may not provide an
acceptable level of performance
and safety if tires not
recommended for those wheels
are selected. You may increase
the chance that you will crash and
suffer serious injury. Only use GM
specific wheel and tire systems
developed for your vehicle, and
have them properly installed by a
GM certified technician.
See Buying New Tires
on
page 10‑52and Accessories and
Modificationson page 10‑3for
additional information.
Uniform Tire Quality
Grading
Quality grades can be found
where applicable on the tire
sidewall between tread shoulder
and maximum section width.
For example:
Treadwear 200 Traction AA
Temperature A
The following information relates
to the system developed by the
United States National Highway
Traffic Safety Administration
(NHTSA), which grades tires
by treadwear, traction, and
temperature performance.
This applies only to vehicles
sold in the United States.
Page 355 of 438
Vehicle Care 10-57
{WARNING
Using the wrong replacement
wheels, wheel bolts, or wheel
nuts on your vehicle can be
dangerous. It could affect the
braking and handling of your
vehicle, make your tires lose air
and make you lose control. You
could have a collision in which
you or others could be injured.
Always use the correct wheel,
wheel bolts, and wheel nuts for
replacement.
Notice: The wrong wheel can
also cause problems with bearing
life, brake cooling, speedometer
or odometer calibration,
headlamp aim, bumper height,
vehicle ground clearance, and tire
or tire chain clearance to the
body and chassis.
See If a Tire Goes Flat
on
page 10‑58for more information.
Used Replacement Wheels
{WARNING
Putting a used wheel on the
vehicle is dangerous. You cannot
know how it has been used or
how far it has been driven.
It could fail suddenly and cause a
crash. If you have to replace a
wheel, use a new GM original
equipment wheel.
Tire Chains
{WARNING
Do not use tire chains. There is
not enough clearance. Tire chains
used on a vehicle without the
proper amount of clearance can
cause damage to the brakes,
suspension or other vehicle parts.
(Continued)
WARNING (Continued)
The area damaged by the tire
chains could cause you to lose
control of the vehicle and you or
others may be injured in a crash.
Use another type of traction
device only if its manufacturer
recommends it for use on the
vehicle and tire size combination
and road conditions. Follow that
manufacturer's instructions. To
help avoid damage to the vehicle,
drive slowly, readjust or remove
the device if it is contacting the
vehicle, and do not spin the
vehicle's wheels. If you do find
traction devices that will fit, install
them on the front tires.
Page 368 of 438
10-70 Vehicle Care
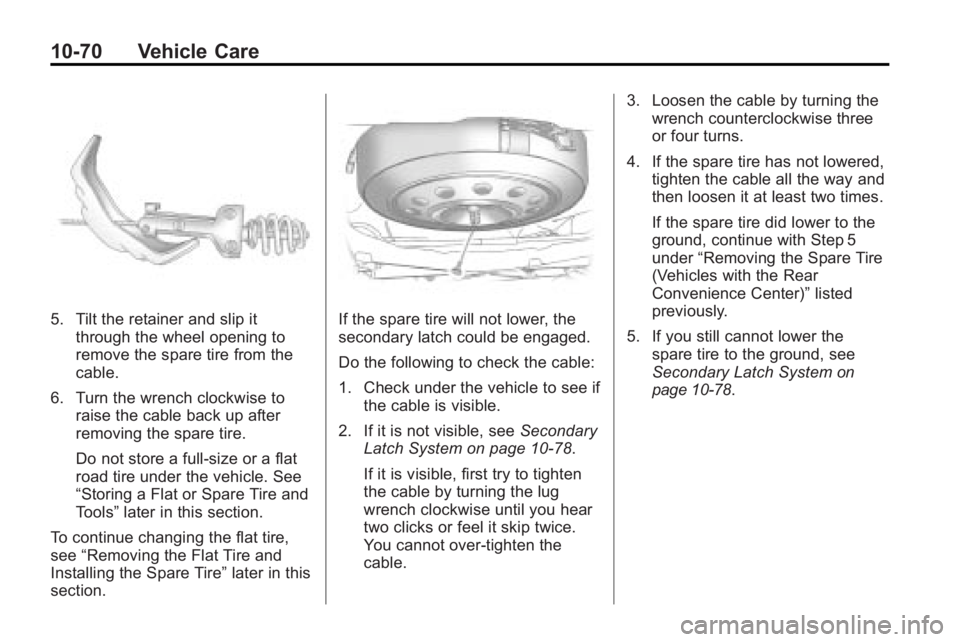
5. Tilt the retainer and slip itthrough the wheel opening to
remove the spare tire from the
cable.
6. Turn the wrench clockwise to raise the cable back up after
removing the spare tire.
Do not store a full-size or a flat
road tire under the vehicle. See
“Storing a Flat or Spare Tire and
Tools” later in this section.
To continue changing the flat tire,
see “Removing the Flat Tire and
Installing the Spare Tire” later in this
section.If the spare tire will not lower, the
secondary latch could be engaged.
Do the following to check the cable:
1. Check under the vehicle to see if the cable is visible.
2. If it is not visible, see Secondary
Latch System on page 10‑78.
If it is visible, first try to tighten
the cable by turning the lug
wrench clockwise until you hear
two clicks or feel it skip twice.
You cannot over-tighten the
cable. 3. Loosen the cable by turning the
wrench counterclockwise three
or four turns.
4. If the spare tire has not lowered, tighten the cable all the way and
then loosen it at least two times.
If the spare tire did lower to the
ground, continue with Step 5
under “Removing the Spare Tire
(Vehicles with the Rear
Convenience Center)” listed
previously.
5. If you still cannot lower the spare tire to the ground, see
Secondary Latch System
on
page 10‑78.
Page 375 of 438

Vehicle Care 10-77
8. Make sure the metal tube iscentered at the striker. Push the
tube toward the front of the
vehicle.
9. Close the liftgate and make sure it is latched properly.
Storing the Tools
A. Tool Bag
B. Wing Bolt
C. Jack
Put back all tools as they were
stored in the jack storage
compartment and put the
compartment cover back on.
1. Ensure that the bottom of thejack is facing toward you.
2. Turn the jack (C) on its side and place down on the holding
bracket. 3. Reinstall the wing bolt (B) by
turning clockwise.
4. To replace the cover, line up the tab at the front of the cover with
the notch in the cover opening.
Push the cover in place and
make sure that the rear clips are
in the slots and push the cover
closed.
Store the center cap or the plastic
bolt-on wheel covers until a full size
tire is put back on the vehicle. When
you replace the compact spare with
a full-size tire, reinstall the bolt-on
wheel covers or the center cap.
Hand-tighten them over the wheel
nuts, using the lug wrench.