lock BUICK ENCLAVE 2011 Get To Know Guide
[x] Cancel search | Manufacturer: BUICK, Model Year: 2011, Model line: ENCLAVE, Model: BUICK ENCLAVE 2011Pages: 16, PDF Size: 2.22 MB
Page 2 of 16
2
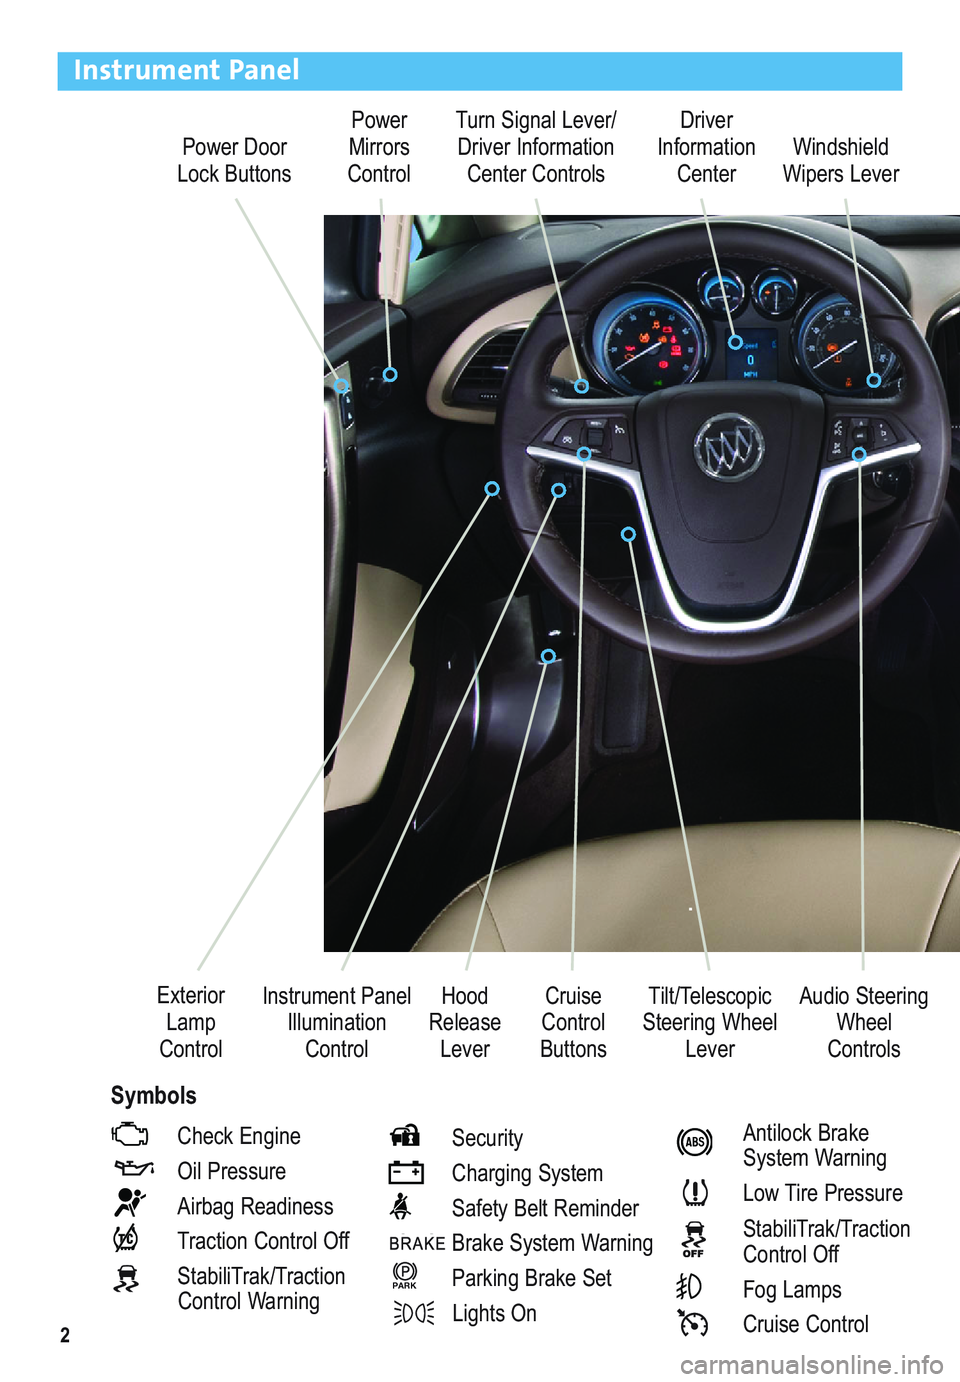
Power Door
Lock ButtonsPower
Mirrors
ControlTurn Signal Lever/
Driver Information
Center ControlsDriver
Information
Center
Tilt/Telescopic
Steering Wheel
Lever Instrument Panel
Illumination
ControlCruise
Control
ButtonsWindshield
Wipers Lever
Hood
Release
Lever Exterior
Lamp
Control
Instrument Panel
Check Engine
Oil Pressure
Airbag Readiness
Traction Control Off
StabiliTrak/Traction
Control WarningSecurity
Charging System
Safety Belt Reminder
Brake System Warning
Parking Brake Set
Lights On
PARK
Antilock Brake
System Warning
Low Tire Pressure
StabiliTrak/Traction
Control Off
Fog Lamps
Cruise Control
Audio Steering
Wheel
Controls
Symbols
Page 4 of 16
4
Remote Keyless Entry Transmitter
Unlock
Press to unlock
the driver’s door.
Press again to
unlock all doors.
Lock
Press to lock
all doors. The
driver’s door will
not lock if open.
Note:Open the
Vehicle Settings in
the Configuration
menu to change the
remote lock and unlock settings.
Trunk
Press and hold to unlock the trunk.
Keyless Access System✦
The Keyless Access System enables operation of the doors and ignition without removing
the transmitter from a pocket or purse. The system will recognize the transmitter when it is
within 3 feet of the vehicle.
Keyless Unlocking/Locking
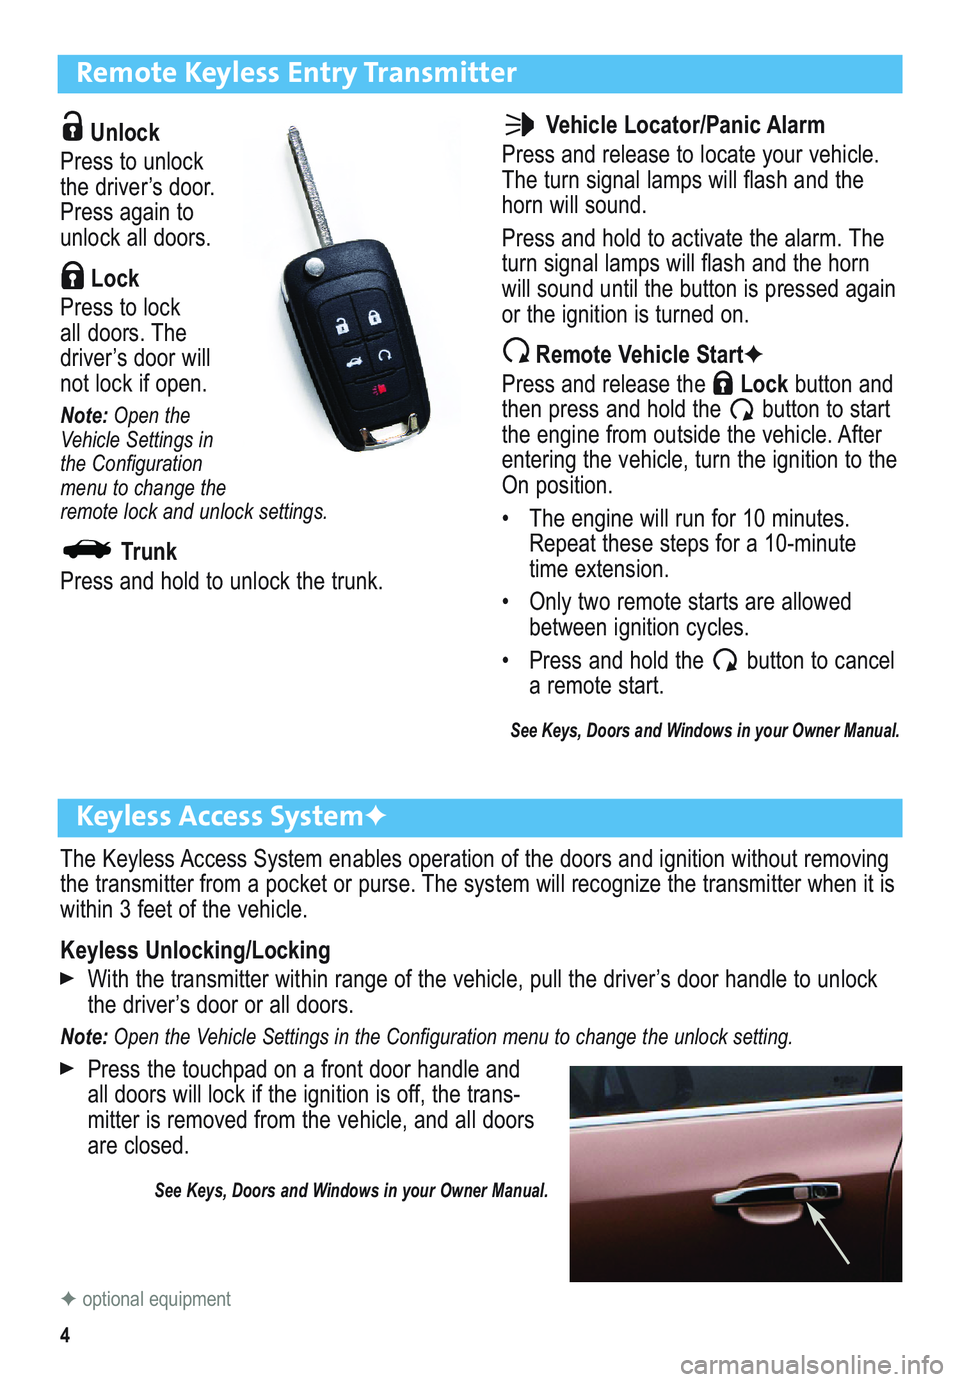
With the transmitter within range of the vehicle, pull the driver’s door handle to unlock
the driver’s door or all doors.
Note: Open the Vehicle Settings in the Configuration menu to change the unlock setting.
Press the touchpad on a front door handle and
all doors will lock if the ignition is off, the trans -
mitter is removed from the vehicle, and all doors
are closed.
See Keys, Doors and Windows in your Owner Manual.
Vehicle Locator/Panic Alarm
Press and release to locate your vehicle.
The turn signal lamps will flash and the
horn will sound.
Press and hold to activate the alarm. The
turn signal lamps will flash and the horn
will sound until the button is pressed again
or the ignition is turned on.
Remote Vehicle Start✦
Press and release the Lockbutton and
then press and hold the button to start
the engine from outside the vehicle. After
entering the vehicle, turn the ignition to the
On position.
• The engine will run for 10 minutes.
Repeat these steps for a 10-minute
time extension.
• Only two remote starts are allowed
between ignition cycles.
• Press and hold the button to cancel
a remote start.
See Keys, Doors and Windows in your Owner Manual.
✦optional equipment
Page 6 of 16
6
Tilt/Telescopic Steering Wheel
With the vehicle parked, push down the lever on the left side of the ste\
ering column to
adjust the steering wheel. The steering wheel can then be moved up or down and in or
out. Pull up the lever to lock the steering wheel in place.
See Instruments and Controls in your Owner Manual.
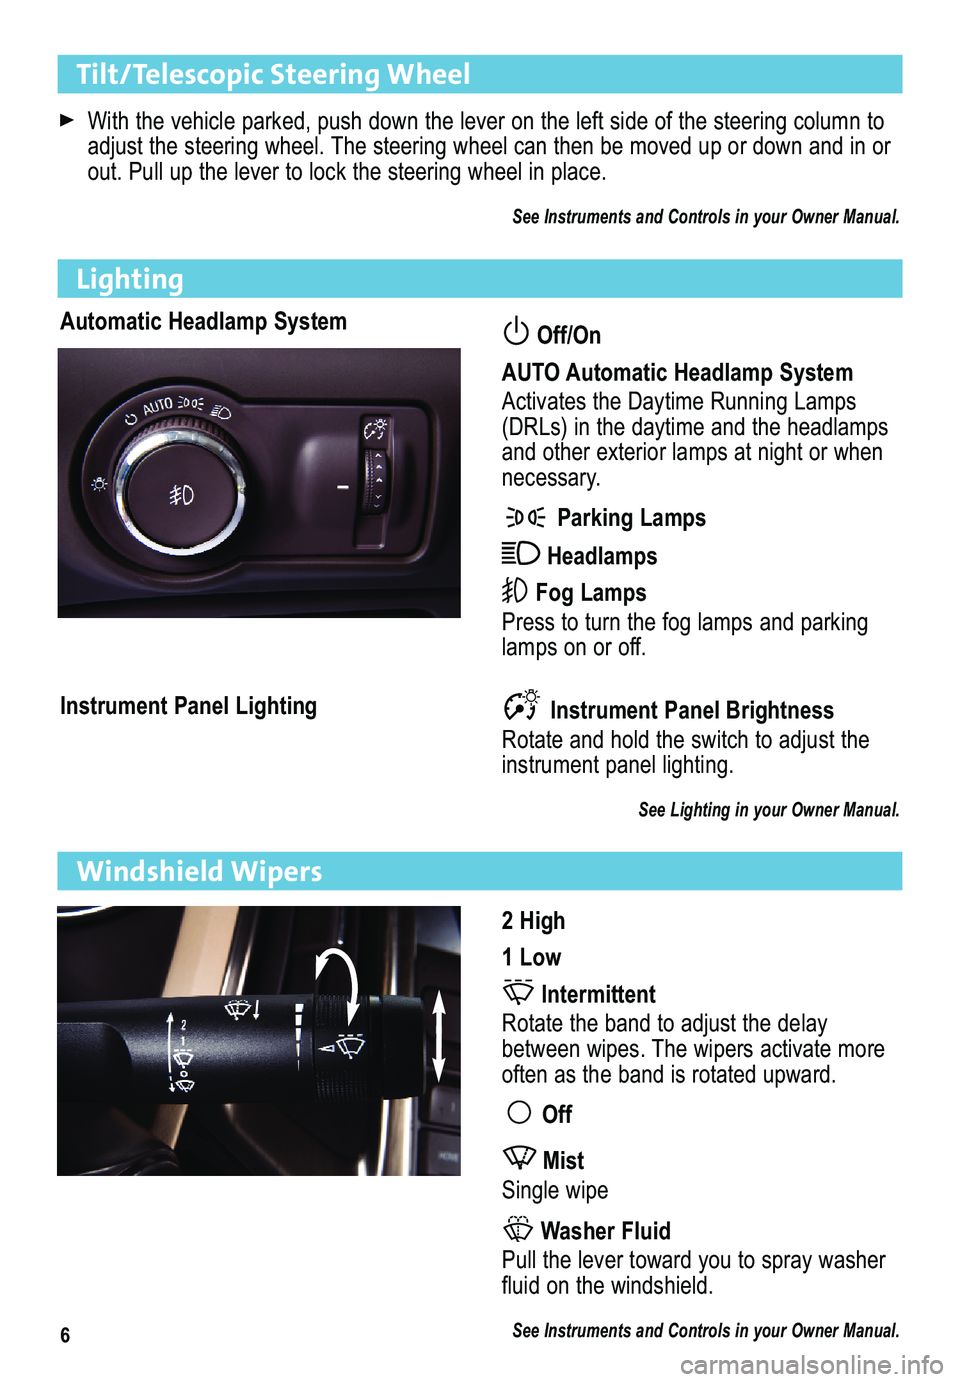
Automatic Headlamp SystemOff/On
AUTO Automatic Headlamp System
Activates the Daytime Running Lamps
(DRLs) in the daytime and the headlamps
and other exterior lamps at night or when
necessary.
Parking Lamps
Headlamps
Fog Lamps
Press to turn the fog lamps and parking
lamps on or off.
Instrument Panel Lighting
Lighting
Instrument Panel Brightness
Rotate and hold the switch to adjust the
instrument panel lighting.
See Lighting in your Owner Manual.
2 High
1 Low
Intermittent
Rotate the band to adjust the delay
between wipes. The wipers activate more
often as the band is rotated upward.
Off
Mist
Single wipe
Washer Fluid
Pull the lever toward you to spray washer
fluid on the windshield.
See Instruments and Controls in your Owner Manual.
Windshield Wipers
Page 8 of 16
8
Audio System
Radio with CD, Touchscreen and Navigation shown
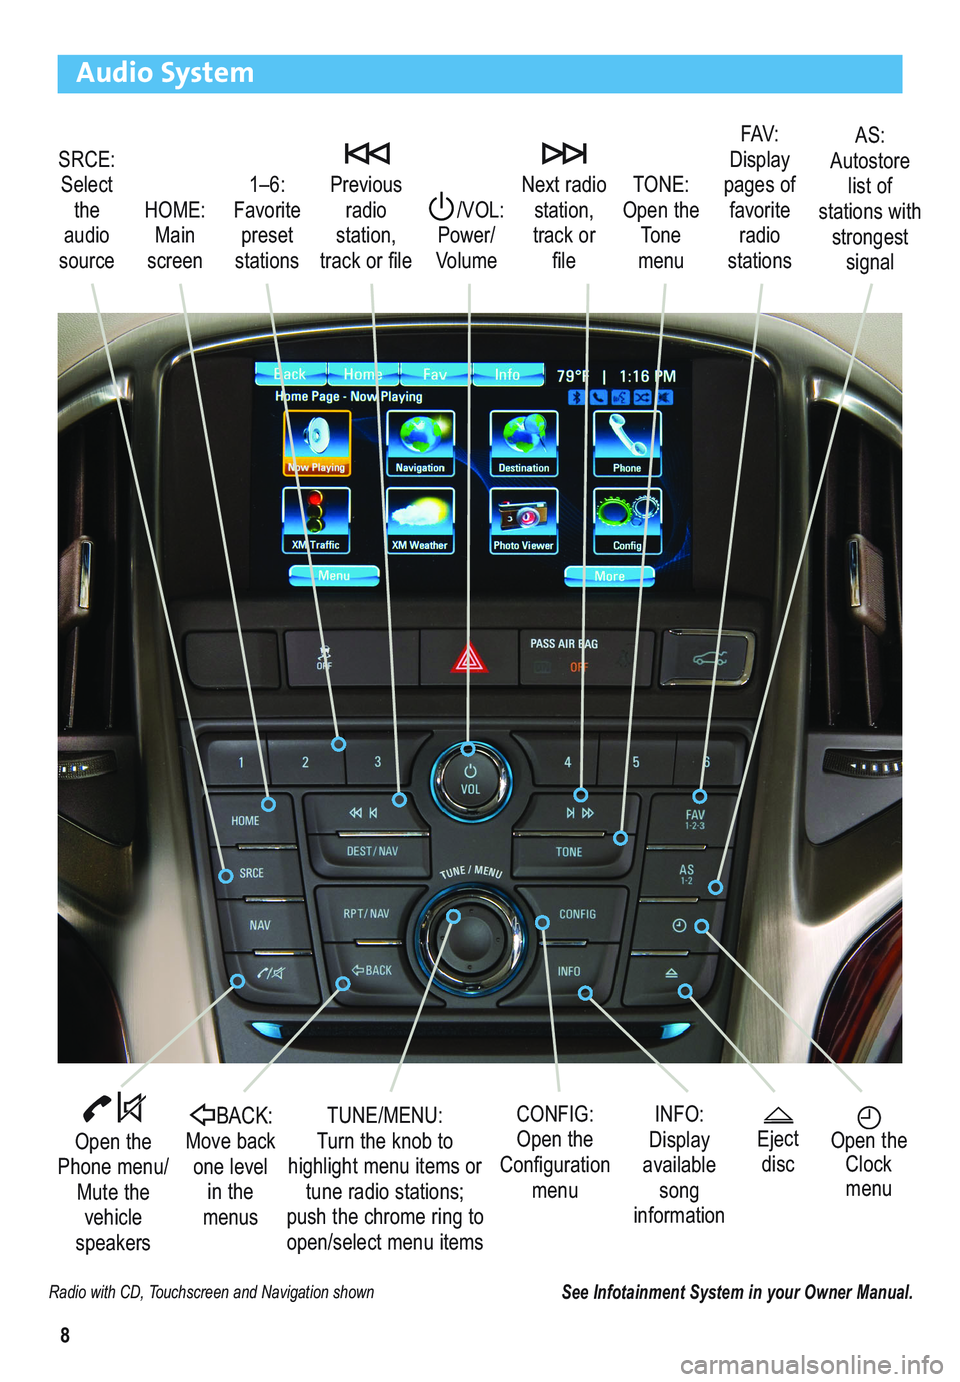
SRCE:
Select
the
audio
source/VOL:
Power/
VolumeNext radio
station,
track or
file1–6:
Favorite
preset
stations HOME:
Main
screenPrevious
radio
station,
track or fileTONE:
Open the
Tone
menu
Open the
Phone menu/
Mute the
vehicle
speakers
INFO:
Display
available
song
information CONFIG:
Open the
Configuration
menu TUNE/MENU:
Turn the knob to
highlight menu items or
tune radio stations;
push the chrome ring to
open/select menu items
See Infotainment System in your Owner Manual.
Open the
Clock
menuBACK:Move back
one level
in the
menus
FAV:
Display
pages of
favorite
radio
stationsAS:
Autostore
list of
stations with
strongest
signal
Eject
disc
Page 9 of 16
9
Audio System
Note: Avoid extended searching for specific items or configuring system settings while driving.
Setting the Time
1. Turn on the audio system.
2. Press the Clockbutton.
3. Press the MENUknob chrome ring to highlight the desired time.
4. Turn the MENUknob to change the value; press the chrome ring to confirm the set
value. Press the BACK button to return to the Time Settings menu.
Note:Open the Time and Date Settings in the Configuration menu to make other time and date
adjustments.
Storing Favorite Stations
Radio stations from all bands (AM, FM or XM
✦) can be stored, in any order, on up to six
pages of favorites.
1. Tune in the desired radio station.
2. Press the FAVbutton to display the page where the station is to be stored.
3. Press and hold one of the six numeric pushbuttons until a beep is heard.
4. Repeat the steps for each pushbutton on each page.
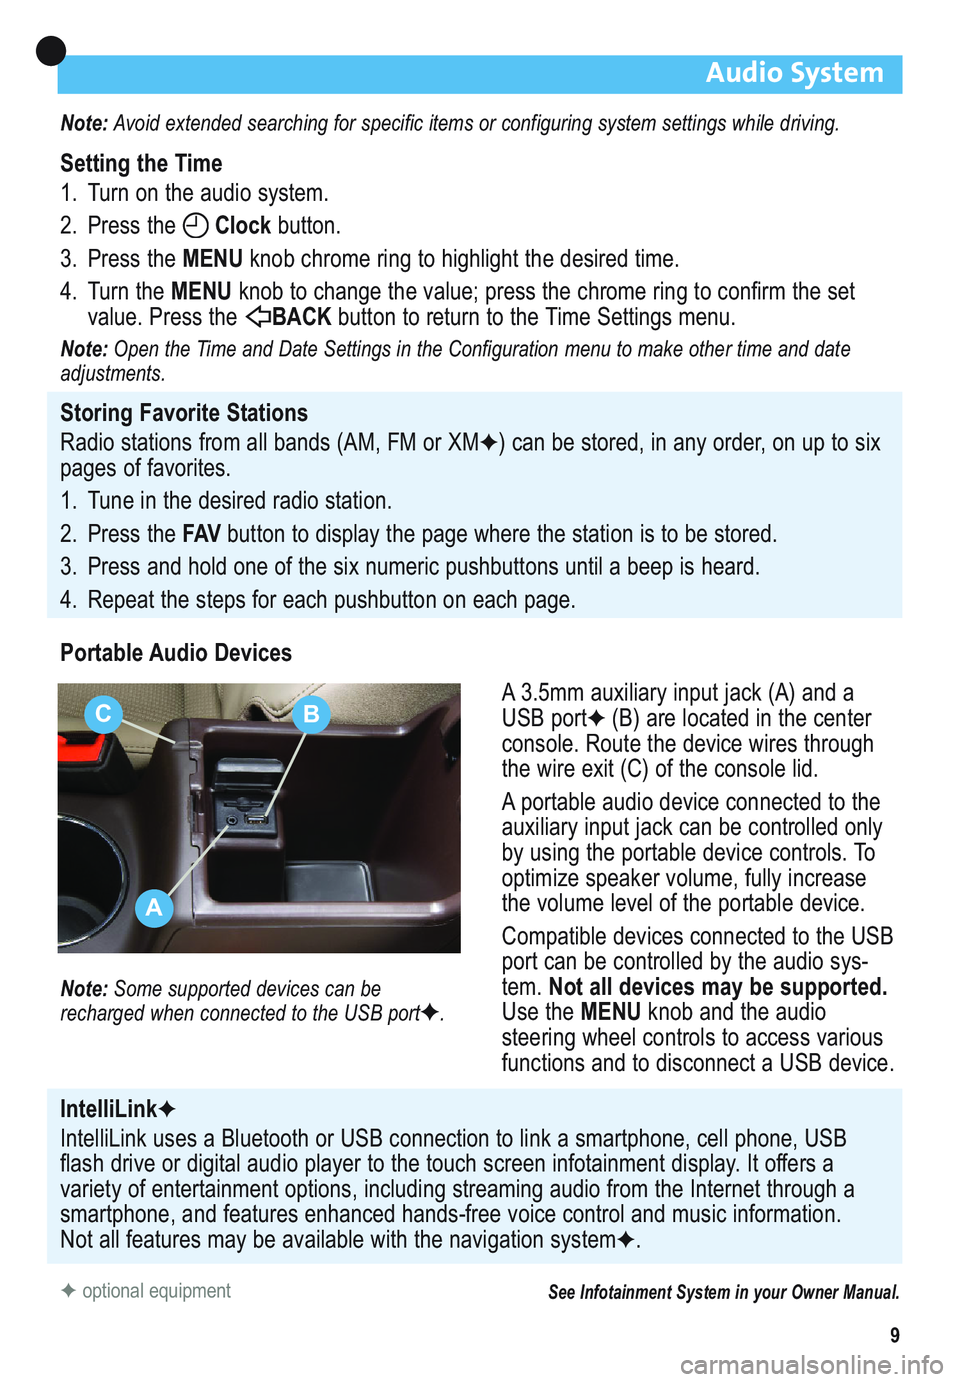
Portable Audio Devices
A 3.5mm auxiliary input jack (A) and a
USB port
✦(B) are located in the center
console. Route the device wires through
the wire exit (C) of the console lid.
A portable audio device connected to the
auxiliary input jack can be controlled only
by using the portable device controls. To
optimize speaker volume, fully increase
the volume level of the portable device.
Compatible devices connected to the USB
port can be controlled by the audio sys-
tem. Not all devices may be supported.
Use the MENUknob and the audio
steering wheel controls to access various
functions and to disconnect a USB device.
Note: Some supported devices can be
recharged when connected to the USB port✦.
✦optional equipmentSee Infotainment System in your Owner Manual.
IntelliLink✦
IntelliLink uses a Bluetooth or USB connection to link a smartphone, cell phone, USB
flash drive or digital audio player to the touch screen infotainment display. It offers a
variety of entertainment options, including streaming audio from the Internet through a
smartphone, and features enhanced hands-free voice control and music information.
Not all features may be available with the navigation system
✦.
A
CB
Page 11 of 16
11
Audio Steering Wheel Controls
Volume
Press +or –to adjust the volume.
SRC Source
Press to select an audio source.
Next/Previous
Toggle up or down to go to the next or pre-
vious favorite radio station, track, or file.
Push to Talk
Press to interact with the OnStar
®or
Bluetooth system.
End Call/Mute
Press to end or reject an OnStar or a
Bluetooth call.
Press to mute the vehicle speakers.
See Instruments and Controls in your Owner Manual.
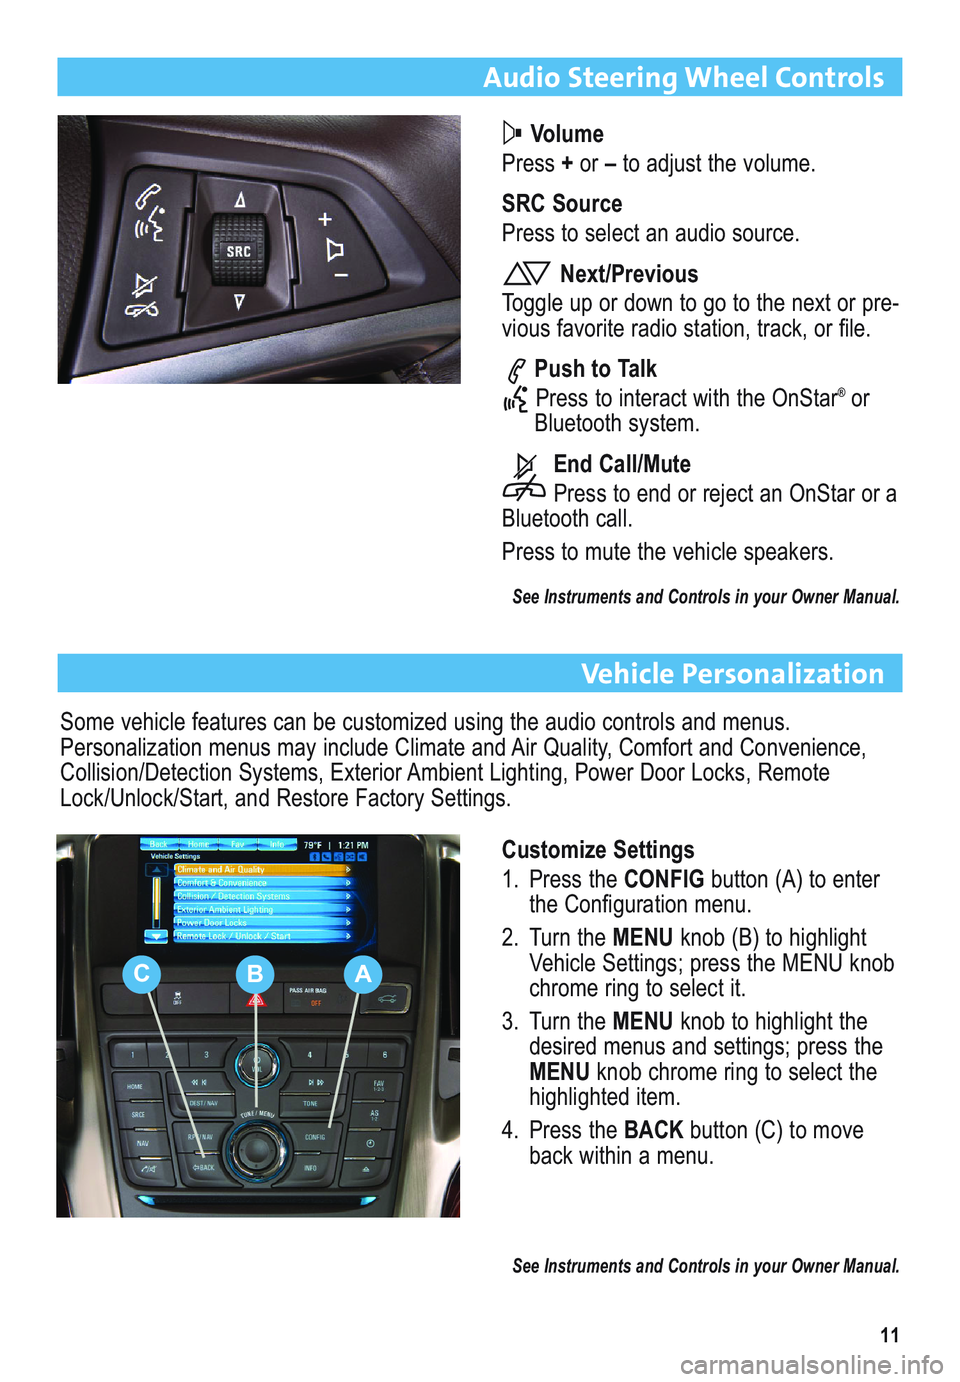
Vehicle Personalization
Customize Settings
1. Press the CONFIGbutton (A) to enter
the Configuration menu.
2. Turn the MENUknob (B) to highlight
Vehicle Settings; press the MENU knob
chrome ring to select it.
3. Turn the MENUknob to highlight the
desired menus and settings; press the
MENUknob chrome ring to select the
highlighted item.
4. Press the BACKbutton (C) to move
back within a menu.
See Instruments and Controls in your Owner Manual.
Some vehicle features can be customized using the audio controls and menus.
Personalization menus may include Climate and Air Quality, Comfort and Convenience,
Collision/Detection Systems, Exterior Ambient Lighting, Power Door Locks, Remote
Lock/Unlock/Start, and Restore Factory Settings.
CBA
Page 14 of 16
14
Electric Parking Brake
To apply the parking brake, pull up theParking Brakeswitch by the shift lever.
To release the parking brake, turn on the ignition, press the brake pedal and press
down theParking Brakeswitch.
Note: The parking brake will automatically release if the vehicle is running, placed into gear, and an
attempt is made to drive away.
See Driving and Operating in your Owner Manual.
Door Locks
Pull the inside door handle of a locked door to unlock it; pull the inside handle again to
open the door.
To prevent a rear door from opening from the inside and to disable the rear window
controls, press the Safety Locksbutton located on the driver’s door. The button
indicator will illuminate when activated.
See Keys, Doors and Windows in your Owner Manual.
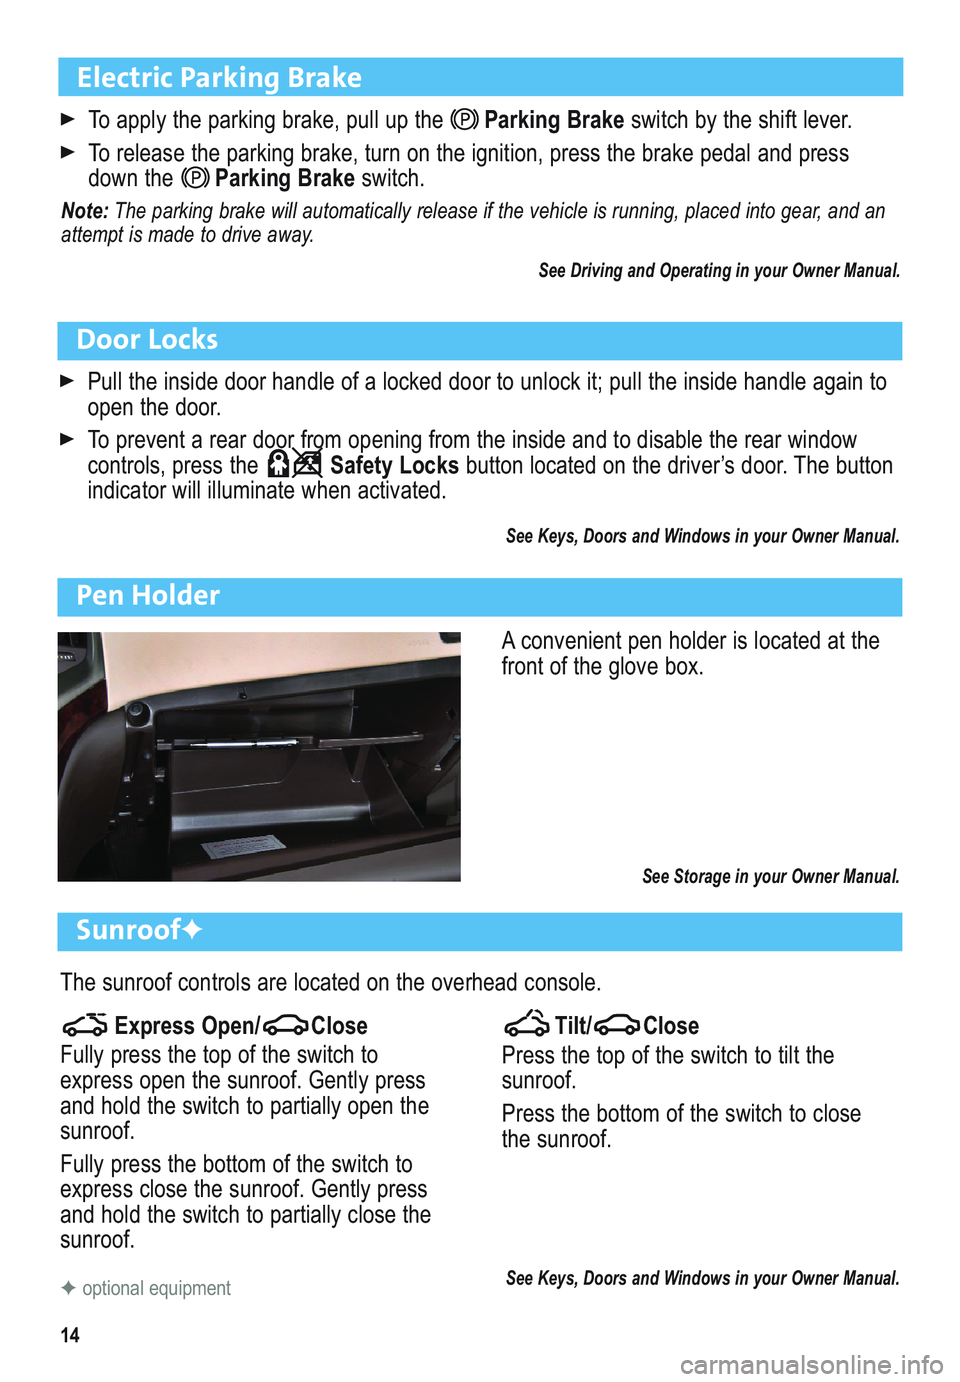
Pen Holder
A convenient pen holder is located at the
front of the glove box.
See Storage in your Owner Manual.
Sunroof✦
The sunroof controls are located on the overhead console.
Tilt/ Close
Press the top of the switch to tilt the
sunroof.
Press the bottom of the switch to close
the sunroof.
See Keys, Doors and Windows in your Owner Manual.✦optional equipment
Express Open/ Close
Fully press the top of the switch to
express open the sunroof. Gently press
and hold the switch to partially open the
sunroof.
Fully press the bottom of the switch to
express close the sunroof. Gently press
and hold the switch to partially close the
sunroof.
Page 16 of 16
16
Roadside Assistance
1-800-252-1112 TTY Users: 1-888-889-2438
As the owner of a new Buick, you are automatically enrolled in the Buick Roadside Assistance
program for 5 years/100,000 miles at no expense to you. This value-added service is intended
to provide you with peace of mind as you drive across town or travel the open road.
Buick’s Roadside Assistance toll-free number is staffed by a team of trained advisors who are
available 24 hours a day, 365 days a year, to contact a service provider for light services (fuel
delivery, jump-starts, flat tire and lock-outs) or make arrangements to tow your vehicle to the
nearest Buick dealer.
Roadside Assistance and OnStar
®
If you require roadside service and have a current OnStar subscription, press the OnStar but-
ton and the vehicle will send your current GPS location to an OnStar Advisor who will speak to
you, assess your problem, contact Roadside Assistance and relay your exact location so you
will get the help you need.
Buick Owner Center
The Buick Owner Center, a complimentary service for Buick owners, is a one-stop resource
designed to enhance your Buick ownership experience. Exclusive member benefits include
online service reminders, vehicle maintenance tips, online owner manual, special privileges
and more.
Sign up today at www.gmownercenter.com/buick.
Certain restrictions, precautions and safety procedures apply to your vehicle. Please read your Owner Manual
for complete instructions. All information contained herein is based on the latest information available at the time
of printing and is subject to change without notice. Copyright 2011 General Motors. All rights reserved.
Always demand genuine GM Parts
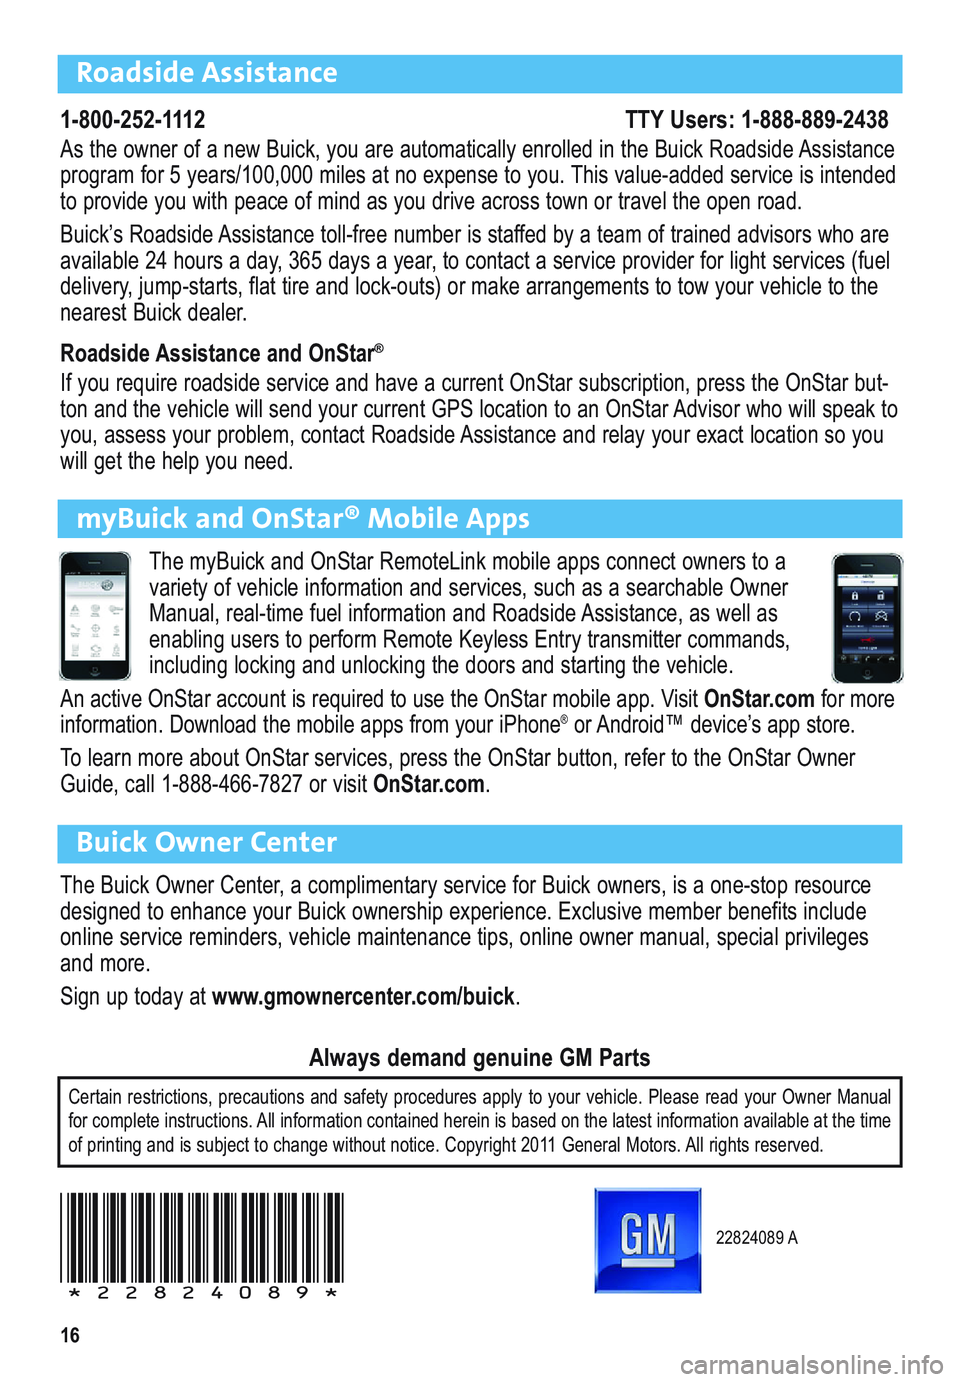
myBuick and OnStar® Mobile Apps
The myBuick and OnStar RemoteLink mobile apps connect owners to a
variety of vehicle information and services, such as a searchable Owner
Manual, real-time fuel information and Roadside Assistance, as well as
enabling users to perform Remote Keyless Entry transmitter commands,
including locking and unlocking the doors and starting the vehicle.
An active OnStar account is required to use the OnStar mobile app. Visit OnStar.comfor more
information. Download the mobile apps from your iPhone®or Android™ device’s app store.
To learn more about OnStar services, press the OnStar button, refer to the OnStar Owner
Guide, call 1-888-466-7827 or visit OnStar.com.
22824089 A
!22824089!