ECO mode BUICK ENCLAVE 2011 Owner's Manual
[x] Cancel search | Manufacturer: BUICK, Model Year: 2011, Model line: ENCLAVE, Model: BUICK ENCLAVE 2011Pages: 388, PDF Size: 5.26 MB
Page 3 of 388
Black plate (3,1)Buick Verano Owner Manual - 2012 - CRC - 1/10/12
Introduction iii
The names, logos, emblems,
slogans, vehicle model names, and
vehicle body designs appearing in
this manual including, but not limited
to, GM, the GM logo, BUICK, the
BUICK Emblem, and VERANO
are trademarks and/or service
marks of General Motors LLC, its
subsidiaries, affiliates, or licensors.This manual describes features that
may or may not be on your specific
vehicle either because they are
options that you did not purchase or
due to changes subsequent to the
printing of this owner manual.
Please refer to the purchase
documentation relating to your
specific vehicle to confirm each of
the features found on your vehicle.
For vehicles first sold in Canada,
substitute the name
“General
Motors of Canada Limited” for Buick
Motor Division wherever it appears
in this manual.
Keep this manual in the vehicle for
quick reference.
Canadian Vehicle Owners
Propriétaires Canadiens
A French language copy of this
manual can be obtained from your
dealer or from:
On peut obtenir un exemplaire de
ce guide en français auprès du
concessionnaire ou à l'adresse
suivante:
Helm, Incorporated
Attention: Customer Service
47911 Halyard Drive
Plymouth, MI 48170
Litho in U.S.A.
Part No. 20916303 B Second Printing©2012 General Motors LLC. All Rights Reserved.
Page 36 of 388
Black plate (6,1)Buick Verano Owner Manual - 2012 - CRC - 1/10/12
2-6 Keys, Doors, and Windows
The Driver Information Center
(DIC) displays READY FOR
REMOTE #2, 3, 4 or 5.
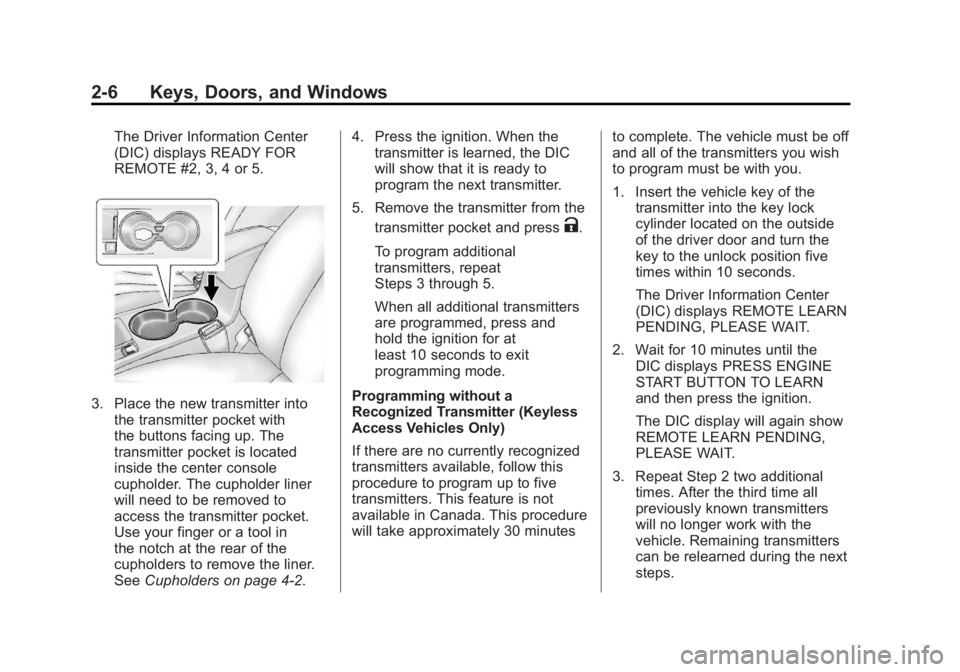
3. Place the new transmitter intothe transmitter pocket with
the buttons facing up. The
transmitter pocket is located
inside the center console
cupholder. The cupholder liner
will need to be removed to
access the transmitter pocket.
Use your finger or a tool in
the notch at the rear of the
cupholders to remove the liner.
See Cupholders on page 4‑2. 4. Press the ignition. When the
transmitter is learned, the DIC
will show that it is ready to
program the next transmitter.
5. Remove the transmitter from the transmitter pocket and press
K.
To program additional
transmitters, repeat
Steps 3 through 5.
When all additional transmitters
are programmed, press and
hold the ignition for at
least 10 seconds to exit
programming mode.
Programming without a
Recognized Transmitter (Keyless
Access Vehicles Only)
If there are no currently recognized
transmitters available, follow this
procedure to program up to five
transmitters. This feature is not
available in Canada. This procedure
will take approximately 30 minutes to complete. The vehicle must be off
and all of the transmitters you wish
to program must be with you.
1. Insert the vehicle key of the
transmitter into the key lock
cylinder located on the outside
of the driver door and turn the
key to the unlock position five
times within 10 seconds.
The Driver Information Center
(DIC) displays REMOTE LEARN
PENDING, PLEASE WAIT.
2. Wait for 10 minutes until the DIC displays PRESS ENGINE
START BUTTON TO LEARN
and then press the ignition.
The DIC display will again show
REMOTE LEARN PENDING,
PLEASE WAIT.
3. Repeat Step 2 two additional times. After the third time all
previously known transmitters
will no longer work with the
vehicle. Remaining transmitters
can be relearned during the next
steps.
Page 37 of 388
Black plate (7,1)Buick Verano Owner Manual - 2012 - CRC - 1/10/12
Keys, Doors, and Windows 2-7
The DIC display should
now show READY FOR
REMOTE # 1.
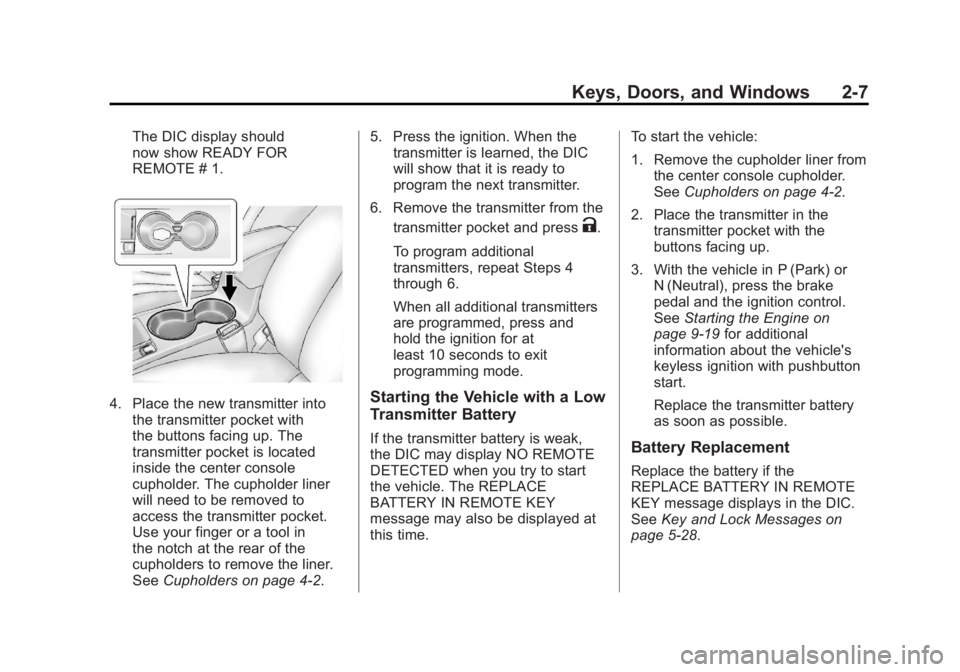
4. Place the new transmitter intothe transmitter pocket with
the buttons facing up. The
transmitter pocket is located
inside the center console
cupholder. The cupholder liner
will need to be removed to
access the transmitter pocket.
Use your finger or a tool in
the notch at the rear of the
cupholders to remove the liner.
See Cupholders on page 4‑2. 5. Press the ignition. When the
transmitter is learned, the DIC
will show that it is ready to
program the next transmitter.
6. Remove the transmitter from the transmitter pocket and press
K.
To program additional
transmitters, repeat Steps 4
through 6.
When all additional transmitters
are programmed, press and
hold the ignition for at
least 10 seconds to exit
programming mode.
Starting the Vehicle with a Low
Transmitter Battery
If the transmitter battery is weak,
the DIC may display NO REMOTE
DETECTED when you try to start
the vehicle. The REPLACE
BATTERY IN REMOTE KEY
message may also be displayed at
this time. To start the vehicle:
1. Remove the cupholder liner from
the center console cupholder.
See Cupholders on page 4‑2.
2. Place the transmitter in the transmitter pocket with the
buttons facing up.
3. With the vehicle in P (Park) or N (Neutral), press the brake
pedal and the ignition control.
See Starting the Engine on
page 9‑19 for additional
information about the vehicle's
keyless ignition with pushbutton
start.
Replace the transmitter battery
as soon as possible.Battery Replacement
Replace the battery if the
REPLACE BATTERY IN REMOTE
KEY message displays in the DIC.
See Key and Lock Messages on
page 5‑28.
Page 38 of 388
Black plate (8,1)Buick Verano Owner Manual - 2012 - CRC - 1/10/12
2-8 Keys, Doors, and Windows
The battery is not rechargeable. To
replace the battery:
1. Push the button on thetransmitter to extend the key.
2. Remove the battery cover by prying it with a finger.
3. Remove the battery by pushing on the battery and sliding it
toward the key blade.
4. Insert the new battery, positive side facing up. Push the battery
down until it is held in place.
Replace with a CR2032 or
equivalent battery.
5. Snap the battery cover back on to the transmitter.
Remote Vehicle Start
The vehicle may have this feature
that allows you to start the engine
from outside the vehicle.
/(Remote Vehicle Start):
This button will be on the RKE
transmitter if the vehicle has remote
start. Vehicles with an automatic climate
control system will default to a
heating or cooling mode depending
on the outside temperature during
a remote start. A vehicle without
automatic climate control will default
to the last used heating or cooling
mode. Once the key is turned to
ON/RUN, the climate control system
will turn on at the setting the vehicle
was last set to. If the vehicle has
heated seats, they may come on
during a remote start. See
Heated
Front Seats on page 3‑6.
Laws in some local communities
may restrict the use of remote
starters. For example, some laws
require a person using remote
start to have the vehicle in view.
Check local regulations for any
requirements.
Other conditions can affect the
performance of the transmitter. See
Remote Keyless Entry (RKE)
System on page 2‑3. Starting the Vehicle
To start the engine using the remote
start feature:
1. Aim the RKE transmitter at the
vehicle.
2. Press and release
Q.
3. Immediately after completing Step 2, press and hold
/until
the turn signal lamps flash, or for
about two seconds if the vehicle
is not in view.
When the engine starts, the parking
lamps will turn on and remain on as
long as the engine is running. The
doors will be locked and the climate
control system may come on.
The engine will continue to run for
10 minutes. Repeat the steps for a
10-minute time extension. Remote
start can be extended only once.
Start the vehicle before driving.
Page 76 of 388

Black plate (24,1)Buick Verano Owner Manual - 2012 - CRC - 1/10/12
3-24 Seats and Restraints
Both roof‐rail airbags will inflate
when either side of the vehicle is
struck or if the sensing system
predicts that the vehicle is about to
roll over on its side, or in a severe
frontal impact.
In any particular crash, no one can
say whether an airbag should have
inflated simply because of the
vehicle damage or repair costs.
What Makes an Airbag
Inflate?
In a deployment event, the sensing
system sends an electrical signal
triggering a release of gas from the
inflator. Gas from the inflator fills the
airbag causing the bag to break out
of the cover. The inflator, the airbag,
and related hardware are all part of
the airbag module.
For airbag location, seeWhere Are
the Airbags? on page 3‑21.
How Does an Airbag
Restrain?
In moderate to severe frontal or
near frontal collisions, even belted
occupants can contact the steering
wheel or the instrument panel. In
moderate to severe side collisions,
even belted occupants can contact
the inside of the vehicle.
Airbags supplement the protection
provided by safety belts by
distributing the force of the
impact more evenly over the
occupant's body.
Rollover capable roof‐rail airbags
are designed to help contain the
head and chest of occupants in the
outboard seating positions in the
first and second rows. The rollover
capable roof‐rail airbags are
designed to help reduce the risk of
full or partial ejection in rollover
events, although no system can
prevent all such ejections. But airbags would not help in
many types of collisions, primarily
because the occupant's motion is
not toward those airbags. See
When
Should an Airbag Inflate? on
page 3‑23 for more information.
Airbags should never be regarded
as anything more than a supplement
to safety belts.
What Will You See after
an Airbag Inflates?
After the frontal airbags and
seat-mounted side impact airbags
inflate, they quickly deflate, so
quickly that some people may not
even realize an airbag inflated.
Roof-rail airbags may still be at least
partially inflated for some time after
they inflate. Some components of
the airbag module may be hot for
several minutes. For location of the
airbags, see Where Are the
Airbags? on page 3‑21.
Page 123 of 388
Black plate (13,1)Buick Verano Owner Manual - 2012 - CRC - 1/10/12
Instruments and Controls 5-13
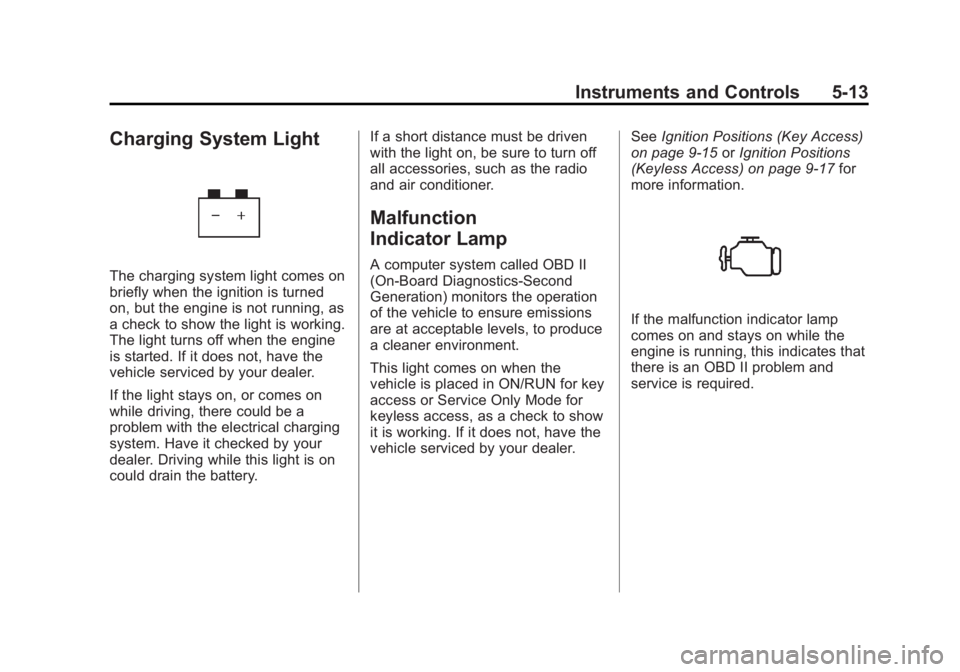
Charging System Light
The charging system light comes on
briefly when the ignition is turned
on, but the engine is not running, as
a check to show the light is working.
The light turns off when the engine
is started. If it does not, have the
vehicle serviced by your dealer.
If the light stays on, or comes on
while driving, there could be a
problem with the electrical charging
system. Have it checked by your
dealer. Driving while this light is on
could drain the battery.If a short distance must be driven
with the light on, be sure to turn off
all accessories, such as the radio
and air conditioner.
Malfunction
Indicator Lamp
A computer system called OBD II
(On-Board Diagnostics-Second
Generation) monitors the operation
of the vehicle to ensure emissions
are at acceptable levels, to produce
a cleaner environment.
This light comes on when the
vehicle is placed in ON/RUN for key
access or Service Only Mode for
keyless access, as a check to show
it is working. If it does not, have the
vehicle serviced by your dealer.
See
Ignition Positions (Key Access)
on page 9‑15 orIgnition Positions
(Keyless Access) on page 9‑17 for
more information.
If the malfunction indicator lamp
comes on and stays on while the
engine is running, this indicates that
there is an OBD II problem and
service is required.
Page 125 of 388
Black plate (15,1)Buick Verano Owner Manual - 2012 - CRC - 1/10/12
Instruments and Controls 5-15
.Check that good quality fuel is
used. Poor fuel quality causes
the engine not to run as
efficiently as designed and may
cause stalling after start-up,
stalling when the vehicle is
changed into gear, misfiring,
hesitation on acceleration,
or stumbling on acceleration.
These conditions might go away
once the engine is warmed up.
If one or more of these conditions
occurs, change the fuel brand used.
It will require at least one full tank of
the proper fuel to turn the light off.
See Recommended Fuel on
page 9‑41.
If none of the above have made the
light turn off, your dealer can check
the vehicle. The dealer has the
proper test equipment and
diagnostic tools to fix any
mechanical or electrical problems
that might have developed.Emissions Inspection and
Maintenance Programs
Some local governments may
have programs to inspect the
on-vehicle emission control
equipment. For the inspection, the
emission system test equipment
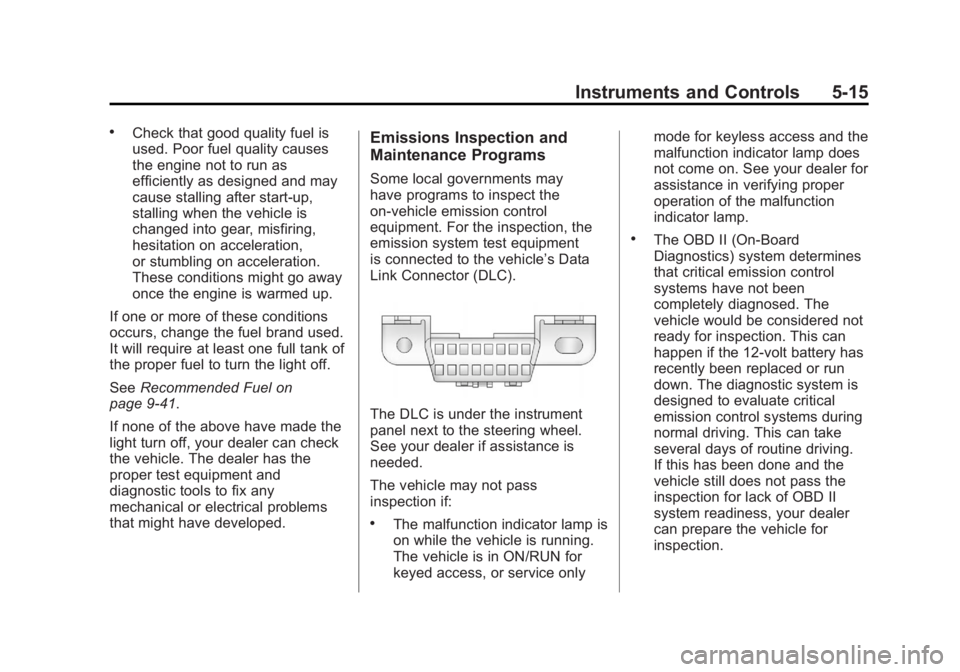
is connected to the vehicle’s Data
Link Connector (DLC).
The DLC is under the instrument
panel next to the steering wheel.
See your dealer if assistance is
needed.
The vehicle may not pass
inspection if:
.The malfunction indicator lamp is
on while the vehicle is running.
The vehicle is in ON/RUN for
keyed access, or service only mode for keyless access and the
malfunction indicator lamp does
not come on. See your dealer for
assistance in verifying proper
operation of the malfunction
indicator lamp.
.The OBD II (On-Board
Diagnostics) system determines
that critical emission control
systems have not been
completely diagnosed. The
vehicle would be considered not
ready for inspection. This can
happen if the 12-volt battery has
recently been replaced or run
down. The diagnostic system is
designed to evaluate critical
emission control systems during
normal driving. This can take
several days of routine driving.
If this has been done and the
vehicle still does not pass the
inspection for lack of OBD II
system readiness, your dealer
can prepare the vehicle for
inspection.
Page 180 of 388
Black plate (30,1)Buick Verano Owner Manual - 2012 - CRC - 1/10/12
7-30 Infotainment System
Phone
Bluetooth (Overview)
For vehicles equipped with the
MyLink or IntelliLink infotainment
system, see the separate MyLink/
IntelliLink Features and Functions
Guide for more information.
For vehicles equipped with
Bluetooth capability, the system
can interact with many cell phones,
allowing:
.Placement and receipt of calls in
a hands-free mode.
.Sharing of the cell phone’s
address book or contact list with
the vehicle.
To minimize driver distraction,
before driving, and with the vehicle
parked:
.Become familiar with the
features of the cell phone.
Organize the phone book and
contact lists clearly and delete duplicate or rarely used entries.
If possible, program speed dial
or other shortcuts.
.Review the controls and
operation of the infotainment
system.
.Pair cell phone(s) to the vehicle.
The system may not work with
all cell phones. See
“Pairing”in
this section for more information.
.If the cell phone has voice
dialing capability, learn to use
that feature to access the
address book or contact list.
See “Voice Pass-Thru” in this
section for more information.
.See “Storing and Deleting Phone
Numbers” in this section for
more information.
{WARNING
When using a cell phone, it can
be distracting to look too long or
too often at the screen of the
(Continued)
WARNING (Continued)
phone or the infotainment
(navigation) system. Taking
your eyes off the road too long or
too often could cause a crash
resulting in injury or death. Focus
your attention on driving.
Vehicles with a Bluetooth system
can use a Bluetooth-capable cell
phone with a Hands-Free Profile
to make and receive phone calls.
The infotainment system and voice
recognition are used to control
the system. The system can be
used while in ON/RUN or ACC/
ACCESSORY. The range of the
Bluetooth system can be up to 9.1 m
(30 ft). Not all phones support all
functions and not all phones work
with the Bluetooth system. See
www.gm.com/bluetooth for more
information about compatible
phones.
Page 203 of 388
Black plate (1,1)Buick Verano Owner Manual - 2012 - CRC - 1/10/12
Driving and Operating 9-1
Driving and
Operating
Driving Information
Distracted Driving . . . . . . . . . . . . . 9-2
Defensive Driving . . . . . . . . . . . . . 9-3
Drunk Driving . . . . . . . . . . . . . . . . . 9-3
Control of a Vehicle . . . . . . . . . . . 9-3
Braking . . . . . . . . . . . . . . . . . . . . . . . 9-3
Steering . . . . . . . . . . . . . . . . . . . . . . . 9-4
Off-Road Recovery . . . . . . . . . . . . 9-5
Loss of Control . . . . . . . . . . . . . . . . 9-5
Driving on Wet Roads . . . . . . . . . 9-6
Highway Hypnosis . . . . . . . . . . . . 9-6
Hill and Mountain Roads . . . . . . 9-7
Winter Driving . . . . . . . . . . . . . . . . . 9-7
If the Vehicle Is Stuck . . . . . . . . . 9-9
Vehicle Load Limits . . . . . . . . . . 9-10
Starting and Operating
New Vehicle Break-In . . . . . . . . 9-14
Ignition Positions (KeyAccess) . . . . . . . . . . . . . . . . . . . . 9-15
Ignition Positions (Keyless Access) . . . . . . . . . . . . . . . . . . . . 9-17
Starting the Engine . . . . . . . . . . 9-19
Engine Heater . . . . . . . . . . . . . . . 9-21 Retained Accessory
Power (RAP) . . . . . . . . . . . . . . . 9-22
Shifting Into Park . . . . . . . . . . . . 9-23
Shifting out of Park . . . . . . . . . . 9-24
Parking over Things That Burn . . . . . . . . . . . . . . . . . . 9-24
Engine Exhaust
Engine Exhaust . . . . . . . . . . . . . . 9-25
Running the Vehicle WhileParked . . . . . . . . . . . . . . . . . . . . . 9-25
Automatic Transmission
Automatic Transmission . . . . . 9-26
Manual Mode . . . . . . . . . . . . . . . . 9-28
Brakes
Antilock BrakeSystem (ABS) . . . . . . . . . . . . . . 9-30
Parking Brake . . . . . . . . . . . . . . . 9-31
Brake Assist . . . . . . . . . . . . . . . . . 9-33
Hill Start Assist (HSA) . . . . . . . 9-33
Ride Control Systems
Traction Control System (TCS) . . . . . . . . . . . . . . 9-33
StabiliTrak
®System . . . . . . . . . 9-35
Cruise Control
Cruise Control . . . . . . . . . . . . . . . 9-37
Object Detection Systems
Ultrasonic Parking Assist . . . . 9-39
Fuel
Fuel . . . . . . . . . . . . . . . . . . . . . . . . . 9-41
Recommended Fuel . . . . . . . . . 9-41
Gasoline Specifications . . . . . . 9-42
California Fuel Requirements . . . . . . . . . . . . . . 9-42
Fuels in Foreign Countries . . . 9-42
Fuel Additives . . . . . . . . . . . . . . . 9-42
Fuel E85 (85% Ethanol) . . . . . 9-43
Filling the Tank . . . . . . . . . . . . . . 9-44
Filling a Portable Fuel Container . . . . . . . . . . . . . . . . . . . 9-46
Towing
General TowingInformation . . . . . . . . . . . . . . . . . 9-46
Driving Characteristics and Towing Tips . . . . . . . . . . . . . . . . 9-47
Trailer Towing . . . . . . . . . . . . . . . . 9-50
Towing Equipment . . . . . . . . . . . 9-52
Conversions and Add-Ons
Add-On Electrical Equipment . . . . . . . . . . . . . . . . . 9-52
Page 221 of 388
Black plate (19,1)Buick Verano Owner Manual - 2012 - CRC - 1/10/12
Driving and Operating 9-19
ACC/ACCESSORY (Amber
Indicator Light):This mode
allows you to use some electrical
accessories when the engine is off.
With the ignition off, pressing the
button one time without the brake
pedal applied will place the ignition
system in ACC/ACCESSORY.
The ignition will switch from ACC/
ACCESSORY to OFF after
five minutes to prevent battery
rundown.
ON/RUN/START (Green Indicator
Light): This mode is for driving and
starting. With the ignition off, and
the brake pedal applied, pressing
the button once will place the
ignition system in ON/RUN/START.
Once engine cranking begins,
release the button. Engine cranking
will continue until the engine
starts. See Starting the Engine on
page 9‑19 for more information. The
ignition will then remain in ON/RUN. Service Only Mode
This power mode is available for
service and diagnostics, and to
verify the proper operation of the
malfunction indicator lamp as may
be required for emission inspection
purposes. With the vehicle off,
and the brake pedal not applied,
pressing and holding the button for
more than five seconds will place
the vehicle in Service Only Mode.
The instruments and audio systems
will operate as they do in ON/RUN,
but the vehicle will not be able to be
driven. The engine will not start in
Service Only Mode. Push the button
again to turn the vehicle off.
Starting the Engine
Place the transmission in the
proper gear.
Notice:
If you add electrical parts
or accessories, you could change
the way the engine operates. Any
resulting damage would not be covered by the vehicle warranty.
See
Add-On Electrical Equipment
on page 9‑52.
Notice: Do not try to shift to
P (Park) if the vehicle is moving.
If you do, you could damage the
transmission. Shift to P (Park)
only when the vehicle is stopped.
Move the shift lever to P (Park) or
N (Neutral). The engine will not start
in any other position. To restart the
vehicle when it is already moving,
use N (Neutral) only.
Starting Procedure (Key Access)
1. With your foot off the accelerator pedal, turn the ignition key to
START. When the engine starts,
let go of the key. The idle speed
will go down as the engine
warms. Do not race the engine
immediately after starting it.
Allow the oil to warm up and
lubricate all moving parts.