ESP BUICK ENCLAVE 2011 Owner's Manual
[x] Cancel search | Manufacturer: BUICK, Model Year: 2011, Model line: ENCLAVE, Model: BUICK ENCLAVE 2011Pages: 388, PDF Size: 5.26 MB
Page 22 of 388
Black plate (16,1)Buick Verano Owner Manual - 2012 - CRC - 1/10/12
1-16 In Brief
Vehicle Features
Radio(s)
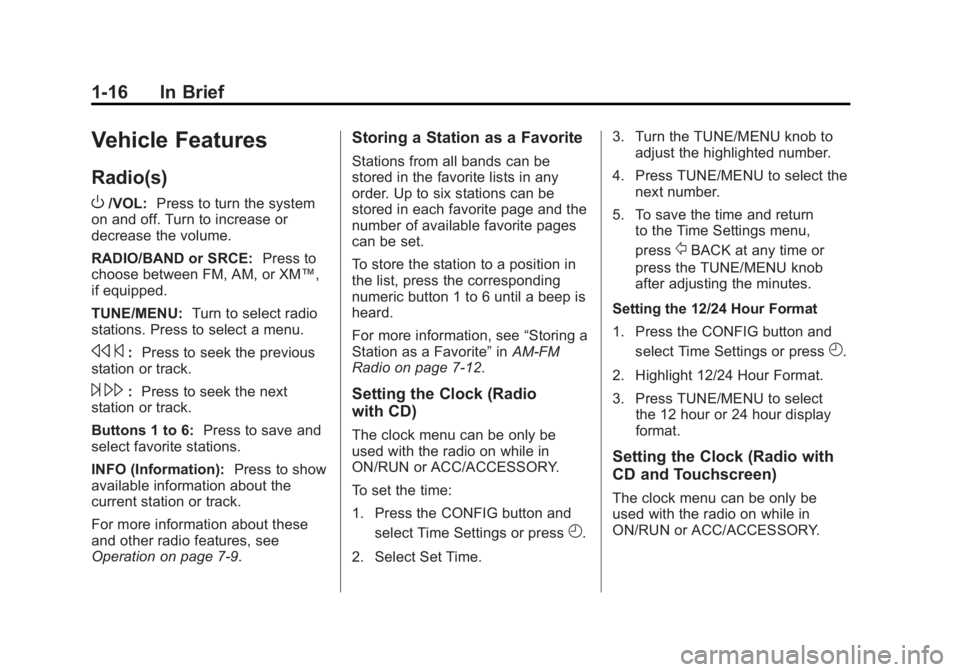
O
/VOL:Press to turn the system
on and off. Turn to increase or
decrease the volume.
RADIO/BAND or SRCE: Press to
choose between FM, AM, or XM™,
if equipped.
TUNE/MENU: Turn to select radio
stations. Press to select a menu.
s ©:Press to seek the previous
station or track.
¨ \: Press to seek the next
station or track.
Buttons 1 to 6: Press to save and
select favorite stations.
INFO (Information): Press to show
available information about the
current station or track.
For more information about these
and other radio features, see
Operation on page 7‑9.
Storing a Station as a Favorite
Stations from all bands can be
stored in the favorite lists in any
order. Up to six stations can be
stored in each favorite page and the
number of available favorite pages
can be set.
To store the station to a position in
the list, press the corresponding
numeric button 1 to 6 until a beep is
heard.
For more information, see “Storing a
Station as a Favorite” inAM-FM
Radio on page 7‑12.
Setting the Clock (Radio
with CD)
The clock menu can be only be
used with the radio on while in
ON/RUN or ACC/ACCESSORY.
To set the time:
1. Press the CONFIG button and
select Time Settings or press
H.
2. Select Set Time. 3. Turn the TUNE/MENU knob to
adjust the highlighted number.
4. Press TUNE/MENU to select the next number.
5. To save the time and return to the Time Settings menu,
press
/BACK at any time or
press the TUNE/MENU knob
after adjusting the minutes.
Setting the 12/24 Hour Format
1. Press the CONFIG button and select Time Settings or press
H.
2. Highlight 12/24 Hour Format.
3. Press TUNE/MENU to select the 12 hour or 24 hour display
format.
Setting the Clock (Radio with
CD and Touchscreen)
The clock menu can be only be
used with the radio on while in
ON/RUN or ACC/ACCESSORY.
Page 28 of 388
Black plate (22,1)Buick Verano Owner Manual - 2012 - CRC - 1/10/12
1-22 In Brief
During cooler conditions, the low tire
pressure warning light may appear
when the vehicle is first started and
then turn off. This may be an early
indicator that the tire pressures are
getting low and the tires need to be
inflated to the proper pressure.
The TPMS does not replace normal
monthly tire maintenance. It is the
driver’s responsibility to maintain
correct tire pressures.
See Tire Pressure Monitor System
on page 10‑43.
Engine Oil Life System
The engine oil life system calculates
engine oil life based on vehicle use
and displays the CHANGE ENGINE
OIL SOON message when it is time
to change the engine oil and filter.
The oil life system should be reset
to 100% only following an oil
change. Resetting the Oil Life System
1. Turn the ignition to ON/RUN with
the engine off.
2. Press the DIC MENU button on the turn signal lever to enter the
Vehicle Information Menu. Use
the thumbwheel to scroll through
the menu items until you reach
REMAINING OIL LIFE.
3. Press the SET/CLR button to reset the oil life at 100%.
4. Turn the ignition to LOCK/OFF.
See Engine Oil Life System on
page 10‑9.Fuel E85 (85% Ethanol)
Vehicles that have a FlexFuel badge
and a yellow fuel cap can use either
unleaded gasoline or ethanol fuel
containing up to 85% ethanol (E85).
See Fuel E85 (85% Ethanol) on
page 9‑43. For all other vehicles,
use only the unleaded gasoline
described under Recommended
Fuel on page 9‑41.
Driving for Better Fuel
Economy
Driving habits can affect fuel
mileage. Here are some driving tips
to get the best fuel economy
possible.
.Avoid fast starts and accelerate
smoothly.
.Brake gradually and avoid
abrupt stops.
.Avoid idling the engine for long
periods of time.
.When road and weather
conditions are appropriate, use
cruise control.
.Always follow posted speed
limits or drive more slowly when
conditions require.
.Keep vehicle tires properly
inflated.
.Combine several trips into a
single trip.
Page 40 of 388
Black plate (10,1)Buick Verano Owner Manual - 2012 - CRC - 1/10/12
2-10 Keys, Doors, and Windows
Door Locks
{WARNING
Unlocked doors can be
dangerous.
.Passengers, especially
children, can easily open the
doors and fall out of a moving
vehicle. The chance of being
thrown out of the vehicle in
a crash is increased if the
doors are not locked. So, all
passengers should wear
safety belts properly and the
doors should be locked
whenever the vehicle is
driven.(Continued)
WARNING (Continued)
.Young children who get into
unlocked vehicles may be
unable to get out. A child can
be overcome by extreme heat
and can suffer permanent
injuries or even death from
heat stroke. Always lock the
vehicle whenever leaving it.
.Outsiders can easily enter
through an unlocked door
when slowing or stopping the
vehicle. Lock the doors to
help prevent this from
happening.
To lock or unlock the door from
outside the vehicle, press
Kon the
Remote Keyless Entry (RKE)
transmitter or use the key in the
driver door. From inside the vehicle with the
doors locked, pull once on the door
handle to unlock it, and a second
time to open it.
Push down on the door lock knob
on the top of the door.
Manually locking the driver door
also automatically locks all other
doors.
For more information see:
.Remote Keyless Entry (RKE)
System Operation on page 2‑4.
.Power Door Locks on page 2‑11.
.Vehicle Personalization on
page 5‑30.
Page 48 of 388
Black plate (18,1)Buick Verano Owner Manual - 2012 - CRC - 1/10/12
2-18 Keys, Doors, and Windows
Windows
{WARNING
Leaving children, helpless adults,
or pets in a vehicle with the
windows closed is dangerous.
They can be overcome by the
extreme heat and suffer
permanent injuries or even death
from heat stroke. Never leave a
child, a helpless adult, or a pet
alone in a vehicle, especially with
the windows closed in warm or
hot weather.
The vehicle aerodynamics are
designed to improve fuel economy
performance. This may result in a
pulsing sound when a window is
partially open. To reduce the sound,
open another window or the sunroof
(if equipped).
Power Windows
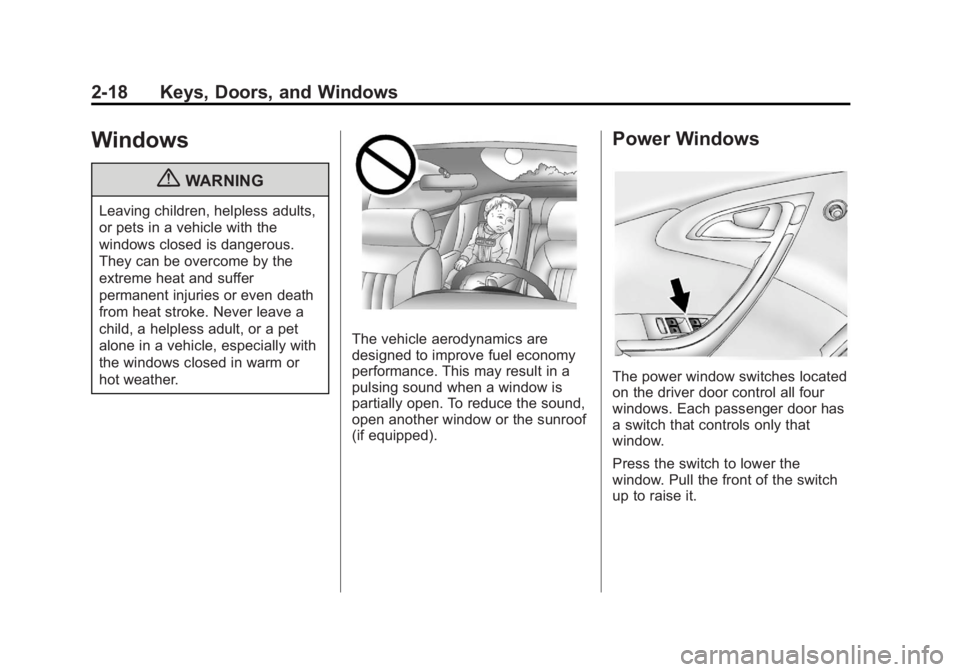
The power window switches located
on the driver door control all four
windows. Each passenger door has
a switch that controls only that
window.
Press the switch to lower the
window. Pull the front of the switch
up to raise it.
Page 58 of 388
Black plate (6,1)Buick Verano Owner Manual - 2012 - CRC - 1/10/12
3-6 Seats and Restraints
2. Push and pull on the seatback tomake sure it is locked.
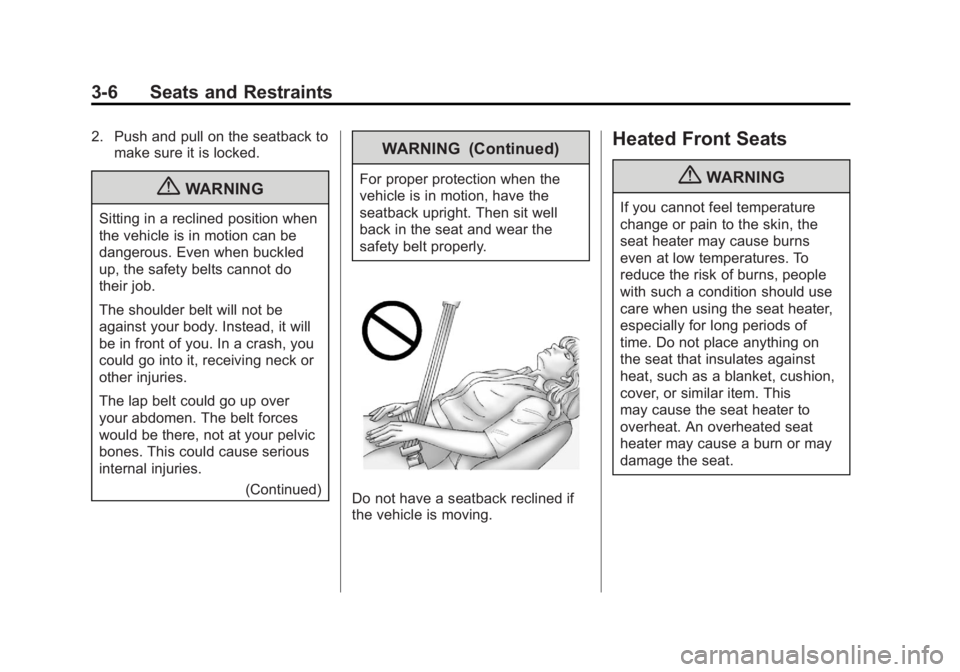
{WARNING
Sitting in a reclined position when
the vehicle is in motion can be
dangerous. Even when buckled
up, the safety belts cannot do
their job.
The shoulder belt will not be
against your body. Instead, it will
be in front of you. In a crash, you
could go into it, receiving neck or
other injuries.
The lap belt could go up over
your abdomen. The belt forces
would be there, not at your pelvic
bones. This could cause serious
internal injuries.
(Continued)
WARNING (Continued)
For proper protection when the
vehicle is in motion, have the
seatback upright. Then sit well
back in the seat and wear the
safety belt properly.
Do not have a seatback reclined if
the vehicle is moving.
Heated Front Seats
{WARNING
If you cannot feel temperature
change or pain to the skin, the
seat heater may cause burns
even at low temperatures. To
reduce the risk of burns, people
with such a condition should use
care when using the seat heater,
especially for long periods of
time. Do not place anything on
the seat that insulates against
heat, such as a blanket, cushion,
cover, or similar item. This
may cause the seat heater to
overheat. An overheated seat
heater may cause a burn or may
damage the seat.
Page 165 of 388
Black plate (15,1)Buick Verano Owner Manual - 2012 - CRC - 1/10/12
Infotainment System 7-15
To adjust the speaker balance:
.Press L (Left) or R (Right) to
change from the left or right
speakers.
EQ Settings
EQ (Equalization): The EQ
settings are selected through the
sound menu. EQ provides a choice
of Manual or Talk. Turn the TUNE/
MENU knob to highlight. Press
TUNE/MENU to select Manual
or Talk.
Radio Settings
To access the Radio Settings menu:
1. Press the CONFIG button.
2. Turn the TUNE/MENU knob until
Radio Settings displays. Press
the TUNE/MENU knob to display
other options within that feature.
Audio system settings or features
can be customized for:
.Audio Cue Options
.Auto Volume
.Gracenote Options
.Startup Volume
.Number of Favorite Pages
.XM Categories
.RDS
.Software Version Menus
Audio Cue Options: Audio Cue
Volume: Press + or - or turn the
TUNE/MENU knob to increase or
decrease the audio cue volume.
Turn the TUNE/MENU knob to On
or Off to turn Audio Cues on or off.
Auto Volume: Turn the TUNE/
MENU knob to select volume Off,
Low, Medium, or High.
Gracenote Options: Press the
TUNE/MENU knob to turn
Normalization on or off.
Startup Volume: Press + or - or
turn the TUNE/MENU knob to
increase or decrease the
infotainment startup volume. Number of Favorite Pages:
Turn
the TUNE/MENU knob to highlight
the number of favorites. Press the
TUNE/MENU knob to select.
XM Categories: If equipped, turn
the TUNE/MENU knob to highlight
the category. Press the TUNE/
MENU knob to select. Turn the
TUNE/MENU knob to Show all XM
Categories to display all categories.
RDS: Press the TUNE/MENU knob
to turn RDS on or off.
Software Version Menus: Turn the
TUNE/MENU knob to highlight the
menu. Press the TUNE/MENU knob
to select software menu.
Finding a Station
Select a band such as AM, FM,
or XM (if equipped).
Turn the TUNE/MENU knob to find
a radio station. To select a preset
station, press the corresponding
preset button.
See “Mixed-Band Presets” following
for more information.
Page 169 of 388
Black plate (19,1)Buick Verano Owner Manual - 2012 - CRC - 1/10/12
Infotainment System 7-19
Storing a Channel as a Favorite
To store the channel to a position
in the list, press and hold the
corresponding 1 to 6 button until the
channel can be heard again.
Retrieving Channels
Press the FAV 1-2-3 button to open
a favorite page or to change to
another favorite page. Briefly press
one of the 1 to 6 buttons to retrieve
the channel.
XM Messages
XL (Explicit Language
Channels):These channels, or any
others, can be blocked by request,
by calling 1-800-929-2100 in the
U.S., and 1-877-438-9677 in
Canada.
XM Updating: The encryption code
in the receiver is being updated. No
action is required. This process
should take no longer than
30 seconds. Loading XM:
The audio system is
acquiring and processing audio and
text data. No action is needed. This
message should disappear shortly.
Channel Off Air: This channel is
not currently in service. Tune in to
another channel.
Channel Unauth: This channel is
blocked or cannot be received with
your XM subscription package.
Channel Unavailable: This
previously assigned channel is no
longer assigned. Tune to another
station.
No Artist Info: The system
is working properly. No artist
information is available at this time
on this channel.
No Title Info: The system is
working properly. No song title
information is available at this time
on this channel.
No CAT Info: The system is
working properly. No category
information is available at this time
on this channel. No Information:
The system is
working properly. No text or
informational messages are
available at this time on this
channel.
No Subscription Please
Renew: XM subscription needs
to be reactivated. Contact
XM at www.xmradio.com or
1-800-929-2100 in the U.S.,
and www.xmradio.ca or
1-877-438-9677 in Canada.
No XM Signal: The system is
working properly. The vehicle may
be in a location where the XM signal
is being blocked. When the vehicle
is moved into an open area, the
signal should return.
CAT Not Found: The system is
working properly. There are no
channels available for the selected
category.
XM Radio ID: If tuned to channel 0,
this message alternates with the
XM Radio eight-digit radio ID label.
This label is needed to activate the
service.
Page 170 of 388
Black plate (20,1)Buick Verano Owner Manual - 2012 - CRC - 1/10/12
7-20 Infotainment System
Unknown:If this message is
received when tuned to channel 0,
there could be a receiver fault.
Consult with your dealer.
Check Antenna: If this message
does not clear within a short period
of time, the receiver could have a
fault. Consult with your dealer.
XM Not Available: If this message
does not clear within a short period
of time, the receiver could have a
fault. Consult with your dealer.
Radio Reception
Frequency interference and static
can occur during normal radio
reception if items such as phone
chargers, vehicle convenience
accessories, and external electronic
devices are plugged into the
accessory power outlet. If there is
interference or static, unplug the
item from the accessory power
outlet.
FM
FM signals only reach about 16 to
65 km (10 to 40 mi). Although the
radio has a built-in electronic circuit
that automatically works to reduce
interference, some static can occur,
especially around tall buildings or
hills, causing the sound to fade in
and out.
AM
The range for most AM stations is
greater than for FM, especially at
night. The longer range can cause
station frequencies to interfere
with each other. For better radio
reception, most AM radio stations
boost the power levels during the
day, and then reduce these levels
during the night. Static can also
occur when things like storms and
power lines interfere with radio
reception. When this happens, try
reducing the treble on the radio.
XM™ Satellite Radio Service
XM Satellite Radio Service provides
digital radio reception from coast to
coast in the 48 contiguous United
States, and in Canada. Just as
with FM, tall buildings or hills can
interfere with satellite radio signals,
causing the sound to fade in and
out. In addition, traveling or standing
under heavy foliage, bridges,
garages, or tunnels may cause loss
of the XM signal for a period of time.
Cell Phone Usage
Cell phone usage may cause
interference with the vehicle's radio.
This interference may occur when
making or receiving phone calls,
charging the phone's battery,
or simply having the phone on. This
interference can cause an increased
level of static while listening to the
radio. If static is received while
listening to the radio, unplug the cell
phone and turn it off.
Page 181 of 388
Black plate (31,1)Buick Verano Owner Manual - 2012 - CRC - 1/10/12
Infotainment System 7-31
Bluetooth Controls
Use the buttons located on the
infotainment system and the
steering wheel to operate the
Bluetooth system.
Steering Wheel Controls
b/g(Push to Talk):Press to
answer incoming calls, confirm
system information, and start voice
recognition.
$/i(Mute/End Call): Press to
end a call, reject a call, or cancel an
operation.
Infotainment System Controls
If equipped, the infotainment system
allows certain controls to be
selected on the infotainment display.
For information about how to
navigate the menu system using the
infotainment controls, see Operation
on page 7‑9.
V/8(Phone/Mute): Press to
enter the Phone main menu. Press
to mute the audio system.
Voice Recognition
The voice recognition system uses
commands to control the system
and dial phone numbers.
Noise: The system may not
recognize voice commands if there
is too much background noise.
When to Speak: A tone sounds to
indicate that the system is ready for
a voice command. Wait for the tone
and then speak.
How to Speak: Speak clearly in a
calm and natural voice.
Audio System
When using the Bluetooth system,
sound comes through the vehicle's
front audio system speakers and
overrides the audio system. Use
the
O/VOL knob during a call to
change the volume level. The
adjusted volume level remains in
memory for later calls. The system
maintains a minimum volume level.
Other Information
The Bluetooth® word mark and
logos are owned by the Bluetooth®
SIG, Inc. and any use of such marks
by General Motors is under license.
Other trademarks and trade names
are those of their respective owners.
See Radio Frequency Statement on
page 13‑15 for information
regarding Part 15 of the Federal
Communications Commission (FCC)
rules and Industry Canada
Standards RSS-GEN/210/220/310.
Bluetooth (Infotainment
Controls)
For vehicles equipped with the
MyLink or IntelliLink infotainment
system, see the separate MyLink/
IntelliLink Features and Functions
Guide for more information.
For information about how to
navigate the menu system using the
infotainment controls, see Operation
on page 7‑9.
Page 182 of 388
Black plate (32,1)Buick Verano Owner Manual - 2012 - CRC - 1/10/12
7-32 Infotainment System
Pairing
A Bluetooth-enabled cell phone
must be paired to the Bluetooth
system and then connected to the
vehicle before it can be used. See
your cell phone manufacturer's user
guide for Bluetooth functions before
pairing the cell phone. If a Bluetooth
phone is not connected, calls will be
made using OnStar Hands-Free
Calling, if available. SeeOnStar
Overview on page 14‑1 for more
information.
Pairing Information
.A Bluetooth phone with MP3
capability cannot be paired to
the vehicle as a phone and an
MP3 player at the same time.
.Up to five cell phones can be
paired to the Bluetooth system.
.The pairing process is disabled
when the vehicle is moving.
.Pairing only needs to be
completed once, unless the
pairing information on the cell
phone changes or the cell phone
is deleted from the system.
.Only one paired cell phone can
be connected to the Bluetooth
system at a time.
.If multiple paired cell phones are
within range of the system, the
system connects to the first
available paired cell phone in the
order that they were first paired
to the system. To link to a
different paired phone, see
“Linking to a Different Phone”
later in this section.
Pairing a Phone
1. Press the CONFIG button.
2. Select Phone Settings or Bluetooth Settings.
3. Select Bluetooth. 4. Select Pair Device (Phone).
A four-digit Personal
Identification Number (PIN)
appears on the display.
The PIN is used in Step 6.
5. Start the pairing process on the cell phone to be paired to the
vehicle. See the cell phone
manufacturer's user guide for
information on this process.
6. Locate the device named “Your
Vehicle” in the list on the cell
phone. Follow the instructions
on the cell phone to enter the
PIN provided in Step 4. After the
PIN is successfully entered, the
system prompts you to provide
a name for the paired cell
phone. This name will be used
to indicate which phones are
paired and connected to the
vehicle. The system responds
with “
successfully paired” after the
pairing process is complete.
7. Repeat Steps 1 through 6 to pair additional phones.