ignition BUICK ENCLAVE 2012 Get To Know Guide
[x] Cancel search | Manufacturer: BUICK, Model Year: 2012, Model line: ENCLAVE, Model: BUICK ENCLAVE 2012Pages: 20, PDF Size: 3 MB
Page 4 of 20
4
Remote Keyless Entry Transmitter
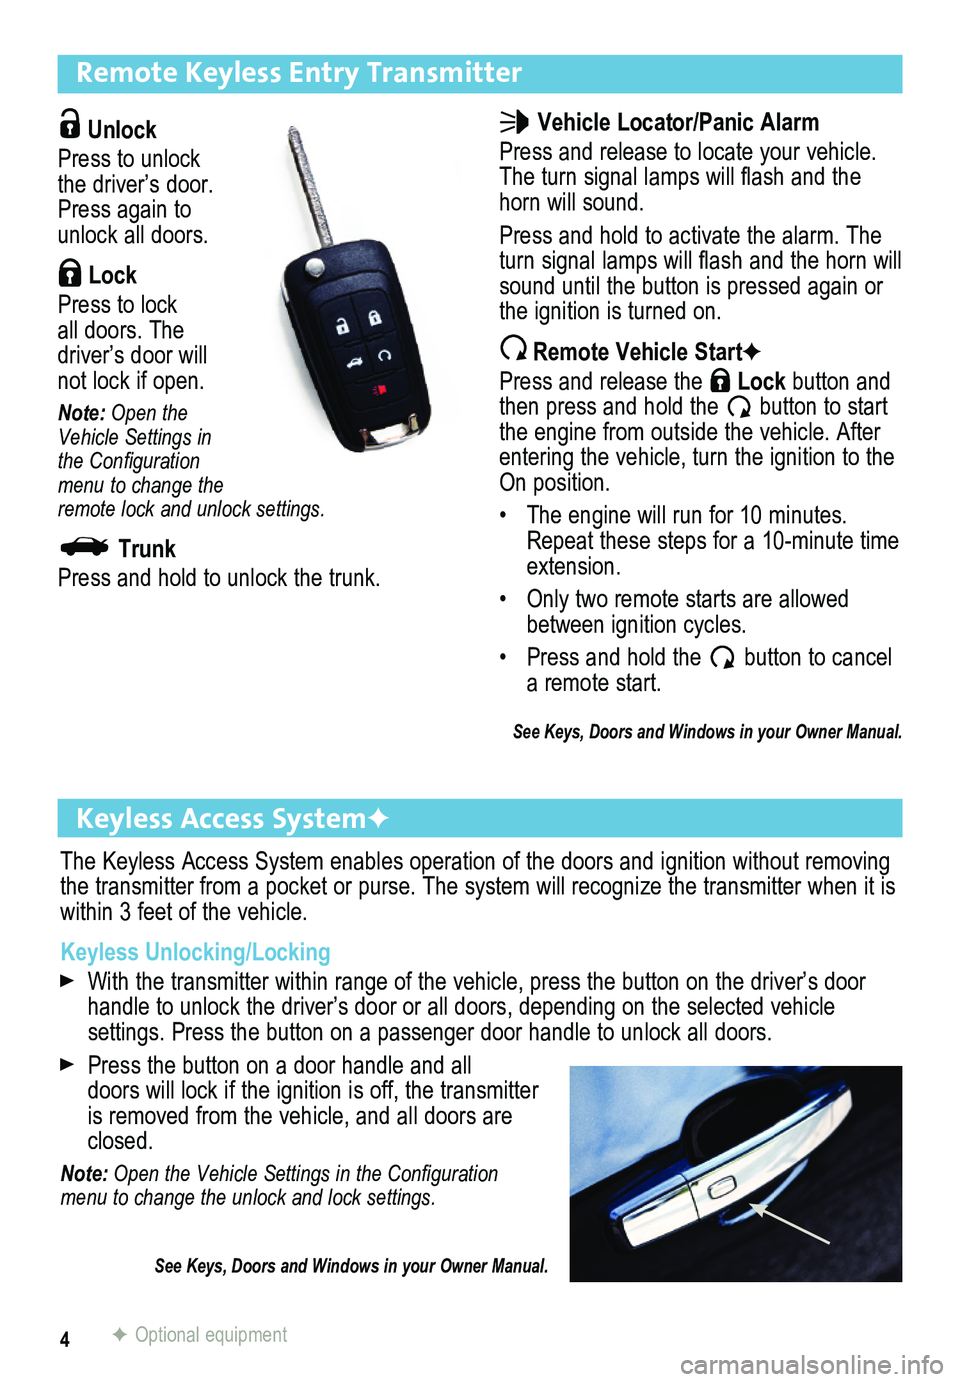
Unlock
Press to unlock the driver’s door. Press again to unlock all doors.
Lock
Press to lock all doors. The driver’s door will not lock if open.
Note: Open the Vehicle Settings in the Configuration menu to change the remote lock and unlock settings.
Trunk
Press and hold to unlock the trunk.
Keyless Access SystemF
The Keyless Access System enables operation of the doors and ignition wi\
thout removing the transmitter from a pocket or purse. The system will recognize the tr\
ansmitter when it is within 3 feet of the vehicle.
Keyless Unlocking/Locking
With the transmitter within range of the vehicle, press the button on the driver’s door handle to unlock the driver’s door or all doors, depending on the sel\
ected vehicle
settings. Press the button on a passenger door handle to unlock all door\
s.
Press the button on a door handle and all doors will lock if the ignition is off, the trans mitter is removed from the vehicle, and all doors are closed.
Note: Open the Vehicle Settings in the Configuration menu to change the unlock and lock settings.
See Keys, Doors and Windows in your Owner Manual.
Vehicle Locator/Panic Alarm
Press and release to locate your vehicle. The turn signal lamps will flash and the horn will sound.
Press and hold to activate the alarm. The turn signal lamps will flash and the horn will sound until the button is pressed again or the ignition is turned on.
Remote Vehicle StartF
Press and release the Lock button and then press and hold the button to start the engine from outside the vehicle. After entering the vehicle, turn the ignition to the On position.
• The engine will run for 10 minutes. Repeat these steps for a 10-minute time extension.
• Only two remote starts are allowed between ignition cycles.
• Press and hold the button to cancel a remote start.
See Keys, Doors and Windows in your Owner Manual.
F Optional equipment
Page 5 of 20
5
Keyless Access StartF
Start
With the vehicle in Park or Neutral, press the brake pedal and then press and hold the ENGINE START/STOP button to start the engine.
Note: The transmitter must be in the vehicle to turn on the ignition. If the transmitter battery is weak, place the transmitter in the pocket in front of the center console cupho\
lders to enable the engine to start.
Stop
Shift to Park and press the ENGINE START/STOP button to turn off the engine.
The audio system will be powered for 10 minutes or until the driver’s door is opened. The windows and sunroofF will be powered for 10 minutes or until any door is opened.
Accessory
With the engine off, press the ENGINE START/STOP button once to place the ignition system in the accessory position.
See Driving and Operating in your Owner Manual.
Seats
Power Driver’s Seat
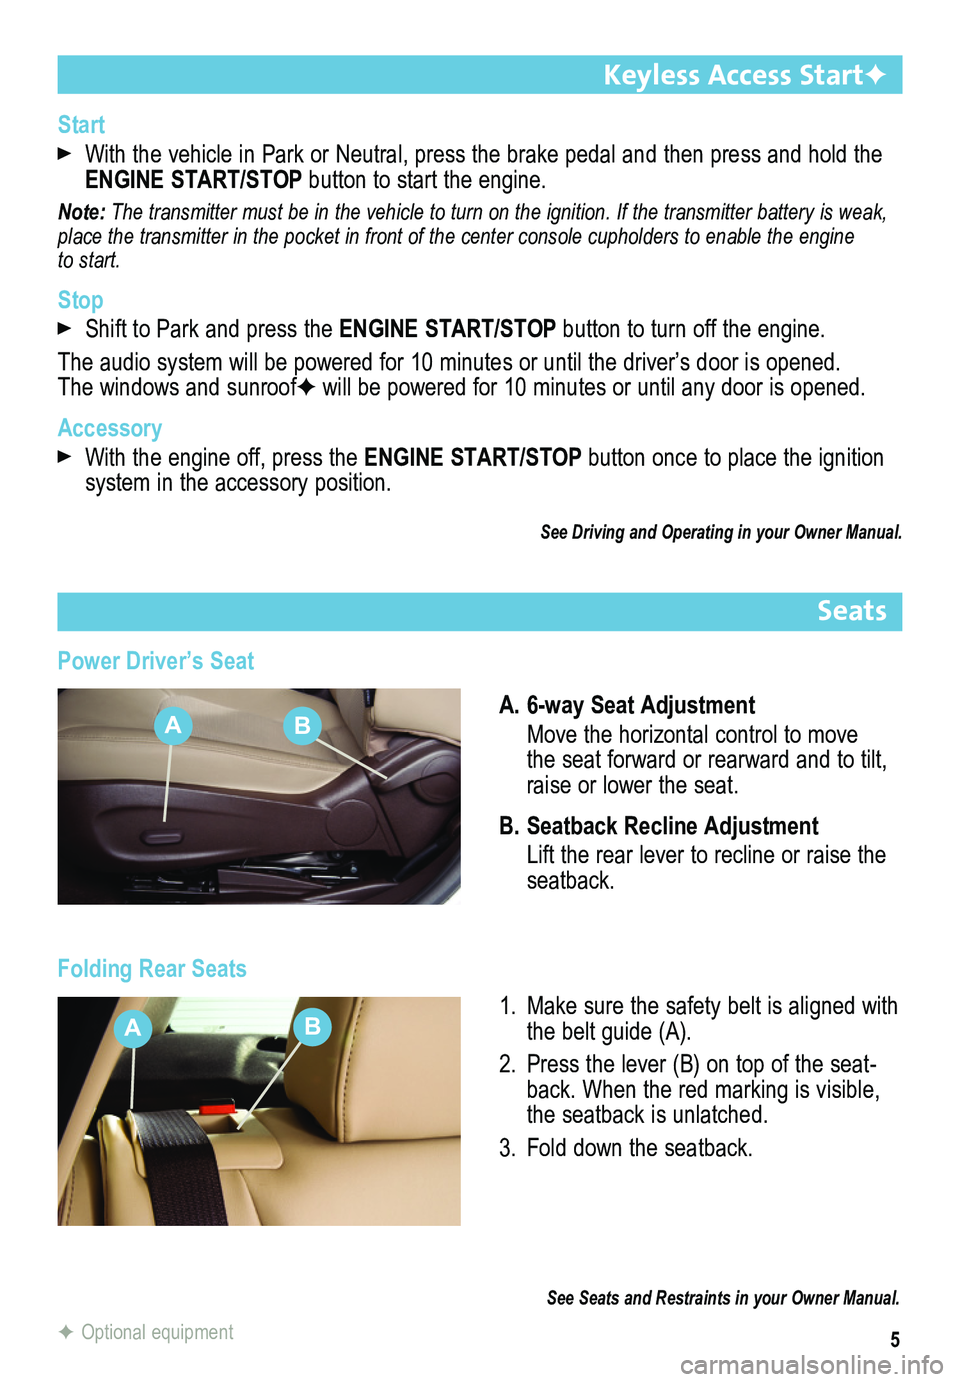
A. 6-way Seat Adjustment
Move the horizontal control to move the seat forward or rearward and to tilt, raise or lower the seat.
B. Seatback Recline Adjustment
Lift the rear lever to recline or raise the seatback.
Folding Rear Seats
1. Make sure the safety belt is aligned with the belt guide (A).
2. Press the lever (B) on top of the seat-back. When the red marking is visible, the seatback is unlatched.
3. Fold down the seatback.
See Seats and Restraints in your Owner Manual.
F Optional equipment
AB
AB
Page 15 of 20
15
Driver Information Center
The Driver Information Center (DIC) on the instrument cluster displays a variety of vehicle system information and warning messages.
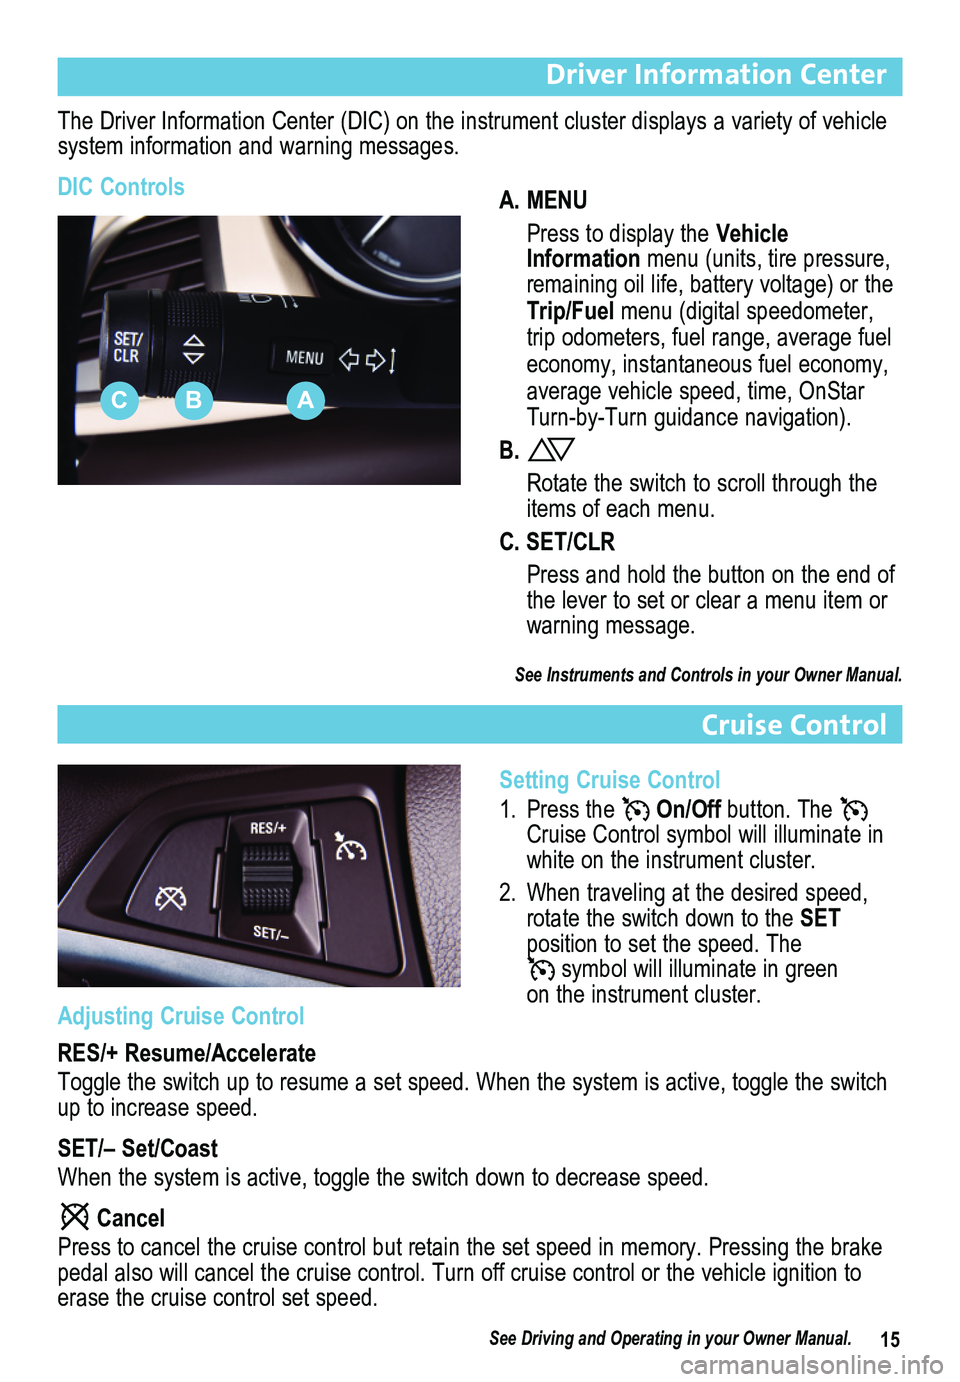
DIC ControlsA. MENU
Press to display the Vehicle Information menu (units, tire pressure, remaining oil life, battery voltage) or the Trip/Fuel menu (digital speedometer, trip odometers, fuel range, average fuel economy, instantaneous fuel economy, average vehicle speed, time, OnStar Turn-by-Turn guidance navigation).
B.
Rotate the switch to scroll through the items of each menu.
C. SET/CLR
Press and hold the button on the end of the lever to set or clear a menu item or warning message.
See Instruments and Controls in your Owner Manual.
Cruise Control
Setting Cruise Control
1. Press the On/Off button. The Cruise Control symbol will illuminate in white on the instrument cluster.
2. When traveling at the desired speed, rotate the switch down to the SET position to set the speed. The symbol will illuminate in green on the instrument cluster.
ABC
Adjusting Cruise Control
RES/+ Resume/Accelerate
Toggle the switch up to resume a set speed. When the system is active, t\
oggle the switch up to increase speed.
SET/– Set/Coast
When the system is active, toggle the switch down to decrease speed.
Cancel
Press to cancel the cruise control but retain the set speed in memory. P\
ressing the brake pedal also will cancel the cruise control. Turn off cruise control or th\
e vehicle ignition to erase the cruise control set speed.
See Driving and Operating in your Owner Manual.
Page 17 of 20
17
Electric Parking Brake
To apply the parking brake, pull up the Parking Brake switch by the shift lever. The Brake and Parking Brake warning lamps on the instrument cluster illumina\
te when the parking brake is applied.
To release the parking brake, turn on the ignition, press the brake peda\
l and press down the Parking Brake switch.
Note: The parking brake will automatically release if the vehicle is running, placed into gear, and an attempt is made to drive away.
See Driving and Operating in your Owner Manual.
Door Locks
Pull the inside door handle of a locked door to unlock it; pull the insi\
de handle again to open the door.
To prevent a rear door from opening from the inside and to disable the r\
ear window controls, press the Safety Locks button located on the driver’s door. The button indicator will illuminate when activated.
See Keys, Doors and Windows in your Owner Manual.
Pen Holder
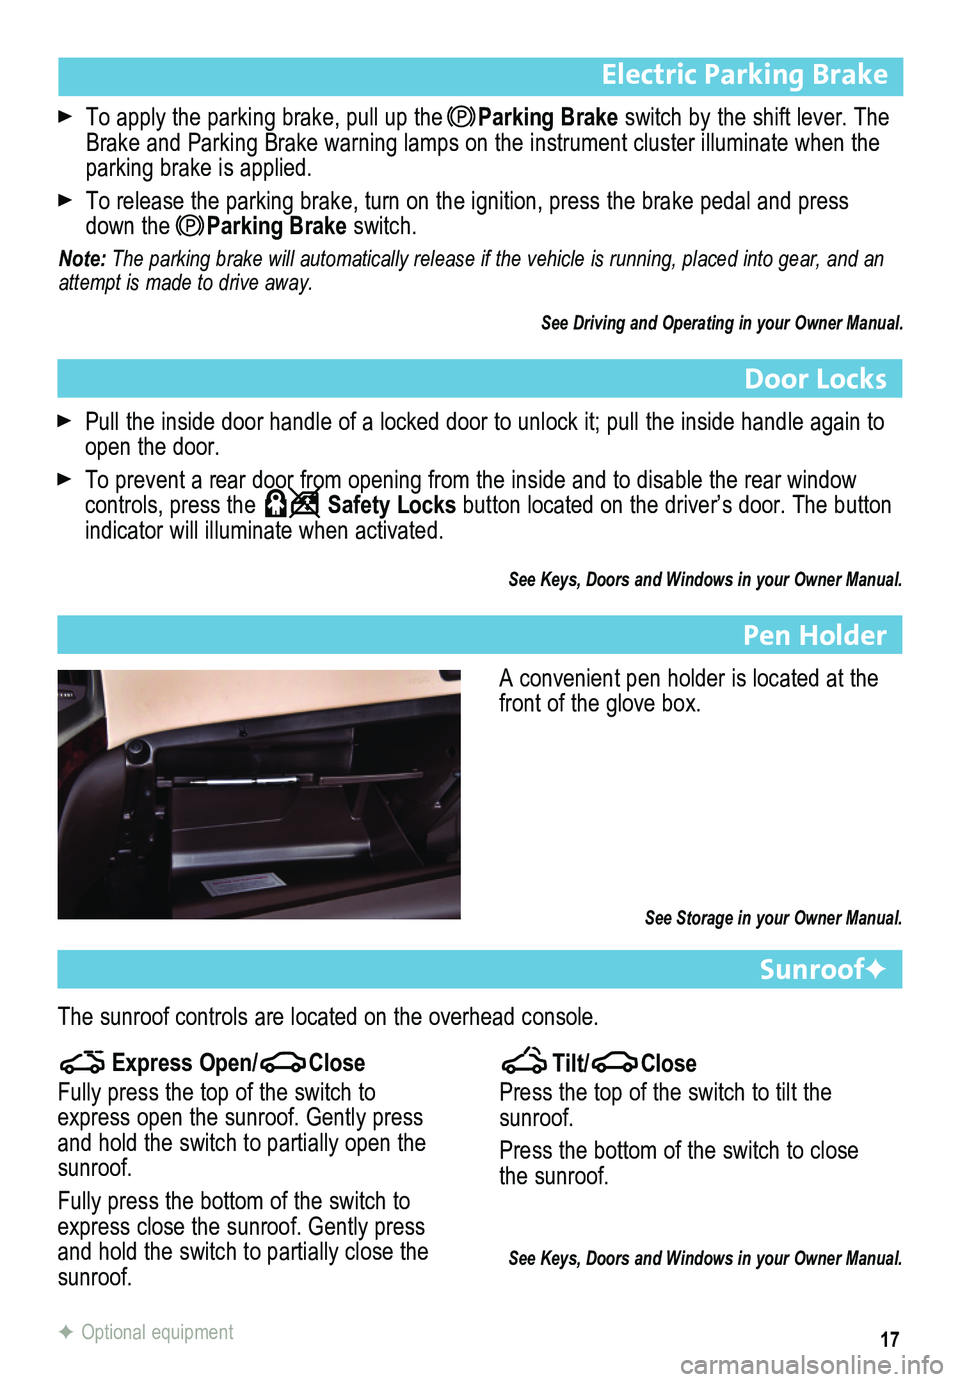
A convenient pen holder is located at the front of the glove box.
See Storage in your Owner Manual.
SunroofF
The sunroof controls are located on the overhead console.
Tilt/Close
Press the top of the switch to tilt the sunroof.
Press the bottom of the switch to close the sunroof.
See Keys, Doors and Windows in your Owner Manual.
Express Open/Close
Fully press the top of the switch to express open the sunroof. Gently press and hold the switch to partially open the sunroof.
Fully press the bottom of the switch to express close the sunroof. Gently press and hold the switch to partially close the sunroof.
F Optional equipment
Page 19 of 20
19
Tire Pressure Monitor
The Low Tire Pressure warning light on the instrument cluster illuminates when a sig-nificant reduction in pressure occurs in one or more of the vehicle’s tires. The warning light will remain on until the tire pressure is corrected. The proper tire pre\
ssures for the vehicle are listed on the Tire and Loading Information label, located below the \
driver’s door latch.
Tire pressure is affected by cold weather and distance driven. If the low tire pressure warn-ing light illuminates when the vehicle is first started and then turns off as the vehicle is driven in cooler temperatures, check for the proper tire pressures.
Note: The Tire Pressure Monitor can alert you about low tire pressure, but it\
doesn’t replace normal monthly tire maintenance. It is the driver’s responsibility to maintain correct tire pressures.
See Vehicle Care in your Owner Manual.
Engine Oil Life System
The Oil Life System calculates engine oil life based on vehicle use and displays Change Engine Oil Soon on the Driver Information Center (DIC) when it’s necessary to change the engine oil and filter. The system should be reset to 100% only following an oil change.
Resetting the Oil Life System
1. Turn the ignition to the On position, but do not start the engine.
2. Press the MENU button to display the Vehicle Information menu on the DIC.
3. Rotate the switch to view Remaining Oil Life.
4. Press the SET/CLR button until 100% is displayed.
5. Turn off the ignition.
See Vehicle Care in your Owner Manual.