ECO mode BUICK ENCLAVE 2012 Owner's Manual
[x] Cancel search | Manufacturer: BUICK, Model Year: 2012, Model line: ENCLAVE, Model: BUICK ENCLAVE 2012Pages: 382, PDF Size: 5.43 MB
Page 3 of 382
Black plate (3,1)Buick Verano Owner Manual - 2013 - crc - 10/17/12
Introduction iii
The names, logos, emblems,
slogans, vehicle model names, and
vehicle body designs appearing in
this manual including, but not limited
to, GM, the GM logo, BUICK, the
BUICK Emblem, and VERANO are
trademarks and/or service marks of
General Motors LLC, its
subsidiaries, affiliates, or licensors.
This manual describes features that
may or may not be on your specific
vehicle either because they are
options that you did not purchase or
due to changes subsequent to the
printing of this owner manual.Please refer to the purchase
documentation relating to your
specific vehicle to confirm each of
the features found on your vehicle.
For vehicles first sold in Canada,
substitute the name
“General
Motors of Canada Limited” for Buick
Motor Division wherever it appears
in this manual.
Keep this manual in the vehicle for
quick reference.
Canadian Vehicle Owners
Propriétaires Canadiens
A French language manual can be
obtained from your dealer, at
www.helminc.com, or from:
On peut obtenir un exemplaire de
ce guide en français auprès du
concessionnaire ou à l'adresse
savant:
Helm, Incorporated
Attention: Customer Service
47911 Halyard Drive
Plymouth, MI 48170
Litho in U.S.A.
Part No. 22744468 B Second Printing©2012 General Motors LLC. All Rights Reserved.
Page 34 of 382

Black plate (6,1)Buick Verano Owner Manual - 2013 - crc - 10/17/12
2-6 Keys, Doors, and Windows
3. Place the new transmitter intothe transmitter pocket with the
buttons facing up. The
transmitter pocket is inside the
center console cupholder. The
cupholder liner will need to be
removed to access the
transmitter pocket. Use a finger
or a tool in the notch at the rear
of the cupholders to remove the
liner. See Cupholders on
page 4‑2.
4. Press the START button. When the transmitter is learned, the
DIC will show that it is ready to
program the next transmitter. 5. Remove the transmitter from the
transmitter pocket and press
K.
To program additional
transmitters, repeat Steps 3–5.
When all additional transmitters
are programmed, press and hold
the ignition for at least
10 seconds to exit
programming mode.
Programming without a
Recognized Transmitter (Keyless
Access Vehicles Only)
If there are no currently recognized
transmitters available, follow this
procedure to program up to five
transmitters. This feature is not
available in Canada. This procedure
will take approximately 30 minutes
to complete. The vehicle must be off
and all of the transmitters you wish
to program must be with you. 1. Insert the vehicle key of the
transmitter into the key lock
cylinder on the outside of the
driver door and turn the key to
the unlock position five times
within 10 seconds.
The Driver Information Center
(DIC) displays REMOTE LEARN
PENDING, PLEASE WAIT.
2. Wait for 10 minutes until the DIC displays PRESS ENGINE
START BUTTON TO LEARN
and then press the ignition.
The DIC display will again show
REMOTE LEARN PENDING,
PLEASE WAIT.
3. Repeat Step 2 two additional times. After the third time all
previously known transmitters
will no longer work with the
vehicle. Remaining transmitters
can be relearned during the next
steps.
The DIC display should now
show READY FOR REMOTE
# 1.
Page 35 of 382
Black plate (7,1)Buick Verano Owner Manual - 2013 - crc - 10/17/12
Keys, Doors, and Windows 2-7
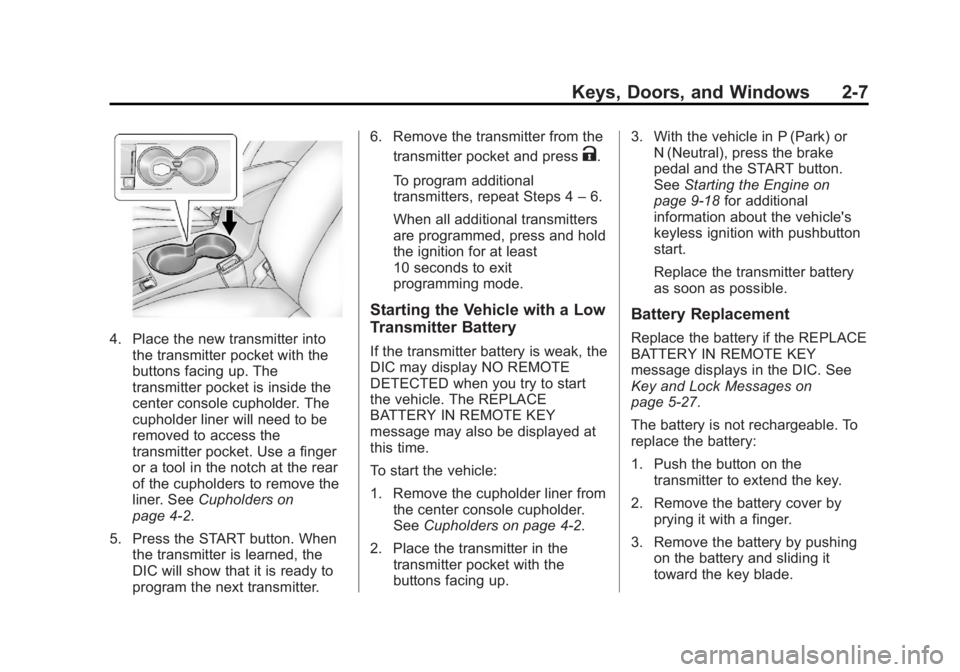
4. Place the new transmitter intothe transmitter pocket with the
buttons facing up. The
transmitter pocket is inside the
center console cupholder. The
cupholder liner will need to be
removed to access the
transmitter pocket. Use a finger
or a tool in the notch at the rear
of the cupholders to remove the
liner. See Cupholders on
page 4‑2.
5. Press the START button. When the transmitter is learned, the
DIC will show that it is ready to
program the next transmitter. 6. Remove the transmitter from the
transmitter pocket and press
K.
To program additional
transmitters, repeat Steps 4 –6.
When all additional transmitters
are programmed, press and hold
the ignition for at least
10 seconds to exit
programming mode.
Starting the Vehicle with a Low
Transmitter Battery
If the transmitter battery is weak, the
DIC may display NO REMOTE
DETECTED when you try to start
the vehicle. The REPLACE
BATTERY IN REMOTE KEY
message may also be displayed at
this time.
To start the vehicle:
1. Remove the cupholder liner from the center console cupholder.
See Cupholders on page 4‑2.
2. Place the transmitter in the transmitter pocket with the
buttons facing up. 3. With the vehicle in P (Park) or
N (Neutral), press the brake
pedal and the START button.
See Starting the Engine on
page 9‑18 for additional
information about the vehicle's
keyless ignition with pushbutton
start.
Replace the transmitter battery
as soon as possible.
Battery Replacement
Replace the battery if the REPLACE
BATTERY IN REMOTE KEY
message displays in the DIC. See
Key and Lock Messages on
page 5‑27.
The battery is not rechargeable. To
replace the battery:
1. Push the button on the
transmitter to extend the key.
2. Remove the battery cover by prying it with a finger.
3. Remove the battery by pushing on the battery and sliding it
toward the key blade.
Page 69 of 382

Black plate (21,1)Buick Verano Owner Manual - 2013 - crc - 10/17/12
Seats and Restraints 3-21
Rear Seat Driver Side Shown,Passenger Side Similar
On vehicles with second row seat‐
mounted side impact airbags, they
are in the sides of the rear seatback
closest to the door.
{WARNING
If something is between an
occupant and an airbag, the
airbag might not inflate properly
or it might force the object into
that person causing severe injury (Continued)
WARNING (Continued)
or even death. The path of an
inflating airbag must be kept
clear. Do not put anything
between an occupant and an
airbag, and do not attach or put
anything on the steering wheel
hub or on or near any other
airbag covering.
Do not use seat accessories that
block the inflation path of a
seat-mounted side impact airbag.
Never secure anything to the roof
of a vehicle with roof-rail airbags
by routing a rope or tie‐down
through any door or window
opening. If you do, the path of an
inflating roof-rail airbag will be
blocked.
When Should an Airbag
Inflate?
Frontal airbags are designed to
inflate in moderate to severe frontal
or near frontal crashes to help
reduce the potential for severe
injuries, mainly to the driver's or
front outboard passenger's head
and chest. However, they are only
designed to inflate if the impact
exceeds a predetermined
deployment threshold. Deployment
thresholds are used to predict how
severe a crash is likely to be in time
for the airbags to inflate and help
restrain the occupants.
Whether the frontal airbags will or
should inflate is not based primarily
on how fast the vehicle is traveling.
It depends on what is hit, the
direction of the impact, and how
quickly the vehicle slows down.
Page 71 of 382

Black plate (23,1)Buick Verano Owner Manual - 2013 - crc - 10/17/12
Seats and Restraints 3-23
wheel or the instrument panel. In
moderate to severe side collisions,
even belted occupants can contact
the inside of the vehicle.
Airbags supplement the protection
provided by safety belts by
distributing the force of the impact
more evenly over the
occupant's body.
Rollover capable roof-rail airbags
are designed to help contain the
head and chest of occupants in the
outboard seating positions in the
first and second rows. The rollover
capable roof-rail airbags are
designed to help reduce the risk of
full or partial ejection in rollover
events, although no system can
prevent all such ejections.
But airbags would not help in many
types of collisions, primarily
because the occupant's motion is
not toward those airbags. SeeWhen
Should an Airbag Inflate? on
page 3‑21. Airbags should never be regarded
as anything more than a supplement
to safety belts.
What Will You See after
an Airbag Inflates?
After the frontal airbags and
seat-mounted side impact airbags
inflate, they quickly deflate, so
quickly that some people may not
even realize an airbag inflated.
Roof-rail airbags may still be at least
partially inflated for some time after
they inflate. Some components of
the airbag module may be hot for
several minutes. For location of the
airbags, see
Where Are the
Airbags? on page 3‑20.
The parts of the airbag that come
into contact with you may be warm,
but not too hot to touch. There may
be some smoke and dust coming
from the vents in the deflated
airbags. Airbag inflation does not
prevent the driver from seeing out of the windshield or being able to steer
the vehicle, nor does it prevent
people from leaving the vehicle.
{WARNING
When an airbag inflates, there
may be dust in the air. This dust
could cause breathing problems
for people with a history of
asthma or other breathing trouble.
To avoid this, everyone in the
vehicle should get out as soon as
it is safe to do so. If you have
breathing problems but cannot
get out of the vehicle after an
airbag inflates, then get fresh air
by opening a window or a door.
If you experience breathing
problems following an airbag
deployment, you should seek
medical attention.
The vehicle has a feature that may
automatically unlock the doors, turn
on the interior lamps, turn on the
hazard warning flashers, and shut
Page 72 of 382
Black plate (24,1)Buick Verano Owner Manual - 2013 - crc - 10/17/12
3-24 Seats and Restraints
off the fuel system after the airbags
inflate. You can lock the doors, turn
off the interior lamps, and turn off
the hazard warning flashers by
using the controls for those
features.
{WARNING
A crash severe enough to inflate
the airbags may have also
damaged important functions in
the vehicle, such as the fuel
system, brake and steering
systems, etc. Even if the vehicle
appears to be drivable after a
moderate crash, there may be
concealed damage that could
make it difficult to safely operate
the vehicle.
Use caution if you should attempt
to restart the engine after a crash
has occurred.
In many crashes severe enough to
inflate the airbag, windshields are
broken by vehicle deformation. Additional windshield breakage may
also occur from the front outboard
passenger airbag.
.Airbags are designed to inflate
only once. After an airbag
inflates, you will need some new
parts for the airbag system.
If you do not get them, the
airbag system will not be there
to help protect you in another
crash. A new system will include
airbag modules and possibly
other parts. The service manual
for the vehicle covers the need
to replace other parts.
.The vehicle has a crash sensing
and diagnostic module which
records information after a
crash. See
Vehicle Data
Recording and Privacy on
page 13‑18 andEvent Data
Recorders on page 13‑19.
.Let only qualified technicians
work on the airbag systems.
Improper service can mean that an airbag system will not work
properly. See your dealer for
service.
Passenger Sensing
System
The vehicle has a passenger
sensing system for the front
outboard passenger position. The
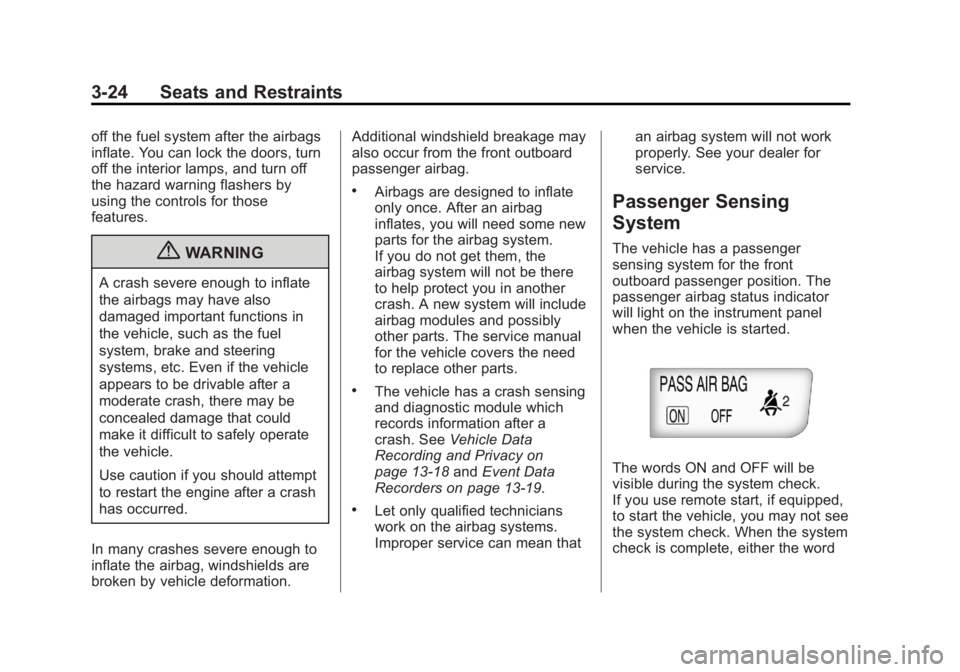
passenger airbag status indicator
will light on the instrument panel
when the vehicle is started.
The words ON and OFF will be
visible during the system check.
If you use remote start, if equipped,
to start the vehicle, you may not see
the system check. When the system
check is complete, either the word
Page 115 of 382
Black plate (13,1)Buick Verano Owner Manual - 2013 - crc - 10/17/12
Instruments and Controls 5-13
Malfunction
Indicator Lamp
A computer system called OBD II
(On-Board Diagnostics-Second
Generation) monitors the operation
of the vehicle to ensure emissions
are at acceptable levels, helping to
maintain a clean environment.
The malfunction indicator lamp
comes on when the vehicle is
placed in ON/RUN for key access or
Service Only Mode for keyless
access, as a check to show it is
working. If it does not, have the
vehicle serviced by your dealer. See
Ignition Positions (Key Access) on
page 9‑14orIgnition Positions
(Keyless Access) on page 9‑16 for
more information.
If the malfunction indicator lamp
comes on while the engine is
running, this indicates that the
OBD II system has detected a
problem and diagnosis and service
might be required.
Malfunctions often are indicated by
the system before any problem is
apparent. Being aware of the light
can prevent more serious damage
to the vehicle. This system also
assists the dealer technician in
correctly diagnosing any
malfunction.
Notice: If the vehicle is
continually driven with this light
on, the emission controls might
not work as well, the vehicle fuel
economy might not be as good,
and the engine might not run as
smoothly. This could lead to
costly repairs that might not be
covered by the vehicle warranty.
Notice: Modifications made to the
engine, transmission, exhaust,
intake, or fuel system of the
vehicle or the replacement of the original tires with other than
those of the same Tire
Performance Criteria (TPC) can
affect the vehicle's emission
controls and can cause this light
to come on. Modifications to
these systems could lead to
costly repairs not covered by the
vehicle warranty. This could also
result in a failure to pass a
required Emission Inspection/
Maintenance test. See
Accessories and Modifications on
page 10‑3.
This light comes on during a
malfunction in one of two ways:
Light Flashing:
A misfire condition
has been detected. A misfire
increases vehicle emissions and
could damage the emission control
system on the vehicle. Diagnosis
and service might be required.
To prevent more serious damage to
the vehicle:
.Reduce vehicle speed.
.Avoid hard accelerations.
Page 164 of 382
Black plate (20,1)Buick Verano Owner Manual - 2013 - crc - 10/17/12
7-20 Infotainment System
Phone
Bluetooth (Overview)
For vehicles equipped with radios
with cd and touchscreen, see
“Bluetooth”in the infotainment
manual.
For vehicles equipped with
Bluetooth capability, the system can
interact with many cell phones,
allowing:
.Placement and receipt of calls in
a hands-free mode.
.Sharing of the cell phone’s
address book or contact list with
the vehicle.
To minimize driver distraction,
before driving, and with the vehicle
parked:
.Become familiar with the
features of the cell phone.
Organize the phone book and
contact lists clearly and delete duplicate or rarely used entries.
If possible, program speed dial
or other shortcuts.
.Review the controls and
operation of the infotainment
system.
.Pair cell phone(s) to the vehicle.
The system may not work with
all cell phones. See
“Pairing”in
this section for more information.
.If the cell phone has voice
dialing capability, learn to use
that feature to access the
address book or contact list. See
“Voice Pass-Thru” in this section
for more information.
.See “Storing and Deleting Phone
Numbers” in this section for
more information.
{WARNING
When using a cell phone, it can
be distracting to look too long or
too often at the screen of the
(Continued)
WARNING (Continued)
phone or the infotainment
(navigation) system. Taking your
eyes off the road too long or too
often could cause a crash
resulting in injury or death. Focus
your attention on driving.
Vehicles with a Bluetooth system
can use a Bluetooth-capable cell
phone with a Hands-Free Profile to
make and receive phone calls. The
infotainment system and voice
recognition are used to control the
system. The system can be used
while in ON/RUN or ACC/
ACCESSORY. The range of the
Bluetooth system can be up to 9.1 m
(30 ft). Not all phones support all
functions and not all phones work
with the Bluetooth system. See
www.gm.com/bluetooth for more
information about compatible
phones.
Page 185 of 382
Black plate (1,1)Buick Verano Owner Manual - 2013 - crc - 10/17/12
Driving and Operating 9-1
Driving and
Operating
Driving Information
Distracted Driving . . . . . . . . . . . . . 9-2
Defensive Driving . . . . . . . . . . . . . 9-3
Drunk Driving . . . . . . . . . . . . . . . . . 9-3
Control of a Vehicle . . . . . . . . . . . 9-3
Braking . . . . . . . . . . . . . . . . . . . . . . . 9-3
Steering . . . . . . . . . . . . . . . . . . . . . . . 9-4
Off-Road Recovery . . . . . . . . . . . . 9-4
Loss of Control . . . . . . . . . . . . . . . . 9-5
Driving on Wet Roads . . . . . . . . . 9-5
Highway Hypnosis . . . . . . . . . . . . 9-6
Hill and Mountain Roads . . . . . . 9-6
Winter Driving . . . . . . . . . . . . . . . . . 9-7
If the Vehicle Is Stuck . . . . . . . . . 9-9
Vehicle Load Limits . . . . . . . . . . 9-10
Starting and Operating
New Vehicle Break-In . . . . . . . . 9-14
Ignition Positions (KeyAccess) . . . . . . . . . . . . . . . . . . . . 9-14
Ignition Positions (Keyless Access) . . . . . . . . . . . . . . . . . . . . 9-16 Starting the Engine . . . . . . . . . . 9-18
Engine Heater . . . . . . . . . . . . . . . 9-20
Retained Accessory
Power (RAP) . . . . . . . . . . . . . . . 9-21
Shifting Into Park . . . . . . . . . . . . 9-21
Shifting out of Park . . . . . . . . . . 9-22
Parking . . . . . . . . . . . . . . . . . . . . . . 9-23
Parking over Things
That Burn . . . . . . . . . . . . . . . . . . 9-23
Engine Exhaust
Engine Exhaust . . . . . . . . . . . . . . 9-24
Running the Vehicle WhileParked . . . . . . . . . . . . . . . . . . . . . 9-24
Automatic Transmission
Automatic Transmission . . . . . 9-25
Manual Mode . . . . . . . . . . . . . . . . 9-26
Manual Transmission
Manual Transmission . . . . . . . . 9-28
Brakes
Antilock BrakeSystem (ABS) . . . . . . . . . . . . . . 9-29
Parking Brake . . . . . . . . . . . . . . . 9-30
Brake Assist . . . . . . . . . . . . . . . . . 9-32
Hill Start Assist (HSA) . . . . . . . 9-32
Ride Control Systems
Traction Control System (TCS) . . . . . . . . . . . . . . 9-33
StabiliTrak
®System . . . . . . . . . 9-34
Cruise Control
Cruise Control . . . . . . . . . . . . . . . 9-36
Object Detection Systems
Ultrasonic Parking Assist . . . . 9-38
Side Blind Zone Alert (SBZA) . . . . . . . . . . . . . . . 9-40
Rear Vision Camera (RVC) . . . . . . . . . . . . . 9-42
Fuel
Fuel . . . . . . . . . . . . . . . . . . . . . . . . . 9-45
Recommended Fuel . . . . . . . . . 9-46
Gasoline Specifications . . . . . . 9-46
California FuelRequirements . . . . . . . . . . . . . . 9-46
Fuels in Foreign Countries . . . 9-47
Fuel Additives . . . . . . . . . . . . . . . 9-47
Fuel E85 (85% Ethanol) . . . . . 9-48
Filling the Tank . . . . . . . . . . . . . . 9-49
Filling a Portable Fuel Container . . . . . . . . . . . . . . . . . . . 9-50
Page 202 of 382
Black plate (18,1)Buick Verano Owner Manual - 2013 - crc - 10/17/12
9-18 Driving and Operating
If the vehicle cannot be pulled over,
and must be shut off while driving,
press and hold the engine START/
STOP button for longer than
two seconds, or press twice in
five seconds.
ACC/ACCESSORY (Amber
Indicator Light):This mode allows
you to use some electrical
accessories when the engine is off.
With the ignition off, pressing the
button one time without the brake
pedal applied will place the ignition
system in ACC/ACCESSORY.
The ignition will switch from ACC/
ACCESSORY to OFF after
five minutes to prevent battery
rundown.
ON/RUN/START (Green Indicator
Light): This mode is for driving and
starting. With the ignition off, and
the brake pedal applied, pressing
the button once will place the
ignition system in ON/RUN/START.
Once engine cranking begins,
release the button. Engine cranking
will continue until the engine starts. See
Starting the Engine on
page 9‑18 for more information. The
ignition will then remain in ON/RUN.
Service Only Mode
This power mode is available for
service and diagnostics, and to
verify the proper operation of the
malfunction indicator lamp as may
be required for emission inspection
purposes. With the vehicle off, and
the brake pedal not applied,
pressing and holding the button for
more than five seconds will place
the vehicle in Service Only Mode.
The instruments and audio systems
will operate as they do in ON/RUN,
but the vehicle will not be able to be
driven. The engine will not start in
Service Only Mode. Push the button
again to turn the vehicle off.
Starting the Engine
Place the transmission in the
proper gear.
Automatic Transmission
Move the shift lever to P (Park) or
N (Neutral). The engine will not start
in any other position. To restart the
vehicle when it is already moving,
use N (Neutral) only.
Notice: Do not try to shift to
P (Park) if the vehicle is moving.
If you do, you could damage the
transmission. Shift to P (Park)
only when the vehicle is stopped.
Notice: If you add electrical parts
or accessories, you could change
the way the engine operates. Any
resulting damage would not be
covered by the vehicle warranty.
See Add-On Electrical Equipment
on page 9‑56.
Manual Transmission
The shift lever should be in
N (Neutral) and the parking brake
engaged. Hold the clutch pedal
down to the floor and start the
engine. The vehicle will not start if
the clutch pedal is not all the
way down.