Battery BUICK ENCLAVE 2013 Owner's Manual
[x] Cancel search | Manufacturer: BUICK, Model Year: 2013, Model line: ENCLAVE, Model: BUICK ENCLAVE 2013Pages: 392, PDF Size: 4.27 MB
Page 30 of 392
Black plate (2,1)Buick Verano Owner Manual (GMNA-Localizing-U.S./Canada/Mexico-
6042574) - 2014 - crc - 10/18/13
2-2 Keys, Doors, and Windows
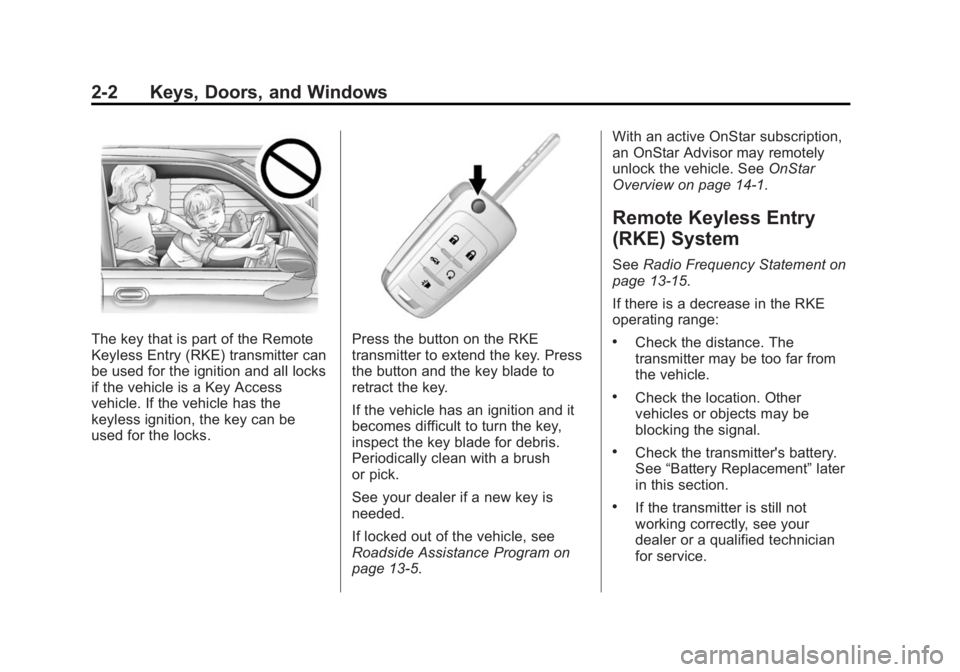
The key that is part of the Remote
Keyless Entry (RKE) transmitter can
be used for the ignition and all locks
if the vehicle is a Key Access
vehicle. If the vehicle has the
keyless ignition, the key can be
used for the locks.Press the button on the RKE
transmitter to extend the key. Press
the button and the key blade to
retract the key.
If the vehicle has an ignition and it
becomes difficult to turn the key,
inspect the key blade for debris.
Periodically clean with a brush
or pick.
See your dealer if a new key is
needed.
If locked out of the vehicle, see
Roadside Assistance Program on
page 13-5.With an active OnStar subscription,
an OnStar Advisor may remotely
unlock the vehicle. See
OnStar
Overview on page 14-1.
Remote Keyless Entry
(RKE) System
See Radio Frequency Statement on
page 13-15.
If there is a decrease in the RKE
operating range:
.Check the distance. The
transmitter may be too far from
the vehicle.
.Check the location. Other
vehicles or objects may be
blocking the signal.
.Check the transmitter's battery.
See “Battery Replacement” later
in this section.
.If the transmitter is still not
working correctly, see your
dealer or a qualified technician
for service.
Page 36 of 392
Black plate (8,1)Buick Verano Owner Manual (GMNA-Localizing-U.S./Canada/Mexico-
6042574) - 2014 - crc - 10/18/13
2-8 Keys, Doors, and Windows
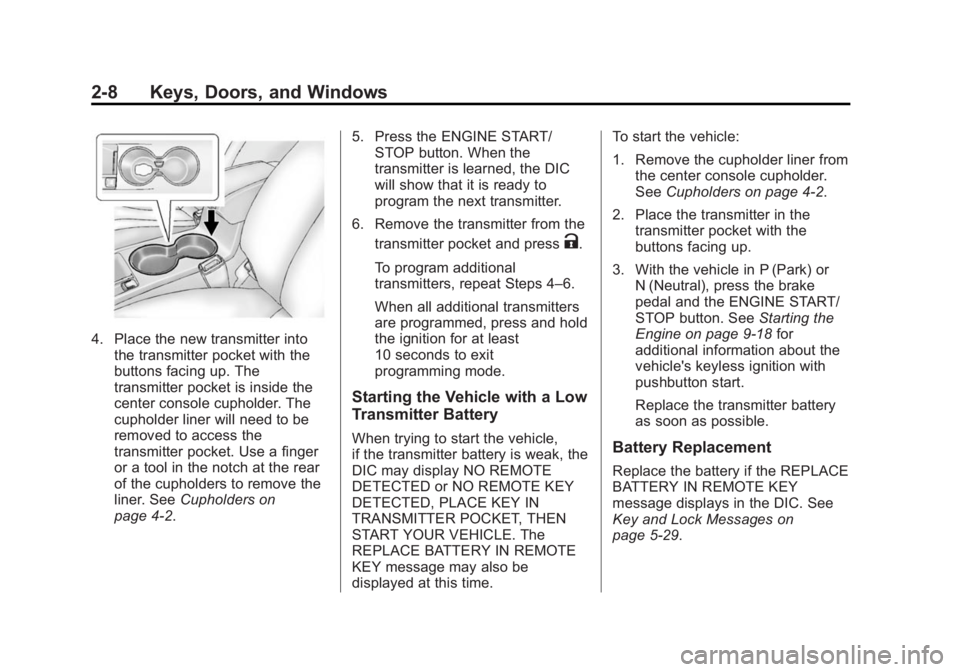
4. Place the new transmitter intothe transmitter pocket with the
buttons facing up. The
transmitter pocket is inside the
center console cupholder. The
cupholder liner will need to be
removed to access the
transmitter pocket. Use a finger
or a tool in the notch at the rear
of the cupholders to remove the
liner. See Cupholders on
page 4-2. 5. Press the ENGINE START/
STOP button. When the
transmitter is learned, the DIC
will show that it is ready to
program the next transmitter.
6. Remove the transmitter from the transmitter pocket and press
K.
To program additional
transmitters, repeat Steps 4–6.
When all additional transmitters
are programmed, press and hold
the ignition for at least
10 seconds to exit
programming mode.
Starting the Vehicle with a Low
Transmitter Battery
When trying to start the vehicle,
if the transmitter battery is weak, the
DIC may display NO REMOTE
DETECTED or NO REMOTE KEY
DETECTED, PLACE KEY IN
TRANSMITTER POCKET, THEN
START YOUR VEHICLE. The
REPLACE BATTERY IN REMOTE
KEY message may also be
displayed at this time. To start the vehicle:
1. Remove the cupholder liner from
the center console cupholder.
See Cupholders on page 4-2.
2. Place the transmitter in the transmitter pocket with the
buttons facing up.
3. With the vehicle in P (Park) or N (Neutral), press the brake
pedal and the ENGINE START/
STOP button. See Starting the
Engine on page 9-18 for
additional information about the
vehicle's keyless ignition with
pushbutton start.
Replace the transmitter battery
as soon as possible.Battery Replacement
Replace the battery if the REPLACE
BATTERY IN REMOTE KEY
message displays in the DIC. See
Key and Lock Messages on
page 5-29.
Page 37 of 392
Black plate (9,1)Buick Verano Owner Manual (GMNA-Localizing-U.S./Canada/Mexico-
6042574) - 2014 - crc - 10/18/13
Keys, Doors, and Windows 2-9
{Caution
When replacing the battery, do
not touch any of the circuitry on
the transmitter. Static from your
body could damage the
transmitter.
The battery is not rechargeable. To
replace the battery:
1. Press the button on the transmitter to extend the key.
2. Remove the battery cover by prying it with a finger.
3. Remove the battery by pushing on the battery and sliding it
toward the key blade.
4. Insert the new battery, positive side facing up. Push the battery
down until it is held in place.
Replace with a CR2032 or
equivalent battery.
5. Snap the battery cover back on to the transmitter.
Remote Vehicle Start
If equipped, this feature allows the
engine to be started from outside
the vehicle.
/(Remote Vehicle Start): This
button will be on the RKE
transmitter if the vehicle has remote
start.
The climate control system will use
the previous settings during a
remote start. The rear defog may
come on during remote start based
on cold ambient conditions. The
rear fog indicator light does not
come on during remote start. If the
vehicle has heated seats, they may
come on during a remote start. See
Heated Front Seats on page 3-6.
Laws in some local communities
may restrict the use of remote
starters. For example, some laws
require a person using remote start
to have the vehicle in view. Check
local regulations for any
requirements. Other conditions can affect the
performance of the transmitter. See
Remote Keyless Entry (RKE)
System on page 2-2.
Starting the Vehicle
To start the engine using the remote
start feature:
1. Aim the RKE transmitter at the
vehicle.
2. Press and release
Q.
3. Immediately after completing Step 2, press and hold
/for at
least four seconds or until the
turn signal lamps flash. The turn
signal lamps flashing confirms
the request to remote start the
vehicle has been received.
When the engine starts, the parking
lamps will turn on and remain on as
long as the engine is running. The
doors will be locked and the climate
control system may come on.
Page 46 of 392
Black plate (18,1)Buick Verano Owner Manual (GMNA-Localizing-U.S./Canada/Mexico-
6042574) - 2014 - crc - 10/18/13
2-18 Keys, Doors, and Windows
If the engine still does not start with
the other key, the vehicle needs
service. If the vehicle does start, the
first key may be damaged. See your
dealer who can service the
theft-deterrent system and have a
new key made.
Do not leave the key or device that
disarms or deactivates the
theft-deterrent system in the vehicle.
Immobilizer Operation
(Keyless Access)
This vehicle has a passive
theft-deterrent system.
The system does not have to be
manually armed or disarmed.
The vehicle is automatically
immobilized when the transmitter
leaves the vehicle.
The immobilization system is
disarmed when the ignition button is
pushed in and a valid transmitter is
found in the vehicle.
The security light on the instrument
cluster comes on when there is a
problem with arming or disarming
the theft-deterrent system.
The system has one or more
transmitters matched to an
immobilizer control unit in the
vehicle. Only a correctly matched
transmitter will start the vehicle.
If the transmitter is ever damaged,
you may not be able to start your
vehicle.
When trying to start the vehicle, the
security light comes on briefly when
the ignition is turned on.
If the vehicle does not start and the
security light stays on, there is a
problem with the system. Turn the
vehicle off and try again.If the RKE transmitter appears to be
undamaged, try another transmitter,
or place the transmitter in the
transmitter pocket. See
“Starting the
Vehicle with a Low Transmitter
Battery” underRemote Keyless
Entry (RKE) System Operation on
page 2-3.
If the vehicle does not start with the
other transmitter or when the
transmitter is in the transmitter
pocket, your vehicle needs service.
See your dealer who can service
the theft-deterrent system and have
a new transmitter programmed to
the vehicle.
Do not leave the transmitter or
device that disarms or deactivates
the theft-deterrent system in the
vehicle.
Page 49 of 392
Black plate (21,1)Buick Verano Owner Manual (GMNA-Localizing-U.S./Canada/Mexico-
6042574) - 2014 - crc - 10/18/13
Keys, Doors, and Windows 2-21
The vehicle aerodynamics are
designed to improve fuel economy
performance. This may result in a
pulsing sound when either rear
window is down and the front
windows are up. To reduce the
sound, open either a front window
or the sunroof, if equipped.
Power Windows
{Warning
Children could be seriously
injured or killed if caught in the
path of a closing window. Never
leave keys in a vehicle with
children. When there are children
in the rear seat, use the window
lockout button to prevent
operation of the windows. See
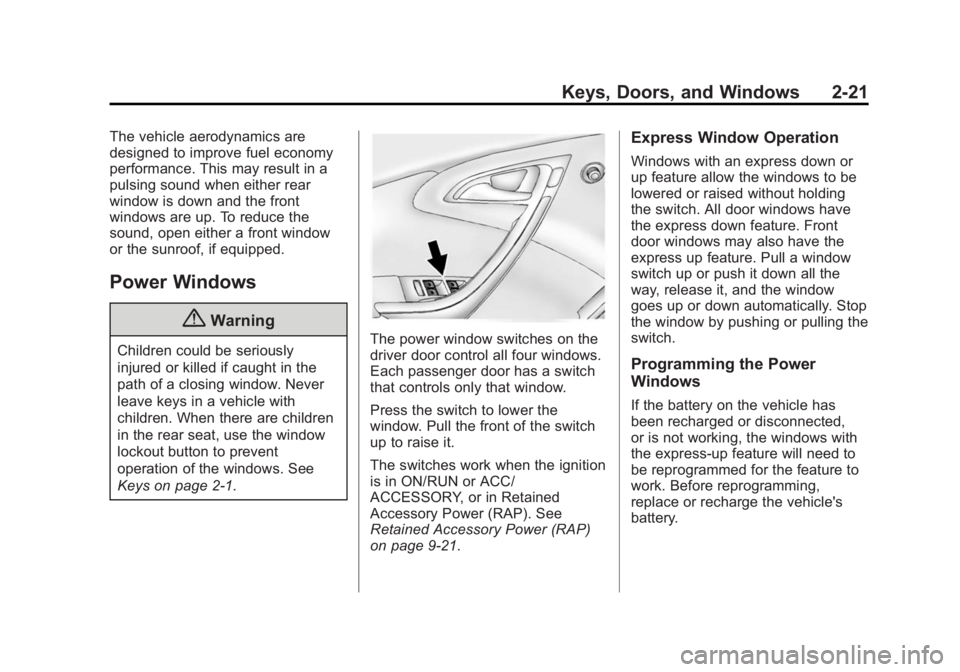
Keys on page 2-1.The power window switches on the
driver door control all four windows.
Each passenger door has a switch
that controls only that window.
Press the switch to lower the
window. Pull the front of the switch
up to raise it.
The switches work when the ignition
is in ON/RUN or ACC/
ACCESSORY, or in Retained
Accessory Power (RAP). See
Retained Accessory Power (RAP)
on page 9-21.
Express Window Operation
Windows with an express down or
up feature allow the windows to be
lowered or raised without holding
the switch. All door windows have
the express down feature. Front
door windows may also have the
express up feature. Pull a window
switch up or push it down all the
way, release it, and the window
goes up or down automatically. Stop
the window by pushing or pulling the
switch.
Programming the Power
Windows
If the battery on the vehicle has
been recharged or disconnected,
or is not working, the windows with
the express-up feature will need to
be reprogrammed for the feature to
work. Before reprogramming,
replace or recharge the vehicle's
battery.
Page 80 of 392
Black plate (28,1)Buick Verano Owner Manual (GMNA-Localizing-U.S./Canada/Mexico-
6042574) - 2014 - crc - 10/18/13
3-28 Seats and Restraints
operates. We recommend that you
not use seat covers or other
aftermarket equipment except when
approved by GM for your specific
vehicle. SeeAdding Equipment to
the Airbag-Equipped Vehicle on
page 3-29 for more information
about modifications that can affect
how the system operates.
A wet seat can affect the
performance of the passenger
sensing system. Here is how:
.The passenger sensing system
may turn off the passenger
airbag(s) when liquid is soaked
into the seat. If this happens, the
off indicator will be lit, and the
airbag readiness light on the
instrument panel will also be lit.
.Liquid pooled on the seat that
has not soaked in may make it
more likely that the passenger
sensing system will turn on the
passenger airbag(s) while a
child restraint or child occupant is on the seat. If the passenger
airbag(s) are turned on, the on
indicator will be lit.
If the passenger seat gets wet, dry
the seat immediately. If the airbag
readiness light is lit, do not install a
child restraint or allow anyone to
occupy the seat. See Airbag
Readiness Light on page 5-12 for
important safety information.
The on indicator may be lit if an
object, such as a briefcase,
handbag, grocery bag, laptop,
or other electronic device is put on
an unoccupied seat. If this is not
desired remove the object from
the seat.
{Warning
Stowing of articles under the
passenger seat or between the
passenger seat cushion and
seatback may interfere with the
proper operation of the passenger
sensing system.
Servicing the
Airbag-Equipped Vehicle
Airbags affect how the vehicle
should be serviced. There are parts
of the airbag system in several
places around the vehicle. Your
dealer and the service manual have
information about servicing the
vehicle and the airbag system. To
purchase a service manual, see
Service Publications Ordering
Information on page 13-11.
{Warning
For up to 10 seconds after the
vehicle is turned off and the
battery is disconnected, an airbag
can still inflate during improper
service. You can be injured if you
are close to an airbag when it
inflates. Avoid yellow connectors.
They are probably part of the
airbag system. Be sure to follow
(Continued)
Page 107 of 392
Black plate (1,1)Buick Verano Owner Manual (GMNA-Localizing-U.S./Canada/Mexico-
6042574) - 2014 - crc - 10/18/13
Instruments and Controls 5-1
Instruments and
Controls
Controls
Steering Wheel Adjustment . . . 5-2
Steering Wheel Controls . . . . . . 5-2
Heated Steering Wheel . . . . . . . 5-3
Horn . . . . . . . . . . . . . . . . . . . . . . . . . . 5-3
Windshield Wiper/Washer . . . . . 5-3
Compass . . . . . . . . . . . . . . . . . . . . . 5-4
Clock . . . . . . . . . . . . . . . . . . . . . . . . . 5-5
Power Outlets . . . . . . . . . . . . . . . . . 5-6
Cigarette Lighter . . . . . . . . . . . . . . 5-7
Ashtrays . . . . . . . . . . . . . . . . . . . . . . 5-7
Warning Lights, Gauges, and
Indicators
Warning Lights, Gauges, andIndicators . . . . . . . . . . . . . . . . . . . . 5-8
Instrument Cluster . . . . . . . . . . . . 5-9
Speedometer . . . . . . . . . . . . . . . . 5-10
Odometer . . . . . . . . . . . . . . . . . . . . 5-10
Trip Odometer . . . . . . . . . . . . . . . 5-10
Tachometer . . . . . . . . . . . . . . . . . . 5-10
Fuel Gauge . . . . . . . . . . . . . . . . . . 5-10
Engine Coolant Temperature Gauge . . . . . . . . . . . . . . . . . . . . . . 5-11 Safety Belt Reminders . . . . . . . 5-11
Airbag Readiness Light . . . . . . 5-12
Passenger Airbag Status
Indicator . . . . . . . . . . . . . . . . . . . . 5-12
Charging System Light . . . . . . 5-13
Malfunction
Indicator Lamp . . . . . . . . . . . . . 5-14
Brake System Warning Light . . . . . . . . . . . . . . . . . . . . . . . 5-16
Electric Parking Brake Light . . . . . . . . . . . . . . . . . . . . . . . 5-17
Antilock Brake System (ABS) Warning Light . . . . . . . . . . . . . . 5-18
Lane Departure Warning (LDW) Light . . . . . . . . . . . . . . . . 5-18
Vehicle Ahead Indicator . . . . . . 5-18
Traction Off Light . . . . . . . . . . . . 5-19
StabiliTrak
®OFF Light . . . . . . . 5-19
Traction Control System (TCS)/StabiliTrak
®Light . . . . 5-19
Tire Pressure Light . . . . . . . . . . 5-20
Engine Oil Pressure Light . . . . 5-20
Low Fuel Warning Light . . . . . . 5-21
Security Light . . . . . . . . . . . . . . . . 5-21
High-Beam On Light . . . . . . . . . 5-21
Front Fog Lamp Light . . . . . . . . 5-21
Lamps On Reminder . . . . . . . . . 5-22
Cruise Control Light . . . . . . . . . 5-22
Door Ajar Light . . . . . . . . . . . . . . 5-22
Information Displays
Driver Information Center (DIC) . . . . . . . . . . . . . . . 5-22
Vehicle Messages
Vehicle Messages . . . . . . . . . . . 5-26
Battery Voltage and ChargingMessages . . . . . . . . . . . . . . . . . . 5-26
Brake System Messages . . . . 5-26
Compass Messages . . . . . . . . . 5-27
Door Ajar Messages . . . . . . . . . 5-27
Engine Cooling System Messages . . . . . . . . . . . . . . . . . . 5-27
Engine Oil Messages . . . . . . . . 5-28
Engine Power Messages . . . . 5-28
Fuel System Messages . . . . . . 5-29
Key and Lock Messages . . . . . 5-29
Object Detection System Messages . . . . . . . . . . . . . . . . . . 5-29
Ride Control System Messages . . . . . . . . . . . . . . . . . . 5-30
Security Messages . . . . . . . . . . 5-31
Tire Messages . . . . . . . . . . . . . . . 5-31
Transmission Messages . . . . . 5-31
Washer Fluid Messages . . . . . 5-32
Window Messages . . . . . . . . . . . 5-32
Vehicle Personalization
Vehicle Personalization . . . . . . 5-32
Page 112 of 392
Black plate (6,1)Buick Verano Owner Manual (GMNA-Localizing-U.S./Canada/Mexico-
6042574) - 2014 - crc - 10/18/13
5-6 Instruments and Controls
2. Press + or−to increase or
decrease the Hours and Minutes
displayed on the clock.
If auto timing is set, the time
displayed on the clock may not
update immediately when driving
into a new time zone.
12/24 HR Format: Press the 12 HR
screen button for standard time;
press the 24 HR screen button for
military time.
Day + or Day −:Press the Day +
or Day −display buttons to increase
or decrease the day.
Display: Press Display to turn the
display of the time on the screen on
or off.Power Outlets
The accessory power outlets can be
used to plug in electrical equipment,
such as a cell phone or MP3 player.
There is one accessory power outlet
located on the center stack below
the climate control and one on the
rear of the center floor console.
These outlets are powered when the
key is in ON/RUN or ACC/
ACCESSORY, or until the driver
door is opened within 10 minutes of
turning off the vehicle. See Retained
Accessory Power (RAP) on
page 9-21.{Caution
Leaving electrical equipment
plugged in for an extended period
of time while the vehicle is off will
drain the battery. Always unplug
electrical equipment when not in
use and do not plug in equipment
that exceeds the maximum
20 amp rating.
Certain electrical accessories may
not be compatible with the
accessory power outlet and could
overload vehicle or adapter fuses.
If a problem is experienced, see
your dealer.
When adding electrical equipment,
be sure to follow the installation
instructions included with the
equipment. See Add-On Electrical
Equipment on page 9-57.
Page 119 of 392
Black plate (13,1)Buick Verano Owner Manual (GMNA-Localizing-U.S./Canada/Mexico-
6042574) - 2014 - crc - 10/18/13
Instruments and Controls 5-13
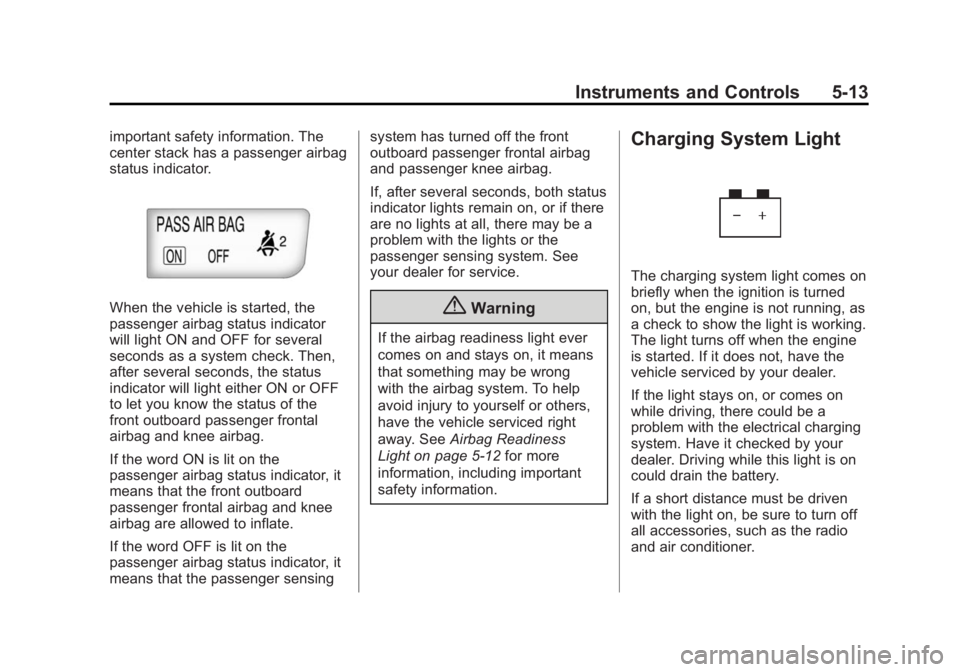
important safety information. The
center stack has a passenger airbag
status indicator.
When the vehicle is started, the
passenger airbag status indicator
will light ON and OFF for several
seconds as a system check. Then,
after several seconds, the status
indicator will light either ON or OFF
to let you know the status of the
front outboard passenger frontal
airbag and knee airbag.
If the word ON is lit on the
passenger airbag status indicator, it
means that the front outboard
passenger frontal airbag and knee
airbag are allowed to inflate.
If the word OFF is lit on the
passenger airbag status indicator, it
means that the passenger sensingsystem has turned off the front
outboard passenger frontal airbag
and passenger knee airbag.
If, after several seconds, both status
indicator lights remain on, or if there
are no lights at all, there may be a
problem with the lights or the
passenger sensing system. See
your dealer for service.{Warning
If the airbag readiness light ever
comes on and stays on, it means
that something may be wrong
with the airbag system. To help
avoid injury to yourself or others,
have the vehicle serviced right
away. See
Airbag Readiness
Light on page 5-12 for more
information, including important
safety information.
Charging System Light
The charging system light comes on
briefly when the ignition is turned
on, but the engine is not running, as
a check to show the light is working.
The light turns off when the engine
is started. If it does not, have the
vehicle serviced by your dealer.
If the light stays on, or comes on
while driving, there could be a
problem with the electrical charging
system. Have it checked by your
dealer. Driving while this light is on
could drain the battery.
If a short distance must be driven
with the light on, be sure to turn off
all accessories, such as the radio
and air conditioner.
Page 122 of 392
Black plate (16,1)Buick Verano Owner Manual (GMNA-Localizing-U.S./Canada/Mexico-
6042574) - 2014 - crc - 10/18/13
5-16 Instruments and Controls
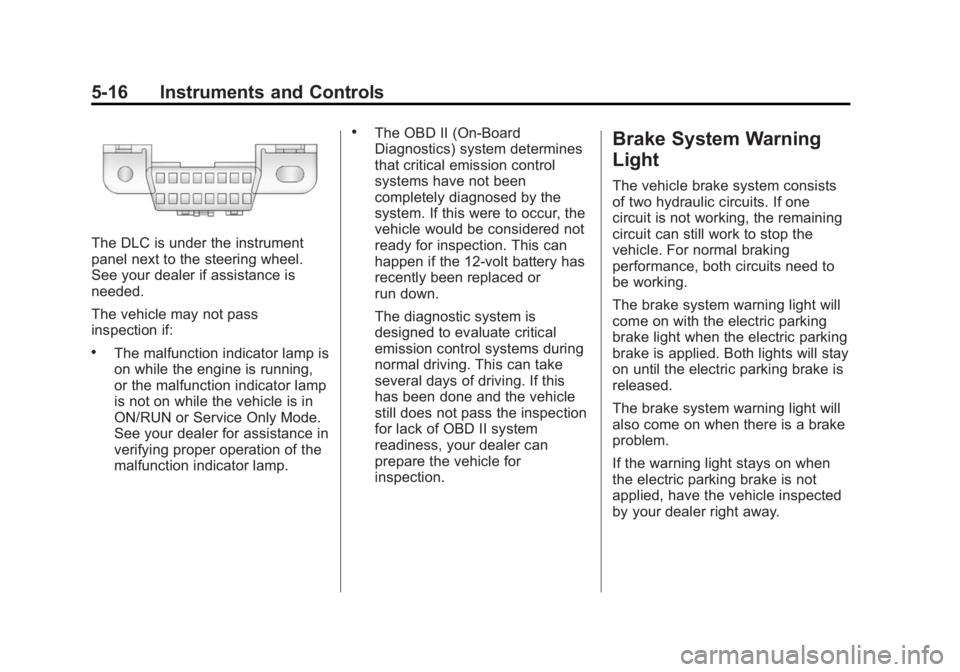
The DLC is under the instrument
panel next to the steering wheel.
See your dealer if assistance is
needed.
The vehicle may not pass
inspection if:
.The malfunction indicator lamp is
on while the engine is running,
or the malfunction indicator lamp
is not on while the vehicle is in
ON/RUN or Service Only Mode.
See your dealer for assistance in
verifying proper operation of the
malfunction indicator lamp.
.The OBD II (On-Board
Diagnostics) system determines
that critical emission control
systems have not been
completely diagnosed by the
system. If this were to occur, the
vehicle would be considered not
ready for inspection. This can
happen if the 12-volt battery has
recently been replaced or
run down.
The diagnostic system is
designed to evaluate critical
emission control systems during
normal driving. This can take
several days of driving. If this
has been done and the vehicle
still does not pass the inspection
for lack of OBD II system
readiness, your dealer can
prepare the vehicle for
inspection.Brake System Warning
Light
The vehicle brake system consists
of two hydraulic circuits. If one
circuit is not working, the remaining
circuit can still work to stop the
vehicle. For normal braking
performance, both circuits need to
be working.
The brake system warning light will
come on with the electric parking
brake light when the electric parking
brake is applied. Both lights will stay
on until the electric parking brake is
released.
The brake system warning light will
also come on when there is a brake
problem.
If the warning light stays on when
the electric parking brake is not
applied, have the vehicle inspected
by your dealer right away.