ESP BUICK ENCLAVE 2013 Owner's Manual
[x] Cancel search | Manufacturer: BUICK, Model Year: 2013, Model line: ENCLAVE, Model: BUICK ENCLAVE 2013Pages: 392, PDF Size: 4.27 MB
Page 21 of 392
Black plate (15,1)Buick Verano Owner Manual (GMNA-Localizing-U.S./Canada/Mexico-
6042574) - 2014 - crc - 10/18/13
In Brief 1-15
Vehicle Features
Radio(s)
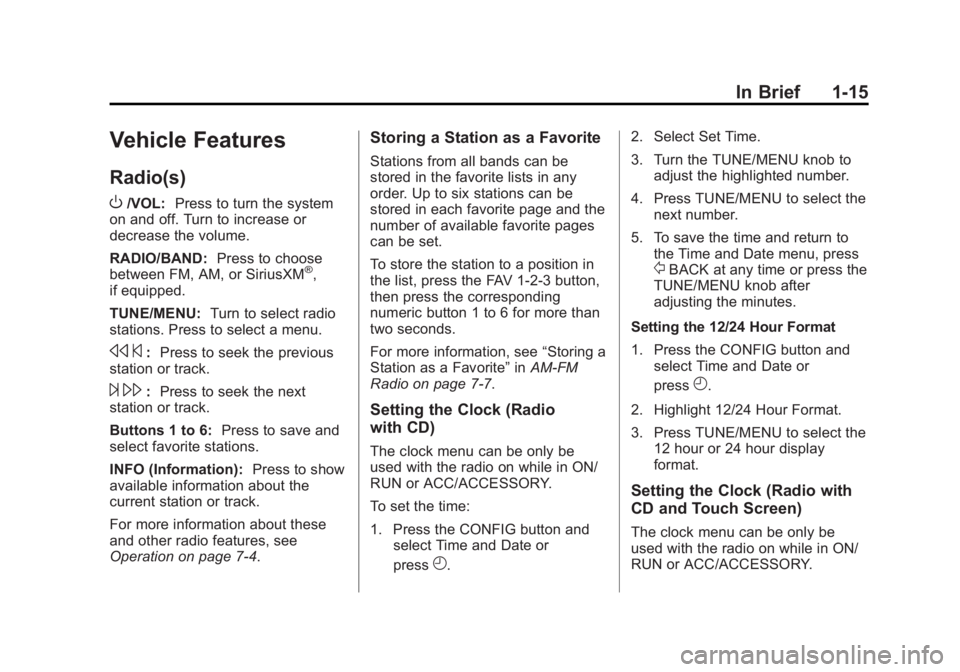
O
/VOL:Press to turn the system
on and off. Turn to increase or
decrease the volume.
RADIO/BAND: Press to choose
between FM, AM, or SiriusXM
®,
if equipped.
TUNE/MENU: Turn to select radio
stations. Press to select a menu.
s ©:Press to seek the previous
station or track.
¨ \: Press to seek the next
station or track.
Buttons 1 to 6: Press to save and
select favorite stations.
INFO (Information): Press to show
available information about the
current station or track.
For more information about these
and other radio features, see
Operation on page 7-4.
Storing a Station as a Favorite
Stations from all bands can be
stored in the favorite lists in any
order. Up to six stations can be
stored in each favorite page and the
number of available favorite pages
can be set.
To store the station to a position in
the list, press the FAV 1-2-3 button,
then press the corresponding
numeric button 1 to 6 for more than
two seconds.
For more information, see “Storing a
Station as a Favorite” inAM-FM
Radio on page 7-7.
Setting the Clock (Radio
with CD)
The clock menu can be only be
used with the radio on while in ON/
RUN or ACC/ACCESSORY.
To set the time:
1. Press the CONFIG button and select Time and Date or
press
H. 2. Select Set Time.
3. Turn the TUNE/MENU knob to
adjust the highlighted number.
4. Press TUNE/MENU to select the next number.
5. To save the time and return to the Time and Date menu, press
/BACK at any time or press the
TUNE/MENU knob after
adjusting the minutes.
Setting the 12/24 Hour Format
1. Press the CONFIG button and select Time and Date or
press
H.
2. Highlight 12/24 Hour Format.
3. Press TUNE/MENU to select the 12 hour or 24 hour display
format.
Setting the Clock (Radio with
CD and Touch Screen)
The clock menu can be only be
used with the radio on while in ON/
RUN or ACC/ACCESSORY.
Page 25 of 392
Black plate (19,1)Buick Verano Owner Manual (GMNA-Localizing-U.S./Canada/Mexico-
6042574) - 2014 - crc - 10/18/13
In Brief 1-19
Side Blind Zone
Alert (SBZA)
If equipped, SBZA will detect
vehicles in the next lane over in the
vehicle's side blind zone area.
When this happens, the SBZA
display will light up in the
corresponding outside side mirror
and will flash if the turn signal is on.
SeeSide Blind Zone Alert (SBZA)
on page 9-41.
Rear Vision
Camera (RVC)
If equipped, RVC displays a view of
the area behind the vehicle, on the
center stack display, when the
vehicle is shifted into R (Reverse).
See Rear Vision Camera (RVC) on
page 9-43.
Ultrasonic Parking Assist
If equipped, this system uses
sensors on the rear bumper to
assist with parking and avoiding objects while in R (Reverse).
It operates at speeds less than
8 km/h (5 mph). Ultrasonic Rear
Parking Assist (URPA) uses audible
beeps to provide distance and
system information.
Keep the sensors on the vehicle's
rear bumper clean to ensure proper
operation.
See
Ultrasonic Parking Assist on
page 9-39.
Power Outlets
The accessory power outlets can be
used to plug in electrical equipment,
such as a cell phone or MP3 player.
There is one accessory power outlet
located on the center stack below
the climate control and one on the
rear of the center floor console.
These outlets are powered when the
key is in ON/RUN or ACC/
ACCESSORY, or until the driver
door is opened within 10 minutes of
turning off the vehicle. See Retained
Accessory Power (RAP) on
page 9-21. See
Power Outlets on page 5-6.
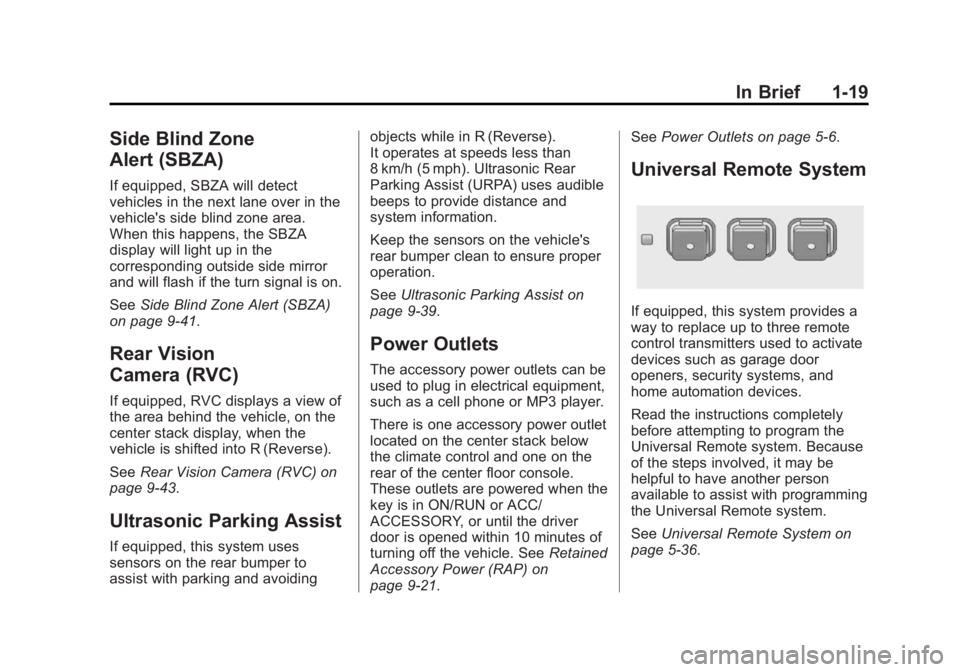
Universal Remote System
If equipped, this system provides a
way to replace up to three remote
control transmitters used to activate
devices such as garage door
openers, security systems, and
home automation devices.
Read the instructions completely
before attempting to program the
Universal Remote system. Because
of the steps involved, it may be
helpful to have another person
available to assist with programming
the Universal Remote system.
SeeUniversal Remote System on
page 5-36.
Page 38 of 392
Black plate (10,1)Buick Verano Owner Manual (GMNA-Localizing-U.S./Canada/Mexico-
6042574) - 2014 - crc - 10/18/13
2-10 Keys, Doors, and Windows
The engine will continue to run for
10 minutes. Repeat the steps for a
10-minute time extension. Remote
start can be extended only once.
Start the vehicle before driving.
Extending Engine Run Time
For a 10-minute extension, repeat
Steps 1–3 while the engine is still
running. The remote start can be
extended once.
When the remote start is extended,
the second 10 minutes will start
immediately.
For example, if the engine has been
running for five minutes, and
10 minutes are added, the engine
will run for a total of 15 minutes.
A maximum of two remote starts,
or a single start with an extension,
is allowed between ignition cycles.
The vehicle's ignition must be
turned on and then back off before
the remote start procedure can be
used again.Canceling a Remote Start
To cancel a remote start, do one of
the following:
.Aim the RKE transmitter at the
vehicle and press and hold
/
until the parking lamps turn off.
.Turn on the hazard warning
flashers.
.Turn the vehicle on and then off.
Conditions in Which Remote Start
Will Not Work
The remote vehicle start feature will
not operate if:
.The key is in the ignition (key
access) or if the key is in the
vehicle (keyless access).
.The hood is not closed.
.The hazard warning flashers
are on.
.The malfunction indicator lamp
is on.
.The engine coolant temperature
is too high.
.The oil pressure is low.
.Two remote vehicle starts, or a
single remote start with an
extension, have already
been used.
.The vehicle is not in P (Park).
Door Locks
{Warning
Unlocked doors can be
dangerous.
.Passengers, especially
children, can easily open the
doors and fall out of a moving
vehicle. The chance of being
thrown out of the vehicle in a
crash is increased if the
doors are not locked. So, all
passengers should wear
safety belts properly and the
doors should be locked
whenever the vehicle is
driven. (Continued)
Page 48 of 392
Black plate (20,1)Buick Verano Owner Manual (GMNA-Localizing-U.S./Canada/Mexico-
6042574) - 2014 - crc - 10/18/13
2-20 Keys, Doors, and Windows
Interior Mirrors
Manual Rearview Mirror
To adjust the inside rearview mirror,
hold the rearview mirror in the
center and move it to view the area
behind the vehicle.
For vehicles with a manual rearview
mirror, push the tab forward for
daytime use and pull it rearward for
nighttime use to avoid glare from
the headlamps from behind.
Vehicles with OnStar
®have three
control buttons at the bottom of the
mirror. See a dealer for more
information about OnStar and how
to subscribe to it. See OnStar
Overview on page 14-1.
Automatic Dimming
Rearview Mirror
To adjust the inside rearview mirror,
hold the rearview mirror in the
center and move it to view the area
behind the vehicle.
For vehicles with an automatic
dimming rearview mirror, the mirror
will automatically reduce the glare
from the headlamps from behind.
The dimming feature comes on
when the vehicle is started.
Vehicles with OnStar have three
control buttons at the bottom of the
mirror. See a dealer for more
information about OnStar and how
to subscribe to it. See OnStar
Overview on page 14-1.
Cleaning the Mirror
Do not spray glass cleaner directly
on the mirror. Use a soft towel
dampened with water.
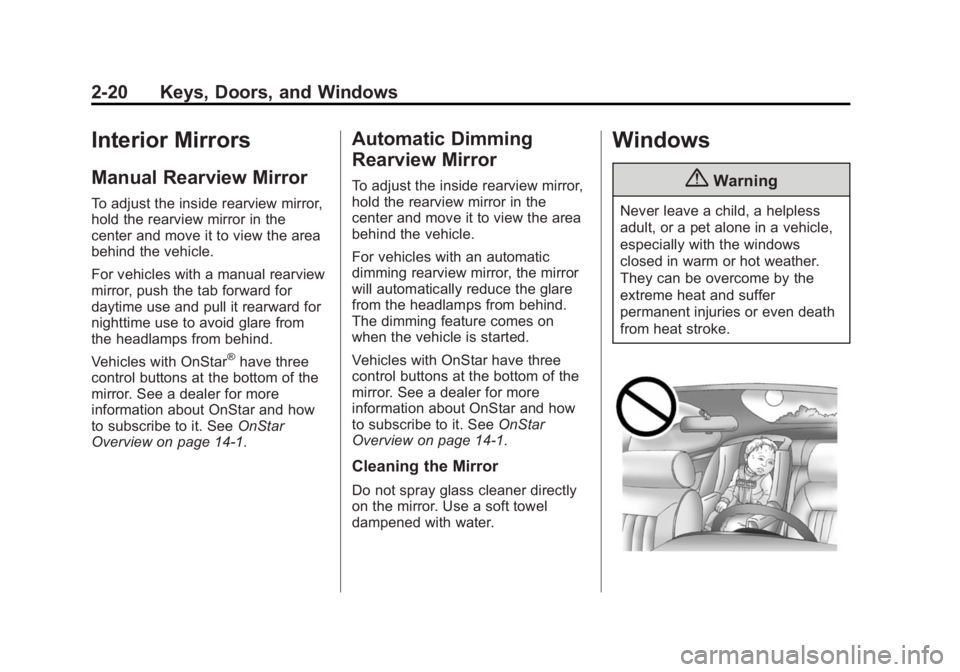
Windows
{Warning
Never leave a child, a helpless
adult, or a pet alone in a vehicle,
especially with the windows
closed in warm or hot weather.
They can be overcome by the
extreme heat and suffer
permanent injuries or even death
from heat stroke.
Page 58 of 392
Black plate (6,1)Buick Verano Owner Manual (GMNA-Localizing-U.S./Canada/Mexico-
6042574) - 2014 - crc - 10/18/13
3-6 Seats and Restraints
Do not have a seatback reclined if
the vehicle is moving.
Heated Front Seats
{Warning
If you cannot feel temperature
change or pain to the skin, the
seat heater may cause burns. To
reduce the risk of burns, people
with such a condition should use
care when using the seat heater,
especially for long periods of
time. Do not place anything on
the seat that insulates against
heat, such as a blanket, cushion,
cover, or similar item. This may
cause the seat heater to
overheat. An overheated seat
heater may cause a burn or may
damage the seat.
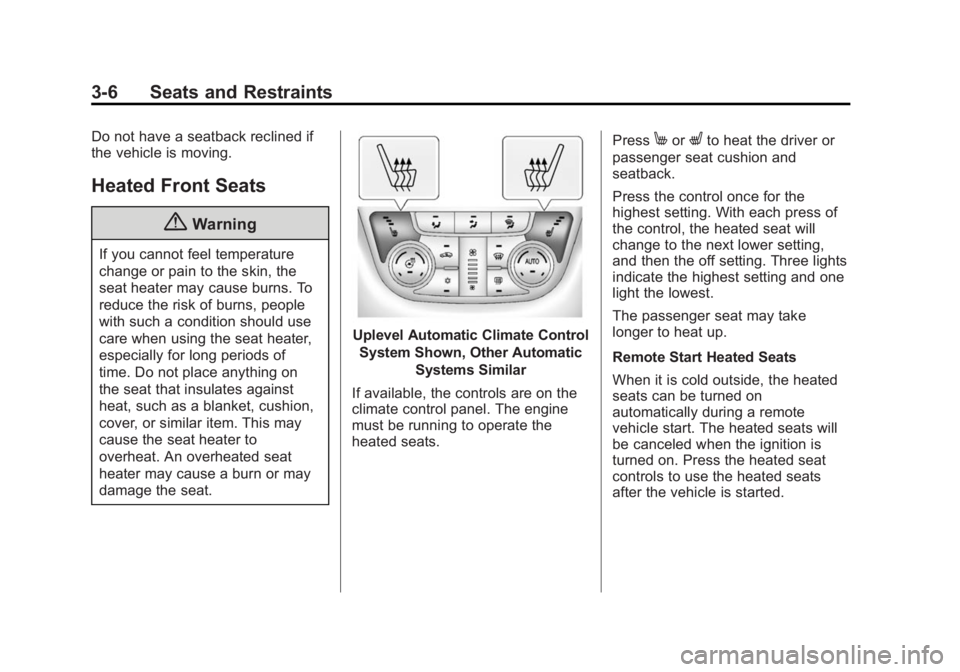
Uplevel Automatic Climate ControlSystem Shown, Other Automatic Systems Similar
If available, the controls are on the
climate control panel. The engine
must be running to operate the
heated seats. Press
MorLto heat the driver or
passenger seat cushion and
seatback.
Press the control once for the
highest setting. With each press of
the control, the heated seat will
change to the next lower setting,
and then the off setting. Three lights
indicate the highest setting and one
light the lowest.
The passenger seat may take
longer to heat up.
Remote Start Heated Seats
When it is cold outside, the heated
seats can be turned on
automatically during a remote
vehicle start. The heated seats will
be canceled when the ignition is
turned on. Press the heated seat
controls to use the heated seats
after the vehicle is started.
Page 163 of 392
Black plate (9,1)Buick Verano Owner Manual (GMNA-Localizing-U.S./Canada/Mexico-
6042574) - 2014 - crc - 10/18/13
Infotainment System 7-9
XM Categories:If equipped, turn
the TUNE/MENU knob to highlight
the category. Press the TUNE/
MENU knob to select. Turn the
TUNE/MENU knob to Show all XM
Categories to display all categories.
Finding a Station
Select a band such as AM, FM,
or SIriusXM (if equipped).
Turn the TUNE/MENU knob to find
a radio station. To select a preset
station, press the corresponding
preset button.
Seeking a Station
Press
s ©or¨\to search for a
station.
Storing a Station as a Favorite
Up to 36 preset stations can be
stored. Each page can store
six preset stations. The presets
within a page can be from different
radio bands. To scroll through the pages, press
the FAV 1-2-3 (favorites) button. The
current page number displays above
the preset buttons. The stored
stations for each list display at the
bottom of the screen. The number of
preset FAV lists can be changed.
To store a radio station to a
favorites page:
1. Press the RADIO/BAND button
until the desired band is
selected.
2. Turn the TUNE/MENU knob to the station.
3. Press the FAV 1-2-3 button to scroll the list.
4. Press and hold one of the preset buttons for more than
two seconds. The station
frequency appears on the preset
button at the bottom of the
display.
5. Repeat the steps for each preset in each page. To recall a preset station from a
favorites page:
1. Press the FAV 1-2-3 button to
scroll to the page.
2. Press the preset button. The stored preset station is recalled.
Autostore Stations
AS 1-2 (Autostore): Autostore
searches and stores six FM and
six AM stations with the strongest
signal. To use autostore:
1. Press RADIO/BAND to select FM or AM.
2. Press AS 1-2 for at least two seconds until a beep
sounds. SEARCH displays on
the radio, followed by the
number of stations found.
3. The radio will automatically store the six strongest stations found
as autostore presets.
Press the AS 1-2 button to alternate
between the autostore stations and
favorites.
Page 166 of 392
Black plate (12,1)Buick Verano Owner Manual (GMNA-Localizing-U.S./Canada/Mexico-
6042574) - 2014 - crc - 10/18/13
7-12 Infotainment System
Storing a Channel as a Favorite
To store the channel to a position in
the list, press and hold the
corresponding 1 to 6 button until the
channel can be heard again.
Retrieving Channels
Press the FAV 1-2-3 button to open
a favorite page or to change to
another favorite page. Briefly press
one of the 1 to 6 buttons to retrieve
the channel.
SiriusXM Messages
XL (Explicit Language
Channels):These channels, or any
others, can be blocked by request,
by calling 1-866-635-2349 (U.S.) or
1-877-209-0079 (Canada).
XM Updating: The encryption code
in the receiver is being updated. No
action is required. This process
should take no longer than
30 seconds. Loading XM:
The audio system is
acquiring and processing audio and
text data. No action is needed. This
message should disappear shortly.
Channel Off Air: This channel is
not currently in service. Tune in to
another channel.
Channel Unauth: This channel is
blocked or cannot be received with
your SiriusXM subscription package.
Channel Unavailable: This
previously assigned channel is no
longer assigned. Tune to another
station.
No Artist Info: The system is
working properly. No artist
information is available at this time
on this channel.
No Title Info: The system is
working properly. No song title
information is available at this time
on this channel.
No CAT Info: The system is
working properly. No category
information is available at this time
on this channel. No Information:
The system is
working properly. No text or
informational messages are
available at this time on this
channel.
No Subscription Please Renew:
SiriusXM subscription needs to be
reactivated. Contact SiriusXM at
www.siriusxm.com or
1-866-635-2349 (U.S.), and
www.xmradio.ca or 1-877-209-0079
(Canada).
No XM Signal: The system is
working properly. The vehicle may
be in a location where the SiriusXM
signal is being blocked. When the
vehicle is moved into an open area,
the signal should return.
CAT Not Found: The system is
working properly. There are no
channels available for the selected
category.
XM Radio ID: If tuned to channel 0,
this message alternates with the
SiriusXM Radio eight-digit radio ID
label. This label is needed to
activate the service.
Page 167 of 392
Black plate (13,1)Buick Verano Owner Manual (GMNA-Localizing-U.S./Canada/Mexico-
6042574) - 2014 - crc - 10/18/13
Infotainment System 7-13
Unknown:If this message is
received when tuned to channel 0,
there could be a receiver fault.
Consult with your dealer.
Check Antenna: If this message
does not clear within a short period
of time, the receiver could have a
fault. Consult with your dealer.
XM Not Available: If this message
does not clear within a short period
of time, the receiver could have a
fault. Consult with your dealer.
Radio Reception
Frequency interference and static
can occur during normal radio
reception if items such as phone
chargers, vehicle convenience
accessories, and external electronic
devices are plugged into the
accessory power outlet. If there is
interference or static, unplug the
item from the accessory power
outlet.
FM
FM signals only reach about 16 to
65 km (10 to 40 mi). Although the
radio has a built-in electronic circuit
that automatically works to reduce
interference, some static can occur,
especially around tall buildings or
hills, causing the sound to fade in
and out.
AM
The range for most AM stations is
greater than for FM, especially at
night. The longer range can cause
station frequencies to interfere with
each other. Static can also occur
when things like storms and power
lines interfere with radio reception.
When this happens, try reducing the
treble on the radio.
SiriusXM Satellite Radio
Service
SiriusXM Satellite Radio Service
provides digital radio reception. Tall
buildings or hills can interfere with
satellite radio signals, causing the
sound to fade in and out. In addition, traveling or standing under
heavy foliage, bridges, garages,
or tunnels may cause loss of the
SiriusXM signal for a period of time.
Cell Phone Usage
Cell phone usage, such as making
or receiving phone calls, charging,
or just having the phone on may
cause static interference in the
radio. Unplug the phone or turn it off
if this happens.
Backglass Antenna
The AM-FM antenna is integrated
with the rear window defogger in the
rear window. Do not scratch the
inside surface or damage the lines
in the glass. If the inside surface is
damaged, it could interfere with
radio reception. For proper radio
reception, the antenna connector
needs to be properly attached to the
post on the glass.
If attaching a cell phone antenna to
the glass, attach it between the grid
lines.
Page 175 of 392
Black plate (21,1)Buick Verano Owner Manual (GMNA-Localizing-U.S./Canada/Mexico-
6042574) - 2014 - crc - 10/18/13
Infotainment System 7-21
How to Speak:Speak clearly in a
calm and natural voice.
Audio System
When using the Bluetooth system,
sound comes through the vehicle's
front audio system speakers and
overrides the audio system. Use the
O/VOL knob during a call to
change the volume level. The
adjusted volume level remains in
memory for later calls. The system
maintains a minimum volume level.
Other Information
The Bluetooth®word mark and
logos are owned by the Bluetooth®
SIG, Inc. and any use of such marks
by General Motors is under license.
Other trademarks and trade names
are those of their respective owners.
See Radio Frequency Statement on
page 13-15.
Bluetooth (Infotainment
Controls)
For radios with CD and touch
screen, see “Bluetooth”in the
infotainment manual.
For information about how to
navigate the menu system using the
infotainment controls, see Operation
on page 7-4.
Pairing
A Bluetooth-enabled cell phone
must be paired to the Bluetooth
system and then connected to the
vehicle before it can be used. See
your cell phone manufacturer's user
guide for Bluetooth functions before
pairing the cell phone. If a Bluetooth
phone is not connected, calls will be
made using OnStar Hands-Free
Calling, if available. See OnStar
Overview on page 14-1. Pairing Information
.A Bluetooth phone with MP3
capability cannot be paired to
the vehicle as a phone and an
MP3 player at the same time.
.Up to five cell phones can be
paired to the Bluetooth system.
.The pairing process is disabled
when the vehicle is moving.
.Pairing only needs to be
completed once, unless the
pairing information on the cell
phone changes or the cell phone
is deleted from the system.
.Only one paired cell phone can
be connected to the Bluetooth
system at a time.
.If multiple paired cell phones are
within range of the system, the
system connects to the first
available paired cell phone in the
order that they were first paired
to the system. To link to a
different paired phone, see
“Linking to a Different Phone”
later in this section.
Page 179 of 392
Black plate (25,1)Buick Verano Owner Manual (GMNA-Localizing-U.S./Canada/Mexico-
6042574) - 2014 - crc - 10/18/13
Infotainment System 7-25
made using OnStar Hands-Free
Calling, if available. SeeOnStar
Overview on page 14-1.
Pairing Information
.A Bluetooth phone with MP3
capability cannot be paired to
the vehicle as a phone and an
MP3 player at the same time.
.Up to five cell phones can be
paired to the Bluetooth system.
.The pairing process is disabled
when the vehicle is moving.
.Pairing only needs to be
completed once, unless the
pairing information on the cell
phone changes or the cell phone
is deleted from the system.
.Only one paired cell phone can
be connected to the Bluetooth
system at a time.
.If multiple paired cell phones are
within range of the system, the
system connects to the first
available paired cell phone in the
order that they were first paired to the system. To link to a
different paired phone, see
“Linking to a Different Phone”
later in this section.
Pairing a Phone
1. Press
b/g. The system
responds “Ready,”followed by
a tone.
2. Say “Bluetooth.” This command
can be skipped.
3. Say “Pair.”The system responds
with instructions and a four-digit
Personal Identification Number
(PIN). The PIN is used in Step 5.
4. Start the pairing process on the cell phone that you want to pair.
For help with this process, see
your cell phone manufacturer's
user guide.
5. Locate the device named “Your
Vehicle” in the list on the cell
phone. Follow the instructions
on the cell phone to enter the
PIN provided in Step 3. After the
PIN is successfully entered, the
system prompts you to provide a name for the paired cell phone.
This name will be used to
indicate which phones are
paired and connected to the
vehicle. The system responds
with
“
successfully paired” after the
pairing process is complete.
6. Repeat Steps 1–5 to pair additional phones.
Listing All Paired and Connected
Phones
The system can list all cell phones
paired to it. If a paired cell phone is
also connected to the vehicle, the
system responds with “is connected”
after that phone name.
1. Press
b/g. The system
responds “Ready,”followed by
a tone.
2. Say “Bluetooth.”
3. Say “List.”