lock BUICK ENCLAVE 2014 Owner's Guide
[x] Cancel search | Manufacturer: BUICK, Model Year: 2014, Model line: ENCLAVE, Model: BUICK ENCLAVE 2014Pages: 410, PDF Size: 4.02 MB
Page 59 of 410
Black plate (9,1)Buick Enclave Owner Manual (GMNA-Localizing-U.S./Canada/Mexico-
6014143) - 2014 - CRC - 8/14/13
Seats and Restraints 3-9
Entering and Exiting the
Third Row
{Warning
Using the third row seating
position while the second row is
folded, or folded and tumbled,
could cause injury in a sudden
stop or crash. Be sure to return
the seat to the passenger seating
position. Push and pull on the
seat to make sure it is locked into
place.
{Caution
Folding a rear seat with the safety
belts still fastened may cause
damage to the seat or the safety
belts. Always unbuckle the safety
belts and return them to their
normal stowed position before
folding a rear seat.
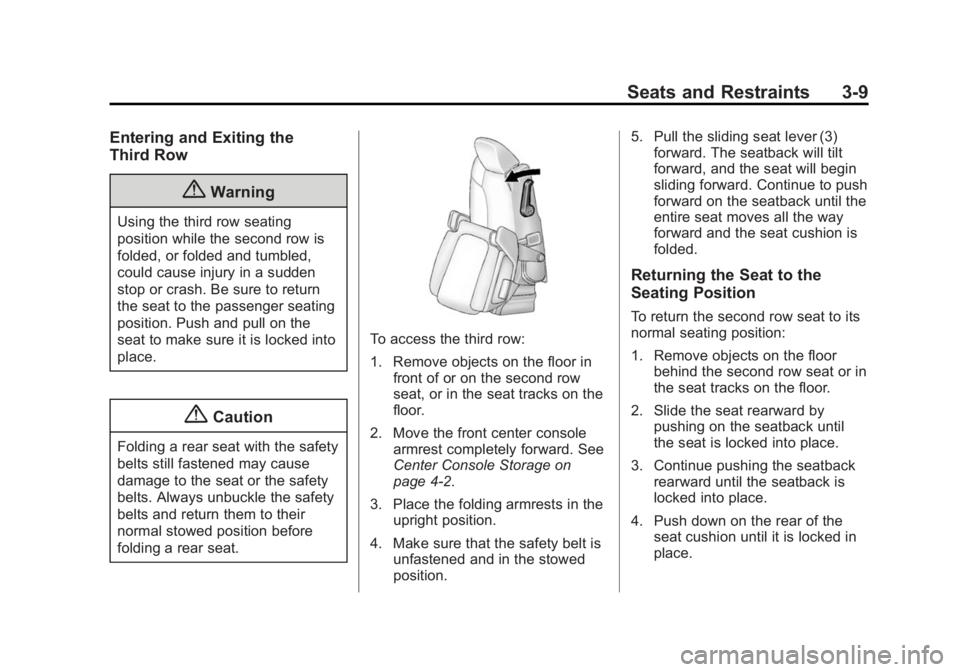
To access the third row:
1. Remove objects on the floor infront of or on the second row
seat, or in the seat tracks on the
floor.
2. Move the front center console armrest completely forward. See
Center Console Storage on
page 4-2.
3. Place the folding armrests in the upright position.
4. Make sure that the safety belt is unfastened and in the stowed
position. 5. Pull the sliding seat lever (3)
forward. The seatback will tilt
forward, and the seat will begin
sliding forward. Continue to push
forward on the seatback until the
entire seat moves all the way
forward and the seat cushion is
folded.
Returning the Seat to the
Seating Position
To return the second row seat to its
normal seating position:
1. Remove objects on the floorbehind the second row seat or in
the seat tracks on the floor.
2. Slide the seat rearward by pushing on the seatback until
the seat is locked into place.
3. Continue pushing the seatback rearward until the seatback is
locked into place.
4. Push down on the rear of the seat cushion until it is locked in
place.
Page 60 of 410
Black plate (10,1)Buick Enclave Owner Manual (GMNA-Localizing-U.S./Canada/Mexico-
6014143) - 2014 - CRC - 8/14/13
3-10 Seats and Restraints
5. Push and pull on the seatbackand seat cushion to make sure
they are locked in place.
6. Check that the safety belt is not under the seat cushion.
Reclining the Seatbacks
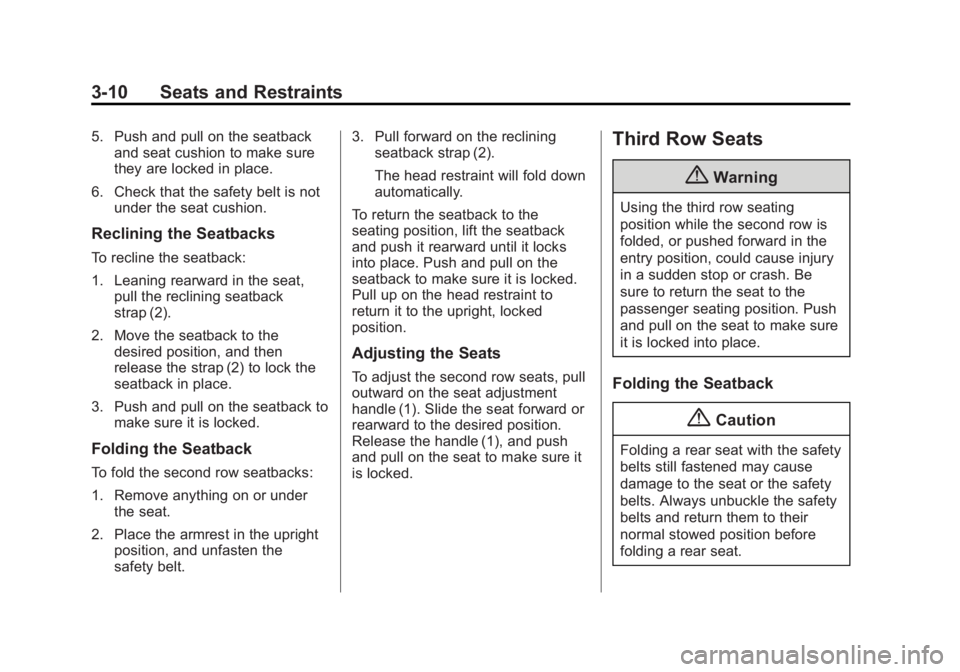
To recline the seatback:
1. Leaning rearward in the seat,pull the reclining seatback
strap (2).
2. Move the seatback to the desired position, and then
release the strap (2) to lock the
seatback in place.
3. Push and pull on the seatback to make sure it is locked.
Folding the Seatback
To fold the second row seatbacks:
1. Remove anything on or underthe seat.
2. Place the armrest in the upright position, and unfasten the
safety belt. 3. Pull forward on the reclining
seatback strap (2).
The head restraint will fold down
automatically.
To return the seatback to the
seating position, lift the seatback
and push it rearward until it locks
into place. Push and pull on the
seatback to make sure it is locked.
Pull up on the head restraint to
return it to the upright, locked
position.
Adjusting the Seats
To adjust the second row seats, pull
outward on the seat adjustment
handle (1). Slide the seat forward or
rearward to the desired position.
Release the handle (1), and push
and pull on the seat to make sure it
is locked.
Third Row Seats
{Warning
Using the third row seating
position while the second row is
folded, or pushed forward in the
entry position, could cause injury
in a sudden stop or crash. Be
sure to return the seat to the
passenger seating position. Push
and pull on the seat to make sure
it is locked into place.
Folding the Seatback
{Caution
Folding a rear seat with the safety
belts still fastened may cause
damage to the seat or the safety
belts. Always unbuckle the safety
belts and return them to their
normal stowed position before
folding a rear seat.
Page 61 of 410
Black plate (11,1)Buick Enclave Owner Manual (GMNA-Localizing-U.S./Canada/Mexico-
6014143) - 2014 - CRC - 8/14/13
Seats and Restraints 3-11
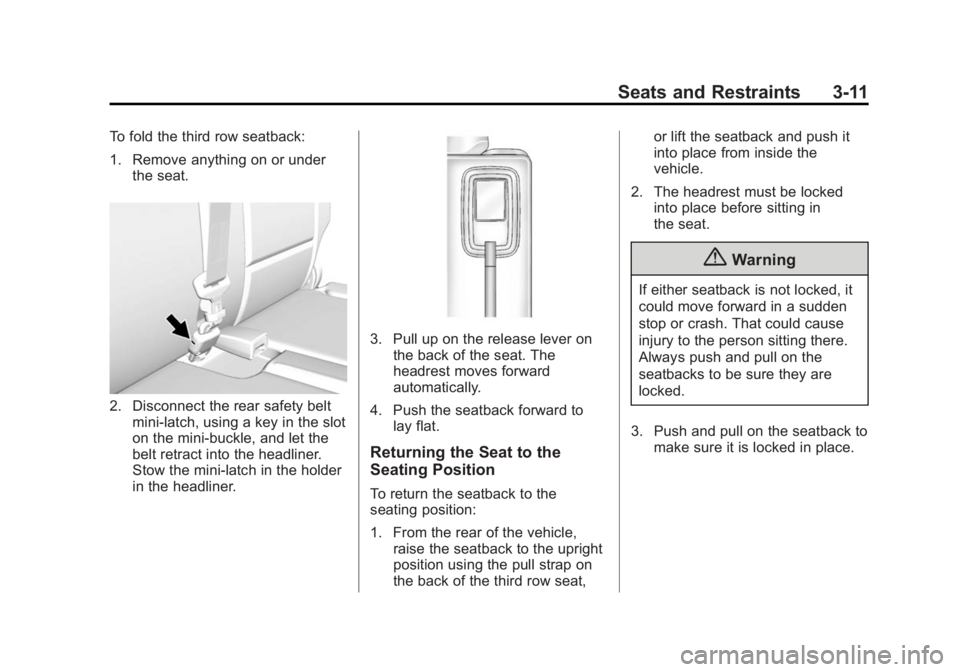
To fold the third row seatback:
1. Remove anything on or underthe seat.
2. Disconnect the rear safety beltmini-latch, using a key in the slot
on the mini-buckle, and let the
belt retract into the headliner.
Stow the mini-latch in the holder
in the headliner.
3. Pull up on the release lever onthe back of the seat. The
headrest moves forward
automatically.
4. Push the seatback forward to lay flat.
Returning the Seat to the
Seating Position
To return the seatback to the
seating position:
1. From the rear of the vehicle,
raise the seatback to the upright
position using the pull strap on
the back of the third row seat, or lift the seatback and push it
into place from inside the
vehicle.
2. The headrest must be locked into place before sitting in
the seat.
{Warning
If either seatback is not locked, it
could move forward in a sudden
stop or crash. That could cause
injury to the person sitting there.
Always push and pull on the
seatbacks to be sure they are
locked.
3. Push and pull on the seatback to make sure it is locked in place.
Page 62 of 410
Black plate (12,1)Buick Enclave Owner Manual (GMNA-Localizing-U.S./Canada/Mexico-
6014143) - 2014 - CRC - 8/14/13
3-12 Seats and Restraints
{Warning
A safety belt that is improperly
routed, not properly attached,
or twisted will not provide the
protection needed in a crash. The
person wearing the belt could be
seriously injured. After raising the
rear seatback, always check to be
sure that the safety belts are
properly routed and attached, and
are not twisted.
4. Reconnect the center safety belt mini-latch to the mini-buckle. Do
not let it twist.
5. Pull on the safety belt to be sure the mini-latch is secure.
Removing the Third Row Seats
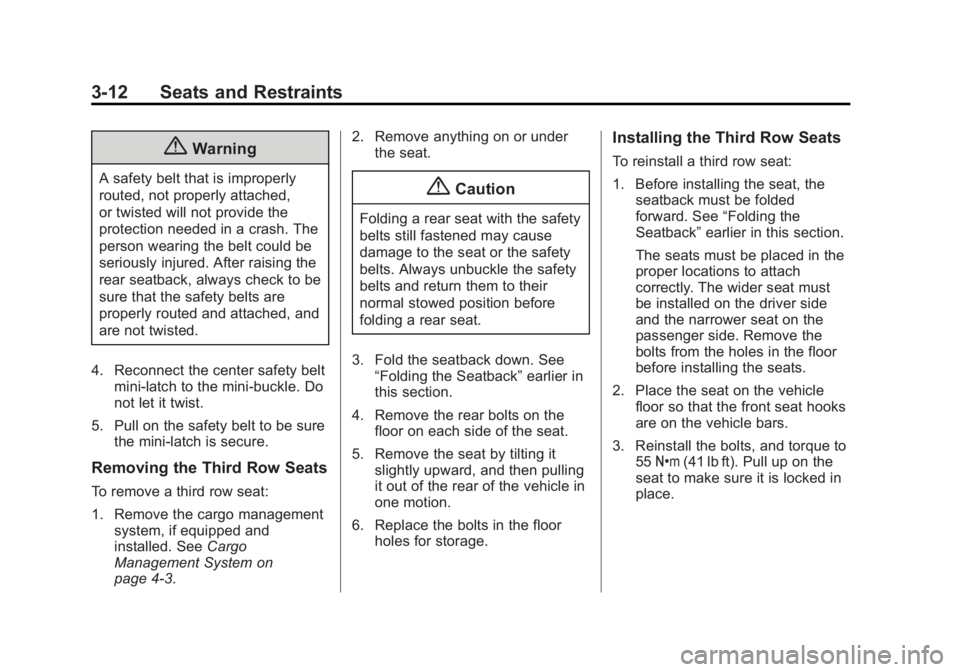
To remove a third row seat:
1. Remove the cargo management
system, if equipped and
installed. See Cargo
Management System on
page 4-3. 2. Remove anything on or under
the seat.
{Caution
Folding a rear seat with the safety
belts still fastened may cause
damage to the seat or the safety
belts. Always unbuckle the safety
belts and return them to their
normal stowed position before
folding a rear seat.
3. Fold the seatback down. See “Folding the Seatback” earlier in
this section.
4. Remove the rear bolts on the floor on each side of the seat.
5. Remove the seat by tilting it slightly upward, and then pulling
it out of the rear of the vehicle in
one motion.
6. Replace the bolts in the floor holes for storage.
Installing the Third Row Seats
To reinstall a third row seat:
1. Before installing the seat, theseatback must be folded
forward. See “Folding the
Seatback” earlier in this section.
The seats must be placed in the
proper locations to attach
correctly. The wider seat must
be installed on the driver side
and the narrower seat on the
passenger side. Remove the
bolts from the holes in the floor
before installing the seats.
2. Place the seat on the vehicle floor so that the front seat hooks
are on the vehicle bars.
3. Reinstall the bolts, and torque to 55Y (41 lb ft). Pull up on the
seat to make sure it is locked in
place.
Page 63 of 410

Black plate (13,1)Buick Enclave Owner Manual (GMNA-Localizing-U.S./Canada/Mexico-
6014143) - 2014 - CRC - 8/14/13
Seats and Restraints 3-13
4. Raise the seatback to its uprightposition. Push and pull on the
seatback to make sure it is
locked into place.
5. Push the headrest up into position. Push and pull on the
headrest to make sure it is
locked into place.
6. Reconnect the center safety belt mini-latch to the mini-buckle. Do
not let it twist.Safety Belts
This section of the manual
describes how to use safety belts
properly. It also describes some
things not to do with safety belts.
{Warning
Do not let anyone ride where a
safety belt cannot be worn
properly. In a crash, if you or your
passenger(s) are not wearing
safety belts, injuries can be much
worse than if you are wearing
safety belts. You can be seriously
injured or killed by hitting things
inside the vehicle harder or by
being ejected from the vehicle. In
addition, anyone who is not
buckled up can strike other
passengers in the vehicle.
(Continued)
Warning (Continued)
It is extremely dangerous to ride
in a cargo area, inside or outside
of a vehicle. In a collision,
passengers riding in these areas
are more likely to be seriously
injured or killed. Do not allow
passengers to ride in any area of
the vehicle that is not equipped
with seats and safety belts.
Always wear a safety belt, and
check that all passenger(s) are
restrained properly too.
This vehicle has indicators as a
reminder to buckle the safety belts.
See Safety Belt Reminders on
page 5-14.
Page 65 of 410
Black plate (15,1)Buick Enclave Owner Manual (GMNA-Localizing-U.S./Canada/Mexico-
6014143) - 2014 - CRC - 8/14/13
Seats and Restraints 3-15
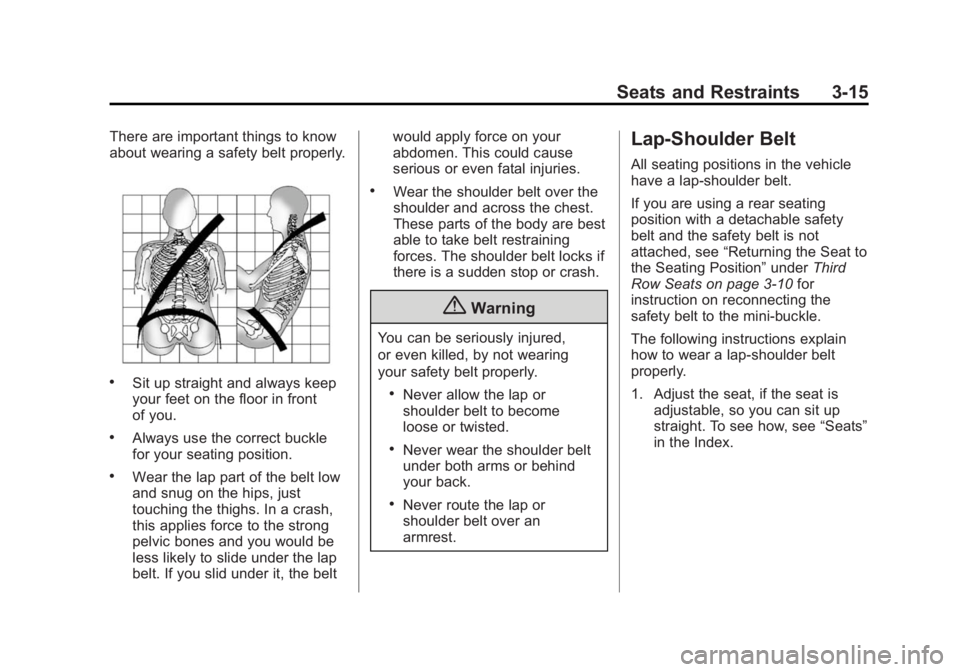
There are important things to know
about wearing a safety belt properly.
.Sit up straight and always keep
your feet on the floor in front
of you.
.Always use the correct buckle
for your seating position.
.Wear the lap part of the belt low
and snug on the hips, just
touching the thighs. In a crash,
this applies force to the strong
pelvic bones and you would be
less likely to slide under the lap
belt. If you slid under it, the beltwould apply force on your
abdomen. This could cause
serious or even fatal injuries.
.Wear the shoulder belt over the
shoulder and across the chest.
These parts of the body are best
able to take belt restraining
forces. The shoulder belt locks if
there is a sudden stop or crash.
{Warning
You can be seriously injured,
or even killed, by not wearing
your safety belt properly.
.Never allow the lap or
shoulder belt to become
loose or twisted.
.Never wear the shoulder belt
under both arms or behind
your back.
.Never route the lap or
shoulder belt over an
armrest.
Lap-Shoulder Belt
All seating positions in the vehicle
have a lap-shoulder belt.
If you are using a rear seating
position with a detachable safety
belt and the safety belt is not
attached, see
“Returning the Seat to
the Seating Position” underThird
Row Seats on page 3-10 for
instruction on reconnecting the
safety belt to the mini-buckle.
The following instructions explain
how to wear a lap-shoulder belt
properly.
1. Adjust the seat, if the seat is adjustable, so you can sit up
straight. To see how, see “Seats”
in the Index.
Page 66 of 410
Black plate (16,1)Buick Enclave Owner Manual (GMNA-Localizing-U.S./Canada/Mexico-
6014143) - 2014 - CRC - 8/14/13
3-16 Seats and Restraints
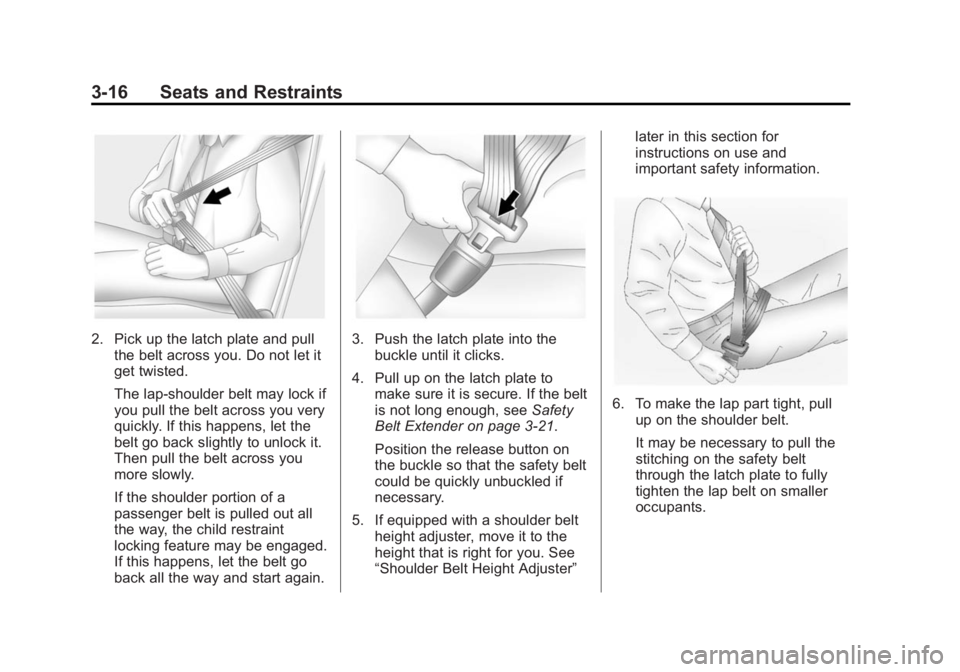
2. Pick up the latch plate and pullthe belt across you. Do not let it
get twisted.
The lap-shoulder belt may lock if
you pull the belt across you very
quickly. If this happens, let the
belt go back slightly to unlock it.
Then pull the belt across you
more slowly.
If the shoulder portion of a
passenger belt is pulled out all
the way, the child restraint
locking feature may be engaged.
If this happens, let the belt go
back all the way and start again.3. Push the latch plate into thebuckle until it clicks.
4. Pull up on the latch plate to make sure it is secure. If the belt
is not long enough, see Safety
Belt Extender on page 3-21.
Position the release button on
the buckle so that the safety belt
could be quickly unbuckled if
necessary.
5. If equipped with a shoulder belt height adjuster, move it to the
height that is right for you. See
“Shoulder Belt Height Adjuster” later in this section for
instructions on use and
important safety information.
6. To make the lap part tight, pull
up on the shoulder belt.
It may be necessary to pull the
stitching on the safety belt
through the latch plate to fully
tighten the lap belt on smaller
occupants.
Page 67 of 410
Black plate (17,1)Buick Enclave Owner Manual (GMNA-Localizing-U.S./Canada/Mexico-
6014143) - 2014 - CRC - 8/14/13
Seats and Restraints 3-17
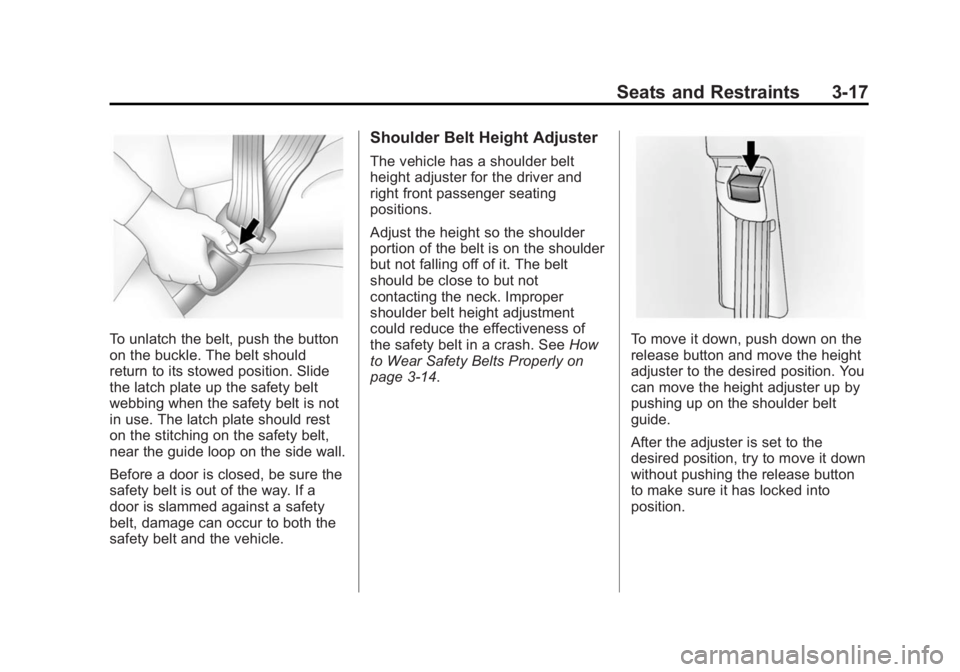
To unlatch the belt, push the button
on the buckle. The belt should
return to its stowed position. Slide
the latch plate up the safety belt
webbing when the safety belt is not
in use. The latch plate should rest
on the stitching on the safety belt,
near the guide loop on the side wall.
Before a door is closed, be sure the
safety belt is out of the way. If a
door is slammed against a safety
belt, damage can occur to both the
safety belt and the vehicle.
Shoulder Belt Height Adjuster
The vehicle has a shoulder belt
height adjuster for the driver and
right front passenger seating
positions.
Adjust the height so the shoulder
portion of the belt is on the shoulder
but not falling off of it. The belt
should be close to but not
contacting the neck. Improper
shoulder belt height adjustment
could reduce the effectiveness of
the safety belt in a crash. SeeHow
to Wear Safety Belts Properly on
page 3-14.
To move it down, push down on the
release button and move the height
adjuster to the desired position. You
can move the height adjuster up by
pushing up on the shoulder belt
guide.
After the adjuster is set to the
desired position, try to move it down
without pushing the release button
to make sure it has locked into
position.
Page 76 of 410

Black plate (26,1)Buick Enclave Owner Manual (GMNA-Localizing-U.S./Canada/Mexico-
6014143) - 2014 - CRC - 8/14/13
3-26 Seats and Restraints
Warning (Continued)
that person causing severe injury
or even death. The path of an
inflating airbag must be kept
clear. Do not put anything
between an occupant and an
airbag, and do not attach or put
anything on the steering wheel
hub or on or near any other
airbag covering.
Do not use seat or console
accessories that block the
inflation path of a seat-mounted
side impact airbag or the front
center airbag.
Never secure anything to the roof
of a vehicle with roof-rail airbags
by routing a rope or tie-down
through any door or window
opening. If you do, the path of an
inflating roof-rail airbag will be
blocked.
When Should an Airbag
Inflate?
This vehicle is equipped with
airbags. SeeAirbag System on
page 3-22. Airbags are designed to
inflate if the impact exceeds the
specific airbag system's deployment
threshold. Deployment thresholds
are used to predict how severe a
crash is likely to be in time for the
airbags to inflate and help restrain
the occupants. The vehicle has
electronic sensors that help the
airbag system determine the
severity of the impact. Deployment
thresholds can vary with specific
vehicle design.
Frontal airbags are designed to
inflate in moderate to severe frontal
or near frontal crashes to help
reduce the potential for severe
injuries, mainly to the driver's or
front outboard passenger's head
and chest.
Whether the frontal airbags will or
should inflate is not based primarily
on how fast the vehicle is traveling. It depends on what is hit, the
direction of the impact, and how
quickly the vehicle slows down.
Frontal airbags may inflate at
different crash speeds depending on
whether the vehicle hits an object
straight on or at an angle, and
whether the object is fixed or
moving, rigid or deformable, narrow
or wide.
Frontal airbags are not intended to
inflate during vehicle rollovers, rear
impacts, or many side impacts.
In addition, the vehicle has
advanced technology frontal
airbags. Advanced technology
frontal airbags adjust the restraint
according to crash severity.
The front center airbag is designed
to inflate in moderate to severe side
crashes depending upon the
location of the impact, when either
side of the vehicle is struck. In
addition, the front center airbag is
designed to inflate when the
sensing system predicts that the
vehicle is about to roll over on its
Page 78 of 410

Black plate (28,1)Buick Enclave Owner Manual (GMNA-Localizing-U.S./Canada/Mexico-
6014143) - 2014 - CRC - 8/14/13
3-28 Seats and Restraints
Airbags should never be regarded
as anything more than a supplement
to safety belts.
What Will You See after
an Airbag Inflates?
After the frontal airbags and
seat-mounted side impact airbags
inflate, they quickly deflate, so
quickly that some people may not
even realize an airbag inflated. The
front center airbag and roof-rail
airbags may still be at least partially
inflated for some time after they
inflate. Some components of the
airbag module may be hot for
several minutes. For location of the
airbags, seeWhere Are the
Airbags? on page 3-24.
The parts of the airbag that come
into contact with you may be warm,
but not too hot to touch. There may
be some smoke and dust coming
from the vents in the deflated
airbags. Airbag inflation does not
prevent the driver from seeing out of the windshield or being able to steer
the vehicle, nor does it prevent
people from leaving the vehicle.
{Warning
When an airbag inflates, there
may be dust in the air. This dust
could cause breathing problems
for people with a history of
asthma or other breathing trouble.
To avoid this, everyone in the
vehicle should get out as soon as
it is safe to do so. If you have
breathing problems but cannot
get out of the vehicle after an
airbag inflates, then get fresh air
by opening a window or a door.
If you experience breathing
problems following an airbag
deployment, you should seek
medical attention.
The vehicle has a feature that may
automatically unlock the doors, turn
on the interior lamps and hazard
warning flashers, and shut off the fuel system after the airbags inflate.
You can lock the doors, and turn off
the interior lamps and hazard
warning flashers by using the
controls for those features.{Warning
A crash severe enough to inflate
the airbags may have also
damaged important functions in
the vehicle, such as the fuel
system, brake and steering
systems, etc. Even if the vehicle
appears to be drivable after a
moderate crash, there may be
concealed damage that could
make it difficult to safely operate
the vehicle.
Use caution if you should attempt
to restart the engine after a crash
has occurred.
In many crashes severe enough to
inflate the airbag, windshields are
broken by vehicle deformation.