service BUICK ENCLAVE 2015 Repair Manual
[x] Cancel search | Manufacturer: BUICK, Model Year: 2015, Model line: ENCLAVE, Model: BUICK ENCLAVE 2015Pages: 395, PDF Size: 4.64 MB
Page 268 of 395

Black plate (13,1)Buick Enclave Owner Manual (GMNA-Localizing-U.S./Canada/Mexico-
7576029) - 2015 - CRC - 8/15/14
Vehicle Care 10-13
Use a 50/50 mixture of clean,
drinkable water and DEX-COOL
coolant. If using this mixture,
nothing else needs to be added.
This mixture:
.Gives freezing protection down
to−37°C (−34°F), outside
temperature.
.Gives boiling protection up to
129°C (265°F), engine
temperature.
.Protects against rust and
corrosion.
.Will not damage aluminum parts.
.Helps keep the proper engine
temperature.
{Caution
If improper coolant mixture,
inhibitors, or additives are used in
the vehicle cooling system, the
engine could overheat and be
damaged. Too much water in the
(Continued)
Caution (Continued)
mixture can freeze and crack
engine cooling parts. The repairs
would not be covered by the
vehicle warranty. Use only the
proper mixture of engine coolant
for the cooling system. See
Recommended Fluids and
Lubricants on page 11-12.
Never dispose of engine coolant by
putting it in the trash, pouring it on
the ground, or into sewers, streams,
or bodies of water. Have the coolant
changed by an authorized service
center, familiar with legal
requirements regarding used
coolant disposal. This will help
protect the environment and your
health.
Checking Coolant
The vehicle must be on a level
surface when checking the coolant
level. Check to see if coolant is visible in
the coolant recovery tank. If the
coolant inside the coolant recovery
tank is boiling, do not do anything
else until it cools down. If coolant is
visible but the coolant level is not at
or above the FULL COLD mark or
the FULL COLD ISO symbol mark,
add a 50/50 mixture of clean,
drinkable water and DEX-COOL
coolant at the coolant recovery tank,
but be sure the cooling system is
cool before this is done. See
Engine
Overheating on page 10-16.
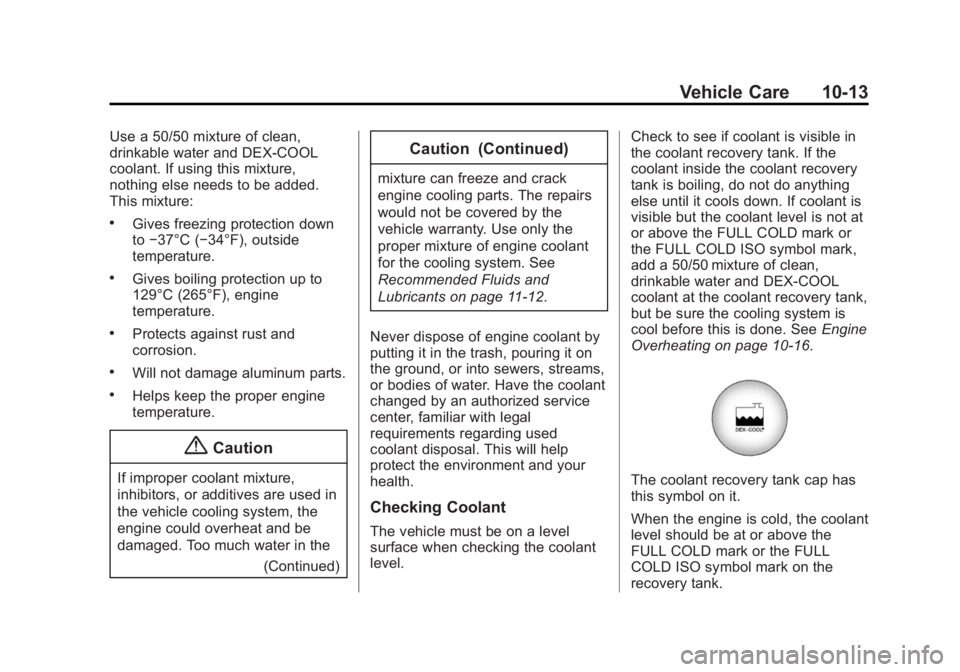
The coolant recovery tank cap has
this symbol on it.
When the engine is cold, the coolant
level should be at or above the
FULL COLD mark or the FULL
COLD ISO symbol mark on the
recovery tank.
Page 269 of 395

Black plate (14,1)Buick Enclave Owner Manual (GMNA-Localizing-U.S./Canada/Mexico-
7576029) - 2015 - CRC - 8/15/14
10-14 Vehicle Care
When the engine is hot, the level
could be higher than the FULL
COLD mark or the FULL COLD ISO
symbol mark. If the coolant is below
the FULL COLD mark or the FULL
COLD ISO symbol mark when the
engine is hot, there could be a leak
in the cooling system.
If the coolant is low, add the coolant
or take the vehicle to your dealer for
service.
How to Add Coolant to the
Recovery Tank
{Warning
You can be burned if you spill
coolant on hot engine parts.
Coolant contains ethylene glycol
and it will burn if the engine parts
are hot enough. Do not spill
coolant on a hot engine.
{Caution
This vehicle has a specific
coolant fill procedure. Failure to
follow this procedure could cause
the engine to overheat and be
severely damaged.
If recovery tank is empty, check the
coolant level in the radiator before
adding coolant to the recovery tank
or take the vehicle to the dealer for
service. See “How to Add Coolant to
the Radiator” later in this section.
If coolant is needed, add the proper
DEX-COOL coolant mixture at the
coolant recovery tank.
How to Add Coolant to the
Radiator
{Warning
Steam and scalding liquids from a
hot cooling system can blow out
and burn you badly. Never turn
the cap when the cooling system,
including the surge tank pressure
cap, is hot. Wait for the cooling
system and surge tank pressure
cap to cool.
If coolant is needed, add the proper
mixture directly to the radiator, but
be sure the cooling system is cool
before this is done. Then check the
recovery tank and add coolant if
needed.
Page 271 of 395

Black plate (16,1)Buick Enclave Owner Manual (GMNA-Localizing-U.S./Canada/Mexico-
7576029) - 2015 - CRC - 8/15/14
10-16 Vehicle Care
6. Reinstall the cap on the coolantrecovery tank but leave the
radiator pressure cap off.
7. Start the engine and let it run until the upper radiator hose
feels warm. Any time during this
procedure, watch out for the
engine cooling fans.
8. If the coolant level inside the radiator filler neck is low, add
more of the proper DEX-COOL
coolant mixture through the filler
neck until the level is back up to
the base of the filler neck.
9. Replace the pressure cap tightly. At any time during this
procedure if coolant begins to
flow out of the filler neck,
reinstall the pressure cap.{Caution
If the pressure cap is not tightly
installed, coolant loss and
possible engine damage may
occur. Be sure the cap is properly
and tightly secured.
Engine Overheating
The vehicle has several indicators
to warn of engine overheating.
There is an engine coolant
temperature gauge on the
instrument panel cluster. See
Engine Coolant Temperature Gauge
on page 5-12.
The vehicle may also display an
ENGINE OVERHEATED IDLE
ENGINE and ENGINE
OVERHEATED STOP
ENGINE message in the Driver
Information Center (DIC). See
Engine Cooling System Messages
on page 5-31. You may decide not to lift the hood
when this warning appears, but
instead get service help right away.
See
Roadside Assistance Program
on page 13-5.
If you do decide to lift the hood,
make sure the vehicle is parked on
a level surface.
Then check to see if the engine
cooling fans are running. If the
engine is overheating, both fans
should be running. If they are not,
do not continue to run the engine
and have the vehicle serviced.
{Caution
Running the engine without
coolant may cause damage or a
fire. Vehicle damage would not be
covered by the vehicle warranty.
See Overheated Engine
Protection Operating Mode on
page 10-18 for information on
driving to a safe place in an
emergency.
Page 275 of 395

Black plate (20,1)Buick Enclave Owner Manual (GMNA-Localizing-U.S./Canada/Mexico-
7576029) - 2015 - CRC - 8/15/14
10-20 Vehicle Care
{Caution
.Do not use engine coolant
(antifreeze) in the windshield
washer. It can damage the
windshield washer system
and paint.
.Do not mix water with
ready-to-use washer fluid.
Water can cause the solution
to freeze and damage the
washer fluid tank and other
parts of the washer system.
.When using concentrated
washer fluid, follow the
manufacturer instructions for
adding water.
.Fill the washer fluid tank only
three-quarters full when it is
very cold. This allows for fluid
expansion if freezing occurs,
which could damage the tank
if it is completely full.
Brakes
Disc brake pads have built-in wear
indicators that make a high-pitched
warning sound when the brake pads
are worn and new pads are needed.
The sound can come and go or be
heard all the time when the vehicle
is moving, except when applying the
brake pedal firmly.
{Warning
The brake wear warning sound
means that soon the brakes will
not work well. That could lead to
a crash. When the brake wear
warning sound is heard, have the
vehicle serviced.
{Caution
Continuing to drive with worn-out
brake pads could result in costly
brake repair.Some driving conditions or climates
can cause a brake squeal when the
brakes are first applied or lightly
applied. This does not mean
something is wrong with the brakes.
Properly torqued wheel nuts are
necessary to help prevent brake
pulsation. When tires are rotated,
inspect brake pads for wear and
evenly tighten wheel nuts in the
proper sequence to torque
specifications. See
Capacities and
Specifications on page 12-2.
Brake pads should be replaced as
complete sets.
Brake Pedal Travel
See your dealer if the brake pedal
does not return to normal height,
or if there is a rapid increase in
pedal travel. This could be a sign
that brake service may be required.
Replacing Brake System Parts
Always replace brake system parts
with new, approved replacement
parts. If this is not done, the brakes
may not work properly. The braking
Page 278 of 395

Black plate (23,1)Buick Enclave Owner Manual (GMNA-Localizing-U.S./Canada/Mexico-
7576029) - 2015 - CRC - 8/15/14
Vehicle Care 10-23
All-Wheel Drive
Transfer case fluid does not require
checking unless there is a fluid leak
or unusual noise. If required, have
the transfer case serviced by your
dealer.
Starter Switch Check
{Warning
When you are doing this
inspection, the vehicle could
move suddenly. If the vehicle
moves, you or others could be
injured.
1. Before starting this check, be sure there is enough room
around the vehicle.
2. Apply both the parking brake and the regular brake.
Do not use the accelerator
pedal, and be ready to turn off
the engine immediately if it
starts. 3. Try to start the engine in each
gear. The vehicle should start
only in P (Park) or N (Neutral).
If the vehicle starts in any other
position, contact your dealer for
service.
Automatic Transmission
Shift Lock Control
Function Check
{Warning
When you are doing this
inspection, the vehicle could
move suddenly. If the vehicle
moves, you or others could be
injured.
1. Before starting this check, be sure there is enough room
around the vehicle. It should be
parked on a level surface. 2. Apply the parking brake. Be
ready to apply the regular brake
immediately if the vehicle begins
to move.
3. With the engine off, turn the ignition on, but do not start the
engine. Without applying the
regular brake, try to move the
shift lever out of P (Park) with
normal effort. If the shift lever
moves out of P (Park), contact
your dealer for service.Ignition Transmission
Lock Check
While parked and with the parking
brake set, try to turn the ignition to
LOCK/OFF in each shift lever
position.
.The ignition should turn to
LOCK/OFF only when the shift
lever is in P (Park).
.The ignition key should come
out only in LOCK/OFF.
Contact your dealer if service is
required.
Page 279 of 395

Black plate (24,1)Buick Enclave Owner Manual (GMNA-Localizing-U.S./Canada/Mexico-
7576029) - 2015 - CRC - 8/15/14
10-24 Vehicle Care
Park Brake and P (Park)
Mechanism Check
{Warning
When you are doing this check,
the vehicle could begin to move.
You or others could be injured
and property could be damaged.
Make sure there is room in front
of the vehicle in case it begins to
roll. Be ready to apply the regular
brake at once should the vehicle
begin to move.
Park on a fairly steep hill, with the
vehicle facing downhill. Keeping
your foot on the regular brake, set
the parking brake.
.To check the parking brake's
holding ability: With the engine
running and the transmission in
N (Neutral), slowly remove foot
pressure from the regular brake
pedal. Do this until the vehicle is
held by the parking brake only.
.To check the P (Park)
mechanism's holding ability:
With the engine running, shift to
P (Park). Then release the
parking brake followed by the
regular brake.
Contact your dealer if service is
required.
Wiper Blade Replacement
Front Wiper Blade
Windshield wiper blades should be
inspected for wear or cracking.
Replacement blades come in
different types and are removed in
different ways. For the proper type
and size, see Maintenance
Replacement Parts on page 11-13.
To replace the wiper blade
assembly:
1. Pull the windshield wiper assembly away from the
windshield.
2. Squeeze the tabs on each sideof the wiper blade assembly and
slide the assembly off the end of
the wiper arm.
3. Install the new blade onto thearm connector and make sure
the tabs are fully set in the
locked position.
Allowing the wiper blade arm to
touch the windshield when no
wiper blade is installed could
damage the windshield. Any
damage that occurs would not
Page 281 of 395

Black plate (26,1)Buick Enclave Owner Manual (GMNA-Localizing-U.S./Canada/Mexico-
7576029) - 2015 - CRC - 8/15/14
10-26 Vehicle Care
Bulb Replacement
For the proper type of replacement
bulbs, seeReplacement Bulbs on
page 10-27.
For any bulb‐changing procedure
not listed in this section, contact
your dealer.
High Intensity Discharge
(HID) Lighting
{Warning
The high intensity discharge
lighting system operates at a very
high voltage. If you try to service
any of the system components,
you could be seriously injured.
Have your dealer or a qualified
technician service them.
After an HID headlamp bulb has
been replaced, the beam might be a
slightly different shade than it was
originally. This is normal.
Taillamps, Turn Signal,
and Stoplamps
To replace one of these bulbs:
1. Open the liftgate. See Liftgate
on page 2-8.
2. Using a small flat bladed tool, remove the screw covers by
prying them from the bottom.
3. Remove the two hex screws holding the taillamp assembly in
place.
4. Pull out the taillamp assembly. 5. Turn the bulb socket
counterclockwise and pull it
straight out to remove it.
6. Replace the bulb.
7. Reverse Steps 3–5 to reinstall the taillamp assembly.
When reinstalling the taillamp
assembly, the pin on the taillamp
assembly must line up and be
inserted correctly into the
opening.
8. Replace the screw covers.
License Plate Lamp
To replace one of these bulbs:
1. Remove the two push pins holding each of the license plate
lamps to the liftgate trim by
unscrewing them.
Page 282 of 395

Black plate (27,1)Buick Enclave Owner Manual (GMNA-Localizing-U.S./Canada/Mexico-
7576029) - 2015 - CRC - 8/15/14
Vehicle Care 10-27
2. Turn and pull the license platelamp forward through the liftgate
trim opening.
3. Turn the bulb socket counterclockwise and pull the
bulb straight out of the socket.
4. Install the new bulb.
5. Reverse Steps 1–3 to reinstall the license plate lamp.
Replacement Bulbs
Exterior Lamp Bulb
Number
License Plate Lamp 194LL
Rear Turn Signal
and Taillamps 7443
(W21/5W)
For replacement bulbs not listed
here, contact your dealer.
Electrical System
High Voltage Devices and
Wiring
{Warning
Exposure to high voltage can
cause shock, burns, and even
death. The high voltage
components in the vehicle can
only be serviced by technicians
with special training.
High voltage components are
identified by labels. Do not
remove, open, take apart,
or modify these components.
High voltage cable or wiring has
orange covering. Do not probe,
tamper with, cut, or modify high
voltage cable or wiring.
Page 286 of 395

Black plate (31,1)Buick Enclave Owner Manual (GMNA-Localizing-U.S./Canada/Mexico-
7576029) - 2015 - CRC - 8/15/14
Vehicle Care 10-31
FusesUsage
RR DEFOG Rear Defogger RR HVAC Rear Climate Control System
RT HI BEAM Right High-Beam Headlamp
RT LO BEAM Right Low-Beam Headlamp
RT PRK Right Parking Lamp
RT TRLR
STOP/TRN Trailer Right
Stoplamp and Turn
Signal
RVC SNSR Regulated Voltage Control Sensor
S/ROOF/
SUNSHADE Sunroof
SERVICE Service Repair SPARE SpareSTOP
LAMPS
(CHINA ONLY) Stoplamps
(China Only) Fuses
Usage
STRTR Starter TCM Transmission Control Module
TRANS Transmission TRLR
BCK/UP Trailer Back-up
Lamps
TRLR BRK Trailer Brake TRLR
PRK LAMP Trailer Parking
Lamps
TRLR PWR Trailer Power WPR/WSW Windshield Wiper/ Washer
Relays Usage
A/C
CMPRSR CLTCH Air Conditioning
Compressor Clutch
AUX
VAC PUMP Auxiliary
Vacuum Pump
CRNK Switched Power FAN 1 Cooling Fan 1 Relays
Usage
FAN 2 Cooling Fan 2
FAN 3 Cooling Fan 3 FOG
LAMP (GMC) Fog Lamps (GMC)
HI BEAM High-Beam Headlamps
HID/
LO BEAM High Intensity
Discharge (HID)
Low-Beam
Headlamps
HORN Horn IGN Ignition Main
LT TRLR
STOP/TRN Trailer Left
Stoplamp and Turn
Signal Lamp
PRK LAMP Parking Lamp
PWR/TRN Powertrain
RR DEFOG Rear Window Defogger
Page 290 of 395

Black plate (35,1)Buick Enclave Owner Manual (GMNA-Localizing-U.S./Canada/Mexico-
7576029) - 2015 - CRC - 8/15/14
Vehicle Care 10-35
Wheels and Tires
Tires
Every new GM vehicle has
high-quality tires made by a
leading tire manufacturer. See
the warranty manual for
information regarding the tire
warranty and where to get
service. For additional
information refer to the tire
manufacturer.
{Warning
.Poorly maintained and
improperly used tires are
dangerous.
.Overloading the tires can
cause overheating as a
result of too much flexing.
There could be a blowout
(Continued)
Warning (Continued)
and a serious crash. See
Vehicle Load Limits on
page 9-9.
.Underinflated tires pose
the same danger as
overloaded tires. The
resulting crash could
cause serious injury.
Check all tires frequently
to maintain the
recommended pressure.
Tire pressure should be
checked when the tires
are cold.
.Overinflated tires are more
likely to be cut, punctured,
or broken by a sudden
impact —such as when
hitting a pothole. Keep
tires at the recommended
pressure.
(Continued)
Warning (Continued)
.Worn or old tires can
cause a crash. If the tread
is badly worn,
replace them.
.Replace any tires that
have been damaged by
impacts with potholes,
curbs, etc.
.Improperly repaired tires
can cause a crash. Only
the dealer or an
authorized tire service
center should repair,
replace, dismount, and
mount the tires.
.Do not spin the tires in
excess of 56 km/h
(35 mph) on slippery
surfaces such as snow,
mud, ice, etc. Excessive
spinning may cause the
tires to explode.