set clock BUICK ENCLAVE 2016 Owner's Manual
[x] Cancel search | Manufacturer: BUICK, Model Year: 2016, Model line: ENCLAVE, Model: BUICK ENCLAVE 2016Pages: 360, PDF Size: 5.04 MB
Page 16 of 360

Buick Enclave Owner Manual (GMNA-Localizing-U.S./Canada/Mexico-
9159225) - 2016 - crc - 7/31/15
In Brief 15
Power Tilt and Telescoping
Steering Wheel
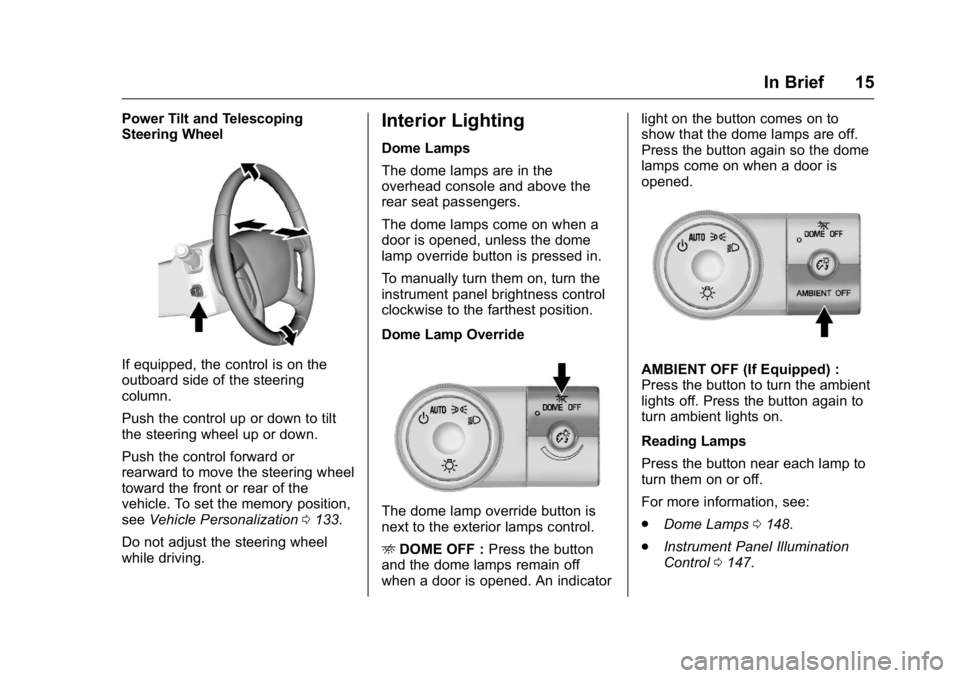
If equipped, the control is on the
outboard side of the steering
column.
Push the control up or down to tilt
the steering wheel up or down.
Push the control forward or
rearward to move the steering wheel
toward the front or rear of the
vehicle. To set the memory position,
seeVehicle Personalization 0133.
Do not adjust the steering wheel
while driving.
Interior Lighting
Dome Lamps
The dome lamps are in the
overhead console and above the
rear seat passengers.
The dome lamps come on when a
door is opened, unless the dome
lamp override button is pressed in.
To manually turn them on, turn the
instrument panel brightness control
clockwise to the farthest position.
Dome Lamp Override
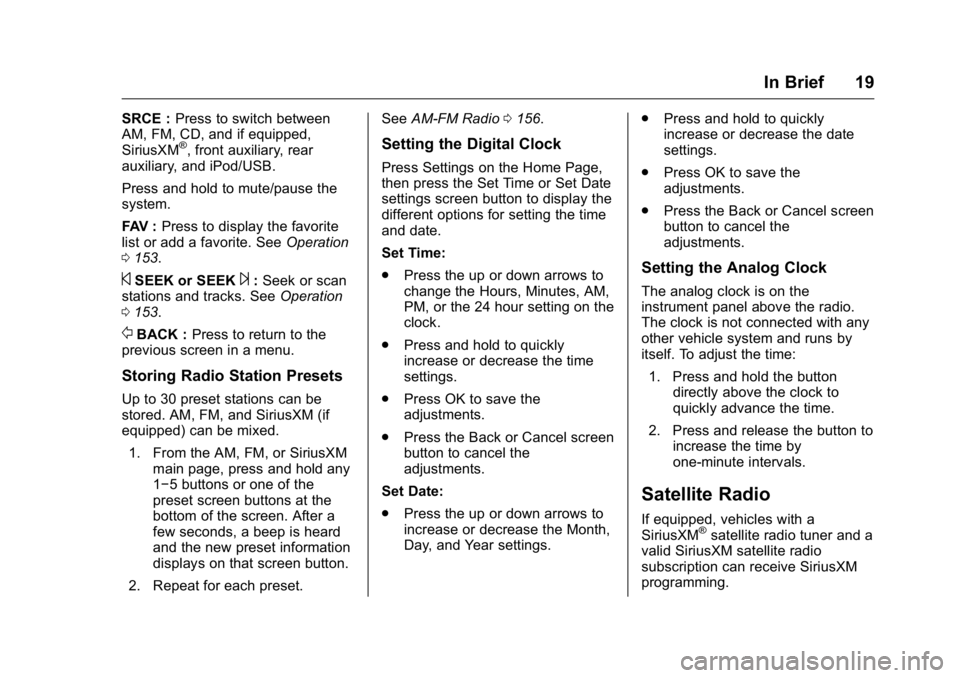
The dome lamp override button is
next to the exterior lamps control.
E DOME OFF : Press the button
and the dome lamps remain off
when a door is opened. An indicator light on the button comes on to
show that the dome lamps are off.
Press the button again so the dome
lamps come on when a door is
opened.
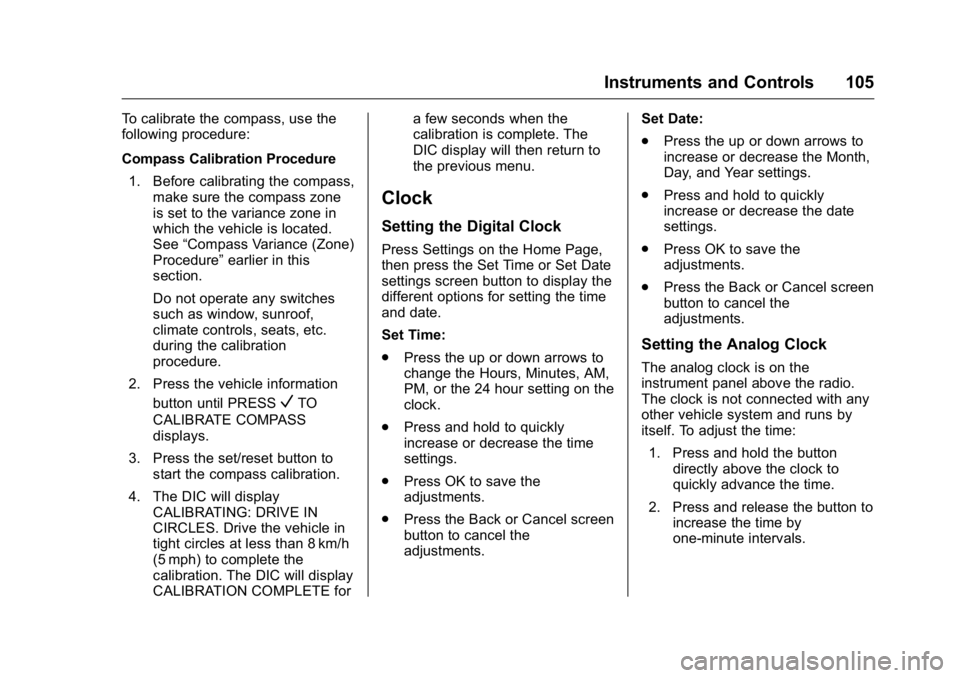
AMBIENT OFF (If Equipped) :
Press the button to turn the ambient
lights off. Press the button again to
turn ambient lights on.
Reading Lamps
Press the button near each lamp to
turn them on or off.
For more information, see:
.
Dome Lamps 0148.
. Instrument Panel Illumination
Control 0147.
Page 20 of 360

Buick Enclave Owner Manual (GMNA-Localizing-U.S./Canada/Mexico-
9159225) - 2016 - crc - 7/31/15
In Brief 19
SRCE :Press to switch between
AM, FM, CD, and if equipped,
SiriusXM
®, front auxiliary, rear
auxiliary, and iPod/USB.
Press and hold to mute/pause the
system.
FAV : Press to display the favorite
list or add a favorite. See Operation
0 153.
©SEEK or SEEK¨:Seek or scan
stations and tracks. See Operation
0 153.
/BACK : Press to return to the
previous screen in a menu.
Storing Radio Station Presets
Up to 30 preset stations can be
stored. AM, FM, and SiriusXM (if
equipped) can be mixed.
1. From the AM, FM, or SiriusXM main page, press and hold any
1−5 buttons or one of the
preset screen buttons at the
bottom of the screen. After a
few seconds, a beep is heard
and the new preset information
displays on that screen button.
2. Repeat for each preset. See
AM-FM Radio 0156.
Setting the Digital Clock
Press Settings on the Home Page,
then press the Set Time or Set Date
settings screen button to display the
different options for setting the time
and date.
Set Time:
.
Press the up or down arrows to
change the Hours, Minutes, AM,
PM, or the 24 hour setting on the
clock.
. Press and hold to quickly
increase or decrease the time
settings.
. Press OK to save the
adjustments.
. Press the Back or Cancel screen
button to cancel the
adjustments.
Set Date:
. Press the up or down arrows to
increase or decrease the Month,
Day, and Year settings. .
Press and hold to quickly
increase or decrease the date
settings.
. Press OK to save the
adjustments.
. Press the Back or Cancel screen
button to cancel the
adjustments.
Setting the Analog Clock
The analog clock is on the
instrument panel above the radio.
The clock is not connected with any
other vehicle system and runs by
itself. To adjust the time:
1. Press and hold the button directly above the clock to
quickly advance the time.
2. Press and release the button to increase the time by
one-minute intervals.
Satellite Radio
If equipped, vehicles with a
SiriusXM®satellite radio tuner and a
valid SiriusXM satellite radio
subscription can receive SiriusXM
programming.
Page 106 of 360

Buick Enclave Owner Manual (GMNA-Localizing-U.S./Canada/Mexico-
9159225) - 2016 - crc - 7/31/15
Instruments and Controls 105
To calibrate the compass, use the
following procedure:
Compass Calibration Procedure1. Before calibrating the compass, make sure the compass zone
is set to the variance zone in
which the vehicle is located.
See “Compass Variance (Zone)
Procedure” earlier in this
section.
Do not operate any switches
such as window, sunroof,
climate controls, seats, etc.
during the calibration
procedure.
2. Press the vehicle information button until PRESS
VTO
CALIBRATE COMPASS
displays.
3. Press the set/reset button to start the compass calibration.
4. The DIC will display CALIBRATING: DRIVE IN
CIRCLES. Drive the vehicle in
tight circles at less than 8 km/h
(5 mph) to complete the
calibration. The DIC will display
CALIBRATION COMPLETE for a few seconds when the
calibration is complete. The
DIC display will then return to
the previous menu.
Clock
Setting the Digital Clock
Press Settings on the Home Page,
then press the Set Time or Set Date
settings screen button to display the
different options for setting the time
and date.
Set Time:
.
Press the up or down arrows to
change the Hours, Minutes, AM,
PM, or the 24 hour setting on the
clock.
. Press and hold to quickly
increase or decrease the time
settings.
. Press OK to save the
adjustments.
. Press the Back or Cancel screen
button to cancel the
adjustments. Set Date:
.
Press the up or down arrows to
increase or decrease the Month,
Day, and Year settings.
. Press and hold to quickly
increase or decrease the date
settings.
. Press OK to save the
adjustments.
. Press the Back or Cancel screen
button to cancel the
adjustments.
Setting the Analog Clock
The analog clock is on the
instrument panel above the radio.
The clock is not connected with any
other vehicle system and runs by
itself. To adjust the time:
1. Press and hold the button directly above the clock to
quickly advance the time.
2. Press and release the button to increase the time by
one-minute intervals.
Page 175 of 360

Buick Enclave Owner Manual (GMNA-Localizing-U.S./Canada/Mexico-
9159225) - 2016 - crc - 7/31/15
174 Infotainment System
Settings
Press Settings on the Home Page
to adjust features and preferences,
such as Favorite Pages, Display,
Time, and Date, etc.1. Press the Settings screen button on the Home Page.
2. Touch-tap the scroll bar until the desired option displays.
Select the desired settings to
change.
A few of the setting options change
the way the navigation system
displays or reacts while in use.
Favorite Pages : Press to select
the number of favorite pages
displayed on the screen. The choice
is 1–6 pages.
Display : Press to adjust the screen
settings.
. Display Off: Select to turn the
screen off. Touch the screen to
turn the screen back on.
. Rear Camera: Select Symbols
and/or Guidelines to have them
display on the rear camera
screen. .
Brightness: Select to adjust the
screen brightness.
Speed Compensated Volume :
Select OFF, Low, Medium, or High
sensitivity to automatically adjust
the volume to minimize the effects
of unwanted background noise that
can result from changing road
surfaces, driving speeds, or open
windows. This feature works best at
lower volume settings where
background noise is typically louder
than the sound system volume.
Audible Touch Feedback : Select
to adjust the volume of the beep
that is played after touching a
screen button.
Notification Prompt Volume :
Select to adjust the volume of the
notification prompts.
Set Time:
. Press the up or down arrows to
change the Hours, Minutes, AM,
PM, or 24 hour setting on the
clock.
. Press and hold to quickly
increase or decrease the time
settings. .
Press OK to save the
adjustments.
. Press the Back or Cancel screen
button to cancel the
adjustments.
Set Date:
. Press the up or down arrows to
increase or decrease the Month,
Day, and Year settings.
. Press and hold to quickly
increase or decrease the date
settings.
. Press OK to save the
adjustments.
. Press the Back or Cancel screen
button to cancel the
adjustments.
XM Categories : If equipped, press
to customize which available XM
Categories are displayed and used
in the system.
Create “AS IS” Infotainment
File : This is used for dealer
troubleshooting.
Open Source Software : Select to
view software website information.
Page 178 of 360

Buick Enclave Owner Manual (GMNA-Localizing-U.S./Canada/Mexico-
9159225) - 2016 - crc - 7/31/15
Climate Controls 177
function along with the inside
temperature setting. The outside
temperature is displayed on the
instrument cluster.
((On/Off) :Turn clockwise or
counterclockwise to turn the climate
control system on or off.
The climate control system will also
turn on if the defrost, AUTO, or air
conditioning buttons are pressed.
Automatic Operation
AUTO (Automatic) : The system
automatically controls the inside
temperature, the air delivery, and
the fan speed.
To use automatic mode:
1. Press the AUTO button. When AUTO is selected, the
current temperature(s) is
displayed and the AUTO
indicator light is on.
When AUTO is selected, the
air conditioning and air inlet are
automatically controlled. The
air conditioning runs when the
outside temperature is over 4 °
C (40 °F). The system is automatically set to outside air,
unless it is hot outside and
then the air inlet changes to
recirculation mode to help
quickly cool the vehicle. The
recirculation indicator light will
come on.
2. Set the temperature for the driver and passenger.
To find a comfortable setting,
start with a 22 °C (73 °F)
temperature setting and allow
about 20 minutes for the
system to regulate. Use the
driver side or passenger side
temperature control to adjust
the temperature setting as
necessary. The system will
remain at the selected setting.
Choosing the warmest or
coolest temperatures does not
cause the vehicle to heat or
cool more quickly.
To avoid blowing cold air in
cold weather, the system
delays turning on the fan until
warm air is available. Turn the
fan knob to override this delay
and select the fan speed. Temperature Control
The driver and passenger side
temperature controls are used to
adjust the temperature of the air
coming through the system. The
temperature can be adjusted even if
the system is turned off since
outside air still enters the vehicle,
unless the recirculation mode is
selected. See
“Recirculation” later in
this section.
Driver Side Temperature
Control : Turn clockwise or
counterclockwise to increase or
decrease the driver side
temperature. The driver side
temperature display will show the
temperature setting.
Passenger Side Temperature
Control : Turn clockwise or
counterclockwise to increase or
decrease the passenger side
temperature. The passenger side
display will show the temperature
setting.
SYNC (Synchronized
Temperature) : Press to set the
passenger temperature to match the
driver temperature setting.
Page 179 of 360

Buick Enclave Owner Manual (GMNA-Localizing-U.S./Canada/Mexico-
9159225) - 2016 - crc - 7/31/15
178 Climate Controls
Manual Operation
The air delivery mode or fan speed
can be manually adjusted.
9(Fan Control) :Turn the knob
clockwise or counterclockwise to
increase or decrease the fan speed.
Turning the fan control knob while in
automatic control places the fan
speed under manual control.
The air delivery mode remains in
automatic control. The fan setting
displays momentarily and then no
longer displays.
Air Delivery Modes : Press
H,),
6, or-to change the direction of
the airflow in the vehicle. An
indicator light comes on in the
selected mode button. Pressing a
mode button while the system is off
changes the air delivery mode
without turning the system on.
Changing the air delivery mode
while in automatic control places the
system into manual control. The air
delivery mode button indicator
displays, and the AUTO button
indicator light turns off.
H(Vent) : Air is directed to the
instrument panel outlets.
)(Bi-Level) : Air is divided
between the instrument panel and
floor outlets. Some air is directed
towards the windshield and side
window outlets. Cooler air is
directed to the upper outlets and
warmer air to the floor outlets.
6(Floor) : Air is directed to the
floor outlets, with some of the air
directed to the windshield, side
window, and second row floor
outlets. In this mode, the system
uses outside air.
-(Defog) : This mode clears the
windows of fog or moisture. Air is
directed to the windshield, floor
outlets, and side window vents.
When this mode is selected, the
system turns off recirculation and
runs the air conditioning compressor
unless the outside temperature is
less than 4 °C (40 °F). Do not drive
the vehicle until all the windows are
clear.
0(Defrost) : Press to turn the
defrost on or off. This mode quickly
clears the windshield of fog or frost. Air is directed to the windshield,
side window, and floor vents. In this
mode, outside air is pulled inside
the vehicle. The air conditioning
system runs automatically in this
setting, unless the outside
temperature is less than 4 °C (40
°F).
Do not drive the vehicle until all the
windows are clear.
Air Conditioning
A/C (Air Conditioning) :
Press to
turn the air conditioning on and off.
An indicator light comes on when
A/C is on.
The A/C does not work when the
outside temperature is below 4 °C
(40 °F). If A/C is pressed the
indicator flashes three times and
turns off to show that the A/C mode
is not available. If the A/C is on and
the outside temperature drops
below a temperature which is too
cool for air conditioning to be
effective, the A/C indicator turns off
to show that the A/C mode has
been canceled.
Page 182 of 360

Buick Enclave Owner Manual (GMNA-Localizing-U.S./Canada/Mexico-
9159225) - 2016 - crc - 7/31/15
Climate Controls 181
Rear Climate Control System
1. Fan Control
2. Temperature Control
3. Air Delivery Mode Control
For vehicles with the rear climate
control system, the controls are
located on the rear of the center
console. The system can also be
controlled with the front controls.
Press the REAR button on the front
climate control system to control the
rear climate control system. The
REAR text displays when the rear
system is on. Sync Mode :
This mode matches
the rear climate control to the front
climate control settings. It comes on
when REAR is pressed.
Independent Mode : This mode
directs rear seating airflow
according to the settings of the rear
controls. It comes on when any rear
control is adjusted.
Fan Control : Turn clockwise or
counterclockwise to increase or
decrease the fan speed. Turn the
knob to
(to turn the fan off. Temperature Control :
Turn
clockwise or counterclockwise to
increase or decrease the airflow
temperature.
Air Delivery Mode Control : Turn
to the desired mode to change the
airflow direction.
H (Vent) : Air is directed through
the overhead outlets.
) (Bi-Level) : Air is directed
through the rear floor outlets, as
well as the overhead outlets.
6 (Floor) : Air is directed through
the floor outlets. The rear system
floor outlets are located under the
third row seats.