warning light BUICK ENCLAVE 2017 Owner's Manual
[x] Cancel search | Manufacturer: BUICK, Model Year: 2017, Model line: ENCLAVE, Model: BUICK ENCLAVE 2017Pages: 366, PDF Size: 5 MB
Page 4 of 366
Buick Enclave Owner Manual (GMNA-Localizing-U.S./Canada/Mexico-
9955666) - 2017 - crc - 8/4/16
Introduction 3
{Danger
Danger indicates a hazard with a
high level of risk which will result
in serious injury or death.
{Warning
Warning indicates a hazard that
could result in injury or death.
Caution
Caution indicates a hazard that
could result in property or vehicle
damage.
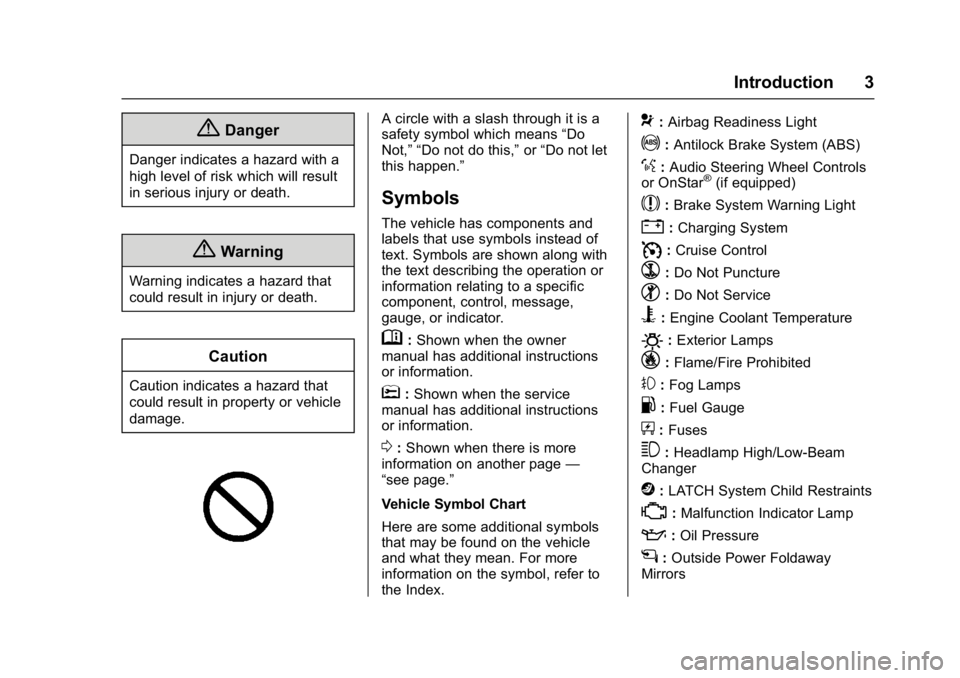
A circle with a slash through it is a
safety symbol which means“Do
Not,” “Do not do this,” or“Do not let
this happen.”
Symbols
The vehicle has components and
labels that use symbols instead of
text. Symbols are shown along with
the text describing the operation or
information relating to a specific
component, control, message,
gauge, or indicator.
M: Shown when the owner
manual has additional instructions
or information.
*: Shown when the service
manual has additional instructions
or information.
0: Shown when there is more
information on another page —
“see page.”
Vehicle Symbol Chart
Here are some additional symbols
that may be found on the vehicle
and what they mean. For more
information on the symbol, refer to
the Index.
9: Airbag Readiness Light
!:Antilock Brake System (ABS)
%:Audio Steering Wheel Controls
or OnStar®(if equipped)
$: Brake System Warning Light
":Charging System
I: Cruise Control
`:Do Not Puncture
^:Do Not Service
B:Engine Coolant Temperature
O:Exterior Lamps
_: Flame/Fire Prohibited
#:Fog Lamps
.:Fuel Gauge
+: Fuses
3:Headlamp High/Low-Beam
Changer
j: LATCH System Child Restraints
*:Malfunction Indicator Lamp
::Oil Pressure
g:Outside Power Foldaway
Mirrors
Page 6 of 366
Buick Enclave Owner Manual (GMNA-Localizing-U.S./Canada/Mexico-
9955666) - 2017 - crc - 8/4/16
In Brief 5
In Brief
Instrument Panel
Instrument Panel . . . . . . . . . . . . . . . . 6
Initial Drive Information
Initial Drive Information . . . . . . . . . . 8
Remote Keyless Entry (RKE)System . . . . . . . . . . . . . . . . . . . . . . . . 8
Remote Vehicle Start . . . . . . . . . . . 8
Door Locks . . . . . . . . . . . . . . . . . . . . . 9
Liftgate . . . . . . . . . . . . . . . . . . . . . . . . . . 9
Windows . . . . . . . . . . . . . . . . . . . . . . . 10
Seat Adjustment . . . . . . . . . . . . . . . 10
Memory Features . . . . . . . . . . . . . . 11
Second Row Seats . . . . . . . . . . . . 11
Third Row Seats . . . . . . . . . . . . . . . 11
Heated and Cooled Front Seats . . . . . . . . . . . . . . . . . . . . . . . . . 12
Head Restraint Adjustment . . . . 13
Safety Belts . . . . . . . . . . . . . . . . . . . . 13
Passenger Sensing System . . . 13
Mirror Adjustment . . . . . . . . . . . . . . 14
Steering Wheel Adjustment . . . . 14
Interior Lighting . . . . . . . . . . . . . . . . 15
Exterior Lighting . . . . . . . . . . . . . . . 16
Windshield Wiper/Washer . . . . . . 16
Climate Controls . . . . . . . . . . . . . . . 17
Transmission . . . . . . . . . . . . . . . . . . 17
Vehicle Features
Infotainment System . . . . . . . . . . . 18
Radio(s) . . . . . . . . . . . . . . . . . . . . . . . 18
Satellite Radio . . . . . . . . . . . . . . . . . 20
Portable Audio Devices . . . . . . . . 20
Bluetooth
®. . . . . . . . . . . . . . . . . . . . . 20
Steering Wheel Controls . . . . . . . 20
Cruise Control . . . . . . . . . . . . . . . . . 21
Forward Collision Alert (FCA) System . . . . . . . . . . . . . . . . . . . . . . . 21
Lane Departure Warning (LDW) . . . . . . . . . . . . . . . 22
Side Blind Zone Alert (SBZA) . . . . . . . . . . . . . . . . . . 22
Rear Vision Camera (RVC) . . . . 22
Rear Cross Traffic Alert (RCTA) System . . . . . . . . . . . . . . . . . . . . . . . 22
Parking Assist . . . . . . . . . . . . . . . . . 22
Power Outlets . . . . . . . . . . . . . . . . . 22
Universal Remote System . . . . . 23
Sunroof . . . . . . . . . . . . . . . . . . . . . . . . 23
Performance and Maintenance
Traction Control/Electronic Stability Control . . . . . . . . . . . . . . 24
Tire Pressure Monitor . . . . . . . . . . 24
Fuel . . . . . . . . . . . . . . . . . . . . . . . . . . . 24
E85 or FlexFuel . . . . . . . . . . . . . . . . 25
Engine Oil Life System . . . . . . . . 25
Driving for Better Fuel Economy . . . . . . . . . . . . . . . . . . . . . 25
Roadside Assistance Program . . . . . . . . . . . . . . . . . . . . . . 26
Page 8 of 366

Buick Enclave Owner Manual (GMNA-Localizing-U.S./Canada/Mexico-
9955666) - 2017 - crc - 8/4/16
In Brief 7
1.Air Vents 0186.
2. Turn Signal Lever. See Turn
and Lane-Change
Signals 0149.
Windshield Wiper/
Washer 0104.
3. Instrument Cluster 0110.
4. Clock 0107.
5. Instrument Panel Storage 097.
6. Infotainment 0154.
7. Passenger Airbag Status Indicator. See Passenger
Sensing System 072.
8. Hazard Warning
Flashers 0149.
9. Heated and Cooled Front
Seats 051 (If Equipped).
10. Rear Window Wiper/
Washer 0105.
Traction Control System (TCS)
Disable Button. See Traction
Control/Electronic Stability
Control 0212.
Forward Collision Alert (FCA)
System 0220 (If Equipped). Lane Departure Warning
(LDW)
0223 (If Equipped).
Tow/Haul Button (If Equipped).
See Tow/Haul Mode 0209.
Power Liftgate Button (If
Equipped). See Liftgate034.
11. Power Outlets 0108.
12. USB Port. See Auxiliary
Devices 0167.
13. Shift Lever. See Automatic
Transmission 0207.
14. Dual Automatic Climate Control
System 0179.
15. Driver Information Center (DIC) Buttons. See Driver Information
Center (DIC) 0122.
16. Steering Wheel Controls 0104
(If Equipped).
17. Horn 0104.
18. Steering Wheel
Adjustment 0103.
19. Cruise Control 0214.
20. Dome Lamp Override. See Dome Lamps 0150. Instrument Panel Illumination
Control
0150.
21. Data Link Connector (DLC) (Out of View). See Malfunction
Indicator Lamp (Check Engine
Light) 0116.
22. Parking Brake 0211.
23. Hood Release. See Hood 0239.
24. Exterior Lamp Controls 0146.
Page 17 of 366
Buick Enclave Owner Manual (GMNA-Localizing-U.S./Canada/Mexico-
9955666) - 2017 - crc - 8/4/16
16 In Brief
Exterior Lighting
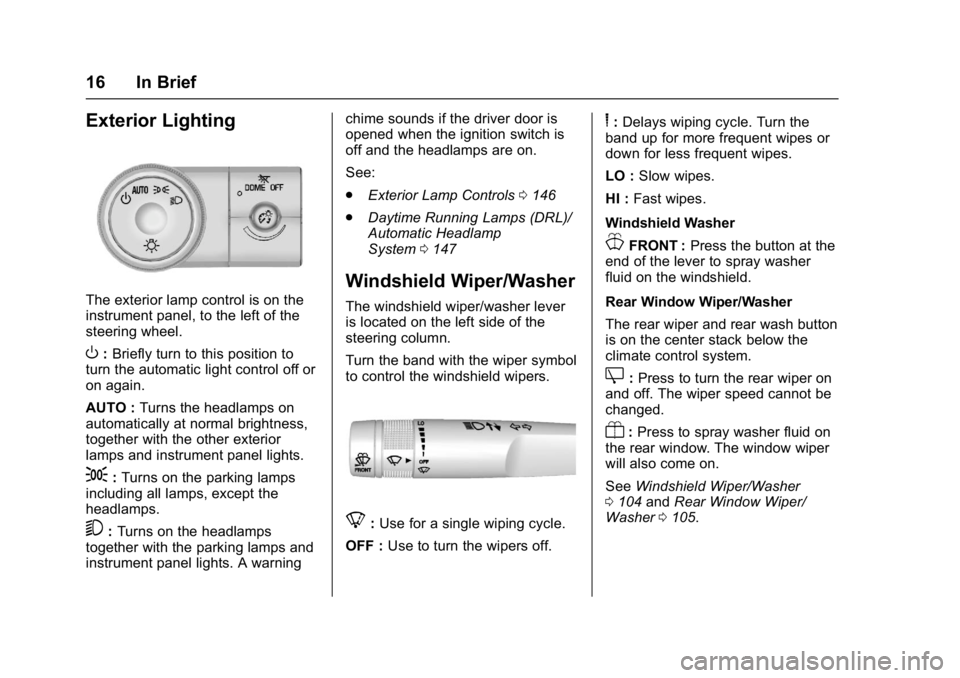
The exterior lamp control is on the
instrument panel, to the left of the
steering wheel.
O:Briefly turn to this position to
turn the automatic light control off or
on again.
AUTO : Turns the headlamps on
automatically at normal brightness,
together with the other exterior
lamps and instrument panel lights.
;: Turns on the parking lamps
including all lamps, except the
headlamps.
5: Turns on the headlamps
together with the parking lamps and
instrument panel lights. A warning chime sounds if the driver door is
opened when the ignition switch is
off and the headlamps are on.
See:
.
Exterior Lamp Controls 0146
. Daytime Running Lamps (DRL)/
Automatic Headlamp
System 0147
Windshield Wiper/Washer
The windshield wiper/washer lever
is located on the left side of the
steering column.
Turn the band with the wiper symbol
to control the windshield wipers.
8:Use for a single wiping cycle.
OFF : Use to turn the wipers off.
6:Delays wiping cycle. Turn the
band up for more frequent wipes or
down for less frequent wipes.
LO : Slow wipes.
HI : Fast wipes.
Windshield Washer
JFRONT : Press the button at the
end of the lever to spray washer
fluid on the windshield.
Rear Window Wiper/Washer
The rear wiper and rear wash button
is on the center stack below the
climate control system.
Z: Press to turn the rear wiper on
and off. The wiper speed cannot be
changed.
Y: Press to spray washer fluid on
the rear window. The window wiper
will also come on.
See Windshield Wiper/Washer
0 104 andRear Window Wiper/
Washer 0105.
Page 23 of 366
Buick Enclave Owner Manual (GMNA-Localizing-U.S./Canada/Mexico-
9955666) - 2017 - crc - 8/4/16
22 In Brief
Lane Departure
Warning (LDW)
If equipped, LDW may help avoid
unintentional lane departures at
speeds of 56 km/h (35 mph) or
greater. LDW uses a camera sensor
to detect the lane markings. The
LDW light,
@, is green if a lane
marking is detected. If the vehicle
departs the lane without using a turn
signal in that direction, the light will
change to amber and flash. In
addition, beeps will sound.
See Lane Departure Warning
(LDW) 0223.
Side Blind Zone
Alert (SBZA)
If equipped, SBZA will detect
moving vehicles in the next lane
over in the vehicle's side blind zone
area. When this happens, the SBZA
display will light up in the
corresponding outside side mirror
and will flash if the turn signal is on.
See Side Blind Zone Alert
(SBZA) 0221.
Rear Vision
Camera (RVC)
If equipped, RVC displays a view of
the area behind the vehicle, on the
infotainment system display, when
the vehicle is shifted into
R (Reverse).
See Rear Vision Camera
(RVC) 0216.
Rear Cross Traffic Alert
(RCTA) System
If equipped, the RCTA system uses
a triangle with an arrow displayed
on the infotainment screen to warn
of traffic behind your vehicle that
may cross your vehicle's path while
in R (Reverse). In addition, beeps
will sound.
See “Rear Cross Traffic Alert
(RCTA)” underRear Vision Camera
(RVC) 0216.
Parking Assist
If equipped, Rear Parking Assist
(RPA) uses sensors on the rear
bumper to assist with parking and
avoiding objects while in
R (Reverse). It operates at speeds
less than 8 km/h (5 mph) and uses
audible beeps to provide distance
and system information.
Keep the sensors on the vehicle's
rear bumper clean to ensure proper
operation.
See Parking Assist 0218.
Power Outlets
The vehicle has 12-volt accessory
power outlets, which can be used to
plug in electrical equipment, such as
a cell phone or MP3 player.
The power outlets are located:
.
On the center stack below the
climate controls.
. Inside the center console.
. At the rear of the center console.
. In the rear cargo area.
Page 25 of 366
Buick Enclave Owner Manual (GMNA-Localizing-U.S./Canada/Mexico-
9955666) - 2017 - crc - 8/4/16
24 In Brief
Performance and
Maintenance
Traction Control/
Electronic Stability
Control
The vehicle has a traction control
system that limits wheel spin, and
the StabiliTrak system that assists
with directional control of the vehicle
in difficult driving conditions. Both
systems turn on automatically every
time the vehicle is started.
.To turn off traction control and
StabiliTrak, press and release
4
on the center stack, and the
appropriate DIC message
displays. See Ride Control
System Messages 0132.
. Press and release
4again to
turn on both systems.
See Traction Control/Electronic
Stability Control 0212.
Tire Pressure Monitor
This vehicle may have a Tire
Pressure Monitor System (TPMS).
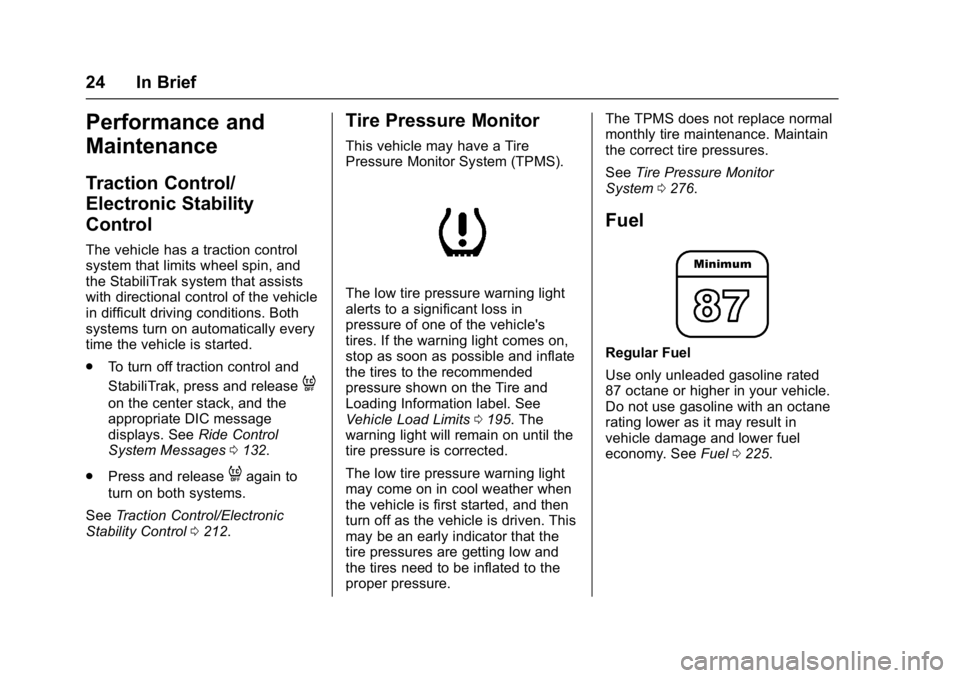
The low tire pressure warning light
alerts to a significant loss in
pressure of one of the vehicle's
tires. If the warning light comes on,
stop as soon as possible and inflate
the tires to the recommended
pressure shown on the Tire and
Loading Information label. See
Vehicle Load Limits 0195. The
warning light will remain on until the
tire pressure is corrected.
The low tire pressure warning light
may come on in cool weather when
the vehicle is first started, and then
turn off as the vehicle is driven. This
may be an early indicator that the
tire pressures are getting low and
the tires need to be inflated to the
proper pressure. The TPMS does not replace normal
monthly tire maintenance. Maintain
the correct tire pressures.
See
Tire Pressure Monitor
System 0276.
Fuel
Regular Fuel
Use only unleaded gasoline rated
87 octane or higher in your vehicle.
Do not use gasoline with an octane
rating lower as it may result in
vehicle damage and lower fuel
economy. See Fuel0225.
Page 29 of 366
Buick Enclave Owner Manual (GMNA-Localizing-U.S./Canada/Mexico-
9955666) - 2017 - crc - 8/4/16
28 Keys, Doors, and Windows
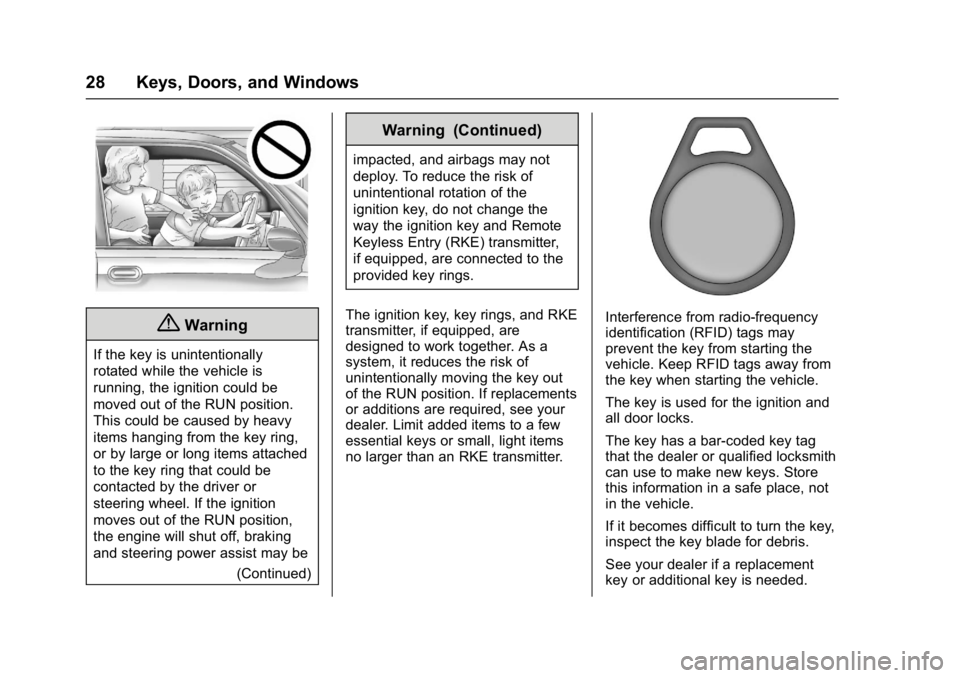
{Warning
If the key is unintentionally
rotated while the vehicle is
running, the ignition could be
moved out of the RUN position.
This could be caused by heavy
items hanging from the key ring,
or by large or long items attached
to the key ring that could be
contacted by the driver or
steering wheel. If the ignition
moves out of the RUN position,
the engine will shut off, braking
and steering power assist may be(Continued)
Warning (Continued)
impacted, and airbags may not
deploy. To reduce the risk of
unintentional rotation of the
ignition key, do not change the
way the ignition key and Remote
Keyless Entry (RKE) transmitter,
if equipped, are connected to the
provided key rings.
The ignition key, key rings, and RKE
transmitter, if equipped, are
designed to work together. As a
system, it reduces the risk of
unintentionally moving the key out
of the RUN position. If replacements
or additions are required, see your
dealer. Limit added items to a few
essential keys or small, light items
no larger than an RKE transmitter.
Interference from radio-frequency
identification (RFID) tags may
prevent the key from starting the
vehicle. Keep RFID tags away from
the key when starting the vehicle.
The key is used for the ignition and
all door locks.
The key has a bar-coded key tag
that the dealer or qualified locksmith
can use to make new keys. Store
this information in a safe place, not
in the vehicle.
If it becomes difficult to turn the key,
inspect the key blade for debris.
See your dealer if a replacement
key or additional key is needed.
Page 53 of 366
Buick Enclave Owner Manual (GMNA-Localizing-U.S./Canada/Mexico-
9955666) - 2017 - crc - 8/4/16
52 Seats and Restraints
Warning (Continued)
cause the seat heater to
overheat. An overheated seat
heater may cause a burn or may
damage the seat.
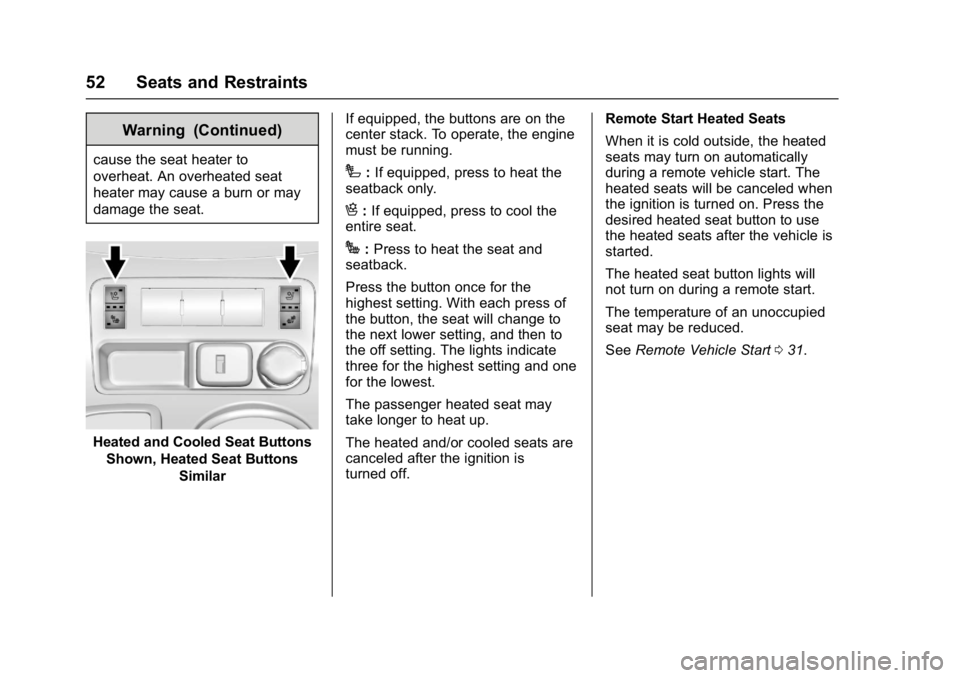
Heated and Cooled Seat ButtonsShown, Heated Seat Buttons Similar If equipped, the buttons are on the
center stack. To operate, the engine
must be running.
I:
If equipped, press to heat the
seatback only.
H: If equipped, press to cool the
entire seat.
J: Press to heat the seat and
seatback.
Press the button once for the
highest setting. With each press of
the button, the seat will change to
the next lower setting, and then to
the off setting. The lights indicate
three for the highest setting and one
for the lowest.
The passenger heated seat may
take longer to heat up.
The heated and/or cooled seats are
canceled after the ignition is
turned off. Remote Start Heated Seats
When it is cold outside, the heated
seats may turn on automatically
during a remote vehicle start. The
heated seats will be canceled when
the ignition is turned on. Press the
desired heated seat button to use
the heated seats after the vehicle is
started.
The heated seat button lights will
not turn on during a remote start.
The temperature of an unoccupied
seat may be reduced.
See
Remote Vehicle Start 031.
Page 57 of 366
Buick Enclave Owner Manual (GMNA-Localizing-U.S./Canada/Mexico-
9955666) - 2017 - crc - 8/4/16
56 Seats and Restraints
6. Push the seatback forward tolay flat.
Returning the Seat to the
Seating Position
To return the seatback to the
seating position:
1. From the rear of the vehicle, raise the seatback to the
upright position using the pull
strap on the back of the third
row seat, or lift the seatback
and push it into place from
inside the vehicle.
{Warning
If either seatback is not locked, it
could move forward in a sudden
stop or crash. That could cause
injury to the person sitting there.
Always push and pull on the
seatbacks to be sure they are
locked.
2. Push and pull on the seatback to make sure it is locked in
place.
{Warning
A safety belt that is improperly
routed, not properly attached,
or twisted will not provide the
protection needed in a crash. The
person wearing the belt could be
seriously injured. After raising the
rear seatback, always check to be
sure that the safety belts are
properly routed and attached, and
are not twisted.
3. Reconnect the center safety belt mini-latch to the
mini-buckle. Do not let it twist.
4. Pull on the safety belt to be sure the mini-latch is secure.
Removing the Third Row Seats
To remove a third row seat:
1. Remove the cargo management system, if it is
installed. See Cargo
Management System 099.
2. Remove anything on or under the seat.
Caution
Folding a rear seat with the safety
belts still fastened may cause
damage to the seat or the safety
belts. Always unbuckle the safety
belts and return them to their
normal stowed position before
folding a rear seat.
3. Fold the seatback down. See “Folding the Seatback” earlier
in this section.
4. Remove the rear bolts on the floor on each side of the seat.
5. Remove the seat by tilting it slightly upward, and then
pulling it out of the rear of the
vehicle in one motion.
6. Replace the bolts in the floor holes for storage.
Page 65 of 366
Buick Enclave Owner Manual (GMNA-Localizing-U.S./Canada/Mexico-
9955666) - 2017 - crc - 8/4/16
64 Seats and Restraints
A pregnant woman should wear a
lap-shoulder belt, and the lap
portion should be worn as low as
possible, below the rounding,
throughout the pregnancy.
The best way to protect the fetus is
to protect the mother. When a safety
belt is worn properly, it is more likely
that the fetus will not be hurt in a
crash. For pregnant women, as for
anyone, the key to making safety
belts effective is wearing them
properly.
Safety Belt Extender
If the vehicle's safety belt will fasten
around you, you should use it.
But if a safety belt is not long
enough, your dealer will order you
an extender. When you go in to
order it, take the heaviest coat you
will wear, so the extender will be
long enough for you. To help avoid
personal injury, do not let someone
else use it, and use it only for the
seat it is made to fit. The extender
has been designed for adults. Never
use it for securing child restraints.
To wear it, attach it to the regularsafety belt. For more information,
see the instruction sheet that comes
with the extender.
Safety System Check
Check that the safety belt reminder,
safety belts, buckles, latch plates,
and retractors, are all working
properly. Look for any other loose or
damaged safety belt system parts
that might keep a safety belt system
from performing properly. See your
dealer to have it repaired. Torn or
frayed safety belts may not protect
you in a crash. They can rip apart
under impact forces. If a belt is torn
or frayed, have it replaced
immediately.
Make sure the safety belt reminder
light is working. See
Safety Belt
Reminders 0113.
Keep safety belts clean and dry.
See Safety Belt Care 064.
Safety Belt Care
Keep belts clean and dry.
{Warning
Do not bleach or dye safety belt
webbing. It may severely weaken
the webbing. In a crash, they
might not be able to provide
adequate protection. Clean and
rinse safety belt webbing only
with mild soap and lukewarm
water. Allow the webbing to dry.
Safety belts should be properly
cared for and maintained.
Safety belt hardware should be kept
dry and free of dust or debris. As
necessary exterior hard surfaces
and safety belt webbing may be
lightly cleaned with mild soap and
water. Ensure there is not excessive
dust or debris in the mechanism.
If dust or debris exists in the system
please see the dealer. Parts may
need to be replaced to ensure
proper functionality of the system.