key BUICK ENCLAVE 2017 Workshop Manual
[x] Cancel search | Manufacturer: BUICK, Model Year: 2017, Model line: ENCLAVE, Model: BUICK ENCLAVE 2017Pages: 366, PDF Size: 5 MB
Page 253 of 366

Buick Enclave Owner Manual (GMNA-Localizing-U.S./Canada/Mexico-
9955666) - 2017 - crc - 8/4/16
252 Vehicle Care
Caution
After driving in the overheated
engine protection operating
mode, the engine oil will be
severely degraded. Any repairs
performed before the engine is
cool may cause engine damage.
Allow the engine to cool before
attempting any repair. Repair the
cause of coolant loss, change the
oil, and reset the oil life system.
SeeEngine Oil 0241.
Power Steering Fluid
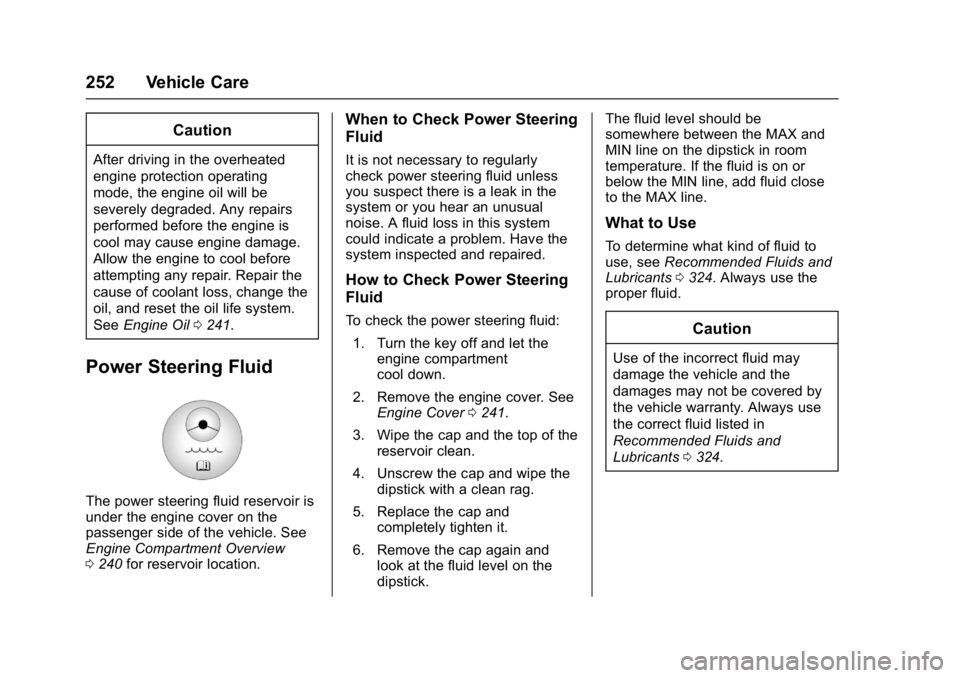
The power steering fluid reservoir is
under the engine cover on the
passenger side of the vehicle. See
Engine Compartment Overview
0240 for reservoir location.
When to Check Power Steering
Fluid
It is not necessary to regularly
check power steering fluid unless
you suspect there is a leak in the
system or you hear an unusual
noise. A fluid loss in this system
could indicate a problem. Have the
system inspected and repaired.
How to Check Power Steering
Fluid
To check the power steering fluid:
1. Turn the key off and let the engine compartment
cool down.
2. Remove the engine cover. See Engine Cover 0241.
3. Wipe the cap and the top of the reservoir clean.
4. Unscrew the cap and wipe the dipstick with a clean rag.
5. Replace the cap and completely tighten it.
6. Remove the cap again and look at the fluid level on the
dipstick. The fluid level should be
somewhere between the MAX and
MIN line on the dipstick in room
temperature. If the fluid is on or
below the MIN line, add fluid close
to the MAX line.
What to Use
To determine what kind of fluid to
use, see
Recommended Fluids and
Lubricants 0324. Always use the
proper fluid.
Caution
Use of the incorrect fluid may
damage the vehicle and the
damages may not be covered by
the vehicle warranty. Always use
the correct fluid listed in
Recommended Fluids and
Lubricants 0324.
Page 258 of 366

Buick Enclave Owner Manual (GMNA-Localizing-U.S./Canada/Mexico-
9955666) - 2017 - crc - 8/4/16
Vehicle Care 257
2. Apply the parking brake. Beready to apply the regular
brake immediately if the vehicle
begins to move.
3. With the engine off, turn the ignition on, but do not start the
engine. Without applying the
regular brake, try to move the
shift lever out of P (Park) with
normal effort. If the shift lever
moves out of P (Park), contact
your dealer for service.
Ignition Transmission
Lock Check
While parked and with the parking
brake set, try to turn the ignition to
LOCK/OFF in each shift lever
position.
.The ignition should turn to
LOCK/OFF only when the shift
lever is in P (Park).
. The ignition key should come
out only in LOCK/OFF.
Contact your dealer if service is
required.
Park Brake and P (Park)
Mechanism Check
{Warning
When you are doing this check,
the vehicle could begin to move.
You or others could be injured
and property could be damaged.
Make sure there is room in front
of the vehicle in case it begins to
roll. Be ready to apply the regular
brake at once should the vehicle
begin to move.
Park on a fairly steep hill, with the
vehicle facing downhill. Keeping
your foot on the regular brake, set
the parking brake.
. To check the parking brake's
holding ability: With the engine
running and the transmission in
N (Neutral), slowly remove foot
pressure from the regular brake
pedal. Do this until the vehicle is
held by the parking brake only. .
To check the P (Park)
mechanism's holding ability:
With the engine running, shift to
P (Park). Then release the
parking brake followed by the
regular brake.
Contact your dealer if service is
required.
Wiper Blade Replacement
Front Wiper Blade
Windshield wiper blades should be
inspected for wear or cracking.
Replacement blades come in
different types and are removed in
different ways. For the proper type
and size, see Maintenance
Replacement Parts 0325.
To replace the wiper blade
assembly:
1. Pull the windshield wiper assembly away from the
windshield.
Page 280 of 366

Buick Enclave Owner Manual (GMNA-Localizing-U.S./Canada/Mexico-
9955666) - 2017 - crc - 8/4/16
Vehicle Care 279
TPMS sensors are installed and
the sensor matching process is
performed successfully. See
your dealer for service.
. Replacement tires or wheels do
not match the original equipment
tires or wheels. Tires and wheels
other than those recommended
could prevent the TPMS from
functioning properly. See Buying
New Tires 0282.
. Operating electronic devices or
being near facilities using radio
wave frequencies similar to the
TPMS could cause the TPMS
sensors to malfunction.
If the TPMS is not functioning
properly, it cannot detect or signal a
low tire condition. See your dealer
for service if the TPMS malfunction
light and DIC message comes on
and stays on.
TPMS Sensor Matching
Process
Each TPMS sensor has a unique
identification code. The identification
code needs to be matched to a new
tire/wheel position after rotating the tires or replacing one or more of the
TPMS sensors. The TPMS sensor
matching process should also be
performed after replacing a spare
tire with a road tire containing the
TPMS sensor. The malfunction light
and the DIC message should go off
at the next ignition cycle. The
sensors are matched to the tire/
wheel positions, using a TPMS
relearn tool, in the following order:
driver side front tire, passenger side
front tire, passenger side rear tire,
and driver side rear. See your
dealer for service or to purchase a
relearn tool. A TPMS relearn tool
can also be purchased. See Tire
Pressure Monitor Sensor Activation
Tool at
www.gmtoolsandequipment.com or
call 1-800-GM TOOLS
(1-800-468-6657).
There are two minutes to match the
first tire/wheel position, and
five minutes overall to match all four
tire/wheel positions. If it takes
longer, the matching process stops
and must be restarted.
The TPMS sensor matching process
is outlined below:
1. Set the parking brake.
2. Turn the ignition to ON/RUN with the engine off.
3. Press the Remote Keyless Entry (RKE) transmitter's
Q
andKbuttons at the same
time for approximately
five seconds. The horn sounds
twice to signal the receiver is in
relearn mode and TIRE
LEARNING ACTIVE message
displays on the DIC screen.
4. Start with the driver side front tire.
5. Place the relearn tool against the tire sidewall, near the valve
stem. Then press the button to
activate the TPMS sensor.
A horn chirp confirms that the
sensor identification code has
been matched to this tire and
wheel position.
6. Proceed to the passenger side front tire, and repeat the
procedure in Step 5.
Page 291 of 366

Buick Enclave Owner Manual (GMNA-Localizing-U.S./Canada/Mexico-
9955666) - 2017 - crc - 8/4/16
290 Vehicle Care
Removing the Flat Tire and
Installing the Spare Tire
1. Do a safety check beforeproceeding. See If a Tire Goes
Flat 0287 for more information.
2. If the vehicle has a wheel cover, loosen the plastic nut
caps with the wheel wrench.
They will not come off. Then,
using the flat end of the wheel
wrench, pry along the edge of
the cover until it comes off. Be
careful; the edges may be
sharp. Do not try to remove the
cover with your bare hands.
Store the wheel cover securely
in the rear of the vehicle until
you have the flat tire repaired
or replaced.
If the vehicle has aluminum
wheels, remove the wheel nut
caps using the wheel wrench.
3. Loosen the wheel nuts —but
do not remove them —using
the wrench. For wheels with a
wheel lock key, use the wheel
lock key between the lock nut
and wrench. The key is
supplied in the front passenger
door pocket.
Caution
If this vehicle has wheel locks and
an impact wrench is used to
remove the wheel nuts, the lock
nut or wheel lock key could be
(Continued)
Caution (Continued)
damaged. Do not use an impact
wrench to remove the wheel nuts
if this vehicle has wheel locks.
4. To identify the appropriatejacking location, find the
triangle or rectangular notch
about 30.5 cm (12 in) from the
front tire or about 27 cm
(10.5 in) from the rear tire.
Page 303 of 366

Buick Enclave Owner Manual (GMNA-Localizing-U.S./Canada/Mexico-
9955666) - 2017 - crc - 8/4/16
302 Vehicle Care
50 amp BATT1 fuse from the
engine compartment fuse block
and store all fuses in a safe
location. SeeEngine
Compartment Fuse
Block 0261.
7. Release the parking brake.
Caution
If the vehicle is towed without
performing each of the steps
listed under “Dinghy Towing,” the
automatic transmission could be
damaged. Be sure to follow all
steps of the dinghy towing
procedure prior to and after
towing the vehicle.
Caution
If 105 km/h (65 mph) is exceeded
while towing the vehicle, it could
be damaged. Never exceed
105 km/h (65 mph) while towing
the vehicle. Once the destination is reached:
1. Set the parking brake.
2. Reinstall the fuses.
3. Shift the transmission to P (Park), turn the ignition to
LOCK/OFF, and remove the
key from the ignition.
4. Disconnect the vehicle from the towing vehicle.
Caution
Do not tow a vehicle with the front
drive wheels on the ground if one
of the front tires is a compact
spare tire. Towing with two
different tire sizes on the front of
the vehicle can cause severe
damage to the transmission.
Dolly Towing (All-Wheel-Drive
Vehicles)
All-wheel-drive vehicles must not be
towed with two wheels on the
ground. To properly tow these
vehicles, they should be placed on
a platform trailer with all four wheels
off of the ground or dinghy towed
from the front.
Page 304 of 366

Buick Enclave Owner Manual (GMNA-Localizing-U.S./Canada/Mexico-
9955666) - 2017 - crc - 8/4/16
Vehicle Care 303
Dolly Towing
(Front-Wheel-Drive
Vehicles Only)
To tow a front-wheel-drive vehicle
from the front with two wheels on
the ground:1. Put the front wheels on a dolly.
2. Move the shift lever to P (Park).
3. Set the parking brake.
4. Clamp the steering wheel in a straight-ahead position with a
clamping device designed for
towing. 5. Remove the key from the
ignition.
6. Secure the vehicle to the dolly.
7. Release the parking brake.
Towing the Vehicle from
the Rear
Caution
Towing the vehicle from the rear
could damage it. Also, repairs
would not be covered by the
vehicle warranty. Never have the
vehicle towed from the rear.
Do not tow the vehicle from the rear.
Page 309 of 366

Buick Enclave Owner Manual (GMNA-Localizing-U.S./Canada/Mexico-
9955666) - 2017 - crc - 8/4/16
308 Vehicle Care
Body Component Lubrication
Lubricate all key lock cylinders,
hood hinges, liftgate hinges, and the
steel fuel door hinges, unless the
components are plastic. Applying
silicone grease on weatherstrips
with a clean cloth will make them
last longer, seal better, and not stick
or squeak.
Underbody Maintenance
At least twice a year, spring and fall,
use plain water to flush any
corrosive materials from the
underbody. Take care to thoroughly
clean any areas where mud and
other debris can collect.
Do not directly power wash the
transfer case and/or front/rear axle
output seals. High pressure water
can overcome the seals and
contaminate the fluid. Contaminated
fluid will decrease the life of the
transfer case and/or axles and
should be replaced.
Sheet Metal Damage
If the vehicle is damaged and
requires sheet metal repair or
replacement, make sure the body
repair shop applies anti-corrosion
material to parts repaired or
replaced to restore corrosion
protection.
Original manufacturer replacement
parts will provide the corrosion
protection while maintaining the
vehicle warranty.
Finish Damage
Quickly repair minor chips and
scratches with touch-up materials
available from your dealer to avoid
corrosion. Larger areas of finish
damage can be corrected in your
dealer's body and paint shop.
Chemical Paint Spotting
Airborne pollutants can fall upon
and attack painted vehicle surfaces
causing blotchy, ring-shaped
discolorations, and small, irregular
dark spots etched into the paint
surface. See“Finish Care”
previously in this section.
Interior Care
To prevent dirt particle abrasions,
regularly clean the vehicle's interior.
Immediately remove any soils.
Newspapers or dark garments can
transfer color to the vehicle’s
interior.
Use a soft bristle brush to remove
dust from knobs and crevices on the
instrument cluster. Using a mild
soap solution, immediately remove
hand lotions, sunscreen, and insect
repellent from all interior surfaces or
permanent damage may result.
Use cleaners specifically designed
for the surfaces being cleaned to
prevent permanent damage. Apply
all cleaners directly to the cleaning
cloth. Do not spray cleaners on any
switches or controls. Remove
cleaners quickly.
Before using cleaners, read and
follow all safety instructions on the
label. While cleaning the interior,
open the doors and windows to get
proper ventilation.
Page 325 of 366

Buick Enclave Owner Manual (GMNA-Localizing-U.S./Canada/Mexico-
9955666) - 2017 - crc - 8/4/16
324 Service and Maintenance
Recommended Fluids, Lubricants, and Parts
Recommended Fluids and Lubricants
UsageFluid/Lubricant
Engine Oil Engine oil meeting the dexos1™ specification of the proper SAE viscosity
grade. ACDelco dexos1 Synthetic Blend is recommended. See Engine
Oil 0241.
Engine Coolant 50/50 mixture of clean, drinkable water and use only DEX-COOL
®Coolant.
See Engine Coolant 0247.
Hydraulic Brake System DOT 3 Hydraulic Brake Fluid (GM Part No. 19299818, in Canada 19299819).
Windshield Washer Automotive windshield washer fluid that meets regional freeze protection requirements.
Hydraulic Power Steering System DEXRON
®-VI Automatic Transmission Fluid.
Automatic Transmission DEXRON
®-VI Automatic Transmission Fluid.
Carrier Assembly –Differential (Rear
Drive Module) and Transfer Case (Power Transfer Unit) SAE 75W-90 Synthetic Axle Lubricant (GM Part No. 88900401, in
Canada 89021678).
Hood Latch Assembly, Secondary Latch, Pivots, Spring Anchor, and Release Pawl Lubriplate Lubricant Aerosol (GM Part No. 89021668, in
Canada 89021674) or lubricant meeting requirements of NLGI #2,
Category LB or GC-LB.
Key Lock Cylinders, Hood and Door Hinges Multi-Purpose Lubricant, Superlube (GM Part No. 12346241, in
Canada 10953474).
Page 346 of 366

Buick Enclave Owner Manual (GMNA-Localizing-U.S./Canada/Mexico-
9955666) - 2017 - crc - 8/4/16
OnStar 345
.Obtain and customize the Wi-Fi®
hotspot name or SSID and
password, if equipped.
Press
Qto connect to an
Advisor to:
. Verify account information or
update contact information.
. Get driving directions.
. Receive a Diagnostic check of
the vehicle's key operating
systems.
. Receive Roadside Assistance.
. Manage Wi-Fi Settings,
if equipped.
Press
>to get a priority connection
to an OnStar Advisor available 24/
7 to:
. Get help for an emergency.
. Be a Good Samaritan or
respond to an AMBER Alert.
. Get assistance in severe
weather or other crisis situations
and find evacuation routes.
OnStar Services
Emergency
Emergency Services require an
active, OnStar service plan
(excludes Basic Plan). With
Automatic Crash Response, built-in
sensors can automatically alert a
specially trained OnStar Advisor
who is immediately connected in to
the vehicle to help.
Press
>for a priority connection to
an OnStar Advisor who can contact
emergency service providers, direct
them to your exact location, and
relay important information.
With OnStar Crisis Assist, specially
trained Advisors are available
24 hours a day, 7 days a week, to
provide a central point of contact,
assistance, and information during a
crisis.
With Roadside Assistance, Advisors
can locate a nearby service provider
to help with a flat tire, a battery
jump, or an empty gas tank.
Security
If equipped, OnStar provides these
services:
. With Stolen Vehicle Assistance,
OnStar Advisors can use GPS to
pinpoint the vehicle and help
authorities quickly recover it.
. With Remote Ignition Block™,
if equipped, OnStar can block
the engine from being restarted.
. With Stolen Vehicle Slowdown
®,
if equipped, OnStar can work
with law enforcement to
gradually slow the vehicle down.
Theft Alarm Notification
If equipped, if the doors are locked
and the vehicle alarm sounds, a
notification by text, e-mail, or phone
call will be sent. If the vehicle is
stolen, an OnStar Advisor can work
with authorities to recover the
vehicle.
Page 349 of 366

Buick Enclave Owner Manual (GMNA-Localizing-U.S./Canada/Mexico-
9955666) - 2017 - crc - 8/4/16
348 OnStar
OnStar AtYourService
OnStar Advisors can provide offers
from restaurants and retailers on
your route, help locate hotels,
or book a room. These services
vary by market.
OnStar Hands-Free Calling
Make and receive calls with the
built-in wireless calling service,
which requires available minutes.
Make a Call1. Press
=. System responds:
“OnStar ready.”
2. Say “Call.”System responds:
“Call. Please say the name or
number to call.”
3. Say the entire number without pausing, including a “1”and the
area code. System responds:
“OK, calling.”
Calling 911 Emergency
1. Press=. System responds:
“OnStar ready.” 2. Say
“Call.”System responds:
“Call. Please say the name or
number to call.”
3. Say “911”without pausing.
System responds: “911.”
4. Say “Call.”System responds:
“OK, dialing 911.”
Retrieve My Number
1. Press=. System responds:
“OnStar ready.”
2. Say “My number.” System
responds: “Your OnStar
Hands-Free Calling number is,”
then says the number.
End a Call
Press=. System responds: “Call
ended.”
Verify Minutes and Expiration
Press=and say “Minutes” then
“Verify” to check how many minutes
remain and their expiration date.
Diagnostics
Advanced Diagnostics provides a
status of the vehicle’ s key systems
with a monthly e-mail, or by
pressing
Q. If equipped, Diagnostic
Alerts can be received in real-time
via e-mail or text. The Proactive
Alerts feature (if available) can help
predict and alert of potential
upcoming maintenance issues with
select components on the vehicle,
before they become a problem.
OnStar can also monitor and report
tire pressure, if the vehicle is
equipped with a Tire Pressure
Monitoring System.