ECO mode BUICK ENCLAVE 2018 User Guide
[x] Cancel search | Manufacturer: BUICK, Model Year: 2018, Model line: ENCLAVE, Model: BUICK ENCLAVE 2018Pages: 393, PDF Size: 5.68 MB
Page 100 of 393
Buick Enclave Owner Manual (GMNA-Localizing-U.S./Canada/Mexico-
10999311) - 2018 - crc - 11/20/17
Seats and Restraints 99
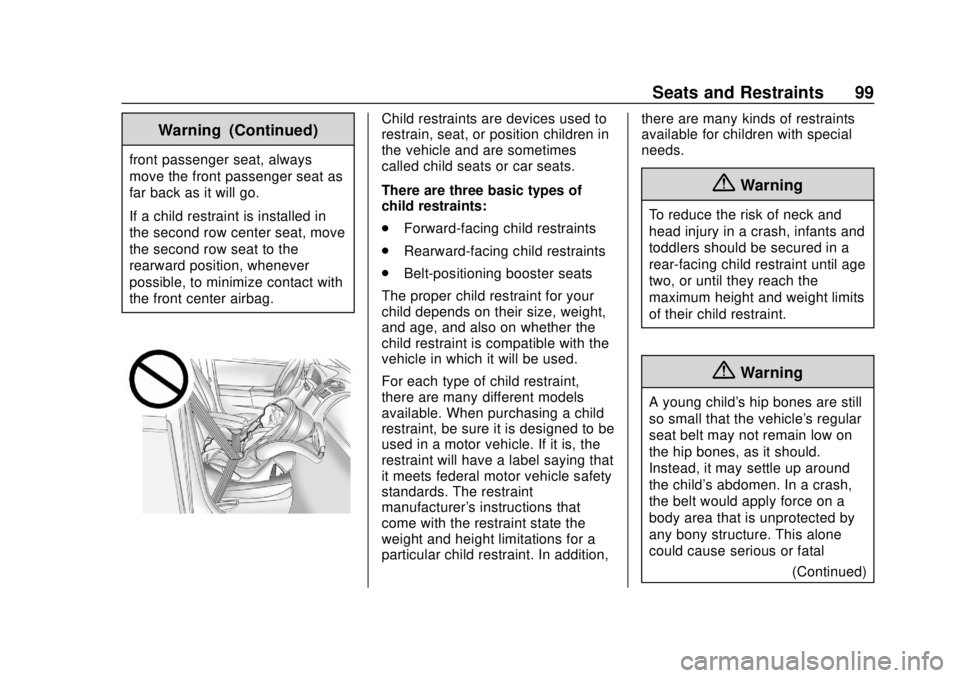
Warning (Continued)
front passenger seat, always
move the front passenger seat as
far back as it will go.
If a child restraint is installed in
the second row center seat, move
the second row seat to the
rearward position, whenever
possible, to minimize contact with
the front center airbag.
Child restraints are devices used to
restrain, seat, or position children in
the vehicle and are sometimes
called child seats or car seats.
There are three basic types of
child restraints:
.Forward-facing child restraints
. Rearward-facing child restraints
. Belt-positioning booster seats
The proper child restraint for your
child depends on their size, weight,
and age, and also on whether the
child restraint is compatible with the
vehicle in which it will be used.
For each type of child restraint,
there are many different models
available. When purchasing a child
restraint, be sure it is designed to be
used in a motor vehicle. If it is, the
restraint will have a label saying that
it meets federal motor vehicle safety
standards. The restraint
manufacturer's instructions that
come with the restraint state the
weight and height limitations for a
particular child restraint. In addition, there are many kinds of restraints
available for children with special
needs.
{Warning
To reduce the risk of neck and
head injury in a crash, infants and
toddlers should be secured in a
rear-facing child restraint until age
two, or until they reach the
maximum height and weight limits
of their child restraint.
{Warning
A young child's hip bones are still
so small that the vehicle's regular
seat belt may not remain low on
the hip bones, as it should.
Instead, it may settle up around
the child's abdomen. In a crash,
the belt would apply force on a
body area that is unprotected by
any bony structure. This alone
could cause serious or fatal
(Continued)
Page 141 of 393
Buick Enclave Owner Manual (GMNA-Localizing-U.S./Canada/Mexico-
10999311) - 2018 - crc - 11/20/17
140 Instruments and Controls
When this light comes on, the Driver
Information Center (DIC) also
displays a message.
If a short distance must be driven
with the light on, be sure to turn off
all accessories, such as the radio
and air conditioner.
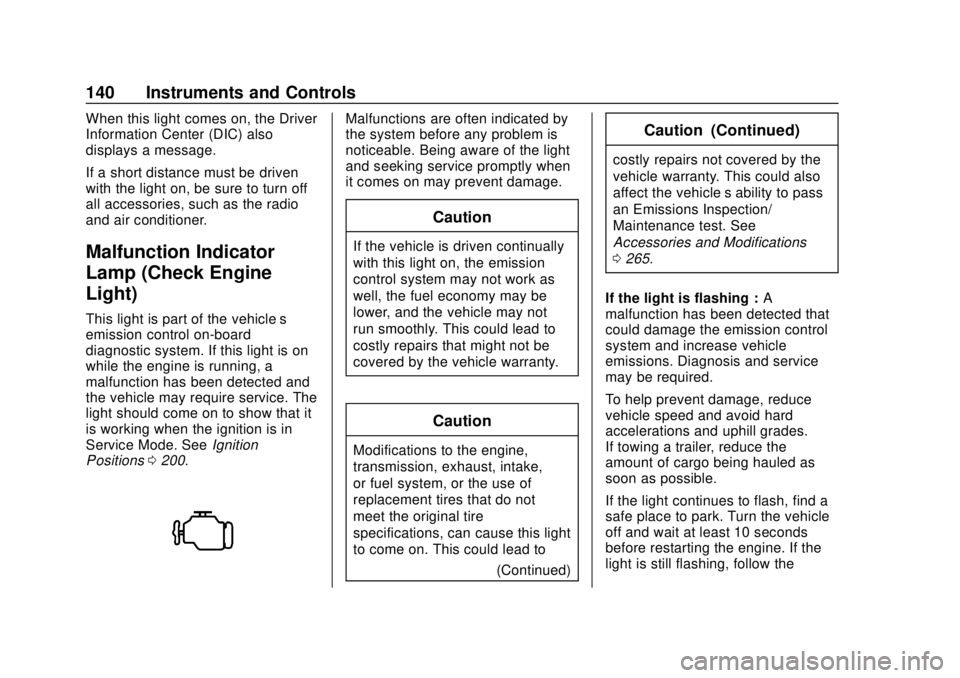
Malfunction Indicator
Lamp (Check Engine
Light)
This light is part of the vehicle’s
emission control on-board
diagnostic system. If this light is on
while the engine is running, a
malfunction has been detected and
the vehicle may require service. The
light should come on to show that it
is working when the ignition is in
Service Mode. SeeIgnition
Positions 0200.
Malfunctions are often indicated by
the system before any problem is
noticeable. Being aware of the light
and seeking service promptly when
it comes on may prevent damage.
Caution
If the vehicle is driven continually
with this light on, the emission
control system may not work as
well, the fuel economy may be
lower, and the vehicle may not
run smoothly. This could lead to
costly repairs that might not be
covered by the vehicle warranty.
Caution
Modifications to the engine,
transmission, exhaust, intake,
or fuel system, or the use of
replacement tires that do not
meet the original tire
specifications, can cause this light
to come on. This could lead to
(Continued)
Caution (Continued)
costly repairs not covered by the
vehicle warranty. This could also
affect the vehicle’s ability to pass
an Emissions Inspection/
Maintenance test. See
Accessories and Modifications
0265.
If the light is flashing : A
malfunction has been detected that
could damage the emission control
system and increase vehicle
emissions. Diagnosis and service
may be required.
To help prevent damage, reduce
vehicle speed and avoid hard
accelerations and uphill grades.
If towing a trailer, reduce the
amount of cargo being hauled as
soon as possible.
If the light continues to flash, find a
safe place to park. Turn the vehicle
off and wait at least 10 seconds
before restarting the engine. If the
light is still flashing, follow the
Page 156 of 393
Buick Enclave Owner Manual (GMNA-Localizing-U.S./Canada/Mexico-
10999311) - 2018 - crc - 11/20/17
Instruments and Controls 155
Personalization Menus
The following list of menu items may
be available:
.Time and Date
. Rear Seat Reminder
. Language
. Valet Mode
. Teen Driver
. Radio
. Vehicle
. Bluetooth
. Apple CarPlay
. Android Auto
. Voice
. Display
. Rear Camera
. Return to Factory Settings
. Software Information
. Wi-Fi
Each menu is detailed in the
following information.Time and Date
Manually set the time and date. See
Clock 0126.
Rear Seat Reminder
This allows for a chime and a
message when the rear door has
been opened before or during
operation of the vehicle.
Select Off or On.
Language
Select Language, then select from
the available language(s).
The selected language will display
on the system, and voice
recognition will reflect the selected
language.
Valet Mode
This will lock the infotainment
system and steering wheel controls.
It may also limit access to vehicle
storage locations, if equipped.
To enable valet mode:
1. Enter a four-digit code on the keypad. 2. Select Enter to go to the
confirmation screen.
3. Re-enter the four-digit code.
Select Lock or Unlock to lock or
unlock the system. Touch Back to
go back to the previous menu.
Teen Driver
See “Teen Driver” under“Settings”
in the infotainment manual.
Radio
Touch and the following may
display:
. Manage Favorites
. Number of Favorites Shown
. Audible Touch Feedback
. Auto Volume
. Maximum Start Up Volume
Manage Favorites
This allows favorites to be edited.
See “Manage Favorites” in
“Settings” under“Radio” in the
infotainment manual.
Page 162 of 393
Buick Enclave Owner Manual (GMNA-Localizing-U.S./Canada/Mexico-
10999311) - 2018 - crc - 11/20/17
Instruments and Controls 161
Android Auto
Select and the following may
display:
.Android Auto
. Manage Android Auto Devices
Android Auto
This feature allows Android devices
to be connected to the infotainment
system through a USB port.
Select Off or On.
Manage Android Auto Devices
Select to manage Android devices.
Android Auto must be on for this
feature to be accessed.
Voice
Select and the following may
display:
. Confidence Threshold
. Prompt Length
. Audio Feedback Speed
. Display “What Can I Say?” TipsConfidence Threshold
This feature allows the adjustment
of the sensitivity of the speech
recognition system.
Select Confirm More or
Confirm Less.
Prompt Length
This feature adjusts the voice
prompt length.
Select Short or Long.
Audio Feedback Speed
This feature adjusts the audio
feedback speed.
Select Slow, Medium, or Fast.
Display
“What Can I Say?” Tips
This feature gives voice
command tips.
Select Off or On.
Display
Select and the following may
display:
. Mode
. Calibrate Touchscreen .
Turn Display Off
Mode
Select to change the display screen
for day or night driving.
Select Auto, Day, or Night.
Calibrate Touchscreen
Select to calibrate the touchscreen,
then follow the prompts.
Turn Display Off
Select to turn the display off. Touch
anywhere on the infotainment
display area or press any controls
on the radio center stack to turn the
display on.
Rear Camera
This allows for Rear Parking Assist
Symbols and Guidance Lines to be
turned off or on.
Select Off or On for the desired
feature.
See Assistance Systems for Parking
or Backing 0235.
Page 164 of 393
Buick Enclave Owner Manual (GMNA-Localizing-U.S./Canada/Mexico-
10999311) - 2018 - crc - 11/20/17
Instruments and Controls 163
instructions refer to a garage door
opener, but can be used for other
devices.
Do not use the Universal Remote
system with any garage door opener
that does not have the stop and
reverse feature. This includes any
garage door opener model
manufactured before April 1, 1982.
Read these instructions completely
before programming the Universal
Remote system. It may help to have
another person assist with the
programming process.
Keep the original hand-held
transmitter for use in other vehicles
as well as for future programming.
Erase the programming when
vehicle ownership is terminated.
See“Erasing Universal Remote
System Buttons” later in this
section.
To program a garage door opener,
park outside directly in line with and
facing the garage door opener
receiver. Clear all people and
objects near the garage door. Make sure the hand-held transmitter
has a new battery for quick and
accurate transmission of the
radio-frequency signal.
Programming the Universal
Remote System
For questions or programming help,
see www.homelink.com/gm or call
1-800-355-3515.
Programming involves
time-sensitive actions, and may time
out causing the procedure to be
repeated.
To program up to three devices:
1. Hold the end of the hand-held transmitter about 3 to 8 cm (1
to 3 in) away from the
Universal Remote system
buttons with the indicator light
in view. The hand-held
transmitter was supplied by the
manufacturer of the garage
door opener receiver.
2. At the same time, press and hold both the hand-held
transmitter button and one of
the three Universal Remote system buttons to be used to
operate the garage door. Do
not release either button until
the indicator light changes from
a slow to a rapid flash. Then
release both buttons.
Some garage door openers
may require substitution of
Step 2 with the procedure
under
“Radio Signals for Some
Gate Operators” later in this
section.
3. Press and hold the newly programmed Universal Remote
system button for five seconds
while watching the indicator
light and garage door
activation.
.If the indicator light stays on
continuously or the garage
door moves when the
button is pressed, then
programming is complete.
There is no need to
complete Steps 4–6.
. If the indicator light does
not come on or the garage
door does not move, a
Page 182 of 393
Buick Enclave Owner Manual (GMNA-Localizing-U.S./Canada/Mexico-
10999311) - 2018 - crc - 11/20/17
Climate Controls 181
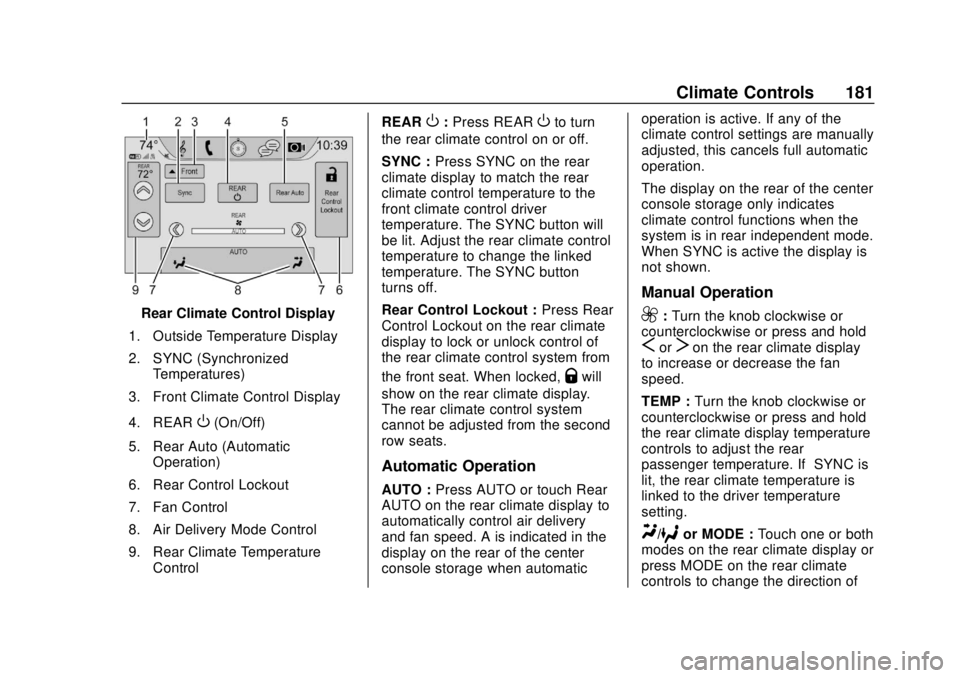
Rear Climate Control Display
1. Outside Temperature Display
2. SYNC (Synchronized Temperatures)
3. Front Climate Control Display
4. REAR
O(On/Off)
5. Rear Auto (Automatic Operation)
6. Rear Control Lockout
7. Fan Control
8. Air Delivery Mode Control
9. Rear Climate Temperature Control REAR
O:
Press REAROto turn
the rear climate control on or off.
SYNC : Press SYNC on the rear
climate display to match the rear
climate control temperature to the
front climate control driver
temperature. The SYNC button will
be lit. Adjust the rear climate control
temperature to change the linked
temperature. The SYNC button
turns off.
Rear Control Lockout : Press Rear
Control Lockout on the rear climate
display to lock or unlock control of
the rear climate control system from
the front seat. When locked,
Qwill
show on the rear climate display.
The rear climate control system
cannot be adjusted from the second
row seats.
Automatic Operation
AUTO : Press AUTO or touch Rear
AUTO on the rear climate display to
automatically control air delivery
and fan speed. A is indicated in the
display on the rear of the center
console storage when automatic operation is active. If any of the
climate control settings are manually
adjusted, this cancels full automatic
operation.
The display on the rear of the center
console storage only indicates
climate control functions when the
system is in rear independent mode.
When SYNC is active the display is
not shown.
Manual Operation
9:
Turn the knob clockwise or
counterclockwise or press and hold
SorTon the rear climate display
to increase or decrease the fan
speed.
TEMP : Turn the knob clockwise or
counterclockwise or press and hold
the rear climate display temperature
controls to adjust the rear
passenger temperature. If SYNC is
lit, the rear climate temperature is
linked to the driver temperature
setting.
Y/6or MODE : Touch one or both
modes on the rear climate display or
press MODE on the rear climate
controls to change the direction of
Page 185 of 393
Buick Enclave Owner Manual (GMNA-Localizing-U.S./Canada/Mexico-
10999311) - 2018 - crc - 11/20/17
184 Driving and Operating
Driving and
Operating
Driving Information
Distracted Driving . . . . . . . . . . . . 185
Defensive Driving . . . . . . . . . . . . . 186
Drunk Driving . . . . . . . . . . . . . . . . . 186
Control of a Vehicle . . . . . . . . . . . 186
Braking . . . . . . . . . . . . . . . . . . . . . . . 186
Steering . . . . . . . . . . . . . . . . . . . . . . 187
Off-Road Recovery . . . . . . . . . . . 187
Loss of Control . . . . . . . . . . . . . . . 188
Off-Road Driving . . . . . . . . . . . . . 188
Driving on Wet Roads . . . . . . . . 193
Hill and Mountain Roads . . . . . 194
Winter Driving . . . . . . . . . . . . . . . . 194
If the Vehicle Is Stuck . . . . . . . . 196
Vehicle Load Limits . . . . . . . . . . . 196
Starting and Operating
New Vehicle Break-In . . . . . . . . . 200
Ignition Positions . . . . . . . . . . . . . 200
Starting the Engine . . . . . . . . . . . 202
Engine Heater . . . . . . . . . . . . . . . . 204
Retained AccessoryPower (RAP) . . . . . . . . . . . . . . . . 205
Shifting Into Park . . . . . . . . . . . . . 205
Shifting out of Park . . . . . . . . . . . 206 Parking over Things
That Burn . . . . . . . . . . . . . . . . . . . 208
Extended Parking . . . . . . . . . . . . 208
Engine Exhaust
Engine Exhaust . . . . . . . . . . . . . . 209
Running the Vehicle While Parked . . . . . . . . . . . . . . . . . . . . . . 210
Automatic Transmission
Automatic Transmission . . . . . . 210
Manual Mode . . . . . . . . . . . . . . . . . 215
Tow/Haul Mode . . . . . . . . . . . . . . . 216
Drive Systems
All-Wheel Drive . . . . . . . . . . . . . . . 216
Brakes
Antilock BrakeSystem (ABS) . . . . . . . . . . . . . . . 217
Electric Parking Brake . . . . . . . . 218
Brake Assist . . . . . . . . . . . . . . . . . . 219
Hill Start Assist (HSA) . . . . . . . . 219
Ride Control Systems
Traction Control/Electronic Stability Control . . . . . . . . . . . . . 220
Driver Mode Control . . . . . . . . . . 222
Cruise Control
Cruise Control . . . . . . . . . . . . . . . . 224
Adaptive Cruise Control . . . . . . 226
Driver Assistance Systems
Driver Assistance Systems . . . 234
Assistance Systems for Parking or Backing . . . . . . . . . . 235
Assistance Systems for Driving . . . . . . . . . . . . . . . . . . . . . . 239
Forward Collision Alert (FCA) System . . . . . . . . . . . . . . . . . . . . . . 239
Forward Automatic Braking (FAB) . . . . . . . . . . . . . . . 241
Front Pedestrian Braking (FPB) System . . . . . . . . . . . . . . . 243
Side Blind Zone Alert (SBZA) . . . . . . . . . . . . . . . . 245
Lane Change Alert (LCA) . . . . . 245
Lane Departure Warning (LDW) . . . . . . . . . . . . . 247
Lane Keep Assist (LKA) . . . . . . 247
Fuel
Fuel . . . . . . . . . . . . . . . . . . . . . . . . . . 249
California Fuel Requirements . . . . . . . . . . . . . . . 250
Fuels in Foreign Countries . . . 250
Fuel Additives . . . . . . . . . . . . . . . . 250
Filling the Tank . . . . . . . . . . . . . . . 250
Filling a Portable Fuel Container . . . . . . . . . . . . . . . . . . . 252
Page 202 of 393
Buick Enclave Owner Manual (GMNA-Localizing-U.S./Canada/Mexico-
10999311) - 2018 - crc - 11/20/17
Driving and Operating 201
The Remote Keyless Entry (RKE)
transmitter must be in the vehicle for
the system to operate. If the
pushbutton start is not working, the
vehicle may be near a strong radio
antenna signal causing interference
to the Keyless Access system. See
Remote Keyless Entry (RKE)
System Operation030.
To shift out of P (Park), the engine
must be running, and the brake
pedal must be applied.
Stopping the Engine/OFF (No
Indicator Lights) : When the
vehicle is stopped, press ENGINE
START/STOP once to turn the
engine off.
If the vehicle is in P (Park), the
ignition will turn off, and Retained
Accessory Power (RAP) will remain
active. See Retained Accessory
Power (RAP) 0205.
If the vehicle is in R (Reverse), D
(Drive) or L (Low), the vehicle will
shift to P (Park), the ignition will turn
off, and Retained Accessory Power
(RAP) will remain active. If the vehicle is in N (Neutral), the
ignition will return to ACC/
ACCESSORY and display the
message SHIFT TO PARK in the
Driver Information Center (DIC).
When the vehicle is shifted into
P (Park), the ignition will turn off.
Do not turn the engine off when the
vehicle is moving. This will cause a
loss of power assist in the brake
and steering systems and disable
the airbags.
If the vehicle must be shut off in an
emergency:
1. Brake using a firm and steady pressure. Do not pump the
brakes repeatedly. This may
deplete power assist, requiring
increased brake pedal force.
2. Shift the vehicle to N (Neutral). This can be done while the
vehicle is moving. After shifting
to N (Neutral), firmly apply the
brakes and steer the vehicle to
a safe location.
3. Come to a complete stop and shift to P (Park). 4. Set the parking brake. See
Electric Parking Brake 0218.
5. Press ENGINE START/STOP to turn the vehicle off.
{Warning
Turning off the vehicle while
moving may cause loss of power
assist in the brake and steering
systems and disable the airbags.
While driving, only shut the
vehicle off in an emergency.
If the vehicle cannot be pulled over,
and must be shut off while driving,
press and hold ENGINE START/
STOP for longer than two seconds,
or press twice in five seconds.
ACC/ACCESSORY (Amber
Indicator Light) : This mode allows
some electrical accessories to be
used when the engine is off.
With the ignition off, pressing the
button one time without the brake
pedal applied will place the ignition
system in ACC/ACCESSORY.
Page 203 of 393
Buick Enclave Owner Manual (GMNA-Localizing-U.S./Canada/Mexico-
10999311) - 2018 - crc - 11/20/17
202 Driving and Operating
The ignition will switch from ACC/
ACCESSORY to OFF after
five minutes to prevent battery
rundown.
ON/RUN/START (Green Indicator
Light) :This mode is for driving and
starting. With the ignition off, and
the brake pedal applied, pressing
the button once will place the
ignition system in ON/RUN/START.
Once engine cranking begins,
release the button. Engine cranking
will continue until the engine starts.
See Starting the Engine 0202. The
ignition will then remain on.
Service Mode
This power mode is available for
service and diagnostics, and to
verify the proper operation of the
malfunction indicator lamp as may
be required for emission inspection
purposes. With the vehicle off, and
the brake pedal not applied,
pressing and holding the button for
more than five seconds will place
the vehicle in Service Mode. The
instruments and audio systems will
operate as they do in ON/RUN, but
the vehicle will not be able to be driven. The engine will not start in
Service Mode. Press the button
again to turn the vehicle off.
Starting the Engine
Press the P (Park) button on the
shift lever or shift the vehicle to
N (Neutral). The engine will not start
in any other position. To restart the
engine when the vehicle is already
moving, use N (Neutral) only.
Caution
Do not try to shift to P (Park) if the
vehicle is moving. If you do, you
could damage the transmission.
Shift to P (Park) only when the
vehicle is stopped.
Caution
If you add electrical parts or
accessories, you could change
the way the engine operates. Any
resulting damage would not be
(Continued)
Caution (Continued)
covered by the vehicle warranty.
SeeAdd-On Electrical Equipment
0 261.
Starting Procedure
1. With the Keyless Access
system, the RKE transmitter
must be in the vehicle. Press
ENGINE START/STOP with the
brake pedal applied. When the
engine begins cranking, let go
of the button.
The idle speed will go down as
the engine gets warm. Do not
race the engine immediately
after starting it.
If the RKE transmitter is not in
the vehicle, if there is
interference, or if the RKE
battery is low, the Driver
Information Center (DIC) will
display a message.
Page 205 of 393
Buick Enclave Owner Manual (GMNA-Localizing-U.S./Canada/Mexico-
10999311) - 2018 - crc - 11/20/17
204 Driving and Operating
.The accelerator pedal is
pressed.
. The engine or transmission is
not at the required operating
temperature.
. The outside temperature is not
in the required operating range.
. The vehicle is in any gear other
than D (Drive).
. Tow/Haul Mode or other driver
modes have been selected.
. The vehicle is on a steep hill or
grade.
. The driver door has been
opened or driver seat belt has
been unbuckled.
. The hood has been opened.
. The Auto Stop has reached the
maximum allowed time.
Engine Heater
The engine heater can provide
easier starting and better fuel
economy during engine warm-up in
cold weather conditions at or below
0 °F (−18 °C). Vehicles with an engine heater should be plugged in
at least four hours before starting.
Some models may have an internal
thermostat in the cord which will
prevent engine heater operation at
temperatures above 0 °F (−18 °C).
To Use the Engine Heater
1. Turn off the engine.
2. Open the hood and unwrap the
electrical cord. The bundled
cord is on the driver side of the
engine compartment, in front of
the battery. See Engine
Compartment Overview 0267. Check the heater cord for
damage. If it is damaged, do
not use it. See your dealer for
a replacement. Inspect the
cord for damage yearly.
3. Plug the cord into a normal, grounded 110-volt AC outlet.
{Warning
Improper use of the heater cord
or an extension cord can damage
the cord and may result in
overheating and fire.
. Plug the cord into a
three-prong electrical utility
receptacle that is protected
by a ground fault detection
function. An ungrounded
outlet could cause an
electric shock.
. Use a weatherproof,
heavy-duty, 15 amp-rated
extension cord if needed.
Failure to use the
recommended extension
cord in good operating
(Continued)