ignition BUICK ENCLAVE 2019 Get To Know Guide
[x] Cancel search | Manufacturer: BUICK, Model Year: 2019, Model line: ENCLAVE, Model: BUICK ENCLAVE 2019Pages: 20, PDF Size: 3.01 MB
Page 4 of 20

4
REMOTE KEYLESS ENTRY TRANSMITTER (KEY FOB)
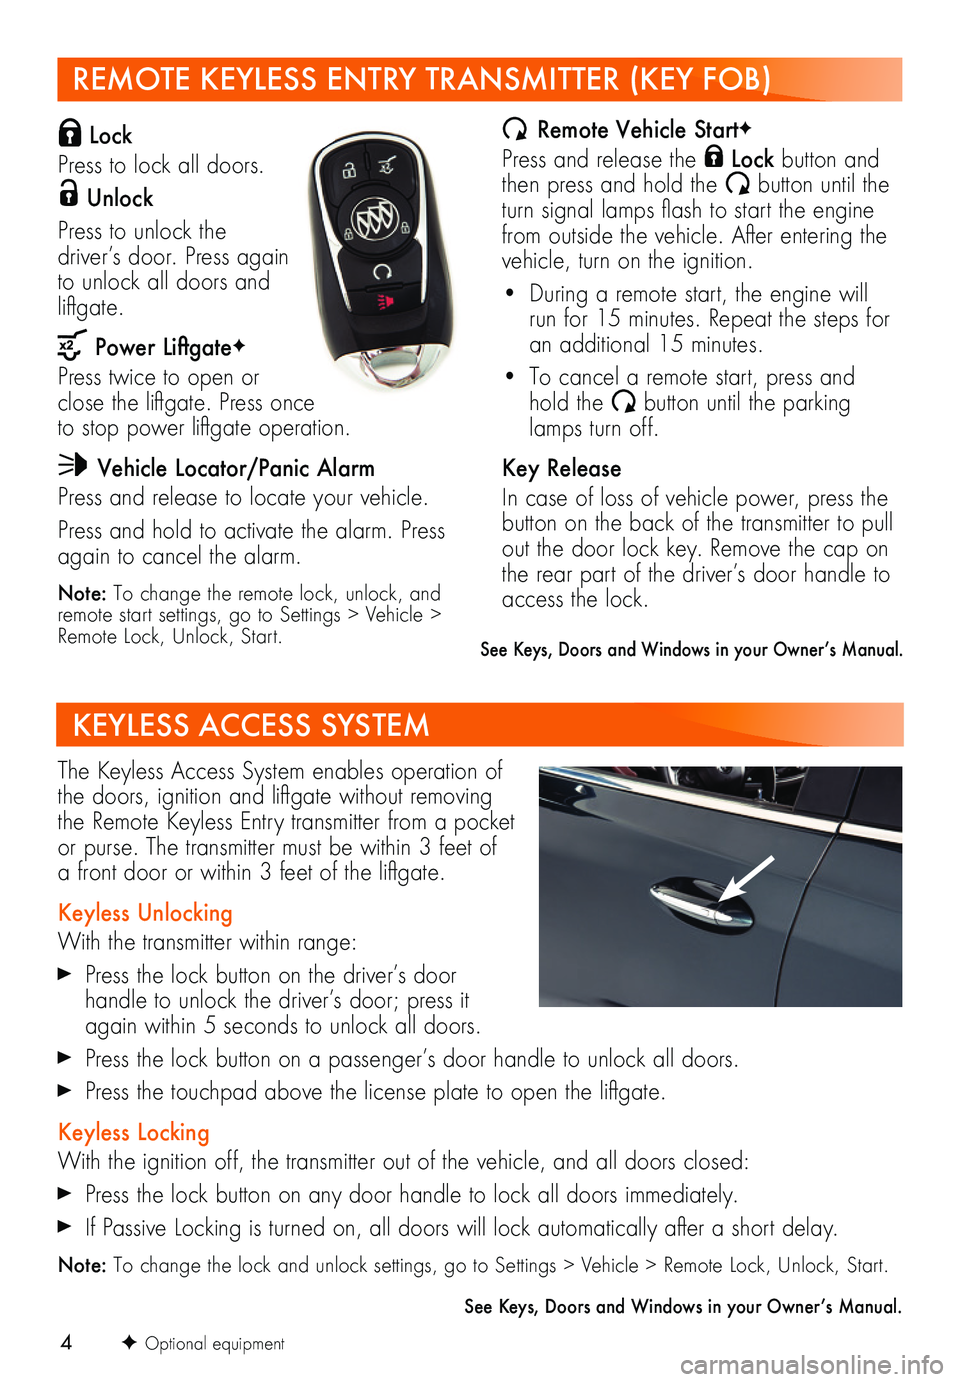
Lock
Press to lock all doors.
Unlock
Press to unlock the
driver’s door. Press again to unlock all doors and liftgate.
Power LiftgateF
Press twice to open or close the liftgate. Press once to stop power liftgate operation.
Vehicle Locator/Panic Alarm
Press and release to locate your vehicle.
Press and hold to activate the alarm. Press again to cancel the alarm.
Note: To change the remote lock, unlock, and remote start settings, go to Settings > Vehicle > Remote Lock, Unlock, Start.
Remote Vehicle StartF
Press and release the Lock button and then press and hold the button until the turn signal lamps flash to start the engine from outside the vehicle. After entering the vehicle, turn on the ignition.
• During a remote start, the engine will run for 15 minutes. Repeat the steps for an additional 15 minutes.
• To cancel a remote start, press and hold the button until the parking lamps turn off.
Key Release
In case of loss of vehicle power, press the button on the back of the transmitter to pull out the door lock key. Remove the cap on the rear part of the driver’s door handle to access the lock.
KEYLESS ACCESS SYSTEM
The Keyless Access System enables operation of the doors, ignition and liftgate without removing the Remote Keyless Entry transmitter from a pocket or purse. The transmitter must be within 3 feet of a front door or within 3 feet of the liftgate.
Keyless Unlocking
With the transmitter within range:
Press the lock button on the driver’s door
handle to unlock the driver’s door; press it again within 5 seconds to unlock all doors.
Press the lock button on a passenger’s door handle to unlock all doors.
Press the touchpad above the license plate to open the liftgate.
Keyless Locking
With the ignition off, the transmitter out of the vehicle, and all doors closed:
Press the lock button on any door handle to lock all doors immediately.
If Passive Locking is turned on, all doors will lock automatically after a short delay.
Note: To change the lock and unlock settings, go to Settings > Vehicle > Remote Lock, Unlock, Start.
See Keys, Doors and Windows in your Owner’s Manual.
F Optional equipment
See Keys, Doors and Windows in your Owner’s Manual.
Page 5 of 20

5
The Remote Keyless Entry transmitter must be in the vehicle to turn on the ignition.
Starting the Engine
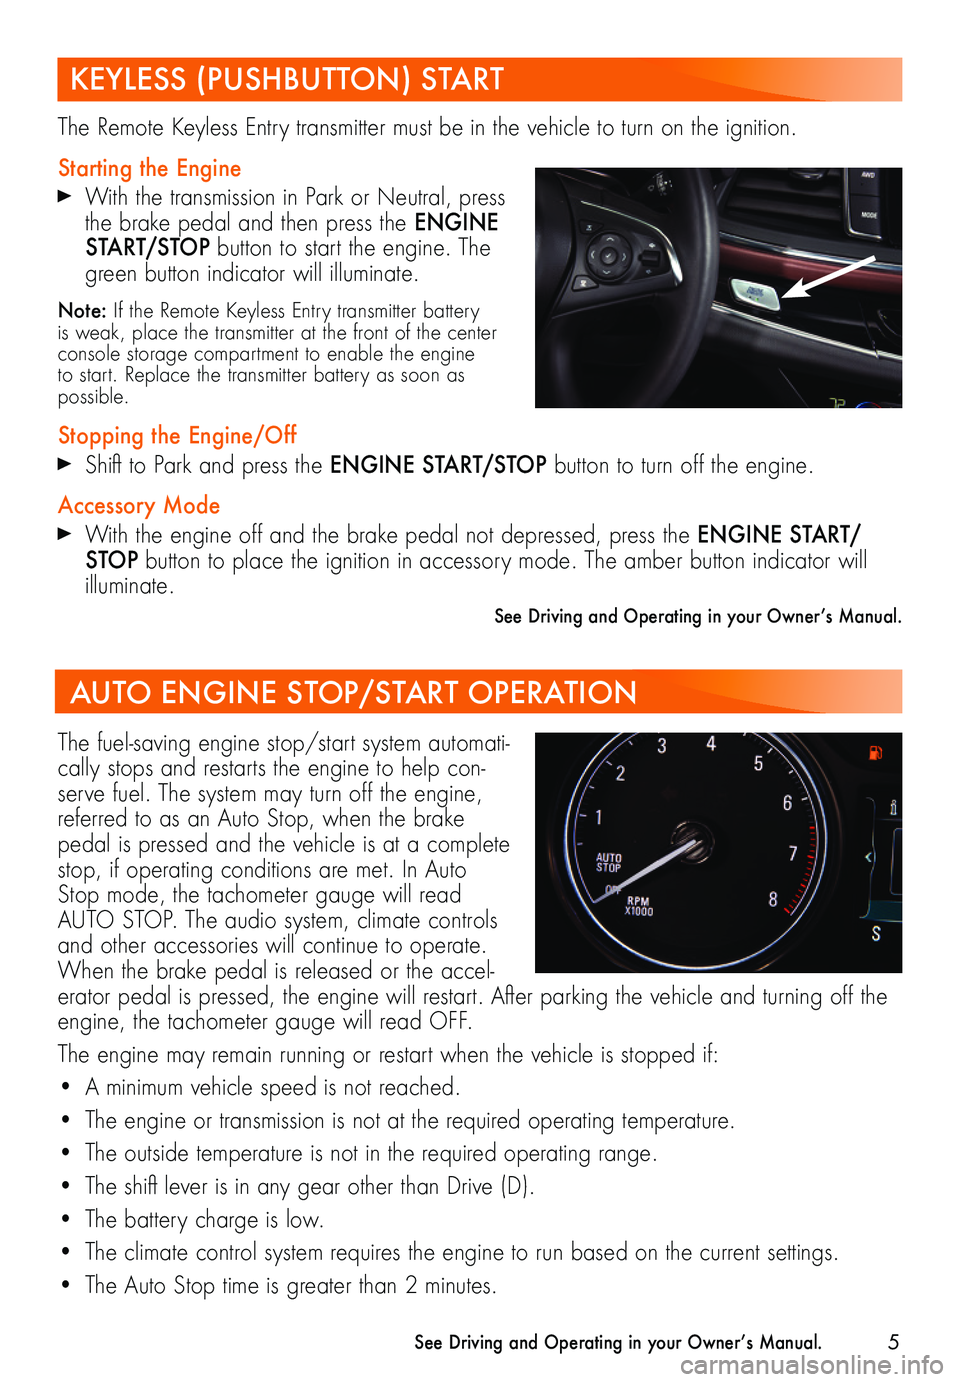
With the transmission in Park or Neutral, press the brake pedal and then press the ENGINE START/STOP button to start the engine. The green button indicator will illuminate.
Note: If the Remote Keyless Entry transmitter battery is weak, place the transmitter at the front of the center console storage compartment to enable the engine to start. Replace the transmitter battery as soon as possible.
Stopping the Engine/Off
Shift to Park and press the ENGINE START/STOP button to turn off the engine.
Accessory Mode
With the engine off and the brake pedal not depressed, press the ENGINE START/STOP button to place the ignition in accessory mode. The amber button indicator will illuminate.
See Driving and Operating in your Owner’s Manual.
The fuel-saving engine stop/start system automati-cally stops and restarts the engine to help con-serve fuel. The system may turn off the engine, referred to as an Auto Stop, when the brake pedal is pressed and the vehicle is at a complete stop, if operating conditions are met. In Auto Stop mode, the tachometer gauge will read AUTO STOP. The audio system, climate controls and other accessories will continue to operate. When the brake pedal is released or the accel-erator pedal is pressed, the engine will restart. After parking the vehicle and turning off the engine, the tachometer gauge will read OFF.
The engine may remain running or restart when the vehicle is stopped if:
• A minimum vehicle speed is not reached.
• The engine or transmission is not at the required operating temperature.
• The outside temperature is not in the required operating range.
• The shift lever is in any gear other than Drive (D).
• The battery charge is low.
• The climate control system requires the engine to run based on the current settings.
• The Auto Stop time is greater than 2 minutes.
See Driving and Operating in your Owner’s Manual.
KEYLESS (PUSHBUTTON) START
AUTO ENGINE STOP/START OPERATION
Page 6 of 20

6
ELECTRONIC PRECISION SHIFT
DRIVER MODE CONTROL
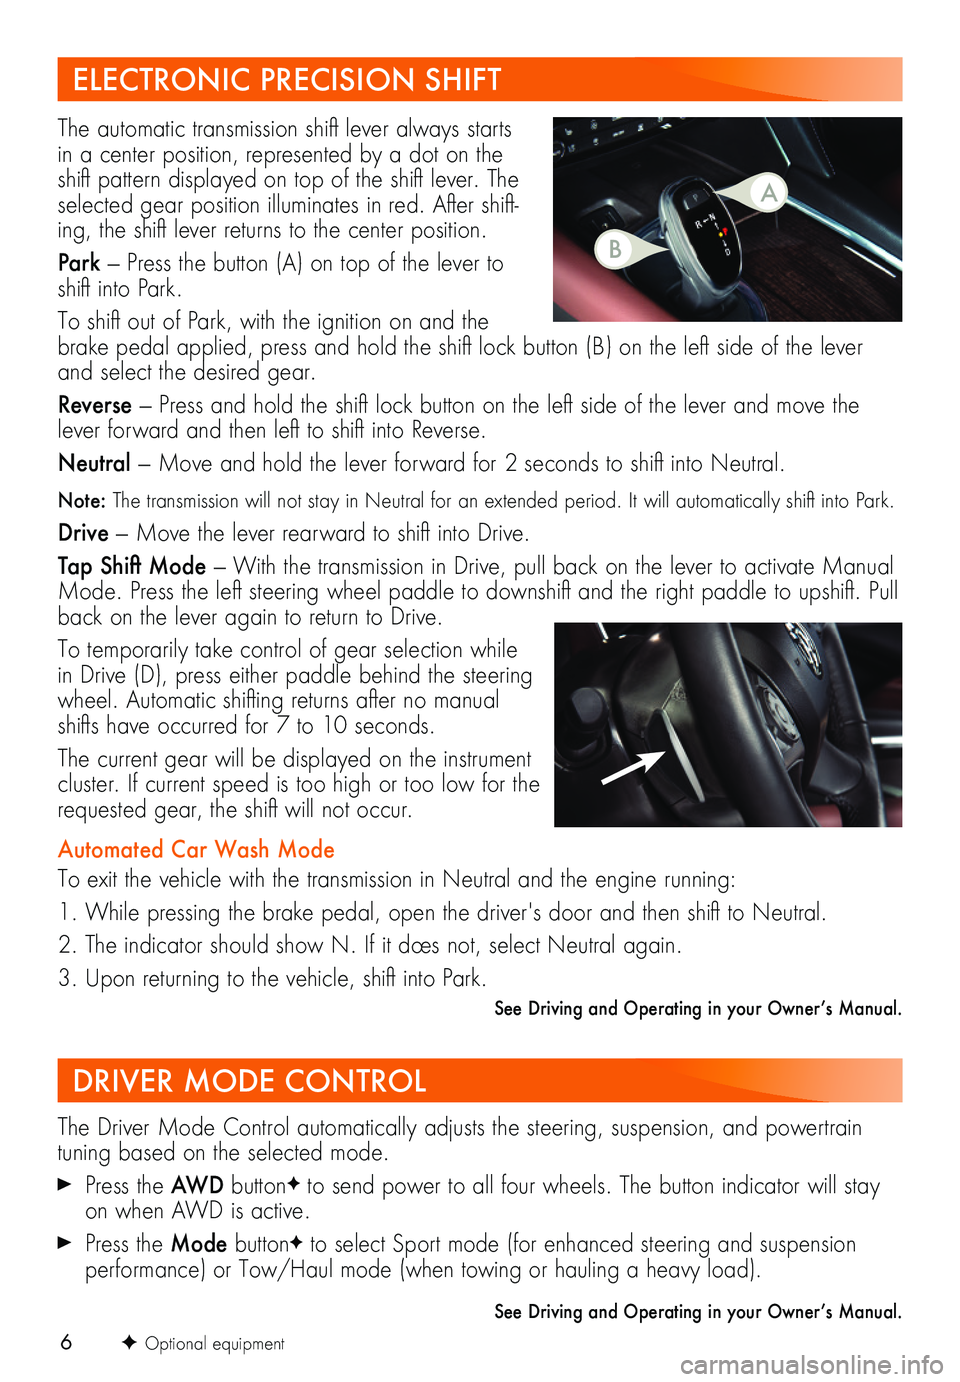
The automatic transmission shift lever always starts in a center position, represented by a dot on the shift pattern displayed on top of the shift lever. The selected gear position illuminates in red. After shift-ing, the shift lever returns to the center position.
Park — Press the button (A) on top of the lever to shift into Park.
To shift out of Park, with the ignition on and the brake pedal applied, press and hold the shift lock button (B) on the left side of the lever and select the desired gear.
Reverse — Press and hold the shift lock button on the left side of the lever and move the lever forward and then left to shift into Reverse.
Neutral — Move and hold the lever forward for 2 seconds to shift into Neutral.
Note: The transmission will not stay in Neutral for an extended period. It will automatically shift into Park.
Drive — Move the lever rearward to shift into Drive.
Tap Shift Mode — With the transmission in Drive, pull back on the lever to activate Manual Mode. Press the left steering wheel paddle to downshift and the right paddle to upshift. Pull back on the lever again to return to Drive.
To temporarily take control of gear selection while in Drive (D), press either paddle behind the steering wheel. Automatic shifting returns after no manual shifts have occurred for 7 to 10 seconds.
The current gear will be displayed on the instrument cluster. If current speed is too high or too low for the requested gear, the shift will not occur.
Automated Car Wash Mode
To exit the vehicle with the transmission in Neutral and the engine running:
1. While pressing the brake pedal, open the driver's door and then shift to Neutral.
2. The indicator should show N. If it does not, select Neutral again.
3. Upon returning to the vehicle, shift into Park.
See Driving and Operating in your Owner’s Manual.
The Driver Mode Control automatically adjusts the steering, suspension, and powertrain
tuning based on the selected mode.
Press the AWD buttonF to send power to all four wheels. The button indicator will stay on when AWD is active.
Press the Mode buttonF to select Sport mode (for enhanced steering and suspension
performance) or Tow/Haul mode (when towing or hauling a heavy load).
See Driving and Operating in your Owner’s Manual.
F Optional equipment
B
A
Page 19 of 20

19
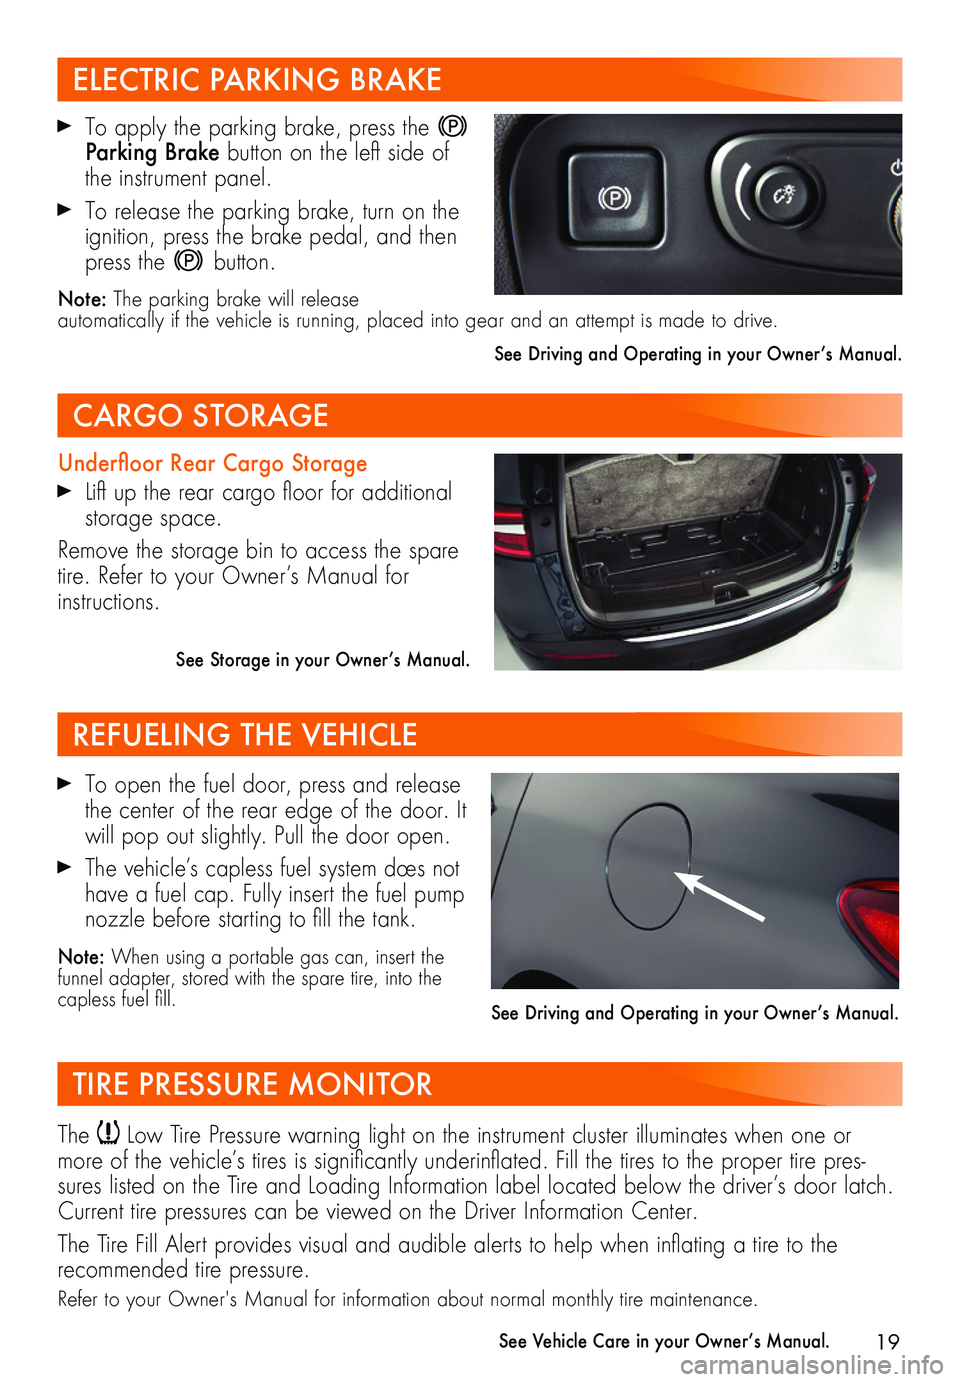
To apply the parking brake, press the Parking Brake button on the left side of the instrument panel.
To release the parking brake, turn on the ignition, press the brake pedal, and then press the button.
Note: The parking brake will release automatically if the vehicle is running, placed into gear and an attempt is made to drive.
See Driving and Operating in your Owner’s Manual.
Underfloor Rear Cargo Storage
Lift up the rear cargo floor for additional storage space.
Remove the storage bin to access the spare tire. Refer to your Owner’s Manual for instructions.
See Storage in your Owner’s Manual.
To open the fuel door, press and release the center of the rear edge of the door. It will pop out slightly. Pull the door open.
The vehicle’s capless fuel system does not have a fuel cap. Fully insert the fuel pump nozzle before starting to fill the tank.
Note: When using a portable gas can, insert the funnel adapter, stored with the spare tire, into the capless fuel fill.
ELECTRIC PARKING BRAKE
CARGO STORAGE
REFUELING THE VEHICLE
TIRE PRESSURE MONITOR
The Low Tire Pressure warning light on the instrument cluster illuminates when one or more of the vehicle’s tires is significantly underinflated. Fill the tires to the proper tire pres-sures listed on the Tire and Loading Information label located below the driver’s door latch. Current tire pressures can be viewed on the Driver Information Center.
The Tire Fill Alert provides visual and audible alerts to help when inflating a tire to the
recommended tire pressure.
Refer to your Owner's Manual for information about normal monthly tire maintenance.
See Vehicle Care in your Owner’s Manual.
See Driving and Operating in your Owner’s Manual.