steering wheel controls BUICK ENCLAVE 2019 User Guide
[x] Cancel search | Manufacturer: BUICK, Model Year: 2019, Model line: ENCLAVE, Model: BUICK ENCLAVE 2019Pages: 398, PDF Size: 5.91 MB
Page 135 of 398
Buick Enclave Owner Manual (GMNA-Localizing-U.S./Canada/Mexico-
12146155) - 2019 - crc - 9/10/18
134 Instruments and Controls
Cluster Menu
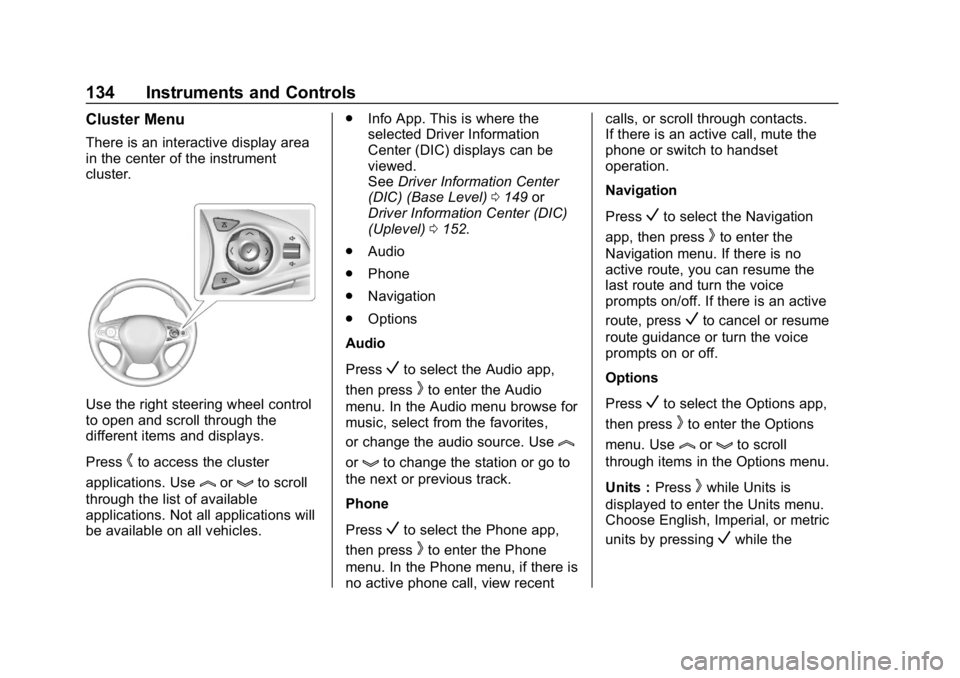
There is an interactive display area
in the center of the instrument
cluster.
Use the right steering wheel control
to open and scroll through the
different items and displays.
Press
hto access the cluster
applications. Use
lorgto scroll
through the list of available
applications. Not all applications will
be available on all vehicles. .
Info App. This is where the
selected Driver Information
Center (DIC) displays can be
viewed.
See Driver Information Center
(DIC) (Base Level) 0149 or
Driver Information Center (DIC)
(Uplevel) 0152.
. Audio
. Phone
. Navigation
. Options
Audio
Press
Vto select the Audio app,
then press
kto enter the Audio
menu. In the Audio menu browse for
music, select from the favorites,
or change the audio source. Use
l
orgto change the station or go to
the next or previous track.
Phone
Press
Vto select the Phone app,
then press
kto enter the Phone
menu. In the Phone menu, if there is
no active phone call, view recent calls, or scroll through contacts.
If there is an active call, mute the
phone or switch to handset
operation.
Navigation
Press
Vto select the Navigation
app, then press
kto enter the
Navigation menu. If there is no
active route, you can resume the
last route and turn the voice
prompts on/off. If there is an active
route, press
Vto cancel or resume
route guidance or turn the voice
prompts on or off.
Options
Press
Vto select the Options app,
then press
kto enter the Options
menu. Use
lorgto scroll
through items in the Options menu.
Units : Press
kwhile Units is
displayed to enter the Units menu.
Choose English, Imperial, or metric
units by pressing
Vwhile the
Page 144 of 398
Buick Enclave Owner Manual (GMNA-Localizing-U.S./Canada/Mexico-
12146155) - 2019 - crc - 9/10/18
Instruments and Controls 143
least one full tank of the proper
fuel to turn the light off. See
Recommended Fuel0251.
If the light remains on, see your
dealer.
Emissions Inspection and
Maintenance Programs
If the vehicle requires an Emissions
Inspection/Maintenance test, the
test equipment will likely connect to
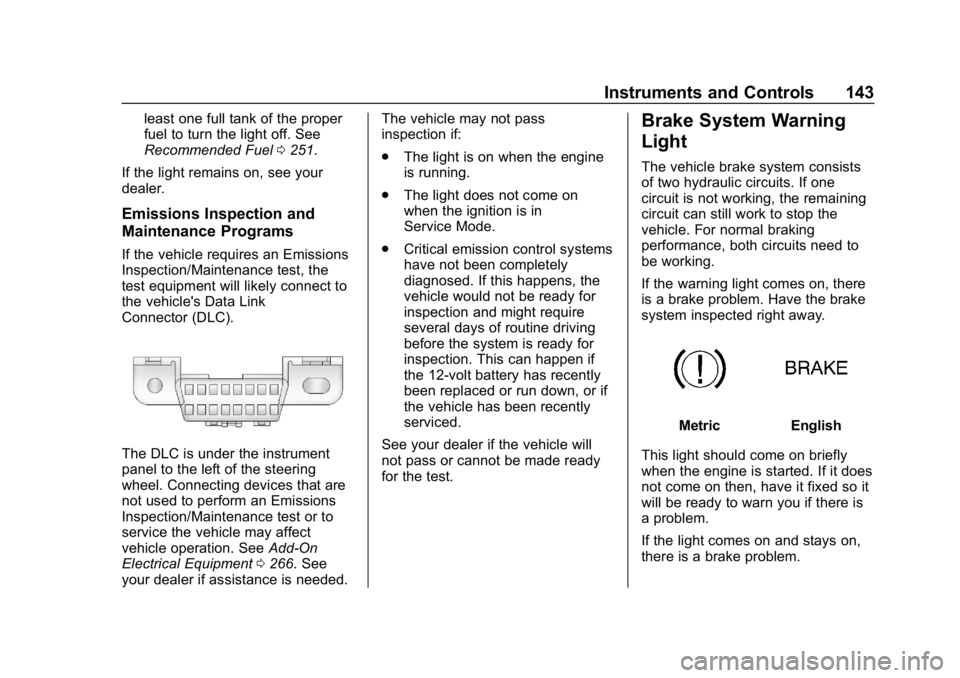
the vehicle's Data Link
Connector (DLC).
The DLC is under the instrument
panel to the left of the steering
wheel. Connecting devices that are
not used to perform an Emissions
Inspection/Maintenance test or to
service the vehicle may affect
vehicle operation. See Add-On
Electrical Equipment 0266. See
your dealer if assistance is needed. The vehicle may not pass
inspection if:
.
The light is on when the engine
is running.
. The light does not come on
when the ignition is in
Service Mode.
. Critical emission control systems
have not been completely
diagnosed. If this happens, the
vehicle would not be ready for
inspection and might require
several days of routine driving
before the system is ready for
inspection. This can happen if
the 12-volt battery has recently
been replaced or run down, or if
the vehicle has been recently
serviced.
See your dealer if the vehicle will
not pass or cannot be made ready
for the test.
Brake System Warning
Light
The vehicle brake system consists
of two hydraulic circuits. If one
circuit is not working, the remaining
circuit can still work to stop the
vehicle. For normal braking
performance, both circuits need to
be working.
If the warning light comes on, there
is a brake problem. Have the brake
system inspected right away.
MetricEnglish
This light should come on briefly
when the engine is started. If it does
not come on then, have it fixed so it
will be ready to warn you if there is
a problem.
If the light comes on and stays on,
there is a brake problem.
Page 146 of 398
Buick Enclave Owner Manual (GMNA-Localizing-U.S./Canada/Mexico-
12146155) - 2019 - crc - 9/10/18
Instruments and Controls 145
If both the ABS and the brake
system warning light are on, the
vehicle's antilock brakes are not
functioning and there is a problem
with the regular brakes. See your
dealer for service.
SeeBrake System Warning Light
0 143.
Sport Mode Light
This light comes on when Sport
Mode is selected.
Lane Keep Assist (LKA)
Light
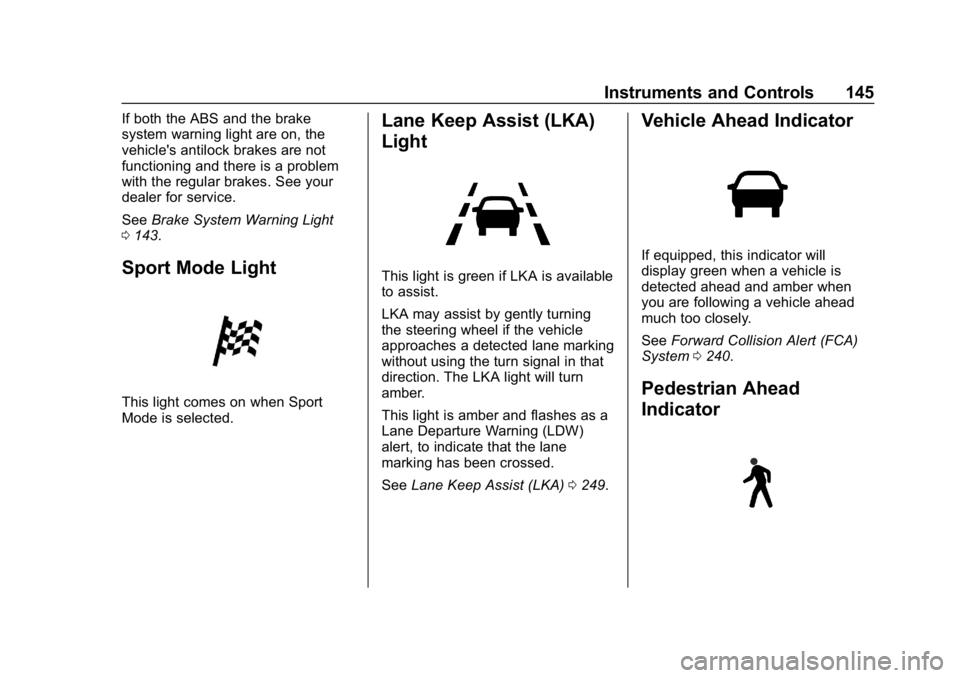
This light is green if LKA is available
to assist.
LKA may assist by gently turning
the steering wheel if the vehicle
approaches a detected lane marking
without using the turn signal in that
direction. The LKA light will turn
amber.
This light is amber and flashes as a
Lane Departure Warning (LDW)
alert, to indicate that the lane
marking has been crossed.
See Lane Keep Assist (LKA) 0249.
Vehicle Ahead Indicator
If equipped, this indicator will
display green when a vehicle is
detected ahead and amber when
you are following a vehicle ahead
much too closely.
See Forward Collision Alert (FCA)
System 0240.
Pedestrian Ahead
Indicator
Page 158 of 398
Buick Enclave Owner Manual (GMNA-Localizing-U.S./Canada/Mexico-
12146155) - 2019 - crc - 9/10/18
Instruments and Controls 157
Time and Date
Manually set the time and date. See
Clock0126.
Rear Seat Reminder
This allows for a chime and a
message when the rear door has
been opened before or during
operation of the vehicle.
Select Off or On.
Language
Select Language, then select from
the available language(s).
The selected language will display
on the system, and voice
recognition will reflect the selected
language.
Valet Mode
This will lock the infotainment
system and steering wheel controls.
It may also limit access to vehicle
storage locations, if equipped.
To enable valet mode:
1. Enter a four-digit code on the keypad. 2. Select Enter to go to the
confirmation screen.
3. Re-enter the four-digit code.
Select Lock or Unlock to lock or
unlock the system. Touch Back to
go back to the previous menu.
Teen Driver
See “Teen Driver” under“Settings”
in the infotainment manual.
Radio
Touch and the following may
display:
. Manage Favorites
. Number of Favorites Shown
. Audible Touch Feedback
. Auto Volume
. Maximum Start Up Volume
Manage Favorites
This allows favorites to be edited.
See “Manage Favorites” in
“Settings” under“Radio” in the
infotainment manual. Number of Favorites Shown
Touch to set the number of favorites
to display.
Select the desired number or select
Auto and the infotainment system
will automatically adjust the number
of favorites shown.
Audible Touch Feedback
This allows Audible Touch
Feedback to be turned on or off.
Select Off or On.
Auto Volume
This feature adjusts the volume
based on vehicle speed and
ambient noise.
Select Off, Low, Medium-Low,
Medium, Medium-High, or High.
Maximum Start Up Volume
This feature sets the maximum
startup volume. If the vehicle is
started and the volume is greater
than this level, the volume is
adjusted to this level.
Page 159 of 398
Buick Enclave Owner Manual (GMNA-Localizing-U.S./Canada/Mexico-
12146155) - 2019 - crc - 9/10/18
158 Instruments and Controls
To set the maximum startup volume,
touch + or−to increase or
decrease.
Vehicle
Select and the following may
display:
. Climate and Air Quality
. Collision/Detection Systems
. Comfort and Convenience
. Lighting
. Power Door Locks
. Remote Lock, Unlock, Start
Climate and Air Quality
Select and the following may
display:
. Auto Fan Speed
. Auto Cooled Seats
. Auto Heated Seats
. Auto Defog
. Auto Rear Defog
. Ionizer Auto Fan Speed
This feature will set the auto fan
speed.
Select Low, Medium, or High.
Auto Cooled Seats
When enabled, this feature will
automatically activate the ventilated
seats at the level required by the
interior temperature. See
Heated
and Ventilated Front Seats 068.
Select Off or On.
Auto Heated Seats
When enabled, this feature will
automatically activate the heated
seats at the level required by the
interior temperature. The auto
heated seats can be turned off by
using the heated seat buttons on
the center stack. See Heated and
Ventilated Front Seats 068.
If equipped with Auto Heated
Steering Wheel, this feature will turn
on when the Auto Heated Seats
turn on.
Select Off or On. Auto Defog
When set to On, the front defog will
automatically react to temperature
and humidity conditions that may
cause fogging.
Select Off or On.
Auto Rear Defog
If equipped, this allows the Auto
Rear Defog to be turned on or off.
This feature will automatically turn
on the rear window defogger when it
is cold outside.
Select Off or On.
Ionizer
If equipped with an ionizer, this
feature helps to clean the air inside
the vehicle and remove
contaminants such as pollen, odors,
and dust. See
Dual Automatic
Climate Control System 0178.
Select Off or On.
Page 174 of 398
Buick Enclave Owner Manual (GMNA-Localizing-U.S./Canada/Mexico-
12146155) - 2019 - crc - 9/10/18
Lighting 173
Interior Lighting
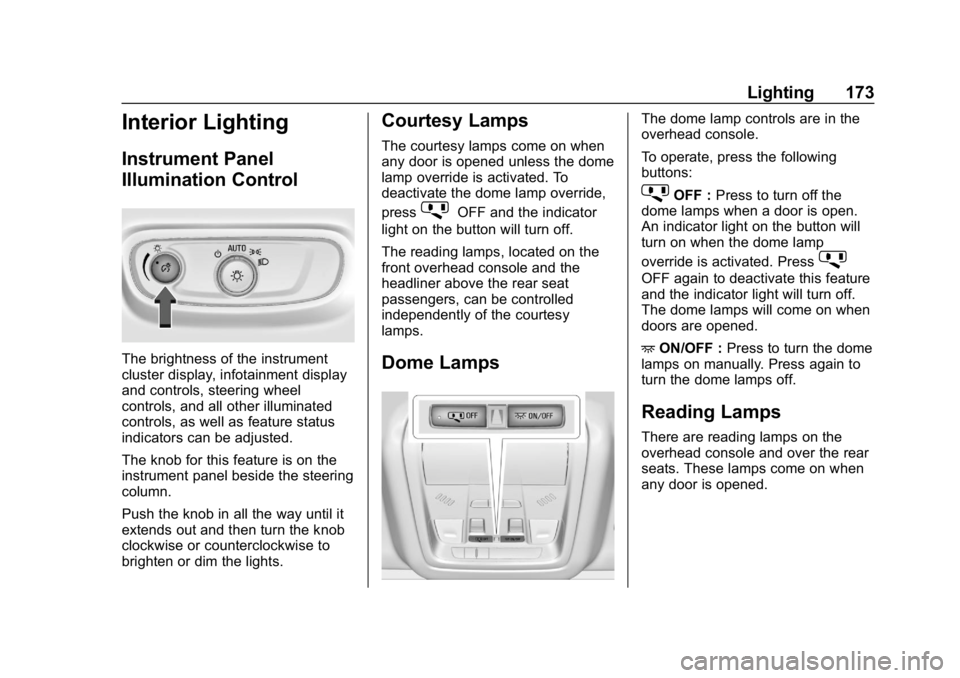
Instrument Panel
Illumination Control
The brightness of the instrument
cluster display, infotainment display
and controls, steering wheel
controls, and all other illuminated
controls, as well as feature status
indicators can be adjusted.
The knob for this feature is on the
instrument panel beside the steering
column.
Push the knob in all the way until it
extends out and then turn the knob
clockwise or counterclockwise to
brighten or dim the lights.
Courtesy Lamps
The courtesy lamps come on when
any door is opened unless the dome
lamp override is activated. To
deactivate the dome lamp override,
press
jOFF and the indicator
light on the button will turn off.
The reading lamps, located on the
front overhead console and the
headliner above the rear seat
passengers, can be controlled
independently of the courtesy
lamps.
Dome Lamps
The dome lamp controls are in the
overhead console.
To operate, press the following
buttons:
jOFF : Press to turn off the
dome lamps when a door is open.
An indicator light on the button will
turn on when the dome lamp
override is activated. Press
j
OFF again to deactivate this feature
and the indicator light will turn off.
The dome lamps will come on when
doors are opened.
+ ON/OFF : Press to turn the dome
lamps on manually. Press again to
turn the dome lamps off.
Reading Lamps
There are reading lamps on the
overhead console and over the rear
seats. These lamps come on when
any door is opened.
Page 220 of 398
Buick Enclave Owner Manual (GMNA-Localizing-U.S./Canada/Mexico-
12146155) - 2019 - crc - 9/10/18
Driving and Operating 219
If driving safely on a wet road and it
becomes necessary to slam on the
brakes and continue braking to
avoid a sudden obstacle, a
computer senses the wheels are
slowing down. If one of the wheels
is about to stop rolling, the computer
will separately work the brakes at
each wheel.
ABS can change the brake pressure
to each wheel, as required, faster
than any driver could. This can help
you steer around the obstacle while
braking hard.
As the brakes are applied, the
computer keeps receiving updates
on wheel speed and controls
braking pressure accordingly.
Remember: ABS does not change
the time needed to get a foot up to
the brake pedal or always decrease
stopping distance. If you get too
close to the vehicle in front of you,
there will not be enough time to
apply the brakes if that vehicle
suddenly slows or stops. Always
leave enough room up ahead to
stop, even with ABS.Using ABS
Do not pump the brakes. Just hold
the brake pedal down firmly and let
ABS work. You may hear the ABS
pump or motor operating and feel
the brake pedal pulsate. This is
normal.
Braking in Emergencies
ABS allows you to steer and brake
at the same time. In many
emergencies, steering can help
more than even the very best
braking.
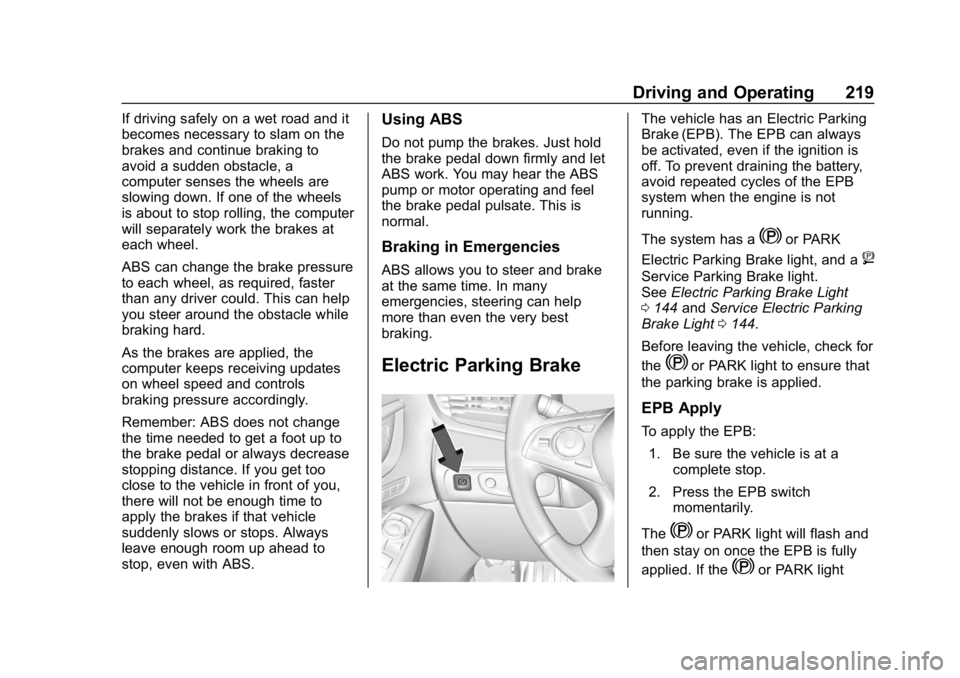
Electric Parking Brake
The vehicle has an Electric Parking
Brake (EPB). The EPB can always
be activated, even if the ignition is
off. To prevent draining the battery,
avoid repeated cycles of the EPB
system when the engine is not
running.
The system has a
Yor PARK
Electric Parking Brake light, and a
8
Service Parking Brake light.
See Electric Parking Brake Light
0 144 andService Electric Parking
Brake Light 0144.
Before leaving the vehicle, check for
the
Yor PARK light to ensure that
the parking brake is applied.
EPB Apply
To apply the EPB:
1. Be sure the vehicle is at a complete stop.
2. Press the EPB switch momentarily.
The
Yor PARK light will flash and
then stay on once the EPB is fully
applied. If the
Yor PARK light
Page 297 of 398
Buick Enclave Owner Manual (GMNA-Localizing-U.S./Canada/Mexico-
12146155) - 2019 - crc - 9/10/18
296 Vehicle Care
FusesUsage
F28 Radio/Heating, ventilation, and air
conditioning
display
F29 Radio
F30 Steering wheel controls
F31 Front blower
F32 DC AC inverter
F33 Driver power seat
F34 Passenger power seat
F35 Feed/Body control module 4
F36 Electric power steering
F37 Power outlet/ Wireless charger/
Accessory
F38 Body control module 8 Fuses
Usage
F39 Steering wheel controls
backlighting
Circuit
Breakers Usage
F40 –
F41 –
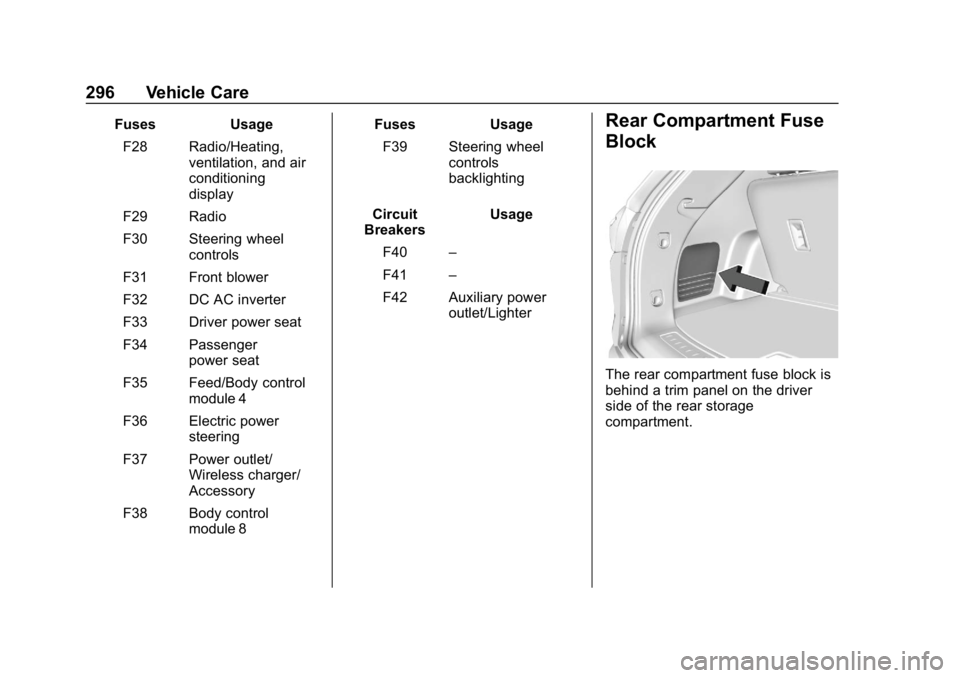
F42 Auxiliary power outlet/LighterRear Compartment Fuse
Block
The rear compartment fuse block is
behind a trim panel on the driver
side of the rear storage
compartment.
Page 313 of 398

Buick Enclave Owner Manual (GMNA-Localizing-U.S./Canada/Mexico-
12146155) - 2019 - crc - 9/10/18
312 Vehicle Care
TPMS Sensor Matching
Process
Each TPMS sensor has a unique
identification code. The identification
code needs to be matched to a new
tire/wheel position after rotating the
vehicle’s tires or replacing one or
more of the TPMS sensors. The
TPMS sensor matching process
should also be performed after
replacing a spare tire with a road
tire containing the TPMS sensor.
The malfunction light and the DIC
message should go off at the next
ignition cycle. The sensors are
matched to the tire/wheel positions,
using a TPMS relearn tool, in the
following order: driver side front tire,
passenger side front tire, passenger
side rear tire, and driver side rear.
See your dealer for service or to
purchase a relearn tool. A TPMS
relearn tool can also be purchased.
See Tire Pressure Monitor Sensor
Activation Tool at
www.gmtoolsandequipment.com or
call 1-800-GM TOOLS
(1-800-468-6657).There are two minutes to match the
first tire/wheel position, and
five minutes overall to match all four
tire/wheel positions. If it takes
longer, the matching process stops
and must be restarted.
The TPMS sensor matching
process is:
1. Set the parking brake.
2. Place the vehicle in Service Mode. See Ignition Positions
0 202.
3. Make sure the Tire Pressure info page option is turned on.
The info pages on the DIC can
be turned on and off through
the Options menu.
See Driver Information Center
(DIC) (Base Level) 0149 or
Driver Information Center (DIC)
(Uplevel) 0152.
4. Use the DIC controls on the right side of the steering wheel
to scroll to the Tire Pressure
screen under the DIC
info page. 5. Press and hold
Vin the center
of the DIC controls.
The horn sounds twice to
signal the receiver is in relearn
mode and the TIRE
LEARNING ACTIVE message
displays on the DIC screen.
6. Start with the driver side front tire.
7. Place the relearn tool against the tire sidewall, near the valve
stem. Then press the button to
activate the TPMS sensor.
A horn chirp confirms that the
sensor identification code has
been matched to this tire and
wheel position.
8. Proceed to the passenger side front tire, and repeat the
procedure in Step 7.
9. Proceed to the passenger side rear tire, and repeat the
procedure in Step 7.
10. Proceed to the driver side rear tire, and repeat the procedure
in Step 7. The horn sounds two
times to indicate the sensor
Page 395 of 398

Buick Enclave Owner Manual (GMNA-Localizing-U.S./Canada/Mexico-
12146155) - 2019 - crc - 9/10/18
394 Index
Seat Belts (cont'd)How to Wear Seat Belts
Properly . . . . . . . . . . . . . . . . . . . . . . . 77
Lap-Shoulder Belt . . . . . . . . . . . . . . 79
Reminders . . . . . . . . . . . . . . . . . . . . 139
Replacing after a Crash . . . . . . . . 82
Use During Pregnancy . . . . . . . . . . 81
Seats Head Restraints . . . . . . . . . . . . . . . . 62
Heated and Ventilated Front . . . . 68
Heated, Rear . . . . . . . . . . . . . . . . . . . 73
Lumbar Adjustment, Front . . . . . . 64
Memory . . . . . . . . . . . . . . . . . . . . . . . . . 65
Power Adjustment, Front . . . . . . . 64
Rear . . . . . . . . . . . . . . . . . . . . . . . . . . . . 70
Reclining Seatbacks . . . . . . . . . . . . 64
Third Row Seat . . . . . . . . . . . . . . . . . 73
Securing Child
Restraints . . . . . . . . . . . . . . . . 111, 113
Security Light . . . . . . . . . . . . . . . . . . . . . . . . . . 148
OnStar . . . . . . . . . . . . . . . . . . . . . . . 376
Vehicle . . . . . . . . . . . . . . . . . . . . . . . . . 50
Vehicle Alarm . . . . . . . . . . . . . . . . . . . 50
Service . . . . . . . . . . . . . . . . . . . . . . . . . 185 Accessories andModifications . . . . . . . . . . . . . . . . 269
Doing Your Own Work . . . . . . . . 269 Service (cont'd)
Maintenance Records . . . . . . . . 356
Maintenance, General
Information . . . . . . . . . . . . . . . . . . 344
Parts Identification Label . . . . . 357
Scheduling Appointments . . . . . 366
Service Electric Parking Brake Light . . . . . . . . . . . . . . . . . . . . 144
Services
Special Application . . . . . . . . . . . 351
Servicing the Airbag . . . . . . . . . . . . . 94
Shifting Into Park . . . . . . . . . . . . . . . . . . . . . . 207
Out of Park . . . . . . . . . . . . . . . . . . . 208
Side Blind Zone Alert (SBZA) . . . 246
Signals, Turn and Lane-Change . . . . . . . . . . . . . . . . . 172
Spare Tire
Compact . . . . . . . . . . . . . . . . . . . . . . 327
Special Application Services . . . . 351
Specifications and Capacities . . . . . . . . . . . . . . . . . . . . . 358
Speedometer . . . . . . . . . . . . . . . . . . . 135
Sport Mode Light . . . . . . . . . . . . . . . 145
StabiliTrak
OFF Light . . . . . . . . . . . . . . . . . . . . . 146
Start Assist, Hill . . . . . . . . . . . . . . . . . 221
Start Vehicle, Remote . . . . . . . . . . . 36 Starter Switch Check . . . . . . . . . . . 285
Starting the Engine . . . . . . . . . . . . . 204
Steering . . . . . . . . . . . . . . . . . . . . . . . . 189
Heated Wheel . . . . . . . . . . . . . . . . 123
Wheel Adjustment . . . . . . . . . . . . 123
Wheel Controls . . . . . . . . . . . . . . . 123
Stop/Start System . . . . . . . . . . . . . . 205
Storage Areas
Cargo Management System . . .118
Center Console . . . . . . . . . . . . . . . .118
Glove Box . . . . . . . . . . . . . . . . . . . . .117
Roof Rack System . . . . . . . . . . . . 120
Sunglasses . . . . . . . . . . . . . . . . . . . .118
Storage Compartments . . . . . . . . . 117
Struts Gas . . . . . . . . . . . . . . . . . . . . . . . . . . . 287
Stuck Vehicle . . . . . . . . . . . . . . . . . . . 198
Sun Visors . . . . . . . . . . . . . . . . . . . . . . . 58
Sunglass Storage . . . . . . . . . . . . . . . 118
Sunroof . . . . . . . . . . . . . . . . . . . . . . . . . . 59
Symbols . . . . . . . . . . . . . . . . . . . . . . . . . . 3
System Forward CollisionAlert (FCA) . . . . . . . . . . . . . . . . . . 240
Infotainment . . . . . . . . . . . . . 177, 373
Roof Rack . . . . . . . . . . . . . . . . . . . . 120
Systems Driver Assistance . . . . . . . . . . . . . 235