change time BUICK ENCLAVE 2021 User Guide
[x] Cancel search | Manufacturer: BUICK, Model Year: 2021, Model line: ENCLAVE, Model: BUICK ENCLAVE 2021Pages: 369, PDF Size: 11.58 MB
Page 114 of 369
Buick Enclave Owner Manual (GMNA-Localizing-U.S./Canada/Mexico-
14637843) - 2021 - CRC - 12/9/20
Instruments and Controls 113
This also shows the number of liters (L) or
gallons (gal) of fuel used since the last reset
of this menu item.
Oil Life :Shows an estimate of the oil's
remaining useful life. If REMAINING OIL LIFE
99% is displayed, that means 99% of the
current oil life remains.
When the remaining oil life is low, the
CHANGE ENGINE OIL SOON message will
appear on the display. The oil should be
changed as soon as possible. See Engine Oil
0 262. In addition to the engine oil life
system monitoring the oil life, additional
maintenance is recommended. See
Maintenance Schedule 0323.
The Oil Life display must be reset after each
oil change. It will not reset itself. Do not
reset the Oil Life display at any time other
than when the oil has just been changed.
It cannot be reset accurately until the next
oil change. To reset the engine oil life
system, press and hold
Vfor several
seconds while the Oil Life display is active.
See Engine Oil Life System 0264.
Tire Pressure : Shows the approximate
pressures of all four tires. Tire pressure is
displayed in either kilopascal (kPa) or in
pounds per square inch (psi). If the pressure is low, the value for that tire is shown in
amber. See
Tire Pressure Monitor System
0 293 and
Tire Pressure Monitor Operation 0294.
Best Fuel Economy : Displays average fuel
economy, the best fuel economy over the
selected distance, and a bar graph showing
instantaneous fuel economy.
Press
kto change the selected distance.
Press and hold
Vwhile this display is active
to reset the best fuel economy and average
fuel economy. This display can also be reset
by selecting reset in the menu.
Economy Trend : Shows history of the
Average Fuel Economy from the last 50 km
(30 mi). Each bar represents about 5 km
(3 mi) of driving. During driving the bars will
shift to always reflect the most recent
distance on the right side. Press and hold
V
to clear the graph or presskto reset
through the menu.
Speed Signs : Shows sign information, which
comes from a roadway database in the
on-board navigation. Following Distance :
The following distance
to a moving vehicle ahead is displayed as a
time value on this page. See Forward
Collision Alert (FCA) System 0235.
Blank Page : Shows no information.
Vehicle Messages
Messages displayed on the DIC indicate the
status of the vehicle or some action that
may be needed to correct a condition.
Multiple messages may appear one after
another.
The messages that do not require
immediate action can be acknowledged and
cleared by pressing
V. The messages that
require immediate action cannot be cleared
until that action is performed.
All messages should be taken seriously;
clearing the message does not correct the
problem.
If a SERVICE message appears, see your
dealer.
Follow the instructions given in the
messages. The system displays messages
regarding the following topics:
.Service Messages
.Fluid Levels
Page 120 of 369
Buick Enclave Owner Manual (GMNA-Localizing-U.S./Canada/Mexico-
14637843) - 2021 - CRC - 12/9/20
Instruments and Controls 119
Universal Remote System
Programming
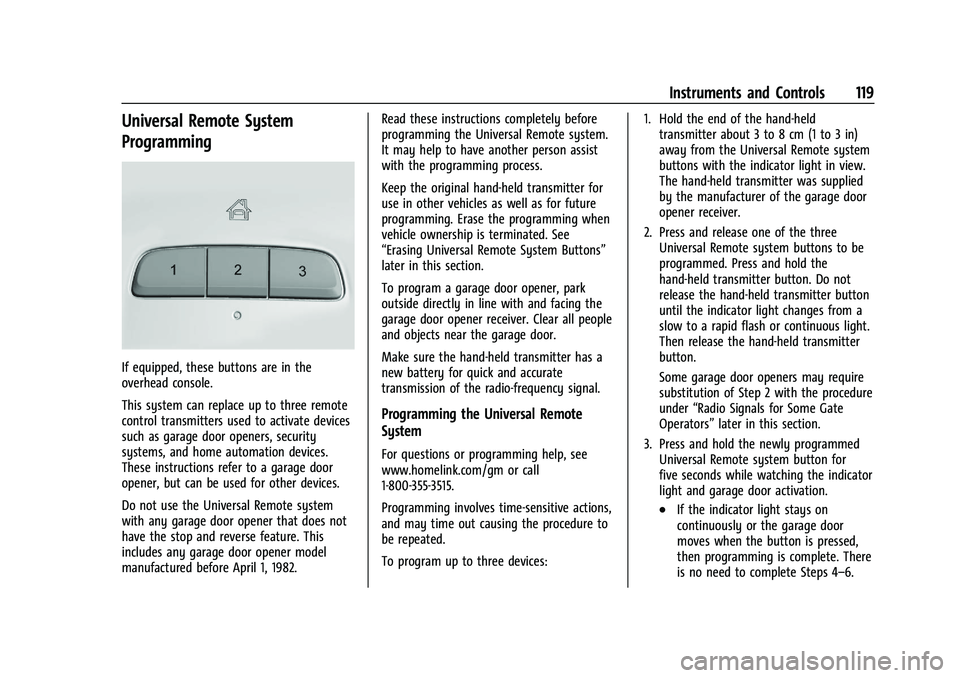
If equipped, these buttons are in the
overhead console.
This system can replace up to three remote
control transmitters used to activate devices
such as garage door openers, security
systems, and home automation devices.
These instructions refer to a garage door
opener, but can be used for other devices.
Do not use the Universal Remote system
with any garage door opener that does not
have the stop and reverse feature. This
includes any garage door opener model
manufactured before April 1, 1982.Read these instructions completely before
programming the Universal Remote system.
It may help to have another person assist
with the programming process.
Keep the original hand-held transmitter for
use in other vehicles as well as for future
programming. Erase the programming when
vehicle ownership is terminated. See
“Erasing Universal Remote System Buttons”
later in this section.
To program a garage door opener, park
outside directly in line with and facing the
garage door opener receiver. Clear all people
and objects near the garage door.
Make sure the hand-held transmitter has a
new battery for quick and accurate
transmission of the radio-frequency signal.
Programming the Universal Remote
System
For questions or programming help, see
www.homelink.com/gm or call
1-800-355-3515.
Programming involves time-sensitive actions,
and may time out causing the procedure to
be repeated.
To program up to three devices:
1. Hold the end of the hand-held
transmitter about 3 to 8 cm (1 to 3 in)
away from the Universal Remote system
buttons with the indicator light in view.
The hand-held transmitter was supplied
by the manufacturer of the garage door
opener receiver.
2. Press and release one of the three Universal Remote system buttons to be
programmed. Press and hold the
hand-held transmitter button. Do not
release the hand-held transmitter button
until the indicator light changes from a
slow to a rapid flash or continuous light.
Then release the hand-held transmitter
button.
Some garage door openers may require
substitution of Step 2 with the procedure
under “Radio Signals for Some Gate
Operators” later in this section.
3. Press and hold the newly programmed Universal Remote system button for
five seconds while watching the indicator
light and garage door activation.
.If the indicator light stays on
continuously or the garage door
moves when the button is pressed,
then programming is complete. There
is no need to complete Steps 4–6.
Page 121 of 369

Buick Enclave Owner Manual (GMNA-Localizing-U.S./Canada/Mexico-
14637843) - 2021 - CRC - 12/9/20
120 Instruments and Controls
.If the indicator light does not come
on or the garage door does not
move, a second button press may be
required. For a second time, press
and hold the newly programmed
button for five seconds. If the
indicator light is continuously lit,
or the garage door moves,
programming is complete.
.If the indicator light flashes rapidly
and the garage door does not move,
continue with programming
Steps 4–6.
Learn or Smart Button
4. After completing Steps 1–3, locate the Learn or Smart button inside the garage
on the garage door opener receiver. The
name and color of the button may vary
by manufacturer. 5. Press and release the Learn or Smart
button. Step 6 must be completed within
30 seconds of pressing this button.
6. Return to the vehicle and firmly press and hold the trained Universal Remote
system button for two seconds and
release. Repeat the “press/hold/release”
sequence up to three times to complete
the training process.
The Universal Remote system should now
activate the garage door.
Repeat the process for programming the
two remaining buttons.
Radio Signals for Some Gate Operators
For questions or programming help, see
www.homelink.com/gm or call
1-800-355-3515.
Some radio–frequency laws and gate
operators require transmitter signals to time
out or quit after several seconds of
transmission. This may not be long enough
for the Universal Remote system to pick up
the signal during programming.
If the programming did not work, replace
Step 2 under “Programming the Universal
Remote System” with the following: Press and hold the Universal Remote system
button while pressing and releasing the
hand-held transmitter button every
two seconds until the signal has been
successfully accepted by the Universal
Remote system. The Universal Remote
system indicator light will flash slowly at
first and then change to a rapid flash or
continuous solid-light. Proceed with Step 3
under
“Programming the Universal Remote
System” to complete.
Universal Remote System
Operation
Using the Universal Remote System
Press and hold the appropriate Universal
Remote system button for at least one-half
second. The indicator light will come on
while the signal is being transmitted.
Erasing Universal Remote System
Buttons
Erase all programmed buttons when vehicle
ownership is terminated.
To erase:
1. Press and hold the two outside buttons until the indicator light begins to flash.
This should take about 10 seconds.
Page 123 of 369
Buick Enclave Owner Manual (GMNA-Localizing-U.S./Canada/Mexico-
14637843) - 2021 - CRC - 12/9/20
122 Lighting
Lighting
Exterior Lighting
Exterior Lamp Controls . . . . . . . . . . . . . . . . . 122
Exterior Lamps Off Reminder . . . . . . . . . . 123
Headlamp High/Low-Beam Changer . . . . 123
Flash-to-Pass . . . . . . . . . . . . . . . . . . . . . . . . . . . 124
Daytime Running Lamps (DRL) . . . . . . . . . 124
Automatic Headlamp System . . . . . . . . . . 124
Hazard Warning Flashers . . . . . . . . . . . . . . 125
Turn and Lane-Change Signals . . . . . . . . . 125
Interior Lighting
Instrument Panel IlluminationControl . . . . . . . . . . . . . . . . . . . . . . . . . . . . . . . 125
Courtesy Lamps . . . . . . . . . . . . . . . . . . . . . . . 126
Dome Lamps . . . . . . . . . . . . . . . . . . . . . . . . . . 126
Reading Lamps . . . . . . . . . . . . . . . . . . . . . . . . 126
Lighting Features
Entry Lighting . . . . . . . . . . . . . . . . . . . . . . . . . 127
Exit Lighting . . . . . . . . . . . . . . . . . . . . . . . . . . . 127
Battery Load Management . . . . . . . . . . . . . 127
Battery Power Protection . . . . . . . . . . . . . . 128
Exterior Lighting Battery Saver . . . . . . . . 128
Exterior Lighting
Exterior Lamp Controls
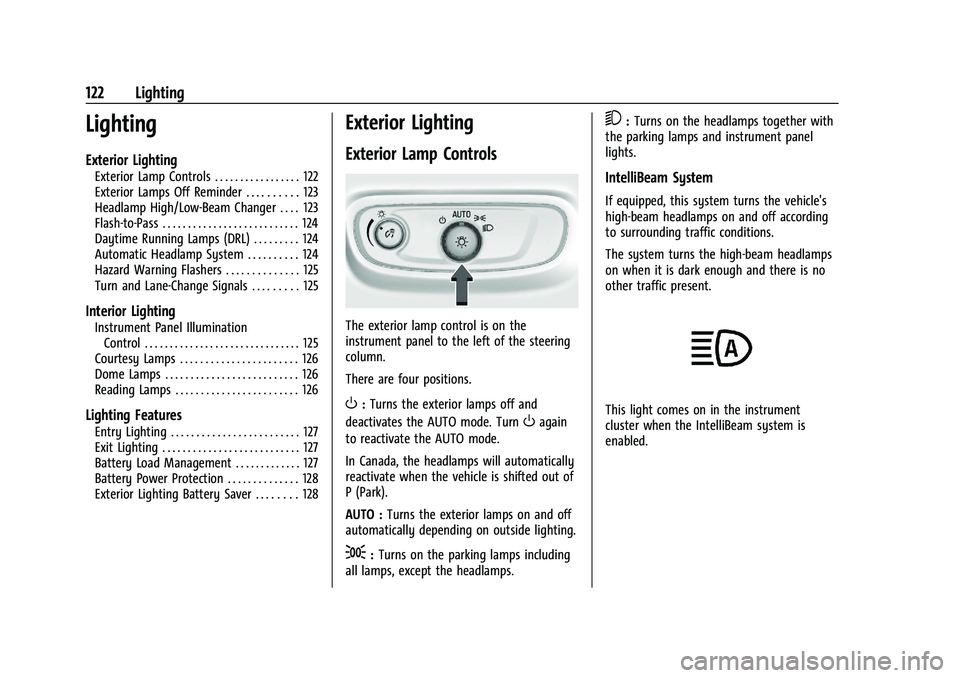
The exterior lamp control is on the
instrument panel to the left of the steering
column.
There are four positions.
O: Turns the exterior lamps off and
deactivates the AUTO mode. Turn
Oagain
to reactivate the AUTO mode.
In Canada, the headlamps will automatically
reactivate when the vehicle is shifted out of
P (Park).
AUTO : Turns the exterior lamps on and off
automatically depending on outside lighting.
;: Turns on the parking lamps including
all lamps, except the headlamps.
5: Turns on the headlamps together with
the parking lamps and instrument panel
lights.
IntelliBeam System
If equipped, this system turns the vehicle's
high-beam headlamps on and off according
to surrounding traffic conditions.
The system turns the high-beam headlamps
on when it is dark enough and there is no
other traffic present.
This light comes on in the instrument
cluster when the IntelliBeam system is
enabled.
Page 125 of 369
Buick Enclave Owner Manual (GMNA-Localizing-U.S./Canada/Mexico-
14637843) - 2021 - CRC - 12/9/20
124 Lighting
This indicator light turns on in the
instrument cluster when the high-beam
headlamps are on.
Flash-to-Pass
This feature is used to signal to the vehicle
ahead that you want to pass.
If the headlamps are off or in the low-beam
position, pull the turn signal lever toward
you to momentarily switch to high beams.
Release the lever to turn the high-beam
headlamps off.
Daytime Running Lamps (DRL)
DRL can make it easier for others to see the
front of your vehicle during the day. Fully
functional DRL are required on all vehicles
first sold in Canada.
The dedicated DRL will come on when all of
the following conditions are met:
.The ignition is on.
.The exterior lamp control is in AUTO.
.The light sensor determines it is daytime.
.The parking brake is released or the
vehicle is not in P (Park).
The taillamps, instrument panel lights, and
other lamps will not be on.
The DRL turn off when the headlamps are
turned to
Oor the ignition is off. For
vehicles sold in Canada, this control only
works when the vehicle is parked.
Automatic Headlamp System
When the exterior lamp control is set to
AUTO and it is dark enough outside, the
headlamps come on automatically.
There is a light sensor on top of the
instrument panel. Do not cover the sensor;
otherwise the headlamps will come on when
they are not needed.
The system may also turn on the headlamps
when driving through a parking garage or
tunnel.
If the vehicle is started in a dark garage, the
automatic headlamp system comes on
immediately. If it is light outside when the
vehicle leaves the garage, there is a slight
delay before the automatic headlamp
system changes to the Daytime Running
Lamps (DRL). During that delay, the
instrument cluster may not be as bright as
usual. Make sure the instrument panel
brightness control is in the full bright
position. See Instrument Panel Illumination
Control 0125.
When it is bright enough outside, the
headlamps will turn off or may change
to DRL.
The automatic headlamp system turns off
when the exterior lamp control is turned to
Oor the ignition is off.
Page 126 of 369
Buick Enclave Owner Manual (GMNA-Localizing-U.S./Canada/Mexico-
14637843) - 2021 - CRC - 12/9/20
Lighting 125
Lights On with Wipers
If the windshield wipers are activated in
daylight with the engine on, and the
exterior lamp control is in AUTO, the
headlamps, parking lamps, and other
exterior lamps come on. The transition time
for the lamps coming on varies based on
wiper speed. When the wipers are not
operating, these lamps turn off. Move the
exterior lamp control to
Oor;to disable
this feature.
Hazard Warning Flashers
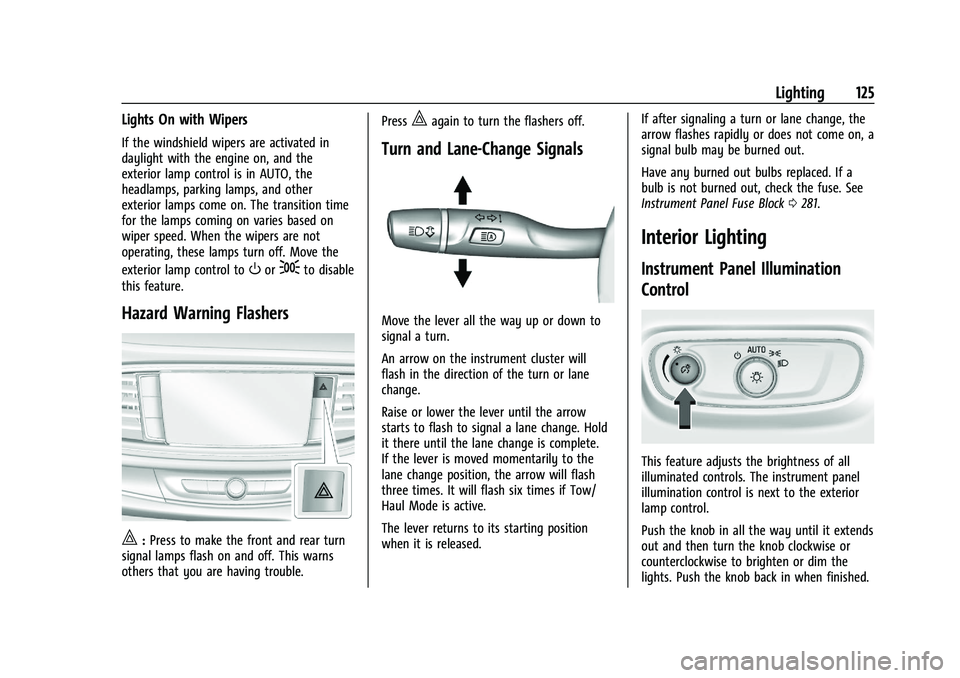
|: Press to make the front and rear turn
signal lamps flash on and off. This warns
others that you are having trouble. Press
|again to turn the flashers off.
Turn and Lane-Change Signals
Move the lever all the way up or down to
signal a turn.
An arrow on the instrument cluster will
flash in the direction of the turn or lane
change.
Raise or lower the lever until the arrow
starts to flash to signal a lane change. Hold
it there until the lane change is complete.
If the lever is moved momentarily to the
lane change position, the arrow will flash
three times. It will flash six times if Tow/
Haul Mode is active.
The lever returns to its starting position
when it is released.
If after signaling a turn or lane change, the
arrow flashes rapidly or does not come on, a
signal bulb may be burned out.
Have any burned out bulbs replaced. If a
bulb is not burned out, check the fuse. See
Instrument Panel Fuse Block
0281.
Interior Lighting
Instrument Panel Illumination
Control
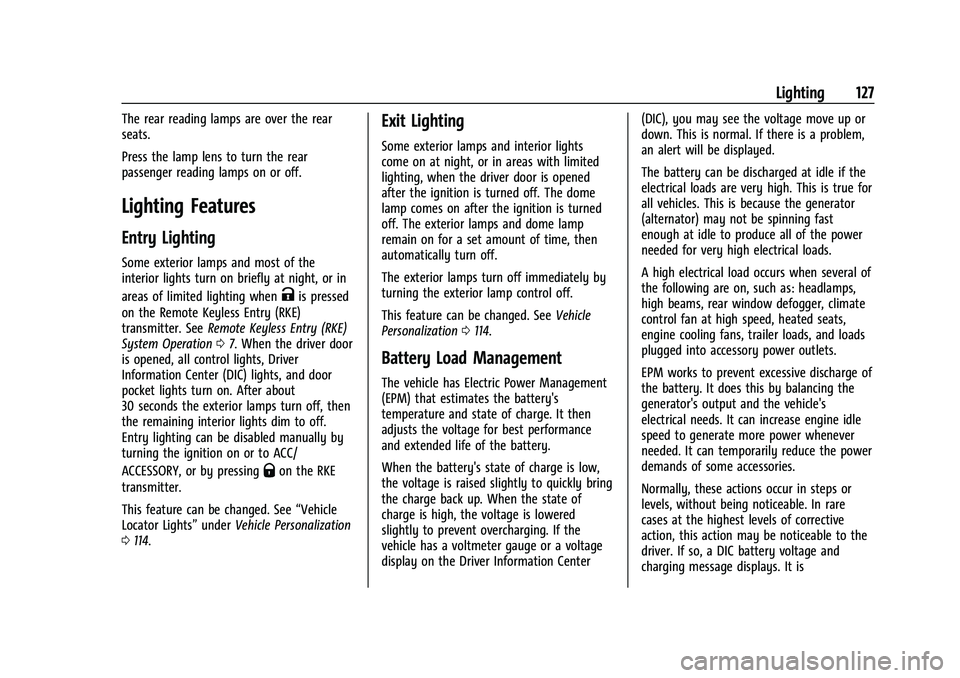
This feature adjusts the brightness of all
illuminated controls. The instrument panel
illumination control is next to the exterior
lamp control.
Push the knob in all the way until it extends
out and then turn the knob clockwise or
counterclockwise to brighten or dim the
lights. Push the knob back in when finished.
Page 128 of 369
Buick Enclave Owner Manual (GMNA-Localizing-U.S./Canada/Mexico-
14637843) - 2021 - CRC - 12/9/20
Lighting 127
The rear reading lamps are over the rear
seats.
Press the lamp lens to turn the rear
passenger reading lamps on or off.
Lighting Features
Entry Lighting
Some exterior lamps and most of the
interior lights turn on briefly at night, or in
areas of limited lighting when
Kis pressed
on the Remote Keyless Entry (RKE)
transmitter. See Remote Keyless Entry (RKE)
System Operation 07. When the driver door
is opened, all control lights, Driver
Information Center (DIC) lights, and door
pocket lights turn on. After about
30 seconds the exterior lamps turn off, then
the remaining interior lights dim to off.
Entry lighting can be disabled manually by
turning the ignition on or to ACC/
ACCESSORY, or by pressing
Qon the RKE
transmitter.
This feature can be changed. See “Vehicle
Locator Lights” underVehicle Personalization
0 114.
Exit Lighting
Some exterior lamps and interior lights
come on at night, or in areas with limited
lighting, when the driver door is opened
after the ignition is turned off. The dome
lamp comes on after the ignition is turned
off. The exterior lamps and dome lamp
remain on for a set amount of time, then
automatically turn off.
The exterior lamps turn off immediately by
turning the exterior lamp control off.
This feature can be changed. See Vehicle
Personalization 0114.
Battery Load Management
The vehicle has Electric Power Management
(EPM) that estimates the battery's
temperature and state of charge. It then
adjusts the voltage for best performance
and extended life of the battery.
When the battery's state of charge is low,
the voltage is raised slightly to quickly bring
the charge back up. When the state of
charge is high, the voltage is lowered
slightly to prevent overcharging. If the
vehicle has a voltmeter gauge or a voltage
display on the Driver Information Center (DIC), you may see the voltage move up or
down. This is normal. If there is a problem,
an alert will be displayed.
The battery can be discharged at idle if the
electrical loads are very high. This is true for
all vehicles. This is because the generator
(alternator) may not be spinning fast
enough at idle to produce all of the power
needed for very high electrical loads.
A high electrical load occurs when several of
the following are on, such as: headlamps,
high beams, rear window defogger, climate
control fan at high speed, heated seats,
engine cooling fans, trailer loads, and loads
plugged into accessory power outlets.
EPM works to prevent excessive discharge of
the battery. It does this by balancing the
generator's output and the vehicle's
electrical needs. It can increase engine idle
speed to generate more power whenever
needed. It can temporarily reduce the power
demands of some accessories.
Normally, these actions occur in steps or
levels, without being noticeable. In rare
cases at the highest levels of corrective
action, this action may be noticeable to the
driver. If so, a DIC battery voltage and
charging message displays. It is
Page 144 of 369
Buick Enclave Owner Manual (GMNA-Localizing-U.S./Canada/Mexico-
14637843) - 2021 - CRC - 12/9/20
Infotainment System 143
Account
The Account tab displays a snapshot of the
account linked with the vehicle. If there is
no such account, this tab will show all
values as——. The call advisor call icon will
be active even if there is no active account.
Advisor Call
Selecting Advisor Call is the same as
pressing
Qor calling 1-888-4ONSTAR
(1-888-466-7827). The X option in the upper
right corner of the screen does not end the
call, but returns to the previous screen.
Turn-by-Turn Directions
With a connected plan, an OnStar Advisor
can download a destination to the vehicle or
its embedded navigation system,
if equipped. Select Turn-by-Turn Directions
from the Services tab of the OnStar app to
call an Advisor or select a recent or favorite
destination. Touch the navigation icons to
select home, address or place. A destination
transfer from OnStar will show the detail
view of the destination when it is
transferred from OnStar to the Navigation
application. See www.onstar.com for a
coverage map. Services vary by model. Map
coverage is available in the United States,
Puerto Rico, and Canada. Wi-Fi Hotspot
Touch to display the Settings page, which
shows the configurations for the vehicle
hotspot and allows them to be changed.
For more information, see www.onstar.com.
Navigation
Using the Navigation System
If equipped, launch the Nav application by
touching the Nav icon on the Home Page or
on the shortcut tray near the bottom of the
infotainment display.
When the Nav application is launched for
the first time, a product walkthrough is
available. Use of the feature requires the
Terms and Conditions and the Privacy
statement to be confirmed. If available and
signed into a profile, it is also suggested to
enable and confirm Predictive Navigation.
Predictive Navigation (If Equipped)
If Predictive Navigation is available and
confirmed, this feature learns preferences by
remembering where the vehicle has been.
It uses the locations and navigation history
to personalize routes and results.
Predictive Navigation may learn elements
such as:
.Personalized routes based on preferred
streets.
.Search results that provide best matches
at the top of the list.
.Predictive traffic.
.Local map content updating.
Predictive Navigation can also be enabled or
disabled at a later time by touching
A
(Options). While in Options, touch Settings,
then Map and Navigation Settings, and then
Predictive Navigation. See Settings0165.
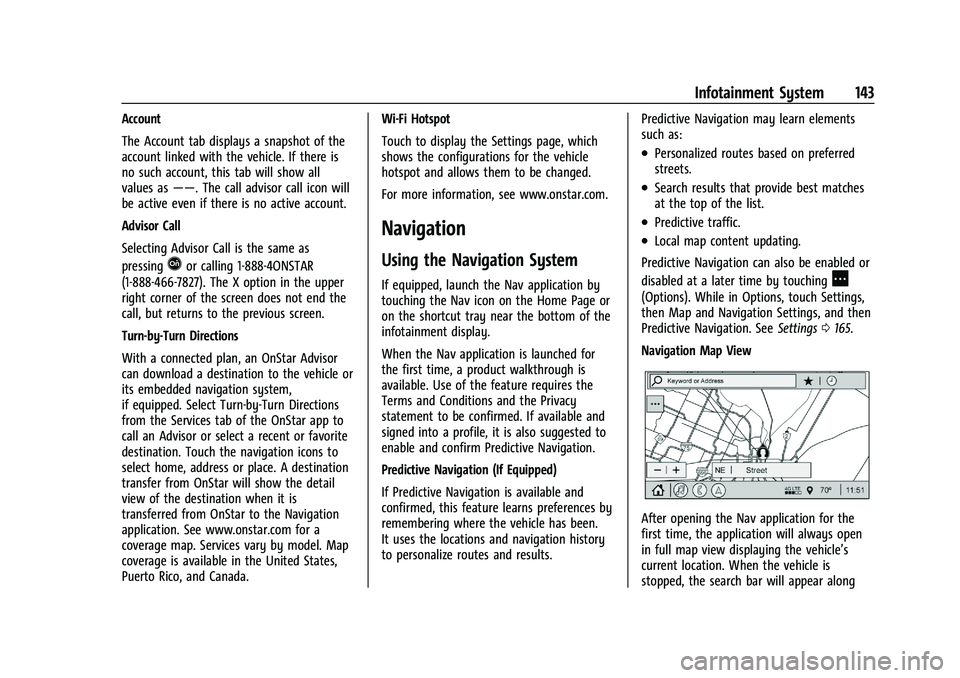
Navigation Map View
After opening the Nav application for the
first time, the application will always open
in full map view displaying the vehicle’s
current location. When the vehicle is
stopped, the search bar will appear along
Page 149 of 369
Buick Enclave Owner Manual (GMNA-Localizing-U.S./Canada/Mexico-
14637843) - 2021 - CRC - 12/9/20
148 Infotainment System
If the vehicle passes the waypoint or gets
out of the current route, the system will
automatically reroute back to this waypoint.
At the same time, it will show a Drive to
icon along with the next waypoint address
so the current waypoint can be skipped and
guidance can resume to the next waypoint
or destination.
Editing a Waypoint
When waypoints are added during active
guidance, the system allows a stop to be
deleted or the order to be changed. To edit
a waypoint:1. Touch
A.
2. Touch Edit Destinations.
.Modify destination order by touching
and holding the arrow until it is
highlighted. Drag to move the
waypoint up or down the list.
.Delete a waypoint by touchingY.
A pop-up will appear to confirm
waypoint removal. Once the request
is confirmed, the system will remove
the address from the destinations list.
Touch
zon the top right corner so
the system can recalculate the route. If there is only one address in the
destinations list, the system will
disable the move and delete
functions. The system will not allow
the final destination to be deleted.
Map Information
Road network attributes are contained in the
map database for map information.
Attributes include information such as street
names, street addresses, and turn
restrictions. A detailed area includes all
major highways, service roads, and
residential roads. The detailed areas include
Places of Interest (POIs) such as restaurants,
airports, banks, hospitals, police stations, gas
stations, tourist attractions, and historical
monuments.
If the vehicle does not have an applicable
service plan, the map database may not
include data for newly constructed areas or
map database corrections that are
completed after production. The navigation
system provides full route guidance in the
detailed map areas.
Zoom Control
The zoom control display is shown on the
map view. A few ways to zoom in or
out are:
.Touch + or
–to zoom in or out on
the map.
.Double tap with one finger to zoom in or
single tap with two fingers to zoom out
on the map.
.Use the index finger and thumb to zoom
out by pinching and then zoom in by
spreading those two fingers on the map.
Map Gestures and Map Scale
Use the following gestures on the
infotainment display to adjust the map scale
and display options.
.Pinch to zoom in or out.
.Pan the map.
.Use two fingers to tilt down and change
from 2D to 3D. Tilt up to change back
to 2D.
.Rotate the map.
See Using the System 0132.
Mute
When in active guidance, the audio prompts
while using navigation can be muted. Touch
the speaker icon on the right side of the
upper bar. A slash will appear on the
speaker to indicate voice guidance is muted.
Page 153 of 369
Buick Enclave Owner Manual (GMNA-Localizing-U.S./Canada/Mexico-
14637843) - 2021 - CRC - 12/9/20
152 Infotainment System
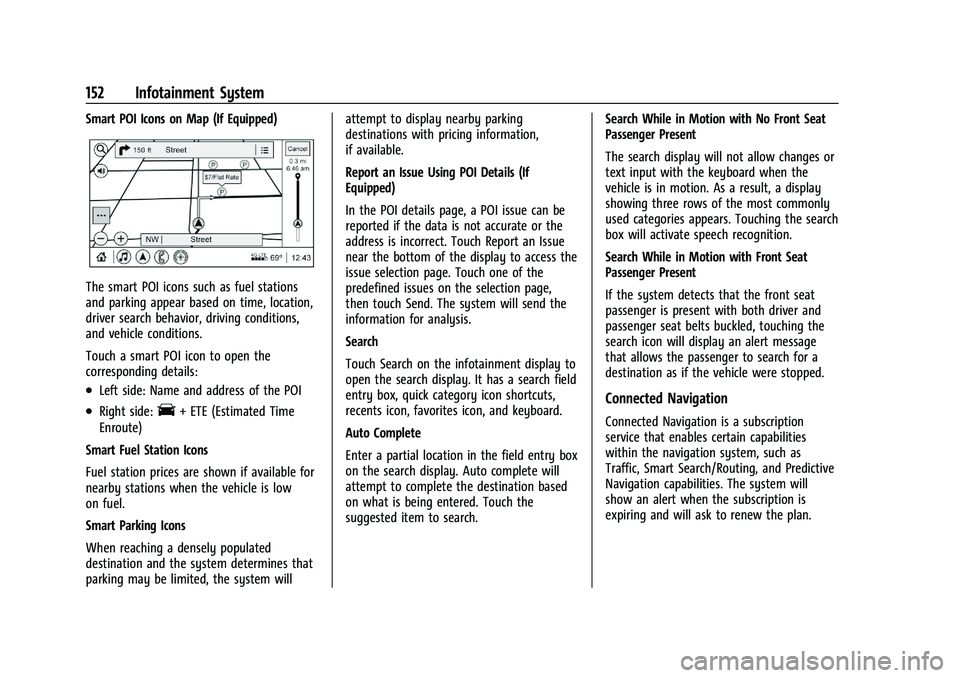
Smart POI Icons on Map (If Equipped)
The smart POI icons such as fuel stations
and parking appear based on time, location,
driver search behavior, driving conditions,
and vehicle conditions.
Touch a smart POI icon to open the
corresponding details:
.Left side: Name and address of the POI
.Right side:E+ ETE (Estimated Time
Enroute)
Smart Fuel Station Icons
Fuel station prices are shown if available for
nearby stations when the vehicle is low
on fuel.
Smart Parking Icons
When reaching a densely populated
destination and the system determines that
parking may be limited, the system will attempt to display nearby parking
destinations with pricing information,
if available.
Report an Issue Using POI Details (If
Equipped)
In the POI details page, a POI issue can be
reported if the data is not accurate or the
address is incorrect. Touch Report an Issue
near the bottom of the display to access the
issue selection page. Touch one of the
predefined issues on the selection page,
then touch Send. The system will send the
information for analysis.
Search
Touch Search on the infotainment display to
open the search display. It has a search field
entry box, quick category icon shortcuts,
recents icon, favorites icon, and keyboard.
Auto Complete
Enter a partial location in the field entry box
on the search display. Auto complete will
attempt to complete the destination based
on what is being entered. Touch the
suggested item to search.
Search While in Motion with No Front Seat
Passenger Present
The search display will not allow changes or
text input with the keyboard when the
vehicle is in motion. As a result, a display
showing three rows of the most commonly
used categories appears. Touching the search
box will activate speech recognition.
Search While in Motion with Front Seat
Passenger Present
If the system detects that the front seat
passenger is present with both driver and
passenger seat belts buckled, touching the
search icon will display an alert message
that allows the passenger to search for a
destination as if the vehicle were stopped.Connected Navigation
Connected Navigation is a subscription
service that enables certain capabilities
within the navigation system, such as
Traffic, Smart Search/Routing, and Predictive
Navigation capabilities. The system will
show an alert when the subscription is
expiring and will ask to renew the plan.