warning BUICK ENCLAVE 2021 User Guide
[x] Cancel search | Manufacturer: BUICK, Model Year: 2021, Model line: ENCLAVE, Model: BUICK ENCLAVE 2021Pages: 369, PDF Size: 11.58 MB
Page 28 of 369

Buick Enclave Owner Manual (GMNA-Localizing-U.S./Canada/Mexico-
14637843) - 2021 - CRC - 12/9/20
Keys, Doors, and Windows 27
Warning (Continued)
into the right lane, you could hit a
vehicle on the right. Check the inside
mirror or glance over your shoulder
before changing lanes.
The passenger side mirror is convex shaped.
A convex mirror's surface is curved so more
can be seen from the driver seat.
Power Mirrors
To adjust a mirror: 1. Press
}or|to choose the driver or
passenger mirror. 2. Press the arrows on the control pad to
move each mirror in the desired
direction.
Folding Mirrors
Manual Folding Mirrors
The mirrors can be folded inward toward
the vehicle to prevent damage when going
through an automatic car wash. Push the
mirror outward to return it to the original
position.
Power Folding Mirrors
If equipped, pressgto power fold the
mirrors. Press again to unfold. Resetting the Power Folding Mirrors
Reset the power folding mirrors if the
mirrors:
.Are accidentally obstructed while folding.
.Are accidentally manually folded/
unfolded.
.Do not stay in the unfolded position.
.Vibrate at normal driving speeds.
Fold and unfold the mirrors one time using
the mirror controls to reset them to their
normal position. A noise may be heard
during the resetting of the power folding
mirrors. This sound is normal after a manual
folding operation.
Remote Mirror Folding
If equipped, press and hold
Qon the RKE
transmitter for approximately one second to
automatically fold the exterior mirrors. Press
and hold
Kon the RKE transmitter for
approximately one second to unfold. See
Remote Keyless Entry (RKE) System
Operation 07.
This feature is turned on or off through
vehicle personalization. See Vehicle
Personalization 0114.
Page 30 of 369
Buick Enclave Owner Manual (GMNA-Localizing-U.S./Canada/Mexico-
14637843) - 2021 - CRC - 12/9/20
Keys, Doors, and Windows 29
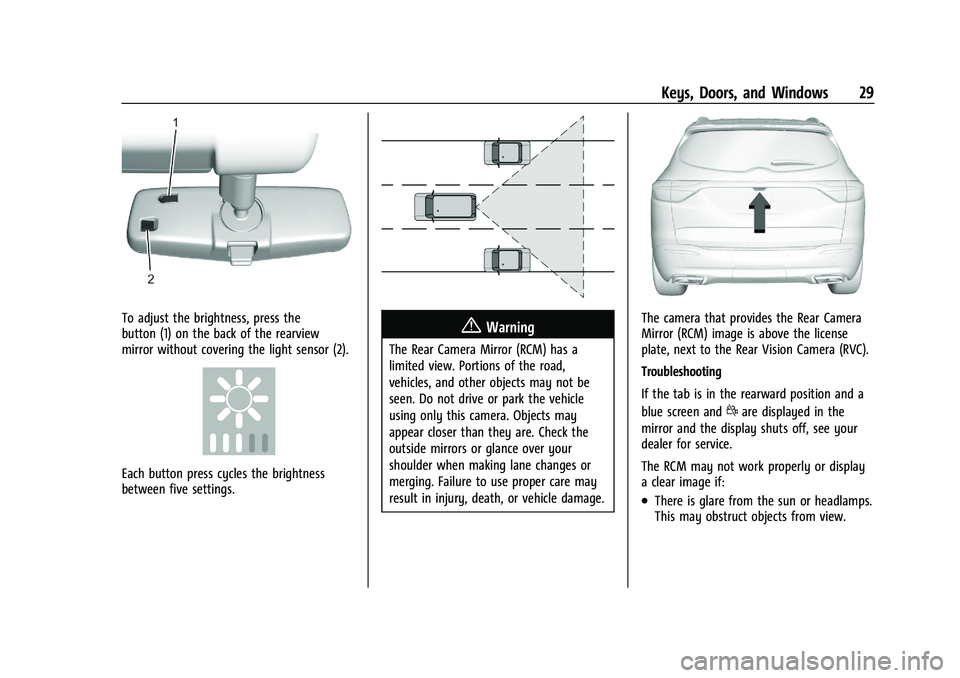
To adjust the brightness, press the
button (1) on the back of the rearview
mirror without covering the light sensor (2).
Each button press cycles the brightness
between five settings.
{Warning
The Rear Camera Mirror (RCM) has a
limited view. Portions of the road,
vehicles, and other objects may not be
seen. Do not drive or park the vehicle
using only this camera. Objects may
appear closer than they are. Check the
outside mirrors or glance over your
shoulder when making lane changes or
merging. Failure to use proper care may
result in injury, death, or vehicle damage.
The camera that provides the Rear Camera
Mirror (RCM) image is above the license
plate, next to the Rear Vision Camera (RVC).
Troubleshooting
If the tab is in the rearward position and a
blue screen and
dare displayed in the
mirror and the display shuts off, see your
dealer for service.
The RCM may not work properly or display
a clear image if:
.There is glare from the sun or headlamps.
This may obstruct objects from view.
Page 31 of 369
Buick Enclave Owner Manual (GMNA-Localizing-U.S./Canada/Mexico-
14637843) - 2021 - CRC - 12/9/20
30 Keys, Doors, and Windows
.Dirt, snow, or other debris blocks the
camera lens. Clean the lens with a soft
damp cloth, or if equipped, with the Rear
Camera Washer. SeeWindshield Wiper/
Washer 088.
.The back of the vehicle has been
damaged and the position and mounting
angle of the camera has changed.
Windows
{
Warning
Never leave a child, a helpless adult, or a
pet alone in a vehicle, especially with the
windows closed in warm or hot weather.
They can be overcome by the extreme
heat and suffer permanent injuries or
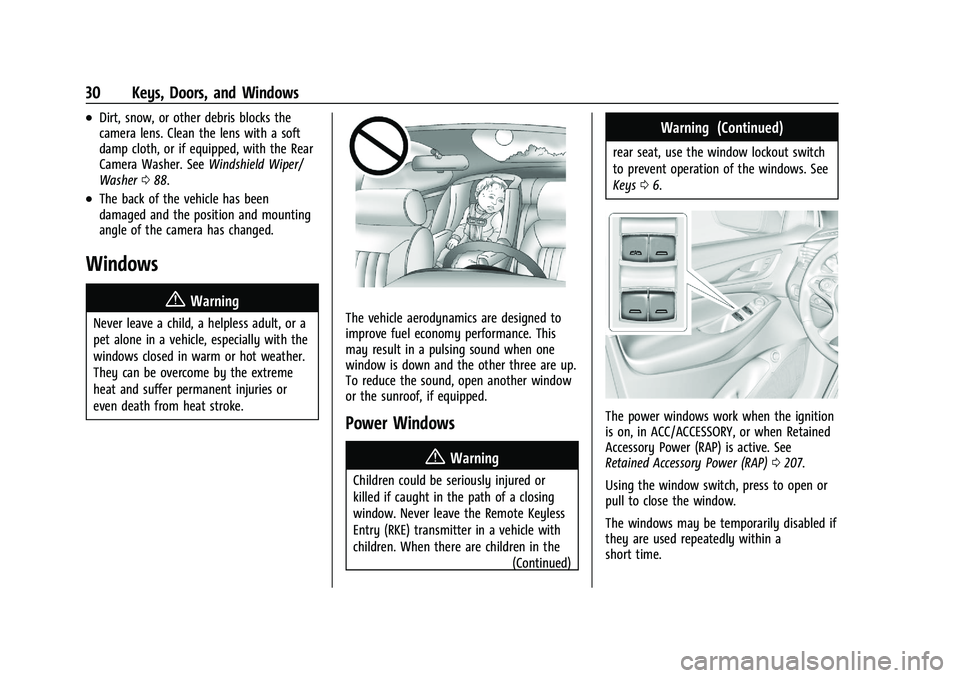
even death from heat stroke.The vehicle aerodynamics are designed to
improve fuel economy performance. This
may result in a pulsing sound when one
window is down and the other three are up.
To reduce the sound, open another window
or the sunroof, if equipped.
Power Windows
{Warning
Children could be seriously injured or
killed if caught in the path of a closing
window. Never leave the Remote Keyless
Entry (RKE) transmitter in a vehicle with
children. When there are children in the (Continued)
Warning (Continued)
rear seat, use the window lockout switch
to prevent operation of the windows. See
Keys06.
The power windows work when the ignition
is on, in ACC/ACCESSORY, or when Retained
Accessory Power (RAP) is active. See
Retained Accessory Power (RAP) 0207.
Using the window switch, press to open or
pull to close the window.
The windows may be temporarily disabled if
they are used repeatedly within a
short time.
Page 32 of 369

Buick Enclave Owner Manual (GMNA-Localizing-U.S./Canada/Mexico-
14637843) - 2021 - CRC - 12/9/20
Keys, Doors, and Windows 31
Window Lockout
This feature stops the rear window switches
from working.
With Power Folding Mirrors
Without Power Folding Mirrors
.Press2to engage the rear window
lockout feature. The indicator light is on
when engaged.
.Press2again to disengage.
Window Express Movement
All windows can be opened without holding
the window switch. Press the switch down
fully and quickly release to express open the
window.
If equipped, pull the window switch up fully
and quickly release to express close the
window. Briefly press or pull the window switch in
the same direction to stop that window’s
express movement.
Window Automatic Reversal System
The express-close feature will reverse
window movement if it comes in contact
with an object. Extreme cold or ice could
cause the window to auto-reverse. The
window will operate normally after the
object or condition is removed.
Automatic Reversal System Override
{Warning
If automatic reversal system override is
active, the window will not reverse
automatically. You or others could be
injured and the window could be
damaged. Before using automatic reversal
system override, make sure that all
people and obstructions are clear of the
window path.
When the engine is on, override the
automatic reversal system by pulling and
holding the window switch if conditions
prevent it from closing.
Page 35 of 369

Buick Enclave Owner Manual (GMNA-Localizing-U.S./Canada/Mexico-
14637843) - 2021 - CRC - 12/9/20
34 Seats and Restraints
Seats and Restraints
Head Restraints
Head Restraints . . . . . . . . . . . . . . . . . . . . . . . . 34
Front Seats
Power Seat Adjustment . . . . . . . . . . . . . . . . 36
Lumbar Adjustment . . . . . . . . . . . . . . . . . . . . 36
Reclining Seatbacks . . . . . . . . . . . . . . . . . . . . . 37
Memory Seats . . . . . . . . . . . . . . . . . . . . . . . . . . 37
Heated and Ventilated Front Seats . . . . . 40
Massage . . . . . . . . . . . . . . . . . . . . . . . . . . . . . . . . 41
Rear Seats
Rear Seats . . . . . . . . . . . . . . . . . . . . . . . . . . . . . . 41
Heated Rear Seats . . . . . . . . . . . . . . . . . . . . . . 44
Third Row Seats . . . . . . . . . . . . . . . . . . . . . . . . 44
Seat Belts
Seat Belts . . . . . . . . . . . . . . . . . . . . . . . . . . . . . . 46
How to Wear Seat Belts Properly . . . . . . . 47
Lap-Shoulder Belt . . . . . . . . . . . . . . . . . . . . . . . 48
Seat Belt Use During Pregnancy . . . . . . . . 51
Seat Belt Extender . . . . . . . . . . . . . . . . . . . . . . 51
Safety System Check . . . . . . . . . . . . . . . . . . . . 51
Seat Belt Care . . . . . . . . . . . . . . . . . . . . . . . . . . 51
Replacing Seat Belt System Parts after aCrash . . . . . . . . . . . . . . . . . . . . . . . . . . . . . . . . . 52
Airbag System
Airbag System . . . . . . . . . . . . . . . . . . . . . . . . . . 52 Where Are the Airbags? . . . . . . . . . . . . . . . . 54
When Should an Airbag Inflate? . . . . . . . . 55
What Makes an Airbag Inflate? . . . . . . . . . 56
How Does an Airbag Restrain? . . . . . . . . . 56
What Will You See after an Airbag
Inflates? . . . . . . . . . . . . . . . . . . . . . . . . . . . . . . 56
Passenger Sensing System . . . . . . . . . . . . . . 57
Servicing the Airbag-Equipped Vehicle . . . . . . . . . . . . . . . . . . . . . . . . . . . . . . . . 61
Adding Equipment to the Airbag-Equipped Vehicle . . . . . . . . . . . . . . 61
Airbag System Check . . . . . . . . . . . . . . . . . . . 62
Replacing Airbag System Parts after a Crash . . . . . . . . . . . . . . . . . . . . . . . . . . . . . . . . . 62
Child Restraints
Older Children . . . . . . . . . . . . . . . . . . . . . . . . . . 62
Infants and Young Children . . . . . . . . . . . . 64
Child Restraint Systems . . . . . . . . . . . . . . . . 66
Where to Put the Restraint . . . . . . . . . . . . . 67
Lower Anchors and Tethers for Children(LATCH System) . . . . . . . . . . . . . . . . . . . . . . 69
Replacing LATCH System Parts After a Crash . . . . . . . . . . . . . . . . . . . . . . . . . . . . . . . . . 76
Securing Child Restraints (With the Seat Belt in the Rear Seat) . . . . . . . . . . . . . . . . . 77
Securing Child Restraints (With the Seat Belt in the Front Seat) . . . . . . . . . . . . . . . . 79
Head Restraints
Front Seats
{Warning
With head restraints that are not
installed and adjusted properly, there is a
greater chance that occupants will suffer
a neck/spinal injury in a crash. Do not
drive until the head restraints for all
occupants are installed and adjusted
properly.
The vehicle's front seats have adjustable
head restraints in the outboard seating
positions.
Page 37 of 369

Buick Enclave Owner Manual (GMNA-Localizing-U.S./Canada/Mexico-
14637843) - 2021 - CRC - 12/9/20
36 Seats and Restraints
When an occupant is in the seat, always
return the head restraint to the upright
position. Pull the head restraint up and push
it rearward until it locks into place. Push and
pull on the head restraint to make sure that
it is locked.
Front Seats
Power Seat Adjustment
{Warning
You can lose control of the vehicle if you
try to adjust a driver seat while the
vehicle is moving. Adjust the driver seat
only when the vehicle is not moving.
{Warning
The power seats will work with the
ignition off. Children could operate the
power seats and be injured. Never leave
children alone in the vehicle.
To adjust the seat:
.Move the seat forward or rearward by
sliding the control forward or rearward.
.Raise or lower the front part of the seat
cushion by moving the front of the
control up or down.
.Raise or lower the entire seat by moving
the rear of the control up or down.
To adjust the seatback, see Reclining
Seatbacks 037.
To adjust the lumbar support, see Lumbar
Adjustment 036.
Lumbar Adjustment
Four-Way Shown, Two-Way Similar
To adjust the lumbar support, if equipped:
.Press and hold the front or rear of the
control to increase or decrease lumbar
support.
.If equipped, press and hold the top or
bottom of the control to raise or lower
lumbar support.
Page 38 of 369
Buick Enclave Owner Manual (GMNA-Localizing-U.S./Canada/Mexico-
14637843) - 2021 - CRC - 12/9/20
Seats and Restraints 37
Reclining Seatbacks
{Warning
Sitting in a reclined position when the
vehicle is in motion can be dangerous.
Even when buckled up, the seat belts
cannot do their job.
The shoulder belt will not be against
your body. Instead, it will be in front of
you. In a crash, you could go into it,
receiving neck or other injuries.
The lap belt could go up over your
abdomen. The belt forces would be there,
not at your pelvic bones. This could cause
serious internal injuries.
For proper protection when the vehicle is
in motion, have the seatback upright.
Then sit well back in the seat and wear
the seat belt properly.
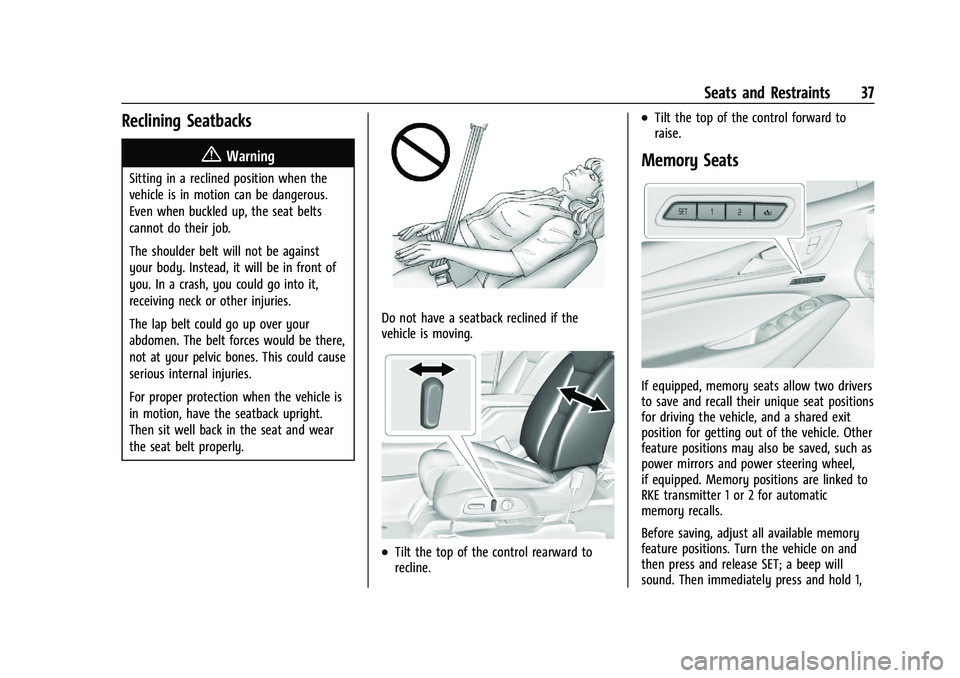
Do not have a seatback reclined if the
vehicle is moving.
.Tilt the top of the control rearward to
recline.
.Tilt the top of the control forward to
raise.
Memory Seats
If equipped, memory seats allow two drivers
to save and recall their unique seat positions
for driving the vehicle, and a shared exit
position for getting out of the vehicle. Other
feature positions may also be saved, such as
power mirrors and power steering wheel,
if equipped. Memory positions are linked to
RKE transmitter 1 or 2 for automatic
memory recalls.
Before saving, adjust all available memory
feature positions. Turn the vehicle on and
then press and release SET; a beep will
sound. Then immediately press and hold 1,
Page 41 of 369
Buick Enclave Owner Manual (GMNA-Localizing-U.S./Canada/Mexico-
14637843) - 2021 - CRC - 12/9/20
40 Seats and Restraints
Obstructions
If something has blocked the driver seat
and/or power steering wheel while recalling
a memory position, the recall may stop.
Remove the obstruction and try the recall
again. If the memory position still does not
recall, see your dealer.
Heated and Ventilated Front
Seats
{Warning
If temperature change or pain to the skin
cannot be felt, the seat heater may cause
burns. To reduce the risk of burns, use
care when using the seat heater,
especially for long periods of time. Do
not place anything on the seat that
insulates against heat, such as a blanket,
cushion, cover, or similar item. This may
cause the seat heater to overheat. An
overheated seat heater may cause a burn
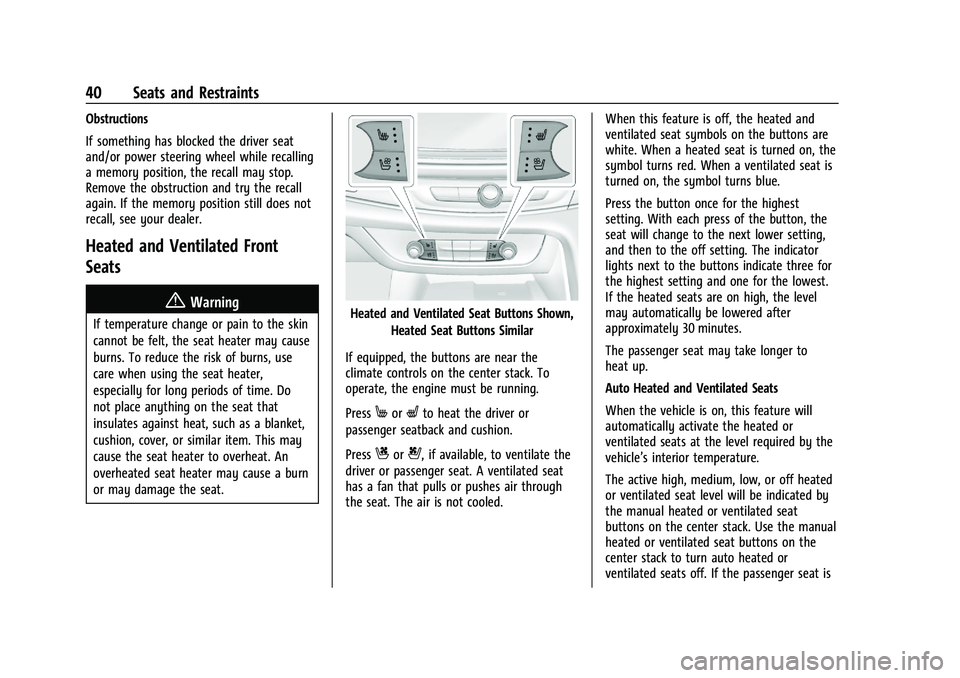
or may damage the seat.Heated and Ventilated Seat Buttons Shown,Heated Seat Buttons Similar
If equipped, the buttons are near the
climate controls on the center stack. To
operate, the engine must be running.
Press
MorLto heat the driver or
passenger seatback and cushion.
Press
Cor{, if available, to ventilate the
driver or passenger seat. A ventilated seat
has a fan that pulls or pushes air through
the seat. The air is not cooled. When this feature is off, the heated and
ventilated seat symbols on the buttons are
white. When a heated seat is turned on, the
symbol turns red. When a ventilated seat is
turned on, the symbol turns blue.
Press the button once for the highest
setting. With each press of the button, the
seat will change to the next lower setting,
and then to the off setting. The indicator
lights next to the buttons indicate three for
the highest setting and one for the lowest.
If the heated seats are on high, the level
may automatically be lowered after
approximately 30 minutes.
The passenger seat may take longer to
heat up.
Auto Heated and Ventilated Seats
When the vehicle is on, this feature will
automatically activate the heated or
ventilated seats at the level required by the
vehicle’s interior temperature.
The active high, medium, low, or off heated
or ventilated seat level will be indicated by
the manual heated or ventilated seat
buttons on the center stack. Use the manual
heated or ventilated seat buttons on the
center stack to turn auto heated or
ventilated seats off. If the passenger seat is
Page 43 of 369

Buick Enclave Owner Manual (GMNA-Localizing-U.S./Canada/Mexico-
14637843) - 2021 - CRC - 12/9/20
42 Seats and Restraints
Rear Seat Adjustment
The second row seats slide forward for
more room.
To adjust the seat position:1. Remove objects on the floor in front of or on the second row seat, or in the seat
tracks on the floor.
2. Lift the lever below the seat cushion and slide the seat forward or backward.
Entering and Exiting the Third Row
{Warning
Using the third row seating position
while the second row is folded could
cause injury in a sudden stop or crash. Be
sure to return the seat to the passenger
seating position. Push and pull on the
seat to make sure it is locked into place.
{Warning
If the seatback and seat base are not
locked, the seat could move forward in a
sudden stop or crash and injure the
occupant. Always push and pull on the
seatbacks to be sure the seatback and
seat base are locked.
Caution
Folding a rear seat with the seat belts
still fastened may cause damage to the
seat or the seat belts. Always unbuckle
the seat belts and return them to their
normal stowed position before folding a
rear seat. To access the third row from the
passenger side:
The second row passenger side seat can be
easily moved for third row entry or exit
with a forward-facing child restraint installed
using the LATCH system. Remove a
rear-facing child restraint before moving the
seat for third row entry or exit.
{Warning
Remove the child from the child restraint
before moving the seat forward for third
row entry or exit. Failure to do so may
result in injury to the child.
1. Remove objects on the floor in front of or under the second row seat, or in the
seat tracks on the floor.
Page 45 of 369
Buick Enclave Owner Manual (GMNA-Localizing-U.S./Canada/Mexico-
14637843) - 2021 - CRC - 12/9/20
44 Seats and Restraints
Heated Rear Seats
{Warning
If temperature change or pain to the skin
cannot be felt, the seat heater may cause
burns. See the Warning underHeated
and Ventilated Front Seats 040.
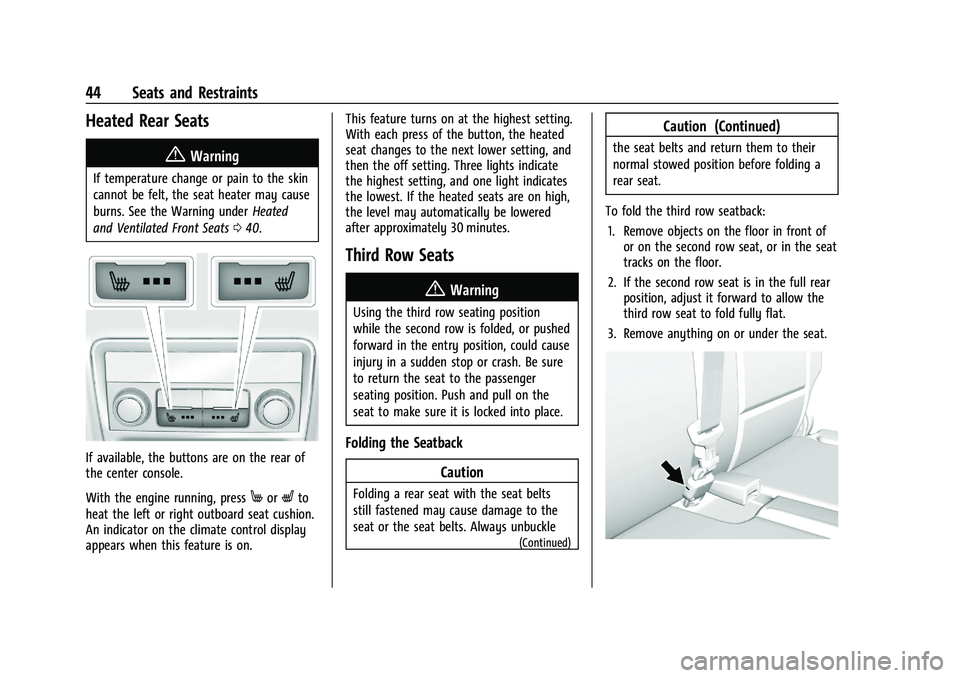
If available, the buttons are on the rear of
the center console.
With the engine running, press
MorLto
heat the left or right outboard seat cushion.
An indicator on the climate control display
appears when this feature is on. This feature turns on at the highest setting.
With each press of the button, the heated
seat changes to the next lower setting, and
then the off setting. Three lights indicate
the highest setting, and one light indicates
the lowest. If the heated seats are on high,
the level may automatically be lowered
after approximately 30 minutes.
Third Row Seats
{Warning
Using the third row seating position
while the second row is folded, or pushed
forward in the entry position, could cause
injury in a sudden stop or crash. Be sure
to return the seat to the passenger
seating position. Push and pull on the
seat to make sure it is locked into place.
Folding the Seatback
Caution
Folding a rear seat with the seat belts
still fastened may cause damage to the
seat or the seat belts. Always unbuckle
(Continued)
Caution (Continued)
the seat belts and return them to their
normal stowed position before folding a
rear seat.
To fold the third row seatback: 1. Remove objects on the floor in front of or on the second row seat, or in the seat
tracks on the floor.
2. If the second row seat is in the full rear position, adjust it forward to allow the
third row seat to fold fully flat.
3. Remove anything on or under the seat.