start stop button BUICK ENCLAVE 2023 Owners Manual
[x] Cancel search | Manufacturer: BUICK, Model Year: 2023, Model line: ENCLAVE, Model: BUICK ENCLAVE 2023Pages: 366, PDF Size: 6.62 MB
Page 6 of 366

Buick Enclave Owner Manual (GMNA-Localizing-U.S./Canada/Mexico-
16411536) - 2023 - CRC - 3/28/22
Introduction 5
1.Air Vents 0183.
2. Turn Signal Lever. See Turn and
Lane-Change Signals 0126.
Exterior Lamp Controls 0123.
3. Manual Mode 0209.
4. Instrument Cluster (Base Level) 096 or
Instrument Cluster (Uplevel) 098.
Driver Information Center (DIC) Display.
See Driver Information Center (DIC) (Base
Level) 0112 orDriver Information Center
(DIC) (Uplevel) 0114.
5. Windshield Wiper/Washer 089.
6. Auto Stop Disable Switch. See Stop/Start
System 0201.
All-Wheel Drive Button (If Equipped). See
Driver Mode Control 0214.
Sport Mode Button (If Equipped) or Tow/
Haul Mode Button (If Equipped). See
Driver Mode Control 0214.
7. Light Sensor. See Automatic Headlamp
System 0125.
8. Hazard Warning Flashers 0126.
Assistance Systems for Parking or Backing
0 226 (If Equipped).
Lane Keep Assist (LKA) 0239 (If
Equipped). 9. Infotainment Controls. See
Overview
0 131.
10. Dual Automatic Climate Control System
0178.
Heated and Ventilated Front Seats 041
(If Equipped).
11. Wireless Charging 093 (If Equipped).
12. Shift Lever. See Automatic Transmission
0 206.
13. USB Port 0139.
14. ENGINE START/STOP Button. See Ignition
Positions 0199.
15. Steering Wheel Controls 0132.
16. Horn 089.
17. Steering Wheel Adjustment 088 (Out
of View).
18. Cruise Control 0215.
Adaptive Cruise Control (Advanced) 0217
(If Equipped).
Heated Steering Wheel 088 (If
Equipped).
Forward Collision Alert (FCA) System
0 232 (If Equipped).
19. Hood Release. See Hood0259. 20. Data Link Connector (DLC) (Out of View).
SeeMalfunction Indicator Lamp (Check
Engine Light) 0105.
21. Instrument Panel Illumination Control
0126.
22. Head-Up Display (HUD) 0117 (If
Equipped).
23. Electric Parking Brake 0210.
Page 9 of 366
Buick Enclave Owner Manual (GMNA-Localizing-U.S./Canada/Mexico-
16411536) - 2023 - CRC - 3/28/22
8 Keys, Doors, and Windows
settings for this feature, touch the Settings
icon on the infotainment home page. Select
“Vehicle”to display the list of available
options and select “Power Door Locks”.
If the passenger door is open when
Qis
pressed, all doors lock.
Pressing
Qmay also arm the theft-deterrent
system. See Vehicle Alarm System 025.
If equipped with auto mirror folding, press
and hold
Qfor one second to fold the
mirrors, if enabled. To view available
settings for this feature, touch the Settings
icon on the infotainment home page. Select
“Vehicle” to display the list of available
options and select “Comfort and
Convenience”.
K: Press to unlock the driver door. Press
unlock again within five seconds to unlock
all doors. The remote key can be
programmed to unlock all doors on the first
button press. Select “Vehicle”to display the
list of available options and select “Remote
Lock, Unlock, Start”. When remotely
unlocking the vehicle at night the back-up
lamps will come on for about 30 seconds to
light your approach to the vehicle. The turn
signal indicators may flash to indicate unlocking. Select
“Vehicle”to display the list
of available options and select “Comfort and
Convenience”.
Pressing
Kwill disarm the theft-deterrent
system. See Vehicle Alarm System 025.
If equipped with auto mirror folding, press
and hold
Kfor one second to unfold the
mirrors, if enabled. To view available
settings for this feature, touch the Settings
icon on the infotainment home page. Select
“Vehicle” to display the list of available
options and select “Comfort and
Convenience”.
If equipped with remote windows, press and
hold
Kto open all of the windows,
if enabled. To view available settings for this
feature, touch the Settings icon on the
infotainment home page. Select “Vehicle”to
display the list of available options and
select “Remote Lock, Unlock, Start”.
/:Press and releaseQand then
immediately press and hold
/for at least
four seconds to start the engine from
outside the vehicle using the remote key.
See Remote Vehicle Start 013.
7:Press and release one time to initiate
vehicle locator. The exterior lamps flash and
the horn chirps three times. Press and hold
7for three seconds to sound the panic
alarm. The horn sounds and the turn signal
lamps flash for 30 seconds, or until
7is
pressed again or the vehicle is started.
b: If equipped, press twice quickly to
open or close the liftgate.
Press once to stop the liftgate from moving.
Keyless Access Operation
With the Keyless Access system, you can
lock and unlock the doors and access the
liftgate without removing the remote key
from your pocket, purse, briefcase, etc. The
remote key should be within 1 m (3 ft) of the
liftgate or door being opened. The buttons
are on the outside door handles.
Keyless Access can be programmed to
unlock all doors on the first lock/unlock
press from the driver door. Keyless
Unlocking can also be turned off. To view
available settings for this feature, touch the
Settings icon on the infotainment home
page. Select “Vehicle”to display the list of
available options and select “Remote Lock,
Unlock, Start”.
Page 12 of 366
Buick Enclave Owner Manual (GMNA-Localizing-U.S./Canada/Mexico-
16411536) - 2023 - CRC - 3/28/22
Keys, Doors, and Windows 11
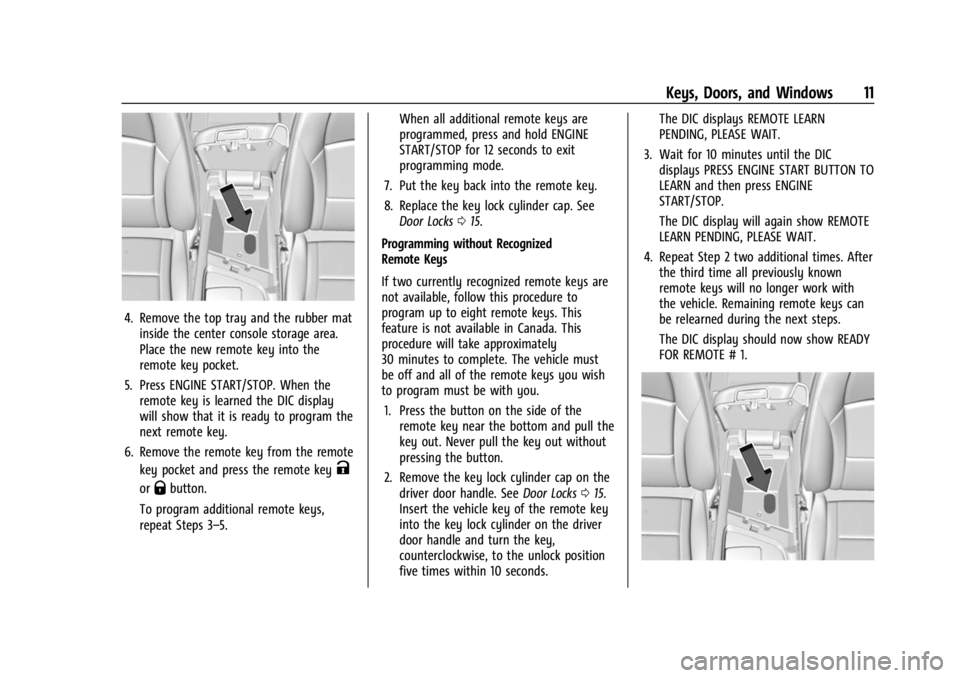
4. Remove the top tray and the rubber matinside the center console storage area.
Place the new remote key into the
remote key pocket.
5. Press ENGINE START/STOP. When the remote key is learned the DIC display
will show that it is ready to program the
next remote key.
6. Remove the remote key from the remote key pocket and press the remote key
K
orQbutton.
To program additional remote keys,
repeat Steps 3–5. When all additional remote keys are
programmed, press and hold ENGINE
START/STOP for 12 seconds to exit
programming mode.
7. Put the key back into the remote key.
8. Replace the key lock cylinder cap. See Door Locks 015.
Programming without Recognized
Remote Keys
If two currently recognized remote keys are
not available, follow this procedure to
program up to eight remote keys. This
feature is not available in Canada. This
procedure will take approximately
30 minutes to complete. The vehicle must
be off and all of the remote keys you wish
to program must be with you. 1. Press the button on the side of the remote key near the bottom and pull the
key out. Never pull the key out without
pressing the button.
2. Remove the key lock cylinder cap on the driver door handle. See Door Locks015.
Insert the vehicle key of the remote key
into the key lock cylinder on the driver
door handle and turn the key,
counterclockwise, to the unlock position
five times within 10 seconds. The DIC displays REMOTE LEARN
PENDING, PLEASE WAIT.
3. Wait for 10 minutes until the DIC displays PRESS ENGINE START BUTTON TO
LEARN and then press ENGINE
START/STOP.
The DIC display will again show REMOTE
LEARN PENDING, PLEASE WAIT.
4. Repeat Step 2 two additional times. After the third time all previously known
remote keys will no longer work with
the vehicle. Remaining remote keys can
be relearned during the next steps.
The DIC display should now show READY
FOR REMOTE # 1.
Page 13 of 366
Buick Enclave Owner Manual (GMNA-Localizing-U.S./Canada/Mexico-
16411536) - 2023 - CRC - 3/28/22
12 Keys, Doors, and Windows
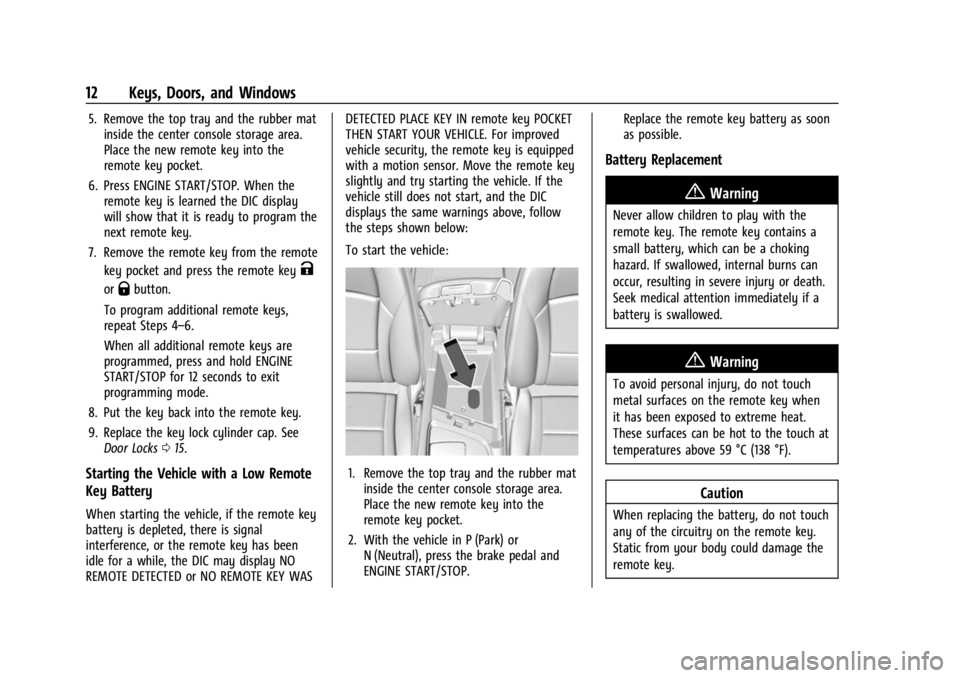
5. Remove the top tray and the rubber matinside the center console storage area.
Place the new remote key into the
remote key pocket.
6. Press ENGINE START/STOP. When the remote key is learned the DIC display
will show that it is ready to program the
next remote key.
7. Remove the remote key from the remote key pocket and press the remote key
K
orQbutton.
To program additional remote keys,
repeat Steps 4–6.
When all additional remote keys are
programmed, press and hold ENGINE
START/STOP for 12 seconds to exit
programming mode.
8. Put the key back into the remote key.
9. Replace the key lock cylinder cap. See Door Locks 015.
Starting the Vehicle with a Low Remote
Key Battery
When starting the vehicle, if the remote key
battery is depleted, there is signal
interference, or the remote key has been
idle for a while, the DIC may display NO
REMOTE DETECTED or NO REMOTE KEY WAS DETECTED PLACE KEY IN remote key POCKET
THEN START YOUR VEHICLE. For improved
vehicle security, the remote key is equipped
with a motion sensor. Move the remote key
slightly and try starting the vehicle. If the
vehicle still does not start, and the DIC
displays the same warnings above, follow
the steps shown below:
To start the vehicle:
1. Remove the top tray and the rubber mat
inside the center console storage area.
Place the new remote key into the
remote key pocket.
2. With the vehicle in P (Park) or N (Neutral), press the brake pedal and
ENGINE START/STOP. Replace the remote key battery as soon
as possible.
Battery Replacement
{Warning
Never allow children to play with the
remote key. The remote key contains a
small battery, which can be a choking
hazard. If swallowed, internal burns can
occur, resulting in severe injury or death.
Seek medical attention immediately if a
battery is swallowed.
{Warning
To avoid personal injury, do not touch
metal surfaces on the remote key when
it has been exposed to extreme heat.
These surfaces can be hot to the touch at
temperatures above 59 °C (138 °F).
Caution
When replacing the battery, do not touch
any of the circuitry on the remote key.
Static from your body could damage the
remote key.
Page 15 of 366
Buick Enclave Owner Manual (GMNA-Localizing-U.S./Canada/Mexico-
16411536) - 2023 - CRC - 3/28/22
14 Keys, Doors, and Windows
Do not use the remote start feature if the
vehicle is low on fuel. The vehicle could run
out of fuel.
The remote key range may be less while the
vehicle is running.
Other conditions can affect the performance
of the remote key. SeeRemote Key07.
Starting the Engine Using Remote Start
To start the vehicle:
1. Press and release
Qon the remote key.
2. Immediately after completing Step 1, press and hold
/until the lamps flash.
If the vehicle's lights cannot be seen,
press and hold
/for at least
four seconds.
When the vehicle starts, the park lamps will
turn on and remain on as long as the
engine is running. The doors will be locked
and the climate control system will operate
automatically if the vehicle has the
automatic system, or at the same setting as
when the vehicle was last turned off.
With an automatic climate control system
and if equipped with heated seats, the
heated seats turn on during colder outside temperatures and shut off when the ignition
is turned on. See
Heated and Ventilated
Front Seats 041.
If equipped with an auto heated steering
wheel, it may come on during a remote
start. See Heated Steering Wheel 088.
The rear window defogger and heated
mirrors, if equipped, turn on during colder
outside temperatures and turn off when the
ignition is turned on.
After entering the vehicle during a remote
start, press the brake and ENGINE START/
STOP with the remote key in the vehicle to
drive the vehicle.
If the vehicle is left running, it automatically
shuts off after 15 minutes unless a time
extension has been done.
Extending Engine Run Time
To extend the engine run time by
15 minutes, repeat Steps 1 and 2 while the
engine is still running. An extension can be
requested 30 seconds after starting. The
engine run time can only be extended if it is
the first remote start since the vehicle has
been driven. Remote start can be extended
one time. If the remote start procedure is used again
while the engine is still running, 15 minutes
will be added on for a total of 30 minutes.
For example, if
Qand then/are pressed
again while the engine is still running,
15 minutes will be added on for a total of
30 minutes.
A maximum of two remote starts or remote
start with an extension are allowed between
ignition cycles.
After the vehicle's engine has been started
two times using the remote start button or
a start with an extension, the ignition must
be turned on and then back off before the
remote start procedure can be used again.
Canceling a Remote Start
To manually shut off a remote start:
.Press and hold/until the lamps
turn off.
.Turn on the hazard warning flashers.
.Turn the ignition switch on and then off.
Conditions in Which the Remote Start
Will Not Work
The remote start will not operate if any of
the following occur:
Page 16 of 366
Buick Enclave Owner Manual (GMNA-Localizing-U.S./Canada/Mexico-
16411536) - 2023 - CRC - 3/28/22
Keys, Doors, and Windows 15
.The hood is open.
.The remote key is in the vehicle.
.The vehicle is on.
.There is an emission control system
malfunction.
.The vehicle is not in park.
.The hazard switch is on.
.Two remote starts or a remote start with
an extension have already been used.
The engine turns off during a remote start if
the coolant temperature gets too high or if
the oil pressure gets low.
Door Locks
{Warning
Unlocked doors can be dangerous.
.Passengers, especially children, can
easily open the doors and fall out of a
moving vehicle. The doors can be
unlocked and opened while the vehicle
is moving. The chance of being thrown
out of the vehicle in a crash is
increased if the doors are not locked.
So, all passengers should wear seat
belts properly and the doors should be
locked whenever the vehicle is driven. (Continued)
Warning (Continued)
.Young children who get into unlocked
vehicles may be unable to get out.
A child can be overcome by extreme
heat and can suffer permanent injuries
or even death from heat stroke.
Always lock the vehicle whenever
leaving it.
.Outsiders can easily enter through an
unlocked door when you slow down
or stop the vehicle. Locking the doors
can help prevent this from happening.
To lock/unlock the doors from the outside:
.PressQorKon the remote key. See
Remote Key Operation 07.
.Use the key in the driver door. The key
lock cylinder is covered with a cap.
To lock/unlock the doors from the inside:
.PressQorKon the power door lock
switch.
.Push down on the door lock knob to lock
a door.
.Pull the door handle once to unlock it.
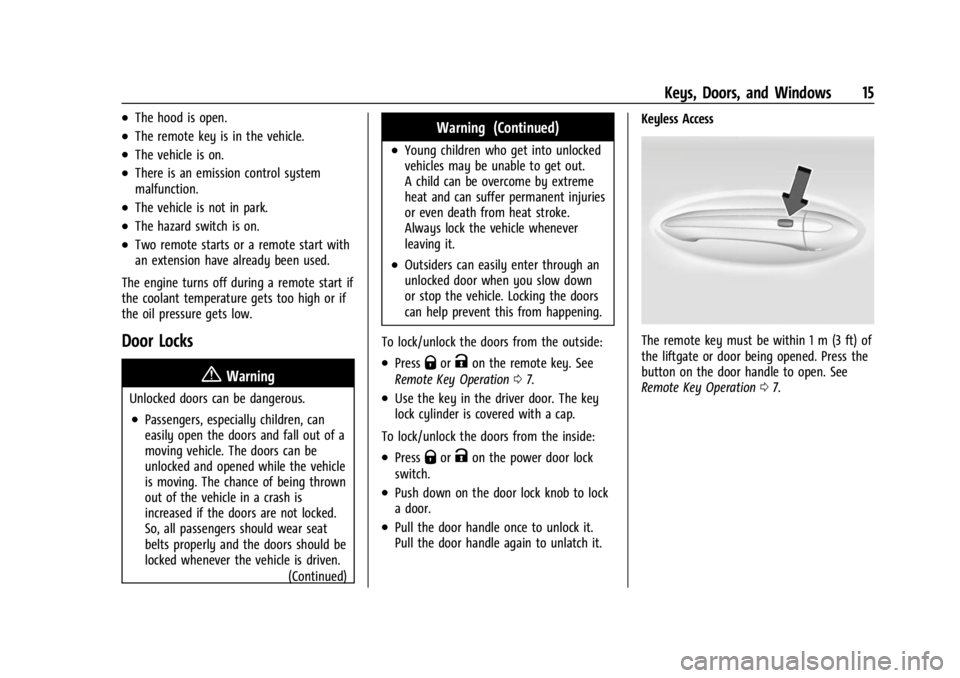
Pull the door handle again to unlatch it. Keyless Access
The remote key must be within 1 m (3 ft) of
the liftgate or door being opened. Press the
button on the door handle to open. See
Remote Key Operation
07.
Page 21 of 366

Buick Enclave Owner Manual (GMNA-Localizing-U.S./Canada/Mexico-
16411536) - 2023 - CRC - 3/28/22
20 Keys, Doors, and Windows
If equipped, the power liftgate switch is on
the driver door. The vehicle must be in
P (Park).
The modes are:
.MAX: Opens to maximum height.
.3/4: Opens to a reduced height that can
be set from 3/4 to fully open. Use to
prevent the liftgate from opening into
overhead obstructions such as a garage
door or roof-mounted cargo. The liftgate
can be manually opened all the way.
.OFF: Opens manually only.
To power open or close the liftgate, select
MAX or 3/4 mode.
.Pressbtwice quickly on the remote
key until the liftgate moves.
.Press8on the driver door. The driver
door must be unlocked.
.Press the touch pad on the underside of
the liftgate handle after unlocking all
doors. A locked vehicle can be opened if
the remote key is within 1 m (3 ft) of the
liftgate.
.Presslon the bottom edge of the
liftgate to the left of the latch to close.
Press any liftgate button, the touch pad,
or
bon the remote key while the liftgate
is moving to stop it. Pressing any liftgate
button or pressing
btwice quickly on the
remote key restarts the operation in the
reverse direction. Pressing the touch pad on
the liftgate handle will restart the motion,
but only in the opening direction.
Caution
Manually forcing the liftgate to open or
close during a power cycle can damage
the vehicle. Allow the power cycle to
complete. The power liftgate may be temporarily
disabled under extreme low temperatures,
or after repeated power cycling over a short
period of time. If this occurs, the liftgate can
still be operated manually.
If the vehicle is shifted out of P (Park) while
the power function is in progress, the
liftgate will continue to completion. If the
vehicle is accelerated before the liftgate has
completed moving, the liftgate may stop or
reverse direction. Check for DIC messages
and make sure the liftgate is closed and
latched before driving.
Falling Liftgate Detection
If the power liftgate automatically closes
after a power opening cycle, it indicates that
the system is reacting to excess weight on
the liftgate or a possible support strut
failure. A repetitive chime will sound while
the falling liftgate detection feature is
operating. Remove any excess weight. If the
liftgate continues to automatically close
after opening, see your dealer for service
before using the power liftgate.
Interfering with the power liftgate motion
or manually closing the liftgate too quickly
after power opening may resemble a
support strut failure. This could also activate
the falling liftgate detection feature. Allow
Page 39 of 366

Buick Enclave Owner Manual (GMNA-Localizing-U.S./Canada/Mexico-
16411536) - 2023 - CRC - 3/28/22
38 Seats and Restraints
Do not have a seatback reclined if the
vehicle is moving.
.Tilt the top of the control rearward to
recline.
.Tilt the top of the control forward to
raise.
Lumbar Adjustment
Four-Way Shown, Two-Way Similar
To adjust the lumbar support, if equipped:
.Press and hold the front or rear of the
control to increase or decrease lumbar
support.
.If equipped, press and hold the top or
bottom of the control to raise or lower
lumbar support.
Massage
If equipped, the ignition must be on to use
the massage feature.
If equipped, press the massage button to
use the massage feature. To stop massage,
press this button again.
The massage feature will turn off after
approximately 10 minutes. Press the
massage button to restart the massage
feature.
Page 121 of 366
Buick Enclave Owner Manual (GMNA-Localizing-U.S./Canada/Mexico-
16411536) - 2023 - CRC - 3/28/22
120 Instruments and Controls
Follow the instructions given in the
messages. The system displays messages
regarding the following topics:
.Service Messages
.Fluid Levels
.Vehicle Security
.Brakes
.Steering
.Ride Control Systems
.Driver Assistance Systems
.Cruise Control
.Lighting and Bulb Replacement
.Wiper/Washer Systems
.Doors and Windows
.Seat Belts
.Airbag Systems
.Engine and Transmission
.Tire Pressure
.Battery
Engine Power Messages
ENGINE POWER IS REDUCED
This message displays when the vehicle's
propulsion power is reduced. A reduction in
propulsion power can affect the vehicle's
ability to accelerate. If this message is on,but there is no observed reduction in
performance, proceed to your destination.
Under certain conditions the performance
may be reduced the next time the vehicle is
driven. The vehicle may be driven while this
message is on, but maximum acceleration
and speed may be reduced. Anytime this
message stays on, or displays repeatedly,
the vehicle should be taken to your dealer
for service as soon as possible.
Under certain operating conditions,
propulsion will be disabled. Try restarting
after the ignition has been off for
30 seconds.
Vehicle Speed Messages
SPEED LIMITED TO XXX KM/H (MPH)
This message shows that the vehicle speed
has been limited to the speed displayed. The
limited speed is a protection for various
propulsion and vehicle systems, such as
lubrication, thermal, brakes, suspension,
Teen Driver if equipped, or tires.
Universal Remote System
See
Radio Frequency Statement 0343.
Universal Remote System
Programming
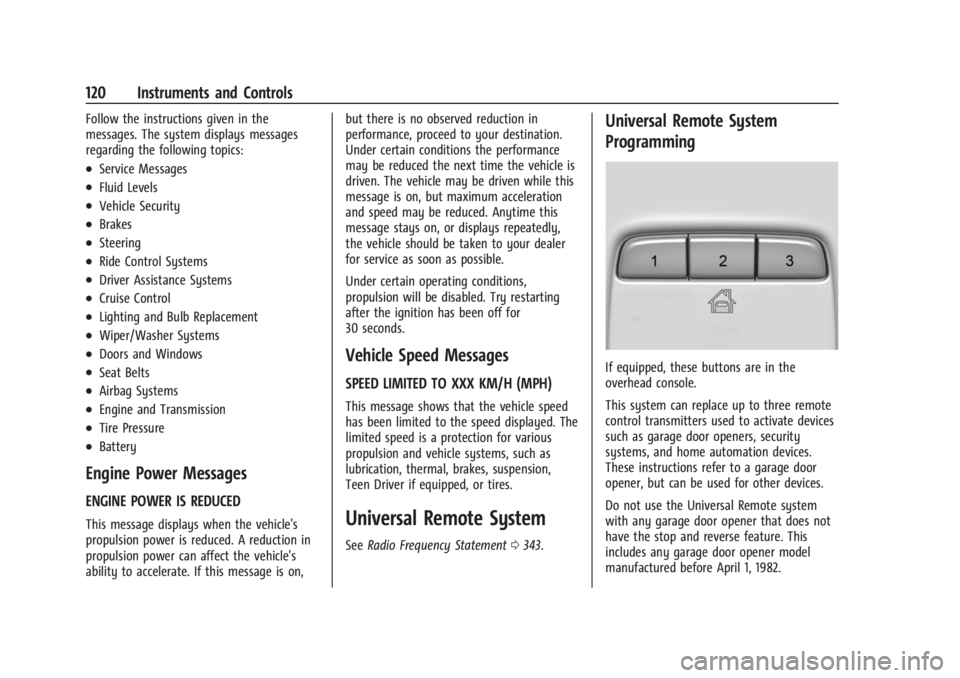
If equipped, these buttons are in the
overhead console.
This system can replace up to three remote
control transmitters used to activate devices
such as garage door openers, security
systems, and home automation devices.
These instructions refer to a garage door
opener, but can be used for other devices.
Do not use the Universal Remote system
with any garage door opener that does not
have the stop and reverse feature. This
includes any garage door opener model
manufactured before April 1, 1982.
Page 170 of 366
Buick Enclave Owner Manual (GMNA-Localizing-U.S./Canada/Mexico-
16411536) - 2023 - CRC - 3/28/22
Infotainment System 169
2. For automatic transmissions, the vehiclemust be in P (Park). For manual
transmissions, the vehicle must be
stopped with the parking brake set.
3. From the Settings menu, touch Vehicle and then Teen Driver.
4. Enter the PIN.
5. Place the remote key you wish to register in the transmitter pocket. The
key does not need to be the one that
started the vehicle. See Remote Key
Operation 07for transmitter pocket
location.
6. From the Teen Driver menu, touch Setup Keys or Add/Remove Teen Driver Keys.
.If the remote key has not previously
been registered, the option to add
the key displays. Touch Add and a
confirmation message displays. Teen
Driver restrictions will be applied
whenever this remote key is used to
operate the vehicle.
.If the remote key has already been
registered, the option to remove the
key displays. If Remove is touched,
the remote key is no longer
registered. A confirmation message displays, and Teen Driver restrictions
will not be applied if this remote key
is used to operate the vehicle.
In vehicles with a pushbutton start system,
if a Teen Driver and a non-Teen Driver key
are both present at start up, the vehicle will
recognize the non-Teen Driver key to start
the vehicle. The Teen Driver settings will not
be active.
For a keyed ignition system: 1. Start the vehicle.
2. For automatic transmissions, the vehicle must be in P (Park). For manual
transmissions, the vehicle must be
stopped with the parking brake set.
3. From the Settings menu, touch Vehicle and then Teen Driver.
4. Enter the PIN.
5. Touch Setup Keys or Add/Remove Teen Driver Keys. The system displays
instructions for registering or
unregistering a key. A confirmation
message displays.
Manage Settings or Teen Driver Settings
Depending on the options of your vehicle,
the following menu items may be displayed: Buckle to Drive :
When turned ON, Buckle to
Drive prevents the driver from shifting out
of P (Park) for a period of time after the
brake pedal is pressed if the driver, or on
some vehicles the detected passenger, has
not buckled their seat belt. On some
vehicles, Buckle to Drive is always ON when
Teen Driver is active and is not configurable.
Audio Volume Limit : Allows a maximum
audio volume to be set. Turn the audio
volume limit on or off. Use the arrows to
choose the maximum allowable level for the
audio volume. On some infotainment
systems, touch Set Audio Volume Limit to
choose the maximum allowable audio
volume level.
Set Audio Volume Limit : Use the arrows to
choose the maximum allowable level for the
audio volume.
Teen Driver Speed Limiter : Limits the
maximum speed of the vehicle. When the
speed limiter is turned on and the vehicle is
started with a Teen Driver key, the DIC
displays a message that the top speed is
limited.