light BUICK ENCORE 2021 Repair Manual
[x] Cancel search | Manufacturer: BUICK, Model Year: 2021, Model line: ENCORE, Model: BUICK ENCORE 2021Pages: 313, PDF Size: 11.21 MB
Page 202 of 313
Buick Encore Owner Manual (GMNA-Localizing-U.S./Canada-14607636) -
2021 - CRC - 8/18/20
Vehicle Care 201
Vehicle Care
General Information
General Information . . . . . . . . . . . . . . . . . . . 202
California Proposition 65 Warning . . . . . 202
California Perchlorate MaterialsRequirements . . . . . . . . . . . . . . . . . . . . . . . . 202
Accessories and Modifications . . . . . . . . . 202
Vehicle Checks
Doing Your Own Service Work . . . . . . . . 203
Hood . . . . . . . . . . . . . . . . . . . . . . . . . . . . . . . . . . 203
Engine Compartment Overview . . . . . . . . 205
Engine Oil . . . . . . . . . . . . . . . . . . . . . . . . . . . . . 208
Engine Oil Life System . . . . . . . . . . . . . . . . . 210
Automatic Transmission Fluid . . . . . . . . . . 210
Engine Air Cleaner/Filter . . . . . . . . . . . . . . . 211
Cooling System . . . . . . . . . . . . . . . . . . . . . . . . 212
Engine Overheating . . . . . . . . . . . . . . . . . . . . 215
Washer Fluid . . . . . . . . . . . . . . . . . . . . . . . . . . 216
Brakes . . . . . . . . . . . . . . . . . . . . . . . . . . . . . . . . . 217
Brake Fluid . . . . . . . . . . . . . . . . . . . . . . . . . . . . 218
Battery - North America . . . . . . . . . . . . . . . 219
All-Wheel Drive . . . . . . . . . . . . . . . . . . . . . . . . 219
Starter Switch Check . . . . . . . . . . . . . . . . . . . 219
Automatic Transmission Shift Lock Control Function Check . . . . . . . . . . . . . . 220
Park Brake and P (Park) Mechanism Check . . . . . . . . . . . . . . . . . . . . . . . . . . . . . . . . 220
Wiper Blade Replacement . . . . . . . . . . . . . 220 Windshield Replacement . . . . . . . . . . . . . . . 221
Gas Strut(s) . . . . . . . . . . . . . . . . . . . . . . . . . . . . 222
Headlamp Aiming
Front Headlamp Aiming . . . . . . . . . . . . . . . 223
Bulb Replacement
Bulb Replacement . . . . . . . . . . . . . . . . . . . . . 223
Halogen Bulbs . . . . . . . . . . . . . . . . . . . . . . . . . 223
LED Lighting . . . . . . . . . . . . . . . . . . . . . . . . . . . 223
Headlamps, Front Turn Signal and
Parking Lamps . . . . . . . . . . . . . . . . . . . . . . . 223
Taillamps, Turn Signal, Sidemarker, Stoplamps, and Back-Up Lamps . . . . . . 224
License Plate Lamp . . . . . . . . . . . . . . . . . . . . 225
Electrical System
Electrical System Overload . . . . . . . . . . . . 226
Fuses and Circuit Breakers . . . . . . . . . . . . . 226
Engine Compartment Fuse Block . . . . . . . 227
Instrument Panel Fuse Block . . . . . . . . . . 230
Rear Compartment Fuse Block . . . . . . . . . 231
Wheels and Tires
Tires . . . . . . . . . . . . . . . . . . . . . . . . . . . . . . . . . . . 232
All-Season Tires . . . . . . . . . . . . . . . . . . . . . . . . 233
Winter Tires . . . . . . . . . . . . . . . . . . . . . . . . . . . 233
Tire Sidewall Labeling . . . . . . . . . . . . . . . . . 234
Tire Designations . . . . . . . . . . . . . . . . . . . . . . 235
Tire Terminology and Definitions . . . . . . 236
Tire Pressure . . . . . . . . . . . . . . . . . . . . . . . . . . 238
Tire Pressure Monitor System . . . . . . . . . 239 Tire Pressure Monitor Operation . . . . . . 240
Tire Inspection . . . . . . . . . . . . . . . . . . . . . . . . 242
Tire Rotation . . . . . . . . . . . . . . . . . . . . . . . . . . 242
When It Is Time for New Tires . . . . . . . . 243
Buying New Tires . . . . . . . . . . . . . . . . . . . . . 244
Different Size Tires and Wheels . . . . . . . 245
Uniform Tire Quality Grading . . . . . . . . . 245
Wheel Alignment and Tire Balance . . . . 247
Wheel Replacement . . . . . . . . . . . . . . . . . . . 247
Tire Chains . . . . . . . . . . . . . . . . . . . . . . . . . . . . 247
If a Tire Goes Flat . . . . . . . . . . . . . . . . . . . . . 248
Tire Changing . . . . . . . . . . . . . . . . . . . . . . . . . 249
Compact Spare Tire . . . . . . . . . . . . . . . . . . . . 252
Jump Starting
Jump Starting - North America . . . . . . . . 253
Towing the Vehicle
Towing the Vehicle . . . . . . . . . . . . . . . . . . . . 255
Recreational Vehicle Towing . . . . . . . . . . . 256
Appearance Care
Exterior Care . . . . . . . . . . . . . . . . . . . . . . . . . . 258
Interior Care . . . . . . . . . . . . . . . . . . . . . . . . . . . 262
Floor Mats . . . . . . . . . . . . . . . . . . . . . . . . . . . . 264
Page 212 of 313
Buick Encore Owner Manual (GMNA-Localizing-U.S./Canada-14607636) -
2021 - CRC - 8/18/20
Vehicle Care 211
Caution
Use of the incorrect automatic
transmission fluid may damage the
vehicle, and the damage may not be
covered by the vehicle warranty. Always
use the correct automatic transmission
fluid. SeeRecommended Fluids and
Lubricants 0275.
Change the fluid at the intervals listed in
Maintenance Schedule 0267, and be sure to
use the fluid listed in Recommended Fluids
and Lubricants 0275.
Engine Air Cleaner/Filter
The engine air cleaner/filter is in the engine
compartment on the passenger side of the
vehicle. See Engine Compartment Overview
0 205.
When to Inspect the Engine Air Cleaner/
Filter
For intervals on changing and inspecting the
engine air cleaner/filter, see Maintenance
Schedule 0267.
How to Inspect the Engine Air Cleaner/
Filter
Do not start the engine or have the engine
running with the engine air cleaner/filter
housing open. Before removing the engine
air cleaner/filter, make sure that the engine
air cleaner/filter housing and nearby
components are free of dirt and debris.
Remove the engine air cleaner/filter. Lightly
tap and shake the engine air cleaner/filter
(away from the vehicle), to release loose
dust and dirt. Inspect the engine air cleaner/
filter for damage, and replace if damaged.
Do not clean the engine air cleaner/filter
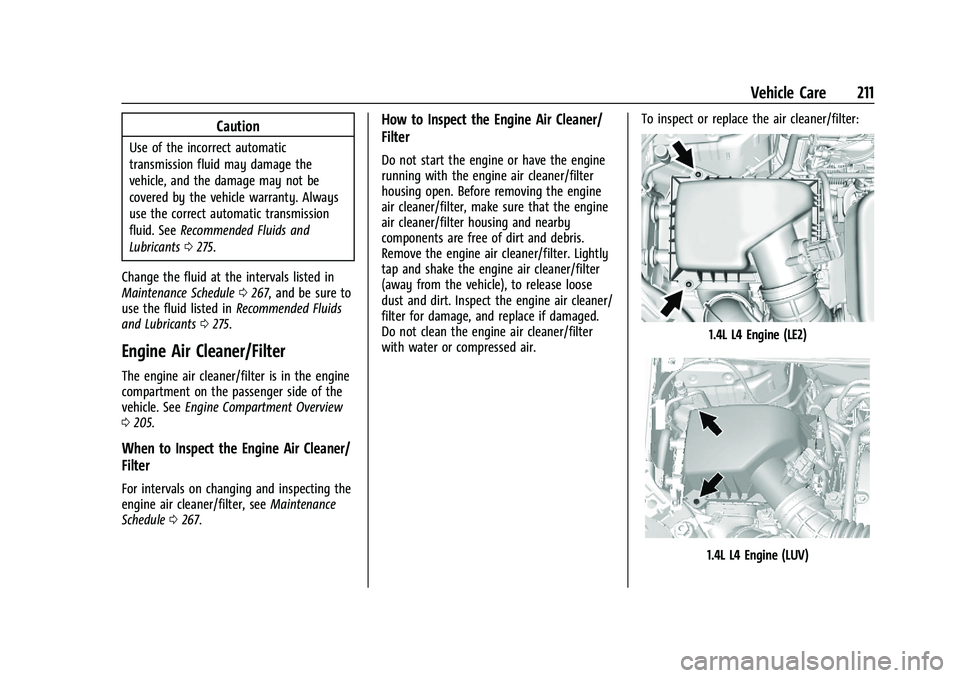
with water or compressed air. To inspect or replace the air cleaner/filter:
1.4L L4 Engine (LE2)
1.4L L4 Engine (LUV)
Page 219 of 313

Buick Encore Owner Manual (GMNA-Localizing-U.S./Canada-14607636) -
2021 - CRC - 8/18/20
218 Vehicle Care
Replacing Brake System Parts
Always replace brake system parts with
new, approved replacement parts. If this is
not done, the brakes may not work
properly. The braking performance can
change in many ways if the wrong brake
parts are installed or if parts are improperly
installed.
Brake Fluid
The brake master cylinder reservoir is filled
with GM approved DOT 4 brake fluid as
indicated on the reservoir cap. SeeEngine
Compartment Overview 0205 for the
location of the reservoir.
Checking Brake Fluid
With the vehicle in P (Park) on a level
surface, the brake fluid level should be
between the minimum and maximum marks
on the brake fluid reservoir. There are only two reasons why the brake
fluid level in the reservoir may go down:
.Normal brake lining wear. When new
linings are installed, the fluid level goes
back up.
.A fluid leak in the brake hydraulic system.
Have the brake hydraulic system fixed.
With a leak, the brakes will not
work well.
Always clean the brake fluid reservoir cap
and the area around the cap before
removing it.
Do not top off the brake fluid. Adding fluid
does not correct a leak. If fluid is added
when the linings are worn, there will be too
much fluid when new brake linings are
installed. Add or remove fluid, as necessary,
only when work is done on the brake
hydraulic system.
{Warning
If too much brake fluid is added, it can
spill on the engine and burn, if the
engine is hot enough. You or others could
be burned, and the vehicle could be
damaged. Add brake fluid only when
work is done on the brake hydraulic
system. When the brake fluid falls to a low level,
the brake warning light comes on. See
Brake
System Warning Light 082.
Brake fluid absorbs water over time which
degrades the effectiveness of the brake fluid.
Replace brake fluid at the specified intervals
to prevent increased stopping distance. See
Maintenance Schedule 0267.
What to Add
Use only GM approved DOT 4 brake fluid
from a clean, sealed container. See
Recommended Fluids and Lubricants 0275.
{Warning
The wrong or contaminated brake fluid
could result in damage to the brake
system. This could result in the loss of
braking leading to a possible injury.
Always use the proper GM approved
brake fluid.
Caution
If brake fluid is spilled on the vehicle's
painted surfaces, the paint finish can be
damaged. Immediately wash off any
painted surface.
Page 224 of 313
Buick Encore Owner Manual (GMNA-Localizing-U.S./Canada-14607636) -
2021 - CRC - 8/18/20
Vehicle Care 223
Headlamp Aiming
Front Headlamp Aiming
Headlamp aim has been preset and should
need no further adjustment.
If the vehicle is damaged in a crash, the
headlamp aim may be affected.
If adjustment to the headlamps is necessary,
see your dealer.
Bulb Replacement
For the proper type of replacement bulbs,
or any bulb changing procedure not listed in
this section, contact your dealer.
Caution
Do not replace incandescent bulbs with
aftermarket LED replacement bulbs. This
can cause damage to the vehicle electrical
system.
Halogen Bulbs
{Warning
Halogen bulbs have pressurized gas inside
and can burst if you drop or scratch the
bulb. You or others could be injured. Be
sure to read and follow the instructions
on the bulb package.
LED Lighting
This vehicle has several LED lamps. For
replacement of any LED lighting assembly,
contact your dealer.
Headlamps, Front Turn Signal and
Parking Lamps
Headlamp Assembly
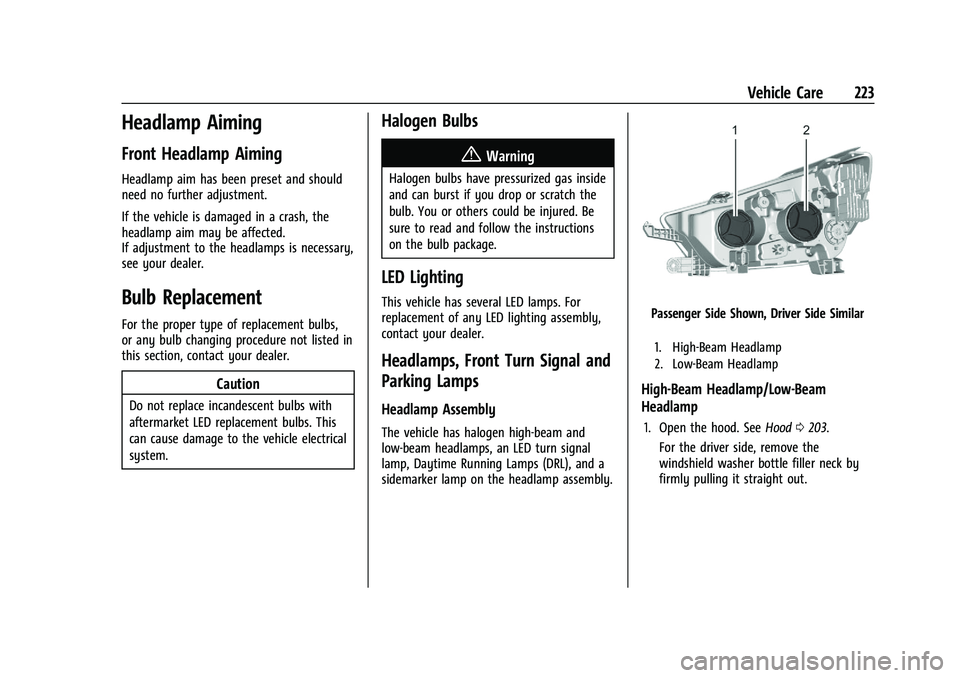
The vehicle has halogen high-beam and
low-beam headlamps, an LED turn signal
lamp, Daytime Running Lamps (DRL), and a
sidemarker lamp on the headlamp assembly.
Passenger Side Shown, Driver Side Similar
1. High-Beam Headlamp
2. Low-Beam Headlamp
High-Beam Headlamp/Low-Beam
Headlamp
1. Open the hood. SeeHood0203.
For the driver side, remove the
windshield washer bottle filler neck by
firmly pulling it straight out.
Page 238 of 313

Buick Encore Owner Manual (GMNA-Localizing-U.S./Canada-14607636) -
2021 - CRC - 8/18/20
Vehicle Care 237
GAWR FRT:Gross Axle Weight Rating
for the front axle. See Vehicle Load
Limits 0170.
GAWR RR
:Gross Axle Weight Rating
for the rear axle. See Vehicle Load
Limits 0170.
Intended Outboard Sidewall
:The side
of an asymmetrical tire that must
always face outward when mounted on
a vehicle.
Kilopascal (kPa)
:The metric unit for air
pressure.
Light Truck (LT-Metric) Tire
:A tire used
on light duty trucks and some
multipurpose passenger vehicles.
Load Index
:An assigned number
ranging from 1 to 279 that corresponds
to the load carrying capacity of a tire.
Maximum Inflation Pressure
:The
maximum air pressure to which a cold
tire can be inflated. The maximum air
pressure is molded onto the sidewall.
Maximum Load Rating
:The load rating
for a tire at the maximum permissible
inflation pressure for that tire. Maximum Loaded Vehicle Weight
:The
sum of curb weight, accessory weight,
vehicle capacity weight, and production
options weight.
Normal Occupant Weight
:The number
of occupants a vehicle is designed to
seat multiplied by 68 kg (150 lb). See
Vehicle Load Limits 0170.
Occupant Distribution
:Designated
seating positions.
Outward Facing Sidewall
:The side of
an asymmetrical tire that has a
particular side that faces outward when
mounted on a vehicle. The side of the
tire that contains a whitewall, bears
white lettering, or bears manufacturer,
brand, and/or model name molding
that is higher or deeper than the same
moldings on the other sidewall of
the tire.
Passenger (P-Metric) Tire
:A tire used
on passenger cars and some light duty
trucks and multipurpose vehicles. Recommended Inflation Pressure
:
Vehicle manufacturer's recommended
tire inflation pressure as shown on the
tire placard. See
Tire Pressure0238 and
Vehicle Load Limits 0170.
Radial Ply Tire
:A pneumatic tire in
which the ply cords that extend to the
beads are laid at 90 degrees to the
centerline of the tread.
Rim
:A metal support for a tire and
upon which the tire beads are seated.
Sidewall
:The portion of a tire between
the tread and the bead.
Speed Rating
:An alphanumeric code
assigned to a tire indicating the
maximum speed at which a tire can
operate.
Traction
:The friction between the tire
and the road surface. The amount of
grip provided.
Tread
:The portion of a tire that comes
into contact with the road.
Page 241 of 313
Buick Encore Owner Manual (GMNA-Localizing-U.S./Canada-14607636) -
2021 - CRC - 8/18/20
240 Vehicle Care
sequence will continue upon subsequent
vehicle start-ups as long as the malfunction
exists.
When the malfunction indicator is
illuminated, the system may not be able to
detect or signal low tire pressure as
intended. TPMS malfunctions may occur for
a variety of reasons, including the
installation of replacement or alternate tires
or wheels on the vehicle that prevent the
TPMS from functioning properly. Always
check the TPMS malfunction telltale after
replacing one or more tires or wheels on
your vehicle to ensure that the replacement
or alternate tires and wheels allow the
TPMS to continue to function properly.
SeeTire Pressure Monitor Operation 0240.
See Radio Frequency Statement 0290.
Tire Pressure Monitor Operation
This vehicle may have a Tire Pressure
Monitor System (TPMS). The TPMS is
designed to warn the driver when a low tire
pressure condition exists. TPMS sensors are
mounted onto each tire and wheel
assembly, excluding the spare tire and
wheel assembly. The TPMS sensors monitor the air pressure in the tires and transmit the
tire pressure readings to a receiver located
in the vehicle.
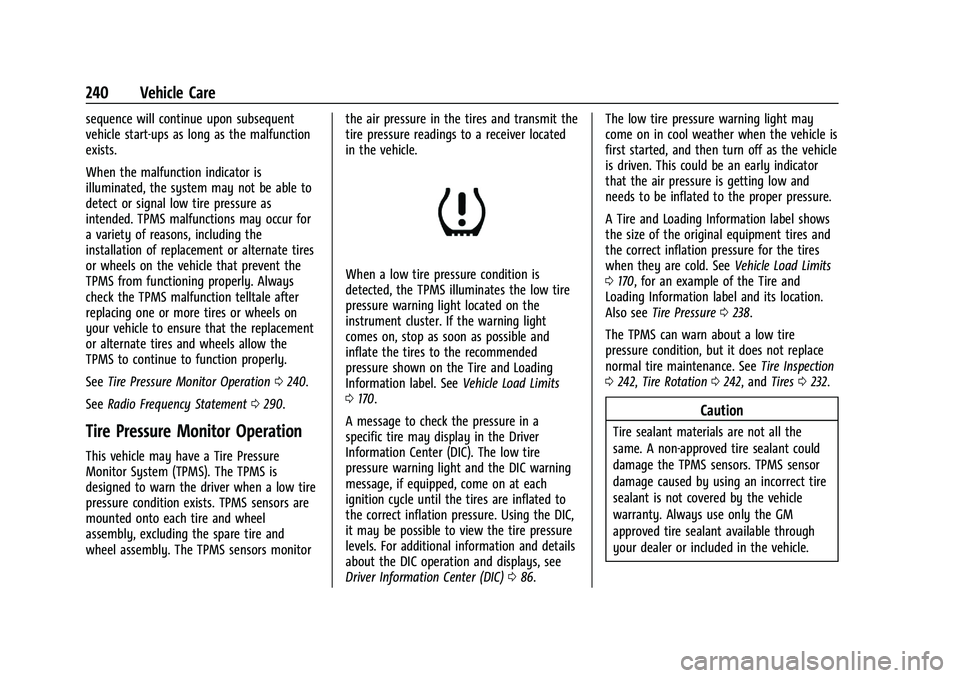
When a low tire pressure condition is
detected, the TPMS illuminates the low tire
pressure warning light located on the
instrument cluster. If the warning light
comes on, stop as soon as possible and
inflate the tires to the recommended
pressure shown on the Tire and Loading
Information label. See
Vehicle Load Limits
0 170.
A message to check the pressure in a
specific tire may display in the Driver
Information Center (DIC). The low tire
pressure warning light and the DIC warning
message, if equipped, come on at each
ignition cycle until the tires are inflated to
the correct inflation pressure. Using the DIC,
it may be possible to view the tire pressure
levels. For additional information and details
about the DIC operation and displays, see
Driver Information Center (DIC) 086. The low tire pressure warning light may
come on in cool weather when the vehicle is
first started, and then turn off as the vehicle
is driven. This could be an early indicator
that the air pressure is getting low and
needs to be inflated to the proper pressure.
A Tire and Loading Information label shows
the size of the original equipment tires and
the correct inflation pressure for the tires
when they are cold. See
Vehicle Load Limits
0 170, for an example of the Tire and
Loading Information label and its location.
Also see Tire Pressure 0238.
The TPMS can warn about a low tire
pressure condition, but it does not replace
normal tire maintenance. See Tire Inspection
0 242, Tire Rotation 0242, and Tires0232.
Caution
Tire sealant materials are not all the
same. A non-approved tire sealant could
damage the TPMS sensors. TPMS sensor
damage caused by using an incorrect tire
sealant is not covered by the vehicle
warranty. Always use only the GM
approved tire sealant available through
your dealer or included in the vehicle.
Page 242 of 313
Buick Encore Owner Manual (GMNA-Localizing-U.S./Canada-14607636) -
2021 - CRC - 8/18/20
Vehicle Care 241
TPMS Malfunction Light and Message
The TPMS will not function properly if one
or more of the TPMS sensors are missing or
inoperable. When the system detects a
malfunction, the low tire pressure warning
light, defined above, flashes for about
one minute and then stays on for the
remainder of the ignition cycle. A DIC
warning message may also display. The
malfunction light and DIC warning message,
if equipped, come on at each ignition cycle
until the problem is corrected. Some of the
conditions that can cause these to come
on are:
.One of the road tires has been replaced
with the spare tire. The spare tire does
not have a TPMS sensor. The malfunction
light and the DIC message, if equipped,
should go off after the road tire is
replaced and the sensor matching process
is performed successfully. See "TPMS
Sensor Matching Process" later in this
section.
.The TPMS sensor matching process was
not done or not completed successfully
after rotating the tires. The malfunction
light and the DIC message, if equipped,
should go off after successfullycompleting the sensor matching process.
See "TPMS Sensor Matching Process" later
in this section.
.One or more TPMS sensors are missing or
damaged. The malfunction light and the
DIC message, if equipped, should go off
when the TPMS sensors are installed and
the sensor matching process is performed
successfully. See your dealer for service.
.Replacement tires or wheels do not match
the original equipment tires or wheels.
Tires and wheels other than those
recommended could prevent the TPMS
from functioning properly. See
Buying
New Tires 0244.
.Operating electronic devices or being near
facilities using radio wave frequencies
similar to the TPMS could cause the TPMS
sensors to malfunction.
If the TPMS is not functioning properly, it
cannot detect or signal a low tire pressure
condition. See your dealer for service if the
TPMS malfunction light and DIC message,
if equipped, come on and stay on.
TPMS Sensor Matching Process
Each TPMS sensor has a unique
identification code. The identification code
needs to be matched to a new tire/wheel position after rotating the vehicle’s tires or
replacing one or more of the TPMS sensors.
Also, the TPMS sensor matching process
should be performed after replacing a spare
tire with a road tire containing the TPMS
sensor. The malfunction light and the DIC
message, if equipped, should go off at the
next ignition cycle. The sensors are matched
to the tire/wheel positions, using a TPMS
relearn tool, in the following order: driver
side front tire, passenger side front tire,
passenger side rear tire, and driver side rear.
See your dealer for service or to purchase a
relearn tool. A TPMS relearn tool can also be
purchased. See Tire Pressure Monitor Sensor
Activation Tool at
www.gmtoolsandequipment.com or call
1-800-GM TOOLS (1-800-468-6657).
There are two minutes to match the first
tire/wheel position, and five minutes overall
to match all four tire/wheel positions. If it
takes longer, the matching process stops
and must be restarted.
The TPMS sensor matching process is:
1. Set the parking brake.
2. Place the vehicle in Service Mode. See Ignition Positions 0174.
Page 244 of 313
Buick Encore Owner Manual (GMNA-Localizing-U.S./Canada-14607636) -
2021 - CRC - 8/18/20
Vehicle Care 243
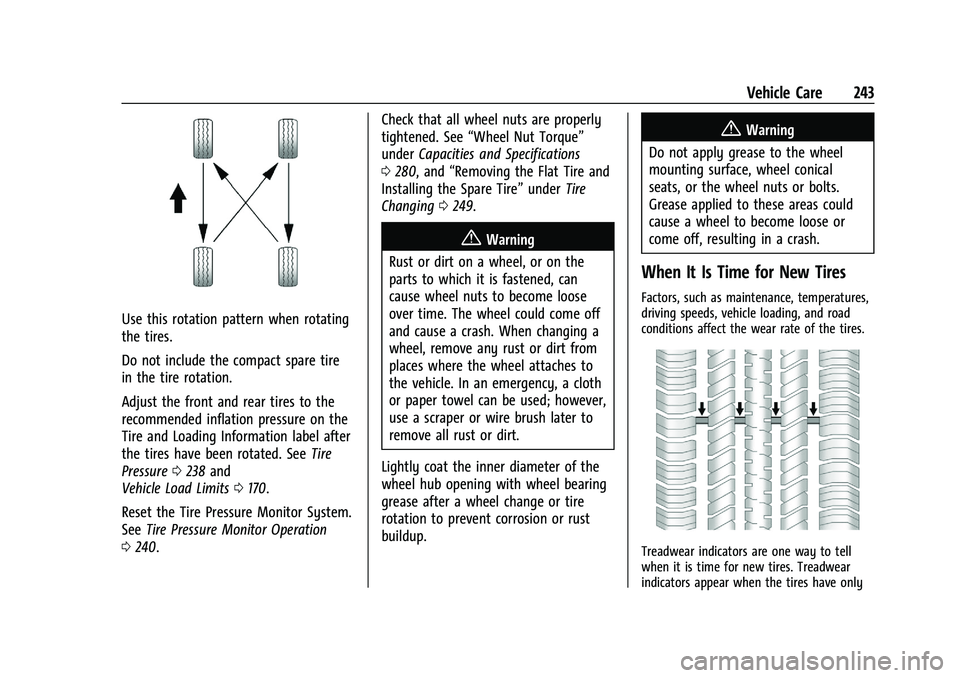
Use this rotation pattern when rotating
the tires.
Do not include the compact spare tire
in the tire rotation.
Adjust the front and rear tires to the
recommended inflation pressure on the
Tire and Loading Information label after
the tires have been rotated. SeeTire
Pressure 0238 and
Vehicle Load Limits 0170.
Reset the Tire Pressure Monitor System.
See Tire Pressure Monitor Operation
0 240. Check that all wheel nuts are properly
tightened. See
“Wheel Nut Torque”
under Capacities and Specifications
0 280, and “Removing the Flat Tire and
Installing the Spare Tire” underTire
Changing 0249.
{Warning
Rust or dirt on a wheel, or on the
parts to which it is fastened, can
cause wheel nuts to become loose
over time. The wheel could come off
and cause a crash. When changing a
wheel, remove any rust or dirt from
places where the wheel attaches to
the vehicle. In an emergency, a cloth
or paper towel can be used; however,
use a scraper or wire brush later to
remove all rust or dirt.
Lightly coat the inner diameter of the
wheel hub opening with wheel bearing
grease after a wheel change or tire
rotation to prevent corrosion or rust
buildup.
{Warning
Do not apply grease to the wheel
mounting surface, wheel conical
seats, or the wheel nuts or bolts.
Grease applied to these areas could
cause a wheel to become loose or
come off, resulting in a crash.
When It Is Time for New Tires
Factors, such as maintenance, temperatures,
driving speeds, vehicle loading, and road
conditions affect the wear rate of the tires.
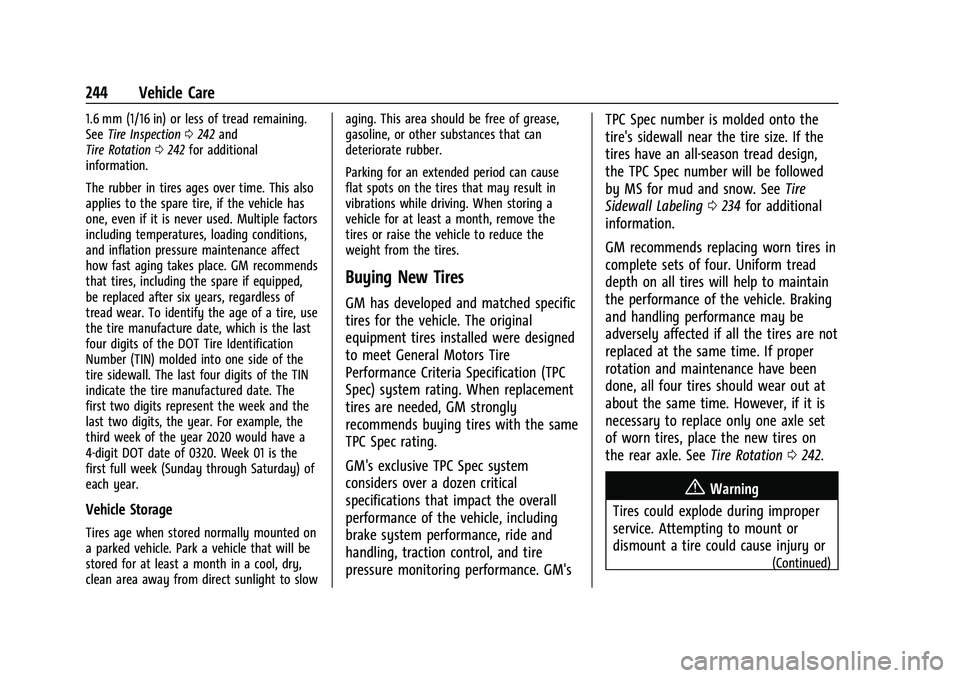
Treadwear indicators are one way to tell
when it is time for new tires. Treadwear
indicators appear when the tires have only
Page 245 of 313
Buick Encore Owner Manual (GMNA-Localizing-U.S./Canada-14607636) -
2021 - CRC - 8/18/20
244 Vehicle Care
1.6 mm (1/16 in) or less of tread remaining.
SeeTire Inspection 0242 and
Tire Rotation 0242 for additional
information.
The rubber in tires ages over time. This also
applies to the spare tire, if the vehicle has
one, even if it is never used. Multiple factors
including temperatures, loading conditions,
and inflation pressure maintenance affect
how fast aging takes place. GM recommends
that tires, including the spare if equipped,
be replaced after six years, regardless of
tread wear. To identify the age of a tire, use
the tire manufacture date, which is the last
four digits of the DOT Tire Identification
Number (TIN) molded into one side of the
tire sidewall. The last four digits of the TIN
indicate the tire manufactured date. The
first two digits represent the week and the
last two digits, the year. For example, the
third week of the year 2020 would have a
4-digit DOT date of 0320. Week 01 is the
first full week (Sunday through Saturday) of
each year.
Vehicle Storage
Tires age when stored normally mounted on
a parked vehicle. Park a vehicle that will be
stored for at least a month in a cool, dry,
clean area away from direct sunlight to slow aging. This area should be free of grease,
gasoline, or other substances that can
deteriorate rubber.
Parking for an extended period can cause
flat spots on the tires that may result in
vibrations while driving. When storing a
vehicle for at least a month, remove the
tires or raise the vehicle to reduce the
weight from the tires.
Buying New Tires
GM has developed and matched specific
tires for the vehicle. The original
equipment tires installed were designed
to meet General Motors Tire
Performance Criteria Specification (TPC
Spec) system rating. When replacement
tires are needed, GM strongly
recommends buying tires with the same
TPC Spec rating.
GM's exclusive TPC Spec system
considers over a dozen critical
specifications that impact the overall
performance of the vehicle, including
brake system performance, ride and
handling, traction control, and tire
pressure monitoring performance. GM's
TPC Spec number is molded onto the
tire's sidewall near the tire size. If the
tires have an all-season tread design,
the TPC Spec number will be followed
by MS for mud and snow. See
Tire
Sidewall Labeling 0234 for additional
information.
GM recommends replacing worn tires in
complete sets of four. Uniform tread
depth on all tires will help to maintain
the performance of the vehicle. Braking
and handling performance may be
adversely affected if all the tires are not
replaced at the same time. If proper
rotation and maintenance have been
done, all four tires should wear out at
about the same time. However, if it is
necessary to replace only one axle set
of worn tires, place the new tires on
the rear axle. See Tire Rotation0242.
{Warning
Tires could explode during improper
service. Attempting to mount or
dismount a tire could cause injury or
(Continued)
Page 247 of 313

Buick Encore Owner Manual (GMNA-Localizing-U.S./Canada-14607636) -
2021 - CRC - 8/18/20
246 Vehicle Care
The Uniform Tire Quality Grading
(UTQG) system does not apply to deep
tread, winter tires, compact spare tires,
tires with nominal rim diameters of
10 to 12 inches (25 to 30 cm), or to some
limited-production tires.
While the tires available on General
Motors passenger cars and light trucks
may vary with respect to these grades,
they must also conform to federal
safety requirements and additional
General Motors Tire Performance
Criteria (TPC) standards.
Quality grades can be found where
applicable on the tire sidewall between
tread shoulder and maximum section
width. For example:
Treadwear 200 Traction AA Temperature A
All Passenger Car Tires Must Conform to
Federal Safety Requirements In Addition
To These Grades.
Treadwear
The treadwear grade is a comparative
rating based on the wear rate of the
tire when tested under controlledconditions on a specified government
test course. For example, a tire graded
150 would wear one and one-half (1½)
times as well on the government course
as a tire graded 100. The relative
performance of tires depends upon the
actual conditions of their use, however,
and may depart significantly from the
norm due to variations in driving habits,
service practices and differences in road
characteristics and climate.
Traction
The traction grades, from highest to
lowest, are AA, A, B, and C. Those
grades represent the tire's ability to
stop on wet pavement as measured
under controlled conditions on specified
government test surfaces of asphalt and
concrete. A tire marked C may have
poor traction performance. Warning:
The traction grade assigned to this tire
is based on straight-ahead braking
traction tests, and does not include
acceleration, cornering, hydroplaning,
or peak traction characteristics.
Temperature
The temperature grades are A (the
highest), B, and C, representing the
tire's resistance to the generation of
heat and its ability to dissipate heat
when tested under controlled conditions
on a specified indoor laboratory test
wheel. Sustained high temperature can
cause the material of the tire to
degenerate and reduce tire life, and
excessive temperature can lead to
sudden tire failure. The grade C
corresponds to a level of performance
which all passenger car tires must meet
under the Federal Motor Safety
Standard No. 109. Grades B and A
represent higher levels of performance
on the laboratory test wheel than the
minimum required by law. Warning:
The temperature grade for this tire is
established for a tire that is properly
inflated and not overloaded. Excessive
speed, underinflation, or excessive
loading, either separately or in
combination, can cause heat buildup
and possible tire failure.