low BUICK ENCORE GX 2023 User Guide
[x] Cancel search | Manufacturer: BUICK, Model Year: 2023, Model line: ENCORE GX, Model: BUICK ENCORE GX 2023Pages: 367, PDF Size: 5.99 MB
Page 23 of 367
Buick Encore GX Owner Manual (GMNA-Localizing-U.S./Canada/Mexico-
16263917) - 2023 - CRC - 2/24/22
22 Keys, Doors, and Windows
Caution
Attempting to move the liftgate too
quickly and with excessive force may
result in damage to the vehicle.
Operate the liftgate manually with a
smooth motion and moderate speed. The
system includes a feature which limits the
manual closing speed to protect the
components.
Hands-Free Operation
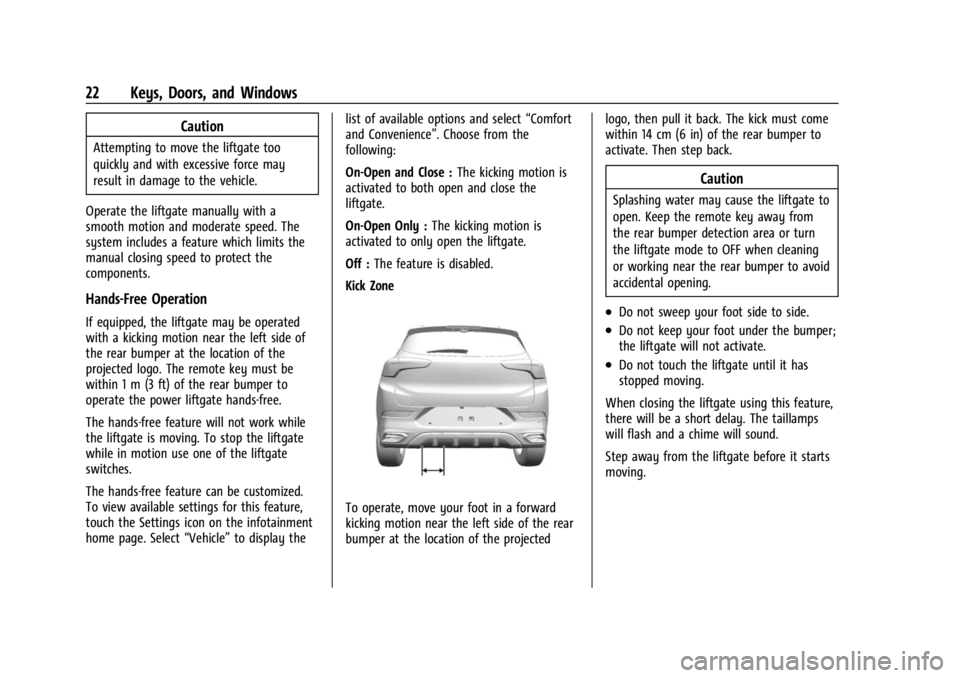
If equipped, the liftgate may be operated
with a kicking motion near the left side of
the rear bumper at the location of the
projected logo. The remote key must be
within 1 m (3 ft) of the rear bumper to
operate the power liftgate hands-free.
The hands-free feature will not work while
the liftgate is moving. To stop the liftgate
while in motion use one of the liftgate
switches.
The hands-free feature can be customized.
To view available settings for this feature,
touch the Settings icon on the infotainment
home page. Select “Vehicle”to display the list of available options and select
“Comfort
and Convenience”. Choose from the
following:
On-Open and Close : The kicking motion is
activated to both open and close the
liftgate.
On-Open Only : The kicking motion is
activated to only open the liftgate.
Off : The feature is disabled.
Kick Zone
To operate, move your foot in a forward
kicking motion near the left side of the rear
bumper at the location of the projected logo, then pull it back. The kick must come
within 14 cm (6 in) of the rear bumper to
activate. Then step back.
Caution
Splashing water may cause the liftgate to
open. Keep the remote key away from
the rear bumper detection area or turn
the liftgate mode to OFF when cleaning
or working near the rear bumper to avoid
accidental opening.
.Do not sweep your foot side to side.
.Do not keep your foot under the bumper;
the liftgate will not activate.
.Do not touch the liftgate until it has
stopped moving.
When closing the liftgate using this feature,
there will be a short delay. The taillamps
will flash and a chime will sound.
Step away from the liftgate before it starts
moving.
Page 24 of 367
Buick Encore GX Owner Manual (GMNA-Localizing-U.S./Canada/Mexico-
16263917) - 2023 - CRC - 2/24/22
Keys, Doors, and Windows 23
Projected Logo
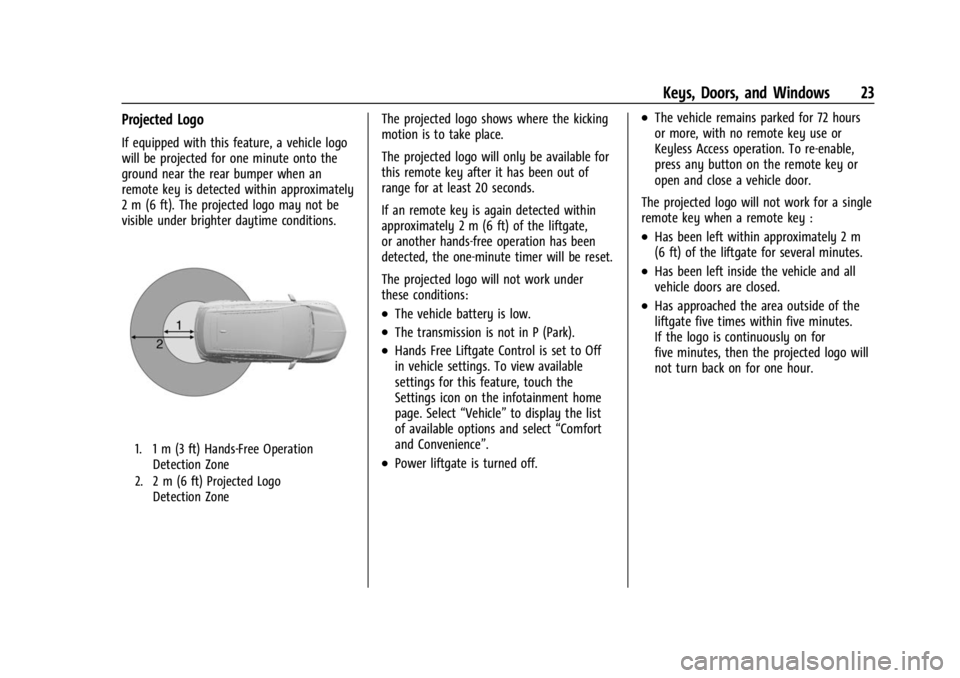
If equipped with this feature, a vehicle logo
will be projected for one minute onto the
ground near the rear bumper when an
remote key is detected within approximately
2 m (6 ft). The projected logo may not be
visible under brighter daytime conditions.
1. 1 m (3 ft) Hands-Free OperationDetection Zone
2. 2 m (6 ft) Projected Logo Detection Zone
The projected logo shows where the kicking
motion is to take place.
The projected logo will only be available for
this remote key after it has been out of
range for at least 20 seconds.
If an remote key is again detected within
approximately 2 m (6 ft) of the liftgate,
or another hands-free operation has been
detected, the one-minute timer will be reset.
The projected logo will not work under
these conditions:
.The vehicle battery is low.
.The transmission is not in P (Park).
.Hands Free Liftgate Control is set to Off
in vehicle settings. To view available
settings for this feature, touch the
Settings icon on the infotainment home
page. Select “Vehicle”to display the list
of available options and select “Comfort
and Convenience”.
.Power liftgate is turned off.
.The vehicle remains parked for 72 hours
or more, with no remote key use or
Keyless Access operation. To re-enable,
press any button on the remote key or
open and close a vehicle door.
The projected logo will not work for a single
remote key when a remote key :
.Has been left within approximately 2 m
(6 ft) of the liftgate for several minutes.
.Has been left inside the vehicle and all
vehicle doors are closed.
.Has approached the area outside of the
liftgate five times within five minutes.
If the logo is continuously on for
five minutes, then the projected logo will
not turn back on for one hour.
Page 25 of 367
Buick Encore GX Owner Manual (GMNA-Localizing-U.S./Canada/Mexico-
16263917) - 2023 - CRC - 2/24/22
24 Keys, Doors, and Windows
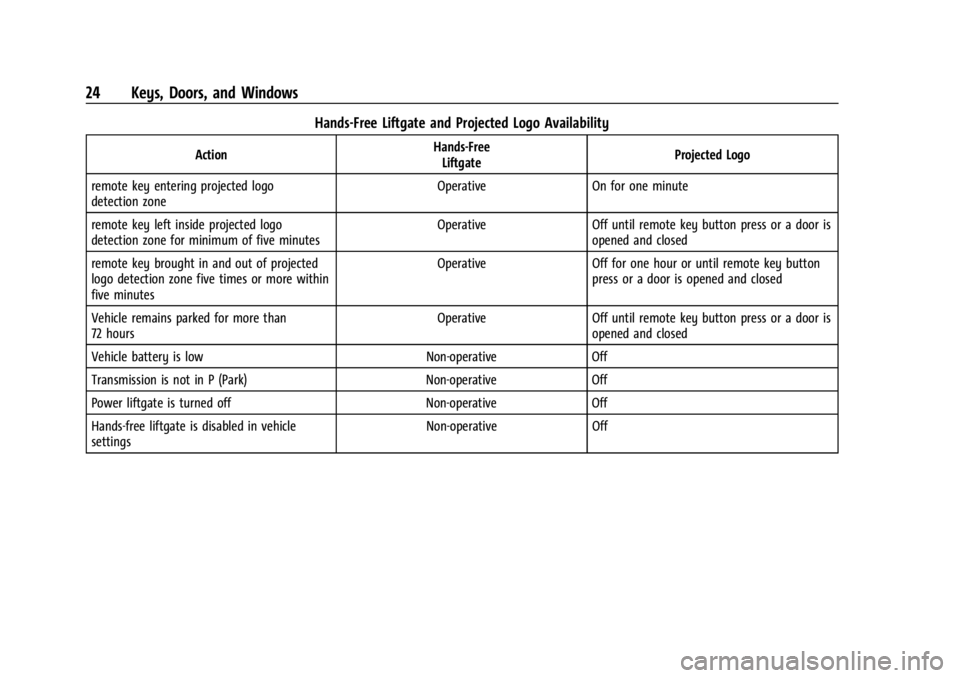
Hands-Free Liftgate and Projected Logo Availability
ActionHands-Free
Liftgate Projected Logo
remote key entering projected logo
detection zone Operative On for one minute
remote key left inside projected logo
detection zone for minimum of five minutes Operative Off until remote key button press or a door is
opened and closed
remote key brought in and out of projected
logo detection zone five times or more within
five minutes Operative Off for one hour or until remote key button
press or a door is opened and closed
Vehicle remains parked for more than
72 hours Operative Off until remote key button press or a door is
opened and closed
Vehicle battery is low Non-operative Off
Transmission is not in P (Park) Non-operative Off
Power liftgate is turned off Non-operative Off
Hands-free liftgate is disabled in vehicle
settings Non-operative Off
Page 26 of 367
Buick Encore GX Owner Manual (GMNA-Localizing-U.S./Canada/Mexico-
16263917) - 2023 - CRC - 2/24/22
Keys, Doors, and Windows 25
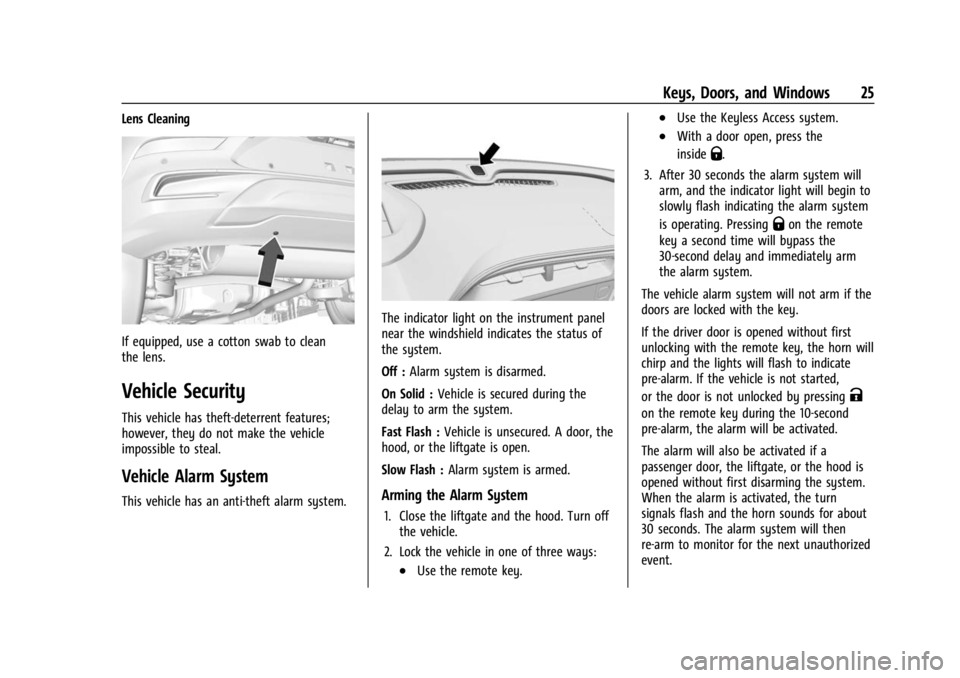
Lens Cleaning
If equipped, use a cotton swab to clean
the lens.
Vehicle Security
This vehicle has theft-deterrent features;
however, they do not make the vehicle
impossible to steal.
Vehicle Alarm System
This vehicle has an anti-theft alarm system.
The indicator light on the instrument panel
near the windshield indicates the status of
the system.
Off :Alarm system is disarmed.
On Solid : Vehicle is secured during the
delay to arm the system.
Fast Flash : Vehicle is unsecured. A door, the
hood, or the liftgate is open.
Slow Flash : Alarm system is armed.
Arming the Alarm System
1. Close the liftgate and the hood. Turn off
the vehicle.
2. Lock the vehicle in one of three ways:
.Use the remote key.
.Use the Keyless Access system.
.With a door open, press the
inside
Q.
3. After 30 seconds the alarm system will arm, and the indicator light will begin to
slowly flash indicating the alarm system
is operating. Pressing
Qon the remote
key a second time will bypass the
30-second delay and immediately arm
the alarm system.
The vehicle alarm system will not arm if the
doors are locked with the key.
If the driver door is opened without first
unlocking with the remote key, the horn will
chirp and the lights will flash to indicate
pre-alarm. If the vehicle is not started,
or the door is not unlocked by pressing
K
on the remote key during the 10-second
pre-alarm, the alarm will be activated.
The alarm will also be activated if a
passenger door, the liftgate, or the hood is
opened without first disarming the system.
When the alarm is activated, the turn
signals flash and the horn sounds for about
30 seconds. The alarm system will then
re-arm to monitor for the next unauthorized
event.
Page 27 of 367
Buick Encore GX Owner Manual (GMNA-Localizing-U.S./Canada/Mexico-
16263917) - 2023 - CRC - 2/24/22
26 Keys, Doors, and Windows
Disarming the Alarm System
To disarm the alarm system or turn off the
alarm if it has been activated:
.PressKon the remote key.
.Unlock the vehicle using the Keyless
Access system.
.Start the vehicle.
To avoid setting off the alarm by accident:
.Lock the vehicle after all occupants have
left the vehicle and all doors are closed.
.Always unlock a door with the remote
key or use the Keyless Access system.
Unlocking the driver door with the key will
not disarm the system or turn off the alarm.
How to Detect a Tamper Condition
IfKis pressed and the horn chirps and the
lights flash three times, the alarm was
activated while the alarm system was
armed.
If the alarm system has been activated, a
message will appear on the DIC.
Immobilizer
See Radio Frequency Statement 0343.
Immobilizer Operation
This vehicle has a passive theft-deterrent
system.
The system does not have to be manually
armed or disarmed.
The vehicle is automatically immobilized
when the vehicle is turned off.
The immobilization system is disarmed
when the ignition is on or in accessory
mode and a valid remote key is present in
the vehicle.
The security light in the instrument cluster
comes on if there is a problem with arming
or disarming the theft-deterrent system.
The system has one or more remote keys
matched to an immobilizer control unit in
the vehicle. Only a correctly matched
remote key will start the vehicle. If the
remote key is ever damaged, the vehicle
may not start. When trying to start the vehicle, the
security light may come on briefly when the
ignition is turned on.
If the engine does not start and the security
light stays on, there is a problem with the
system. Turn the ignition off and try again.
If the vehicle will not change ignition
modes, and the remote key appears to be
undamaged, try another remote key. Or, try
placing the remote key into the remote key
pocket located in the center console. See
Starting the Vehicle With a Low remote key
Battery under
Remote Key Operation 08.
If the ignition mode will not change with
the other remote key or with a remote key
in the remote key pocket, your vehicle
needs service. If the ignition does change
modes, the first remote key may be faulty.
See your dealer who can service the
theft-deterrent system and have a new
remote key programmed to the vehicle.
It is possible for the immobilizer system to
learn new or replacement remote keys. Up
to eight remote keys can be programmed
for the vehicle. To program additional
remote keys, see Programming remote keys
to the Vehicle under Remote Key Operation
0 8.
Page 29 of 367
Buick Encore GX Owner Manual (GMNA-Localizing-U.S./Canada/Mexico-
16263917) - 2023 - CRC - 2/24/22
28 Keys, Doors, and Windows
Reverse Tilt Mirrors
If equipped with reverse tilt mirrors and
memory seats, the passenger and/or driver
mirror tilts to a preselected position when
the vehicle is in R (Reverse). This allows the
curb to be seen when parallel parking.
The mirror(s) may move from their tilted
position when:
.The vehicle is shifted out of R (Reverse),
or remains in R (Reverse) for about
30 seconds.
.The vehicle is turned off.
.The vehicle is driven in R (Reverse) above
a set speed.
To view available settings from the
infotainment screen, touch Settings >
Vehicle > Comfort and Convenience.
Interior Mirrors
Interior Rearview Mirrors
Adjust the rearview mirror for a clear view
of the area behind the vehicle.
Do not spray glass cleaner directly on the
mirror. Use a soft towel dampened with
water.
Manual Rearview Mirror
If equipped, push the tab forward for
daytime use and pull it rearward for
nighttime use to avoid glare of the
headlamps from behind.
Automatic Dimming Rearview
Mirror
If equipped, automatic dimming reduces the
glare of headlamps from behind. The
dimming feature comes on when the vehicle
is started.
Rear Camera Mirror
If equipped, this automatic dimming mirror
provides a wide angle camera view of the
area behind the vehicle.
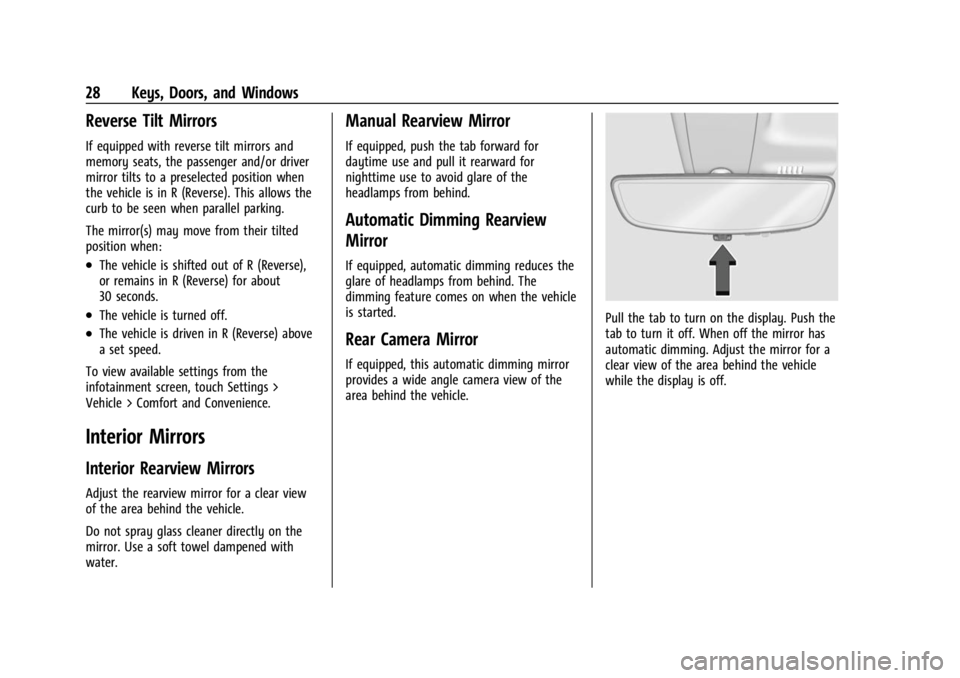
Pull the tab to turn on the display. Push the
tab to turn it off. When off the mirror has
automatic dimming. Adjust the mirror for a
clear view of the area behind the vehicle
while the display is off.
Page 35 of 367
Buick Encore GX Owner Manual (GMNA-Localizing-U.S./Canada/Mexico-
16263917) - 2023 - CRC - 2/24/22
34 Seats and Restraints
Seats and Restraints
Head Restraints
Head Restraints . . . . . . . . . . . . . . . . . . . . . . . . 34
Front Seats
Seat Adjustment . . . . . . . . . . . . . . . . . . . . . . . 36
Power Seat Adjustment . . . . . . . . . . . . . . . . 36
Reclining Seatbacks . . . . . . . . . . . . . . . . . . . . . 37
Lumbar Adjustment . . . . . . . . . . . . . . . . . . . . 38
Memory Seats . . . . . . . . . . . . . . . . . . . . . . . . . . 39
Heated Front Seats . . . . . . . . . . . . . . . . . . . . . 41
Folding Seatback . . . . . . . . . . . . . . . . . . . . . . . 42
Rear Seats
Rear Seats . . . . . . . . . . . . . . . . . . . . . . . . . . . . . . 43
Rear Seat Armrest . . . . . . . . . . . . . . . . . . . . . . 44
Seat Belts
Seat Belts . . . . . . . . . . . . . . . . . . . . . . . . . . . . . . 44
How to Wear Seat Belts Properly . . . . . . 45
Lap-Shoulder Belt . . . . . . . . . . . . . . . . . . . . . . . 47
Seat Belt Use During Pregnancy . . . . . . . . 50
Seat Belt Extender . . . . . . . . . . . . . . . . . . . . . . 50
Safety System Check . . . . . . . . . . . . . . . . . . . . 51
Seat Belt Care . . . . . . . . . . . . . . . . . . . . . . . . . . 51
Replacing Seat Belt System Parts after aCrash . . . . . . . . . . . . . . . . . . . . . . . . . . . . . . . . . . 51
Airbag System
Airbag System . . . . . . . . . . . . . . . . . . . . . . . . . . 52 Where Are the Airbags? . . . . . . . . . . . . . . . . 53
When Should an Airbag Inflate? . . . . . . . . 54
What Makes an Airbag Inflate? . . . . . . . . . 55
How Does an Airbag Restrain? . . . . . . . . . . 55
What Will You See after an Airbag
Inflates? . . . . . . . . . . . . . . . . . . . . . . . . . . . . . . 56
Passenger Sensing System . . . . . . . . . . . . . . 57
Servicing the Airbag-Equipped Vehicle . . . . . . . . . . . . . . . . . . . . . . . . . . . . . . . 60
Adding Equipment to the Airbag-Equipped Vehicle . . . . . . . . . . . . . . 61
Airbag System Check . . . . . . . . . . . . . . . . . . . 61
Replacing Airbag System Parts after a Crash . . . . . . . . . . . . . . . . . . . . . . . . . . . . . . . . . 62
Child Restraints
Older Children . . . . . . . . . . . . . . . . . . . . . . . . . . 62
Infants and Young Children . . . . . . . . . . . . . 63
Child Restraint Systems . . . . . . . . . . . . . . . . 65
Where to Put the Restraint . . . . . . . . . . . . . 67
Lower Anchors and Tethers for Children(LATCH System) . . . . . . . . . . . . . . . . . . . . . . 68
Replacing LATCH System Parts After a Crash . . . . . . . . . . . . . . . . . . . . . . . . . . . . . . . . . 73
Securing Child Restraints (With the Seat Belt in the Rear Seat) . . . . . . . . . . . . . . . . . 74
Securing Child Restraints (With the Seat Belt in the Front Seat) . . . . . . . . . . . . . . . . 75
Head Restraints
{
Warning
With head restraints that are not
installed and adjusted properly, there is a
greater chance that occupants will suffer
a neck/spinal injury in a crash. Do not
drive until the head restraints for all
occupants are installed and adjusted
properly.
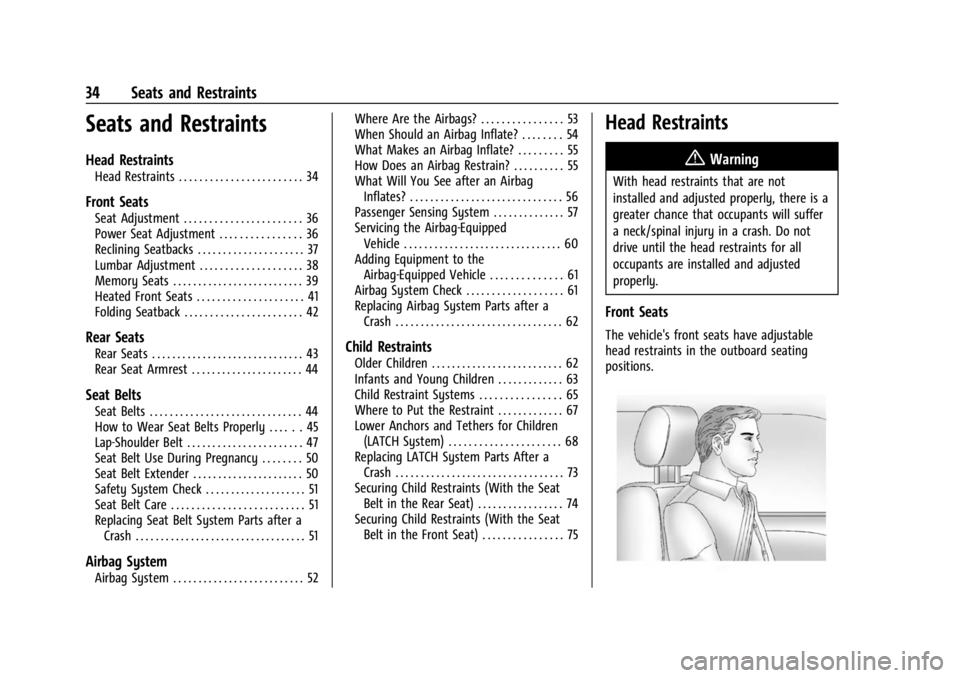
Front Seats
The vehicle's front seats have adjustable
head restraints in the outboard seating
positions.
Page 36 of 367
Buick Encore GX Owner Manual (GMNA-Localizing-U.S./Canada/Mexico-
16263917) - 2023 - CRC - 2/24/22
Seats and Restraints 35
Adjust the head restraint so that the top of
the restraint is at the same height as the
top of the occupant's head. This position
reduces the chances of a neck injury in a
crash.
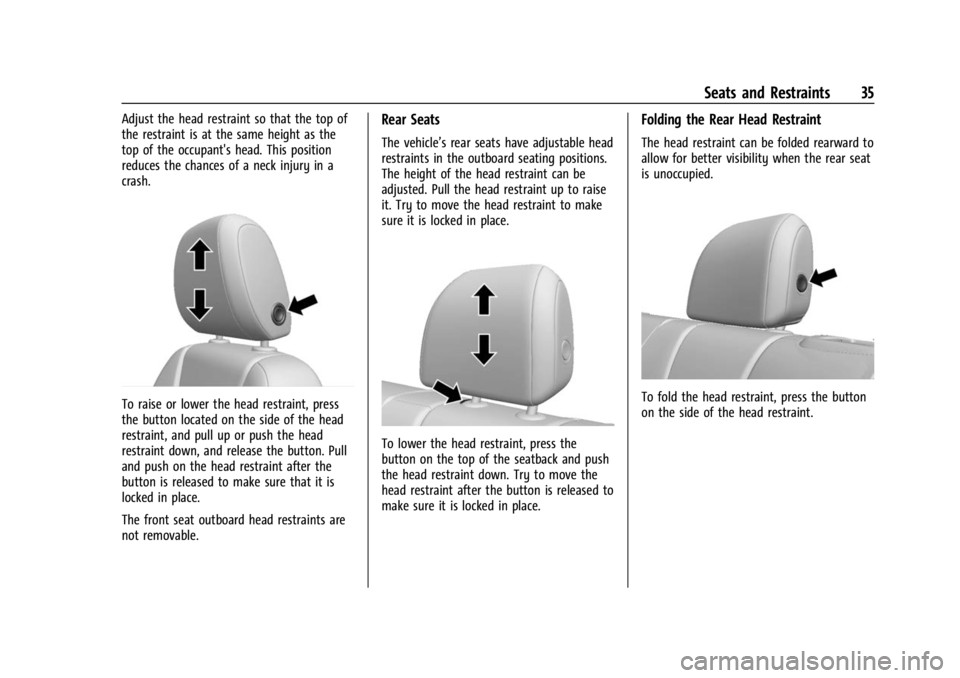
To raise or lower the head restraint, press
the button located on the side of the head
restraint, and pull up or push the head
restraint down, and release the button. Pull
and push on the head restraint after the
button is released to make sure that it is
locked in place.
The front seat outboard head restraints are
not removable.
Rear Seats
The vehicle’s rear seats have adjustable head
restraints in the outboard seating positions.
The height of the head restraint can be
adjusted. Pull the head restraint up to raise
it. Try to move the head restraint to make
sure it is locked in place.
To lower the head restraint, press the
button on the top of the seatback and push
the head restraint down. Try to move the
head restraint after the button is released to
make sure it is locked in place.
Folding the Rear Head Restraint
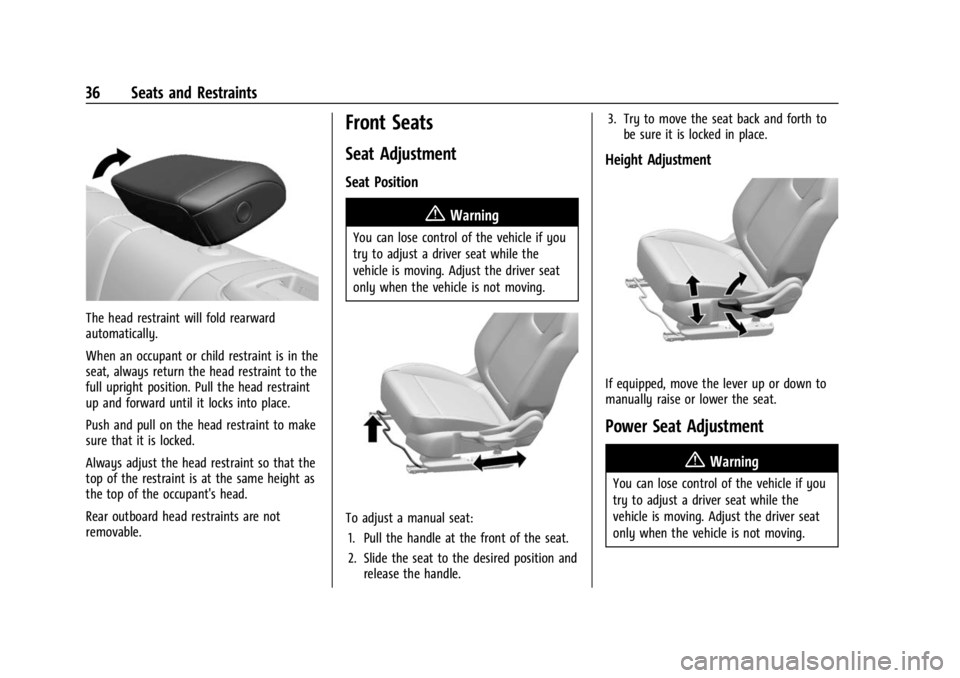
The head restraint can be folded rearward to
allow for better visibility when the rear seat
is unoccupied.
To fold the head restraint, press the button
on the side of the head restraint.
Page 37 of 367
Buick Encore GX Owner Manual (GMNA-Localizing-U.S./Canada/Mexico-
16263917) - 2023 - CRC - 2/24/22
36 Seats and Restraints
The head restraint will fold rearward
automatically.
When an occupant or child restraint is in the
seat, always return the head restraint to the
full upright position. Pull the head restraint
up and forward until it locks into place.
Push and pull on the head restraint to make
sure that it is locked.
Always adjust the head restraint so that the
top of the restraint is at the same height as
the top of the occupant's head.
Rear outboard head restraints are not
removable.
Front Seats
Seat Adjustment
Seat Position
{Warning
You can lose control of the vehicle if you
try to adjust a driver seat while the
vehicle is moving. Adjust the driver seat
only when the vehicle is not moving.
To adjust a manual seat:1. Pull the handle at the front of the seat.
2. Slide the seat to the desired position and release the handle. 3. Try to move the seat back and forth to
be sure it is locked in place.
Height Adjustment
If equipped, move the lever up or down to
manually raise or lower the seat.
Power Seat Adjustment
{Warning
You can lose control of the vehicle if you
try to adjust a driver seat while the
vehicle is moving. Adjust the driver seat
only when the vehicle is not moving.
Page 38 of 367
Buick Encore GX Owner Manual (GMNA-Localizing-U.S./Canada/Mexico-
16263917) - 2023 - CRC - 2/24/22
Seats and Restraints 37
{Warning
The power seats will work with the
ignition off. Children could operate the
power seats and be injured. Never leave
children alone in the vehicle.
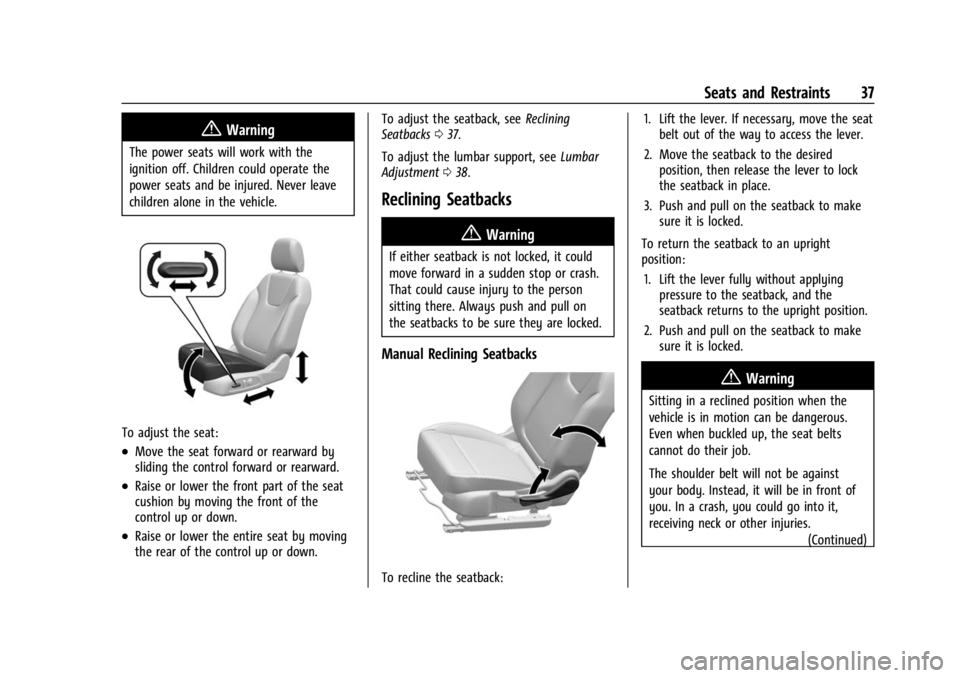
To adjust the seat:
.Move the seat forward or rearward by
sliding the control forward or rearward.
.Raise or lower the front part of the seat
cushion by moving the front of the
control up or down.
.Raise or lower the entire seat by moving
the rear of the control up or down.To adjust the seatback, see
Reclining
Seatbacks 037.
To adjust the lumbar support, see Lumbar
Adjustment 038.
Reclining Seatbacks
{Warning
If either seatback is not locked, it could
move forward in a sudden stop or crash.
That could cause injury to the person
sitting there. Always push and pull on
the seatbacks to be sure they are locked.
Manual Reclining Seatbacks
To recline the seatback: 1. Lift the lever. If necessary, move the seat
belt out of the way to access the lever.
2. Move the seatback to the desired position, then release the lever to lock
the seatback in place.
3. Push and pull on the seatback to make sure it is locked.
To return the seatback to an upright
position: 1. Lift the lever fully without applying pressure to the seatback, and the
seatback returns to the upright position.
2. Push and pull on the seatback to make sure it is locked.
{Warning
Sitting in a reclined position when the
vehicle is in motion can be dangerous.
Even when buckled up, the seat belts
cannot do their job.
The shoulder belt will not be against
your body. Instead, it will be in front of
you. In a crash, you could go into it,
receiving neck or other injuries.
(Continued)