ECO mode BUICK ENCORE GX 2023 Owner's Manual
[x] Cancel search | Manufacturer: BUICK, Model Year: 2023, Model line: ENCORE GX, Model: BUICK ENCORE GX 2023Pages: 367, PDF Size: 5.99 MB
Page 196 of 367
Buick Encore GX Owner Manual (GMNA-Localizing-U.S./Canada/Mexico-
16263917) - 2023 - CRC - 2/24/22
Driving and Operating 195
1. Brake using a firm and steady pressure.Do not pump the brakes repeatedly. This
may deplete power assist, requiring
increased brake pedal force.
2. Shift the vehicle to N (Neutral). This can be done while the vehicle is moving.
After shifting to N (Neutral), firmly apply
the brakes and steer the vehicle to a
safe location.
3. Come to a complete stop. Shift to P (Park) and turn the ignition off.
4. Set the electric parking brake. See Electric
Parking Brake 0206
{Warning
Turning off the vehicle while moving may
cause loss of power assist in the brake
and steering systems and disable the
airbags. While driving, only shut the
vehicle off in an emergency.
If the vehicle cannot be pulled over and
must be turned off while driving, press and
hold ENGINE START/ STOP for longer than
two seconds, or press twice in five seconds.
Accessory Mode (Amber Indicator Light)
This mode allows you to use some electrical
accessories when the engine is off. With the ignition off, pressing the button
one time without the brake pedal applied
will place the ignition system in
accessory mode.
The ignition will switch from accessory to
OFF after five minutes to prevent battery
rundown.
ON/RUN/START (Green Indicator Light)
This mode is for driving and starting. With
the ignition off and the brake pedal applied,
pressing the button once will place the
ignition system in ON/RUN/START. Once
engine cranking begins, release the button.
Engine cranking will continue until the
engine starts. See
Starting the Engine 0195.
The ignition will then remain on.
Service Mode
This power mode is available for service and
diagnostics, and to verify the proper
operation of the malfunction indicator lamp
as may be required for emission inspection
purposes. With the vehicle off and the brake
pedal not applied, pressing and holding the
button for more than five seconds will place
the vehicle in Service Mode. The instruments
and audio systems will operate when the
vehicle is on, but the vehicle will not be able to be driven. The engine will not start in
Service Mode. Press the button again to turn
the vehicle off.
Starting the Engine
Move the shift lever to P (Park) or
N (Neutral). The engine will not start in any
other position. To restart the engine when
the vehicle is already moving, use
N (Neutral) only.
Caution
Do not try to shift to P (Park) if the
vehicle is moving. If you do, you could
damage the transmission. Shift to P (Park)
only when the vehicle is stopped.
Caution
If you add electrical parts or accessories,
you could change the way the engine
operates. Any resulting damage would
not be covered by the vehicle warranty.
See
Add-On Electrical Equipment 0248.
Page 200 of 367
Buick Encore GX Owner Manual (GMNA-Localizing-U.S./Canada/Mexico-
16263917) - 2023 - CRC - 2/24/22
Driving and Operating 199
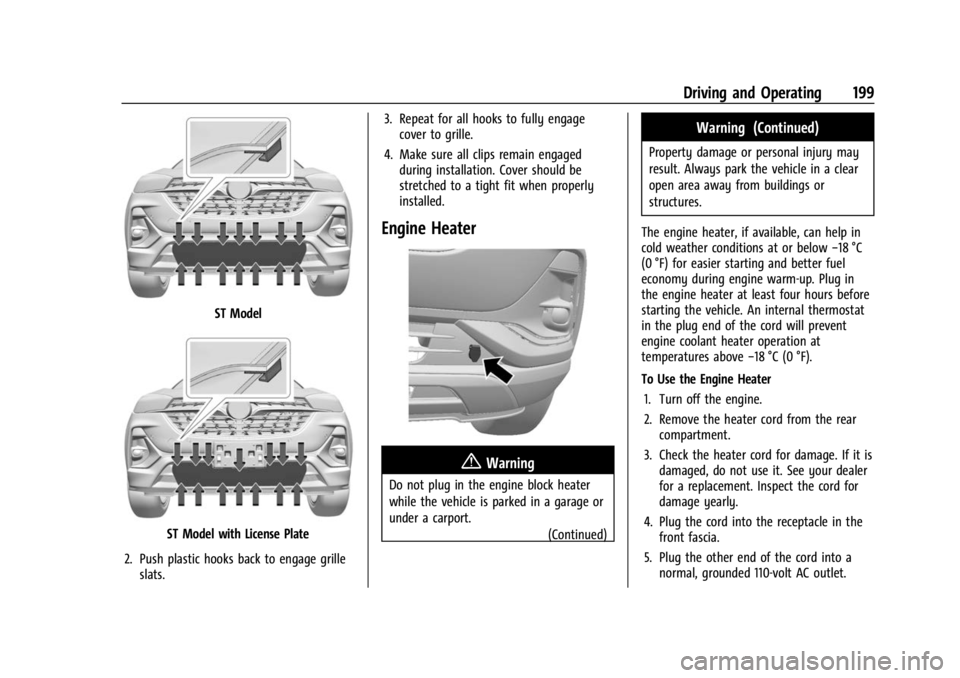
ST Model
ST Model with License Plate
2. Push plastic hooks back to engage grille slats. 3. Repeat for all hooks to fully engage
cover to grille.
4. Make sure all clips remain engaged during installation. Cover should be
stretched to a tight fit when properly
installed.
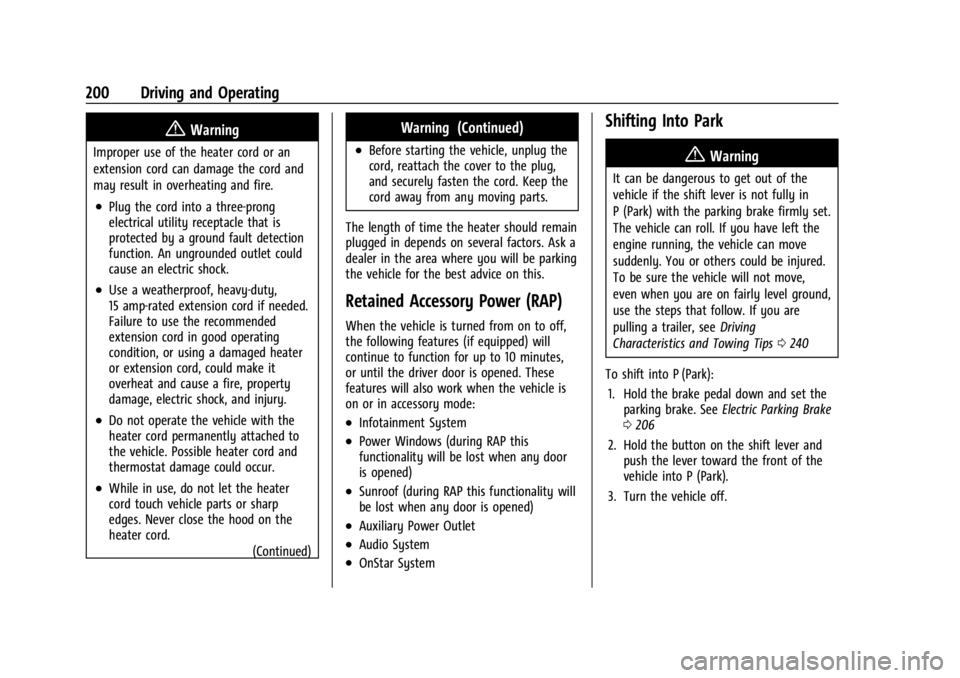
Engine Heater
{Warning
Do not plug in the engine block heater
while the vehicle is parked in a garage or
under a carport.
(Continued)
Warning (Continued)
Property damage or personal injury may
result. Always park the vehicle in a clear
open area away from buildings or
structures.
The engine heater, if available, can help in
cold weather conditions at or below −18 °C
(0 °F) for easier starting and better fuel
economy during engine warm-up. Plug in
the engine heater at least four hours before
starting the vehicle. An internal thermostat
in the plug end of the cord will prevent
engine coolant heater operation at
temperatures above −18 °C (0 °F).
To Use the Engine Heater 1. Turn off the engine.
2. Remove the heater cord from the rear compartment.
3. Check the heater cord for damage. If it is damaged, do not use it. See your dealer
for a replacement. Inspect the cord for
damage yearly.
4. Plug the cord into the receptacle in the front fascia.
5. Plug the other end of the cord into a normal, grounded 110-volt AC outlet.
Page 201 of 367
Buick Encore GX Owner Manual (GMNA-Localizing-U.S./Canada/Mexico-
16263917) - 2023 - CRC - 2/24/22
200 Driving and Operating
{Warning
Improper use of the heater cord or an
extension cord can damage the cord and
may result in overheating and fire.
.Plug the cord into a three-prong
electrical utility receptacle that is
protected by a ground fault detection
function. An ungrounded outlet could
cause an electric shock.
.Use a weatherproof, heavy-duty,
15 amp-rated extension cord if needed.
Failure to use the recommended
extension cord in good operating
condition, or using a damaged heater
or extension cord, could make it
overheat and cause a fire, property
damage, electric shock, and injury.
.Do not operate the vehicle with the
heater cord permanently attached to
the vehicle. Possible heater cord and
thermostat damage could occur.
.While in use, do not let the heater
cord touch vehicle parts or sharp
edges. Never close the hood on the
heater cord.(Continued)
Warning (Continued)
.Before starting the vehicle, unplug the
cord, reattach the cover to the plug,
and securely fasten the cord. Keep the
cord away from any moving parts.
The length of time the heater should remain
plugged in depends on several factors. Ask a
dealer in the area where you will be parking
the vehicle for the best advice on this.
Retained Accessory Power (RAP)
When the vehicle is turned from on to off,
the following features (if equipped) will
continue to function for up to 10 minutes,
or until the driver door is opened. These
features will also work when the vehicle is
on or in accessory mode:
.Infotainment System
.Power Windows (during RAP this
functionality will be lost when any door
is opened)
.Sunroof (during RAP this functionality will
be lost when any door is opened)
.Auxiliary Power Outlet
.Audio System
.OnStar System
Shifting Into Park
{Warning
It can be dangerous to get out of the
vehicle if the shift lever is not fully in
P (Park) with the parking brake firmly set.
The vehicle can roll. If you have left the
engine running, the vehicle can move
suddenly. You or others could be injured.
To be sure the vehicle will not move,
even when you are on fairly level ground,
use the steps that follow. If you are
pulling a trailer, see Driving
Characteristics and Towing Tips 0240
To shift into P (Park): 1. Hold the brake pedal down and set the parking brake. See Electric Parking Brake
0 206
2. Hold the button on the shift lever and push the lever toward the front of the
vehicle into P (Park).
3. Turn the vehicle off.
Page 206 of 367

Buick Encore GX Owner Manual (GMNA-Localizing-U.S./Canada/Mexico-
16263917) - 2023 - CRC - 2/24/22
Driving and Operating 205
L (Manual Mode) will prevent shifting to a
lower gear range if the engine speed is too
high. If vehicle speed is not reduced within
the time allowed, the lower gear range shift
will not be completed. Slow the vehicle,
then press the−(Minus) button to the
desired lower gear range.
While using the ERS, cruise control can
be used.
Drive Systems
All-Wheel Drive
Vehicles with this feature can operate in
All-Wheel Drive (AWD) Mode.
The AWD system delivers power to all four
wheels and the system adjusts as needed to
improve traction.
Press the AWD button on the center console
to activate the system. The AWD light will
flash briefly while the system is engaging
and stay lit to indicate AWD is active. Press
the button again to disable the system. The
light will flash briefly while the system
disables and then stay off.
The AWD Mode will stay selected until the
mode is changed.
When operated in two-wheel drive, the
vehicle will deliver power to the front
wheels only and may provide better fuel
economy.
When using a compact spare tire on an
AWD vehicle, the system automatically
detects the compact spare and reduces AWD performance to protect the system. To
restore full AWD operation and prevent
excessive wear on the system, replace the
compact spare with a full-size tire as soon as
possible. See
Compact Spare Tire 0307.
Brakes
Electric Brake Boost
Vehicles equipped with electric brake boost
have hydraulic brake circuits that are
electronically controlled when the brake
pedal is applied during normal operation.
The system performs routine tests and turns
off within a few minutes after the vehicle is
turned off. Noise may be heard during this
time. If the brake pedal is pressed during
the tests or when the electric brake boost
system is off, a noticeable change in pedal
force and travel may be felt. This is normal.
Antilock Brake System (ABS)
The Antilock Brake System (ABS) helps
prevent a braking skid and maintain steering
while braking hard.
Page 214 of 367
Buick Encore GX Owner Manual (GMNA-Localizing-U.S./Canada/Mexico-
16263917) - 2023 - CRC - 2/24/22
Driving and Operating 213
Switching Between ACC and Regular
Cruise Control
To switch between ACC and regular cruise
control, press and hold
**. A Driver
Information Display (DIC) message displays.
See Vehicle Messages 0116.
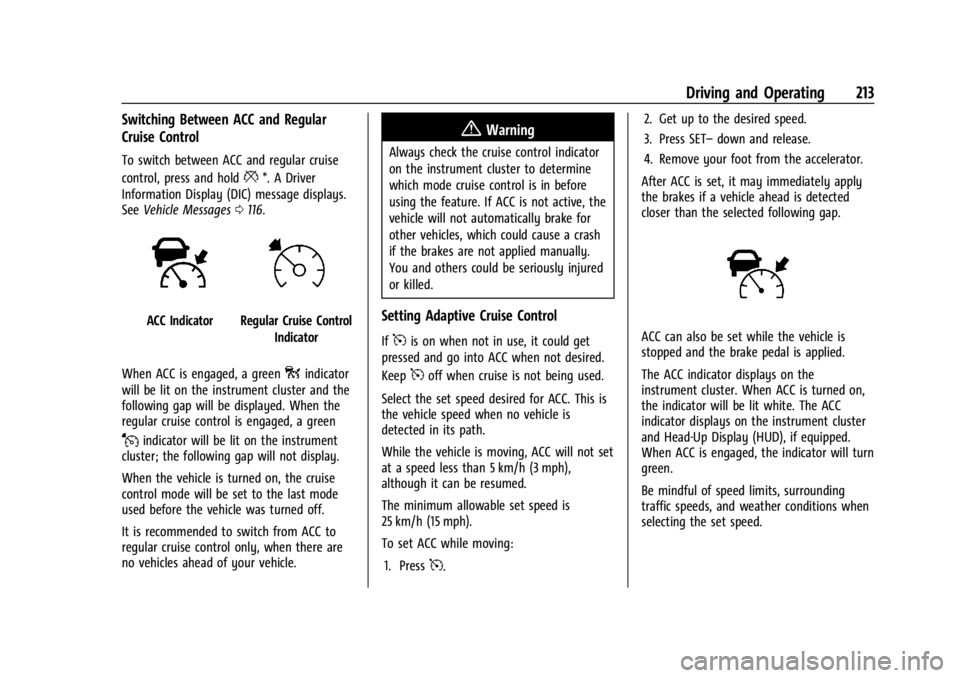
ACC IndicatorRegular Cruise Control
Indicator
When ACC is engaged, a green
oindicator
will be lit on the instrument cluster and the
following gap will be displayed. When the
regular cruise control is engaged, a green
Jindicator will be lit on the instrument
cluster; the following gap will not display.
When the vehicle is turned on, the cruise
control mode will be set to the last mode
used before the vehicle was turned off.
It is recommended to switch from ACC to
regular cruise control only, when there are
no vehicles ahead of your vehicle.
{Warning
Always check the cruise control indicator
on the instrument cluster to determine
which mode cruise control is in before
using the feature. If ACC is not active, the
vehicle will not automatically brake for
other vehicles, which could cause a crash
if the brakes are not applied manually.
You and others could be seriously injured
or killed.
Setting Adaptive Cruise Control
If5is on when not in use, it could get
pressed and go into ACC when not desired.
Keep
5off when cruise is not being used.
Select the set speed desired for ACC. This is
the vehicle speed when no vehicle is
detected in its path.
While the vehicle is moving, ACC will not set
at a speed less than 5 km/h (3 mph),
although it can be resumed.
The minimum allowable set speed is
25 km/h (15 mph).
To set ACC while moving: 1. Press
5. 2. Get up to the desired speed.
3. Press SET–
down and release.
4. Remove your foot from the accelerator.
After ACC is set, it may immediately apply
the brakes if a vehicle ahead is detected
closer than the selected following gap.
ACC can also be set while the vehicle is
stopped and the brake pedal is applied.
The ACC indicator displays on the
instrument cluster. When ACC is turned on,
the indicator will be lit white. The ACC
indicator displays on the instrument cluster
and Head-Up Display (HUD), if equipped.
When ACC is engaged, the indicator will turn
green.
Be mindful of speed limits, surrounding
traffic speeds, and weather conditions when
selecting the set speed.
Page 265 of 367

Buick Encore GX Owner Manual (GMNA-Localizing-U.S./Canada/Mexico-
16263917) - 2023 - CRC - 2/24/22
264 Vehicle Care
6. Verify coolant level after the engine isshut off and the coolant is cold.
If necessary, repeat coolant fill procedure
Steps 1–6.
If the coolant still is not at the proper
level when the system cools down again,
see your dealer.
Caution
If the pressure cap is not tightly installed,
coolant loss and engine damage may
occur. Be sure the cap is properly and
tightly secured.
Automatic Coolant Service Fill Instruction
If equipped, this feature assists in filling and
removing air from the cooling system after
service of components or when coolant is
added after being too low.
To activate the fill and air removal process:
1. With a cold system, open the surge tank cap and add coolant to the indicated
mark on the surge tank.
2. Connect the vehicle to a battery charger.
3. Turn the ignition to Service Mode. See Ignition Positions 0194.
4. Turn off the air conditioning. 5. Set the parking brake.
6. At the same time, press the accelerator
and the brake for two seconds, then
release.
At the end of the cycle, check the coolant
level in the surge tank and add coolant if it
is low. Turn off the vehicle, allow the Engine
Control Module (ECM) to go to sleep, about
two minutes, and repeat Steps 3-7.
Listen for pump activation and movement of
the control valves while watching the level
of the coolant in the surge tank. If the tank
empties, turn the ignition off, carefully
remove the surge tank cap, refill to the
indicated mark, and repeat Steps 4-7. The fill
and air removal process will run for
approximately 10 minutes.
Engine Overheating
The vehicle has an engine coolant
temperature gauge to warn of the engine
overheating. See Engine Coolant
Temperature Gauge 097.
If the decision is made not to lift the hood
when this warning appears, get service help
right away. See Roadside Assistance Program
0 338. If the decision is made to lift the hood,
make sure the vehicle is parked on a level
surface.
Then check to see if the engine cooling fan
is running. If the engine is overheating, the
fan should be running. If it is not, do not
continue to run the engine. Have the vehicle
serviced.
Caution
Do not run the engine if there is a leak
in the engine cooling system. This can
cause a loss of all coolant and can
damage the system and vehicle. Have
any leaks fixed right away.
If Steam Is Coming from the Engine
Compartment
{Warning
Steam and scalding liquids from a hot
cooling system are under pressure.
Turning the pressure cap, even a little,
can cause them to come out at high
speed and you could be burned. Never
turn the cap when the cooling system,
(Continued)
Page 275 of 367
Buick Encore GX Owner Manual (GMNA-Localizing-U.S./Canada/Mexico-
16263917) - 2023 - CRC - 2/24/22
274 Vehicle Care
4. Disconnect the wiring harness connectorfrom the bulb.
5. Install the new bulb in the headlamp assembly by turning clockwise.
6. Reconnect the wiring harness connector.
7. Install the headlamp bulb access cover.
Uplevel Headlamp Assembly
The uplevel model vehicle has LED
high-beam and low-beam headlamps, a DRL
and parking lamp, and a DRL position lamp
on the headlamp assembly.
Sidemarker
The vehicle has an LED sidemarker lamp.
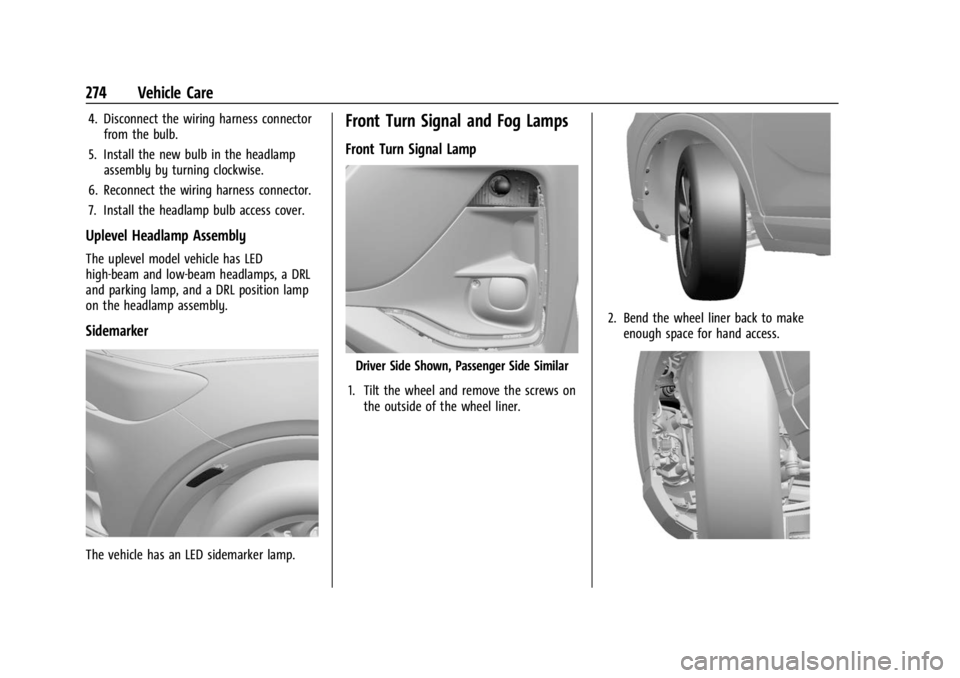
Front Turn Signal and Fog Lamps
Front Turn Signal Lamp
Driver Side Shown, Passenger Side Similar
1. Tilt the wheel and remove the screws on the outside of the wheel liner.
2. Bend the wheel liner back to makeenough space for hand access.
Page 291 of 367

Buick Encore GX Owner Manual (GMNA-Localizing-U.S./Canada/Mexico-
16263917) - 2023 - CRC - 2/24/22
290 Vehicle Care
Intended Outboard Sidewall:The side
of an asymmetrical tire, that must
always face outward when mounted on
a vehicle.
Kilopascal (kPa)
:The metric unit for air
pressure.
Light Truck (LT-Metric) Tire
:A tire used
on light duty trucks and some
multipurpose passenger vehicles.
Load Index
:An assigned number
ranging from 1 to 279 that corresponds
to the load carrying capacity of a tire.
Maximum Inflation Pressure
:The
maximum air pressure to which a cold
tire can be inflated. The maximum air
pressure is molded onto the sidewall.
Maximum Load Rating
:The load rating
for a tire at the maximum permissible
inflation pressure for that tire.
Occupant Distribution
:Designated
seating positions.
Outward Facing Sidewall
:The side of
an asymmetrical tire that has a
particular side that faces outward when
mounted on a vehicle. The side of the tire that contains a whitewall, bears
white lettering, or bears manufacturer,
brand, and/or model name molding
that is higher or deeper than the same
moldings on the other sidewall of
the tire.
Passenger (P-Metric) Tire
:A tire used
on passenger cars and some light duty
trucks and multipurpose vehicles.
Recommended Inflation Pressure
:
Vehicle manufacturer's recommended
tire inflation pressure as shown on the
tire placard. See Tire Pressure0291 and
Vehicle Load Limits 0191.
Radial Ply Tire
:A pneumatic tire in
which the ply cords that extend to the
beads are laid at 90 degrees to the
centerline of the tread.
Rim
:A metal support for a tire and
upon which the tire beads are seated.
Sidewall
:The portion of a tire between
the tread and the bead. Speed Rating
:An alphanumeric code
assigned to a tire indicating the
maximum speed at which a tire can
operate.
Traction
:The friction between the tire
and the road surface. The amount of
grip provided.
Tread
:The portion of a tire that comes
into contact with the road.
Treadwear Indicators
:Narrow bands,
sometimes called wear bars, that show
across the tread of a tire when only
1.6 mm (1/16 in) of tread remains. See
When It Is Time for New Tires 0297.
UTQGS (Uniform Tire Quality Grading
Standards)
:A tire information system
that provides consumers with ratings
for a tire's traction, temperature, and
treadwear. Ratings are determined by
tire manufacturers using government
testing procedures. The ratings are
molded into the sidewall of the tire.
See Uniform Tire Quality Grading 0299.
Page 296 of 367

Buick Encore GX Owner Manual (GMNA-Localizing-U.S./Canada/Mexico-
16263917) - 2023 - CRC - 2/24/22
Vehicle Care 295
If the turn signal lamp does not flash within
15 seconds after starting to inflate the tire,
the tire fill alert has not been activated or is
not working.
If the hazard warning flashers are on, the
tire fill alert visual feedback will not work
properly.
The TPMS will not activate the tire fill alert
properly under the following conditions:
.There is interference from an external
device or transmitter.
.The air pressure from the inflation device
is not sufficient to inflate the tire.
.There is a malfunction in the TPMS.
.There is a malfunction in the horn or turn
signal lamps.
.The identification code of the TPMS
sensor is not registered to the system.
.The battery of the TPMS sensor is low.
If the tire fill alert does not operate due to
TPMS interference, move the vehicle about
1 m (3 ft) back or forward and try again.
If the tire fill alert feature is not working,
use a tire pressure gauge.
TPMS Sensor Matching Process
Each TPMS sensor has a unique
identification code. The identification code
needs to be matched to a new tire/wheel
position after rotating the vehicle’s tires or
replacing one or more of the TPMS sensors.
Also, the TPMS sensor matching process
should be performed after replacing a spare
tire with a road tire containing the TPMS
sensor. The malfunction light and the DIC
message, if equipped, should go off at the
next ignition cycle. The sensors are matched
to the tire/wheel positions, using a TPMS
relearn tool, in the following order: driver
side front tire, passenger side front tire,
passenger side rear tire, and driver side rear.
See your dealer for service or to purchase a
relearn tool. A TPMS relearn tool can also be
purchased. See Tire Pressure Monitor Sensor
Activation Tool at
www.gmtoolsandequipment.com or call
1-800-GM TOOLS (1-800-468-6657).
There are two minutes to match the first
tire/wheel position, and five minutes overall
to match all four tire/wheel positions. If it
takes longer, the matching process stops
and must be restarted.
The TPMS sensor matching process is: 1. Set the parking brake. 2. Turn the ignition on without starting the
vehicle or place the vehicle in Service
Mode. See Ignition Positions 0194.
3. Use SELECTor
o/pto select the
Vehicle in the Base Level Driver
Information Center (DIC). Or Use SELECT
or
o/pto select the Info page in the
Uplevel Driver Information Center (DIC).
4. Use the thumbwheel to scroll to the Tire Pressure Learn Menu Item (Base DIC) or
the Tire Pressure Menu Item screen
(Uplevel DIC).
5. Press and hold
lor the thumbwheel to
begin the sensor matching process.
A message requesting acceptance of the
process may display.
6. If requested, press
lor the
thumbwheel again to confirm the
selection. The horn sounds twice to
signal the receiver is in relearn mode
and the TIRE LEARN orTIRE LEARNING
ACTIVE message displays on the DIC
screen.
7. Start with the driver side front tire.
8. Place the relearn tool against the tire sidewall, near the valve stem. Then press
the button to activate the TPMS sensor.
Page 343 of 367

Buick Encore GX Owner Manual (GMNA-Localizing-U.S./Canada/Mexico-
16263917) - 2023 - CRC - 2/24/22
342 Customer Information
Gather the following information:
.Driver name, address, and telephone
number
.Driver license number
.Owner name, address, and telephone
number
.Vehicle license plate number
.Vehicle make, model, and model year
.Vehicle Identification Number (VIN)
.Insurance company and policy number
.General description of the damage to the
other vehicle
Choose a reputable repair facility that uses
quality replacement parts. See “Collision
Parts” earlier in this section.
If the airbag has inflated, see What Will You
See after an Airbag Inflates? 056.
Managing the Vehicle Damage Repair
Process
In the event that the vehicle requires
damage repairs, GM recommends that you
take an active role in its repair. If you have
a pre-determined repair facility of choice,
take the vehicle there, or have it towed
there. Specify to the facility that any
required replacement collision parts be
original equipment parts, either new Genuine GM parts or recycled original GM
parts. Remember, recycled parts will not be
covered by the GM vehicle warranty.
Insurance pays the bill for the repair, but
you must live with the repair. Depending on
your policy limits, your insurance company
may initially value the repair using
aftermarket parts. Discuss this with the
repair professional, and insist on Genuine
GM parts. Remember, if the vehicle is
leased, you may be obligated to have the
vehicle repaired with Genuine GM parts,
even if your insurance coverage does not
pay the full cost.
If another party's insurance company is
paying for the repairs, you are not obligated
to accept a repair valuation based on that
insurance company's collision policy repair
limits, as you have no contractual limits
with that company. In such cases, you can
have control of the repair and parts choices
as long as the cost stays within reasonable
limits.
Publication Ordering Information
Service Manuals
Service manuals have the diagnosis and
repair information on the engine/propulsion,
transmission, axle, suspension, brakes,
electrical system, steering system, body, etc.
Customer Literature
Owner’s manuals are written specifically for
owners and are intended to provide basic
operational information about the vehicle.
The owner’s manual includes the
Maintenance Schedule for all models.
Customer literature publications available for
purchase include owner’s manuals, warranty
manuals, and portfolios. Portfolios include an
owner’s manual, warranty manual,
if applicable, and zip lock bag or pouch.
Current and Past Models
Service manuals and customer literature are
available for many current and past model
year GM vehicles.
To order, call 1-800-551-4123 Monday–Friday,
8:00 a.m.–6:00 p.m. Eastern Time