Set time BUICK ENCORE GX 2024 Owner's Manual
[x] Cancel search | Manufacturer: BUICK, Model Year: 2024, Model line: ENCORE GX, Model: BUICK ENCORE GX 2024Pages: 330, PDF Size: 6.72 MB
Page 113 of 330

Buick Encore GX Owner Manual (GMNA-Localizing-U.S./Canada/Mexico-
16897608) - 2024 - CRC - 1/23/23
112 Instruments and Controls
Show in Cluster. Reset the Brake Pad Life
after replacing the brake pads. SeeBrake
Pad Life System 0231.
Oil Life : Displays an estimate of the oil's
remaining useful life. If REMAINING OIL LIFE
99% is displayed, that means 99% of the
current oil life remains.
When the remaining oil life is low, the
CHANGE ENGINE OIL SOON message will
appear on the display. The oil should be
changed as soon as possible. See Engine Oil
0 221. In addition to the engine oil life
system monitoring the oil life, additional
maintenance is recommended. See
Maintenance Schedule 0286.
When selected, the following options may
be chosen in the dialog: Reset, and Show in
Cluster. The Oil Life must be reset after each
oil change. It will not reset itself. Do not
reset the Oil Life display accidentally at any
time other than when the oil has just been
changed. It cannot be reset accurately until
the next oil change. To reset, see Engine Oil
Life System 0223.
Engine Air Filter Life : Displays an estimate
of the engine air filter’s remaining useful life
and the state of the system. Engine Air
Filter Life 95% means 95% of the current air
filter life remains. Messages are displayed based on the engine air filter life and the
state of the system. When the REPLACE AT
NEXT OIL CHANGE message displays, the
engine air filter should be replaced at the
time of the next oil change. When the
REPLACE NOW message displays, the engine
air filter should be replaced as soon as
possible. The Air Filter Life display must be
reset after the engine air filter replacement.
To reset, see
Engine Air Filter Life System
0 224.
When selected, the following options may
be chosen in the dialog: Turn Off/On, Reset,
and Show in Cluster.
Gauge
Battery Voltage : Displays the current
battery voltage.
When selected, Show in Cluster may be
chosen in the dialog.
Coolant Temperature : Displays the
temperature of the coolant in either degrees
Celsius (°C) or degrees Fahrenheit (°F).
When selected, Show in Cluster may be
chosen in the dialog. Transmission Fluid Temperature :
Displays
the temperature of the automatic
transmission fluid in either degrees
Celsius (°C) or degrees Fahrenheit (°F).
When selected, Show in Cluster may be
chosen in the dialog.
Oil Pressure : Displays the engine oil
pressure in kPa (kilopascals) or psi (pounds
per square inch).
When selected, Show in Cluster may be
chosen in the dialog.
Oil Temperature : Displays the current oil
temperature in either degrees Celsius (°C) or
degrees Fahrenheit (°F).
When selected, Show in Cluster may be
chosen in the dialog.
Engine Hours : Displays the total number of
hours the engine has run.
When selected, Show in Cluster may be
chosen in the dialog.
Trip
Trip Information : Trip 1 or 2 displays the
current distance traveled, in either
kilometers (km) or miles (mi), since the trip
odometer was last reset.
Page 114 of 330
Buick Encore GX Owner Manual (GMNA-Localizing-U.S./Canada/Mexico-
16897608) - 2024 - CRC - 1/23/23
Instruments and Controls 113
Average Fuel Economy displays the
approximate average liters per
100 kilometers (L/100 km) or miles per
gallon (mpg). This number is calculated
based on the number of L/100 km (mpg)
recorded since the last time this menu item
was reset. This number reflects only the
current, approximate average fuel economy
and changes as driving conditions change.
To reset these values, touch reset on the
touchscreen display when the Trip
Information dialog is selected.
When selected, the following options may
be chosen in the dialog: Reset Trip 1, Reset
Trip 2, and Show in Cluster.
Fuel Economy :Displays average fuel
economy, the best fuel economy over the
selected distance, and a bar graph showing
instantaneous fuel economy. Values are
displayed in liters per 100 kilometers
(L/100 km) or miles per gallon (mpg). This
number reflects only the approximate fuel
economy and changes frequently as driving
conditions change. Only the best score can
be reset.
If the vehicle is equipped with an Active Fuel
Management indicator, the engine operating
mode may be shown in the bottom corner
of this display. When selected, the following options may
be chosen in the dialog: Change Distance,
Reset Best Score, and Add to Driver Display.
The distance for average fuel economy and
the best fuel economy can be changed to:
40 km (25 mi), 80 km (50 mi), and 725 km
(300 mi).
Vehicle Messages
Messages displayed on the DIC indicate the
status of the vehicle or some action that
may be needed to correct a condition.
Multiple messages may appear one after
another.
The messages that do not require
immediate action can be acknowledged and
cleared by pressing the thumbwheel. The
messages that require immediate action
cannot be cleared until that action is
performed.
All messages should be taken seriously;
clearing the message does not correct the
problem.
If a SERVICE message appears, see your
dealer.
Follow the instructions given in the
messages. The system displays messages
regarding the following topics:
.Service Messages
.Fluid Levels
.Vehicle Security
.Brakes
.Ride Control Systems
.Advanced Driver Assistance Systems
.Cruise Control
.Lighting and Bulb Replacement
.Wiper/Washer Systems
.Doors and Windows
.Seat Belts
.Airbag Systems
.Engine and Transmission
.Tire Pressure
.Battery
Engine Power Messages
ENGINE POWER IS REDUCED
This message displays when the vehicle's
propulsion power is reduced. A reduction in
propulsion power can affect the vehicle's
ability to accelerate. If this message is on,
but there is no observed reduction in
Page 120 of 330
Buick Encore GX Owner Manual (GMNA-Localizing-U.S./Canada/Mexico-
16897608) - 2024 - CRC - 1/23/23
Lighting 119
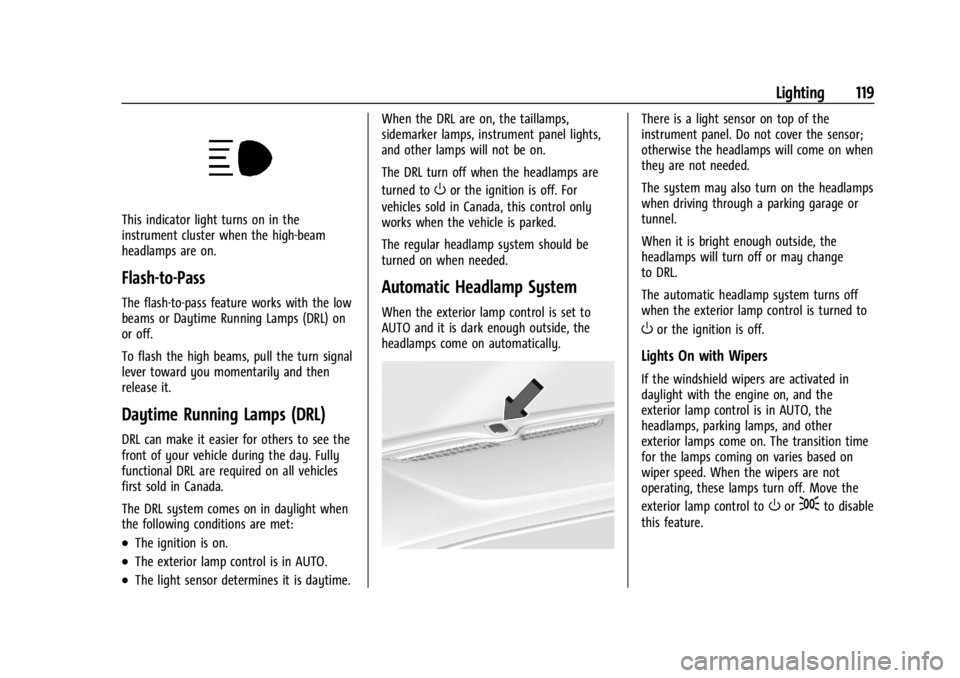
This indicator light turns on in the
instrument cluster when the high-beam
headlamps are on.
Flash-to-Pass
The flash-to-pass feature works with the low
beams or Daytime Running Lamps (DRL) on
or off.
To flash the high beams, pull the turn signal
lever toward you momentarily and then
release it.
Daytime Running Lamps (DRL)
DRL can make it easier for others to see the
front of your vehicle during the day. Fully
functional DRL are required on all vehicles
first sold in Canada.
The DRL system comes on in daylight when
the following conditions are met:
.The ignition is on.
.The exterior lamp control is in AUTO.
.The light sensor determines it is daytime.When the DRL are on, the taillamps,
sidemarker lamps, instrument panel lights,
and other lamps will not be on.
The DRL turn off when the headlamps are
turned to
Oor the ignition is off. For
vehicles sold in Canada, this control only
works when the vehicle is parked.
The regular headlamp system should be
turned on when needed.
Automatic Headlamp System
When the exterior lamp control is set to
AUTO and it is dark enough outside, the
headlamps come on automatically.
There is a light sensor on top of the
instrument panel. Do not cover the sensor;
otherwise the headlamps will come on when
they are not needed.
The system may also turn on the headlamps
when driving through a parking garage or
tunnel.
When it is bright enough outside, the
headlamps will turn off or may change
to DRL.
The automatic headlamp system turns off
when the exterior lamp control is turned to
Oor the ignition is off.
Lights On with Wipers
If the windshield wipers are activated in
daylight with the engine on, and the
exterior lamp control is in AUTO, the
headlamps, parking lamps, and other
exterior lamps come on. The transition time
for the lamps coming on varies based on
wiper speed. When the wipers are not
operating, these lamps turn off. Move the
exterior lamp control to
Oor;to disable
this feature.
Page 123 of 330
Buick Encore GX Owner Manual (GMNA-Localizing-U.S./Canada/Mexico-
16897608) - 2024 - CRC - 1/23/23
122 Lighting
Rear Reading Lamps
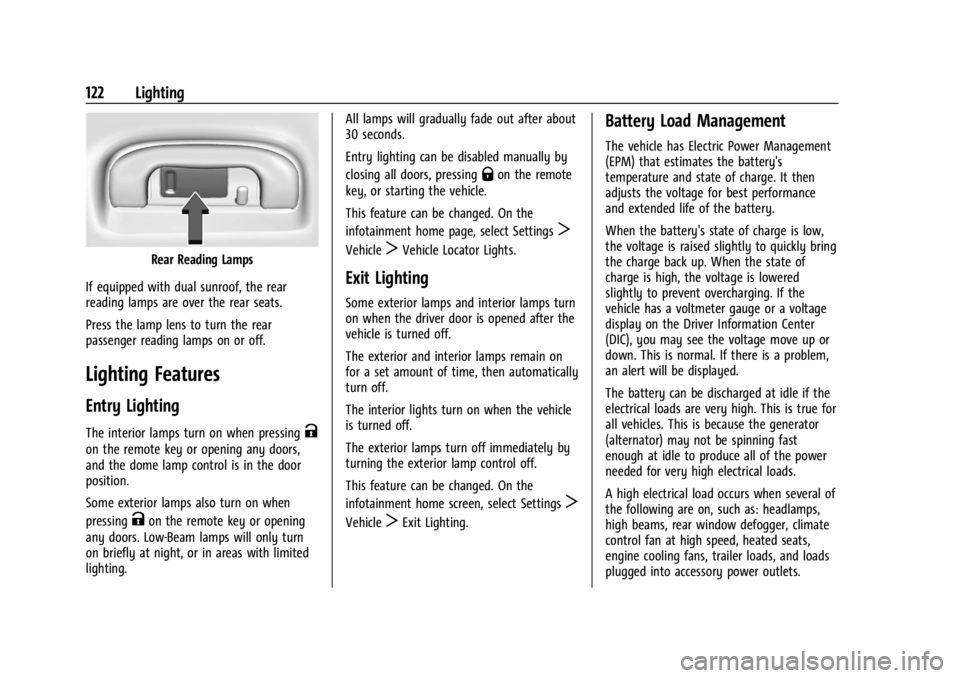
If equipped with dual sunroof, the rear
reading lamps are over the rear seats.
Press the lamp lens to turn the rear
passenger reading lamps on or off.
Lighting Features
Entry Lighting
The interior lamps turn on when pressingK
on the remote key or opening any doors,
and the dome lamp control is in the door
position.
Some exterior lamps also turn on when
pressing
Kon the remote key or opening
any doors. Low-Beam lamps will only turn
on briefly at night, or in areas with limited
lighting. All lamps will gradually fade out after about
30 seconds.
Entry lighting can be disabled manually by
closing all doors, pressing
Qon the remote
key, or starting the vehicle.
This feature can be changed. On the
infotainment home page, select Settings
T
VehicleTVehicle Locator Lights.
Exit Lighting
Some exterior lamps and interior lamps turn
on when the driver door is opened after the
vehicle is turned off.
The exterior and interior lamps remain on
for a set amount of time, then automatically
turn off.
The interior lights turn on when the vehicle
is turned off.
The exterior lamps turn off immediately by
turning the exterior lamp control off.
This feature can be changed. On the
infotainment home screen, select Settings
T
VehicleTExit Lighting.
Battery Load Management
The vehicle has Electric Power Management
(EPM) that estimates the battery's
temperature and state of charge. It then
adjusts the voltage for best performance
and extended life of the battery.
When the battery's state of charge is low,
the voltage is raised slightly to quickly bring
the charge back up. When the state of
charge is high, the voltage is lowered
slightly to prevent overcharging. If the
vehicle has a voltmeter gauge or a voltage
display on the Driver Information Center
(DIC), you may see the voltage move up or
down. This is normal. If there is a problem,
an alert will be displayed.
The battery can be discharged at idle if the
electrical loads are very high. This is true for
all vehicles. This is because the generator
(alternator) may not be spinning fast
enough at idle to produce all of the power
needed for very high electrical loads.
A high electrical load occurs when several of
the following are on, such as: headlamps,
high beams, rear window defogger, climate
control fan at high speed, heated seats,
engine cooling fans, trailer loads, and loads
plugged into accessory power outlets.
Page 131 of 330
Buick Encore GX Owner Manual (GMNA-Localizing-U.S./Canada/Mexico-
16897608) - 2024 - CRC - 1/23/23
130 Infotainment System
SiriusXM Satellite Radio Service
If equipped, SiriusXM Satellite Radio Service
provides digital radio reception. Tall
buildings or hills can interfere with satellite
radio signals, causing the sound to fade in
and out. In addition, traveling or standing
under heavy foliage, bridges, garages,
or tunnels may cause loss of the SiriusXM
signal for a period of time. Some cellular
services may interfere with SXM reception
causing loss of signal.
Mobile Device Usage
Mobile device usage, such as making or
receiving calls, charging, or just having the
mobile device on may cause static
interference in the radio. Unplug the mobile
device or turn it off if this happens.
Multi-Band Antenna
The multi-band roof antenna may be used
for radio, navigation, and other
communication systems, depending on the
equipped options. To ensure clear reception,
keep the antenna clear of obstructions, such
as snow and ice. If the vehicle has a
sunroof, and it is open, or a roof loaded
with cargo, reception may be affected.
Audio Players
Avoiding Untrusted Media Devices
When using media devices such as USB and
mobile devices, consider the source.
Untrusted media devices could contain files
that affect system operation or performance
and should be avoided.
USB Port
The vehicle may be equipped with multiple
USB ports. Ports may also be used for
charging. Music may be played from a
connected USB device.
Caution
To avoid vehicle damage, unplug all
accessories and disconnect all accessory
cables from the vehicle when not in use.
Accessory cables left plugged into the
vehicle, unconnected to a device, could be
damaged or cause an electrical short if
the unconnected end comes in contact
with liquids or another power source such
as the accessory power outlet.
USB Audio
To play music via USB:1. On the audio now playing page, touch source and select USB.
2. If there is no device connected, follow the screen prompts to connect the
device.
3. Supported media content will appear on the display.
Bluetooth Audio
Music may be played from a connected
Bluetooth device.
Volume and song selection may be
controlled by using the infotainment
controls. If Bluetooth is selected and no
volume is present, check the volume setting
on the infotainment system or the
connected phone.
To play music via Bluetooth:
1. On the audio now playing page, touch source and select the desired Bluetooth
device.
2. If there is no device connected, follow the screen prompts to pair the device.
3. Supported media content will appear on the display.
Page 133 of 330
Buick Encore GX Owner Manual (GMNA-Localizing-U.S./Canada/Mexico-
16897608) - 2024 - CRC - 1/23/23
132 Infotainment System
system. The adjusted volume level remains
in memory for later calls. The volume
cannot be lowered beyond a certain level.
Bluetooth (Pairing and Using a
Phone)
Pairing
A Bluetooth-enabled mobile device must be
paired to the Bluetooth system and then
connected to the vehicle before it can be
used. See the mobile device manufacturer's
user guide for Bluetooth functions before
pairing the device.
Pairing Information
.Touch the Phone icon on the home page
of the infotainment display.
.If no mobile device has been paired, a
message on the infotainment display will
show the Manage Phones option. Touch
this option and the Phones screen will
display. See“Pairing a Phone” later in this
section.
.A Bluetooth smartphone with music
capability can be paired to the vehicle as
a smartphone and a music player at the
same time.
.Up to 10 devices can be paired to the
system.
.The pairing process is disabled when the
vehicle is moving.
.Pairing only needs to be completed once,
unless the pairing information on the cell
phone changes or the cell phone is
deleted from the system.
.If multiple paired cell phones are within
range of the system, the system connects
to the paired cell phone that is set to
First to Connect. If there is no cell phone
set to First to Connect, it will link to the
cell phone which was used last. To link to
a different paired cell phone, see “Linking
to a Different Phone” later in this section.
Pairing a Phone 1. Make sure Bluetooth has been enabled on the cell phone before starting the
pairing process.
2. Touch the Phone icon on the Home Page.
3. If no mobile device is connected, touch Manage Phones and the Phones screen
will display.
If another mobile device is connected
already, touch Settings, select the
Systems tab, and then touch Phones.
4. Touch Add Phone. If a previously added phone is
disconnected, the "Add Phone" card will
just be a "+" card.
5. Follow the on-screen prompts to pair the cell phone.
6. Start the pairing process on the cell phone to be paired to the vehicle. See
the cell phone manufacturer's user guide
for information on this process. Once the
cell phone is paired, it will show as
Connected.
7. Follow the instructions on the cell phone to confirm the six-digit code showing on
the infotainment display and touch Pair.
For pairing to be successful, both the
code on the cell phone and infotainment
display needs to be acknowledged. Once
the cell phone is paired, it will show as
Connected.
8. If the vehicle name does not appear on your cell phone, there are a few ways to
start the pairing process over:
.Make sure there is not an entry for
the vehicle under the previously
connected list. If the vehicle and cell
phone were previously paired and
one still remembers the other, it will
not identify as a new device when
searching.
Page 137 of 330
Buick Encore GX Owner Manual (GMNA-Localizing-U.S./Canada/Mexico-
16897608) - 2024 - CRC - 1/23/23
136 Infotainment System
2. For first time connection, there are twoways to set up wireless projection:
.Connect your Android phone or Apple
iPhone by using the factory-provided
phone USB cable and plugging into a
USB data port. For best performance,
it is highly recommended to use the
device’s factory-provided USB cable,
which should be replaced after
significant wear to maintain
connection quality. Aftermarket or
third-party cables may not work.
.Connecting the phone over Bluetooth.
See Bluetooth (Pairing and Using a
Phone) 0132 or
Bluetooth (Overview) 0131.
3. Make sure Wi-Fi and Bluetooth is turned on the phone for wireless projection
to work.
4. When the phone is first connected to activate Apple CarPlay or Android Auto,
agree to the terms and conditions on
both the infotainment system and the
phone.
5. Follow the instructions on the phone.
The Android Auto and Apple CarPlay icons
on the Home Page will illuminate depending
on the smartphone. Android Auto and/or
Apple CarPlay may automatically launch upon wireless connection. If not, touch the
Android Auto or Apple CarPlay icon on the
Home Page to launch.
Wireless CarPlay and/or Wireless Android
Auto may experience occasional service
disruption due to outside Wi-Fi interference.
To disconnect the phones wireless
projection:
1. Select the Settings icon from the Home Page or the Settings icon on the shortcut
tray near the left of the display.
2. Select the Systems tab.
3. Touch Phones.
4. Touch Option on the phone card to show the cell phone’s or mobile device’s
settings.
5. Turn off Apple CarPlay or Android Auto.
Press
{on the center stack to return to the
Home Page.
Features are subject to change. For further
information on how to set up Android Auto
and Apple CarPlay in the vehicle, visit your
brand website. See Online Account0300 for
details. Android Auto is provided by Google and is
subject to Google’s terms and privacy policy.
Apple CarPlay is provided by Apple and is
subject to Apple’s terms and privacy policy.
Data plan rates apply. For Android Auto
support and to see if your phone is
compatible, see https:/www.android.com/
auto/compatability. For Apple CarPlay
support and to see if your phone is
compatible, see www.apple.com/ios/
carplay/. Apple or Google may change or
suspend availability at any time. Google,
Android, Android Auto, Google Maps, and
other marks are trademarks of Google LLC.
Apple CarPlay is a trademark of Apple Inc.
Press
{on the center stack to exit Android
Auto or Apple CarPlay. To enter back into
Android Auto or Apple CarPlay, press and
hold
{on the center stack.
Settings
To access the Settings menus:
1. Touch Settings on the Home Page on the infotainment display.
2. Touch the desired category to display a list of available options.
3. Touch to select the desired feature setting.
Page 138 of 330
Buick Encore GX Owner Manual (GMNA-Localizing-U.S./Canada/Mexico-
16897608) - 2024 - CRC - 1/23/23
Infotainment System 137
4. Touch the options on the infotainmentdisplay to change a setting.
5. Touch
Sto go back.
The Settings menu may contain the
following:
System
The menu may contain the following:
Time / Date
Allows setting of the clock.
Language
Sets the display language used on the
infotainment display. It may also use the
selected language for voice recognition and
audio feedback.
Phones
Allows connecting to a different cell phone
or mobile device source, disconnect a cell
phone or media device, or delete a cell
phone or media device.
Wi-Fi Networks
Shows connected and available Wi-Fi
networks. Wi-Fi Hotspot
Allows adjustment of different Wi-Fi
features.
Vehicle-to-Phone Sharing
Allows authorization of projection apps like
CarPlay and Android to access your
vehicle data.
Display
Allows adjustment of the infotainment
display.
Sounds
Allows adjustment of the infotainment
system sounds.
Vehicle Software
Shows Updates, About, and Reset Options.
Vehicle
The menu may contain the following:
Teen Driver
See
Teen Driver 0138.
Rear Seat Reminder
Allows for a chime and a message when the
rear door has been opened before or during
operation of the vehicle. Buckle to Drive
This feature can prevent shifting out of Park
when the driver, and if applicable the front
passenger, seat belt is not buckled.
Climate and Air Quality
Adjusts different climate settings.
Collision/Detection Systems
Adjusts different driver assistance system
settings.
Comfort and Convenience
Adjusts different comfort and convenience
settings.
Lighting
Adjusts different lighting settings.
Power Door Locks
Adjusts different door lock settings.
Remote Lock, Unlock, and Start
Adjusts different remote lock settings.
Seating Position
Adjusts different seating position settings.
Page 140 of 330
Buick Encore GX Owner Manual (GMNA-Localizing-U.S./Canada/Mexico-
16897608) - 2024 - CRC - 1/23/23
Infotainment System 139
2. For automatic transmissions, the vehiclemust be in P (Park). For manual
transmissions, the vehicle must be
stopped with the parking brake set.
3. From the Settings menu, touch Vehicle and then Teen Driver.
4. Enter the PIN.
5. Touch Setup Keys or Add/Remove Teen Driver Keys. The system displays
instructions for registering or
unregistering a key. A confirmation
message displays.
Manage Settings or Teen Driver Settings
Depending on the options of your vehicle,
the following menu items may be displayed:
Buckle to Drive : When turned ON, Buckle to
Drive prevents the driver from shifting out
of P (Park) for a period of time after the
brake pedal is pressed if the driver, or on
some vehicles the detected passenger, has
not buckled their seat belt. On some
vehicles, Buckle to Drive is always ON when
Teen Driver is active and is not configurable.
See Buckle To Drive 048.
Audio Volume Limit : Allows a maximum
audio volume to be set. Turn the audio
volume limit on or off. Use the arrows to
choose the maximum allowable level for the audio volume. On some infotainment
systems, touch Set Audio Volume Limit to
choose the maximum allowable audio
volume level.
Set Audio Volume Limit :
Use the arrows to
choose the maximum allowable level for the
audio volume.
Teen Driver Speed Limiter : Limits the
maximum speed of the vehicle. When the
speed limiter is turned on and the vehicle is
started with a Teen Driver key, the DIC
displays a message that the top speed is
limited.
On certain vehicles, when the Speed Limiter
is turned ON, the vehicle’s maximum
acceleration will be limited. The DIC will
display a message that the acceleration is
limited.
Teen Driver Speed Warning : Displays a
warning in the DIC when exceeding a
selectable speed. Turn the speed warning on
or off and choose the desired speed warning
level. The speed warning does not limit the
speed of the vehicle. On some infotainment
systems, touch Set Teen Driver Speed
Warning to set the warning speed. Set Teen Driver Speed Warning :
Choose the
desired speed warning level. The speed
warning does not limit the speed of the
vehicle.
When Teen Driver is Active:
.If equipped, the radio will mute when the
driver seat belt, and in some vehicles the
front passenger seat belt, is not buckled.
The audio from any device paired to the
vehicle will also be muted.
.An object placed on the front passenger
seat, such as a briefcase, handbag,
grocery bag, laptop, or other electronic
device, could cause the passenger sensing
system to falsely sense an unbuckled
front passenger and mute the radio.
If this happens, remove the object from
the seat. See Passenger Sensing System
0 61.
.Some safety systems, such as Automatic
Emergency Braking, if equipped, cannot
be turned off.
.The gap setting for Adaptive Cruise
Control and alert timing for Forward
Collision Alert, if equipped, cannot be
changed.
.When trying to change a safety feature
that is not configurable in Teen Driver,
the feature may be grayed out or
Page 141 of 330
Buick Encore GX Owner Manual (GMNA-Localizing-U.S./Canada/Mexico-
16897608) - 2024 - CRC - 1/23/23
140 Infotainment System
removed from the infotainment menu,
or the DIC will display a message
indicating that Teen Driver is active and
the action is not available.
.Super Cruise or Ultra Cruise, if equipped,
is not available.
.Enhanced Low Fuel Warning
(if equipped)–When the vehicle is low
on fuel, the low fuel light on the
instrument cluster flashes and the DIC
low fuel warning cannot be dismissed.
.Do not tow a trailer if equipped with
Automatic Emergency Braking.
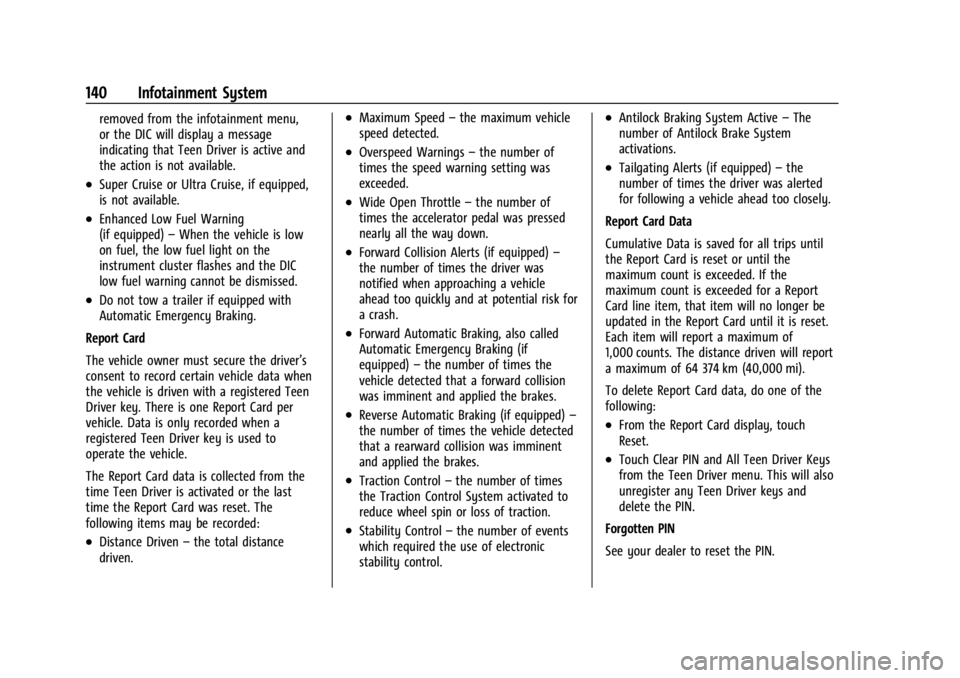
Report Card
The vehicle owner must secure the driver’s
consent to record certain vehicle data when
the vehicle is driven with a registered Teen
Driver key. There is one Report Card per
vehicle. Data is only recorded when a
registered Teen Driver key is used to
operate the vehicle.
The Report Card data is collected from the
time Teen Driver is activated or the last
time the Report Card was reset. The
following items may be recorded:
.Distance Driven –the total distance
driven.
.Maximum Speed –the maximum vehicle
speed detected.
.Overspeed Warnings –the number of
times the speed warning setting was
exceeded.
.Wide Open Throttle –the number of
times the accelerator pedal was pressed
nearly all the way down.
.Forward Collision Alerts (if equipped) –
the number of times the driver was
notified when approaching a vehicle
ahead too quickly and at potential risk for
a crash.
.Forward Automatic Braking, also called
Automatic Emergency Braking (if
equipped) –the number of times the
vehicle detected that a forward collision
was imminent and applied the brakes.
.Reverse Automatic Braking (if equipped) –
the number of times the vehicle detected
that a rearward collision was imminent
and applied the brakes.
.Traction Control –the number of times
the Traction Control System activated to
reduce wheel spin or loss of traction.
.Stability Control –the number of events
which required the use of electronic
stability control.
.Antilock Braking System Active –The
number of Antilock Brake System
activations.
.Tailgating Alerts (if equipped) –the
number of times the driver was alerted
for following a vehicle ahead too closely.
Report Card Data
Cumulative Data is saved for all trips until
the Report Card is reset or until the
maximum count is exceeded. If the
maximum count is exceeded for a Report
Card line item, that item will no longer be
updated in the Report Card until it is reset.
Each item will report a maximum of
1,000 counts. The distance driven will report
a maximum of 64 374 km (40,000 mi).
To delete Report Card data, do one of the
following:
.From the Report Card display, touch
Reset.
.Touch Clear PIN and All Teen Driver Keys
from the Teen Driver menu. This will also
unregister any Teen Driver keys and
delete the PIN.
Forgotten PIN
See your dealer to reset the PIN.