stop start BUICK ENVISION 2017 User Guide
[x] Cancel search | Manufacturer: BUICK, Model Year: 2017, Model line: ENVISION, Model: BUICK ENVISION 2017Pages: 366, PDF Size: 5.37 MB
Page 40 of 366

Buick Envision Owner Manual (GMNA-Localizing-U.S./Canada/Mexico-
10122659) - 2017 - crc - 11/16/16
Keys, Doors, and Windows 39
If equipped with a power liftgate, the
switch is on the driver door. The
vehicle must be in P (Park).
The modes are:
.MAX: Opens to maximum
height.
. 3/4: Opens to a reduced height
that can be set from 3/4 to fully
open. Use to prevent the liftgate
from opening into overhead
obstructions such as a garage
door or roof-mounted cargo. The
liftgate can be manually opened
all the way.
. OFF: Opens manually only. To power open or close the liftgate,
select MAX or 3/4 mode.
.
Press
btwice quickly on the
RKE transmitter until the liftgate
moves.
. Press
8on the driver door.
. Press the touch pad on the
outside liftgate handle after
unlocking all doors. If equipped
with Keyless Access, the RKE
transmitter must be within
1 m (3 ft).
.
Presslon the bottom of the
liftgate next to the pull cup to
close. Press any liftgate button or the
touch pad while the liftgate is
moving to stop it. Pressing again
restarts the operation in the reverse
direction. The touch pad on the
liftgate handle cannot be used to
close the liftgate.
Caution
Manually forcing the liftgate to
open or close during a power
cycle can damage the vehicle.
Allow the power cycle to
complete.
The power liftgate may be
temporarily disabled under extreme
low temperatures, or after repeated
power cycling over a short period of
time. If this occurs, the liftgate can
still be operated manually.
If the vehicle is shifted out of
P (Park) while the power function is
in progress, the liftgate will continue
to completion. If the vehicle is
accelerated before the liftgate has
completed moving, the liftgate may
stop or reverse direction. Check for
Page 42 of 366
Buick Envision Owner Manual (GMNA-Localizing-U.S./Canada/Mexico-
10122659) - 2017 - crc - 11/16/16
Keys, Doors, and Windows 41
Hands-Free Operation
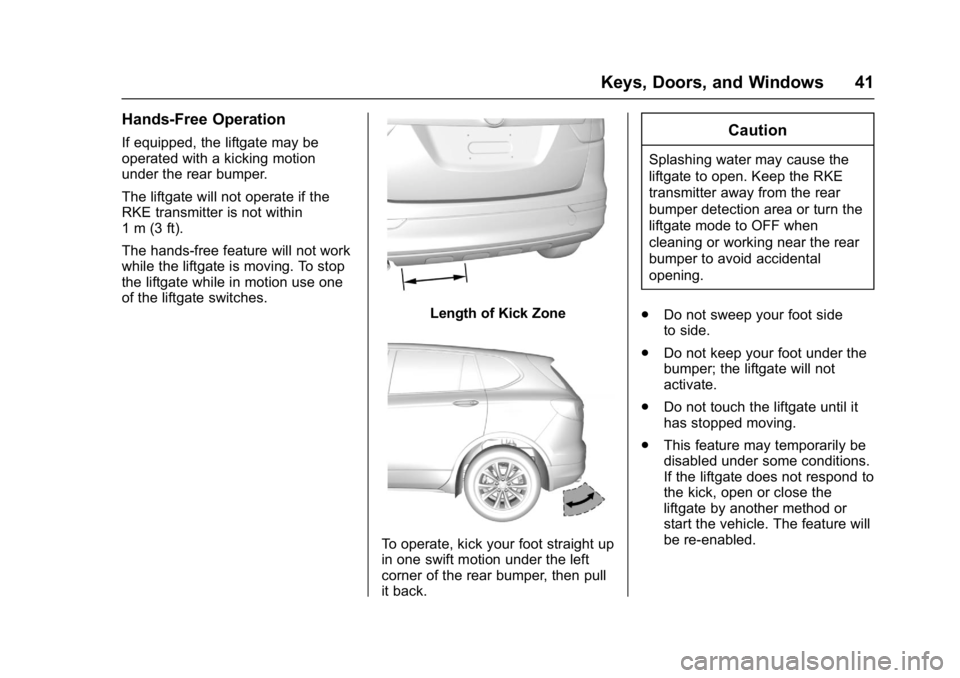
If equipped, the liftgate may be
operated with a kicking motion
under the rear bumper.
The liftgate will not operate if the
RKE transmitter is not within
1 m (3 ft).
The hands-free feature will not work
while the liftgate is moving. To stop
the liftgate while in motion use one
of the liftgate switches.
Length of Kick Zone
To operate, kick your foot straight up
in one swift motion under the left
corner of the rear bumper, then pull
it back.
Caution
Splashing water may cause the
liftgate to open. Keep the RKE
transmitter away from the rear
bumper detection area or turn the
liftgate mode to OFF when
cleaning or working near the rear
bumper to avoid accidental
opening.
. Do not sweep your foot side
to side.
. Do not keep your foot under the
bumper; the liftgate will not
activate.
. Do not touch the liftgate until it
has stopped moving.
. This feature may temporarily be
disabled under some conditions.
If the liftgate does not respond to
the kick, open or close the
liftgate by another method or
start the vehicle. The feature will
be re-enabled.
Page 58 of 366
Buick Envision Owner Manual (GMNA-Localizing-U.S./Canada/Mexico-
10122659) - 2017 - crc - 11/16/16
Seats and Restraints 57
.Memory SET, 1, 2, orB
.Power mirror, with the driver or
passenger side mirror selected
. Power steering wheel,
if equipped
Obstructions
If something has blocked the driver
seat and/or power steering wheel
while recalling a memory position,
the recall may stop. Remove the
obstruction and try the recall again.
If the memory position still does not
recall, see your dealer for service.
Heated and Ventilated
Front Seats
{Warning
If you cannot feel temperature
change or pain to the skin, the
seat heater may cause burns. To
reduce the risk of burns, people
with such a condition should use
care when using the seat heater,
especially for long periods of (Continued)
Warning (Continued)
time. Do not place anything on
the seat that insulates against
heat, such as a blanket, cushion,
cover, or similar item. This may
cause the seat heater to
overheat. An overheated seat
heater may cause a burn or may
damage the seat.
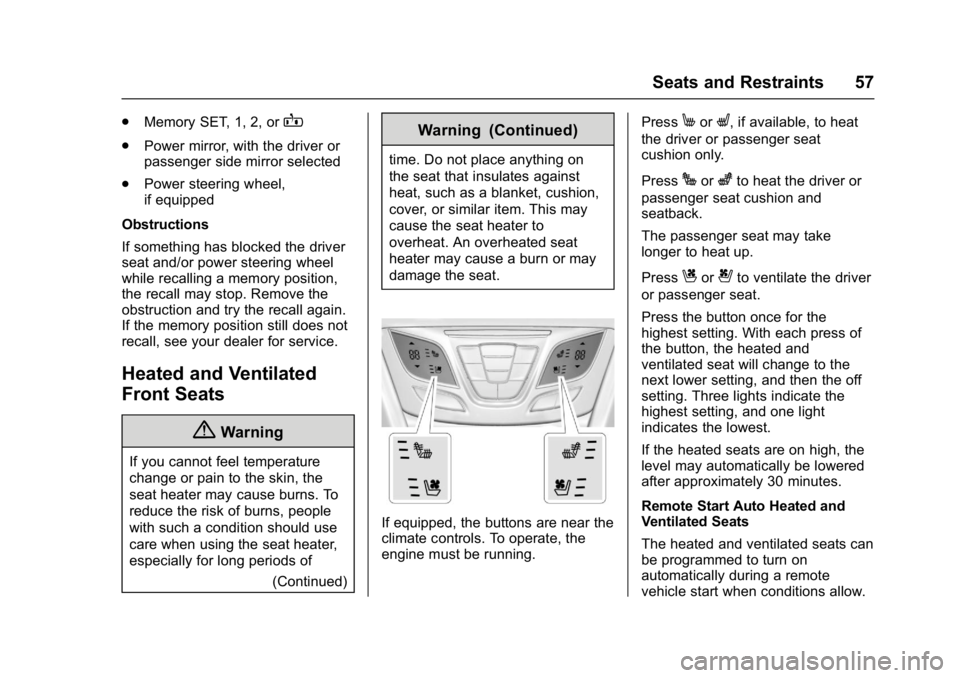
If equipped, the buttons are near the
climate controls. To operate, the
engine must be running. Press
MorL, if available, to heat
the driver or passenger seat
cushion only.
Press
Jorzto heat the driver or
passenger seat cushion and
seatback.
The passenger seat may take
longer to heat up.
Press
Cor{to ventilate the driver
or passenger seat.
Press the button once for the
highest setting. With each press of
the button, the heated and
ventilated seat will change to the
next lower setting, and then the off
setting. Three lights indicate the
highest setting, and one light
indicates the lowest.
If the heated seats are on high, the
level may automatically be lowered
after approximately 30 minutes.
Remote Start Auto Heated and
Ventilated Seats
The heated and ventilated seats can
be programmed to turn on
automatically during a remote
vehicle start when conditions allow.
Page 59 of 366
Buick Envision Owner Manual (GMNA-Localizing-U.S./Canada/Mexico-
10122659) - 2017 - crc - 11/16/16
58 Seats and Restraints
The heated seat function can be
programmed to come on when
ENGINE START/STOP is pressed
under certain conditions. See
Vehicle Personalization0149.
Press the heated or ventilated seat
button to use the heated or
ventilated seats after the vehicle is
started.
The heated and ventilated seat
button lights will not turn on during a
remote start.
The temperature of an unoccupied
seat may be reduced.
To program the heated and
ventilated seat features, see Vehicle
Personalization 0149.Rear Seats
Rear Seat Adjustment
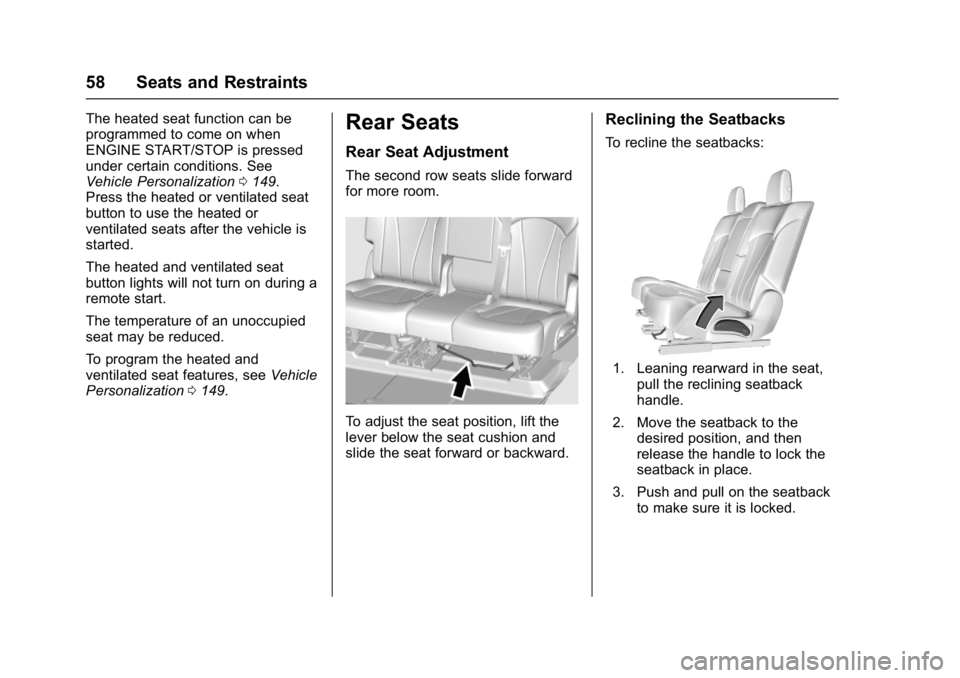
The second row seats slide forward
for more room.
To adjust the seat position, lift the
lever below the seat cushion and
slide the seat forward or backward.
Reclining the Seatbacks
To recline the seatbacks:
1. Leaning rearward in the seat,
pull the reclining seatback
handle.
2. Move the seatback to the desired position, and then
release the handle to lock the
seatback in place.
3. Push and pull on the seatback to make sure it is locked.
Page 64 of 366
Buick Envision Owner Manual (GMNA-Localizing-U.S./Canada/Mexico-
10122659) - 2017 - crc - 11/16/16
Seats and Restraints 63
pelvic bones and you would be
less likely to slide under the lap
belt. If you slid under it, the belt
would apply force on your
abdomen. This could cause
serious or even fatal injuries.
. Wear the shoulder belt over the
shoulder and across the chest.
These parts of the body are best
able to take belt restraining
forces. The shoulder belt locks if
there is a sudden stop or crash.
{Warning
You can be seriously injured,
or even killed, by not wearing
your safety belt properly.
. Never allow the lap or
shoulder belt to become
loose or twisted.
. Never wear the shoulder
belt under both arms or
behind your back.
. Never route the lap or
shoulder belt over an
armrest.
Lap-Shoulder Belt
All seating positions in the vehicle
have a lap-shoulder belt.
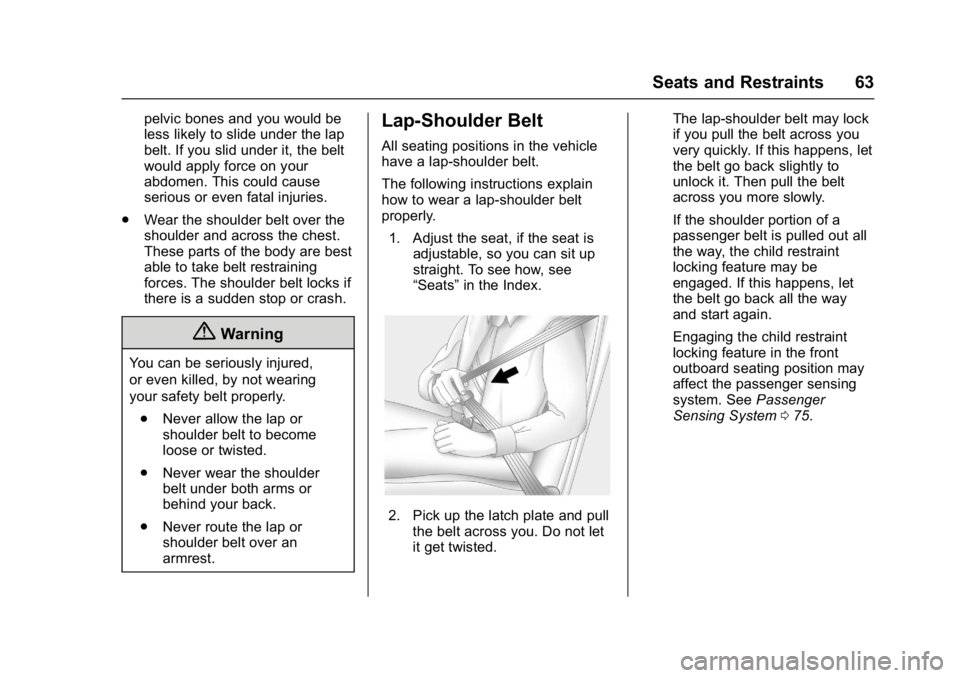
The following instructions explain
how to wear a lap-shoulder belt
properly.
1. Adjust the seat, if the seat is adjustable, so you can sit up
straight. To see how, see
“Seats” in the Index.
2. Pick up the latch plate and pull
the belt across you. Do not let
it get twisted. The lap-shoulder belt may lock
if you pull the belt across you
very quickly. If this happens, let
the belt go back slightly to
unlock it. Then pull the belt
across you more slowly.
If the shoulder portion of a
passenger belt is pulled out all
the way, the child restraint
locking feature may be
engaged. If this happens, let
the belt go back all the way
and start again.
Engaging the child restraint
locking feature in the front
outboard seating position may
affect the passenger sensing
system. See
Passenger
Sensing System 075.
Page 106 of 366

Buick Envision Owner Manual (GMNA-Localizing-U.S./Canada/Mexico-
10122659) - 2017 - crc - 11/16/16
Storage 105
Caution
Loading cargo on the roof rack
that weighs more than 100 kg
(220 lb) or hangs over the rear or
sides of the vehicle may damage
the vehicle. Load cargo so that it
rests evenly between the
crossrails, making sure to fasten
cargo securely.
To prevent damage or loss of cargo
when driving, check to make sure
crossrails and cargo are securely
fastened. Loading cargo on the roof
rack will make the vehicle’s centerof gravity higher. Avoid high speeds,
sudden starts, sharp turns, sudden
braking, or abrupt maneuvers;
otherwise it may result in loss of
control. If driving for a long distance,
on rough roads, or at high speeds,
occasionally stop the vehicle to
make sure the cargo remains in its
place. Do not exceed the maximum
vehicle capacity when loading the
vehicle. For more information on
vehicle capacity and loading, see
Vehicle Load Limits
0183.
Page 109 of 366
Buick Envision Owner Manual (GMNA-Localizing-U.S./Canada/Mexico-
10122659) - 2017 - crc - 11/16/16
108 Instruments and Controls
Horn
Pressaon the steering wheel pad
to sound the horn.
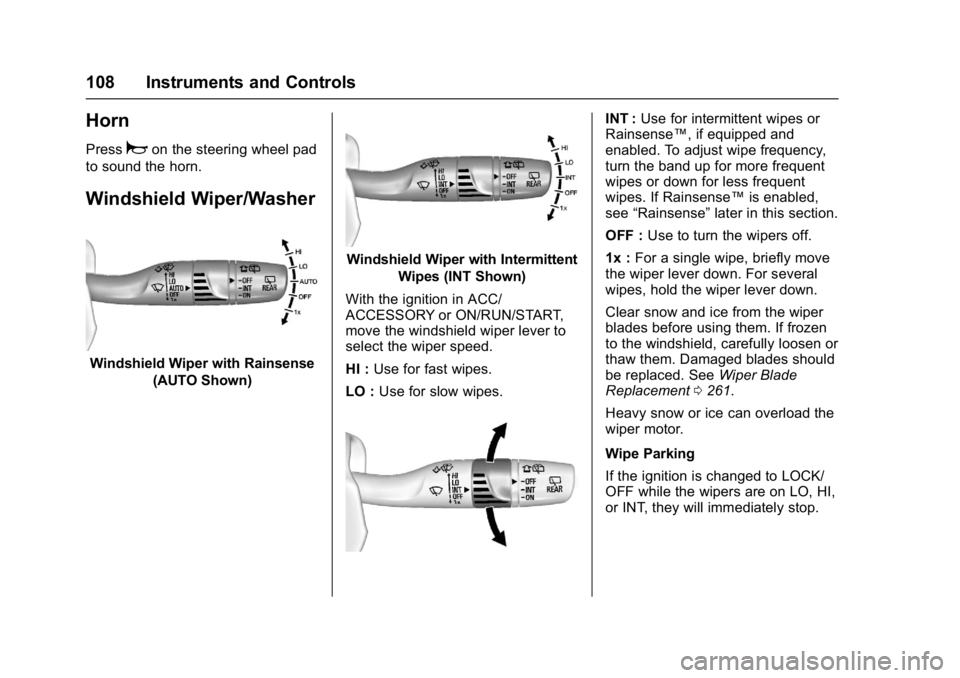
Windshield Wiper/Washer
Windshield Wiper with Rainsense (AUTO Shown)
Windshield Wiper with Intermittent
Wipes (INT Shown)
With the ignition in ACC/
ACCESSORY or ON/RUN/START,
move the windshield wiper lever to
select the wiper speed.
HI : Use for fast wipes.
LO : Use for slow wipes.
INT : Use for intermittent wipes or
Rainsense™, if equipped and
enabled. To adjust wipe frequency,
turn the band up for more frequent
wipes or down for less frequent
wipes. If Rainsense™ is enabled,
see “Rainsense” later in this section.
OFF : Use to turn the wipers off.
1x : For a single wipe, briefly move
the wiper lever down. For several
wipes, hold the wiper lever down.
Clear snow and ice from the wiper
blades before using them. If frozen
to the windshield, carefully loosen or
thaw them. Damaged blades should
be replaced. See Wiper Blade
Replacement 0261.
Heavy snow or ice can overload the
wiper motor.
Wipe Parking
If the ignition is changed to LOCK/
OFF while the wipers are on LO, HI,
or INT, they will immediately stop.
Page 110 of 366
Buick Envision Owner Manual (GMNA-Localizing-U.S./Canada/Mexico-
10122659) - 2017 - crc - 11/16/16
Instruments and Controls 109
If the windshield wiper lever is then
moved to OFF before the driver
door is opened or within 10 minutes,
the wipers will restart and move to
the base of the windshield.
If the ignition is changed to LOCK/
OFF while the wipers are performing
wipes due to windshield washing or
Rainsense, the wipers continue to
run until they reach the base of the
windshield.
Rainsense™
If equipped with Rainsense, a
sensor located near the top center
of the windshield detects the
amount of water on the windshield
and automatically controls the
frequency of the windshield wiper.
When Rainsense is enabled, the
normal intermittent control operates
as a sensitivity control.
Keep this area of the windshield
clear of debris to allow for best
system performance.
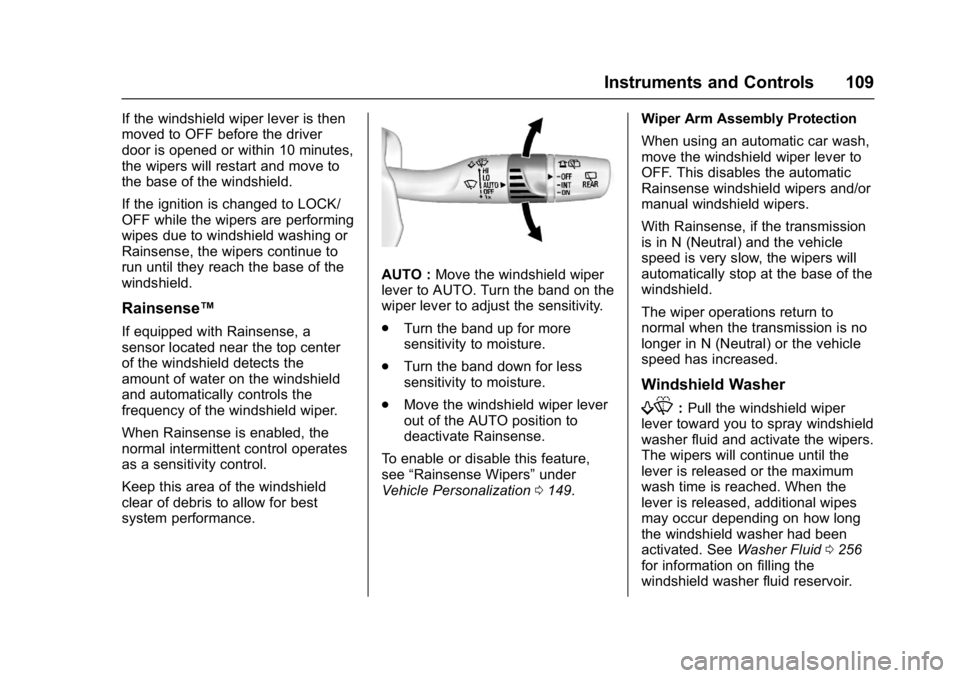
AUTO :Move the windshield wiper
lever to AUTO. Turn the band on the
wiper lever to adjust the sensitivity.
. Turn the band up for more
sensitivity to moisture.
. Turn the band down for less
sensitivity to moisture.
. Move the windshield wiper lever
out of the AUTO position to
deactivate Rainsense.
To enable or disable this feature,
see “Rainsense Wipers” under
Vehicle Personalization 0149. Wiper Arm Assembly Protection
When using an automatic car wash,
move the windshield wiper lever to
OFF. This disables the automatic
Rainsense windshield wipers and/or
manual windshield wipers.
With Rainsense, if the transmission
is in N (Neutral) and the vehicle
speed is very slow, the wipers will
automatically stop at the base of the
windshield.
The wiper operations return to
normal when the transmission is no
longer in N (Neutral) or the vehicle
speed has increased.
Windshield Washer
f:
Pull the windshield wiper
lever toward you to spray windshield
washer fluid and activate the wipers.
The wipers will continue until the
lever is released or the maximum
wash time is reached. When the
lever is released, additional wipes
may occur depending on how long
the windshield washer had been
activated. See Washer Fluid0256
for information on filling the
windshield washer fluid reservoir.
Page 118 of 366
Buick Envision Owner Manual (GMNA-Localizing-U.S./Canada/Mexico-
10122659) - 2017 - crc - 11/16/16
Instruments and Controls 117
Units :PressTwhile Units is
displayed to enter the Units menu.
Choose US or Metric units by
pressing
Vwhile the desired item is
highlighted.
Info Pages : Press
Twhile Info
Pages is displayed to enter the Info
Pages menu and select the items to
be displayed in the Info App.
See Driver Information Center (DIC)
(Base Level) 0131 orDriver
Information Center (DIC) (Uplevel)
0 134.
Speed Warning : The Speed
Warning display allows the driver to
set a speed that they do not want to
exceed. To set the Speed Warning,
press
Twhen Speed Warning is
displayed. Press
yorzto adjust
the value. Press
Vto set the speed.
Once the speed is set, this feature
can be turned off by pressing
V
while viewing this page. If the
selected speed limit is exceeded, a
pop-up warning is displayed with a
chime. Software Information (Uplevel
Cluster) :
Displays the open source
software information.
Speedometer
The speedometer shows the
vehicle's speed in either kilometers
per hour (km/h) or miles per
hour (mph).
Odometer
The odometer shows how far the
vehicle has been driven, in either
kilometers or miles.
Trip Odometer
The trip odometer shows how far
the vehicle has been driven since
the trip odometer was last reset.
The trip odometer is accessed and
reset through the Driver Information
Center (DIC).
See Driver Information Center (DIC)
(Base Level) 0131 orDriver
Information Center (DIC) (Uplevel)
0 134.
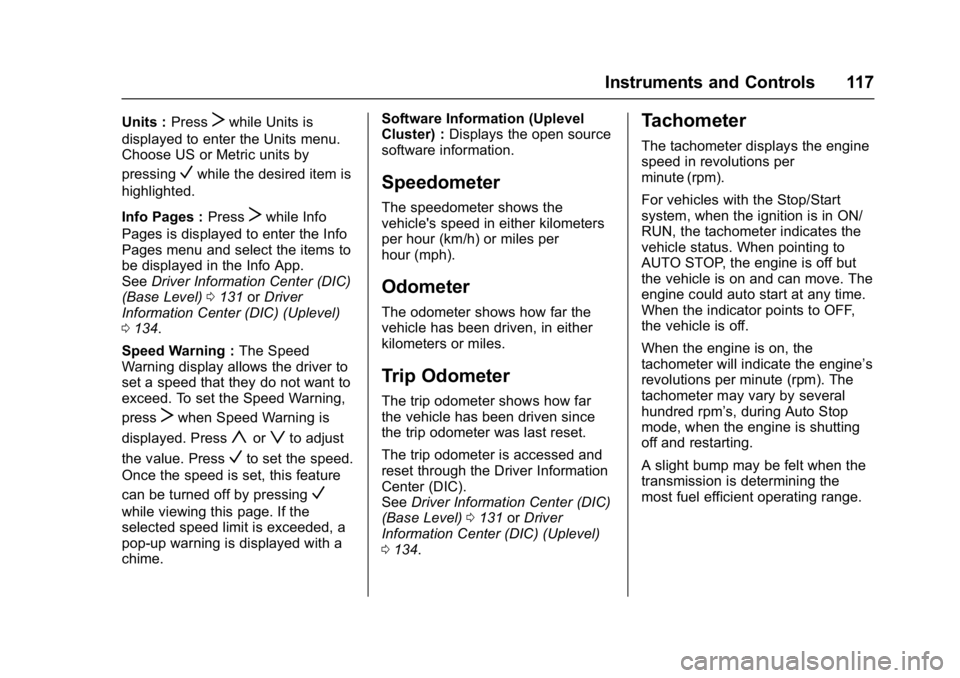
Tachometer
The tachometer displays the engine
speed in revolutions per
minute (rpm).
For vehicles with the Stop/Start
system, when the ignition is in ON/
RUN, the tachometer indicates the
vehicle status. When pointing to
AUTO STOP, the engine is off but
the vehicle is on and can move. The
engine could auto start at any time.
When the indicator points to OFF,
the vehicle is off.
When the engine is on, the
tachometer will indicate the engine’s
revolutions per minute (rpm). The
tachometer may vary by several
hundred rpm’s, during Auto Stop
mode, when the engine is shutting
off and restarting.
A slight bump may be felt when the
transmission is determining the
most fuel efficient operating range.
Page 121 of 366
Buick Envision Owner Manual (GMNA-Localizing-U.S./Canada/Mexico-
10122659) - 2017 - crc - 11/16/16
120 Instruments and Controls
Uplevel English
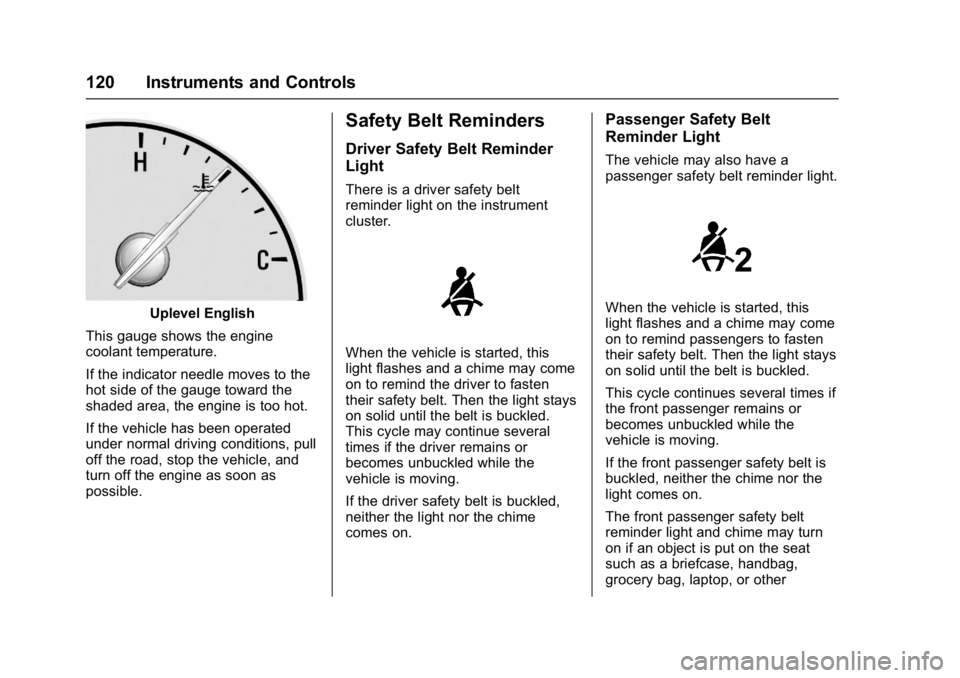
This gauge shows the engine
coolant temperature.
If the indicator needle moves to the
hot side of the gauge toward the
shaded area, the engine is too hot.
If the vehicle has been operated
under normal driving conditions, pull
off the road, stop the vehicle, and
turn off the engine as soon as
possible.
Safety Belt Reminders
Driver Safety Belt Reminder
Light
There is a driver safety belt
reminder light on the instrument
cluster.
When the vehicle is started, this
light flashes and a chime may come
on to remind the driver to fasten
their safety belt. Then the light stays
on solid until the belt is buckled.
This cycle may continue several
times if the driver remains or
becomes unbuckled while the
vehicle is moving.
If the driver safety belt is buckled,
neither the light nor the chime
comes on.
Passenger Safety Belt
Reminder Light
The vehicle may also have a
passenger safety belt reminder light.
When the vehicle is started, this
light flashes and a chime may come
on to remind passengers to fasten
their safety belt. Then the light stays
on solid until the belt is buckled.
This cycle continues several times if
the front passenger remains or
becomes unbuckled while the
vehicle is moving.
If the front passenger safety belt is
buckled, neither the chime nor the
light comes on.
The front passenger safety belt
reminder light and chime may turn
on if an object is put on the seat
such as a briefcase, handbag,
grocery bag, laptop, or other