Lug BUICK ENVISION 2017 Owner's Manual
[x] Cancel search | Manufacturer: BUICK, Model Year: 2017, Model line: ENVISION, Model: BUICK ENVISION 2017Pages: 366, PDF Size: 5.37 MB
Page 22 of 366
Buick Envision Owner Manual (GMNA-Localizing-U.S./Canada/Mexico-
10122659) - 2017 - crc - 11/16/16
In Brief 21
in R (Reverse). In addition, beeps
will sound, or the driver seat will
pulse.
SeeAssistance Systems for Parking
or Backing 0214.
Parking Assist
If equipped, Rear Parking
Assist (RPA) uses sensors on the
rear bumper to assist with parking
and avoiding objects while in
R (Reverse). It operates at speeds
less than 8 km/h (5 mph). RPA may
show a warning triangle on the
infotainment display and a graphic
on the instrument cluster to provide
the object distance. In addition,
multiple beeps or seat pulses may
occur if very close to an object.
The vehicle may also have the Front
Parking Assist system.
See Assistance Systems for Parking
or Backing 0214.
Automatic Parking
Assist (APA)
If equipped, the APA system helps
to search for and maneuver the
vehicle into parallel or perpendicular
parking spots using automatic
steering, DIC displays, and beeps.
When the vehicle speed is below
30 km/h (18 mph), press
Oto
enable the system.
See “Automatic Parking Assist
(APA)” underAssistance Systems
for Parking or Backing 0214.
Power Outlets
The vehicle has four 12-volt
accessory power outlets, which can
be used to plug in electrical
equipment, such as a cell phone or
MP3 player.
There are power outlets:
.
On the center floor console.
. Inside the center floor console.
. On the rear of the center floor
console.
. In the rear cargo area. To use the outlet, remove the cover.
See
Power Outlets 0112.
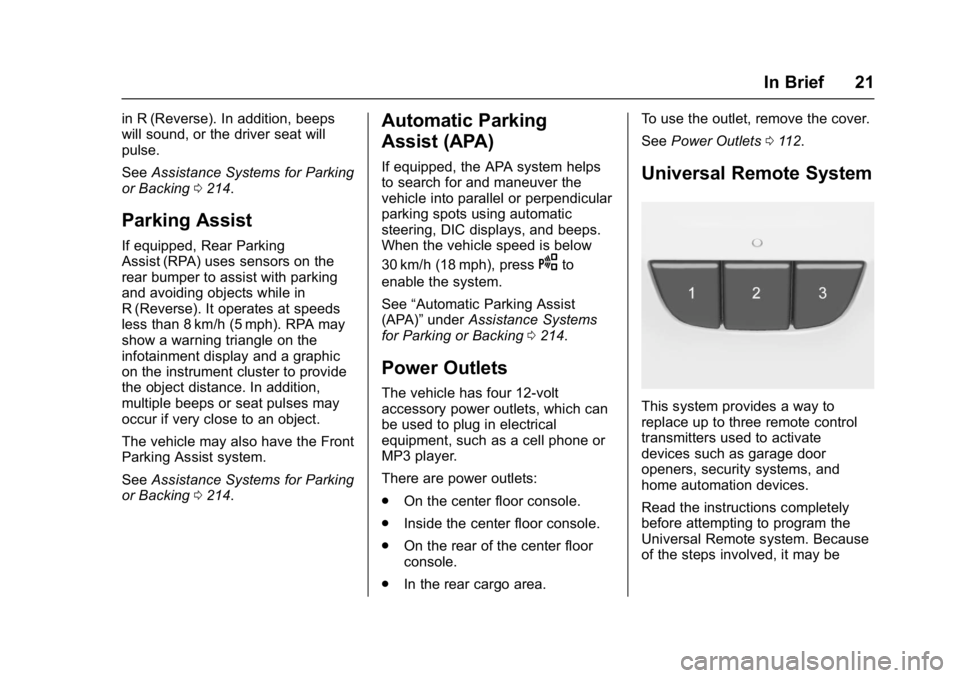
Universal Remote System
This system provides a way to
replace up to three remote control
transmitters used to activate
devices such as garage door
openers, security systems, and
home automation devices.
Read the instructions completely
before attempting to program the
Universal Remote system. Because
of the steps involved, it may be
Page 50 of 366
Buick Envision Owner Manual (GMNA-Localizing-U.S./Canada/Mexico-
10122659) - 2017 - crc - 11/16/16
Keys, Doors, and Windows 49
Sunroof Switch
Express-Open/Express-Close :To
express-open the sunroof, fully
press and release
e(1). Press
the switch again to stop it. To
express-close the sunroof, fully
press and release
g(1). Press
the switch again to stop it.
Open/Close (Manual Mode) : To
open the sunroof, press and hold
e(1) until the sunroof reaches
the desired position. Press and hold
g(1) to close it.
Vent : From the closed position,
press
e(1) to vent the sunroof.
Sunshade Switch
Express-open/Express-close : To
express-open the sunshade, fully
press and release
r(2). To
express-close the sunshade, fully
press and release
s(2) . Press
the switch again to stop it.
Open/Close : To open the
sunshade, press and hold
r(2)
until the sunshade reaches the
desired position. When the sunroof is opened, an air
deflector will automatically raise.
The air deflector will retract when
the sunroof is closed.
Automatic Reversal System
The sunroof/sunshade is equipped
with an automatic reversal system
that is only active when the sunroof/
sunshade is being operated in
express-close. If an object is in the
path of the sunroof/sunshade while
it is express-closing, the reversal
system will detect the object
and stop.
In the event of closing difficulties
like frost or other conditions, it is
possible to override the reversal
system. To override the reversal
system, close in manual mode. To
stop the movement, release the
switch.
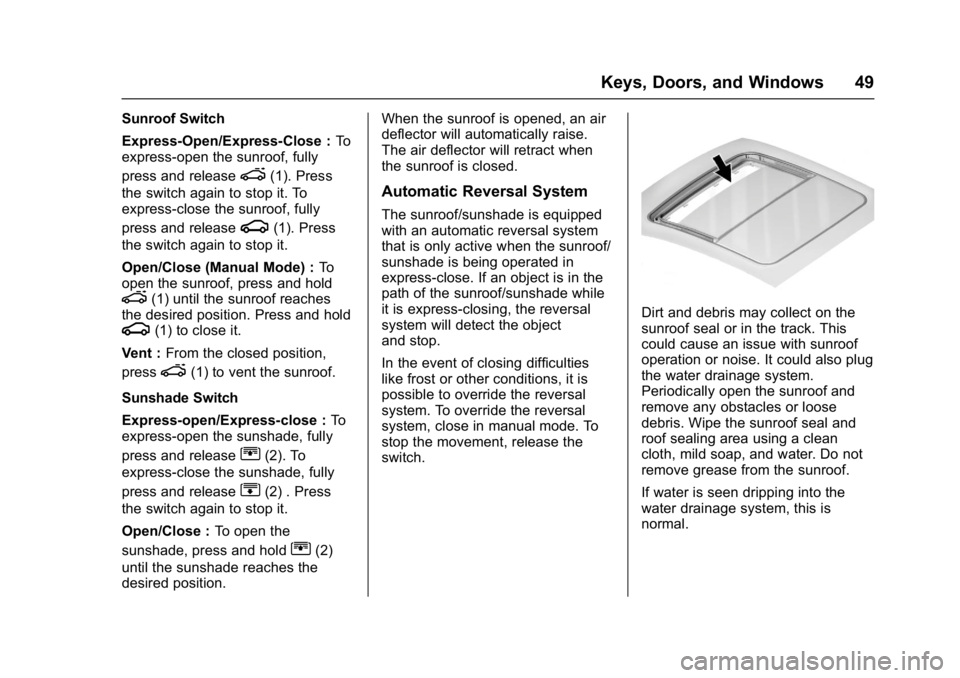
Dirt and debris may collect on the
sunroof seal or in the track. This
could cause an issue with sunroof
operation or noise. It could also plug
the water drainage system.
Periodically open the sunroof and
remove any obstacles or loose
debris. Wipe the sunroof seal and
roof sealing area using a clean
cloth, mild soap, and water. Do not
remove grease from the sunroof.
If water is seen dripping into the
water drainage system, this is
normal.
Page 113 of 366

Buick Envision Owner Manual (GMNA-Localizing-U.S./Canada/Mexico-
10122659) - 2017 - crc - 11/16/16
112 Instruments and Controls
2. Touch Clock Display and touchOFF or ON to turn the clock
display off or on.
3. Touch
}to go back to the
previous menu.
Setting the Analog Clock
The clock on the center stack is not
connected to any other vehicle
system. To adjust the time:
1. Press and hold the button next to the clock to quickly advance
the time.
2. Press and release the button to increase the time by
one-minute intervals.
Power Outlets
The vehicle has four 12-volt
accessory power outlets, which can
be used to plug in electrical
equipment, such as a cell phone or
MP3 player.
There are power outlets:
.On the center floor console.
. Inside the center floor console. .
On the rear of the center floor
console.
. In the rear cargo area.
To use the outlet, remove the cover.
Caution
Leaving electrical equipment
plugged in for an extended period
of time while the vehicle is off will
drain the battery. Always unplug
electrical equipment when not in
use and do not plug in equipment
that exceeds the maximum
20 amp rating.
{Warning
Power is always supplied to the
rear cargo power outlet. Do not
leave electrical equipment
plugged in when the vehicle is not
in use because the vehicle could
catch fire and cause injury or
death. Certain accessory plugs may not be
compatible with the accessory
power outlet and could overload
vehicle and adapter fuses. If a
problem is experienced, see your
dealer.
When adding electrical equipment,
be sure to follow the proper
installation instructions included with
the equipment. See
Add-On
Electrical Equipment 0237.
Caution
Hanging heavy equipment from
the power outlet can cause
damage not covered by the
vehicle warranty. The power
outlets are designed for
accessory power plugs only, such
as cell phone charge cords.
Power Outlet 110/120 Volt
Alternating Current
If equipped, this power outlet can be
used to plug in electrical equipment
that uses a maximum limit of 400
watts.
Page 114 of 366

Buick Envision Owner Manual (GMNA-Localizing-U.S./Canada/Mexico-
10122659) - 2017 - crc - 11/16/16
Instruments and Controls 113
The power outlet is on the rear of
the center console.
An indicator light on the outlet turns
on to show it is in use. The light
comes on when the ignition is in
ON/RUN and equipment requiring
less than 400 watts is plugged into
the outlet, and no system fault is
detected.
The indicator light does not come on
when the ignition is in LOCK/OFF or
if the equipment is not fully seated
into the outlet.
If equipment is connected using
more than 400 watts or a system
fault is detected, a protection circuit
shuts off the power supply and theindicator light turns off. To reset the
circuit, unplug the item and plug it
back in or turn the Retained
Accessory Power (RAP) off and
then back on. See
Retained
Accessory Power (RAP) 0192. The
power restarts when equipment
using 400 watts or less is plugged
into the outlet and a system fault is
not detected.
The power outlet is not designed for
the following and may not work
properly if they are plugged in:
. Equipment with high initial peak
wattage, such as
compressor-driven refrigerators
and electric power tools.
. Other equipment requiring an
extremely stable power supply,
such as
microcomputer-controlled
electric blankets and touch
sensor lamps.
. Medical equipment.
Warning Lights,
Gauges, and
Indicators
Warning lights and gauges can
signal that something is wrong
before it becomes serious enough
to cause an expensive repair or
replacement. Paying attention to the
warning lights and gauges could
prevent injury.
Some warning lights come on briefly
when the engine is started to
indicate they are working. When
one of the warning lights comes on
and stays on while driving, or when
one of the gauges shows there may
be a problem, check the section that
explains what to do. Waiting to do
repairs can be costly and even
dangerous.
Page 185 of 366

Buick Envision Owner Manual (GMNA-Localizing-U.S./Canada/Mexico-
10122659) - 2017 - crc - 11/16/16
184 Driving and Operating
Tire and Loading Information
Label
Example Label
A vehicle-specific Tire and
Loading Information label is
attached to the center pillar
(B-pillar). The tire and loading
information label shows the
number of occupant seating
positions (1), and the maximum
vehicle capacity weight (2) in
kilograms and pounds.
The Tire and Loading
Information label also shows the
size of the original equipment
tires (3) and the recommendedcold tire inflation pressures (4).
For more information on tires
and inflation see
Tires0271
and Tire Pressure 0279.
There is also important loading
information on the vehicle
Certification/Tire label. It may
show the Gross Vehicle Weight
Rating (GVWR) and the Gross
Axle Weight Rating (GAWR) for
the front and rear axle. See
“Certification/Tire Label” later in
this section.“Steps for Determining Correct
Load Limit–
1.
Locate the statement "The
combined weight of
occupants and cargo should
never exceed XXX kg or
XXX lbs." on your vehicle’s
placard.
2.Determine the combined
weight of the driver and
passengers that will be
riding in your vehicle.
3.Subtract the combined
weight of the driver and
passengers from XXX kg or
XXX lbs.
4.The resulting figure equals
the available amount of
cargo and luggage load
capacity. For example, if the
"XXX" amount equals
1400 lbs. and there will be
five 150 lb passengers in
your vehicle, the amount of
available cargo and luggage
load capacity is 650 lbs.
(1400-750 (5 x 150) =
650 lbs.)
5.Determine the combined
weight of luggage and cargo
being loaded on the vehicle.
That weight may not safely
exceed the available cargo
and luggage load capacity
calculated in Step 4.
Page 186 of 366
Buick Envision Owner Manual (GMNA-Localizing-U.S./Canada/Mexico-
10122659) - 2017 - crc - 11/16/16
Driving and Operating 185
6.If your vehicle will be towing
a trailer, load from your
trailer will be transferred to
your vehicle. Consult this
manual to determine how
this reduces the available
cargo and luggage load
capacity of your vehicle.”
See Trailer Towing 0233 for
important information on towing
a trailer, towing safety rules and
trailering tips.
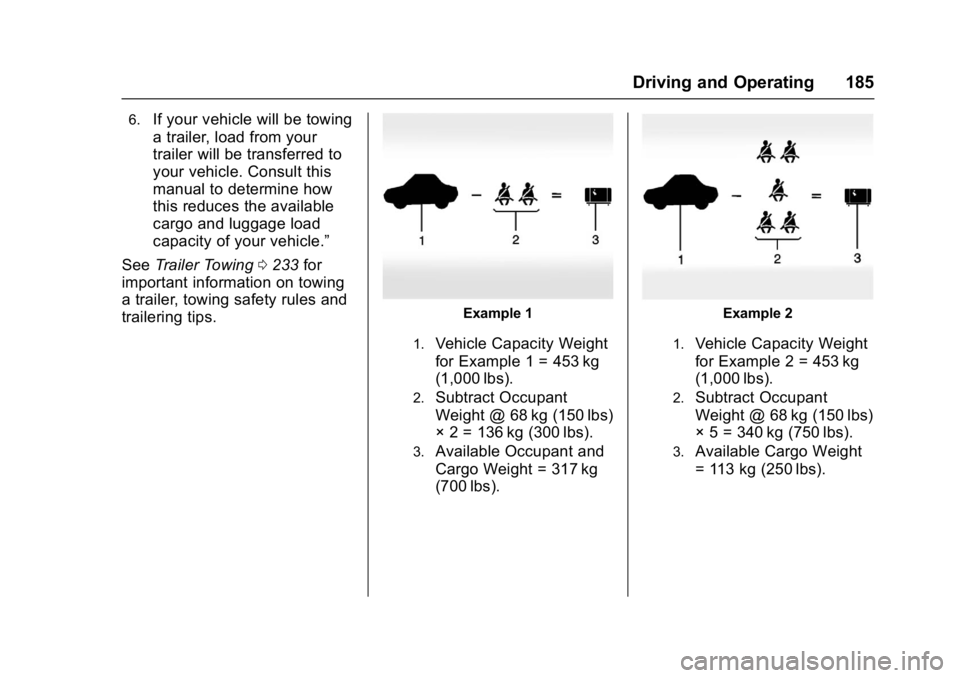
Example 1
1.Vehicle Capacity Weight
for Example 1 = 453 kg
(1,000 lbs).
2.Subtract Occupant
Weight @ 68 kg (150 lbs)
× 2 = 136 kg (300 lbs).
3.Available Occupant and
Cargo Weight = 317 kg
(700 lbs).
Example 2
1.Vehicle Capacity Weight
for Example 2 = 453 kg
(1,000 lbs).
2.Subtract Occupant
Weight @ 68 kg (150 lbs)
× 5 = 340 kg (750 lbs).
3.Available Cargo Weight
= 113 kg (250 lbs).
Page 192 of 366
Buick Envision Owner Manual (GMNA-Localizing-U.S./Canada/Mexico-
10122659) - 2017 - crc - 11/16/16
Driving and Operating 191
.The outside temperature is not
in the required operating range,
typically between −10 °C (14 °F)
and 50 °C (122 °F).
. The shift lever is in any gear
other than D (Drive).
. The battery charge is low.
. The interior comfort level has not
reached the required level for
the climate control system or
defog settings.
. The Auto Stop time is greater
than two minutes.
Engine Heater
The vehicle may have an engine
heater. The engine heater can help
in cold weather conditions at or
below −18 °C (0 °F) for easier
starting and better fuel economy
during engine warm-up. Plug in the
heater at least four hours before
starting the vehicle. An internal
thermostat in the plug end of the
cord will prevent engine heater
operation at temperatures above
−18 °C (0 °F).
To Use The Engine Heater
1. Turn off the engine.
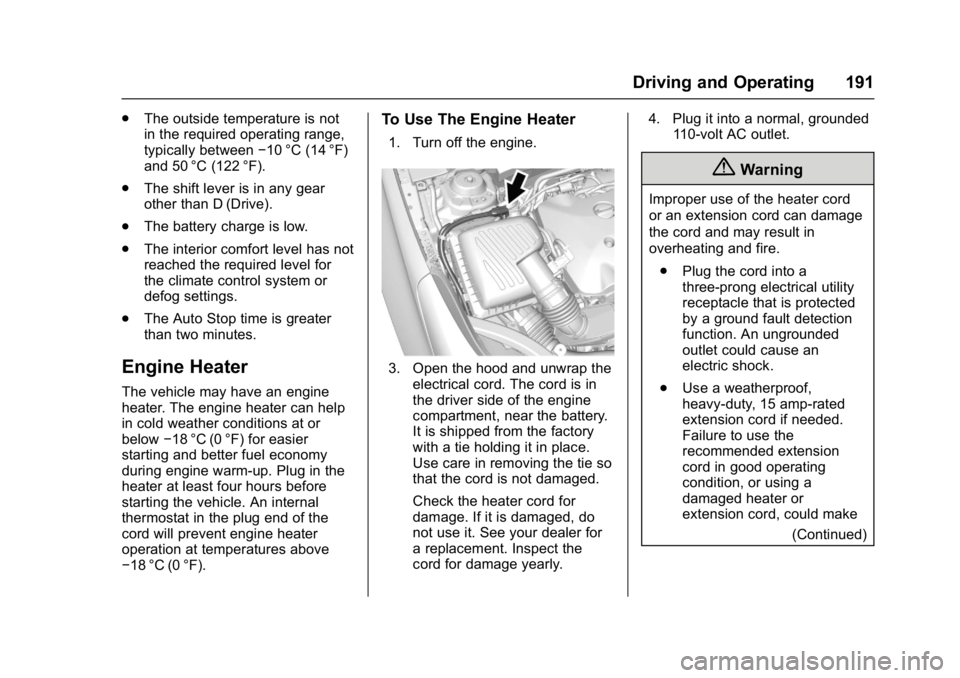
3. Open the hood and unwrap the
electrical cord. The cord is in
the driver side of the engine
compartment, near the battery.
It is shipped from the factory
with a tie holding it in place.
Use care in removing the tie so
that the cord is not damaged.
Check the heater cord for
damage. If it is damaged, do
not use it. See your dealer for
a replacement. Inspect the
cord for damage yearly. 4. Plug it into a normal, grounded
110-volt AC outlet.
{Warning
Improper use of the heater cord
or an extension cord can damage
the cord and may result in
overheating and fire.
. Plug the cord into a
three-prong electrical utility
receptacle that is protected
by a ground fault detection
function. An ungrounded
outlet could cause an
electric shock.
. Use a weatherproof,
heavy-duty, 15 amp-rated
extension cord if needed.
Failure to use the
recommended extension
cord in good operating
condition, or using a
damaged heater or
extension cord, could make
(Continued)
Page 193 of 366
Buick Envision Owner Manual (GMNA-Localizing-U.S./Canada/Mexico-
10122659) - 2017 - crc - 11/16/16
192 Driving and Operating
Warning (Continued)
it overheat and cause a fire,
property damage, electric
shock, and injury.
. Do not operate the vehicle
with the heater cord
permanently attached to the
vehicle. Possible heater
cord and thermostat
damage could occur.
. While in use, do not let the
heater cord touch vehicle
parts or sharp edges. Never
close the hood on the
heater cord.
. Before starting the vehicle,
unplug the cord, reattach
the cover to the plug, and
securely fasten the cord.
Keep the cord away from
any moving parts.
5. Before starting the engine, be sure to unplug and store the
cord as it was before to keep it away from moving engine
parts. If you do not it could be
damaged.
The length of time the heater should
remain plugged in depends on
several factors. Ask a dealer in the
area where you will be parking the
vehicle for the best advice on this.
Retained Accessory
Power (RAP)
These vehicle accessories can be
used for up to 10 minutes after the
engine is turned off:
. Audio system
. Power windows
. Sunroof (if equipped)
Power to the audio system will
continue to operate for up to
10 minutes or until the driver door is
opened.
Power to the power windows and
sunroof will continue to operate for
up to 10 minutes or until any door is
opened. All these features will work when the
vehicle is on or in ACC/
ACCESSORY.
Shifting Into Park
To shift into P (Park):
1. Hold the brake pedal down and set the parking brake.
See Electric Parking Brake
0 199.
2. Move the shift lever into P (Park) by holding in the
button on the back of the shift
lever and pushing the lever all
the way toward the front of the
vehicle.
3. Turn the ignition to LOCK/OFF.
4. Take the Remote Keyless Entry (RKE) transmitter with you.
Page 228 of 366

Buick Envision Owner Manual (GMNA-Localizing-U.S./Canada/Mexico-
10122659) - 2017 - crc - 11/16/16
Driving and Operating 227
use gasoline with a posted octane
rating of less than 87, as this may
cause engine knock and will lower
fuel economy.
For the 2.0L L4 Turbo engine,
premium unleaded gasoline meeting
ASTM specification D4814 with a
posted octane rating of 93 is highly
recommended for best performance
and fuel economy. Unleaded
gasoline with an octane rated as low
as 87 can be used. Using unleaded
gasoline rated below 93 octane,
however, will lead to reduced
acceleration and fuel economy.
If knocking occurs, use a gasoline
rated at 93 octane as soon as
possible, otherwise, the engine
could be damaged. If heavy
knocking is heard when using
gasoline with a 93 octane rating, the
engine needs service.Prohibited Fuels
Caution
Do not use fuels with any of the
following conditions; doing so
may damage the vehicle and void
its warranty:
. For vehicles which are not
FlexFuel, fuel labeled
greater than 15% ethanol by
volume, such as mid-level
ethanol blends (16 –50%
ethanol), E85, or FlexFuel.
. Fuel with any amount of
methanol, methylal, and
aniline. These fuels can
corrode metal fuel system
parts or damage plastic and
rubber parts.
. Fuel containing metals such
as methylcyclopentadienyl
manganese tricarbonyl
(MMT), which can damage
the emissions control
system and spark plugs.
(Continued)
Caution (Continued)
.Fuel with a posted octane
rating of less than the
recommended fuel. Using
this fuel will lower fuel
economy and performance,
and may decrease the life of
the emissions catalyst.
California Fuel
Requirements
If the vehicle is certified to meet
California Emissions Standards, it is
designed to operate on fuels that
meet California specifications. See
the underhood emission control
label. If this fuel is not available in
states adopting California Emissions
Standards, the vehicle will operate
satisfactorily on fuels meeting
federal specifications, but emission
control system performance may be
affected. The malfunction indicator
lamp could turn on and the vehicle
may not pass a smog-check test.
See Malfunction Indicator Lamp
(Check Engine Light) 0122. If this
Page 300 of 366

Buick Envision Owner Manual (GMNA-Localizing-U.S./Canada/Mexico-
10122659) - 2017 - crc - 11/16/16
Vehicle Care 299
Caution
Ignoring these steps could result
in costly damage to the vehicle
that would not be covered by the
vehicle warranty. Trying to start
the vehicle by pushing or pulling it
will not work, and it could damage
the vehicle.
2.0L L4 Engine Shown, 2.5L L4Engine Similar
1. Discharged BatteryPositive (+) Terminal 2. Discharged Battery
Negative (–) Grounding
Point
3. Good Battery Negative (–) Terminal
4. Good Battery Positive (+) Terminal
The jump start negative grounding
point (2) for the discharged battery
is on the shock tower on the
driver side.
The jump start positive terminal on
the discharged battery (1) is located
on the battery on the driver side of
the vehicle.
The jump start positive terminal (4)
and negative terminal (3) are on the
battery of the vehicle providing the
jump start.
The positive jump start connection
for the discharged battery is under a
cover. Open the cover to expose the
terminal.
1. Check the other vehicle. It must have a 12-volt battery
with a negative ground system.
Caution
If the other vehicle does not have
a 12-volt system with a negative
ground, both vehicles can be
damaged. Only use a vehicle that
has a 12-volt system with a
negative ground for jump starting.
2. Position the two vehicles so that they are not touching.
3. Set the parking brake firmly and put the shift lever in
P (Park) with an automatic
transmission, or Neutral with a
manual transmission.
Caution
If any accessories are left on or
plugged in during the jump
starting procedure, they could be
damaged. The repairs would not
be covered by the vehicle
warranty. Whenever possible, turn
off or unplug all accessories on
either vehicle when jump starting.